5 axis 3d printer reddit
Attracting More Clients For Your Additive Manufacturing
Attracting More Clients and Jobs for Your Additive Manufacturing (3D Printing) Business
There are no two ways to say this – The 3D printing industry is one of the most competitive manufacturing services in the world today. Owning an additive manufacturing business can be one of the most daunting endeavors you’ll ever make, especially when you’re just getting started.
More often than not, the ability of your business to secure a large client base will be a determining factor. However, not all established businesses in 3D printing can boast of week-in-week-out repeat clients; With 3D printing, it's often a mix between less occasional high-paying clients and the more frequent new clients that contribute lower profits on a more steady basis to keep the revenue flowing. If you are just getting started with 3D printing or just looking to get more clients for your business, we’ve researched some of the best tips to help move your business forward. It is important to note that none of these strategies are magical, and they won’t transform your business overnight, however, with proper execution and patience, you’ll see the results soon enough!
1. Visibility is key
Even before starting your business, visibility is one of the things to focus on to build momentum and get people talking. Talk to a couple of business associates, friends, and family to help with your potential first businesses. Tap into the power of social media to make posts about exciting 3D printing stuff, information, and tech.
Since very few people would be willing to give anyone without a job portfolio a trial, ensure that you have personal low-cost projects going from time to time and share them on platforms like Instagram, Facebook, and Twitter. Post ongoing and completed jobs on 3D printing forums across Facebook groups, Reddit, and 3D hubs. Ensure that you participate by interacting with other users, share ideas, ask and answer questions where possible.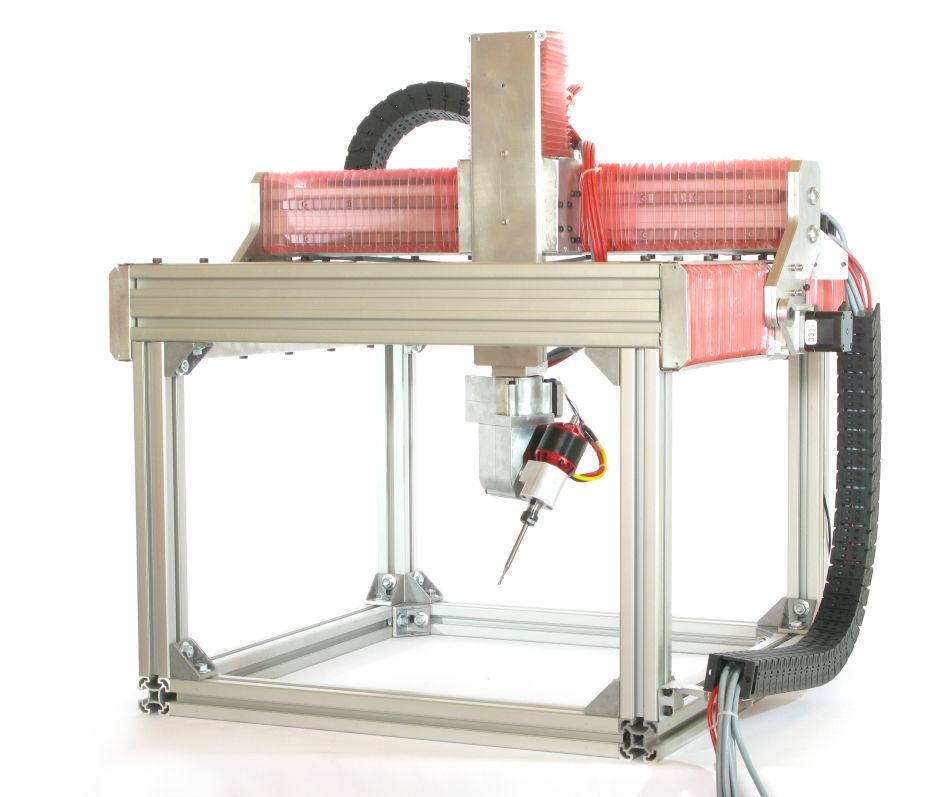
Finally, depending on what stage your business has developed, you may consider running a couple of ads on Facebook and Instagram to drive prospects to your landing/portfolio page. To get even more out of your online presence, make professional videos that you can promote on YouTube where you’re designing or exhibiting some of your completed projects. The bottom line here is to gather all-around visibility.
2. Find your own niche
Start by completing an array of projects across different product niches to gain some business and client base. Once you have executed a fair number of jobs, you should start considering branching out into one or two niches.
Doing this will help you concentrate and target your business efforts towards prospects in such niches. It would also help tailor your equipment needs and marketing needs to suit a single category. As you continue to grow in this niche, your business will soon become an authority figure in manufacturing items that fall into that category.
Avoid the common pitfall of branching out to anyone's niche too early. This can limit your revenue potential at the very beginning of your business. Also, research your desired niche before concluding, knowing fully well, that it doesn’t have to be your favorite, but where you excel the most.
3. Heard of 3D hubs?
3D hubs are the largest platform for ordering local 3D printing services. It also has a great forum where both beginners, design experts, customers, and other 3D printers interact. There are a lot of jobs to be won on this platform. Ensure that you constantly visit, remain active, and market yourself and your services. You’ll catch the eye of one or two clients soon enough.
4. Have the right tools for the job
In an era where 3D printers have become relatively affordable and more common in households and offices, 3D printing businesses must be able to deliver higher quality prints to stay relevant.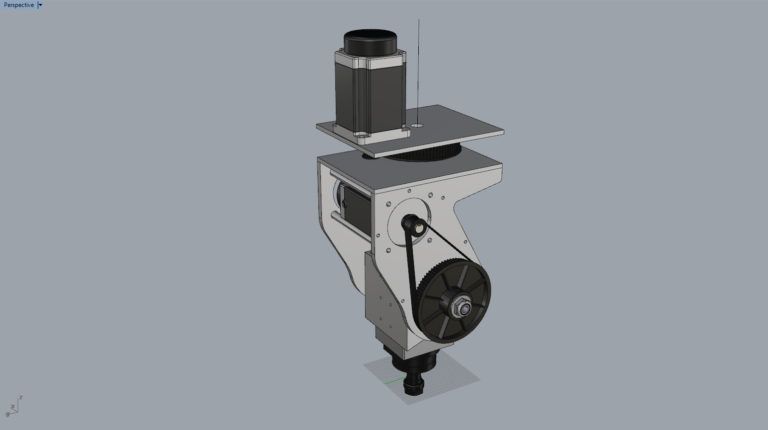
The quality of your job outputs is largely dependent on your personal skill and experience as well as the type and quality of the machine used in executing the print. Get yourself reliable 3D printers that have a range for diversity and capacity that will keep the minds of your customers at ease. Also, since your jobs serve as referral points for new customers, a higher quality print is one of the first steps to convincing anyone that you’ve got what it takes to print for them.
5. Blog and Guest Post on Authority sites
Blogs and guest posts are great ways to get the attention of potential customers looking for everyday 3D printing information. With the right strategy and SEO, you can create exciting blog topics to post on your website or as a guest post on other 3D authority websites.
After delivering an enlightening piece, be sure to leave a contact us the link, mail, or description in the concluding paragraph to make it easy for clients who may be looking to collaborate to reach you.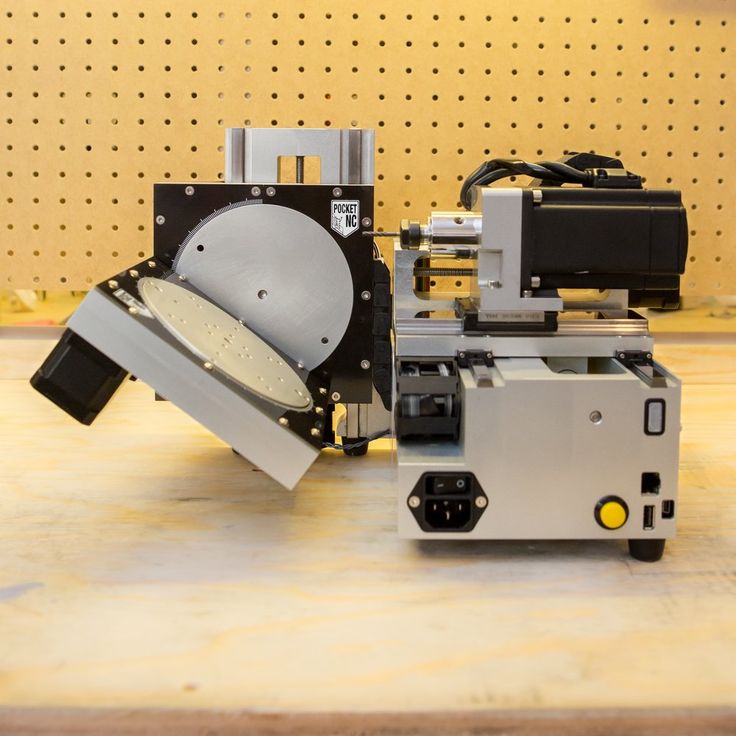
6. Add a design to your business offerings
Most customers looking for 3D printing services usually have other value-adding needs. Rather than position your business as a sole 3D printing service, offer CAD model design services, design optimization, and more.
Look for pre and post 3D printing services that you can use to steal the hearts of new product developers to help a client grow from concept and design iteration to print-ready designs that is optimized for 3D printing. You’ll be surprised how many clients need help designing their concept from start to finish. The bottom line is to upsell your additional services to your client to make even more from each job.
7. Price responsibly and get a positive referral
Start out with low introductory prices to get the attention of prospective clients and get positive referrals for all of your completed projects. Next, encourage them to make great reviews for your services while you gradually increase your prices. If there is anything customers trust more than anything in the world, its review from other clients who share and experience the same pain points for their businesses.
Finally, consider using promotional materials and souvenirs to advertise your business as it grows.
Premium Parts can help your business
3D printing has no doubt revolutionized the manufacturing space in today’s businesses. Using 3D printing services like ours at Premium Part opens you up to the numerous benefits of additive manufacturing. With our excellent, tailored, and personalized range of services, we can help you and your business to achieve your prototyping and production goals in a very short period of time without any compromise on quality. We also help with design optimization, cost estimation, and quotes for free. Go to our 3D printing homepage and learn more about the benefits of 3D printing for your business and receive your free quote right now!
Ortur Obsidian Review: Feature Packed 3D Printer
I noticed the Ortur Obsidian while browsing Gearbest, and it looked like a featured packed 3D printer available for a fair price. I thought it would be a good printer to test and check if it’s a good competitor for the popular Artillery Genius. Continue reading to learn more about the Ortur Obsidian and find out if it lives up to the expectations.
Ortur Obsidian Shipping and Packaging
The Ortur Obsidian comes in a carboard box with ample protection on all sides. Everything is packet well in plastic bags for extra protection. I don’t think there’s any risk of receiving the printer in good condition even if it gets a bit roughed up during shipping.
Assembly of the Ortur Obsidian
In the Ortur Obsidian description, it’s stated that the assembly takes about 20 minutes, but this is an optimistic estimate. It took me about 1 hour to properly assemble the printer and check everything, mostly because the assembly guide steps are not accurately described in the correct order.
On the included SD card, there are a few helpful videos for assembling the printer but even in these videos, some of the steps are not followed in the correct order.
I recommend you check all the screws to make sure everything is nice and tight because I found some loose screws. Besides that, I also recommend you check the eccentric nuts for all the roller wheels and tighten them just right. They should be tight enough so they can barely be turned with your fingers, but not too tight so they develop flat spots.
Finally, take extra care when assembling the printer to make sure the frame is square. All these steps are required for any printer to ensure good results during printing. It’s always good to take your time during assembly, to avoid issues which can be more time consuming later.
Besides the printer parts, you also get the following accessories:
- Tools for assembling the printer
- Card reader with 8GB MicroSD card
- Leveling blocks
- 200gr white PLA roll
- Power cable
- Plastic handle
- Top mounts for Z screws
- Screws for assembling the printer
- Z-sync belt
- Zip ties
- PTFE tube for reverse bowden
- Rubber feet
- Z endstop
- Pulleys for the Z sync belt
Ortur Obsidian Specs
| Brand | Ortur |
| Model | Obsidian |
| Type | DIY |
| Material (Frames) | Aluminium Extrusion,Sheet-metal structure |
| Platform board | Aluminum Alloy |
| Nozzle diameter | 0.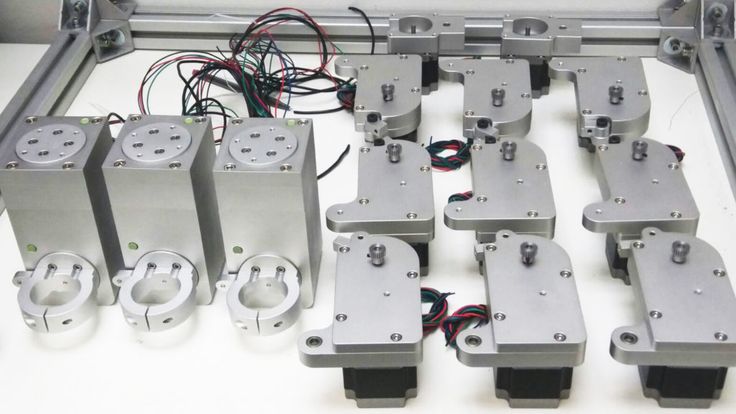 4mm 4mm |
| Nozzle temperature | 0 to 260 degree |
| Product forming size | 250mm * 250mm * 300mm |
| Layer thickness | 0.05-0.4mm |
| Memory card offline print | SD card |
| LCD Screen | Yes |
| Print speed | 150mm/s (MAX) |
| Platform temperature | 0 to 120 degree |
| Supporting material | ABS,HIPS,Nylon,PETG,PLA,TPU |
| Material diameter | 1.75mm |
| Language | English,French,German,Russian,Spanish |
| File format | G-code,STL |
| Model supporting function | Yes |
| XY-axis positioning accuracy | 0.11 mm |
| Z-axis positioning accuracy | 0.04mm |
| Voltage | 110V/220V |
| Print Surface | Sticker |
| Host computer software | Cura,Repetier-Host,Simplify3D |
| Packing Type | Partially-Assembled packing |
| System support | Windows, Linux, Mac OS |
| Voltage Range | AC110V/220V |
| Current | 24V, 15A |
| Connector Type | SD card,USB |
250x250x300 build volume
The Ortur Obsidian 3D printer sits between the regular and large format 3D printers.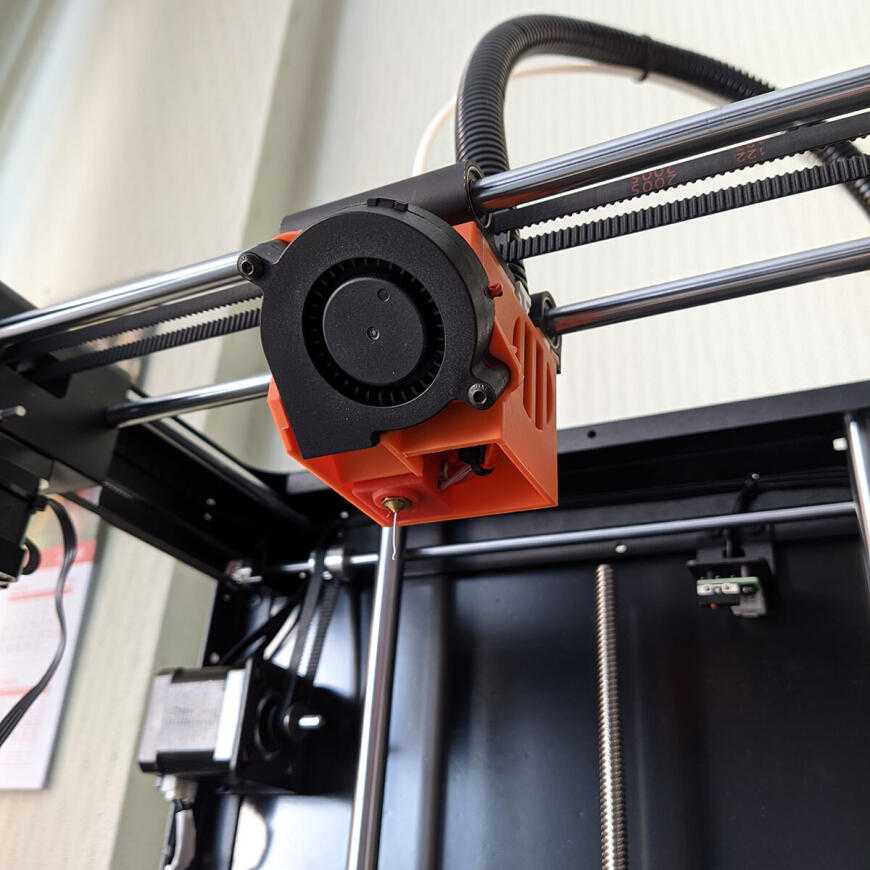 It has a build volume of 250x250x300 in a compact footprint close to the one taken by the Artillery Genius which has a build volume of 220x220x250.
I really like this because it offers the best of both worlds. Larger print volume with smaller footprint, that doesn’t take a lot of space.
Dual-Z axis with Z sync belt
Lately, more and more 3D printers offer Dual-Z axis and the Ortur Obsidian maintains the trend. With a Dual-Z axis setup, the X gantry can be moved easily and more consistently compared to a single axis printer. Both motors are wired to a single stepper driver. This works well, but you won’t be able to use features like the Z Steppers Auto-Alignment available in Marlin.
Considering that the stepper motors are linked with a Z sync belt, this is not that big of an issue and can easily be ignored. Unfortunately, my Z sync belt seems to be a bit longer than it should, and doesn’t sit properly on the pulleys. It could be an isolated issue, but it’s worth mentioning.
POM anti-backlash couplers
Another excellent feature which works great with the Dual Z axis setup is the inclusion of POM anti-backlash couplers. The Ortur Obsidian doesn’t use the regular Z screw nuts like most of the printers, but instead it has a pair of POM couplers which are used more commonly on CNC machines.
BMG Direct Drive Extruder with reverse bowden
The Ortur Obsidian also includes a BMG Direct Drive extruder clone with a 3:1 gear ratio. It’s not the best quality BMG clone but it works well and gets the job, accurately extruding filament.
Currently, the BMG is my favorite extruder and I’m happy to see this included out of the box with the Ortur Obsidian.
On the right side of the motor, there’s also a handy metal knob which is used when feeding new filament which makes filament replacements a breeze.
To make things even better, the Ortur Obsidian uses a reverse bowden setup to route the filament from the spool located in the back of the printer, to the hotend. That way, there is no weight added to the top of the printer.
It’s the first 3D printer I tested which uses this setup, and I love it. It makes the whole setup look cleaner.
PTFE lined V6 clone hotend
The BMG Direct drive extruder is paired with a V6 hotend clone. The heat break is lined with a PTFE tube which goes right up to the nozzle, thus limiting the temperature you can print reliably. With this setup, the hotend is capable of safely working up to 240C without damaging the PTFE tube and I don’t really recommend going past this temperature for long periods of time.
If needed, you could easily upgrade the heat-break with a Bi-metal heat break from Trianglelab or a Copperhead heat break from Slice Engineering which will offer much better thermal performance and will allow you to reach higher temperatures safely. Even with the stock setup, you can print PLA, PETG, and TPU with no issues.
Next to the hotend there’s also a white LED light which should light up your print, but it’s blocked by the bottom metal cover of the extruder.
Inductive Auto Bed Leveling probe
To make things easier for beginners and advanced users alike, the Ortur Obsidian also includes an inductive auto bed leveling probe. This is similar to the popular BLTouch ABL probe but it only detects metallic surfaces so it will only work with the stock bed or with a PEI Spring Steel Sheet. The heatbed is probed in 25 points and I had no issues with it during my testing. It’s reliable and produces consistent measurements.
When you receive the printer, I recommend you make sure the probe is set at the correct distance from the bed. In my case, the probe was sitting a lot higher and it would not detect the bed.
The probe can detect metallic surfaces from about 4mm, so I recommend you install at ~2-3mm above the bed. The easiest way to do it is to manually lower the nozzle to barely touch the heatbed then lower the probe until the red LED from the probe light up.
32-bit board with TMC2208 silent steper drivers
The Ortur Obsidian comes with a proprietary Ortur 6. 1 32-bit board with TMC2208 silent stepper drivers. As I previously mentioned, it only includes four stepper drivers which are soldered to the board, so there’s no way to upgrade it in the future.
There’s also an ESP-01S slot where you can install a Wi-Fi module if you want, but usually the functionality of these adapters is not that great. The transfer speed is limited, so if you are looking to add Wi-Fi capabilities to your printer, then an Octoprint server would be better.
Unfortunately, the Ortur Obsidian board does not have heatsinks on the stepper drivers. Even tough there’s a fan blowing cool air over the board, I had a layer shift during a 20 hour print. This is caused by the overheating of the stepper drivers and it’s unfortunate. The heatsinks can help the drivers stay cool and avoid issues during printing.
Heatsinks can be purchased for about 3$, and the board cooling can be improved but hopefully Ortur will start adding heatsinks to the board in the future.
Responsive touchscreen
The touchscreen installed on the Ortur Obsidian is nice and responsive. It uses a proprietary interface which is a bit different compared to other 3D printers.
I like that there’s a speed indicator updating in real time during printing, where you can see the movement speeds on various parts of the print.
I don’t really like the small buttons and the way they are laid out on the screen. The XYZ homing buttons are sometimes hard to accurately touch with your fingers and there’s no home button to move all the axis to 0.
Marlin RTOS 2.1.6 firmware
The Ortur Obsidian is running Marlin with the addition of freeRTOS. I’m not sure if this version of Marlin brings any substantial improvements over the regular Marlin Firmware but this is what we get with this printer. There are no sources available right now for me to check.
I will contact Ortur and update the review after I get more information about this.
Ribbon cables
You have probably seen the same kind of ribbon cables with the popular Artillery Genius and Sidewinder X1 printers.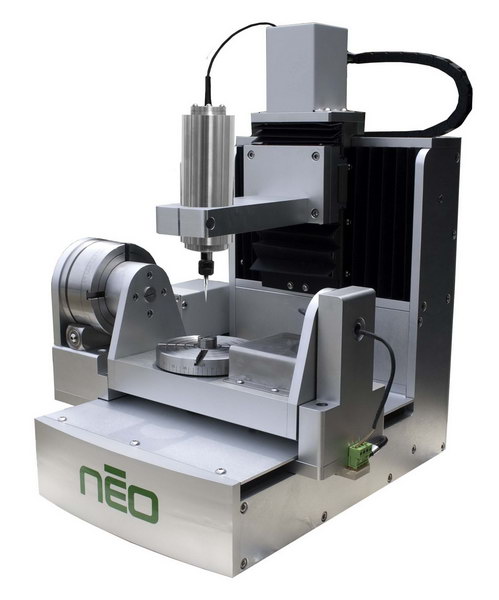 I think the Ortur Obsidian uses the ribbon cables a bit better, because there are ribbon cable strain relief brackets included which will make them more reliable.
Hopefully, more printers will use the same ribbon cables in the future because ribbon cables make the printer look much cleaner.
Belt tensioners on X and Y axis
You can tension the X and Y axis belts using the included metal belt tensioners. It’s nice to see these tensioners included out of the box because it makes tightening the belts easy.
What I don’t like is the missing spacers to keep the idlers centered. This is not a big issue and the printer works well but if the belt is not properly aligned, issues can occur during printing.
Auto Power Off with integrated relay
The inclusion of a power relay on the Ortur Obsidian is a nice upgrade over other printers available right now on the market. When the print is complete, the printer waits for the hotend to cool down then it turns off the printer
It’s the first printer I tested with this upgrade and I love it.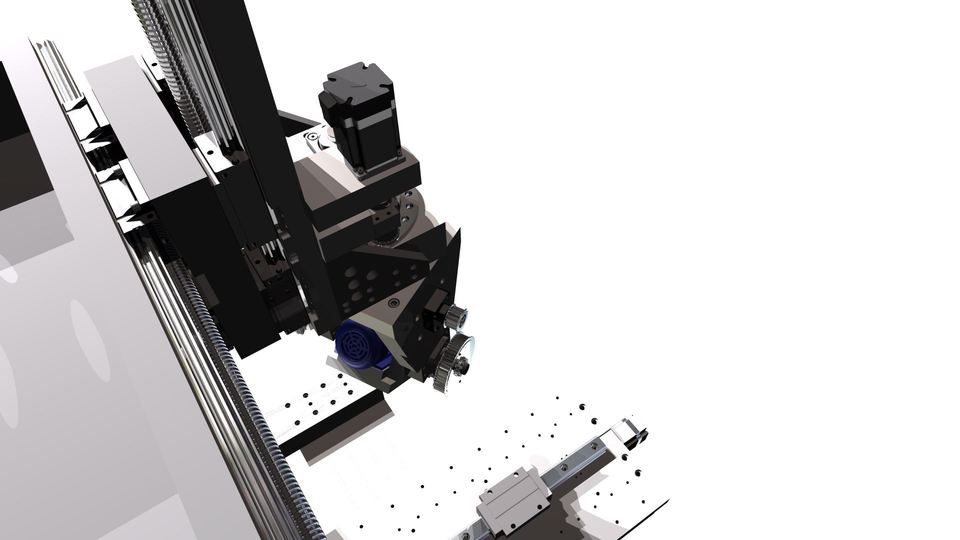
You can add the M81 command to your end G-code which will turn off the printer. If the printer is connected via USB to Octoprint, the screen will stay on, but you can fix this with a simple cable mod: Fix Octoprint always on printer display.
Quiet operation
All the fans installed on the printer are relatively quiet. During printing, most of the noise comes from the 5015 part cooling fan blowing at 100%. The PSU and case fans are quiet, but still audible.
Ortur Obsidian drawbacks
No heatbed insulation
I would have liked to see some heatbed insulation material under the bed because it makes heating up a bit faster, and the the power consumption would be a bit lower during operation. They probably did this to make sure the bed cools faster and users don’t damage the surface when removing a print.
Fortunately, It’s a cheap and easy to do upgrade.
No removable print surface
Another feature which would have made this printer a bit better would be the addition of a removable bed surface.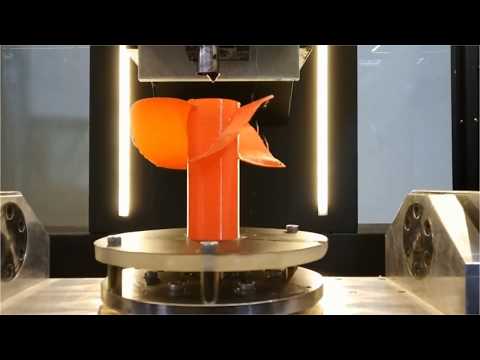 I’m not a fan of the included “glass sticker” and I will probably replace it soon with a magnetic PEI Spring Steel Sheet.
While the prints stick really well on this surface, removing them is hard. The prints don’t pop off by themselves like when using a simple glass bed and you need to use a sharp scraper or blade to remove them. Besides that, my print surface already has marks from the few prints I did during my time with the printer even tough the first layer was properly tuned.
Keep in mind that it’s not recommended to print ABS on the stock build surface (probably because the ABS would fuse with the bed and removing it would be impossible).
The PEI sheet upgrade will be a bit harder to do because the 250×250 PEI sheets are not that common, so you would have to get one cut on order. Besides the size issue, removing the old sticker and cleaning up the adhesive could be hard to do, but I will update this article when I perform the upgrade.
Side mounted power connector
I don’t really understand why Ortur installed the power connector on the side of the printer when there’s ample space available in the back.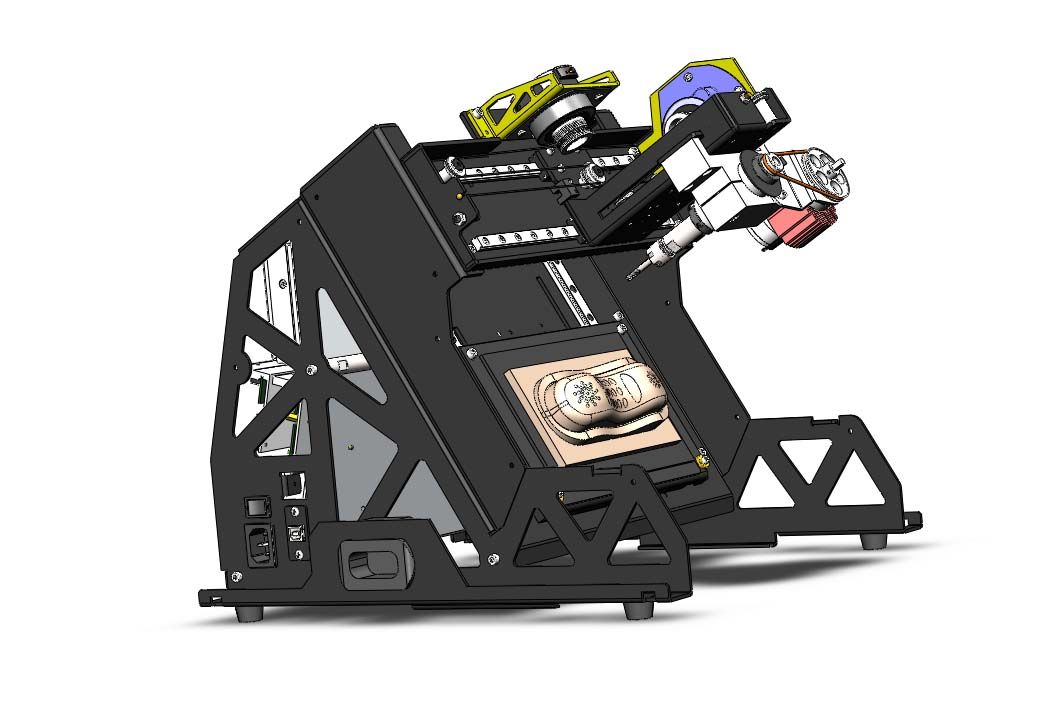 You could mitigate this issue with an angled power cable but I would have still liked to have the power connector on the back.
Bad quality printed parts
The printer also has some printed parts used in the construction of the printer. They don’t look that great but they get the job done. Fortunately, all the files are available on the SD card so you can easily re-print them if you are looking to make the printer look better.
This is not such a big issue, but I thought it’s worth mentioning, just so you know what to expect.
IdeaMaker profiles for Ortur Obsidian
During my time with the printer, I also tuned three IdeaMaker profiles for the Ortur Obsidian. These profiles are tuned for the stock printer and worked well for me. If you are looking to give them a go, then feel free to download them from the links below:
Ortur Obsidian IdeaMaker Profile – PLA – 3DPrintBeginner
Ortur Obsidian IdeaMaker Profile – PETG – 3DPrintBeginner
Ortur Obsidian IdeaMaker Profile – TPU – 3DPrintBeginner
Test prints on Ortur Obsidian
3D Benchy
As usual, we start the tests with a 3D Benchy.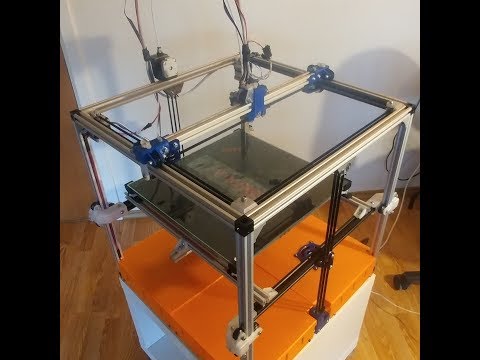 The quality is pretty good, considering this is out of the boxwith no tweaks made to the printer profile. A bit of over-extrusion which was easily compensated for with the flow calibration.
- Material: SUNLU Gray PLA
- Layer Height: 0.2 mm
- Nozzle Temperature: 205C
- Bed Temperature: 60C
- Print Speed: 50 mm/s
Calibration Cube
After calibrating the flow rate, the calibration cube looks good and the extrusion is accurate. Unfortunately, the bridging settings were messed up and there are a few issues with the cube. But I was confident enough to start a bigger print.
- Material: SUNLU Gray PLA
- Layer Height: 0.2 mm
- Nozzle Temperature: 205C
- Bed Temperature: 60C
- Print Speed: 50 mm/s
Gizmo
The first bigger model which I printed was Gizmo from Thingiverse. Layers are consistent even though it was printed at a higher speed than my regular settings.
- Material: SUNLU Marble PLA
- Layer Height: 0.15mm
- Nozzle Temperature: 210C
- Bed Temperature: 60C
- Print Speed: 60 mm/s
Doctor Doom
Doctor Doom bust from Eastman was printed in around 24 hours. While the carbon filament can make the prints look better, there’s no denying that the print quality is excellent, and the Ortur Obsidian can deliver on its promises.
- Material: SUNLU Carbon Fiber PLA
- Layer Height: 0.15mm
- Nozzle Temperature: 210C
- Bed Temperature: 60C
- Print Speed: 50 mm/s
Supergirl
The second bust is Supergirl from Eastman. This time, there was a small layer shift on the Y axis which I believe was caused by the lack of heatsinks on the stepper drivers. Anyway, the print quality is just as good.
- Material: FilamentOne PLA Glint Red
- Layer Height: 0.15mm
- Nozzle Temperature: 210C
- Bed Temperature: 60C
- Print Speed: 50 mm/s
TMNT
I also wanted to test the print quality using silk filament, so I printed the TMNT bust from Eastman. With this print, you can see the layer lines a bit more, and there are also some parts where cooling was not doing the best. But the print still looks really well in my opinion.
- Material: SUNLU Silk Copper PLA
- Layer Height: 0.15mm
- Nozzle Temperature: 210C
- Bed Temperature: 60C
- Print Speed: 45 mm/s
Dory
PETG also print well on the Ortur Obsidian. The print quality is good, but if you look closely some small inconsistent layers can be seen.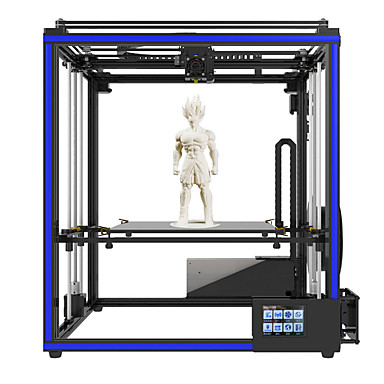 This could be caused by the old filament I used (opened about 12 months ago). I think that with a bit more tuning, you can get better quality from PETG.
I’m also happy to report that adhesion was great and there was no need for glue stick or other adhesion helpers.
- Material: Fiberlogy Easy PETG
- Layer Height: 0.2mm
- Nozzle Temperature: 240C
- Bed Temperature: 70C
- Print Speed: 50 mm/s
TPU 3D Benchy
To also test the TPU performance, I printed another 3D Benchy because it it a pretty challenging print in TPU. The quality is fine, but as you can see, there’s some small stringing which most of the time is hard to get rid of. Maybe with a bit more retraction and coasting this can be improved (or even drying the filament in advance).
- Material: Devil Design Pink TPU
- Layer Height: 0.2mm
- Nozzle Temperature: 215C
- Bed Temperature: 50C
- Print Speed: 40 mm/s
Conclusions: Is the Ortur Obsidian worth it?
The Ortur Obsidian looked like a promising printer, and I’m happy to report that it confirmed my expectations.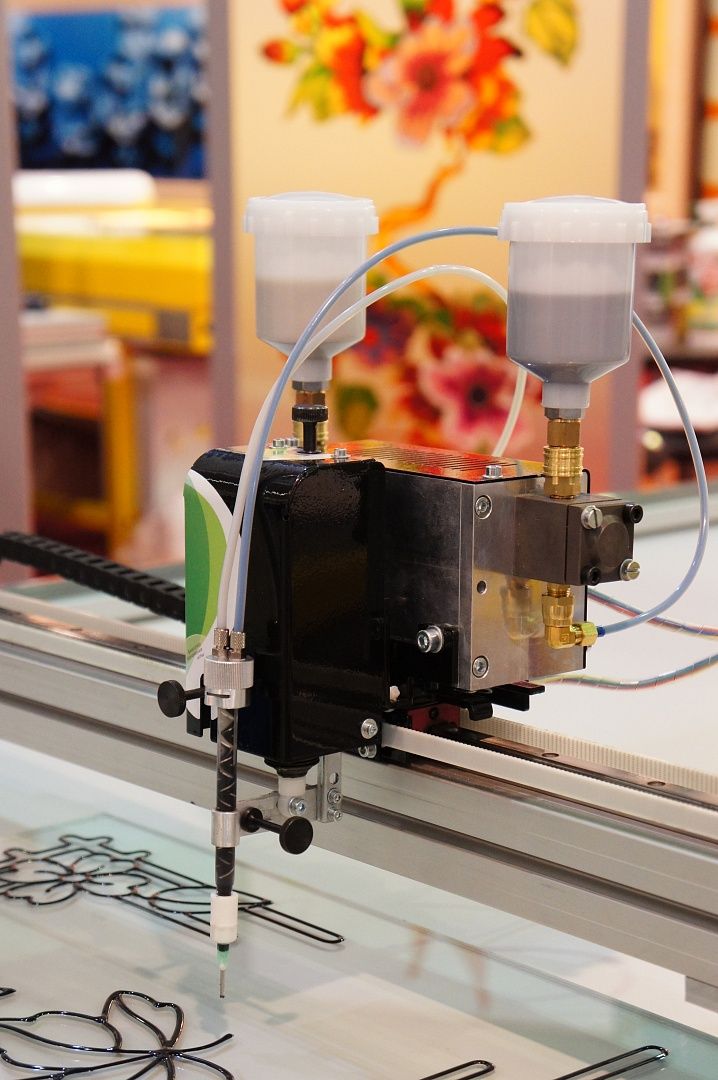 It manages to produce quality prints consistently and there was no need for me to do any calibration for these results (besides the regular flow rate calibration).
It comes with some of the best hardware specs available right now in a compact package. All of these features are sold for a good price and I have no problem recommending the Ortur Obsidian considering the price range and the build volume offered.
Sure, it has some small drawbacks which can be fixed with upgrades further down the line, but out of the box, the printer is good enough to be worthy of your consideration.
The Ortur Obsidian is an excellent alternative to the popular Artillery Genius, offering more features with up to date hardware and a larger build volume. I would recommend getting it instead of the Genius even tough it’s a bit more expensive.
Where to buy the Ortur Obsidian?
The Ortur Obsidian can be purchased from the following sites:
Gearbest
I recommend checking out the Discount Codes page before purchasing.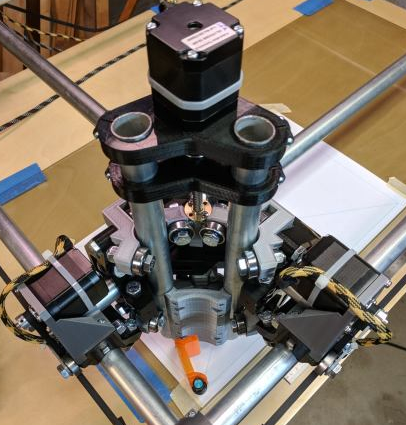 I regularly update the article with discount codes for various online shops, and you might find one for this particular model.
The Ortur Obsidian was provided free of charge by Ortur for the purpose of this review. While the article includes affiliate links, all opinions are my own. Nobody reviewed the article before it was posted, following the Review Guidelines.
Liked it?Consider supporting 3DPrintBeginner if this content helped. You can also join Patreon for exclusive perks! |
affordable 5-axis 3D printing and conformal printing
mike_vp
Loading
03/14/2022
7162
Miscellaneous
Subscribe to the author
Subscribe
I do not want
Freddy Hong, Steve Hodges, Konnor Myante, David Boyle based on the well -known PRUSA I3 MK3S Printer. The authors want to present their work at the CHI 2022 conference.
As the creators themselves write: "We want 5-axis 3D printing to attract more hobbyists and manufacturers. The Prusa i3 MK3s was chosen as the base printer because it is perhaps the most popular/common hardware for desktop FDM 3D printers with a large community of users We also appreciate the openness of the Prusa i3 which has made the job much easier. a serial 3D printer can be upgraded to 5-axis 3D printing.0003
To make multi-axis 3D printing accessible to more manufacturers and researchers, we have developed a cheap and affordable way to upgrade a conventional 3D printer to a 5-axis one. We have also developed a conformal GUI slicer integrated into the popular CAD package. Together, they provide an accessible workflow for designing, modeling, and creating conformally printed 3D models."0003
The online repository (to be published on March 17) contains detailed information on all mechanical parts and 3D printing files needed to assemble the equipment. The repository will also contain development versions of the conformal slicer. (It would benefit a lot from more user contributions!)
prusa i3 5-AXIS 3D PRINTING
Follow author
Subscribe
Don't want
50
Article comments
More interesting articles
ski
Loading
11/13/2022
655
3
Subscribe to the author
Subscribe to the author
Don't want
Thomas' video post - geek-n#rno about the real wear resistance of the latest generation E3D Revo ObXidi nozzles...
Read more
2
Subscribe to the author
Subscribe
Don't want
The International Championship of High-Tech Professions High-Tech 2022 will be held in Yekaterinburg from 8 to 10. ..
..
Read more
187
Follow author
Follow
Don't want
Now you can quickly view STL files as 'thumbnail' in Windows Explorer when you select...
Read more
how we taught 3D printers to print complex parts more economically and twice as fast , R&D and industrial design.
6914 views
What is the idea
The most popular FDM 3D printers print parts layer by layer. At the same time, in 70% of cases, “hinged” elements appear during printing - fragments that do not have support under them and hang over the desktop like visors. To fix such details, it is necessary to print special supporting structures (they can take up to 50% of the material).
In addition, after printing, these supports must be removed: such processing is often time consuming and not always safe - the part may break in the hands due to insufficient strength, and then everything will have to be redone. And some designs are simply impossible to produce using this method: the supports will fill almost the entire space of the part.
I saw a solution that avoids this problem in the field of metalworking - five-axis milling machines have been used there for a long time. The idea is to equip the 3D printer with a turntable: with its help, the body of the model is always positioned during printing so that each subsequent layer is built based on the already printed elements of the model.
Five Axis 3D Printer
Why do we need a five-axis 3D printer and who are our customers
The 5-axis 3D printer allows you to print complex parts quickly, without wasting material on creating support structures and saving time in post-processing. In essence, we allow you to reduce costs and increase productivity: according to our estimates, one machine can replace two previous generation 3D printers.
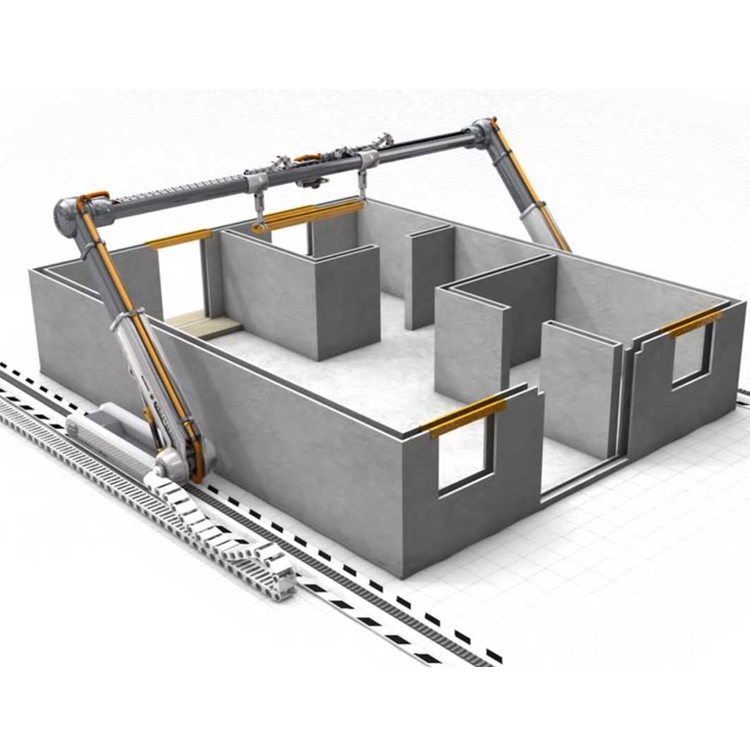
The 5-axis printer allows you to print parts with complex geometries, such as live piping layouts that companies need during the design phase.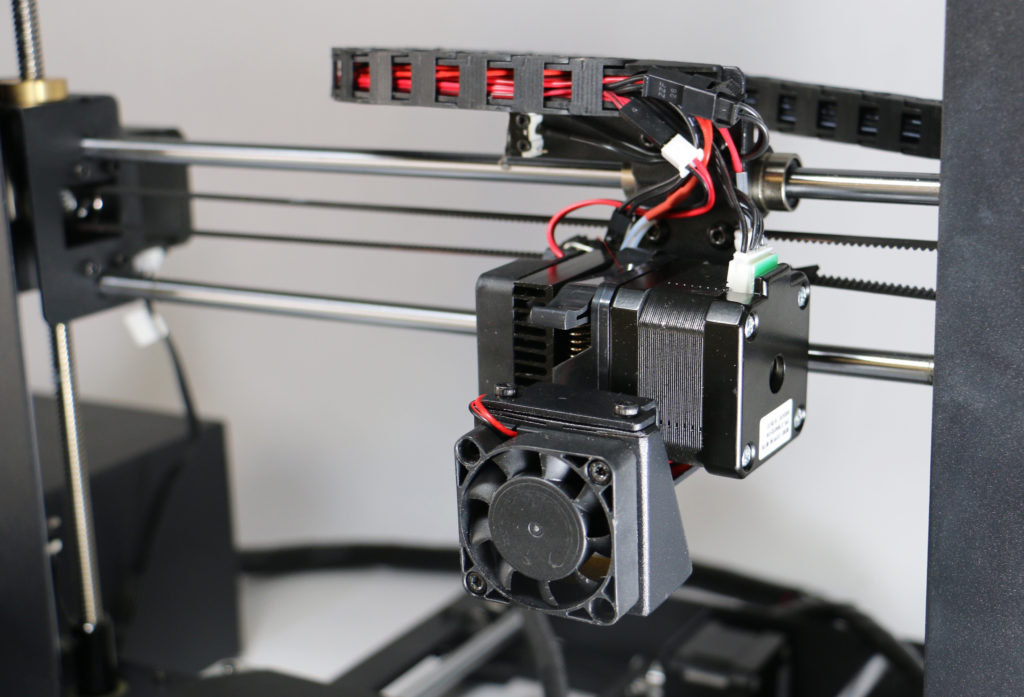 Printing this on a conventional 3D printer will not work, and creating it using conventional methods will take a lot of time and effort. In addition, products printed on a five-axis printer are much stronger than conventional ones. When printing, new layers of matter are not just layered on top of each other, but are printed "overlapped" at different angles - it is much more difficult to break such details.
Of course, not everyone needs to print complex and durable products: potential buyers of the Epit 5.1 5-axis 3D printer are 3D printing service companies, industrial design studios and design departments of manufacturing enterprises. That is, our machine is needed specifically for industrial use.
How we got on this subject
Seven years ago, I worked in a company that produced plastic automotive components, responsible for marketing and creating new business lines.
Then for one of the projects it was necessary to make a prototype of a new part: doing it with traditional methods was expensive and time consuming (I would have to create a mold), so I decided to contact a company that was engaged in 3D printing.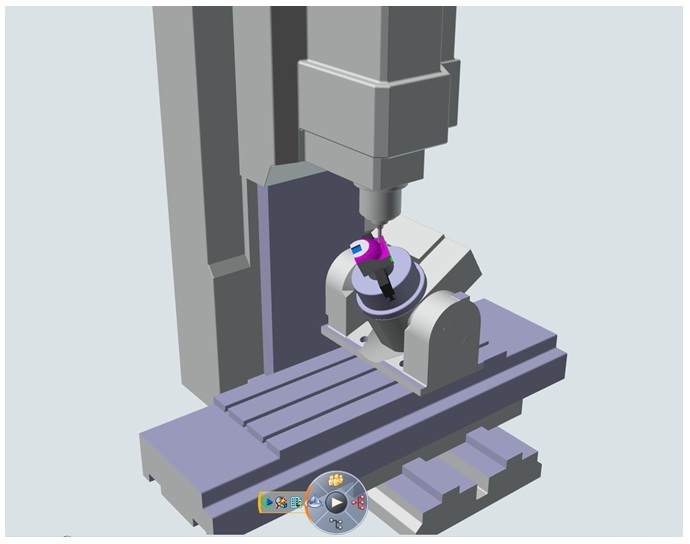 At that time, this direction was on the hype, and everyone talked about the fact that soon 3D printers would be in every kitchen and garage.
But the reality turned out to be completely discouraging. With our task, we turned to several companies that were engaged in 3D printing in Naberezhnye Chelny, but no one was able to make the part according to our request: it turned out to be too complicated.
Since I am a designer by education, I began to think over and look for solutions to the problem myself - and did not find anything similar on the market.
Creating a team turned out to be more difficult than finding funding. Initially, I focused on the "iron" component of the project and did not think about the software that is necessary for the efficient operation of a 3D printer, so I began to look for developers.
An expert I knew then told me: “You need people who, like you, do not understand what they are getting into” - because developing software for such a printer turned out to be a rather specific and long task.
I began to apply to the universities of Tatarstan and neighboring regions - to look for students who are ready to take on a non-trivial task. But the students who responded could not move forward in the solution, and as a result, I found Mikhail Ivanov in Innopolis, who became a developer and my partner in a startup.
The second person who was needed in our business was someone who understands electronics, a specialist in the field of digital program control. Unlike a programmer, such a specialist cannot work remotely, so I was looking for a person in Naberezhnye Chelny.
Having spent a lot of effort and nerves, I found only two people who had the necessary level of knowledge and were able to realize my ideas, and fortunately one of them, Pavel Kozhevnikov, took on the project.
Getting funding, finding a team, and working on the printer went gradually - and in April of this year we created an MVP.
What we are doing now
In the spring of 2020, we entered the Pulsar Venture Capital accelerator and are now working on a project together with the company's experts.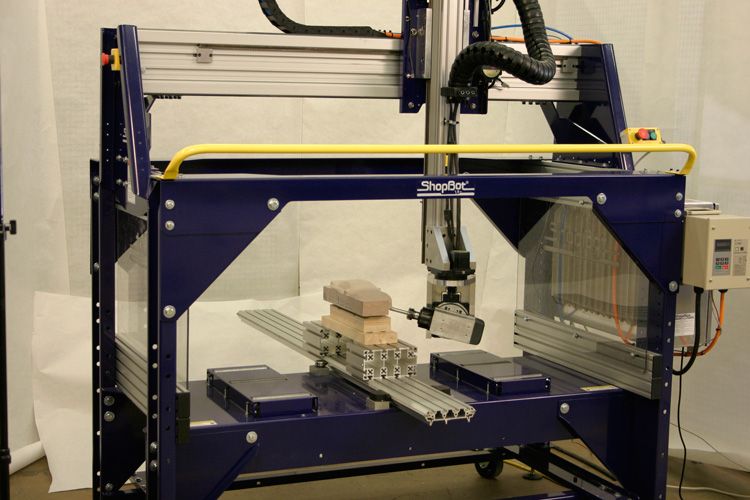 Acceleration made me run faster, spend even more time on the project, and constantly refine something.
On the other hand, due to quarantine, we are working remotely, and for me it turned out to be even more convenient - I stayed in the usual atmosphere with the opportunity to work on the product.
Now we have a finished product, the first pre-orders for it, and an understanding of how we will bring it to the market, how to position it. In addition, during the acceleration we have expanded the horizons of thinking and now we are looking not only at Russia, but also at the global market - this has ceased to seem like an impossible task.
We assessed the economics of the business and set the price for the printer at around $7,000, which is an adequate price for a printer with such a wide range of capabilities, because it allows you to get prototypes of products quickly and with high quality.
I see how 3D printer owners are increasingly thinking about the efficiency of their equipment and the ability to do more.