3D printing oozing
Stringing or Oozing
Stringing or Oozing
Stringing (otherwise known as oozing, whiskers, or “hairy” prints) occurs when small strings of plastic are left behind on a 3D printed model. This is typically due to plastic oozing out of the nozzle while the extruder is moving to a new location. Thankfully, there are several settings within Simplify3D that can help with this issue. The most common setting that is used to combat excessive stringing is something that is known as retraction. If retraction is enabled, when the extruder is done printing one section of your model, the filament will be pulled backwards into the nozzle to act as a countermeasure against oozing. When it is time to begin printing again, the filament will be pushed back into the nozzle so that plastic once again begins extruding from the tip. To ensure retraction is enabled, click “Edit Process Settings” and click on the Extruder tab. Ensure that the retraction option is enabled for each of your extruders. In the sections below, we will discuss the important retraction settings as well as several other settings that can be used to combat stringing, such as the extruder temperature settings.
Common Solutions
Retraction distance
The most important retraction setting is the retraction distance. This determines how much plastic is pulled out of the nozzle. In general, the more plastic that is retracted from the nozzle, the less likely the nozzle is to ooze while moving. Most direct-drive extruders only require a retraction distance of 0.5-2.0mm, while some Bowden extruders may require a retraction distance as high as 15mm due to the longer distance between the extruder drive gear and the heated nozzle. If you encounter stringing with your prints, try increasing the retraction distance by 1mm and test again to see if the performance improves.
Retraction speed
The next retraction setting that you should check is the retraction speed. This determines how fast the filament is retracted from the nozzle. If you retract too slowly, the plastic will slowly ooze down through the nozzle and may start leaking before the extruder is done moving to its new destination. If you retract too quickly, the filament may separate from the hot plastic inside the nozzle, or the quick movement of the drive gear may even grind away pieces of your filament. There is usually a sweet spot somewhere between 1200-6000 mm/min (20-100 mm/s) where retraction performs best. Thankfully, Simplify3D has already provided many pre-configured profiles that can give you a starting point for what retraction speed works best, but the ideal value can vary depending on the material that you are using, so you may want to experiment to see if different speeds decrease the amount of stringing that you see.
Temperature is too high
Once you have checked your retraction settings, the next most common cause for excessive stringing is the extruder temperature. If the temperature is too high, the plastic inside the nozzle will become less viscous and will leak out of the nozzle much more easily. However, if the temperature is too low, the plastic will still be somewhat solid and will have difficulty extruding from the nozzle. If you feel you have the correct retraction settings, but you are still encountering these issues, try decreasing your extruder temperature by 5-10 degrees. This can have a significant impact on the final print quality. You can adjust these settings by clicking “Edit Process Settings” and selecting the Temperature tab. Select your extruder from the list on the left, and then double-click on the temperature setpoint you wish to edit.
Long movements over open spaces
As we discussed above, stringing occurs when the extruder is moving between two different locations, and during that move, plastic starts to ooze out of the nozzle. The length of this movement can have a large impact on how much oozing takes place. Short moves may be quick enough that the plastic does not have time to ooze out of the nozzle. However, long movements are much more likely to create strings. Thankfully, Simplify3D includes an extremely useful feature that can help minimize the length of these movements. The software is smart enough that it can automatically adjust the travel path to make sure that nozzle has a very short distance to travel over an open space. In fact, in many cases, the software may be able to find a travel path that avoids crossing an open space all together! This means that there is no possibility to create a string, because the nozzle will always be on top of the solid plastic and will never travel outside the part. To use this feature, click on the Advanced tab and enable the “Avoid crossing outline for travel movement” option.
Movement Speed
Finally, you may also find that increasing the movement speed of your machine can also reduce the amount of time that the extruder can ooze when moving between parts. You can verify what movement speeds your machine is using by clicking on the Speeds tab of your process settings. The X/Y Axis Movement Speed represents the side-to-side travel speed, and is frequently directly related to the amount of time your extruder spends moving over open air. If your machine can handle moving at higher speeds, you may find that increasing this settings can also reduce stringing between parts.
Related Topics
5 Ways How to Fix Stringing & Oozing in Your 3D Prints – 3D Printerly
If you’re in the field of 3D printing, you might have come across an issue of strings of melted plastic or plastic oozing from your 3D prints. This is called stringing and oozing, which fits perfectly.
Fixing stringing and oozing is best done by having good retraction settings, where a good retraction length is 3mm and a good retraction speed is 50mm/s. You can also decrease your printing temperature to help filament be less runny, which reduces the instance of stringing and oozing.
It’s a fairly common problem that people experience which leads to poor quality prints, so you definitely want to get this fixed.
There are more details to know about so keep on reading the article to find out why this happens in the first place, and how to fix it once and for all.
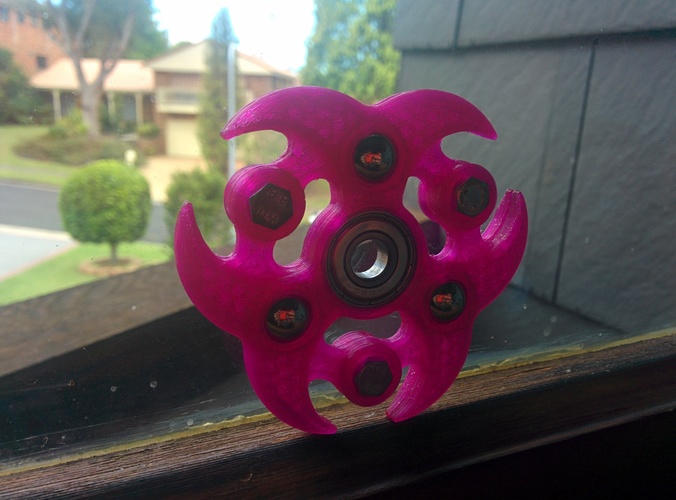
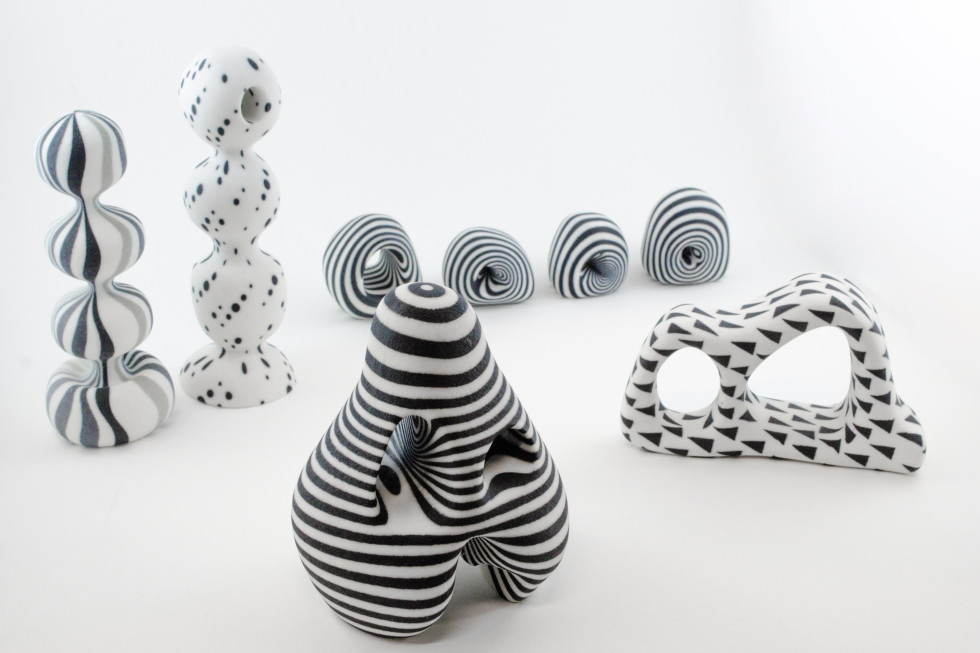
Here’s an example of stringing in a 3D print.
What to do against this stringing? from 3Dprinting
What Causes 3D Prints to Have Stringing & Oozing?
Sometimes users try to print an object in which the nozzle has to move through an open area to reach the next point.
Stringing and oozing is the problem in which the nozzle extrudes the melted plastic while moving from an open space.
The melted plastic sticks between two points and look like attached strings or threads. To prevent or solve the problem, the first step is to find out the actual cause of the issue.
Some of the major causes behind the stringing and oozing problem include:
- Retraction settings not being used
- Retraction speed or distance too low
- Printing with a temperature too high
- Using filament which has absorbed too much moisture
- Using a clogged or jammed nozzle without cleaning
Knowing the causes is a good way to start before getting into the solutions.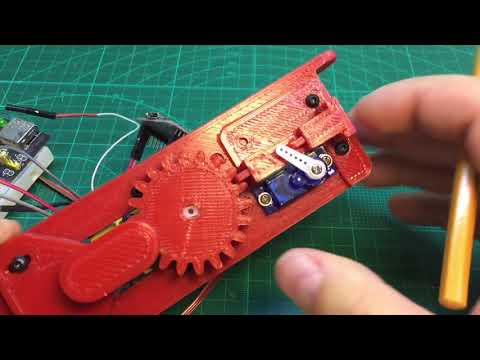 The section below will take you through a number of ways how to fix stringing & oozing in your 3D prints.
Once you’ve gone through the list and tried them out, your problem should hopefully be solved.
How to Fix Stringing and Oozing in 3D Prints
Just like there are various reasons that cause stringing and oozing problems, there are also plenty of solutions that can help you fix and avoid it.
Most of the time this type of problem can be fixed just by changing some settings in the 3D printer such as extruder speed, temperature, distance, etc. It’s not ideal when your 3D prints are stringy so you want to get this sorted out quickly.
Below are some of the simplest and easiest solutions that can be implemented without requiring any major tools or techniques.
The methods that will help you to get rid of the problem for once and for all includes:
1. Print at a Lower Temperature
The chances of stringing and oozing increase if you are printing at a high temperature. The very first thing that you should do is to reduce the temperature and check for the results.
Reducing the temperature will help you because it will extrude less liquid material reducing the chances of stinging and oozing.
Those higher temperature materials are more prone to stringing because of the effects of higher heat on the viscosity or liquidity of filament.
Although PLA is a relatively low temperature material, it doesn’t mean it’s safe from stringing and oozing.
- Reduce the temperature step by step and check if there are any improvements.
- Make sure that the temperature is within the range required for the type of filament being used (should be on the filament packaging)
- Try to use a filament that melts at lower temperatures efficiently like PLA
- While reducing the printing temperature, you may have to lower down the extrusion speed because the filament material will take time to melt at low temperatures.
- Do test prints of little objects to get an idea about the perfect temperature because different materials print well on different temperatures.
- Some people will print their first layer 10°C hotter for good adhesion, then lower the printing temperature for the rest of the print.
2. Activate or Increase Retraction Settings
3D printers include a mechanism that works as a pullback gear called retraction, as explained in the video above. Enable retraction settings to pull back the semi-solid filament that is pushing the liquid to extrude from the nozzle.
According to experts, activating the retraction settings usually work to fix the stringing problems.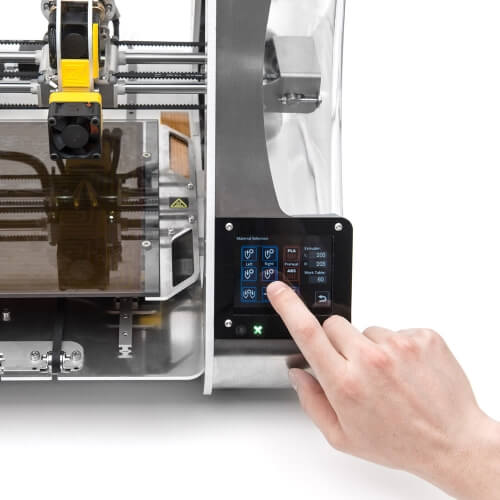 What it does is relieve the pressure of the melted filament so it will not drip while moving from one point to another.
- Retraction settings are activated by default but check for the settings if you are experiencing stringing or oozing.
- Enable the retraction settings so that the filament can be pulled back every time the nozzle reaches an open space where printing is not designed or required.
- A good retraction setting start-point is a retraction speed of 50mm/s (adjust in 5-10mm/s adjustments until good) and retraction distance of 3mm (1mm adjustments until good).
- You can also implement a setting called ‘Combing Mode’ so it only travels where you have already printed, rather than in the middle of your 3D print.
I’d advise you to download and use this Retraction Test on Thingiverse, created by deltapenguin. It’s a great way to quickly test out how well in-tune your retraction settings are dialed in.
It really is hit or miss, high retraction settings of 70mm/s retraction speed and 7mm retraction distance works well, while others get good results with much lower.
One user who was experiencing some pretty bad stringing said that he fixed it by using a retraction distance of 8mm and retraction speed of 55mm. He also shortened his Bowden tube by 6 inches since he replaced the stock one with some Capricorn PTFE Tubing.
The results does depend on what 3D printer you have, your hotend, and other factors, so it’s good to test out some values with a test.
3. Adjust Print Speed
Adjusting the print speed is a common factor to fix stringing, especially if you have reduced the printing temperature.
Reducing speed is necessary because with the reduced temperature the nozzle can start under extruding. After all, the filament will take more time to melt and become ready to extrude since it’s less runny.
If the nozzle is moving at a high speed, with a high temperature, and no retraction settings, you can bet you’ll experience stringing and oozing at the end of your 3D print.
- Reduce the printing speed because this will mitigate the chances of leaking filament and causing stringing.
- A good starting speed ranges from 40-60mm/s
- A good travel speed setting is anywhere from 150-200mm/s
- As different filaments take different time periods to melt, you should test the material by reducing the speed before starting your printing process.
- Make sure that the printing speed is optimal because both too fast and too slow speed can cause problems.
4. Protect Your Filament from Moisture
Most 3D printer users knows that moisture affects the filament badly. Filaments absorb moisture in the open air and this moisture turns into bubbles when heated.
The bubbles usually keep on bursting and this process forces the dripping of the filament from the nozzle causing stringing and oozing problems.
The moisture can also become steam and will increase the chances of the stringing problems when mixed with the plastic material.
Some filaments are worse than others such as Nylon and HIPS.
- Keep your filament stored and protected in a box or something that is totally airtight, with desiccant and has the ability to stop moisture from reaching the filament.
- If suitable, try to use a filament which absorbs less moisture like PLA
I’d recommend going for something like the SUNLU Upgraded Filament Dryer from Amazon. You can even dry filament while you’re 3D printing since it has a hole that can feed through. It has an adjustable temperature range of 35-55°C and a timer that goes up to 24 hours.
5. Clean the Printing Nozzle
Whenever you print an object some particles of the plastic are left behind in the nozzle and with time get stuck in it.
This happens more so when you print with a high temperature material, then switch to a lower temperature material like from ABS to PLA.
You don’t want any kind of blockage in the way of your nozzle, since this is a very significant area for creating successful prints without imperfections.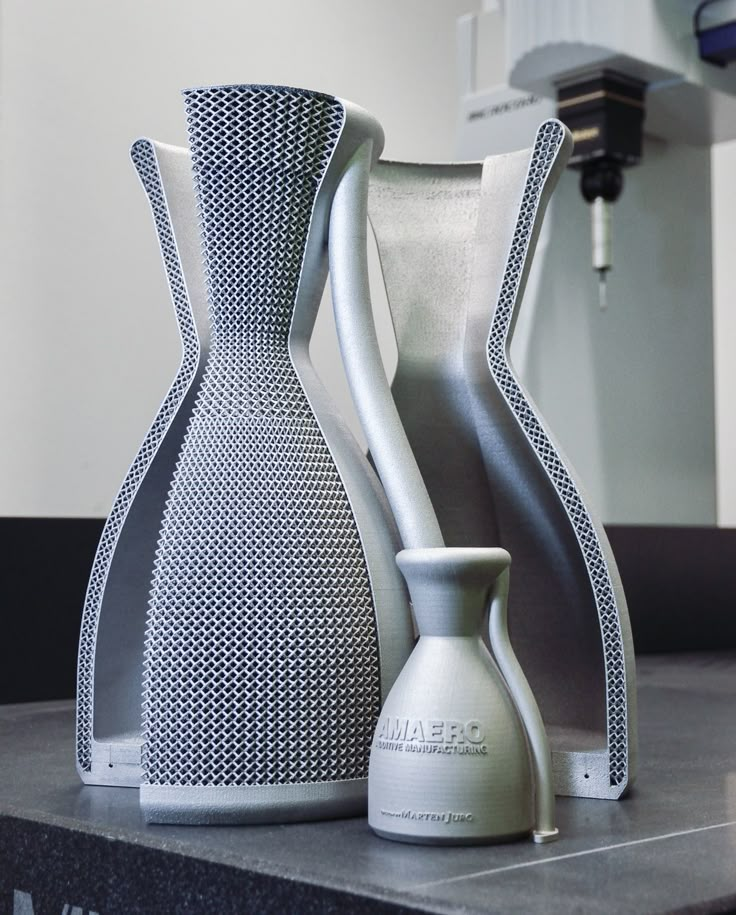
- Clean your nozzle thoroughly before printing to make it free from the residues and dirt particles.
- Use a brush with metal wires to clean the nozzle, sometimes the common brush can also work well.
- It will be better if you clean the nozzle every time you complete a print because it becomes easier to remove the heated liquid residues.
- Clean your nozzle using acetone if you are printing after a long time.
- Keep in mind that cleaning the nozzle is considered essential whenever you switch from one material to another.
After going through the above solutions, you should be in the clear for getting rid of that stringing and oozing problem that you have been experiencing.
It may be a quick fix, or it can require some trial and testing, but at the end of it, you know you’ll come out with some print quality you can be proud of.
Happy printing!
Troubleshooting 3D Printing・Cults
This article should help you identify various 3D printing related issues. Find the image or description in this list that best describes the problem you're experiencing. We offer some tips that should help you solve this problem.
As you know, 3D printing is an empirical process and it is through mistakes that you learn to understand, set up and use your machine. With the help of this list, you should be able to resolve the major bugs. If you are still experiencing issues or have additional tips to add to this list, feel free to contact us and let us know!
#1 Drooling
Symptom
Thin threads are woven into gaps between different parts of a 3D printed part.
Common Name: oozing
Possible Cause
Plastic continues to leak out of the head as it moves due to residual pressure in the heater and fluidity of the molten plastic.
Suggested remedies
Increase filament retraction length in Slic3r, retraction distance in CuraEngine.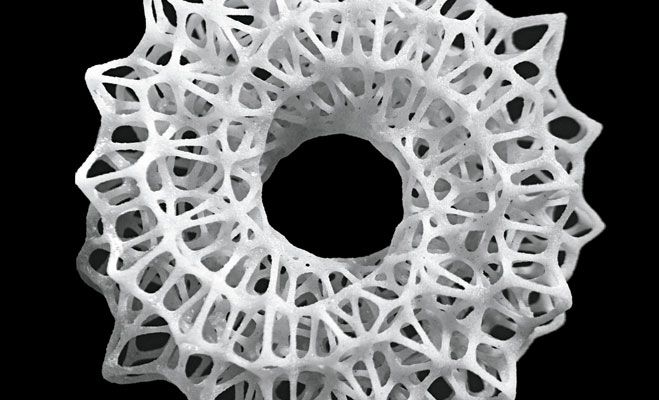 Retracting the filament will cause the pressure in the print head heater to drop. The effect can be modulated by adjusting the retraction speed directly in the slicer.
Increase print head speed. This allows the melted plastic to spread less time and leave marks between the printed parts.
Reduce the extrusion temperature of your plastic. If it is too high, the plastic becomes more fluid and flows out of the extruder faster.
#2 It is collapsing
Symptom
Collapse or poor quality of the overhanging surface, leaving small bumps.
Common name: overhang
Possible cause
The plastic deposited on the periphery of the protrusion does not solidify fast enough, so the deposited filament moves before it solidifies. The phenomenon is repeated or emphasized from one layer to another.
Suggested fixes
Vent the deposited plastic more efficiently, for example by adding a fan to the extruder or directly with a portable fan.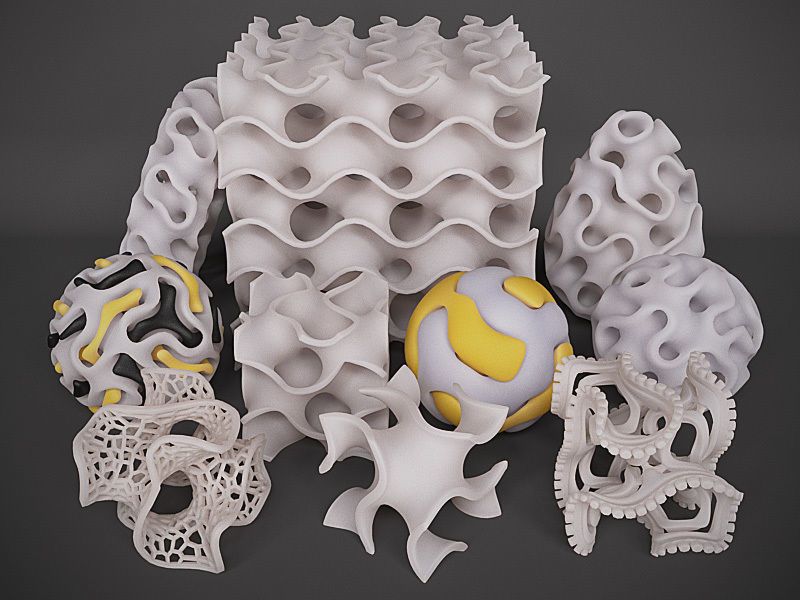
Create print supports under the overhangs.
Change part orientation to avoid overhangs.
#3 Flaking on the sides or top
Symptoms
Contours not bonded enough.
Flat surfaces are not completely covered.
Possible cause
Not enough material is deposited. Too narrow, the deposited wires do not touch each other enough and therefore do not stick to the adjacent wire.
There is dirt in the nozzle, which prevents the passage of the melt.
The extrusion temperature is too low, the wire dries out too quickly or shrinks and therefore does not stick to the adjacent wire.
Suggested Tools
Calibrate the extruder to obtain material flow according to data received from the slicer.
Unlock the extrusion nozzle.
Increase extrusion temperature.
Increase the blending speed in your slicer.
#4 There is not enough material on thin parts
Symptom
The edges of a very thin area are not strong enough, there is not enough material.
Possible cause
Recycling or reworking is not effective enough.
Incorrect filament solidification.
Thread drive slippage during retraction.
Suggested remedies
Reduce the retraction speed and length while printing.
Increase "extra leg length when retracting" when using Slic3r.
Increase the spring pressure on the driven gear.
#5 Blisters
Symptom
Blisters, mismatched geometry, such as small bumps that are seen mostly in areas with a small surface area.
Possible cause
The filament is too hot during extrusion or the filament cooling system is not effective enough.
Suggested media
Place more parts on the plate while printing. In this case, the nozzle will print more objects and therefore allow more time for the part to cool before passing over it again.
Improve the cooling of your 3D printed object by adding cooling systems.
#6 Thin walls delaminate
Symptom
At a thin wall without filler, the threads diverge, they are not glued together on the sides.
Possible Cause
The walls of your 3D print are too thin or not adapted to such a small size.
Suggested remedies
Draw thicker walls to adapt to the thread thickness.
In the slicer settings, set a sludge width that is a sub-multiple of the wall width while remaining consistent with the extrusion diameter and layer height.
Change slicer.
#7 Layer shifts horizontally
Symptom
The layer is shifted in the X or Y axis (or both).
Possible Cause
Print head or plate movement problem.
Suggested fix
Reduce the acceleration on the axis that has the problem.
#8 Layers shift evenly
Symptom
Layers almost always shift along the X and/or Y axis after a certain print height.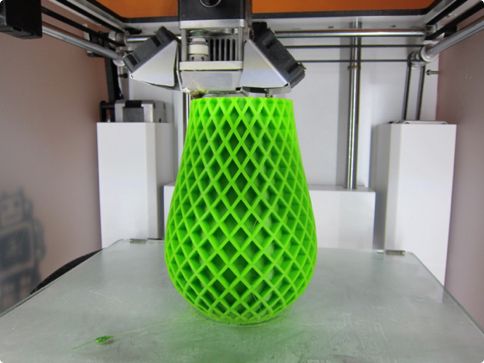
Possible Cause
Head or plate offset failure due to overheating of motors going into safe mode.
Suggested fix
Cool engines with cooling systems (fans).
#9 Corners curl up
Symptom
Deformation in the Z direction during 3D printing. This figure increases in case of a strong overhang.
Common name: curling
Possible cause
Poor solidification, shrinkage effect due to temperature difference of the wire deposited on the previous cooled layer.
Suggested remedies
Increase the slope in the 3D part to reduce overhang.
Further cooling of the deposited plastic using a ventilation system.
Add print supports to affected areas.
#10 Corners fall off
Symptom
The corners of the printed object are peeling off the plate, creating an uneven base.
Common name: warping
Possible cause
Poor fit between the workpiece and the insert.
Material shrinkage factor too high.
The first layer is not pressed enough against the board.
Suggested remedies
Change media as PLA is less likely to warp.
Apply adhesive to the printing plate (glue, tape, varnish, etc.).
Correctly adjust the plate height before printing.
Apply a thinner first coat to further crush the deposited wire.
Add a bezel under the first layer.
Heat up the stove.
Clean and degrease the base.
Change the filling strategy. Fill the bottom concentrically instead of linearly, then fill the inside in a honeycomb pattern to avoid any shrinkage effect.
Reduce the internal fill density of your 3D printed object.
#11 Extrusion density too low
Symptom
Incorrect material density.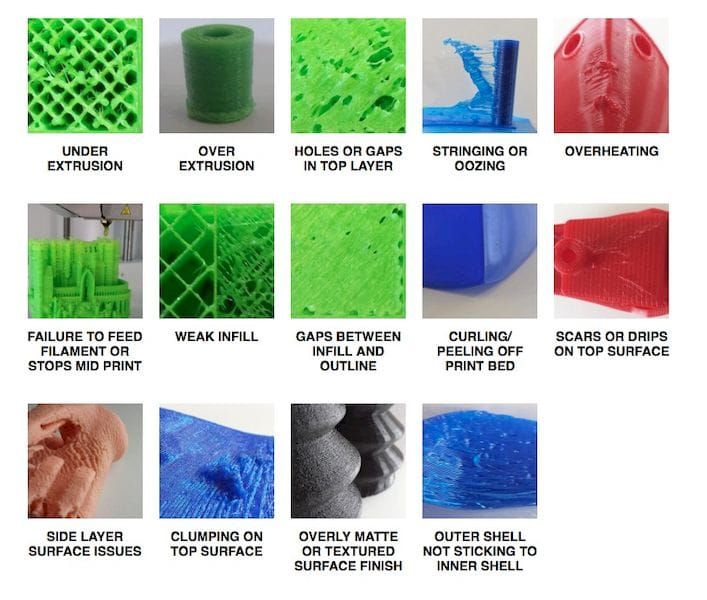
Possible cause
Material consumption too low
Suggested remedies
Unlock the extrusion nozzle.
Filament blocked upstream of extruder (e.g. knot in spool)
Check thread drive (e.g. knurled screw problem)
Corners #12 not forming correctly
Symptom
The corners are not straight enough, they can even stick out and increase the size of the part.
Possible cause
Too much material is deposited in the corner due to the nozzle slowing down too much as it passes through the corner.
Suggested remedies
Intentionally soften the corner of the part in the 3D modeling software.
Increase the "jerk" on your 3D printer's axis controller.
#13 There are black drops
Symptom
Burnt (blackened) plastic in some areas of the printed object.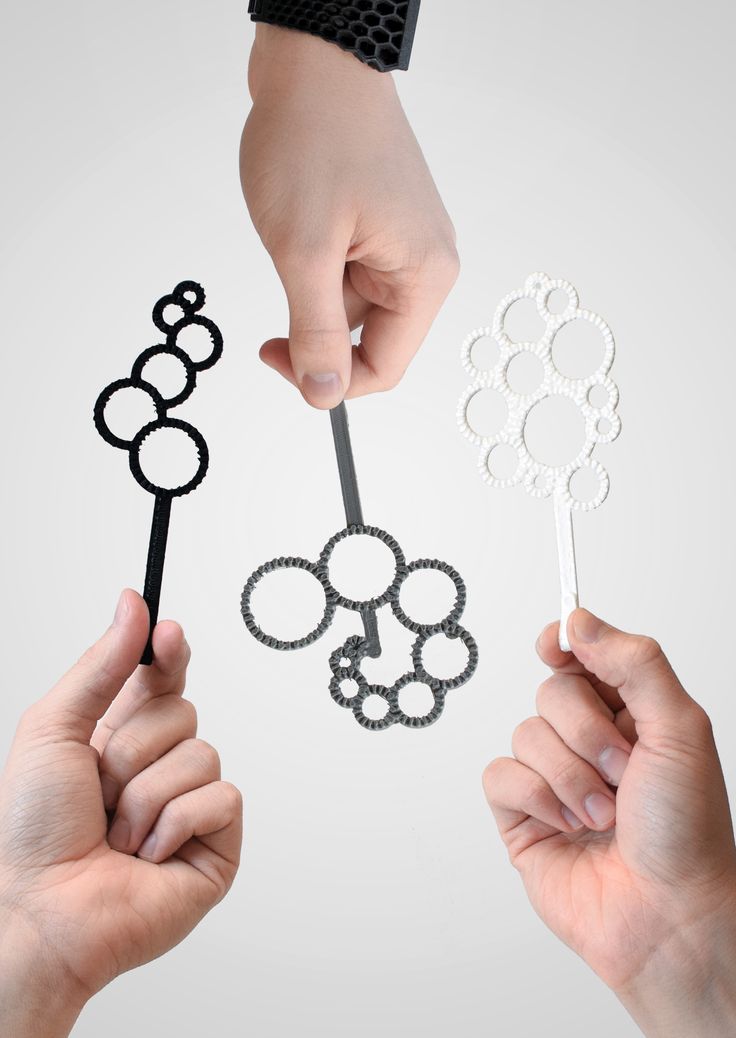
Possible Cause
Poor nozzle seal causing burnt PLA or ABS to drip around the nozzle.
Suggested fix
Remove the nozzle and close it again.
#14 Layers poorly welded
Symptom
Part breaks at the attachment point between two printed layers.
Possible cause
Too much cooling, the deposited layer does not adhere well to the previous layer, because it was not hot enough during the deposition.
Suggested remedies
Reduce fan speed during printing.
Increase the minimum print speed in the slicer.
#15 Bubbles form on the first layer
Symptom
The first layer comes off the plate locally in the form of bubbles.
Possible Causes
Moisture in the material which gradually evaporates on contact with the heating plate.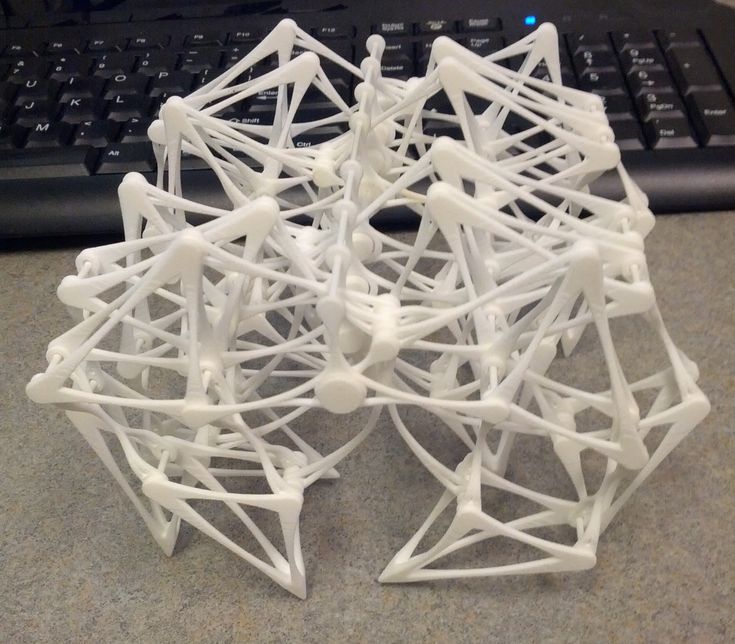
Insufficient heating plate temperature for the material being used.
Suggested products
Store raw material rolls in a dry place, in closed packaging, with a desiccant bag.
Dry damaged material: place in a rotary oven at 40°C for approximately 3 hours. Be careful not to heat above 45°C or 50°C as this may cause the threads to stick together in the bobbin and even lose their cylindrical shape.
Increase the temperature of the heating plate.
Printing on tape or special adhesive.
#16 Fragile top and bottom
Symptom
Horizontal sides too thin and brittle.
Possible Causes
Insufficient material thickness above and below thin fill print. The laid threads have too few support points and break between the threading ribs.
Suggested remedies
Place at least 2 or 3 fully filled layers ("Solid layers" option in Slic3r) for the "top" and "bottom" faces.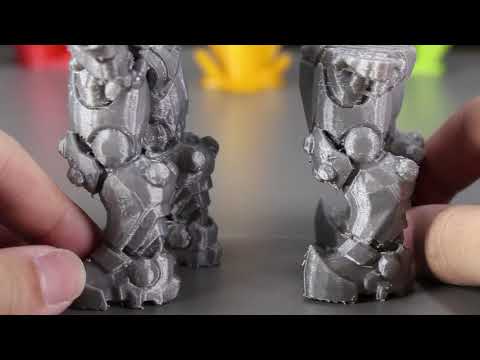
Increase the fill of your object.
#17 Hole tops collapse
Symptom
Horizontal center hole top wires collapse during construction.
Possible causes
Plumb line too horizontal.
Mismatch between nozzle temperature, wire cooling and speed.
Suggested fixes
Reduce or eliminate this overhang area by modifying the 3D file geometry. An example is in the large hole in the photo, shaped like a drop of water, not a cylinder.
Add print supports below this area if the overhang is too difficult for the 3D printer.
Avoid too much slowdown in this area, even if the layer print time is short.
#18 Color or transparency varies
Symptom
The color or transparency of the material changes in different areas during 3D printing.
Possible causes
Different crystallization of the material due to different cooling rates. This may be due, for example, to the printing time of individual parts of the object or to the power of the fan.
Radiation from the nozzle can affect the thermal cycle of the previous layer and thereby change its appearance.
The applied layer is too hot because the underlying layer has not cooled down.
Be careful, the physical-mechanical properties of the part may change due to these differences in crystallization!
Suggested fixes
Better control of cooling with slicer settings: change fan power based on plate cooling time or slow print speed in proportion to plate surface.
Reduce extrusion temperature for faster and more uniform phase transition.
#19 Layers are delaminating
Symptom
Some layers are bent and cracks appear between the different printed layers.
Possible causes
Twisting phenomenon due to the effect mentioned in #9 the above happens between layers.
The wire cools too quickly at the exit of the nozzle, it does not weld properly with the previous layer.
Severe contraction of the material during cooling or phase change.
Some materials extruded at high temperature (ABS, PC...) may present a significant shrinkage phenomenon.
Suggested remedies
Change the extrusion temperature.
Change the media.
Avoid blowing on a wire that has been set aside, reducing fan power, or placing the printer in a draughty room.
Close the assembly area in a controlled cabinet at a temperature close to the glass transition temperature of the material.
#20 Drops appear
Symptom
Drops of material are deposited at various points on the side of the 3D printed object.
Possible Causes
Excessive extrusion when resuming extrusion after stopping extrusion when moving from one point of the part to another or when changing layers.
Suggested Remedies
Some slicers have a setting that after a pause in printing, request that more be pushed in before resuming normal printing than was removed by retraction.
#21 Bowden extruder salivation
Symptom
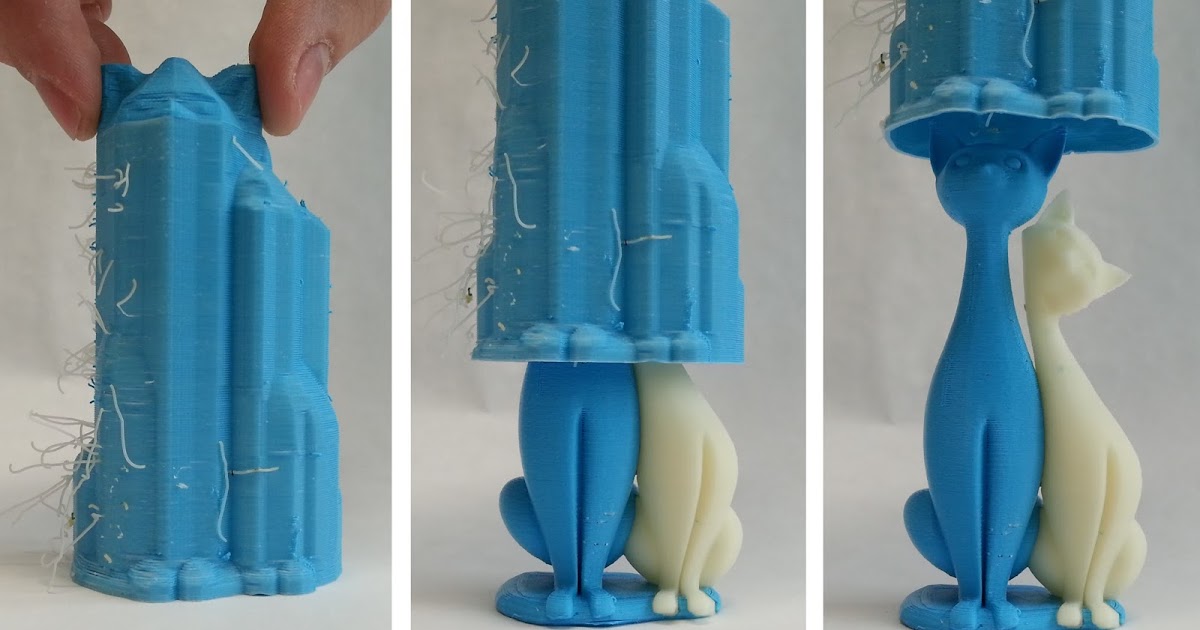
The Bowden extruder is either running too hard or not running enough. First impressions of your extruder are not great, too much extruded material, bridges between different areas in motion where extrusion should stop.
Possible cause
Insufficient thread shrinkage to compensate for the gap in the Bowden tube. Depending on the diameter of the tube and filament, as well as the length of the body, the motor must draw a certain length of filament through the bends of the tube before the filament is drawn out of the heating head.
Suggested fixes
Increase the "pull" distance in the slicer. The detail on the left was printed with 1. 5 mm of indentation, which was clearly not enough. When the pull-in distance was increased to 6mm, the center part was printed. Too much shrinkage causes hot material to enter the thermal break, the temperature of the thermal break gradually rises, and the melting thread eventually gets stuck in the thermal break. The engine is no longer able to effectively push it. Reducing the retraction distance to 4 mm results in the part shown on the right.
#22 Streaks or regular patterns on extrusion
Symptom
Repeating patterns appear on the walls of 3D prints.
The pattern may change depending on the direction of movement of the motors.
Possible cause
Incorrect extruder drive setting
This problem can occur if the extruder is set to the wrong current. If the extruder has insufficient power, the extrusion will not be constant.
Suggested remedies
Adjust the extruder driver with a multimeter. Be careful not to short circuit during the measurement, use a ceramic screwdriver.
Artwork by Philippe, Pierrot and Franck and originally posted on LOGre
This page has been translated using machine translation. Suggest the best translation
(Solution available) Gaps/holes in 3D printing walls
I'm new to 3D printing, I recently bought an Ender 5 Pro. I'm trying to print with 1.75mm PLA but the results are very poor unfortunately. When I got there after leveling the table, I got a decent result from the display dog and started printing small things where the quality was acceptable. I then tried to switch to larger items, but the print failed halfway through due to insufficient adhesion.
There were other quality issues with this print and you can already see that there are holes in the walls:
I did another round of table alignment and Z alignment to make sure the adhesion was good and the test print came out pretty good in all corners and center. Single-layer rectangles are not perfect, the lines split in some places, but mostly they are small. But now I have a different problem: all the prints are very dirty, less clear, they are not as strong as before, and there are also large holes in the walls. The same base of the statue (how I had to stop after getting dirty before) looks like this now:
Another attempt failed after a few hours (e.g. printing stopped and printed nothing in the air), but there are also issues with holes/gaps even more noticeable:
Finally, as a test, I printed an object with the same G-code as before, and the result is very different. The object on the left is the new one. It is weak, you can feel by pressing that the walls are not solid, they bend. The "eye" rectangle is also not clear:
There is a difference though, I changed the extruder nozzle between, the new one was also in the Ender package, it is also 0.4 mm, as the original should have been, I changed to try with the new one.
Due to the last test with the same gcode and a different result, I think the problem may be in the hardware setting as well, not just in the software. Does anyone know what I'm doing wrong?
EDIT 1 : after calibrating the ejection amount and lowering the print temperature from 200 C to 190 C, now I get the following result. Used values:
- Table temperature: 65 C initial, 60 C others
- Printing temperature: 200 C initial, 190 C later
- Print speed: 80 mm/s
- Wall speed: 40 mm/s
- Retraction: 10 mm
- Retraction speed: 80 mm
- Wall thickness: 0.8 mm
- Layer height: 0.2 mm
- Starting layer: 0.2 mm
- Line width: 0.4 mm
EDIT 2 : Based on the comments, some changes have been made and here are the results. Cube XYZ,
- print speed reduced to 60 mm
- layer height 0.12 mm
- Seam alignment Z is the sharpest corner
- Fill density 30%
- Retraction distance 8 mm
- Retraction speed 40 mm
It looks good, although the layers are visible, some ghosts right on X and Y. Dimensions not correct though: X=20.07mm, Y=20.03mm, Z=19.84 mm
Are X/Y allowed? What to do with Z, increase steps/mm ?
Finally, here's the 3D benchy too, although it looks mostly ok, there are some bumps in the walls and small strings in the exposed areas. This has been printed previously and with different settings though:
- 0.2mm Layer Width
- Print speed 80 mm
- Retraction 10 mm
- Retraction speed 80 mm
- Z Seam alignment set randomly
EDIT 3 I tried now to print a polypearl which has thin curved lines. The first attempt failed after 2 hours, a pen appeared on the nozzle, which ruined the print. It was a print from 190 p. I gave it another try and printed with 200 C and surprisingly it completed the job. See below photos, here are my settings for it (changes for Cura 4.6.0 default Super Quality):
- Layer Height: 0.08 mm
- Initial layer height: 0.12 mm 9$2 (default 500)
- Print jerk: 8 mm/s (default 10)
- Retraction distance: 8 mm
- Retraction speed: 40 mm/s
The model adheres well to the glass plate even without glue or hairspray, maybe a little too well. I see some problems, although I'm not sure how normal they are:
- the outer area of the first layer is not very pleasant
- there are some oozing, strange lines on the surface and between the columns
- The top end of the turret is somewhat dirty and has a horizontal line attached to it (of course, it can be easily removed).
- the bottom is very smooth, I can see the texture of the glass (the top of the Creality glass is textured) and the texture of the very first failed print when I didn't take into account the extra height of the glass after leveling and the printhead hit it hard and the nozzle was completely damaged. Rookie mistake.
These images are here: https://photos.app.goo.gl/ZfuMFFedL171eLeM7
Are these problems normal/acceptable?
▲ 4
Let's see what errors I'm seeing (accumulated from what I've commented):
The legs seem to be very weak. This can be either a clogged nozzle, printing too fast, or too low a temperature, or too low a pressure (for example, an incorrectly calibrated extruder). Try cleaning or a fresh nozzle, another parameter game can wait after you fix the next big problem.
To fix under the extrusion if it persists after ringing is fixed, experiment with the following settings:
- Check the mechanical system. Make sure the extruder
- has no defects. I saw a lot of underextrusions when my extruder arm broke. The gear turned, but no longer pressed on the thread.
- presses the filament with the idler bearing well against the bobbin gear.
- is properly calibrated for physical parameters. Use the extrusion multiplier to account for different materials.
- Temperature. If the extrusion is not going well, increase it by a factor of 5. The °C steps can help.
The dented cube shows this best: massive ringing occurs. This is the effect that occurs when the printer changes direction rapidly - the printhead cannot speed up and slow down indefinitely as it has momentum, and as a result oscillates around the new path a bit, like a sine ring. This creates a "ghost" of previous toolpath changes on the flat face, which is why I asked for the cube to be printed.
There are 2 software fixes to fix ghosting and ringing:
- Reduce the print speed.
- this comes at the cost of longer print times
- Improve your maximum acceleration and jerk
- Some reduction in maximum acceleration (from 500 mm/s2 to 1000 mm/s2) can significantly improve print quality with little to no effect on overall print time and keep print speeds high.
- Jerk is a derivative of acceleration; figuring out the two values that might be best for setting up a printer can be a lot of experimentation.
There is also a hardware way to reduce it in many designs by shaving weight off moving parts or strengthening the design:
- Get a lighter printhead
- removal of unnecessary add-ons
- replacement for lighter print head design
- transition to Bowden design
- in CoreXY: use lighter rails
- Toughen the design
- Adjust the carriage mount so that it compresses better
- replacement of bearings and bushings with bearings with tighter tolerances
- ties can significantly strengthen the structure of the portal and cube
This could come from any of several sources.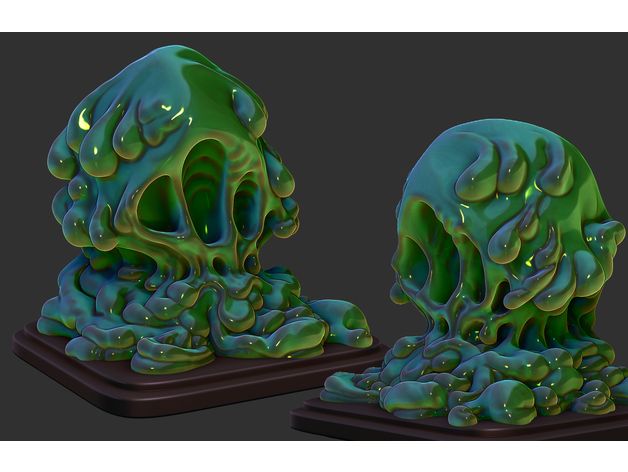 In descending order of similarity:
- the first layer is not a multiple of the actual layers (eg 0.12 instead of 0.2 mm), resulting in a partial layer at the top of the cut. in the example given, this would result in a fixed negative error of of about 0.08mm.
- Incorrectly calibrated first layer. Depending on your alignment skills this can result in a fixed error of up to 0.1mm for a bad calibration up to 0.025mm for a really good calibration. This error can be either positive or negative.
- Z-axis mismatches due to misaligned lead screw, sticky lead screw, or insufficient Z-step motor voltage. Both tend to create a systematic error - as when printing a given percent loss of height. Such inconsistencies can be eliminated by solving the problem mentioned: first check the orthogonality, then carefully lubricate the screw with light machine oil (not WD40!), finally, increase the motor voltage a little. Only if your results are severely out of order, you should check if your steps/mm are set correctly.
Learn more