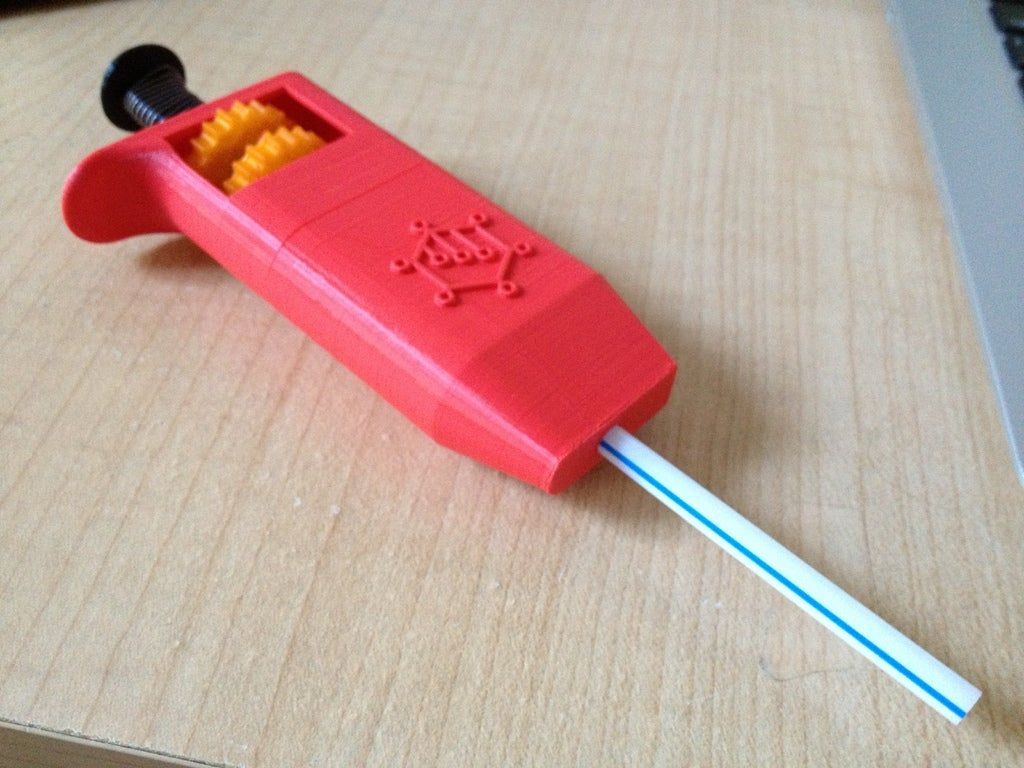
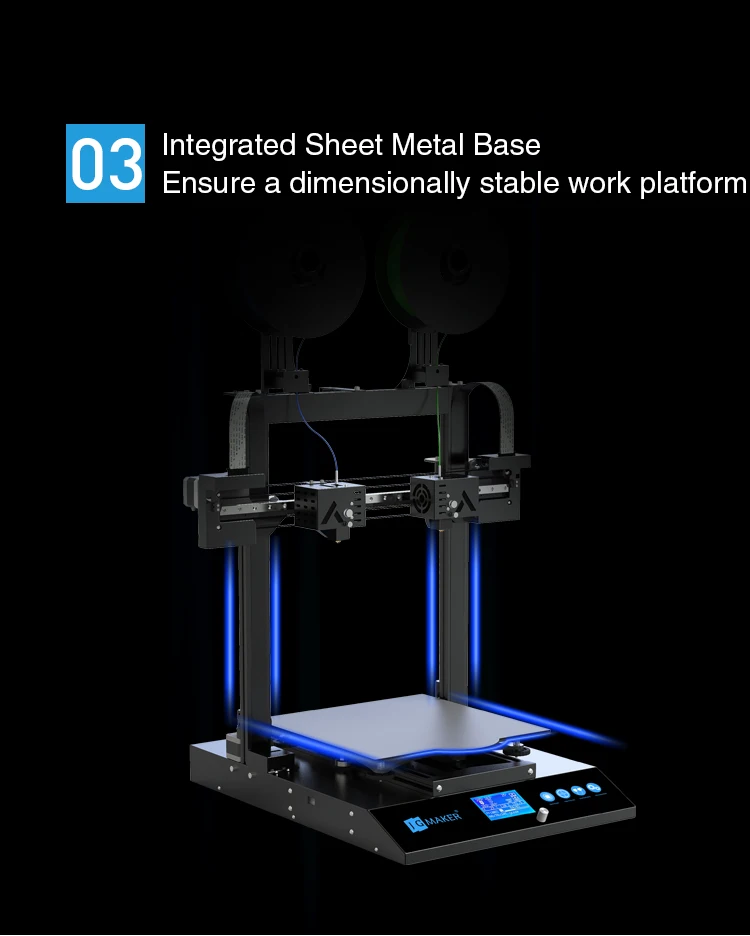
3D printed pipette
3D printed Lab Equipment Labconscious®
Green Lab Tips
Green lab tips to reduce laboratory waste, use green chemistry, conserve water and save energy for biologists.
Nicole Kelesoglu
Sustainable lab equipment that costs less
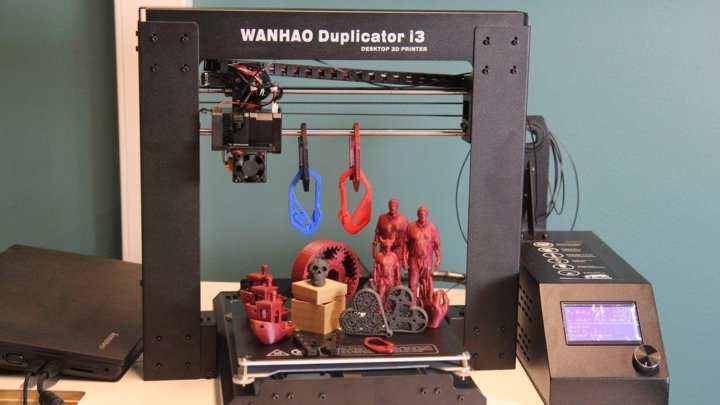
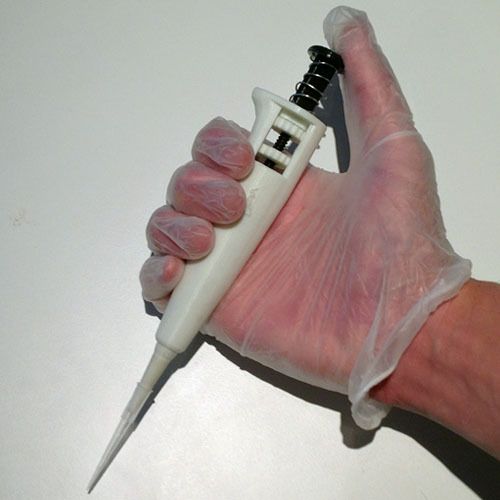
Researchers looking for ways to save costs in running their laboratories should consider 3D printing. This post idea came to me through the article 3D Printing Provides Cost Effective Alternative to Expensive Lab Equipment Plus R&D Tax Credit. Looking further I found this Open-source Scientific Tools collection on Thingiverse with a gel electrophoresis system, test tubes, a magnetic stirrer, micro pipettes, microscopes and even a Geiger counter! I quickly found other resources like the NIH 3D Print Exchange for custom labware, Open-Labware.net and Instrucables.com. It turns out that there are hundreds of open source lab equipment and supply 3D printer design files online. Improvements in 3D printer technology has made 3D printers cheaper to buy and easier to use - making them more accessible to scientists.
Here are a few publications that exemplify how 3D printing can significantly reduce laboratory costs. New equipment can be produced and the life of used lab equipment is extended by repair or adding functionality. You'll appreciate some of the impressive customization!
- DNA Assembly in 3D Printed Fluidics PLoS ONE
- 3D-Printing for Analytical Ultracentrifugation PLoS ONE
- 3D-printing your lab equipment—it’s cheaper than you think by Joshua M. Pearce PhD Michigan Technology University
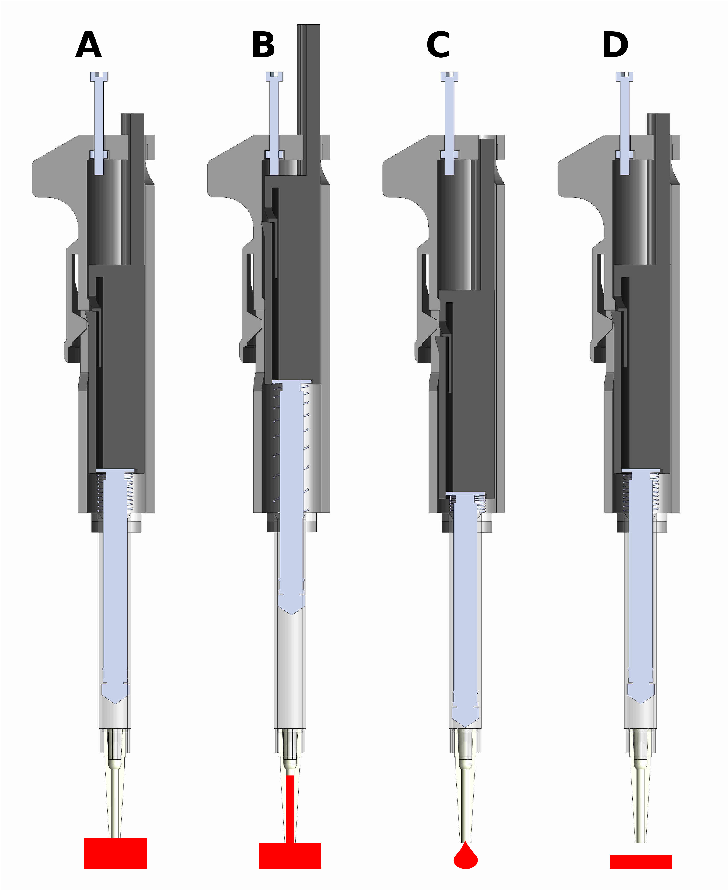
Lab Pipette
Programmable Temperature Controller
Electrophysiology chamber
Reservoir Tab
Click images and hover above for credit and source links.
3D printing scientific lab equipment can be environmentally friendly
My next question was how can 3D printed lab supplies be more sustainable than ordering from a catalog? Most plastic lab supplies are produced by injection molding. This new paper Environmental and Economic Implications of Distributed Additive Manufacturing: The Case of Injection Mold Tooling (2017) Jrnl. Industrial Ecology reports how the alternative process of 3D printing yields a reduction potential of 3% to 5% in primary energy, 4% to 7% in GHG emissions, 12% to 60% in lead time, and 15% to 35% in cost over injection molding. 3D printer companies themselves help support sustainability efforts by accepting used cartridges, canisters, spools, print engines and containers for return, or recycle. All this green potential can go even further with some consideration to the plastic filament you use to print.
Eco-friendly filament for 3D printing
There was once no such thing as completely eco-friendly 3D printing with plastic. The common filaments that feed plastic into 3D printers are composed of either acrylonitrile butadiene styrene (ABS) or polylactic acid (PLA). PLA has always had the sustainable attribute of being a plant based bio-plastic.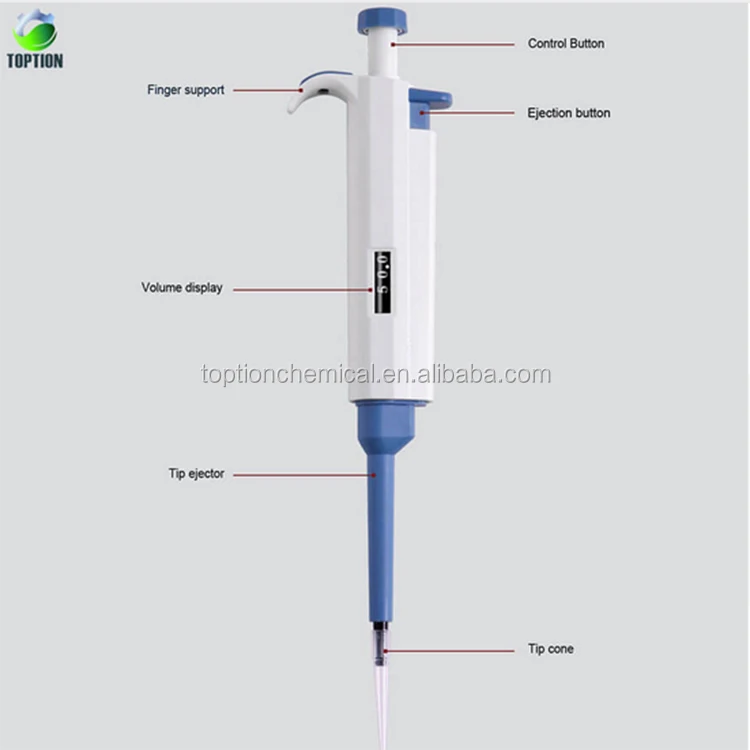 According to the article, Is Recycling PLA really better than composting? the environmental impact of recycling PLA is over 50 times better than composting, and 16 times better than incinerating PLA. Unfortunately PLA is not a sturdy enough material for most lab supplies. ABS on the other hand is a wonderfully sturdy material, but is not eco-friendly. To picture ABS picture a micro pipette or lego bricks. These items generally don't get processed by local recycling companies. There are recycling machines sold for use with 3D printers that can turn ABS or PLA objects back into filaments. Unfortunately, it can be tricky to ensure that the new filament is sufficiently pure for reuse in a 3D printer. These have been the challenges to eco-friendly 3D printing.
Fortunately there is a relatively new filament called "Enviro ABS" made by the company 3D Printlife. While regular ABS filament may require around 1000 years to disintegrate in a landfill, this filament will be gone in around 12 years..jpg-650.jpg) As per the company's comments on their ASTM D5511 testing, which is the “Standard Method for Determining Anaerobic Biode-gradation of Plastic Materials Under High-Solids Anaerobic-Digestion Conditions”. This predicted degradation time is dependent on the shape of the object. Certainly there would be a big difference between a small test tube and thicker parts to a microcentrifuge. The manufacturer uses an additive that allows it to be broken down by bacteria in a landfill to energy facility or a commercial compost. Eco-friendly 3D printing...Voila!
As per the company's comments on their ASTM D5511 testing, which is the “Standard Method for Determining Anaerobic Biode-gradation of Plastic Materials Under High-Solids Anaerobic-Digestion Conditions”. This predicted degradation time is dependent on the shape of the object. Certainly there would be a big difference between a small test tube and thicker parts to a microcentrifuge. The manufacturer uses an additive that allows it to be broken down by bacteria in a landfill to energy facility or a commercial compost. Eco-friendly 3D printing...Voila!
Tagslab equipment, 3D printing, biodegradable plastic, used lab equipment, green lab tips
Pipettes - Collections - glitchpudding
by glitchpudding, last updated
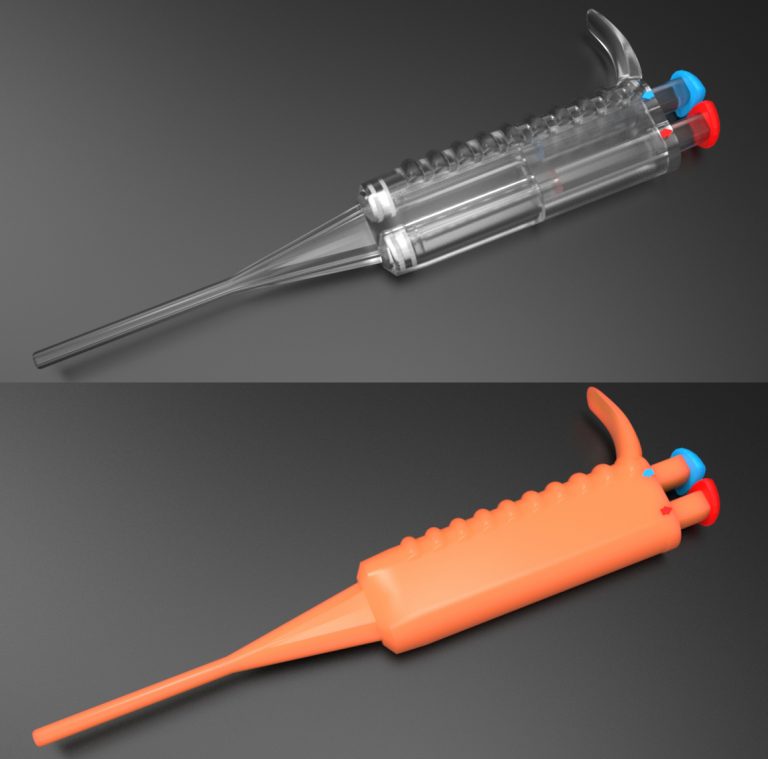
DIY 3D printed pipette solutions
113 113
961 1247
1920 2307
579 751
109 162
150 245
29 63
47 73
73 139
17 38
22 38
22 38
Adding printer's marks and bleeds in Illustrator
User's Guide Cancel
Search
- Illustrator User Guide
- Illustrator basics
- Introduction to Illustrator
- What's new in Illustrator
- Frequently Asked Questions
- Illustrator System Requirements
- Illustrator for Apple Silicon
nine0007 Working environment - Basic information about the working environment
- Learn faster with Illustrator's Search panel
- Create documents
- Toolbox
- Default key combinations
- Customizing keyboard shortcuts
- Introduction to artboards
- Managing artboards
- Work environment setup
- Properties panel
- Parameter setting nine0007 Working environment "Touch control"
- Introduction to Illustrator
- Microsoft Surface Dial support in Illustrator
- Undo changes and design history management
- Rotate view
- Rulers, grids and guides
- Accessibility in Illustrator
- Safe Mode
- View graphic objects
- Working in Illustrator using the Touch Bar
- Files and templates
- Tool overview
- Tool selection
- Selection
- Partial selection
- Bulk selection
- Magic wand
- Lasso
- Artboard
- Selection
- Navigation tools
- Hand
- Rotate view
- Scale
- Drawing Tools
- Gradient
- Mesh
- Creating Shapes
- Gradient
- Text tools
- Text
- Text on a contour
- Vertical text
- Text
- Drawing tools
- Pen
- Add reference point
- Delete control points
- Reference point
- Curvature
- Line segment
- Rectangle
- Rounded rectangle
- Ellipse
- Polygon
- Star
- Brush
- Blob brush
- Pencil
- Shaper
- Fragment
- Modification tools
- Rotation
- Reflection
- Scale
- Curvature
- Width
- Free Transform
- Pipette
- Mix
- Eraser
- Scissors
- Retrotext
- Luminous neon text
- Old-fashioned text
- Repainting
- Convert sketch to vector format
- Introducing Illustrator on iPad
- An overview of Illustrator on iPad.

- Illustrator on iPad FAQ
- System requirements | Illustrator on iPad
- Do's and Don'ts in Illustrator on iPad
- An overview of Illustrator on iPad.
- Workspace
- Workspace Illustrator on iPad
- Touch shortcuts and gestures
- Keyboard shortcuts for Illustrator on iPad
- Manage application settings
- Documents
- Working with documents in Illustrator on iPad
- Import Photoshop and Fresco documents
- Selecting and arranging objects
- Creating repeating objects
- Objects with transitions
- Drawing
- Creating and modifying paths
- Drawing and editing shapes
- Text
- Working with text and fonts
- Creating text labels along a path
- Adding custom fonts
- Working with images
- Vectorization of raster images
- Color
- Applying colors and gradients
nine0022
- Basics
- Working with Illustrator cloud documents
- Share and collaborate on Illustrator cloud documents
- Publication of documents for verification
- Cloud storage update for Adobe Illustrator
- Cloud documents in Illustrator | Frequently Asked Questions
- Troubleshooting
- Troubleshooting creating or saving cloud documents in Illustrator
- Troubleshoot cloud documents in Illustrator
- Drawing
- Basic drawing
- Edit contours
- Drawing a graphic object with pixel-level precision
- Draw with the Pen, Curvature, and Pencil tools
- Drawing simple lines and shapes
- Image trace
- Contour simplification
- Definition of perspective grids
- Symbol tools and symbol sets
- Correction of contour segments
- Making a flower in five easy steps
- Drawing perspective
- Symbols
- Drawing pixel-aligned outlines when creating designs for the web
- 3D objects and materials
- Learn more about 3D effects in Illustrator
- Creating 3D graphics
- Projecting a pattern onto 3D objects
- Creating 3D text
- Learn more about 3D effects in Illustrator
- Color
- About color
- Choice of colors
- Using and creating color swatches
- Color correction
- Adobe Color Themes panel
- Color groups (harmonies)
- Color Themes Panel
- Recoloring a graphic object
- Coloring
- About coloring
- Coloring with fills and strokes
- Live Paint Groups
- Gradients
- Brushes
- Transparency and Blending Modes
- Apply strokes to objects
- Creating and editing patterns
- Nets
- Patterns
- Selecting and organizing objects
- Selecting objects
- Layers
- Grouping and collating objects
- Move, align and distribute objects
- Placement of objects
- Locking, hiding and deleting objects
- Copying and duplicating objects
- Rotate and flip objects
- Object weave
- Redrawing objects
- Cropping images
- Transform objects
- Combining objects
- Cutting, splitting and trimming objects
- Puppet deformation
- Scale, skew and distort objects
- Objects with transitions
- Redrawing with shells
- Redrawing objects with effects
- Creating shapes with the Shape Maker and Shape Builder tools
- Working with live corners
- Improved touch-enabled repaint processes
- Edit clipping masks
- Dynamic figures
- Creating shapes with the Shape Builder tool
- Global change
- Text
- Adding object types to text and work objects
- Create bulleted and numbered lists
- Text area control
- Fonts and decorations
- Text formatting
- Import and export of text
- Paragraph formatting
- Special characters
- Creating text along a path
- Character and paragraph styles
- Tab nine0007 Text and fonts
- Search for missing fonts (Typekit workflow)
- Update text from Illustrator 10
- Font for Arabic and Hebrew
- Fonts | Frequently Asked Questions and Troubleshooting Tips
- Creating a 3D text effect
- Creative Design
- Scale and rotate text
- Leading and letter spacing
- Hyphenation and line breaks
- Text enhancements
- Spell checker and language dictionaries
- Asian character formatting
- Composers for Asian scripts
- Creation of text projects with transitions between objects
- Create a text poster using image tracing
- Working with effects
- Graphic styles
- Shading
- Design attributes
- Sketching and mosaic
- Shadows, glows and shading
- Overview of effects
- Web Graphics Best Practices
- Diagrams
- SVG
- Animation creation
- Fragments and image maps
- Import
- Putting multiple files in a document nine0007 Managing linked and embedded files
- Communication information
- Image extraction
- Import artwork from Photoshop
- Import bitmaps
- Import Adobe PDF files
- Import EPS, DCS and AutoCAD files
- Creative Cloud Libraries in Illustrator
- Preservation of illustrations
- Using an Illustrator graphic in Photoshop
- Export illustration
- Collection of resources and their bulk export
- Packing files
- Create Adobe PDF files
- CSS Extraction | Illustrator CC
- Adobe PDF Options
- File information and metadata
- Preparing to print
- Setting up documents for printing
- Changing page size and orientation
- Setting crop marks for trimming and straightening
- Getting Started with Large Canvas
- Printing
- Overlay
- Color managed printing
- PostScript printing
- Print styles
- Marks and bleed
- Printing and saving transparent graphics
- Trapping nine0007 Printing of color plates
- Printing gradients, meshes and color overlays
- White overlay
- Combining data using the Variables panel
- Automation using scripts
- Automation using operations
- Crash problems
- Restoring files after a crash
- File problems
- Supported file formats
- GPU driver problems
- Problems with Wacom devices
- Problems with DLL files
- Memory problems
- Problems with settings file
- Problems with fonts
- Printer problems
- How to share a crash report with Adobe
- Illustrator performance improvement
About print marks
When preparing documents for printing, various marks are used to accurately align illustration elements and check colors. You can add the following printer's marks to your document:
crop marks
Thin (hairy) horizontal and vertical lines that show where the page should be cut. Crop marks can also help in registering (aligning) one separation plate with another.
Registration marks nine0003
Small "flags" located outside the page area to align color separations in a color document.
Color scales
Small squares representing CMYK inks and shades of gray (in 10% increments). These marks are used in the print shop to adjust the ink density on the press.
Page Information
To indicate on the film the name of the artboard, the time and date of printing, the screen line used, the screen angle for color separations, and the color of each form. This information is placed at the top of the images. nine0003 Printing marks
A.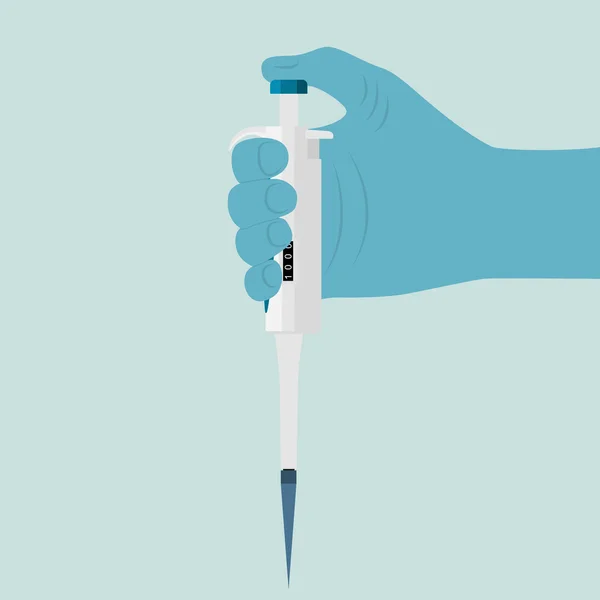 Radial target (required) B. Registration marks C. Page information D. Crop marks E. Color chart F. Shade chart
Adding printer marks
-
Choose File > Print.
-
Select Marks and Bleeds on the left side of the Print dialog box. nine0003
-
Select the type of printer's marks to add. You can also choose the label style: Latin or Japanese.
-
(Optional) If crop marks are selected, specify the line width and offset distance between the crop marks and artwork.
To avoid printer marks on bleeds, the Shift value must be greater than the Bleed value.
Bleed
Bleed is the area outside the bounding box or crop marks. Bleeding can be included in a graphic as error margins to ensure that the graphic takes up all the space up to the edge of the page when it is cut, or that only the outline of the image is visible in the document. After you create a document that takes up space before the bleed, Illustrator can set the size of the bleed. The larger the bleed value, the more of the area behind the crop marks that Illustrator prints. Crop marks determine the size of the bounding box when printed. nine0003
The bleed size depends on the purpose of printing. The pre-cut size (that is, the image printed on a sheet of paper) must be at least 18 points larger than the crop size. If the bleed is to ensure that the image fits within the outline, you should use a 2-3 pt larger bleed. Consult your printer for recommendations on the amount of bleed required for a particular job.
Add bleed
-
Choose File > Print.
-
Select Marks and Bleeds on the left side of the Print dialog box.
-
Do one of the following:
-
To place bleed marks, specify values in the Top, Left, Bottom, and Right boxes. To use the same values, click the link icon .
-
Select Use Document Settings to use the document settings set in the New Document dialog box. nine0003
The maximum bleed is 72 points, the minimum is 0 points.
-
Related content
- Setting crop marks for cropping and straightening
Signing in to your account
To come in
account management
pipette picture_picture number 400515660_AI picture format_lovepik.com
| Applicable groups | For personal use | Run command | Micro enterprise | Medium enterprise |
| Authorization period | CONSTANT | CONSTANT | CONSTANT | CONSTANT |
| Portrait authorization | CONSTANT | CONSTANT | CONSTANT | |
| Authorized Agreement | Personal authorization | Enterprise authorization | Enterprise authorization | Enterprise authorization |
| Online account | ||||
| Media Marketing (Facebook, Twitter, Instagram, etc. | Personal Commercial (Limit 20000 impressions) | |||
| Digital media marketing (SMS, Email, Online Advertising, E-books, etc.) | Personal Commercial (Limit 20000 impressions) | |||
| Design of web, mobile and program pages Web and Application Development, Software Development and Game Applications, H5, E-Commerce and Product | Personal Commercial (Limit 20000 impressions) | |||
| Physical products printed products Food packaging, books and magazines, newspapers, postcards, posters, brochures, coupons, etc. | Personal Commercial (Print limit 200 copies) | limit 5000 Copies Print | limit 20000 Copies Print | unlimited Copies Print |
| Product Marketing and Business Plan Proposal for network design, VI design, marketing planning, PPT (non-resale), etc. | Personal Commercial | |||
| Marketing and outdoor advertising Outdoor billboards, bus advertisements, shop windows, office buildings, hotels, shops, other public places, etc. | Personal Commercial (Print limit 200 copies) nine0800 | |||
| Media (CD, DVD, Movie, TV, Video, etc.) | Personal Commercial (Limit 20000 impressions) | |||
| Resale of a physical product Textiles, mobile phone cases, greeting cards, postcards, calendars, cups, T-shirts | ||||
| Online resale Mobile wallpapers, design templates, design elements, PPT templates and use our designs as the main item for resale. |
 )
)