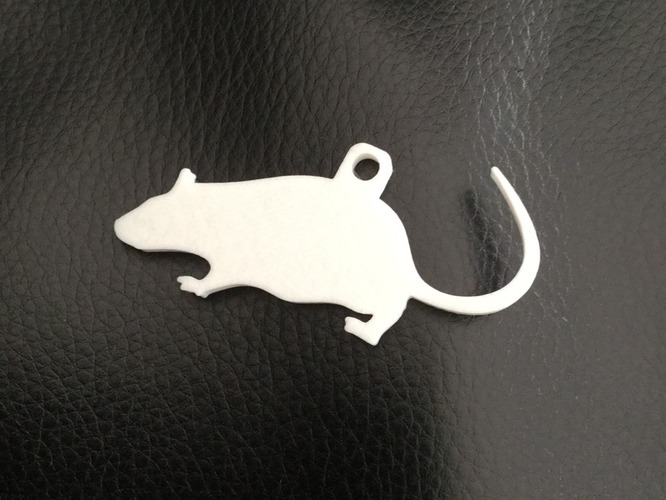
3D printed mouse animal
3D printed rodent skin-skull-brain model: A novel animal-free approach for neurosurgical training
. 2021 Jun 23;16(6):e0253477.
doi: 10.1371/journal.pone.0253477. eCollection 2021.
Marie Bainier 1 , Arel Su 2 , Roger L Redondo 1
Affiliations
Affiliations
- 1 Roche Pharmaceutical Research and Early Development (pRED), Neuroscience and Rare Diseases, Roche Innovation Center Basel, F. Hoffmann-La Roche Ltd, Basel, Switzerland.
- 2 Roche Pharmaceutical Research and Early Development (pRED), Pharmaceutical Sciences, Roche Innovation Center Basel, F.
Hoffmann-La Roche Ltd, Basel, Switzerland.
- PMID: 34161366
- PMCID: PMC8221494
- DOI: 10.1371/journal.pone.0253477
Free PMC article
Marie Bainier et al. PLoS One. .
Free PMC article
. 2021 Jun 23;16(6):e0253477.
doi: 10.1371/journal.pone.0253477. eCollection 2021.
Authors
Marie Bainier 1 , Arel Su 2 , Roger L Redondo 1
Affiliations
- 1 Roche Pharmaceutical Research and Early Development (pRED), Neuroscience and Rare Diseases, Roche Innovation Center Basel, F.
 Hoffmann-La Roche Ltd, Basel, Switzerland.
 - 2 Roche Pharmaceutical Research and Early Development (pRED), Pharmaceutical Sciences, Roche Innovation Center Basel, F. Hoffmann-La Roche Ltd, Basel, Switzerland.
- PMID: 34161366
- PMCID: PMC8221494
- DOI: 10.1371/journal.pone.0253477
Abstract
In neuroscience, stereotactic brain surgery is a standard yet challenging technique for which laboratory and veterinary personnel must be sufficiently and properly trained. There is currently no animal-free training option for neurosurgeries; stereotactic techniques are learned and practiced on dead animals. Here we have used three-dimensional (3D) printing technologies to create rat and mouse skin-skull-brain models, specifically conceived for rodent stereotaxic surgery training. We used 3D models obtained from microCT pictures and printed them using materials that would provide the most accurate haptic feedback for each model-PC-ABS material for the rat and Durable resin for the mouse. We filled the skulls with Polyurethane expanding foam to mimic the brain. In order to simulate rodent skin, we added a rectangular 1mm thick clear silicone sheet on the skull. Ten qualified rodent neurosurgeons then performed a variety of stereotaxic surgeries on these rat and mouse 3D printed models. Participants evaluated models fidelity compared to cadaveric skulls and their appropriateness for educational use. The 3D printed rat and mouse skin-skull-brain models received an overwhelmingly positive response. They were perceived as very realistic, and considered an excellent alternative to cadaveric skulls for training purposes.
 They can be made rapidly and at low cost. Our real-size 3D printed replicas could enable cost- and time-efficient, animal-free neurosurgery training. They can be absolute replacements for stereotaxic surgery techniques practice including but not limited to craniotomies, screw placement, brain injections, implantations and cement applications. This project is a significant step forward in implementing the replacement, reduction, and refinement (3Rs) principles to animal experimentation. These 3D printed models could lead the way to the complete replacement of live animals for stereotaxic surgery training in laboratories and veterinary studies.
Conflict of interest statement
All authors (MB, AS, RLR) were under paid employment by the company F. Hoffmann- La Roche (Roche). The funder provided support in the form of salaries for authors (MB, AS, RLR), but did not have any additional role in the study design, data collection and analysis, decision to publish, or preparation of the manuscript. This does not alter the authors’ adherence to all the PLoS ONE policies on sharing data and materials.
Figures
Fig 1. 3D models of rat and…
Fig 1. 3D models of rat and mouse skull.
(A) Rat skull model. (B) Mouse…
Fig 1. 3D models of rat and mouse skull.(A) Rat skull model. (B) Mouse skull model. (C) Close up of landmarks.
Fig 2. Polyurethane brain manufacturing process.
(A)…
Fig 2. Polyurethane brain manufacturing process.
(A) Brain model once dry. (B) Excess of PU…
(A) Brain model once dry. (B) Excess of PU foam removed.
Fig 3. Skin addition process.
(A) Zones…
Fig 3. Skin addition process.
(A) Zones where glue should be applied. (B) Clamping during…
Fig 3. Skin addition process.(A) Zones where glue should be applied. (B) Clamping during the setting time.
Fig 4. Surgeons assessment of model fidelity.
Fig 4. Surgeons assessment of model fidelity.
Q1: Rate anatomical accuracy. Q2: Rate model size…
Fig 4. Surgeons assessment of model fidelity.Q1: Rate anatomical accuracy. Q2: Rate model size accuracy. Q3: Rate Landmarks visibility. Q4: Rate tactile fidelity during surgery (Haptic feedback). Data presented with mean and SD.
Fig 5. 3D printed model rendering.
(A)…
Fig 5. 3D printed model rendering.
(A) Comparison of 250g wistar rat skull and 3D…
Fig 5. 3D printed model rendering.(A) Comparison of 250g wistar rat skull and 3D printed model, Lateral view. (B) Comparison of 250g wistar rat skull and 3D printed model, Dorsal view. (C) Mouse 3D printed model, lateral and dorsal view.
Fig 6. Different techniques that can be…
Fig 6. Different techniques that can be learned and practiced using the skin-skull-brain model.
(A)…
Fig 6. Different techniques that can be learned and practiced using the skin-skull-brain model.(A) Craniotomies. (B) Screws placement. (C) Optic fiber implantation and securing using bone/dental cement. (D) Large Electrophysiology probes implantation and securing using bone/dental cement. (E) Brain injections. (F) Suturing.
Fig 7. Surgeons assessment of appropriateness for…
Fig 7. Surgeons assessment of appropriateness for educational use.
Q5: Are these models appropriate and…
Fig 7. Surgeons assessment of appropriateness for educational use.Q5: Are these models appropriate and useful for surgery training? Q6: Are these models good alternatives to cadaveric skulls for training purposes? Q7: Would these models help trainees to develop their confidence? Q8: Would you use these models to train someone or to be trained on new techniques? Q9: Would you use these models to test the feasibility of new surgeries? Data presented with mean and SD.
See this image and copyright information in PMC
Similar articles
-
Using 3D Printing to Create Personalized Brain Models for Neurosurgical Training and Preoperative Planning.
Ploch CC, Mansi CSSA, Jayamohan J, Kuhl E.
 Ploch CC, et al. World Neurosurg. 2016 Jun;90:668-674. doi: 10.1016/j.wneu.2016.02.081. Epub 2016 Feb 24. World Neurosurg. 2016. PMID: 26924117
 -
Three-Dimensional Printed Models for Lateral Skull Base Surgical Training: Anatomy and Simulation of the Transtemporal Approaches.
Mooney MA, Cavallo C, Zhou JJ, Bohl MA, Belykh E, Gandhi S, McBryan S, Stevens SM, Lawton MT, Almefty KK, Nakaji P. Mooney MA, et al. Oper Neurosurg (Hagerstown). 2020 Feb 1;18(2):193-201. doi: 10.1093/ons/opz120. Oper Neurosurg (Hagerstown). 2020. PMID: 31172189
-
Three-Dimensional Printed Skull Base Simulation for Transnasal Endoscopic Surgical Training.
Zheng JP, Li CZ, Chen GQ, Song GD, Zhang YZ. Zheng JP, et al. World Neurosurg.
 2018 Mar;111:e773-e782. doi: 10.1016/j.wneu.2017.12.169. Epub 2018 Jan 5. World Neurosurg. 2018. PMID: 29309974
 -
Three-Dimensional Printing in Neurosurgery Residency Training: A Systematic Review of the Literature.
Blohm JE, Salinas PA, Avila MJ, Barber SR, Weinand ME, Dumont TM. Blohm JE, et al. World Neurosurg. 2022 May;161:111-122. doi: 10.1016/j.wneu.2021.10.069. Epub 2021 Oct 11. World Neurosurg. 2022. PMID: 34648984 Review.
-
Properties and Characteristics of Three-Dimensional Printed Head Models Used in Simulation of Neurosurgical Procedures: A Scoping Review.
Maclachlan LR, Alexander H, Forrestal D, Novak JI, Redmond M. Maclachlan LR, et al. World Neurosurg. 2021 Dec;156:133-146.e6. doi: 10.
 1016/j.wneu.2021.09.079. Epub 2021 Sep 24. World Neurosurg. 2021. PMID: 34571242 Review.
See all similar articles
References
-
- Ferry B, Gervasoni D, Vogt C. Stereotaxic Neurosurgery in Laboratory Rodent. Springer; 2014. doi: 10.1007/978-2-8178-0472-9 - DOI
-
- Pritchett-Corning KR, Luo Y, Mulder GB, White WJ. Principles of rodent surgery for the new surgeon. J Vis Exp. 2011. Jan 6;(47):2586. doi: 10.3791/2586 - DOI - PMC - PubMed
-
- Lim KH, Loo ZY, Goldie SJ, Adams JW, McMenamin PG.
 Use of 3D printed models in medical education: A randomized control trial comparing 3D prints versus cadaveric materials for learning external cardiac anatomy. Anat Sci Educ. 2016; 9(3):213–221. doi: 10.1002/ase.1573 - DOI - PubMed
- Lim KH, Loo ZY, Goldie SJ, Adams JW, McMenamin PG.
-
- Frölich AM, Spallek J, Brehmer L, Buhk J-H, Krause D, Fiehler J, et al.. 3D Printing of Intracranial Aneurysms Using Fused Deposition Modeling Offers Highly Accurate Replications. AJNR Am J Neuroradiol. 2016;37(1):120–124. doi: 10.3174/ajnr.A4486 - DOI - PMC - PubMed
-
- Callahan AB, Campbell AA, Petris C, Kazim M.
 Low-Cost 3D Printing Orbital Implant Templates in Secondary Orbital Reconstructions. Ophthalmic Plast Reconstr Surg. 2017. Sep/Oct;33(5):376–380. doi: 10.1097/IOP.0000000000000884 - DOI - PubMed
- Callahan AB, Campbell AA, Petris C, Kazim M.
Publication types
MeSH terms
Grant support
All authors are employees of Roche Innovation Center Basel, F. Hoffmann-La Roche Ltd. The funder provided support in the form of salaries for authors (MB, AS, RLR), but did not have any additional role in the study design, data collection and analysis, decision to publish, or preparation of the manuscript. The specific roles of these authors are articulated in the ‘author contributions’ section. We take the opportunity to confirm that our commercial affiliation did not play a role in our study.
3d Mouse - Etsy.de
Etsy is no longer supporting older versions of your web browser in order to ensure that user data remains secure. Please update to the latest version.
Take full advantage of our site features by enabling JavaScript.
Find something memorable, join a community doing good.
( 1,000+ relevant results, with Ads Sellers looking to grow their business and reach more interested buyers can use Etsy’s advertising platform to promote their items. You’ll see ad results based on factors like relevancy, and the amount sellers pay per click. Learn more. )
China PMM G703 Ultralight Logitech (G305 Shell Swap) 3D Printed Mouse Cover Mod Kit Manufacturers, Suppliers, Factory - Cheap PMM G703 Ultralight Logitech (G305 Shell Swap) 3D Printed Mouse Cover Mod Kit
PMM G703 Ultralight Logitech (G305 Shell Swap) DIY 3D Printed Nylon Cover Kit + USB Charging Battery
Disclaimer:
there is no PCB or 3D design for sale.
◆ We are the official manufacturer of PMM mouse mods (www.pmm.gg).
Instruction:
◆ NOTE. This is an old version of the G703 mod that supports the G305, and' is no longer updated, the newest version uses the internals of the G603.
◆ Shape: Logitech G305
◆ Weight: 65g
◆ Required Electronics: Logitech G305
◆ Download the installation guide for mouse mod kits here: https://pmm.gg/g305-kit
For assembly questions, send a request to [[email protected]]!Terms & Policies:
By purchasing this item, you agree to the following terms:
★ All 3D printed parts purchased are for private and personal use only.
★ We don't provide 3D models, only 3D printed parts.
★ Once an order has been placed and processed, we DO NOT ACCEPT ANY RETURN REQUESTS!!!
If the item is broken, request a free rework by providing solid proof of broken parts within 3 days of delivery!!!
Description:
This high quality 3D printed lightweight Logitech mouse case features a honeycomb structure that provides mechanical strength while reducing weight.
Material Option:
As a professional 3D printing supplier, we have more than 50 material options, the recommended materials for this mouse cover are listed below with a score of 5 points.
Nylon cases can weigh 23g. For people whose hands are always sweaty, we highly recommend nylon cases.
◆ Nylon (White) - ♥ Highly Recommended ♥
SLS Nylon with excellent flexibility, strength and impact resistance. The surface is matte and porous, not as smooth as resin.
[Smooth-4, Durability-5, Toughness-5, Rigidity-3]
◆ Nylon (Black) - ♥ Highly recommended ♥ than white nylon.
[Smooth-4, Durability-5, Toughness-5, Rigidity-3]
Please select the ETSY Shop FACFX 39 ... /www.etsy.com/listing/970247957/PMM-g703-ultralight-logitech-g305
hot label : PMM G703 Ultralight Logitech (G305 Shell Swap) 3D printed mouse cover kit, China, manufacturers, suppliers, factory, cheap, low cost, quotation
13 notes about 3D printing, after 3 years of ownership 3D printer / Habr
This article will be, first of all, of interest both to those who have directly dealt with 3D printing, that is, who owns a 3D printer, but also to those who are just about to join the ranks of 3D printers and are thinking about buying their own printer.
As part of this article, I would like to share my observations, as a direct owner of a 3D printer, for more than 3 years.
Despite the fact that 3D printers have been known for a long time and, in my memory, have become widely used, judging by the information on various resources, starting around 2010 (I may be wrong, these are my subjective observations), for a long time I ignored this area, it’s hard to say why…
Probably, he considered it some kind of “childish pampering”, another hype topic for which there is simply not enough time…
The break happened when one of the wheels on my travel suitcase wore out. You know, a big plastic suitcase, with four spinning wheels on the bottom. Unfortunately, it is a “rather disposable thing”, due to the lack of bearings on the wheels, which is why the wear of the friction point of the axle and wheel allows the suitcase to last no more than one or two seasons.
And it’s like “lightning flashed in the middle of the day: 3D printer!” It is with his help that I can fix this problem! Looking ahead, I’ll say that I didn’t succeed in fixing the suitcase in this way, so I had to use a different approach . ..
..
As a result, I "upped" him - by installing wheels from unnecessary roller skates. Thanks to this “up”, the suitcase has become a real all-terrain vehicle and, even being very loaded, it rides easily - pushed forward even with “one finger”. And even in the snow, 5-6 cm thick. A tank, not a suitcase turned out! By the way - I took spinning wheeled "units" in Leroy. Then he removed and threw out his native plastic wheels, inserting from roller skates:
But this thought itself became a kind of trigger that allowed me to finally join the world of printers and buy my first 3D printer.
Like many, before buying it, I studied various forums and sites for a long time, delving into all the subtleties. And for some reason, I immediately liked the type of printer called the delta printer. Probably because during operation it looks like some kind of "alien device".
If at your leisure you like to sit “looking into the carpet”, then with the advent of such a printer you will have a much more interesting activity, even, one might say, hypnotizing :-))
And this, in fact, is my delta (if anyone interesting), which went, let's say, "ultimate up": all the electronics were placed upstairs, on a self-made welded frame, covered with polyethylene and a magnetic door was made. The coil with a bar is installed at the top, on the frame. The axis on which the coil is put on is machined on a lathe from aluminum and a bearing from the VAZ timing is inserted into it. As a result, the coil - "rotates even from the passage of a fly nearby":
Well, yes, I won’t argue for a long time, let’s start reviewing the main facts that I have accumulated as a result of owning this car ... The facts are purely subjective and may differ from your vision. In any case, I will be glad to comments, clarifications, etc.
▍ NOTE 1. Delta is good, but...
Here I should give a number of my observations regarding the delta printer:
- It contains a completely finished frame of the future box, which makes it easy to form a heat chamber. I understand that many printers are made in the form factor of a “certain box” (but this point cannot be ignored), which greatly facilitates the process of wrapping this box with heat-insulating material.
 In my case, as such a material, I used a plastic film.
 - Already thanks to its design, delta allows you to work at much higher speeds than XY printers. By the way, it is on the delta principle that many modern high-speed industrial robots are built to sort various parts directly on the conveyor belt:
However, this plus does not allow to fully realize the occurrence of parasitic vibrations, even despite their suppressors:
Thus, accurate printing is possible, only at speeds (at least that was the case for me), no more than 60 mm per second. A complex procedure for aligning the movement of the head parallel to the table, which is why, for many, the so-called "lens" appears. People struggle with it with varying degrees of success, but I have not encountered this on my printer and for me, therefore, the “lens” has never been a problem. At the same point, it is worth noting the calibration of the table, which was initially absent on the first deltas, and I had to use an external third-party solution from one American do-it-yourselfer called EZBED. This solution was a hardware-software complex that allows you to quickly and easily calibrate the printing table, that is, to let the printer understand its geometry. Modern printers do not have this issue as they come with a built-in calibration solution. It is worth noting that I solved this problem by attaching a limit switch to the print head, and using the Marlin-1.1.9 firmware.
▍ NOTE 2. "Size doesn't matter..." :-)
When I got the printer, I was impressed by the possibility of huge printouts, a la the handguards of some futuristic rifles, huge body parts, etc.
However, if you try to analyze the results of your many years of practice, it turns out that in most cases, rather small objects were printed that easily fit in the palm of your hand, a maximum of two palms. Despite such a seemingly small size, the printing of these details took a significant amount of time. Of course, this very much depends on which nozzle you print with. But, despite this, it is difficult to disagree with the fact that most of the printed parts will be quite utilitarian and small in size.
Therefore, to be honest, the need for a printer that allows you to print "Venus de Milo in life size" is not obvious.
Of course, you can object to me that “I’m going to buy a printer, I’ll get used to it a bit and I’ll get started!!!”
One simple point must be taken into account here: there are no universal things. And in order to understand how much 3D printing in general and your printer, in particular, you will need to solve your problems, and how much it will be able to solve such problems, you just need to first try the 3D printing method personally and then a lot will become clear to you .
Therefore, for a beginner, I recommend taking a small printer that allows you to print extremely small items that fit in the palm of two. With such a device, you will definitely never lose, as it will always be needed. In addition, with its help you will be able to get used to the printing process and, if necessary, purchase a larger device, already clearly understanding its capabilities and ability to solve your set of tasks.
▍ NOTE 3. "What type of printer to get."
Based on the foregoing, I do not recommend taking a delta printer and this can be said right away.
Not because it is bad, in fact, it prints quite accurately, its main problem (in my opinion) is the inability to print rectangular flat, fairly large case components, as well as the inability to fully realize high-speed work, since the quality drops critically. Here it turns out to be a rather offensive situation - the printer can work quickly, but this cannot be done, since the quality will be “nothing”.
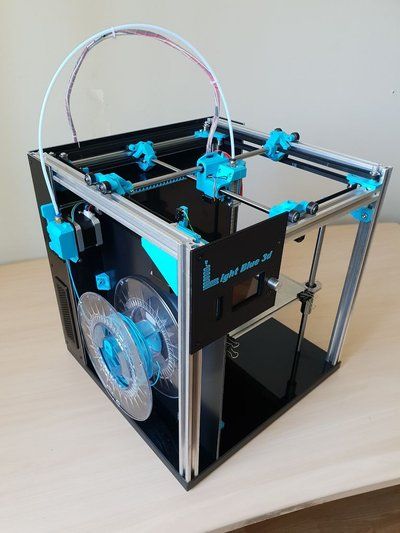
And then what kind to take? Depending on the budget and capabilities, I recommend taking any cube printer, for example, the same Core XY (the head moves, and the table goes down as the model “grows”, from top to bottom):
Image source: thingiverse.com
Such a printer allows you to easily print fairly large flat parts of cases, has good speed and accuracy. In addition, the presence of a rigid box-shaped frame allows it to be easily covered with polyethylene to create a sealed heat chamber. In addition, the very fact that the table does not move while working reduces the number of problems with model peeling.
However, the full advantages of this printer will not be revealed if it has a direct extruder. On the one hand, it will allow printing with rubber-like materials, on the other -
large inertia and head weight. And these are parasitic vibrations, wear of the fur. parts, etc. (like everything in life, “we treat one thing and cripple another” :-))
At the initial stages, this may not be necessary, but in the future it may be necessary to print, for example, tires for your homemade car. And with this, the Bowden extruder has obvious problems. Although, in fairness, printing with such a rubber-like material is far from a daily need. However, whoever seeks will always find: over time, I found a way to “upgrade” my printer with a Bowden extruder to print with flexible materials. "Crutches" of course. But even so.
By the way, there are printers of a cheaper type, the so-called "drygostol", printing by moving the table and head:
They are inexpensive, moderately accurate, but they require a sufficiently high-quality gluing of the printed model to the table, because the table moves, and the model can come off when the table is jerked sharply. When printing large models, this can be a problem.
▍ NOTE 4. What to print with?
It's only a matter of taste and purpose. That is, if your printout will only stand on a shelf and should differ in some kind of aesthetic appearance, these are some requirements, if the printout is an engineering part that will be operated under conditions of increased mechanical load, these are different requirements. That is, in the first case, you can use any PLA, SBS plastics, and others with similar properties.
For engineering parts, for example, I only use ABS. It combines high hardness, strength and low price. Although I understand that now this last statement will cause a storm of comments in the style of “no! - there is even stronger, even better, the same PETG, etc. ":-)
I just wanted to say here that thanks to the low price and the practical experiments that I conducted with ABS plastic, I realized that it is completely meets all my requirements.
However, the fact that ABS plastic releases carcinogenic substances when heated is quite annoying and forces you to take measures to prevent poisoning. For this, my printer prints completely closed and on an open balcony. After printing, the printer chamber opens, and it remains open in this form until it is completely ventilated and cools down.
▍ NOTE 5. "ABS is difficult to type on, it separates, peels off the table, and in general..."
With a properly configured printer (in my case, at a print temperature of 205 degrees, a thermal chamber and a desktop temperature of 100 degrees), the use of auxiliary techniques, for example, among which, one can name the so-called ABS juice (which is ABS- plastic dissolved in acetone), you can create wear-resistant and durable things, without any hypothetical problems.
For example, my printer has been printing for many hours at temperatures well below freezing. And this happened more than once, not twice, not three! And the print quality was excellent:
12-hour ABS printing at -4 C
▍ NOTE 6. Acetone for post-processing and ABS juicing
At one time, I wrote a fairly detailed article on this topic and I will try to give the main excerpts from it. The essence of the issue here is as follows: due to the fact that different GOSTs are used for the production of acetone, acetone differs in quality. Despite the fact that it would seem that “acetone is also acetone in Africa,” nevertheless, one type of acetone can differ significantly from each other. For example, ordinary acetone, which can be bought at any hardware store, such as "1000 little things", "store near the house" and the like, is very low quality acetone, smells disgusting (although someone like it, maybe someone likes its pleasant building aroma and "aftertaste" :-))).
In contrast to it, there is a much higher quality acetone, which, however, is not found at all in any household stores, even large chain stores, such as Auchan or Leroy Merlin.
This type of acetone is found exclusively in shops that sell varnishes and paints for automotive work - that is, these are highly specialized shops for auto repair shops:
Acetone, which can be purchased there, is of excellent quality, smells almost like alcohol, quickly disappears,
:-) - this is a joke, of course, don't even try it.
However, its main advantage, compared to household type acetone, is that it perfectly dissolves ABS plastic and does not allow it to precipitate. For me personally, it was a very surprising observation when the same ABS plastic was perfectly dissolved with acetone from an auto shop, and completely precipitated when I tried to use household acetone (I just ran out of good acetone, and I had to use "what is ").![]()
So if you want perfect results every time, then this is the right acetone. It should be labeled "for professional use":
▍ NOTE 7. What about ABS juice?
"ABS juice" is what printers call a mixture of acetone and pieces of ABS plastic dissolved in it. This mixture is smeared on the surface of the desktop before printing and allowed to dry. Thanks to this spread, the model easily sticks to the desktop and does not peel off during the printing process. After printing is completed and the platen has cooled down, the model can be easily separated.
All that needs to be said here is that, after trying different approaches over time, I settled on using flexible metal spatulas, also called “Japanese-style spatulas”:
According to the results of many tests, this method of spreading turned out to be one of the most convenient options, such spatulas can be cleaned very quickly and easily after work. In other words, highly recommended!
▍ NOTE 8. "Yes, nothing sensible can be done on it, I indulged a little and decided to sell it - you can't use it for anything good anyway"
I absolutely disagree with the statement above, which is periodically heard from newcomers to 3D printing. You can even say more: at the moment I can’t even imagine how I used to live without a 3D printer! Since it is he who makes it possible for any do-it-yourselfer to significantly expand their capabilities and make piece products, almost of factory quality! Of course, for this, appropriate hands must be applied to the 3D printer, but that’s another question… and take on things that I would never have thought to take on before!
For example, among my homemade products, the following can be listed:
- Heated sole for boots, which is a hose integrated into the insole (and filled with household silicone from a household store), through which water flows, heated with a catalytic type hand warmer.
 Water is pumped using a small peristaltic pump. The engine with a metal gearbox, which is used in the creation of this pump, allows you to develop a force of 3 kg, which is even redundant for this homemade product. The engine is powered by Peltier elements mounted next to the catalytic heater. The project is currently in progress.
- Centrifugal water pump mounted on the shaft of an internal combustion engine that drives a high pressure wearable air compressor with a pressure of 500 bar. The pump pumps coolant through the casing of the high pressure pump, or rather its second stage. Despite the fact that the pump is 3D printed and runs at over 6000 rpm, nothing “fell apart, fell apart, didn’t break.” As you can see in the photo, the pump is installed instead of the “starter”, that is, the armstarter. The compressor scheme as a whole is as follows: 2 engines. Connected by clutch. One is heavy duty. The second is modified and turned into a high pressure compressor:
Yes, before assembling this, I also did not believe that this was possible. Moreover, even when I collected it, I did not believe my eyes :-))). However, it is a fact…
- I printed a number of Rank-Hilsch test tubes, the essence of which I have described in detail in this article.
- Printed mass of parts, more than 100 pieces, to create 10 robots controlled via the Internet. There was also a detailed article about this here.
Well, and a bunch of all sorts of useful and not very crafts. As you can see from my crafts above, I have a special passion for creating some useful things, a utilitarian direction. That is, so that the printout is useful, and does not belong to the type “yyy breathe, Mikola, what am I doing here” :-), and then put it on the shelf and that's it. Although, engineers are also not alien to beauties, and this will be my next fact below.
▍ NOTE 9 Proper placement of the model when printing is half the battle
It would seem an obvious fact, but many underestimate it. Here I mean the following: by experience, I accidentally discovered that when printing various statues (in which I, completely unexpectedly for myself, discovered another passion of mine), it is advisable to place the statues at an angle to the printing table.
This allows the layers in the printout to run at an angle of approximately 45-50 degrees to the model. The result of this is that the printed model is almost completely invisible layers and the model looks like it has been post-processed, but at the same time retains a deep matte color, which, to my personal taste, is more like a marble than a glossy result of processing in an acetone bath :
An additional advantage of this method is that the layers going at an angle of 45-50 ° to the model give it additional strength. This is especially true for printing statues, which contain many thin elements that are easily chipped when the statue is accidentally dropped from a table or shelf (learned from bitter experience, this happened to me many times, and ruined some fairly decent prints).
That is, layers running across the model, if the model has a large extension in height, does not allow it to maintain sufficient strength. For better understanding, I tried to illustrate this point in the figures below:
▍ NOTE 10. Bleeding must be taken into account when printing, especially if the model is composed of separate parts and must be assembled by joining these parts to each other, entering into each other, etc.
I tried to illustrate this point in the figures below. The implication here is that if you're printing a composite model, you need to correct for the amount of bleed on the plastic (I'm not sure what it's called, but at least I tried to convey what I mean). If this is not taken into account, then the model will not fit.
For example, in my case this correction is 0.2 mm per diameter - if I want the model to fit more tightly; if I need a free joint, without excessive density, then 0.3 mm per diameter:
That is, suppose that the blue part has a size of 10x10mm. So it must be modeled in a CAD program as 9.8x9.8 mm (if we want it to sit tight) or 9.7x9.7 mm (to sit freely). Well, or expand the hole in the green part, and leave the blue one as it is.
This is often a problem when you download a prefabricated model from the Internet - but it is not going to, even if you crack! And because no amendments have been made…
For your particular case, the amendments may be different.
▍ NOTE 11. What if...
In fact, this note complements note number 8. Using a 3D printer allows you to create metal parts using a printed 3D model. For this, the casting method is used according to the lost wax or burnt model. In our case, we will deal mainly with metal casting on a burnt model.
Briefly it looks like this: printing a 3D model (using PLA plastic) → pouring it with plaster → burning the PLA plastic, simultaneously with burning the mold, in a conventional stove oven → pouring the resulting shape with molten metal (melted in a conventional microwave) .
Image source: 3dtopo.com
I told about a simple method of melting metals in a home microwave oven here.
There was even a good article about casting on Habré.
▍ NOTE 12. Durability?
Despite the fact that ABS plastic is called exposed to ultraviolet radiation and, accordingly, burns out, losing its strength in the sun, in my practice, even printouts that are constantly exposed to the sun have not lost their strength and color at all, continuing to be successfully used and Currently.
It should also be added here that printouts are constantly exposed not only to the rays of the sun, but also work continuously in damp conditions!
As such printouts, I can give an example of winglets for technical cranes, which I printed out, but, unfortunately, did not photograph this process; as well as fasteners on shoes that I use “both in the snow, and in the heat and in the pouring rain, and in general are always with me”:
▍ NOTE 13.