3D printed guitar thingiverse
Guitars - Collections - glitchpudding
by glitchpudding, last updated
"The guitar is infinite. It never stops teaching you, it never stops being difficult; there's an unlimited amount of things to learn, and you'll never master it." - Kaki King http://youtu.be/AwkyDyyFrIc
1624 1881
2975 2394
79 91
3494 3831
233 250
265 335
1348 1633
1408 1679
391 472
3524 4116
286 428
252 328
▷ 3d printed guitar parts 【 STLFinder 】
Electric guitar with 3D printed parts
prusaprinters
In this video I build an electric guitar with 3D printed parts. The construction costs amount to about 50 €. The most interesting and most expensive is certainly the pickup. This was built from 15x5mm magnets. About 8000 windings were wound up with a...
DIY guitar under 60€ with 3D printed parts.
thingiverse
In this video I build an electric guitar with 3D printed parts. The construction costs amount to about 50 €. The most interesting thing is certainly the pickup. This was built from 15x5mm magnets. About 8000 windings were wound up with a 0.05mm...
3D Printed Guitar Picks
thingiverse
guitar picks
3D printed guitar
thingiverse
This is my first 3D printed guitar model. It was made in Fusion 360 and printed on Lulzbot mini and Wanhao Duplicator I6. This is an awesome project if you always wanted to make an electric guitar but don't have access to a woodshop. The guitar...
3D printed 4theswarm guitar
myminifactory
This is my third electric guitar, or at least the body freshly painted. I've sculpted this guitar entirely in ZBrush, this time including the joints to fit together all the parts. My concept takes inspiration by nature and in particular from...
3D printed Guitar
thingiverse
Hello Community, I wanted to share a 3D printed guitar we brought to life with a Luthier in France. The steps we followed are listed below : - 3D modelling using Autodesk Fusion 360 starting from a 2D luthery scheme - Customizing the 3D model to our...
3d printed travel guitar
thingiverse
... the guitar Gibson Les Paul, amplifer belcat i-5g. ... instructions for assembling an acoustic guitar in the pdf file. This guitar is not acoustic, but the assembly is very similar. ...movie https://drive.google.com/open?id=0B0-nmPDD8Tg7VWEzTnZrZEUzOVk
3D Printed Guitar
thingiverse
I had a broken acoustic guitar and decided to fix it. ... The riser was rotted out and the pickguard didn't match so I ended up going all out.
Snapfit 3d Printed Guitar
grabcad
This is a real electric guitar made using a Makerbot Replicator 2 printer. The model was based on Jeff Campbell's 1962 Stratocaster model. Modified for modern hardware and electronics and to print on a smaller bed printer. ... You can read about it on...
3D printed guitar!
thingiverse
https://youtu.be/QKkojD5Qzhg This guitar is divided into 7 main printable parts. I recommend to use a steel rod instead of threaded rod like I did. ... For more projects like this- ...
Polycaster - 3D Printed Guitar
thingiverse
The neck I used was designed for a guitar with a much deeper neck pocket, so I had to shave down the neck joint a few mm for the strings to fit.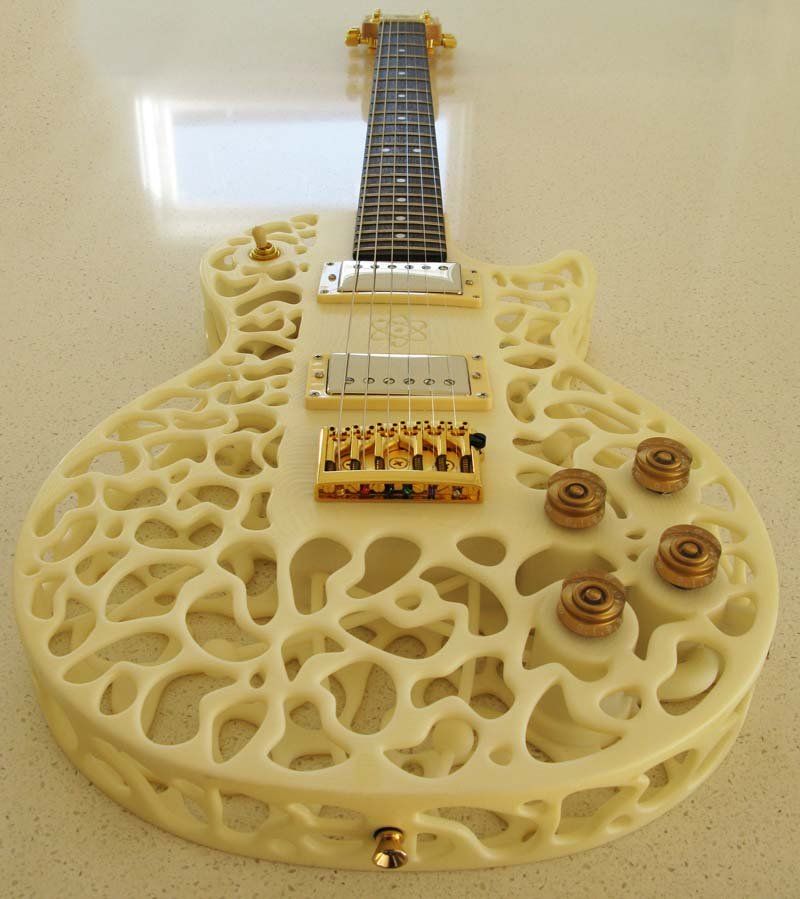 But when that was done, everything lined up perfectly. I didn't even have to intonate it.
Some parts...
But when that was done, everything lined up perfectly. I didn't even have to intonate it.
Some parts...
3D printed guitar effects pedal
thingiverse
///////////////////////////////////////////////////////////////////////////////////////////////////////////////////////////// 3Dプリンタ-製のエフェクターケースです。形状はRATを意識しています。 3Dプリンタ-でロゴも印刷しました。(添付なし) 印刷したロゴのパーツのトップをマジックペンなどで塗って貼り付ければ見栄えするかと思います。...
Fully 3d printed electric guitar
youmagine
The body and neck of this electric guitar were 3d printed on a Flash Forge. The neck is assembled with two carbon fiber tubes set in epoxy in place of a traditional truss rod.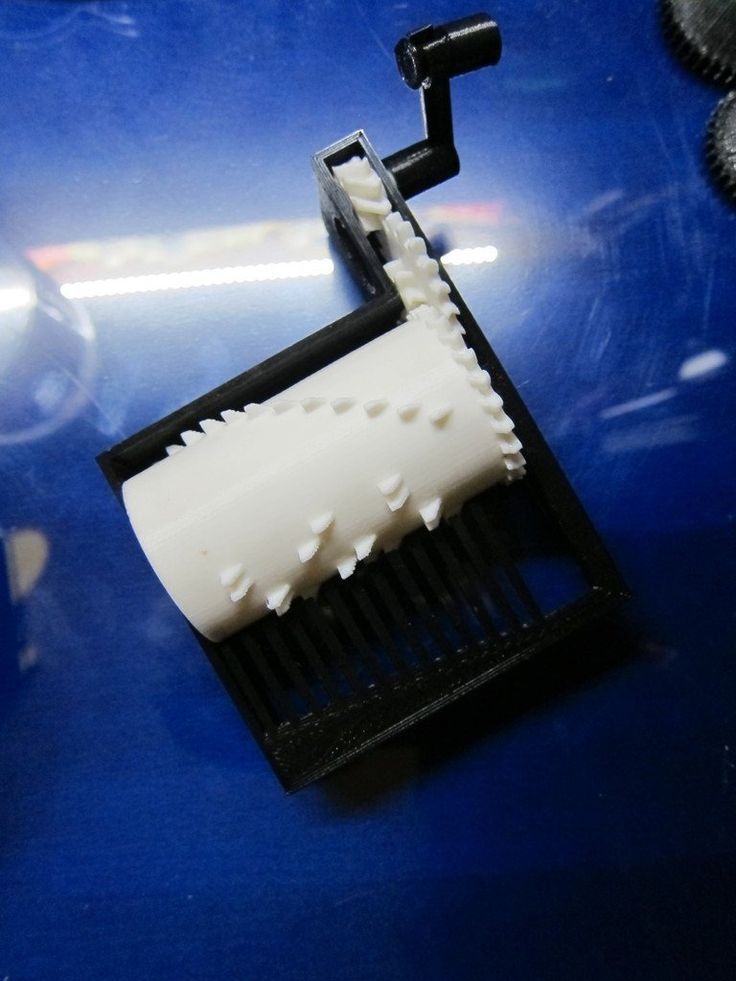 The neck was further strengthened by infiltrating the infill areas of...
Guitar Parts Free 3D model
cgtrader
Native format is .skp 3dsmax scene is 3ds Max 2016 version, rendered with Vray 3.00 Guitar Parts. Four different guitar Humbuckers you can use for your guitar design projects. The one on the lower left is for mounting flush in the cavity of the...
3D Printed UCB Parts
grabcad
3D printed components of the 2020 UCB.
Speaker ( 3D printed parts )
thingiverse
3D printed parts for a speaker.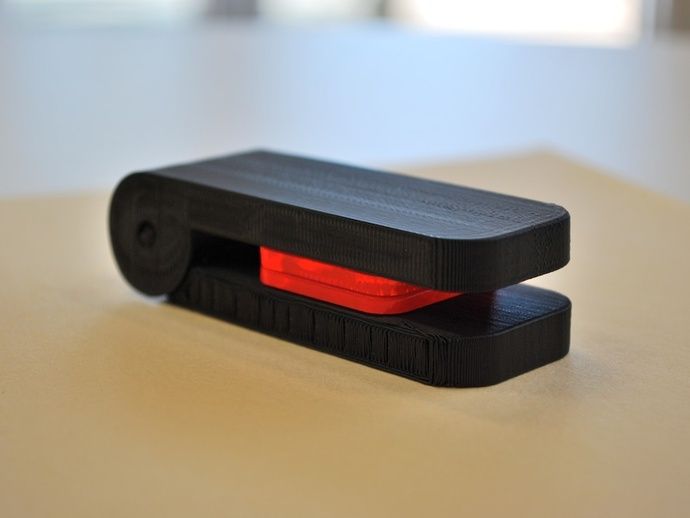 ... first test (without 3D printed parts) :https://www.youtube.com/watch?v=wtHowpZ0QWw
Drone 3D printed parts
thingiverse
Sharing some 3d printed parts for drone build https://rotorbuilds.com/build/28872
Cakewalk3D 3D printed parts
thingiverse
To adapt Cakewalk 3d to your printer, all you need is to 3D print 3 or 4 supporting parts: 1 connector between the cartridge and the Nema motor 2 detachable rings to hold the cartridge 1 carriage part for Anet 8 / Anet 8 plus 3d printer The 3d...
Cakewalk3D 3D printed parts
grabcad
All parts are food-safe and easily washable in your dishwasher. To adapt Cakewalk 3d to your printer, all you need is to 3D print 3 or 4 supporting parts:1 connector between the cartridge and the Nema motor2 detachable rings to hold the cartridge1...
Heart 3D printed parts
grabcad
Heart made for 3D printing that can fit together. Kindly drop comments if you want to see any specific CAD models. ...Share your ideas
BFR4WD 3D printed parts
thingiverse
3D printed parts for my BFR4WD mobile robot. Additional machined aluminium parts are required to complete the chassis. Head pan and tilt parts can be used to create a stand alone robot head using standard hobby servos. ... Print Settings Printer Brand: ...
3d Printed Bow Parts
thingiverse
This is a set of 3d printable parts so anyone can make their own bow and arrows, even if they don't have any tools. all you need is a 5 foot 3/4 inch PVC pipe segment (they'll cut it for you at the store) and a 3 foot, 7/16 inch wooden dowel for the...
plotclock 3D printed parts
thingiverse
Now part of the plotclock kit available from : www.kghjfg.moonfruit.com These are slightly different versions of Part3, Part9, Part10 and Part12 of the plotclock, changed for a 3D printer. Originally Part3 and Part9 needed Part6 and Part4 to work,.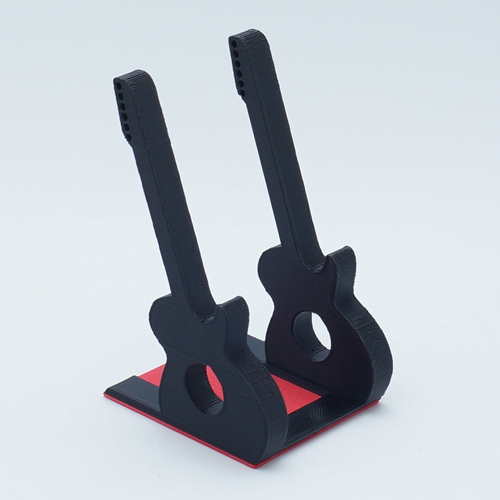 ..
..
Guitar Parts
grabcad
3D Guitar Assy.
3D Printed Guitar Pick with Magnet pad
myminifactory
A 3D printed guitar pick with magnet pad. The magnetic pad is to prevent of losing this small guitar pick. Just stick small thin piece of tin metal in any shape to the guitar or any magnetic metal will do. ... 3D object is meduim size with 0.6mm thick.
Baco PG-2 - 3D Printed Guitar
thingiverse
Soon we will publish the complete instructions to create your own DIY and 3D printed electric guitar! Stay Tuned! .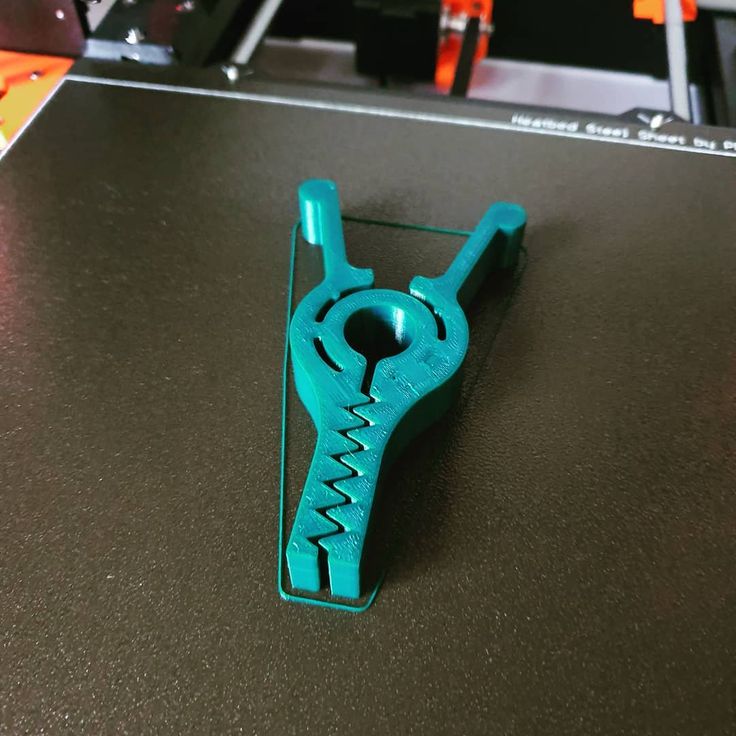 ..Print Settings Printer: 3DRAG ...
GUITAR STAND - BASS STAND - 3D PRINTED
pinshape
Guitar stand made with wood and 3D printed parts. The stand is universal and adjustable to the size of any guitar, whether acoustic, electric or Spanish. In addition to the printed parts you will need cylindrical wooden sticks with a diameter of...
3D Printed Functional Electric Guitar Project !!!
thingiverse
☑️ THE 3D PRINT ZONE - 3D PRINTED ELECTRIC GUITAR PROJECT ☑️ Website: https://the3dprintzone.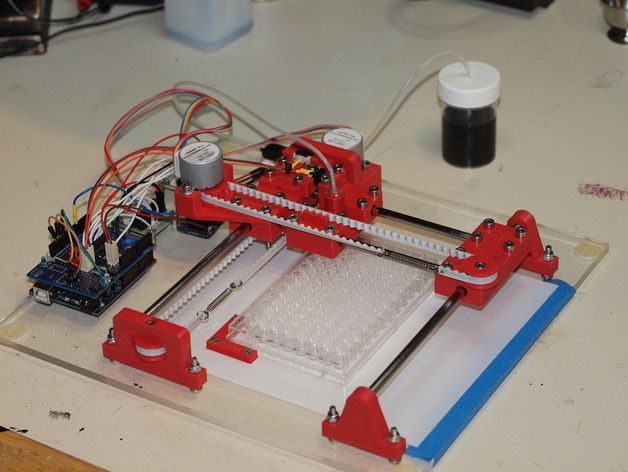 com/ YouTube Channel: https://www.youtube.com/channel/UCghGnerjapvhQsnTicj7Fkw Hello 3D printers! Here is an awesome project (challenge) for you to take on!
3D Printed Guitar Body - Stratocaster Type - Voronoi
thingiverse
Printing at 0.3mm layer height (which saved a lot of time but lost some quality on the surface layers) with a 50% infill gives the body a very “3D Printed” aesthetic which I really like. It also balances and weighs very similar to my old Fender...
3D Printed Guitar Capo - Project Note
myminifactory
BRIEF To design a 3D enabling guitar capo which allows guitar players to use and to better understand 3D printing applications and design. Design Process
The design process started off with drawing concepts and ideas which were developed from...
Design Process
The design process started off with drawing concepts and ideas which were developed from...
A guitar on a 3D printer or a summer project
Good afternoon, dear readers. Today's article will no longer be an overview, but a creative and practical one, dedicated to hobbies and hobbies.
Introductory lyrics.
In my student years, I happened to play the rhythm guitar in a musical group whose work was in the style of Heavy / Speed Metal (in a simple way - they played ROCK).
Every year, I and probably many of you think that life flies by, accelerating and accelerating, and somewhere far away there are dreams and there is absolutely no time for their fulfillment. But nostalgia and the desire not to give in to despair sometimes help make dreams come true or return to a long-forgotten hobby. This happened to me as well. I managed to escape from the working routine, and pick up the guitar again. Having acquired a tool, I began to restore long-forgotten skills.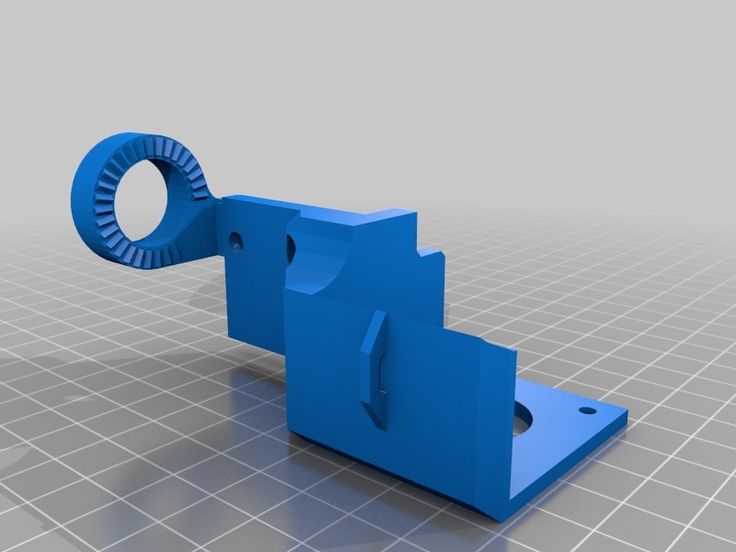
At one fine moment, the instrument became "not enough" and I wanted to buy something else that sounded different. I considered various options, and at some point the thought came - why not assemble the guitar myself. There is a 3D printer, there are filaments, examples of manufacturing are in plain sight. So the idea of a 3D printed guitar slowly began to flicker, until an interesting project caught my eye:
Why not, I said to myself. Found the description of the project on thingiverse. The body of this instrument was based on the design of guitars from the "state" manufacturer Strandberg guitar. Exactly what is needed! But without backlight - it's superfluous.
Preparation
"Wishlist" is not enough to make wishes come true, so a rough list of everything needed for manufacturing was compiled:
3D printer
Picaso Designer Classic. None of them were suitable for the project, because did not have enough printable area for those models that are hosted on Thingiverse.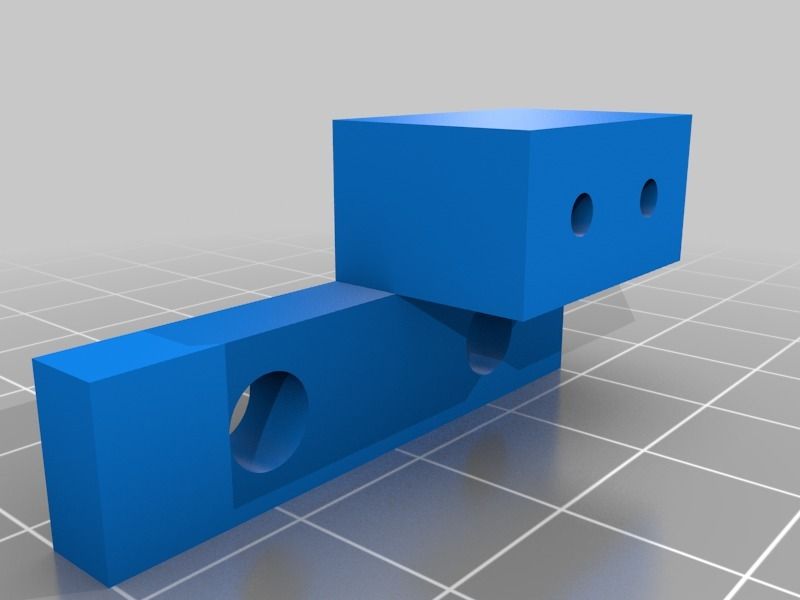 There was no desire to break / saw the finished models, especially the central part of the guitar, to which the neck was to be attached, the pickups were to be placed, and also where the tremolo was installed. This is the most loaded part of the case and should have been printed in its entirety without breakdown.
As a result, after turning and twisting the models in slicers, it was decided to print on Picaso, because in principle, everything was placed at an angle, except for the central part, and the quality of the printed wall on this machine was quite suitable for my tasks. It was decided to print the central part at a printing studio or ask friends with larger printers.
Printable plastic
The author of the project on Thingiverse made a guitar from PLA plastic, but I did not like this option at all, since in this case the guitar would have to be primed and painted. My task was to make a tool without post-processing and painting, so that it could be seen that it was made using 3D printing, but at the same time, it did not have a completely collective-farm look. After looking through the reviews of plastics on 3Dtoday, I decided to focus on composites, especially since I had a shareware promo reel of FormaX composite from REC3D. Once, at one of the 3D printing exhibitions, I happened to turn a part made of this material in my hands, and then I also noticed an interesting visual effect that hides layers and makes the surface of products pleasant to the touch. An additional plus in this solution was the presence of carbon fiber additives in the filament, which should create additional shielding (so that the guitar does not "start" when played).
Donor guitar
Inventing a printed neck is, of course, beyond the bounds, so only the body should be printed, but let's look for the neck, and at the same time all the electronics from the donor guitar will come in handy. There were a lot of options on avito, and in the end, Jackson, who had seen life, was purchased as a donor:
At home, the guitar was immediately dismantled, the neck was washed, polished and put in order. (guitars need to be looked after, of course).
Electronics from the guitar was also included in the project. I really liked the black and white combination of pickups. Yes, and FormaX is also black. The only thing that didn't fit the project from the donor was the tremolo bridge - "that iron thing with twists on the body, to which the strings are attached."
In a music store I picked up an inexpensive option + they also gave me cheap Olympia strings as a gift:
Test printing and fitting of the model x). This thermoblock allows you to work at high temperatures with most materials with a working temperature up to 410°C. We install it according to the instructions from the PICASO 3D website - it takes no more than five minutes, calibrate the printer, refill the plastic, get the instruction from REC3D technical support on FormaX printing and run it for test printing - a piece of the rec company symbol. At the same time, we evaluate the wall of the model.
Pleasant enough structure.
Another test - printing a piece of the central part of the guitar to assess the strength with a given infill.
Print settings:
- Nozzle temperature: 280°C.
- Table temperature: 95 °C.
- No airflow
- Table adhesive: PICASO 3D printing adhesive.
- Supports strictly from the table (otherwise the internal communication channels will be flooded)
Nozzle in thermoblock steel: 0.5 mm.
The model shows a defect on the wall. Most likely the reason is in the feed - the material is abrasive and can get stuck in the nozzle. Therefore, we will play with temperatures and retracts during further printing.
Also during the test prints with "formax" it became clear that in order to obtain a better surface, it is better to place the part at an angle. In this case, the top, covering layers (which are the front side of the case) will be just as perfect as the side ones.
Running a little ahead of the story , I show a photo with examples of printing the same part printed at an angle (left) and just on a table (right). The question of further orientation of the model on the table immediately disappeared.
The right part was printed by the PICASO 3D 3D printer farm on the PICASO Designer XL PRO printer at my request. By my mistake in the TOR - the location of the part was flat on the platform and using supports not only from the surface, which led to the fact that the internal cavities for laying communications were filled with plastic, and the surface itself had an unpresentable appearance. I will write about the left part a little later - but I managed to fit it into PICASO Classic and it was printed at an angle.
As a result of all the trials and tests, it was decided to print all parts at an angle and spend plastic on supports (walk, walk) - I didn’t want to stop the project. To celebrate, another FormaX coil was purchased.
The first quality print result met all expectations:
From different angles, the plastic plays with both color and texture.
Here are some photos of the rest of the print:
All photos are attached in the original size - you can click the mouse and look closer. The material is absolutely fantastic. After it, I don’t want to look in the direction of PLA and ABS.
I had to stop printing several times due to problems:
As a result, I got parts for assembling as many as two guitars. In the photo below, parts rejected for various reasons.
As for the central part of the guitar - I still managed to fit it on the table in the slicer at a certain angle, but when printing, the corner of the model was "eaten", although everything should have fit.
The problem was found during communication with the representative of PICASO, Kapiton (very competent specialist) . It turned out that with the declared height of the print area, in fact, almost half a centimeter is missing. As it turned out, there was a special revision of the part that protects the coupling under the table screw, and the one that was installed on my printer was larger. They promptly sent me an STL model, I printed it from ABS and replaced it - everything immediately began to fit in height)
Such a stunning surface of parts made from this material. Without post-processing:
While the parts were printed and reprinted, I gutted the donor:
Everything was neatly disassembled, cleaned and set aside for further assembly of the printed version.
During the work, a problem was found in the central part - the neck did not fit into place. He crawled onto the body and covered the part of the pickup with an overlay:
I did not want to cut the neck and it was decided to increase the size of the platform on which it is attached. Since I'm not good at editing STL, I asked Ivan (Plastmaska) for help.
Thanks to Ivan, the printing of the third version of the central part of the body was launched on the same day and the next I had the opportunity to join the parts and evaluate what happened:
Next, the parts were fastened together with using 7 screws M3x10 and 2 screws M3x20 and followed by the assembly of electronics, wiring, installation of the tremolo bridge and neck:
Here I ran into the problem that the power of my "children's" soldering iron for soldering electronics is not enough. I had to call out in 3D chats and Ivan Kashirin (known to many printers in St. Petersburg) came to the rescue. The guitar was carefully transported to Vanya's office and all the electronics were carefully soldered:
After assembly and soldering, it remained to put the strings, set their height, adjust the scale and install printed covers that cover the technological connectors on the back of the case.
Tuning and maintenance of the guitar was handled by Mikhail Marchenko, a professional in his field. I highly recommend those. who needs to put the instrument in order - https://vk.com/marchenko_mikhail.
A few photos:
Surely many people have a question - why did the project take the whole summer. In general, everything could be done slowly in 3-4 days, but summer is vacations, summer cottages, a lot of work for yourself and that guy, and there wasn’t much time to get down to business.
Well, a quick video. Happy listening everyone.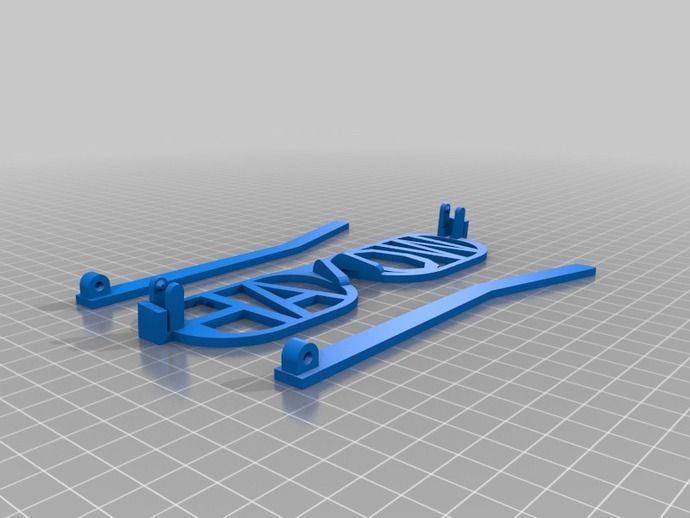
A new development for guitars - 3D printed pickups (+ video)
Now 3D printing has reached the point where it can be used to print a guitar that sounds exactly the same as a traditionally produced instrument. However, in addition to this, 3D printing technologies can be used to radically change the way you play the guitar.
Looking for an innovative way to use guitars, Andrew Strassell, owner of an independent custom guitar company, came up with an idea that could really revolutionize the industry. One of the main disadvantages of electric guitars is that the pickups that pick up the vibrations of the strings are almost impossible to replace. Since different types of pickups produce different tones, players who want to experiment with sound usually have to use multiple guitars. This is not only expensive and irrational with a limited budget, but also not very convenient, since you have to constantly change tools during the game.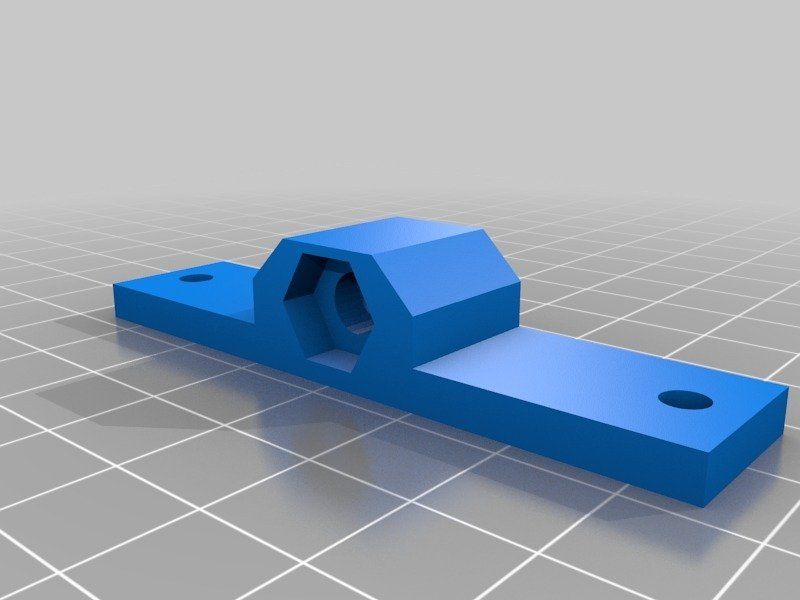
It's not that the pickups can't be replaced, it's just that the process is time consuming and requires the entire instrument to be taken apart and reassembled, so there is a risk of damage to the guitar. However, Strassell has designed a guitar that uses a 3D-printed cartridge cartridge that is as easy to replace as inserting a different game cartridge into a video console. Thus, musicians will be able to easily switch between the traditional sound of hard rock, blues or country if they wish. In addition, guitarists will be able to install the cartridge upside down - thereby obtaining a reverse polarity, which opens up new facets of sonic experimentation. All this can be done in seconds on the same guitar.
“The biggest beneficiaries of this development are small local groups. They no longer have to spend $1,500 on a Les Paul that they would never take apart because it cost so much. Our solution is much more advanced than the cheap Korean-made guitars, and provides a lot more options,” says Straussell.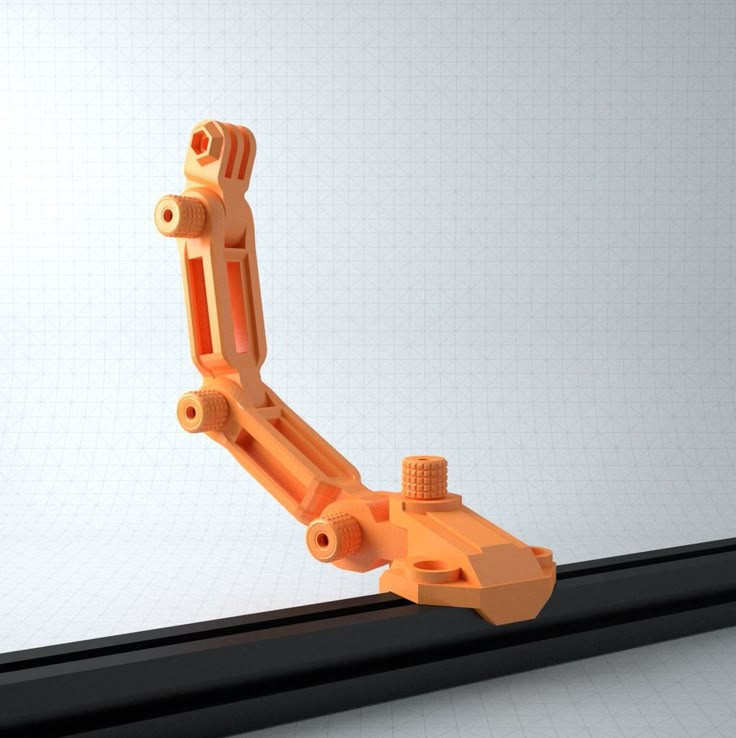
“There is a lack of innovation in this area, it's just that no one is promoting it. Fewer people want to play the guitar, and I believe that this is one of the fundamental musical instruments. Guitar manufacturers are basically reissuing the same half-century-old models. I think there is a demand for innovation in this industry and we need to rethink our vision of tools,” Strassell explains.
The developer also started a fundraising campaign on Indiegogo, where he set an ambitious but achievable goal of $50,000 to jump-start the business. Due to the fact that the campaign takes place on Indiegogo, where there is a flexible funding option, users who support the project will receive custom guitars, even if Strassell fails to achieve his stated goal. To date, there are only a few guitars ready that implement the idea of replaceable pickups, but soon there will be more. Recently, Strassell's new guitars found their first buyer - musician Josh Shabtai of the Brooklyn-based band Controller, who plays modern dance-rock with an incendiary indie sound.