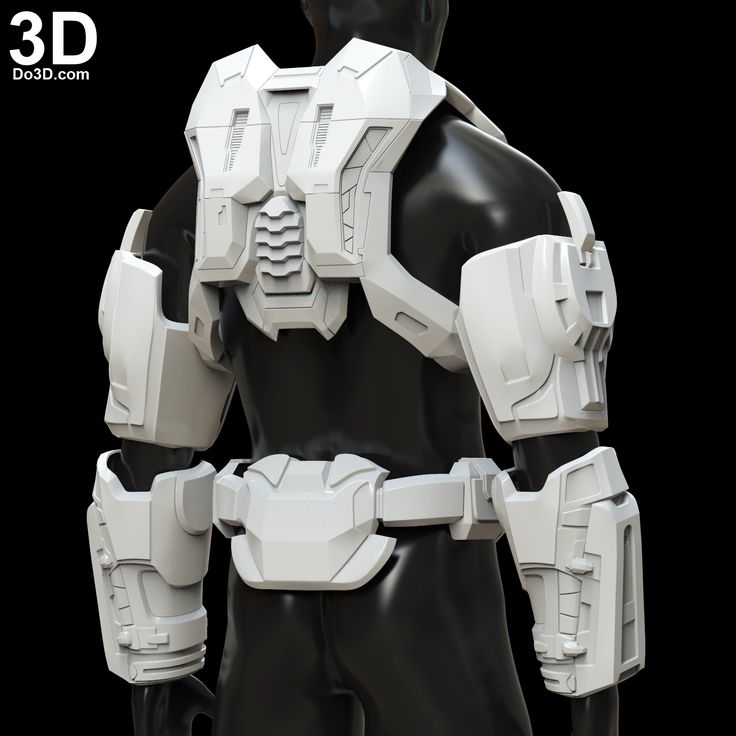
3D printing body armor
3D printed nanomaterial could replace kevlar and steel for bulletproof armor
0Shares
The Institute for Soldier Nanotechnologies (ISN), made up of the MIT, Caltech, ETH Zurich and the US Army Research Lab, has used 3D printing technology at the nanoscale to form a material that is reportedly more effective at stopping a projectile than Kevlar or steel.
Thinner than a single human hair, the material is made from tiny carbon struts that form interconnected tetrakaidecahedrons – structures with 14 faces – that are fabricated via two-photon lithography.
According to the team, the nano-architected material could potentially replace kevlar for a wide array of bulletproof protective gear used by the armed forces.
According to Julia Greer, Materials Scientist at Caltech, “the knowledge from this work could provide design principles for ultra-lightweight impact-resistant materials for use in efficient armor materials, protective coating, and blast-resistant shields desirable in defense and space applications. ”
Engineering material structures at the nanoscale
Nano-architected materials have a structure that is designed at the nanometer scale, enabling scientists to engineer virtually any imaginable 3D shape with desirable properties. While the strength of nano-architected materials has been previously studied under compression and tension, the ISN team sought to explore how such a material might survive high-speed impacts.
The material developed by the ISN consists of interconnected tetrakaidecahedrons made up of carbon struts that are arranged via two-photon lithography. Greer’s team has been exploring the capabilities of two-photon lithography in printing nanoscale 3D printed objects since 2018.
The tetrakaidecahedron structure was first proposed by Lord Kelvin in the 19th century as theoretically one of the most efficient structures possible for filling space with duplicates of itself.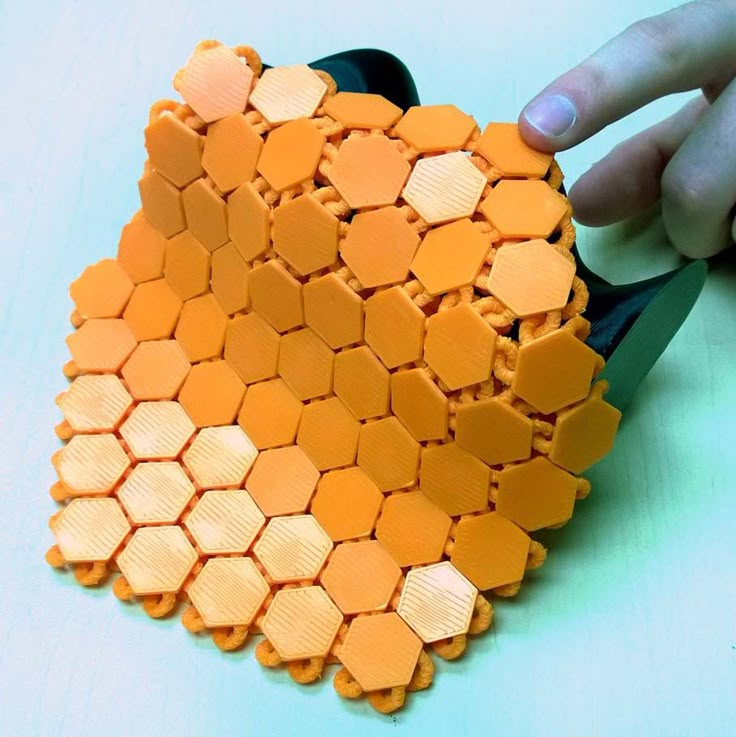
A light-sensitive photoresist forms the basis of the nano-architected material, conforming its shape based on light exposure from the lasers during the two-photon lithography process. During this process, a tightly focused laser is traced within the photoresist in three dimensions, solidifying the material until the full structure is printed. The printed structures are then pyrolyzed via burning in a furnace at extremely high temperatures to convert the polymer to pyrolytic carbon.
Two versions of the ultra-thin material were created with different densities and blasted with microparticles of 14-micron diameters at speeds of between 40 and 1,100 meters per second. For reference, the speed of sound is 340 meters per second. The denser version of the material was found to be more resilient to the blasts, with the microparticles embedding themselves in the material rather than tearing through, as would be the case with either fully dense polymers or carbon sheets of the same thickness.
The carbon struts immediately surrounding the microparticle were observed to crumple while the overall structure remained intact. According to the ISN team, pound for pound the nano-architected material outperformed steel by more than 100 percent, and Kevlar composites by more than 70 percent.
“Historically, this geometry appears in energy-mitigating foams,” said Carlos Portela, Assistant Professor of Mechanical Engineering at MIT and lead author of the paper. “While carbon is normally brittle, the arrangement and small sizes of the struts in the nano-architected material gives rise to a rubbery, bending-dominated architecture.
Material fabrication and results of the microparticle impact experiments. Image via Nature Materials.“We show the material can absorb a lot of energy because of this shock compaction mechanism of struts at the nanoscale versus something that’s fully dense and monolithic, not nano-architected.”
The ISN partners believe the developed material has the potential to replace Kevlar and steel for armor materials, protective coating, and blast-resistant shields used by soldiers in the armed forces. However, further development still needs to be undertaken before the material can be used in real-world applications.
Going forward, the researchers will seek to find ways to scale up the production of the material and explore how other nano-architected materials can hold up under high-speed impacts.
Further information on the nano-architected material can be found in the paper titled: “Supersonic Impact Resilience of Nanoarchitected Carbon”, published in the Nature Materials journal. The study was co-authored by C. Portela, B. Edwards, D. Veysset, Y. Sun, K. Nelson, D. Kochmann and J. Greer.
Impact processes and resulting damage of blasting the material with microparticles at supersonic speeds. Image via Nature Materials.Nanoscale 3D printing
Thanks to the range of potential applications opened up by nanoscale 3D printing, scientists are increasingly looking to optimize the technology and develop new processes, materials, and applications.
For instance, researchers from the University of Dayton have developed an enhanced, cost-effective technique to 3D print nanoscale structures, known as Opto-Thermo-Mechanical (OTM) nano-printing. Utilizing low-cost laser beams, the technique is capable of printing at scales a thousand times smaller than a human hair.
Elsewhere, scientists from Fraunhofer IMM are developing a novel multi-photon lithography process to produce nanoscale metal 3D printed structures, and researchers at the National Institute of Standards and Technology (NIST) have been working on a new method to 3D print gels and soft materials at the nanoscale. According to NIST, the technique could allow for the creation of complex microscopic structures, such as flexible electrodes, biosensors, or soft micro-robots.
Nominations for the 2021 3D Printing Industry Awards are now open, have your say who is leading the industry now.
Subscribe to the 3D Printing Industry newsletter for the latest news in additive manufacturing.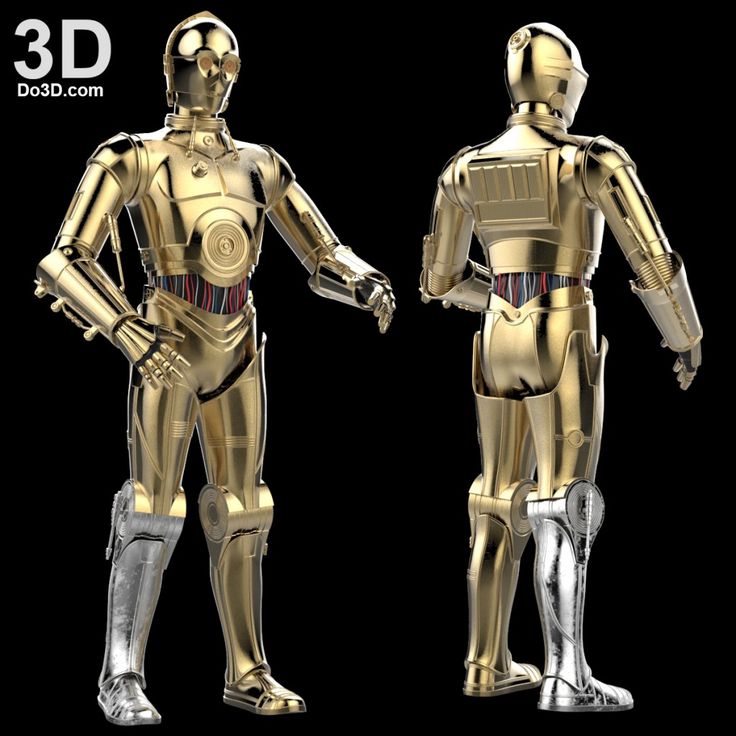 You can also stay connected by following us on Twitter and liking us on Facebook.
Looking for a career in additive manufacturing? Visit 3D Printing Jobs for a selection of roles in the industry.
Subscribe to our YouTube channel for the latest 3D printing video shorts, reviews and webinar replays.
Featured image shows the ISN has developed a nano-architected material that is reportedly more effective at stopping a projectile than Kevlar or steel. Photo via Caltech.
Tags Army Research Laboratory B. Edwards C. Portela California Institute of Technology Caltech Carlos Portela D. Kochmann D. Veysset ETH Zurich Fraunhofer Institute for Microengineering and Microsystems Institute for Soldier Nanotechnologies J. Greer Julia Greer K. Nelson kevlar Lord Kelvin Massachusetts Institute of Technology MIT NIST University of Dayton Y. Sun
Hayley Everett
Hayley is a Technology Journalist for 3DPI and has a background in B2B publications spanning manufacturing, tools and cycling.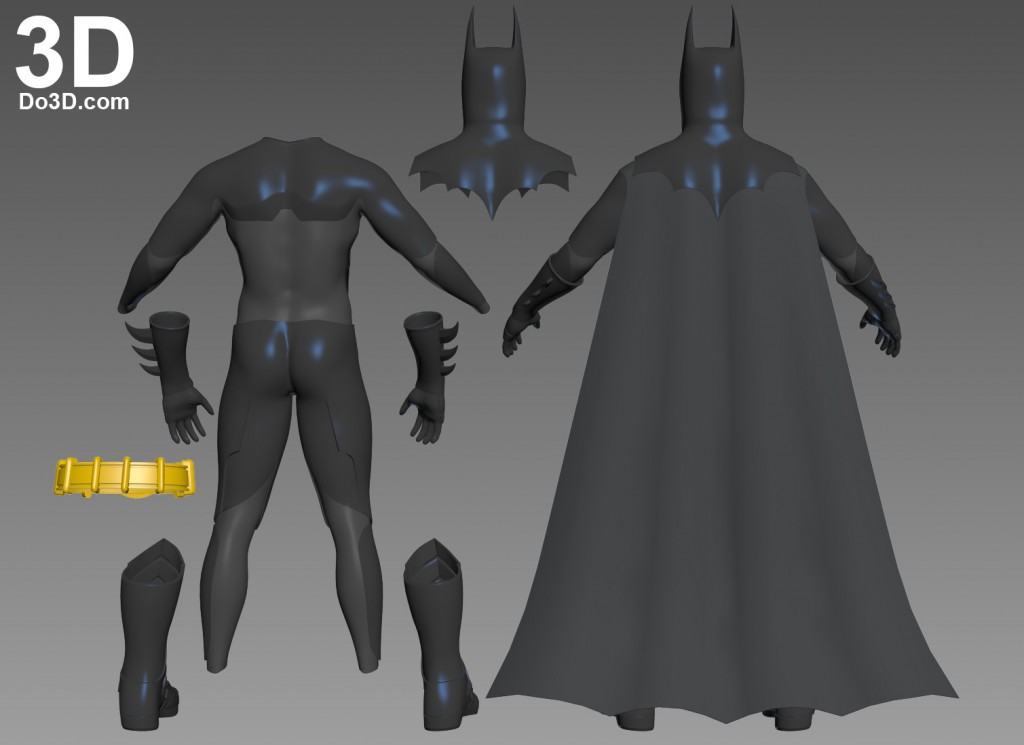 Writing news and features, she holds a keen interest in emerging technologies which are impacting the world we live in.
How to 3D Print Armor and Costumes for Cosplay – Clever Creations
3D printing has made it easier than ever to create detailed and accurate cosplay props and costumes to wear. A set of armor for cosplay used to take days to craft by hand, but with a 3D printer, you can create the base for your armor pieces in a matter of hours.
With the wide selection of affordable 3D printers for cosplay available right now, it’s a hobby that almost anyone can pick up. To get you started, we’ll show you how to design or find 3D models of armor, how to 3D print armor, and how to make your finished prints look like professional cosplay props.
How to 3D Print Armor: A Comprehensive Guide
Get a 3D model of armor
Before you can 3D print your cosplay armor, you will understandably need a 3D model of a wearable armor set.
Designing armor yourself
The most reliable way to get a set of 3D models of armor is to design them yourself.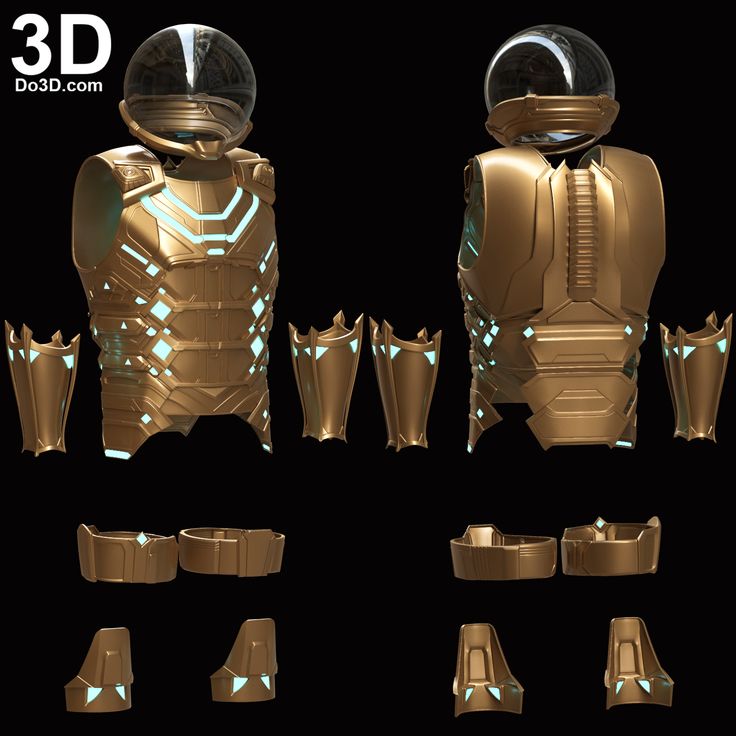 This will ensure the files are sized properly to your body and look the way you want them to.
Designing 3D models for an armor set requires you to properly size them to your (or the intended wearer’s) body measurements and contour the pieces to your body parts. At the same time, it is key to stay accurate to what you’re trying to represent. No matter if you are trying to design Batman, Stormtrooper, Mandalorian, or other Star Wars cosplay armor, you typically want to make sure it resembles that from the show, movie, or video game.
The overall difficulty of such a project depends on your 3D modeling skills and how much detail your armor needs. Luckily there are plenty of learning resources available to help, no matter what (free) 3D modeling software you choose.
Here are a few of our favorite tutorials to get you started, if you choose to design your own 3D printed armor!
Download a 3D model
Downloading a 3D model of armor is much easier than designing it yourself, but it offers you less reliable results.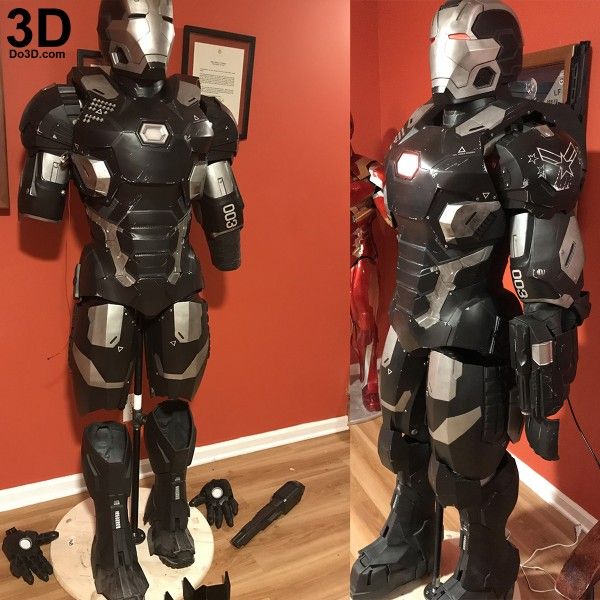
Since most of the free files uploaded online are from hobbyists trying to share their own projects, the armor pieces are likely sized to their body proportions. You will need to scale them up or down to fit your measurements, which can take some experimentation to get it right.
This Youtube has some great tips for getting a good fit:
There are many websites where you can download free 3D models, but some of our favorites include:
- Thingiverse
- MyMiniMaker
- PrusaPrinters
All models on these sites are submitted by other users. While that does lead to some less-than-stellar designs sometimes, other users will often step in and fix or redesign models that don’t work properly.
Our favorite 3D printed armor models
There are countless options for armor sets available on popular 3D model sharing sites. You can find everything, from generic to historical to recreations from pop culture.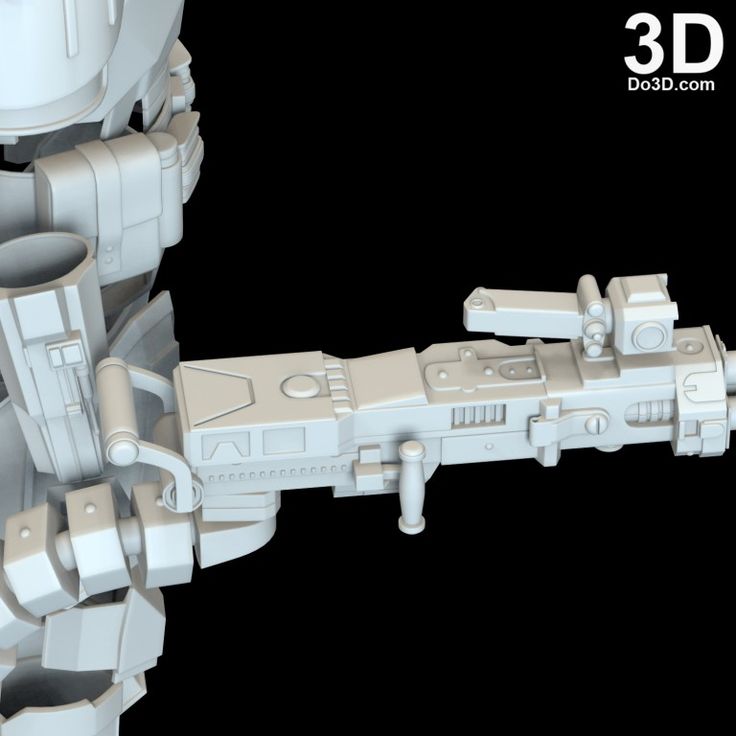 Here are some of our favorites:
Mandalorian Beskar Armor
For an easy Mandalorian costume, this simple version of the Beskar armor is one of the best options available. This 3D printed armor attaches to your shirt and pants, so there is no need for buckles or straps. It also doesn’t need much fine detail painting, so you can finish the armor off fairly quickly by painting it with a can of spray paint.
- Found on: Thingiverse
- Designed by: Maurice Sizzlac
Halo Master Chief Full-Body Armor
As a full-sized version of Master Chief’s suit from Halo, this 3d printed armor is extra bulky. You will need to use a lot more filament for this project than some of the others we have listed and some of the larger pieces will need to be split to fit on your build plate (even with a bigger 3D printer), but the finished look is worth it!
- Found on: Thingiverse
- Designed by: Jason McLachlan
Storm Trooper Armor
You’d be hard-pressed to find a more iconic full-body suit than a Storm Trooper armor, and this particular set pays close attention to detail.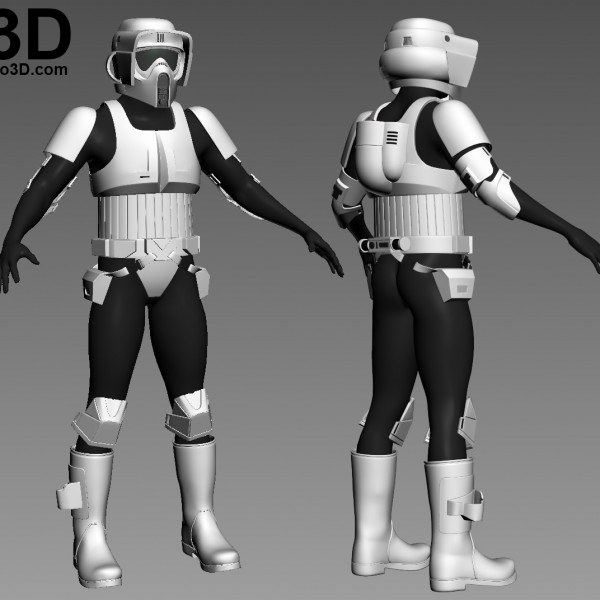 As with any Storm Trooper costume, this one will take quite some time to 3D print and finish since it has full-body coverage. You can expedite the process by using faster 3D print settings, as the armor does not have many fine details.
- Found on: Thingiverse
- Designed by: Matthew Snow
Iron Man Mk 6 Suit
With two sets of files to print either War Machine or the MK 6 Iron Man suit, these 3D printed armor sets are versatile and stunningly detailed. The armor sets are a labor of love to make, especially when you add in the wiring and lighting for the repulsors, but the results speak for themselves.
- Found on: Thingiverse
- Designed by: Steffan Scholtes
Cat Armor
No one should ride into battle without their cat, and thanks to this 3D model, you won’t have to! Designed specifically for your furry companion(s) to wear, this set of armor is made up of several articulated pieces that strap to the cat’s back.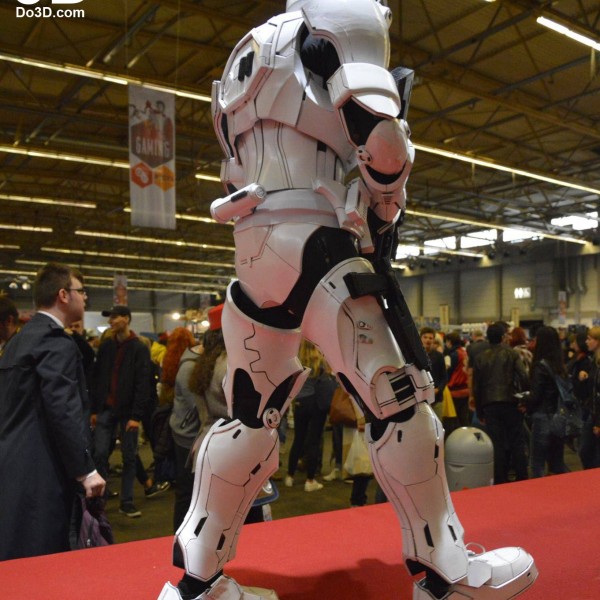 This makes it easier to size and fit the armor to different body types and sizes, so you won’t need to worry about measuring or scaling with this project.
- Found on: Cults3D
- Designed by: PrintThatThing
Preparing your armor for 3D printing
Before you can 3D print your armor pieces, there are a few things you’ll need to do first.
Splitting your models
If your armor pieces are too large for your print bed, you will need to split them into multiple pieces and glue them together once they are finished 3D printing. The easiest way to do this is to use the plane cut tool in your favorite 3D printing software. If you are unsure which software to use for this, Autodesk’s MeshMixer, Slic3r, or Netfabb all support the plane cut feature.
For step-by-step instructions for splitting models, we find this video to be of great help:
Generating your GCode
What settings you need to use for your 3D printed armor depends heavily on what 3D printer you have and how you plan to use your finished armor. A few things to consider are:
- Infill: How much infill you use can determine how heavy your finished armor will be (especially with larger models) and how much filament your 3D printer will use to print your armor. Less infill means a lighter finished model and less filament used but your armor will be more fragile. More infill means heavier armor and more durability.
For most uses, you can usually get away with a low percentage of infill (10-20%), but it all depends on what type of movements and stress each piece will be under when worn. If you want to optimize for strength, you can also look at using some of the strongest infill patterns. - Wall thickness: Remember that you will most likely have to sand away some of your outer material, so adding an extra outer layer or two can ensure you have extra material to sand away.
- Supports: You may need to use support material to 3D print your armor depending on the shape of the armor pieces.
 You can also use a raft or skirt on your 3D printer bed for better adhesion to the build plate. Those tools are especially useful if the object you are 3D printing is asymmetrical or has narrow first layers.
 - Layer height: Adjusting the layer height will change how quickly your 3D printer prints your armor pieces, but it will also affect your final print resolution. A smaller layer height means your 3D printer will make shorter (and therefore more) layers to make the model, which means greater detail and less visible layer lines. A taller layer height means the opposite, so you will lose detail but spend less time 3D printing. Tall layers are better for large, simple models that you plan to fill in with putty or primer in post-processing (more on that later).
- Temperature/flow/speed: Things like bed and extruder temperature, material flow, and nozzle speed all depend on your 3D printer. Go with the settings you know work well with your machine.

If you’re using models you downloaded from a model-sharing website, the designer sometimes lists what 3D printer, slicer, and settings they used. In those cases, it’s best to at least consider their recommendations when generating GCode in your slicer software.
Print your armor
Once your GCode is generated, you can move on to 3D printing your armor. This can be done on almost any 3D printer, but some are better suited to the task than others.
The Prusa i3 MK3S+ is our top choice in printers for creating armor and other cosplay items. It has a large bed, is highly accurate, has advanced mesh auto-leveling, and offers you a choice between purchasing a fully assembled machine or building it from a kit.
If you want to learn more about the Prusa i3 MK3S+ or see our picks for the best 3D printers for cosplay, we have an entire article that you can check out.
Recommended:
The 6 Best 3D Printers for Cosplay
Finish your armor
Your printed armor pieces are most likely going to need a lot of post-processing work.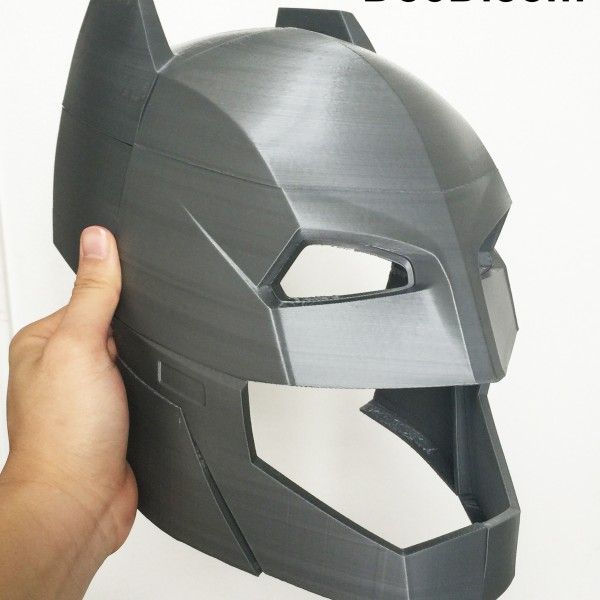 This is especially true if you are using them to cosplay and want them to look as realistic as possible.
Removing supports
If any of your armor pieces needed supports or rafts to print, you’ll need to remove them before you can do anything else. If this is a step you absolutely dread, it may be worth it to invest in a dual extruder 3D printer that supports PVA. It dissolves in water, so you can just run your model under the faucet to break off the supports.
Assembling the pieces
If you split any models to make them fit on a smaller build plate, you will need to assemble them into one piece by gluing them together with super glue, two-part epoxy, or other strong plastic glues. These are a variety of ways to glue 3D prints, and the adhesive you use will depend on the type of filament that you 3D printed in. For more information you can check out our dedicated article on the subject.
Recommended:
How to Glue 3D Prints: The Best Glue for PLA, PETG & ABS
Image: DaDave via Thingiverse
Armor pieces during assemblySanding
Let’s talk about everyone’s least favorite part of post-processing: sanding.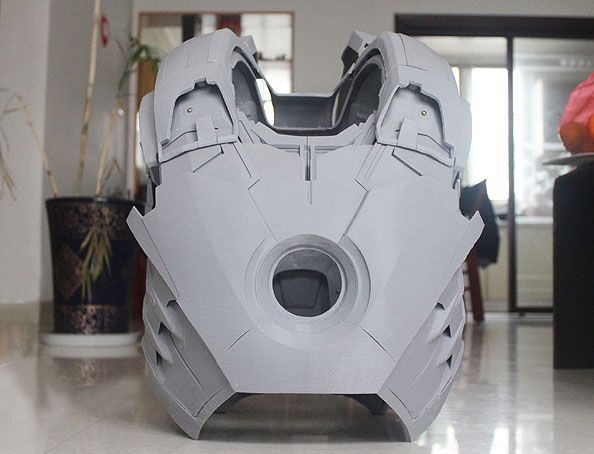 It takes a long time and a lot of elbow grease, but sanding is pretty much a requirement of you want a smooth finish on your armor.
The best way to sand a model is to start with a rough-grit paper like 200 to quickly remove the layer lines, and progressively work your way up to using a fine-grit paper like 2000.
You can cut out some of the initial sanding using something like bondo, wood putty, even resin to fill in the layer lines. Then you just have to sand the filler smooth instead of the actual 3D printed surface.
Recommended:
PLA Smoothing: How to Get Perfectly Smooth PLA 3D Prints
Priming
While some people skip this step, we think it’s a pretty important one. Priming your armor pieces before you paint ensures that you have a good foundation layer for your paint, so you can use less coats to cover your model. You can use a paint and primer combination to ignore this step, but the results vary.
Painting
Once your pieces are smoothed out and primed, you can finally move on to painting them.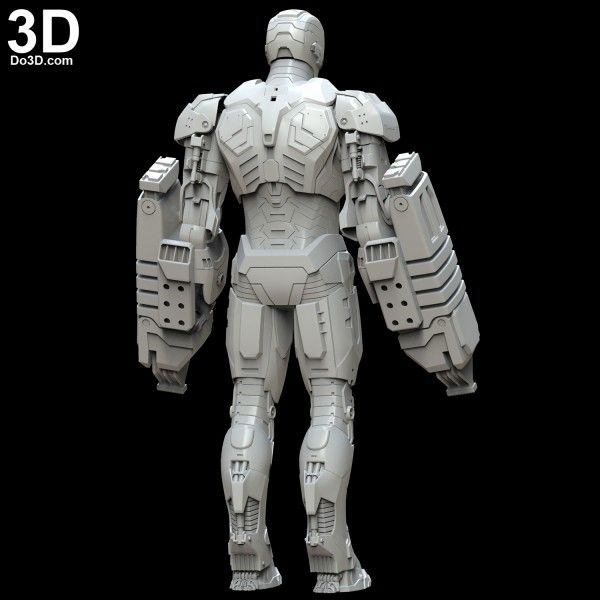 How involved this process is depends on the armor set you’re making and how detailed you want to be.
If your armor doesn’t have any fine details to recreate, you can usually get away with using a can of spray paint to quickly cover your pieces in an even coat. Filigree and other fine detailing has to be done by hand.
You can also use the painting process to make the armor look damaged, rusted, or otherwise less than perfect. This is good if you want to recreate a look from a certain point (like after a specific fight) in a movie, show, or other type of medium.
Conclusion
3D printing a set of armor takes a lot of time and effort, but it is one of the coolest 3D printing projects you can try. If you are thinking of giving it a shot, you might also want to 3D print a helmet to go with it.
Are you planning to design or print your own armor or costume? What questions do you still have about the process? Let us know in the comments.
The new material will allow printing heavy-duty products, for example, body armor plates
Application
them.
 HM. Berbekov, it was he who developed a new nanocomposite material for 3D printing based on ultra-high molecular weight polyethylene (UHMWPE). Also, the composition includes halloysite - a natural material that has a nanotubular structure, which gives additional strength characteristics to the finished product.
 By the way, a similar nanocomposite filament is also produced abroad, but according to the developers, the domestic thread will differ from it in increased heat resistance and strength, as well as lower shrinkage and moisture absorption. And, of course, it will also cost less, especially in the context of sanctions and widespread import substitution.
I would also like to mention that for the first time Azamat started developing nanocomposite materials back in 2011, when he was graduating from school, and more recently, at an exhibition of innovative projects, his invention was recognized as the best. This is my hint to skeptics who believe that today's supply of schools with 3D printers will not work .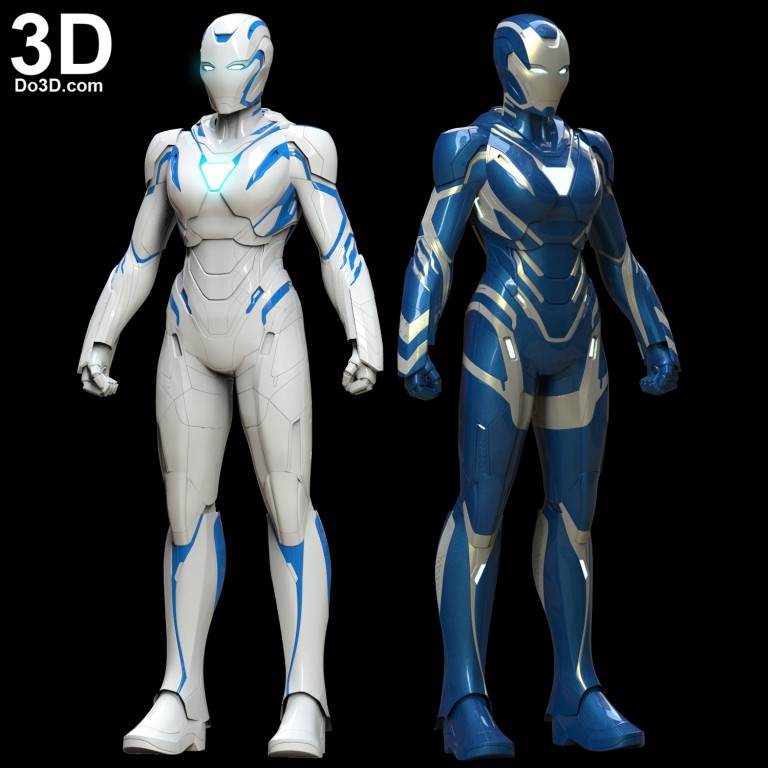 .. we will see the result in about 3-4 years8).
“What about body armor?” someone will ask. The fact is that today bulletproof vests of various protection classes are produced from UHMWPE. Its characteristics are comparable to Kevlar, and in some characteristics even surpass it. For example, Kevlar loses strength by almost 2 times when wet, and when dried, it is not completely restored. In addition, the nanocomposite material can be used in space, military, engineering and many other fields of activity.
At the moment, the material is being tested for strength, fire resistance, flexibility, etc. Within a month, the university plans to purchase a good 3D printer in order to start testing its development (and this is already a hint to printer manufacturers.;)
Follow author
Follow
Don't want
6
More interesting articles
36
Subscribe to the author
Subscribe
Don't want
My life takes place in a 5-storey Khrushchev building with water heating through a gas column.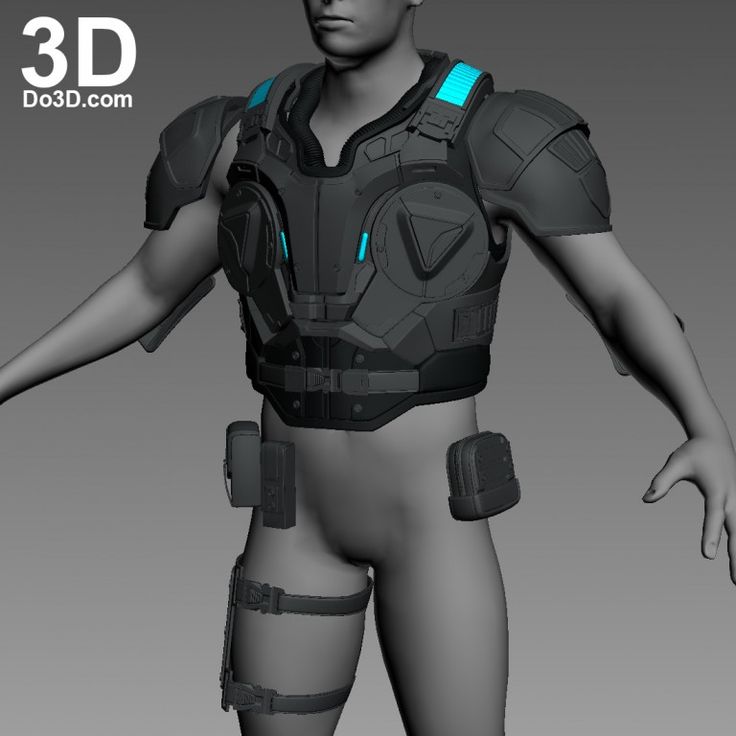 And service...
Read more
spc
Loading
24.10.2022
470
four
Subscribe to the author
Subscribe
Don't want
In general, parts of the Baby-Vac aspirator bought a long time ago began to crumble. I think...
Read more
253
Subscribe to the author
Subscribe
Don't want
Hello dear community!
In this topic, I would like to deviate a bit from the 'home...
Read more
3D printing of body armor or what can a fish and a paratrooper have in common?
News
Subscribe to the author
Subscribe
Don't want
One of the interesting words that are increasingly found in the description of new developments has become "biomimicry", that is, the imitation of nature when creating all kinds of technological innovations.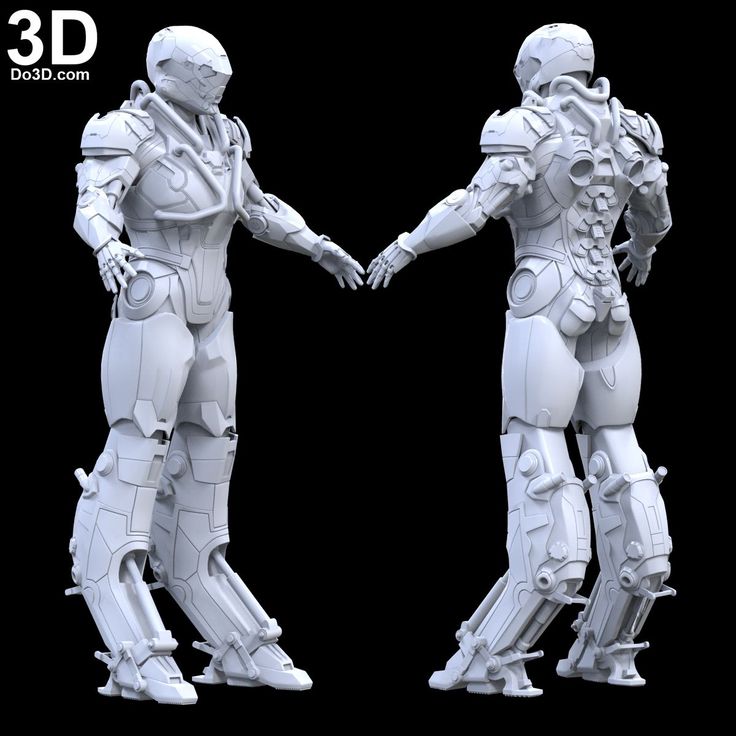 Logic is elementary and strong, like armor: if nature has been improving itself for billions of years by the method of “poke”, called “evolution” in scientific circles, then why reinvent the wheel when you can steal ready-made ideas? By the way, it is about armor that will be discussed in our story.
Among the many researchers who turned their eyes to nature for inspiration was a collaborative team of scientists from the Israel Institute of Technology in Haifa and the Massachusetts Institute of Technology, under the overall direction of Stefan Rudik. Working together, the two teams came up with the idea of body armor that provides unprecedented freedom of movement, but can still stop bullets and shrapnel. The inspiration for the new concept was… fish scales. For the production of such protective suits, it is planned to use additive technologies.
“Many species of fish combine flexibility with good protection due to the presence of scales,” says Rudik.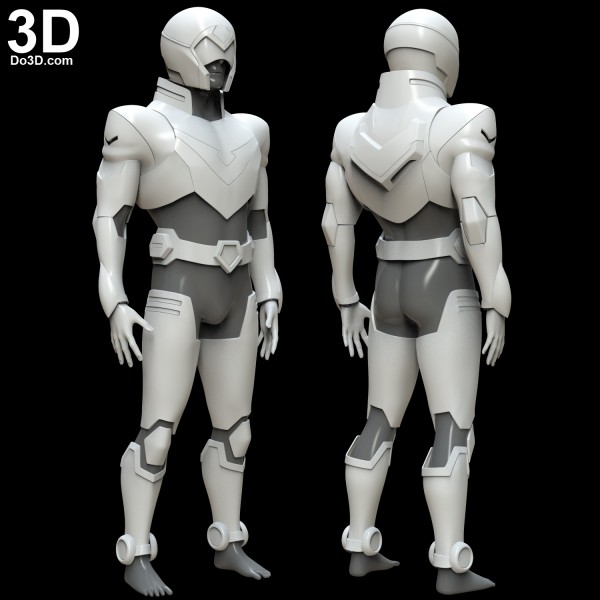 “Looking at the example provided by nature itself, we tried to recreate a flexible protective structure by combining two layers of materials. The flexible inner layer serves as the base for the outer layer of tough, armor-like scales."
Something similar has previously been done by researchers at Northeastern University in Massachusetts, who printed ABS flakes on an Objet Eden 333 3D printer and then attached the resulting samples to a silicone liner. The result of the experiments was a flexible composite "matter" that can protect against impacts. The work of Rudik and his team in a similar direction received funding from the US military, interested in developing the concept into real samples suitable for field testing.
One of the advantages of such body armor will be a high degree of customization. Armor can be easily adjusted not only to the figure of a fighter, but also changed in accordance with operational requirements: a sniper does not have to be immured from head to toe, but in close combat, additional protection on the arms and legs will not hurt.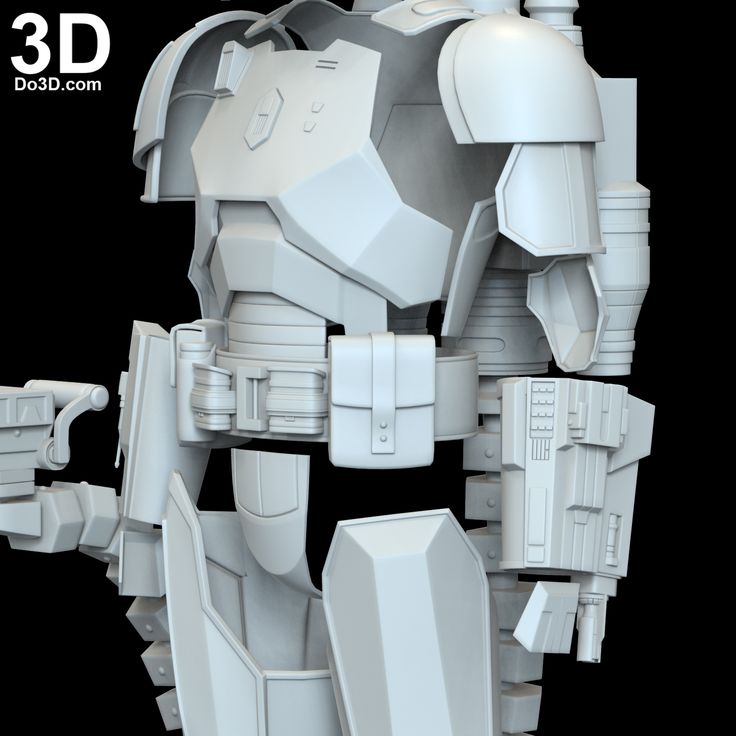 Thus, "fish armor" will provide individual and operational flexibility.
In general, scaly armor has been used in various armies for many centuries. Such armor was also popular among wealthier Russians, being preferred to ordinary chain mail because of better protection, but not restricting movement, like armor. That's just the weight of such armor was very significant, quickly wearing out the fighters. The developers hope that modern materials science will significantly reduce weight, but at the same time increase the level of protection.
Although the work is still in the early stages of testing, military interest in the project suggests that prototypes will soon appear in conflict zones, which will confirm the golden words of the dressmaker at the court of Marie Antoinette: "Everything new is well forgotten old."
Post supported by the airsoft4you community: https://vk.com/airsoft4you
Subscribe to the author
Subscribe
Don't want
More interesting articles
9
Subscribe to the author
Subscribe
Don't want
Monochrome liquid crystal matrices with increased sharpness, light transmission, durability.