Visual guide to 3d printing problems
Blobs and Zits
Blobs and Zits
During your 3D print, the extruder must constantly stop and start extruding as it moves to different portions of the build platform. Most extruders are very good at producing a uniform extrusion while they are running, however, each time the extruder is turned off and on again, it can create extra variation. For example, if you look at the outer shell of your 3D print, you may notice a small mark on the surface that represents the location where the extruder started printing that section of plastic. The extruder had to start printing the outer shell of your 3D model at that specific location, and then it eventually returned to that location when the entire shell had been printed. These marks are commonly referred to as blobs or zits. As you can imagine, it is difficult to join two pieces of plastic together without leaving any mark whatsoever, but there are several tools in Simplify3D that can be used to minimize the appearance of these surface blemishes.
Common Solutions
Retraction and coasting settings
If you start to notice small defects on the surface of your print, the best way to diagnose what is causing them is to watch closely as each perimeter of your part is printed. Does the defect appear the moment the extruder starts printing the perimeter? Or does it only appear later when the perimeter is completed and the extruder is coming to a stop? If the defect appears right away at the beginning of the loop, then it’s possible your retraction settings need to be adjusted slightly. Click on “Edit Process Settings” and go to the Extruders tab. Right below the retraction distance, there is a setting labeled “Extra Restart Distance.” This option determines the difference between the retraction distance when the extruder is stopping and the priming distance that is used when the extruder is restarting. If you notice a surface defect right at the beginning of the perimeter, then your extruder is likely priming too much plastic.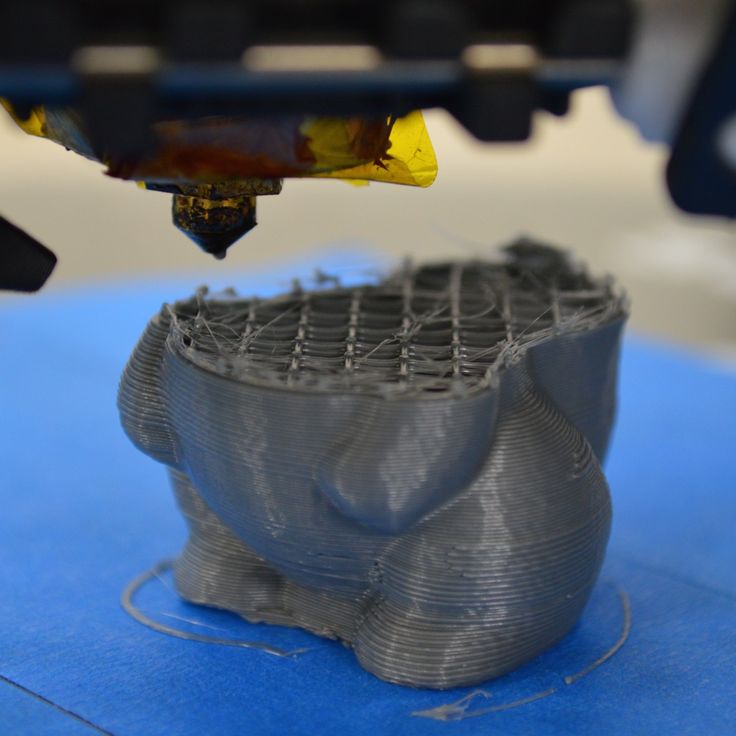 You can reduce the priming distance by entering a negative value for the extra restart distance. For example, if your retraction distance is 1.0mm, and the extra restart distance is -0.2mm (note the negative sign), then each time your extruder stops, it will retract 1.0mm of plastic. However, each time the extruder has to start extruding again, it will only push 0.8mm of plastic back into the nozzle. Adjust this setting until the defect no longer appears when the extruder initially begins printing the perimeter.
If the defect does not occur until the end of the perimeter when the extruder is coming to a stop, then there is a different setting to adjust. This setting is called coasting. You can find it right below the retraction settings on the Extruder tab. Coasting will turn off your extruder a short distance before the end of the perimeter to relieve the pressure that is built up within the nozzle. Enable this option and increase the value until you no longer notice a defect appearing at the end of each perimeter when the extruder is coming to a stop. Typically, a coasting distance between 0.2-0.5mm is enough to have a noticeable impact.
Avoid unnecessary retractions
The retraction and coasting settings mentioned above can help avoid defects each time the nozzle retracts, however, in some cases, it is better to simply avoid the retractions all together. This way the extruder never has to reverse direction and can continue a nice uniform extrusion. This is particularly important for machines that use a Bowden extruder, as the long distance between the extruder motor and the nozzle makes retractions more troublesome. To adjust the settings that control when a retraction takes place, go to the Advanced tab and look for the “Ooze Control Behavior” section. This section contains many useful settings that can modify the behavior of your 3D printer. As was mentioned in the Stringing or Oozing section, retractions are primarily used to prevent the nozzle from oozing as it moves between different parts of your print. However, if the nozzle is not going to cross an open space, the oozing that occurs will be on the inside of the model and won’t be visible from the outside. For this reason, many printers will have the “Only retract when crossing open spaces” option enabled to avoid unnecessary retractions.
Another related setting can be found in the “Movement Behavior” section. If your printer is only going to retract when crossing open spaces, then it would be beneficial to avoid these open spaces as much as possible. Simplify3D includes an extremely useful feature that can divert the travel path of the extruder to avoid crossing an outline perimeter. If the extruder can avoid crossing the outline by changing the travel path, then a retraction won’t be needed. To use this feature, simply enable the “Avoid crossing outline for travel movement” option.
Non-stationary retractions
Another extremely useful feature in Simplify3D is the ability to perform non-stationary retractions. This is particularly useful for bowden extruders that build up a lot of pressure inside the nozzle while printing. Typically when these types of machines stop extruding, the excess pressure is still likely to create a blob if the extruder is standing still.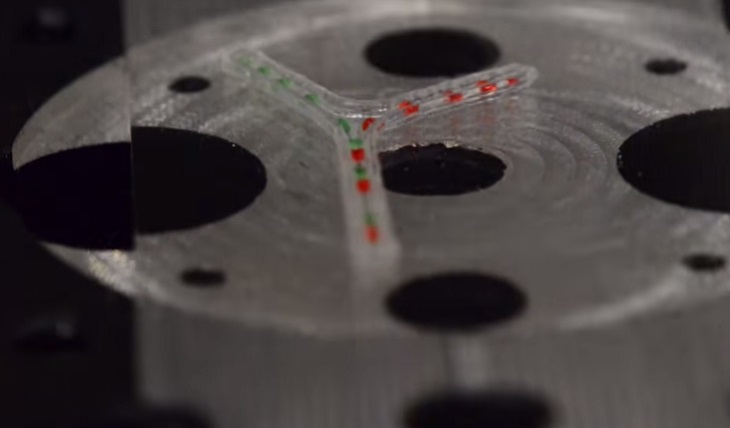 So Simplify3D has added a unique option that allows you to keep the nozzle moving while it performs its retraction. This means you are less likely to see a stationary blob since the extruder is constant moving during this process. To enable this option, we have to adjust a few settings. First, click “Edit Process Settings” and go to the Extruder tab. Make sure that the “Wipe Nozzle” option is enabled. This will tell the printer to wipe the nozzle at the end of each section when it stops printing. For the “Wipe Distance”, enter a value of 5mm as a good starting point. Next, go to the Advanced tab and enable the option labeled “Perform retraction during wipe movement”. This will prevent a stationary retraction, since the printer has now been instructed to wipe the nozzle while it retracts. This is a very powerful feature and a great option to try if you are still having trouble removing these defects from the surface of your print.
Choose the location of your start points
If you are still seeing some small defects on the surface of your print, Simplify3D also provides an option that can control the location of these points.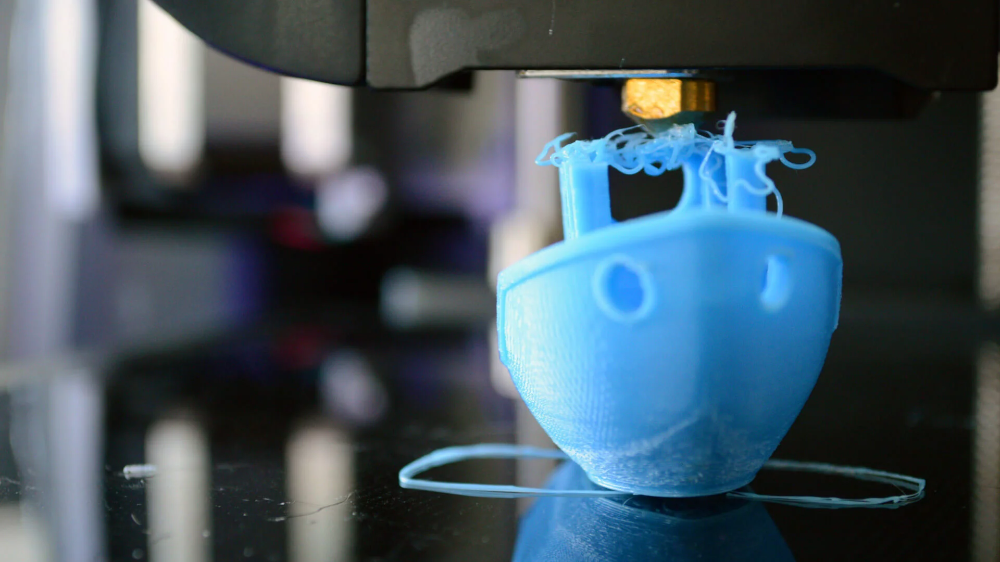 Click on “Edit Process Settings” and select the Layer tab. In most cases, the locations of these start points are chosen to optimize the printing speed. However, you also have the ability to randomize the placement of the start points or align them to a specific location. For example, if you were printing a statue, you could align all of the start points to be on the backside of the model so that they were not visible from the front. To do this, enable the “Choose start point that is closest to specific location” option and then enter the XY coordinate where you want the start points to be placed.
Related Topics
Stringing or Oozing
Stringing or Oozing
Stringing (otherwise known as oozing, whiskers, or “hairy” prints) occurs when small strings of plastic are left behind on a 3D printed model. This is typically due to plastic oozing out of the nozzle while the extruder is moving to a new location. Thankfully, there are several settings within Simplify3D that can help with this issue. The most common setting that is used to combat excessive stringing is something that is known as retraction. If retraction is enabled, when the extruder is done printing one section of your model, the filament will be pulled backwards into the nozzle to act as a countermeasure against oozing. When it is time to begin printing again, the filament will be pushed back into the nozzle so that plastic once again begins extruding from the tip. To ensure retraction is enabled, click “Edit Process Settings” and click on the Extruder tab. Ensure that the retraction option is enabled for each of your extruders. In the sections below, we will discuss the important retraction settings as well as several other settings that can be used to combat stringing, such as the extruder temperature settings.
Common Solutions
Retraction distance
The most important retraction setting is the retraction distance. This determines how much plastic is pulled out of the nozzle. In general, the more plastic that is retracted from the nozzle, the less likely the nozzle is to ooze while moving.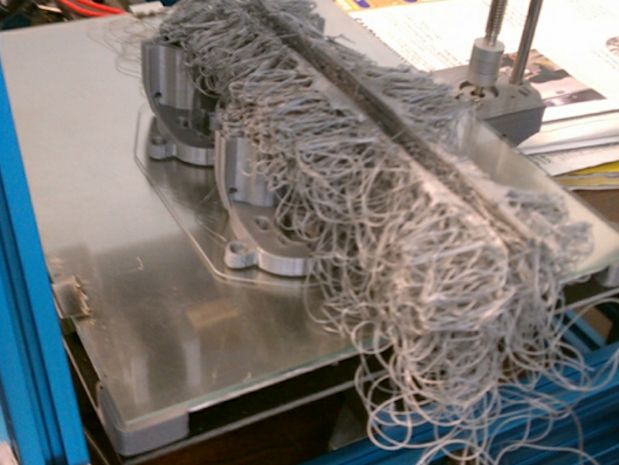 Most direct-drive extruders only require a retraction distance of 0.5-2.0mm, while some Bowden extruders may require a retraction distance as high as 15mm due to the longer distance between the extruder drive gear and the heated nozzle. If you encounter stringing with your prints, try increasing the retraction distance by 1mm and test again to see if the performance improves.
Retraction speed
The next retraction setting that you should check is the retraction speed. This determines how fast the filament is retracted from the nozzle. If you retract too slowly, the plastic will slowly ooze down through the nozzle and may start leaking before the extruder is done moving to its new destination. If you retract too quickly, the filament may separate from the hot plastic inside the nozzle, or the quick movement of the drive gear may even grind away pieces of your filament. There is usually a sweet spot somewhere between 1200-6000 mm/min (20-100 mm/s) where retraction performs best. Thankfully, Simplify3D has already provided many pre-configured profiles that can give you a starting point for what retraction speed works best, but the ideal value can vary depending on the material that you are using, so you may want to experiment to see if different speeds decrease the amount of stringing that you see.
Temperature is too high
Once you have checked your retraction settings, the next most common cause for excessive stringing is the extruder temperature. If the temperature is too high, the plastic inside the nozzle will become less viscous and will leak out of the nozzle much more easily. However, if the temperature is too low, the plastic will still be somewhat solid and will have difficulty extruding from the nozzle. If you feel you have the correct retraction settings, but you are still encountering these issues, try decreasing your extruder temperature by 5-10 degrees. This can have a significant impact on the final print quality. You can adjust these settings by clicking “Edit Process Settings” and selecting the Temperature tab. Select your extruder from the list on the left, and then double-click on the temperature setpoint you wish to edit.
Long movements over open spaces
As we discussed above, stringing occurs when the extruder is moving between two different locations, and during that move, plastic starts to ooze out of the nozzle. The length of this movement can have a large impact on how much oozing takes place. Short moves may be quick enough that the plastic does not have time to ooze out of the nozzle. However, long movements are much more likely to create strings. Thankfully, Simplify3D includes an extremely useful feature that can help minimize the length of these movements. The software is smart enough that it can automatically adjust the travel path to make sure that nozzle has a very short distance to travel over an open space. In fact, in many cases, the software may be able to find a travel path that avoids crossing an open space all together! This means that there is no possibility to create a string, because the nozzle will always be on top of the solid plastic and will never travel outside the part. To use this feature, click on the Advanced tab and enable the “Avoid crossing outline for travel movement” option.
Movement Speed
Finally, you may also find that increasing the movement speed of your machine can also reduce the amount of time that the extruder can ooze when moving between parts. You can verify what movement speeds your machine is using by clicking on the Speeds tab of your process settings. The X/Y Axis Movement Speed represents the side-to-side travel speed, and is frequently directly related to the amount of time your extruder spends moving over open air. If your machine can handle moving at higher speeds, you may find that increasing this settings can also reduce stringing between parts.
Related Topics
A visual guide to fixing the 'troubles' that happened anyway when 3D printing on the Ultimaker 2 printer. Part 3.
After a short break, we continue to acquaint you with the possible troubles with 3D printing. In the process of writing this article, we made sure that these technical problems can occur not only for owners of Ultimaker 2 or Ultimaker Original, but also for owners of other 3D printers.
Here you can visually compare problems, find out how they are correctly or commonly called, and of course, get useful information on how to fix them.
Scrolling (grinding) the thread.
:!: Rolling (grinding) occurs when the motor tries to push the filament through the nozzle, but for some reason it starts to slip and spins the plastic down.
The motor will turn the thread until it can move neither in nor out.
This problem is more specific to the Ultimaker Original, but it can also happen to the Ultimaker 2. start pulling it down. When this happens, you will hear a *Current* sound and the feed wheel will rotate in the opposite direction about a quarter of a turn. The reason that prevents the feed mechanism from pushing the thread forward can be different, in order to check it, you need to do a few things.
:?:Tangled thread
This may seem obvious, but make sure your thread can unwind unobstructed. For example, make sure the thread is not tangled on the spool. It's not uncommon for filament to wrap underneath itself when you take it out of the printer for storage.
:?:Feeder pressure
The amount of pressure the feeder puts on the thread can be adjusted using a small hidden screw located on the top of the feeder. To the right of where the tube is located, which goes into the feed boxes, there is a small hole into which you can insert a hex key to adjust the pressure. The current setting can be seen on a small white indicator (indicator) below and to the side of this hole. When the white indicator (indicator) is in the highest position, the pressure is low, and vice versa.
:idea:In the middle of March 2014, the spiral inside the feed mechanism was changed and therefore the setting is different depending on when you bought the printer. For printers released before mid-March 2014, the score should be at the top, and for printers released after March 2014, the score should be in the middle.
Air holes
:!: Air holes appear as bumps on the top surface of the product and can be open or closed. The most important thing here is to make sure your fans are running at maximum speed when the printer is printing the top layer. Without proper cooling, thin plastic filaments tend to curl up and stick out of the surface, making it difficult to apply subsequent layers. With good cooling, the thread gradually grows over the intervals until it completely covers the surface.
:idea:Besides good cooling, it is also necessary to print a sufficiently thick top surface so that the printer can close it properly.
You must ensure that at least the top six layers are printed.
:idea:The smaller the layer height, the more top layers to print. If the layers are very thin, then there is a chance that the plastic filaments will break before you have completely printed the product. In other words, very thin layers can be another cause of air holes.
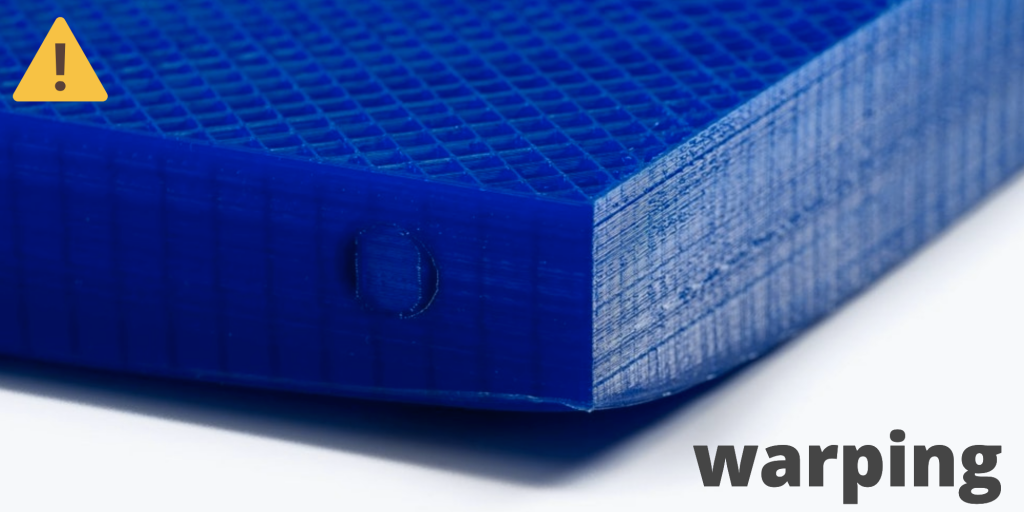
The bottom of the product is shrinking
:!:In this case, the additional temperature of the print bed is the culprit. When plastic is extruded, it behaves like rubber. Usually this effect holds back the previous layers. When a new layer of plastic is applied, it fuses with the previous one and is held in place until it cools completely below the glass transition temperature (where the plastic becomes solid). With a very hot print bed, the plastic stays above that temperature and remains pliable. When new layers of plastic are applied to the surface of this semi-solid mass of plastic, bending forces cause the product to bend. This continues until the print reaches a height where the heat from the print bed no longer holds the product above this temperature, and each layer becomes solid before overlaying the next layer and thus being held in place.
:idea:For PLA, a table temperature of 50-60°C is recommended. This temperature is sufficient to maintain the adhesion of the table at a low temperature. The default layer temperature is set to 75°C, which is definitely too high for PLA. However, there is an exception to this rule. If you are printing objects with a very large footprint taking up most of the table, you must use a higher table temperature to make sure the corners (edges) do not rise.
:idea:In addition to lowering the temperature of the table, it is recommended to set the fans to turn on earlier so that the layers cool down faster. This can be done in Cura.
Expert settings: Expert -> Open Expert Settings... In the window that opens, you will find a section dedicated to cooling. Try setting "Fan full on at height" to 1mm, and that way the fans will start blowing early and full force.
If you are printing a small object, the above steps may not be sufficient. The layers simply do not have enough time to properly cool before the next layer is applied.
:idea:The solution to this problem is to print two copies of the object at once, so that the printhead moves between the two copies in turn, and thus gives more time to cool down.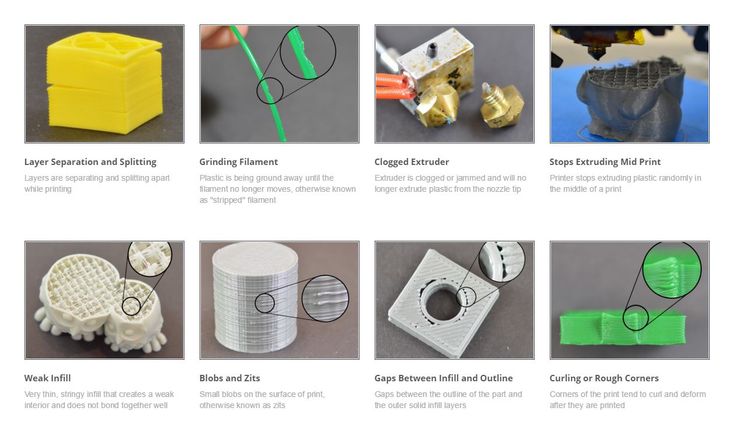
Friends! We hope that in this article you have learned a lot of useful things for yourself, and you can easily cope with the problems of your printer. Also, our team will be happy to answer your questions in the comments to the article.
To be continued
A visual guide to fixing the 'troubles' that happened anyway when 3D printing on the Ultimaker 2. Part 2.
I`ll be back!
And just as we promised, we continue to reveal to you the most 'popular' problems and how to deal with them.
:!: We remind you that the information in this manual is mainly focused on the Ultimaker 2 model, but, some will also work for Ultimaker Original or Ultimaker Original +
:!: Here you can visually compare problems, learn how they are correctly or commonly called, and of course, get useful information on how to eliminate them.
Irregular circles and lines not sticking to each other
Trying to print round objects but they come out uneven. At the same time, the fill lines do not touch the outer perimeter properly.
The problem is due to the gap caused by the looseness of the belts. Mostly these are so-called 'short belts', they are connected to stepper motors and are not tightened enough. Fortunately, this is easy to fix.
To make sure the belts have been tightened correctly, you need to loosen the four screws that secure the stepper motor to the outside of the printer. Don't remove the screws completely, just loosen them so you can move the stepper motors up or down.
Now push on the top of the motor until the belt is tight and tight. While maintaining pressure on the motor, tighten the screws again to secure the motor. Do this for both engines.
:!:Also make sure the rods are well lubricated. One drop of sewing oil on each rod is enough. Make sure the pulley set screws on the motor are well tightened.
Stringing
The main cause of unwanted thread (string) during printing is retraction.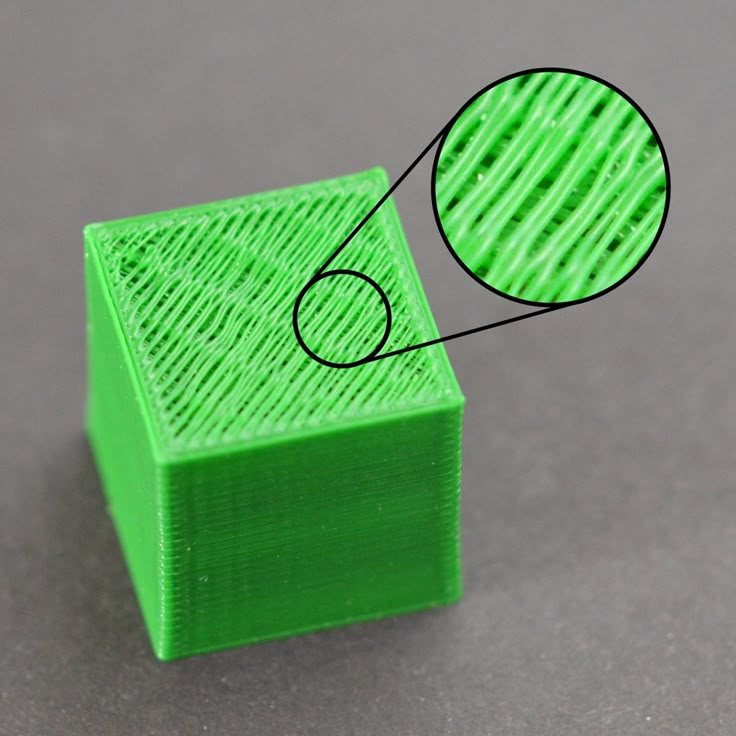
:idea:So the first thing to do is to make sure that retraction is enabled in the CURA software.
This parameter is located in the "Basic" tab as a checkbox. When you are in full settings mode (expert -> Go to normal settings...). Make sure the checkbox is checked.
:!:You can check whether retraction will occur or not by selecting the 'View Layers' option in CURA.
This option is located in the upper right corner of the window. If you look, you will see that the retractions are indicated by small blue lines that go out of the seal and up. Sometimes it's hard to see these lines without zooming in and turning around.
As illustrated in the image, it is very difficult to identify these small lines of retraction without magnifying the view. Another blue line indicates the travel path for which the retraction is being prepared. To reduce the appearance of a string, you can increase the speed at which the print head moves.
:!:The default travel speed is 150mm/sec, but you can increase this to 250mm/sec.
:idea:By increasing the travel speed, you give the print head less time to extrude the plastic, and it also allows you to break the strings that form.
Temperature can also play an important role.
Lower temperature experiment.
This image clearly shows that lowering the temperature has a positive effect on the number of strings. As always, when lowering the temperature, you need to make sure that you are printing slowly enough to prevent extrusion. Please note that the temperature shown in this photo is for PLA only.
For other types of media, you may not be able to work at this minimum.
Or vice versa, you will need to lower the temperature further.
Ringing
Ringing is what we call small waves or shadows, usually around the sharp corners of the print. Very often this is seen when there is text on your print, you may see what looks like a shadow of the text. This happens when the print head makes a sudden change of direction and the inertia of the head causes vibrations that appear in the print.
:!:We only need a few tweaks to deal with this.
:idea:Slower print speed will help reduce this effect.
Decreasing printer acceleration maximizes the effect of wave reduction without affecting print speed too much. You can enable this setting by going to advanced settings on the printer itself: Maintenance -> Advanced -> Motion Options. Try 3000 or 1500 and see how it affects your printing.
update
There may also be another defect, similar to banding, which appears when printing thin-walled elements, but different.
This may be similar to banding. To get rid of this defect, you need to print thicker outer walls to hide the infill. Try to print two outer shells using a standard nozzle that gives a wall thickness of 0.