3D printer build log
3D Printer Build Log - Frame – Clever Creations
Time has come to build a new 3D printer. While the previous 3D printer I designed and built 5-6 years ago is still in use, I run too often into its limitations. This is starting to impact my workflow and honestly also affects my enjoyment of 3D printing.
To solve this, I decided to design and build a new 3D printer and start from scratch. A big challenge, but also a lot of fun. Since building the last printer I have learned a lot, and I look forward to applying some of that new knowledge to the design of the new printer.
In this article I will give some more details on my motivations and goals, and share the progress I have made on this project so far.
What was wrong with the old 3D printer?
The biggest issues I have with the old printer are as follows:
- The build platform is too small. 20×20 cm is not enough space anymore. For some upcoming projects I need to print parts that exceed the 20×20 cm build plate.
- Not a lot of space for upgrades. If I would add an extra extruder for dual extrusion, or even extra cooling fans on the extruder carriage, the extruder carriage would become too big. At the moment it is small enough to make use of the full build plate, but increasing its size would reduce its maximum travel distance to under 20×20 cm.
- Loud. The printer uses quite a few small high RPM fans to cool the filament, PSU, the Smoothieboard MOSFETs, etc. Add to that the noise of the stepper motors and sometimes it can feel like there is a jet taking off in the room.
- Dusty. Dust gets everywhere in the 3D printer, especially in the summertime. The printer stands opposite from the A/C, so in the warmer months a lot of dust from the air in the room gets blown onto it. The construction of the printer also does not lend itself to being cleaned very easily, nor is there enough space for a 3D printer enclosure around it.

Aside from these issues, there are also a bunch of smaller ones. For example, misalignment problems that have crept in and components that are starting to wear out.
Design-wise there is a lot that can be improved about the printer. I used a learning-by-doing approach in designing and building, and unfortunately that means making some mistakes along the way.
It was a good learning experience, but now it is time to move on and do things the right way.
Why not upgrade the old printer?
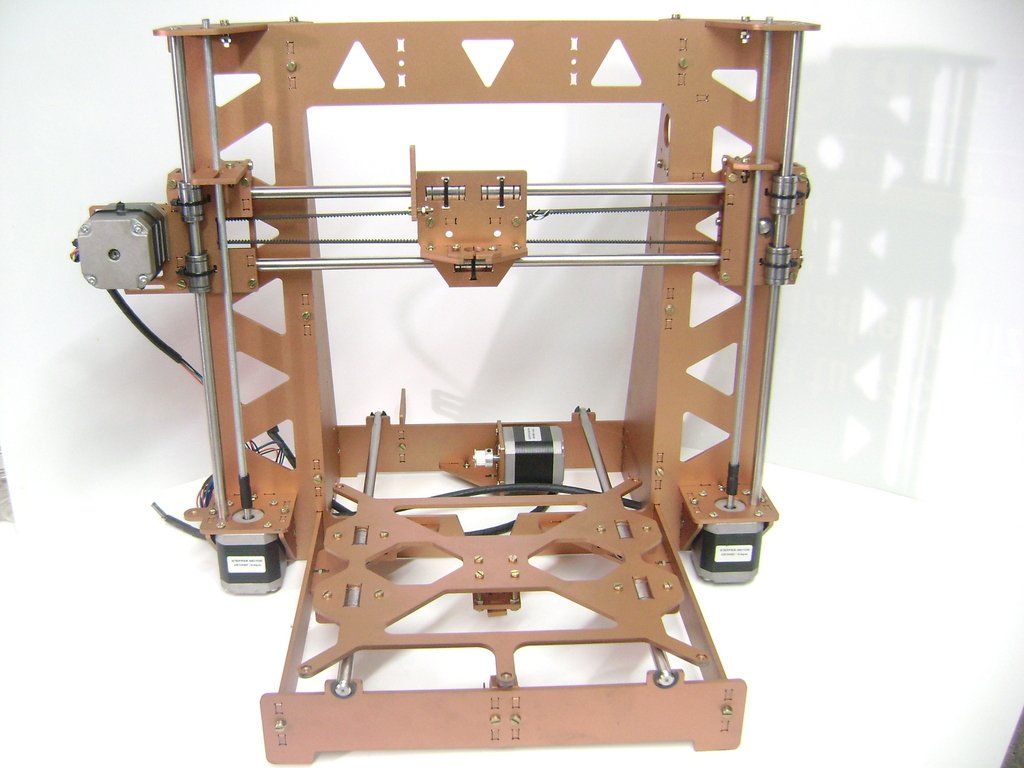
Upgrading the old printer crossed my mind, but it quickly became clear that this is not feasible. The main reason for this is the (lack of) rigidity of the 10x10mm Makerbeams.
While Makerbeams are great for small stuff and for large builds that are static, they are not sturdy enough for large builds with moving parts. As I upgraded the printer and increased the build volume over time, the flexibility of the Makerbeams became quite clear. I have had to reinforce the frame with a decent bit of cross-bracing and extra beams to make sure it did not flex too much during printing.
Enlarging the frame to fit a 300*300mm build plate would require an even larger amount of extra reinforcement to keep it rigid enough. Because of the impracticality of that, and because of the price of the Makerbeams and their accessories (quite high compared to 2020 or 3030 extrusion), I did not consider that to be a valid option.
What are the goals for the new 3D printer?
Given that I am starting from scratch, I am able to construct what is for me right now the ideal 3D printer. This is the list of specifications I came up with:
- 300*300*~400mm print volume. This is big enough for any of my upcoming projects.
- 3030 extrusion for the frame. This should be sufficiently rigid for a 3D printer this size.
- 2020 extrusion for the moving parts. The X and Z gantries are kept as light as possible by using 2020 instead of 3030 extrusion.
- 240V heated bed. Powering the bed using mains power (as opposed to 12/24V) means the wiring does not have to carry as many amps, which is a lot safer.
 Using 240V also allows me to get a smaller DC power supply for the electronics.
 - Linear rails for all axes. Linear rails are in many ways superior than linear rods, there is no need to go with smooth rods anymore.
- Triple leadscrew + double linear rail setup for the Z axis. This seems to be the most stable way to move the Z gantry up and down without over-constraining it.
- CoreXY 3D printer mechanics. This will be the same as the previous printer. Having the X/Y stepper motor mass mounted on the frame allows for faster acceleration of the XY carriage and less ringing.
- Fully enclosed with acrylic/Plexiglas panels. This will keep out any dust, and keep in some of the sound. It also allows for heating the print chamber and filtering any 3D printer fumes.
Recommended:
The 9 Best Enclosed 3D Printers
- 32-bit control board. The printer needs to be able to print with high speed, high acceleration, high resolution and as little noise as possible.
 An 8-bit controller is too slow for that, so a 32-bit 3D printer motherboard it is.
 - WiFi connectivity instead of Ethernet. No more Ethernet cables across my workspace. In combination with the 32-bit specification above, the logical choice for a control board is the Duet 2 Wifi. This board also uses the TMC2660 stepper drivers which can run the steppers silently using 1/256-step microstepping.
- Touch screen interface. I will mostly be controlling the 3D printer over WiFi, but it might be useful to be able to control it standalone sometimes. Plus I think a touch screen adds to the coolness factor.
The progress so far
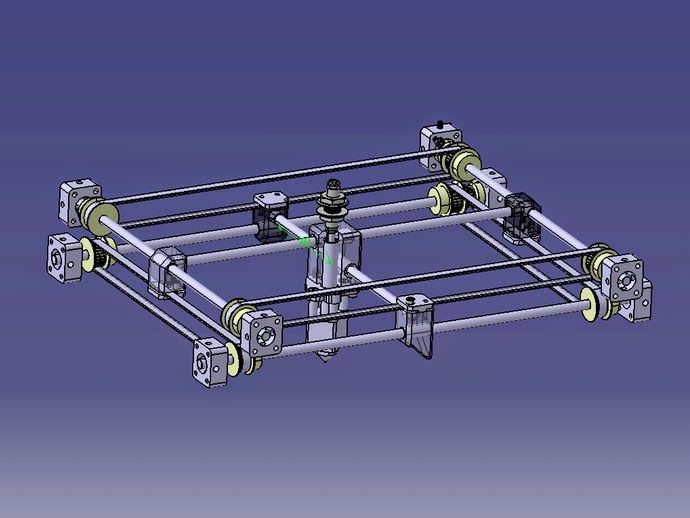
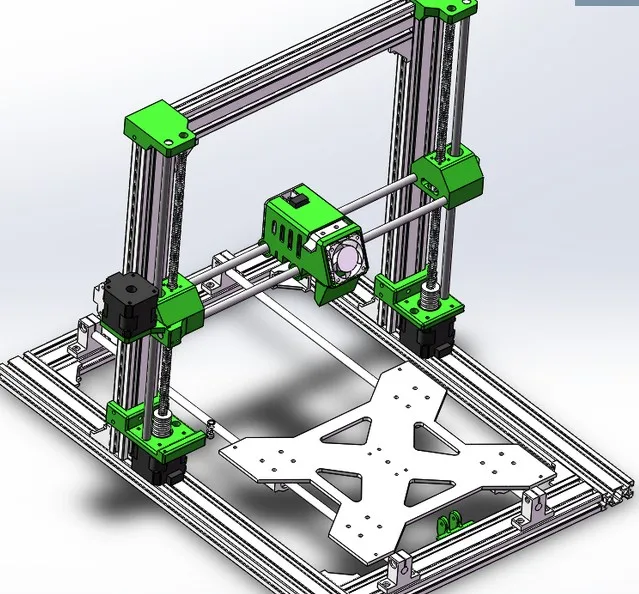
Over the last couple months I designed the major parts of the 3D printer in SOLIDWORKS. The design is not complete yet, but it is far along enough to start building.
The majority of the components I need to build the printer have been ordered and have arrived.
I started the build itself as well. In my excitement to get started I neglected to take a lot of pictures, but I will make sure to document everything properly the rest of the build.
The frame
I started building the 3D printer by constructing the frame. To do this I had to bolt together the 3030 extrusion that makes up the frame.
Because I used blind joints for the construction, this meant a lot of drilling and tapping of the ends of the extrusion. If you ever need to do the same and have the option to get the ends of your aluminum extrusion threaded at the store, it is worth the extra cost.
The frame as it was being built.Squaring the frame took some time, but it was perfectly doable with the help of a digital protractor. I recommend always using one when squaring up a 3D printer frame. Starting off with a misaligned frame is a recipe for disaster later on in the build.
GemRed 82305 Digital Angle Finder Protractor (Stainless steel,...
Check PriceOnly after building the frame I realized how large this 3D printer is actually going to be. It stands 1 meter tall, with the width and depth both being 56cm. I was aware of the dimensions before building, but it’s hard getting an idea of the true size from the CAD software.
The main reason for the large outer dimensions is because the printer will be fully enclosed, and everything needs to fit on the inside of the frame.
The electronics and touch screen will be mounted below the print area.
Above the print area there needs to be enough space for the stepper motors, and for the input filament to freely bend as the extruder carriage travels around.
For reference, the print volume will be 31.4*31.4*45cm.
Z-stage
Aside from assembling the frame of the 3D printer, I also started building the Z-stage.
I 3D printed the first prototype parts and mounted the leadscrews, Z-axis stepper motor and GT2 timing belts.
The triple lead screw system in the 3D printer.The three leadscrews are driven by a single stepper motor. The advantage of this is that there is no risk of the leadscrews going out of sync.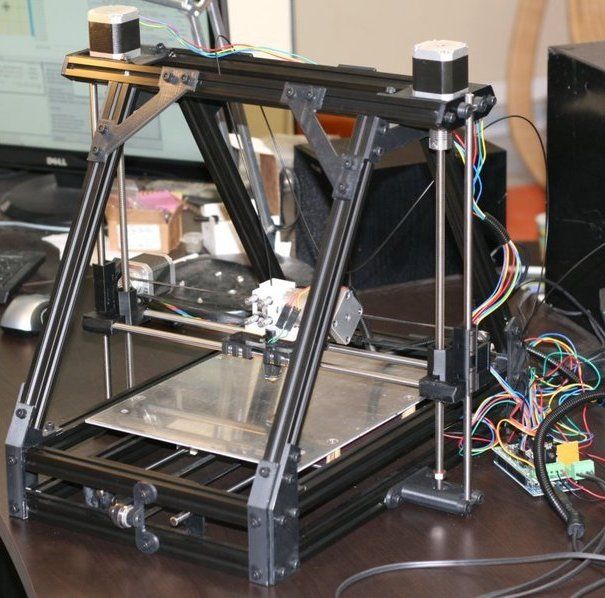 This is something that can happen when each leadscrew is driven by its own stepper.
I added several arms with pulleys that route the timing belts for syncing the lead screws along the outer edge of the 3D printer.
This looks a lot cleaner than a single long belt that travels through the center of the printer, and also allows for easy access to the electronics that will be mounted below.
I haven’t seen anyone else route the belts like this, and I am not a 100% percent sure it will work, even though I don’t see any reason why it wouldn’t. Time will tell.
The NEMA17 stepper drives the leadscrews with a 2:1 gear reduction (using a 20T pulley on the motor shaft and a 40T pulley on the rear leadscrew). This should provide enough torque to move the Z gantry without problems.
Without the gear reduction the NEMA17 stepper might not be strong enough, as the aluminium heated bed + glass surface + aluminium Z gantry frame will weigh quite a bit. I can always switch to a NEMA23 if necessary though.
What is next?
The next step is to install the Z gantry in the 3D printer, and properly align all linear rails and lead screws. I expect this to be a tedious process that takes up a lot of time. Not coincidentally, it is also the part in the build that I am looking the least forward to.
Continue reading:
3D Printer Build Log – Z-Axis Assembly
Voron 0.1 3D Printer Build #1: The frame
By socketwench on Sun, 07/31/2022 - 14:31 in
3D Printing
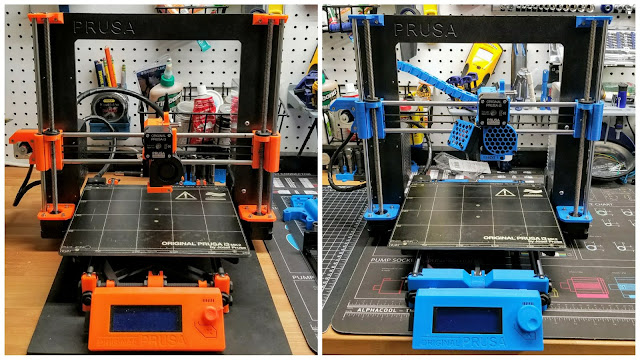
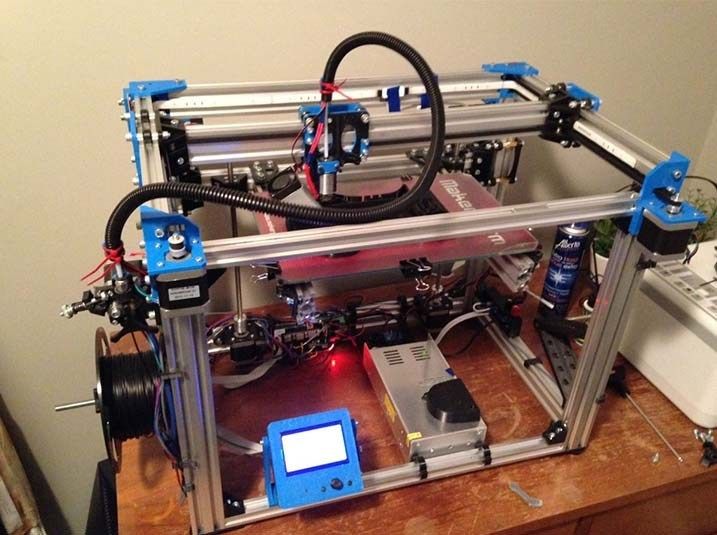
While I've been very happy with my now heavily modified Ender 3 Pro, it does continue to have a few issues that are so fundamental that no amount of modding can correct them.
- The printer is open frame, requiring a large enclosure to house it.
- The "bed-slinger" design requires even more shelf space to store the printer in operation, making it hard to keep in my office.
- Due the the moving bed, the top speed of the printer is limited.
And the thing is, I really, really want to print faster and with higher quality. Fortunately, there is an alternative 3D printer design which supports this -- core-xy. In a core-xy printer, the print bed is either fully stationary, or only moves up and down in the Z axis. Instead, the print head is capable of moving across the entire build plate by itself. While it's possible to make a 3D printer meet this definition without being core-xy, many of the fastest printers are. In a core-xy printer, the print head is connected to two separate drives via belts. When one belt spools up, the other has to let out. This allows the motors to also be mounted to the printer frame, reducing overall mass needed to move when the print head travels.
While there are several different brands of core-xy printer out there, one struck my interest immediately: Voron. Voron isn't a brand, or even really a company, it's a collective which designs some of the best core-xy printers around using open source designs and readily available components. While it was tempting to build a big 2.4, the diminutive Voron 0.1 (often called "The Voron Zero") was immediately appealing to me. The printer is enclosed and very, very small; I would easily be able to store it in my office without issue. It's small print area of 100mm isn't a huge drawback for me as I rarely do large prints. I prefer smaller prints which can be assembled together. And of course, it's fast.
Voron is also different in one other respect. You can't buy from them. They have no store, offer no built machines, not even kits. Other companies have stepped in providing pre-made Voron kits, but the current chip shortage has left them all, for me, sold out. So instead, I'm building this by self-sourcing each, and every part.
Unlike every other machine I've built, the Voron 0.1 uses linear rails to allow for motion on all three axes. These are precision, machined parts with a sliding carriage. The first step in the build is to assemble four rails, two for the Z axis, and two for the Y axis. The X axis comes much later. The Voron 0.1 assembly manual provides clear directions on how and where to mount the linear rails.
This is also where I ran head-first into another aspect of this project. It's not simply that the printer is tiny, all the parts are tiny too! The linear rails required M2 hardware and special, 15mm square aluminum profiles. After an inexpensive initial test order of these profiles confirmed they were the right size and kind, I ordered more and all the parts needed to make the frame. Taking a lesson from the build of my CNC machine and the Laser machine, I decided to order all the parts pre-cut and tapped to size.With that done, mounting the rails was a matter of inserting M2 nuts into a printed carrier, and sliding that carefully into the extrusion. Printed centering guides and a caliper got me through this first, daunting step.
With the rails mounted to the profiles, the next step was to create the rear assembly. This combines two vertical rails with a square of plain aluminum profiles as support.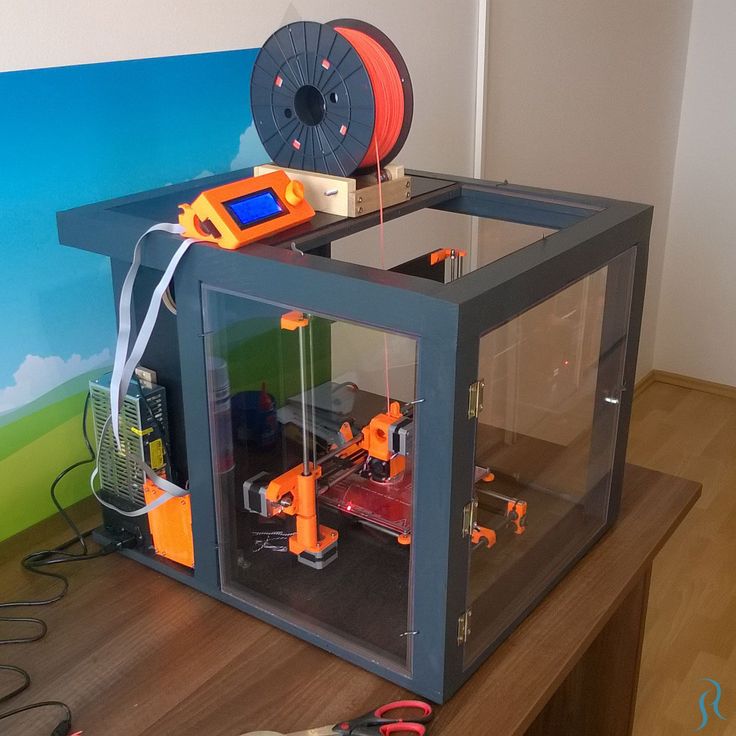 The Voron 0.1 uses an interesting construction method that I haven't seen before with aluminum profiles. Most profiles look like four arrows pointing away from each other at right angles from a central point. It looks a bit like an X with an arrow tip on each end. Instead of conventional "V-groove" profiles, however, the 0.1 uses a special kind of 15mm square profile. The interior channel isn't so much a V as it is an lower-case t. This allows for M3 nuts to be simply inserted into the end and be perpendicular to the face of the profile.
But there's one more trick up it's sleeve on which the Voron relies heavily. Using button-head bolts, you can slide them into the t channel head-down. To access them, a through-hole is drilled in the middle of the profile so that an hex wrench can be passed through and tighten the bolt. It's an ingenious method, and saves a lot of otherwise bulky gusset plates and re-enforcing brackets.
To make the access holes:
- I used a caliper to mark the distance in the channel to drill.
- A nail-set was used to mar the profile channel at the location to drill.
- Using a right-angle drilling guide and the largest bit that would fit in the channel, I drilled on through.
This process seemed harder for the first one, but very straightforward for the rest. As a bonus, if you miss the place to drill, widen the hole some more. The dimensions aren't critical.
The next thing to build was what I'll call the rear assembly. It has two profiles with linear rails for the Z-axis, and a square of profiles as a frame. To keep this flat while assembling, I used a woodworking trick of a large piece of plate glass.
The bed assembly was the goal for my weekend. I wanted to put together the small three piece arrangement of profiles and their three printed parts and mount them to the rear assembly.
I quickly found that I was missing key hardware for this. Unlike the button head bolts I've used so far on this build, the bed assembly mounted to the linear rails using cap head bolts.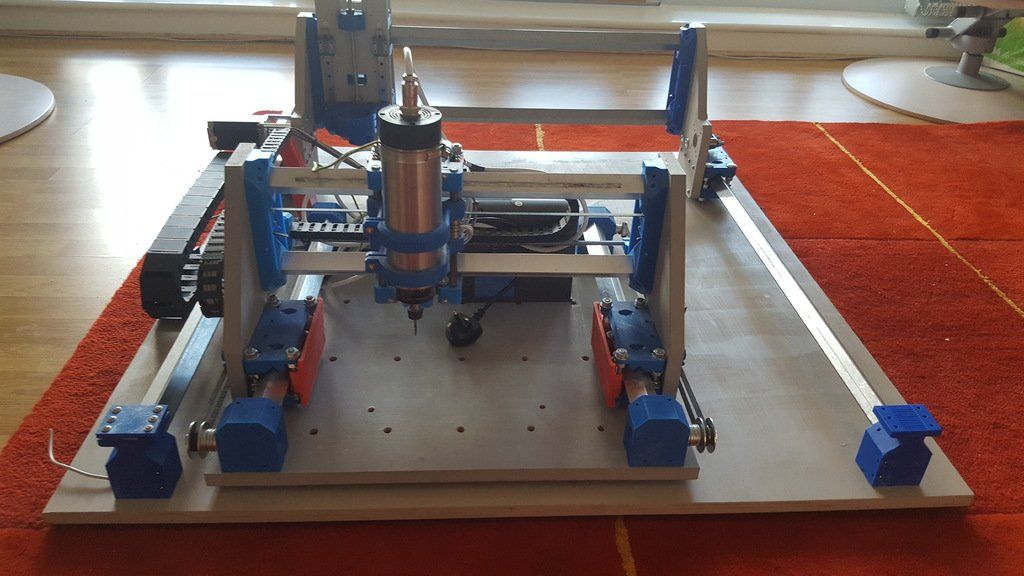 While I had plenty of M3 bolts in that form, I had no M2 versions. Acknowledging I'd have to disassemble this later anyways, I used the button head bolts and mounted it on the rear assembly anyways.
The result, while simple, left me giddy.
Video file
I couldn't resist wanting to build the rest of the frame of the printer despite not having all the final hardware available. It was simply too tempting to ignore and leave as a pile of parts on my workbench for the next week or more.
The rest of the frame came together much more quickly now that all the profiles were prepped. I only needed to bolt them together. The only nerve-wracking part was the two top parts which held the Y axis rails. The assembly manual leaves these hanging in mid-air by one bolt for a few steps. Thankfully, the one bolt was enough and I was able to build the rest of the Voron 0.1 cubular frame easily
For the moment, I'm still in the process of printing out more of the parts needed to assemble the printer. There's also a lot more parts to buy, including all of the electronics. So far, however, the experience has been downright joyful. Each printed part is well designed and prints quickly and easily even on my Ender 3. The small size is challenging, but also endearing. I honestly just want to pick up this printer and give it a hug.
3D printing
DIY
build logs
Related posts
3D Printing
3D Printing
TCHeRI
3D Printing
3D Printing
3D Printing
A little about 3D printing | Digital World Magazine
The first 3D printers appeared quite a long time ago, back in the 80s of the XX century. Over the past time, printing technology has stepped far forward, and now there are many models on the market that implement various types of printing. The most popular and affordable 3D printers are based on FDM (Fused Deposition Modeling) technology.
Their principle of operation is simple: a plastic thread, called a filament, enters the heater, where it is melted, and then ejected through a tiny hole in the printing nozzle. The moving head of the printer can be compared to a very precise glue gun, but the molten plastic flows out of the nozzle of the 3D printer (extruder) in a much thinner stream. By successive passage of the head, the printer is able to build very thin layers of plastic, each subsequent of which is superimposed on the previous one.
If there is nothing at the bottom—for example, when you print an arch or a roof surface—the printer creates a special support that can be removed when the print is complete. Some models build relief by cooling with air flow. You can create anything, it depends on your imagination and the physical dimensions of the printer.
If you decide to purchase such a device, you should pay attention to a few points.
First, accuracy and speed. Accuracy is usually understood as the height of the layer when printing - the smaller it is, the higher the accuracy. Currently, the most accurate 3D printer is capable of printing with a layer height of 50 microns. Speed refers to the rate at which the model grows, measured in square centimeters per hour. When printing, you should pay attention to the fact that the higher the accuracy, the lower the speed, and vice versa. For example, printers with an accuracy of 150 microns are suitable for the home.
Secondly, you should take into account the declared accuracy of printing and the conformity of the materials and components from which the 3D printer is made. Sometimes manufacturers claim very high printing accuracy, and the printer body is assembled from plywood, which does not provide a rigid structure and similar accuracy.
Most printers are compatible with one type of filament, usually ABS (acrylonitrile butadiene styrene) or PLA (polylactic acid, which is basically polyester). ABS and PLA are the most common now. Some printers can print with both types, others only with one of them. But, in addition to them, other threads with different properties can be used: solubility in water; glow in the dark; great flexibility; structure and smell of wood; increased strength, etc.
It is likely that you will not need most of the plastics, but you can hardly know this in advance. And therefore, if you like to experiment or still don’t really know what type of model and what you plan to print from, choose a 3D printer with the maximum number of supported types of plastic filaments.
Many manufacturers supply 3D printers in a box with individual elements, which are assembled by the user. If the DIY approach doesn't suit you, choose a pre-assembled model.
In the early days of 3D printing, assembling a printer was a very complex process, involving pins on a printed circuit board (and often searching for missing components).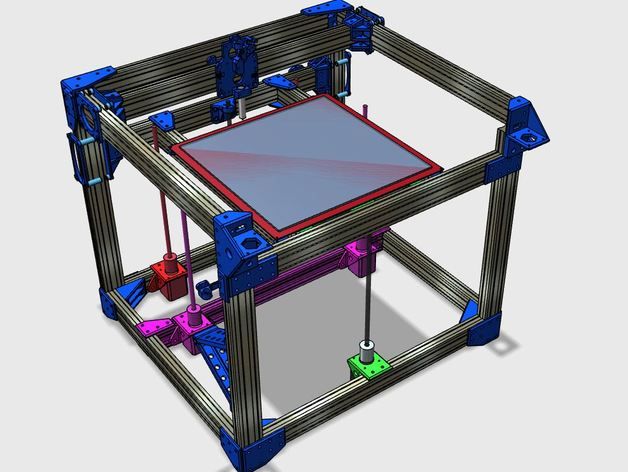 To date, this procedure has been greatly simplified. Kits like the Ultimaker contain few parts, do not require soldering, drilling and cutting, and all components are connected to each other with standard screws or bolts.
Another option is to purchase all the necessary components in the nearest store. If you have enough experience and patience, you can build a RepRap (Replicating Rapid Prototyper) printer. RepRap printers usually consist of widely used elements and components that can be printed on the 3D printer itself. The use of printed components eliminates the need for custom manufacturing, but you must have access to other 3D printers during the assembly process
And the last thing you should pay attention to is the printing software. It tells the printer how to move when printing an object. It also allows you to control the speed of ejection of the plastic thread from the extruder, the heating temperature of the filament, the speed of formation of layers and their thickness.
For some 3D printers, the required software is not included in the package. If not, you should go to the manufacturer's website and look for relevant links or recommendations.
For those who are new to 3D printing, we decided to clarify a few topical issues. To do this, we talked with Mikhail Loktev, a design engineer at Foto-Business.
– What is 3D printing for?
– Simply put, the printer takes any three-dimensional model and implements it in plastic or some other material and simplifies the work of creating an object. This is actually where it all began - fast and easy prototyping. You are an engineer who has designed a new door handle or gear. Before launching it into a series and spending a large investment, it is reasonable to check it. What was done before - they took plasticine, a file, an expensive CNC machine, which made this model from wood, metal. But the machine can cut far from everything, and it will take a lot of time to set it up to make some kind of detail. The printer also allows, roughly speaking, to do the same thing in 20 minutes to 20 hours, only practically without any human participation. There is a model, just press a few buttons and the process has started. Some of the first who were our customers were filmmakers, they constantly need to make some items for films and to be inexpensive. For example, a pistol or a blaster - printed, painted as needed and ready. Printers are also bought by state corporations that need to make some kind of model, because there are secret things, military developments, dual-use. But they do not want prototyping to be carried out on the side and extra people were admitted to them. Buy and place a machine in KB - is not affordable for everyone, but the printer solves this problem and allows you to get rid of information leakage. This is true for commercial structures as well.
Plastic is an exceptionally plastic material. We can make very low volume parts without significant mold and casting costs. Again, personalized products, souvenirs. Now many businesses are founded by students, for example, they print custom phone cases with silhouettes of something, a logo or the name of the customer. It's cheap enough.
The printer allows you to simplify existing technological processes, improve any detail, refine it. For example, a customer came from the food industry, they are constantly changing something in the form of bakery products. Before launching them into a series, you need to see how it will look. They print both the form and the sample itself.
– Is food grade plastic used in printing and is it possible to print kitchen utensils?
- Let's just say that PLA plastic - organic material in terms of chemical composition is theoretically absolutely safe, but I would not expose it to high temperatures when cooking.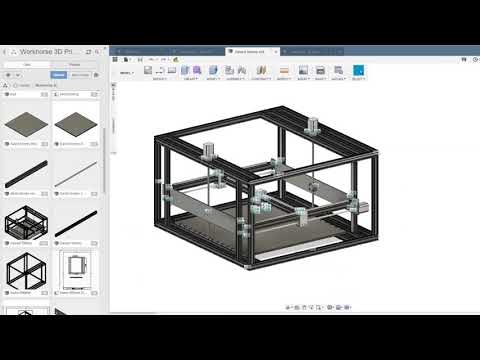 In general, a great variety of plastics are now appearing - luminous, with the smell of wood, flexible, conductive, etc. It is possible that soon they will also be used to create dishes, the potential for chemistry is huge and there is room to move. The main thing is that there are tasks, it pushes manufacturers.
–
– Nothing really complicated. Depending on perseverance - from several hours to several days, but this time is necessary to master the printer itself - after all, such a printer is now like a fashionable gadget. Knowledge of modeling programs is not required, although it will not hurt. The Internet is full of model files optimized for printing. For example, there are no cases for the iPhone. Download, print. If you want something of your own, there are, in addition to complex programs, many simple visual editors.
– What is the cost of consumables?
- The cost of printing using good quality plastic is about 1. 5-1.7 rubles per gram. The cost of the finished model depends on the filling. It is worth considering that the printer allows you to print both thin-walled and fully filled models, everything can be adjusted.
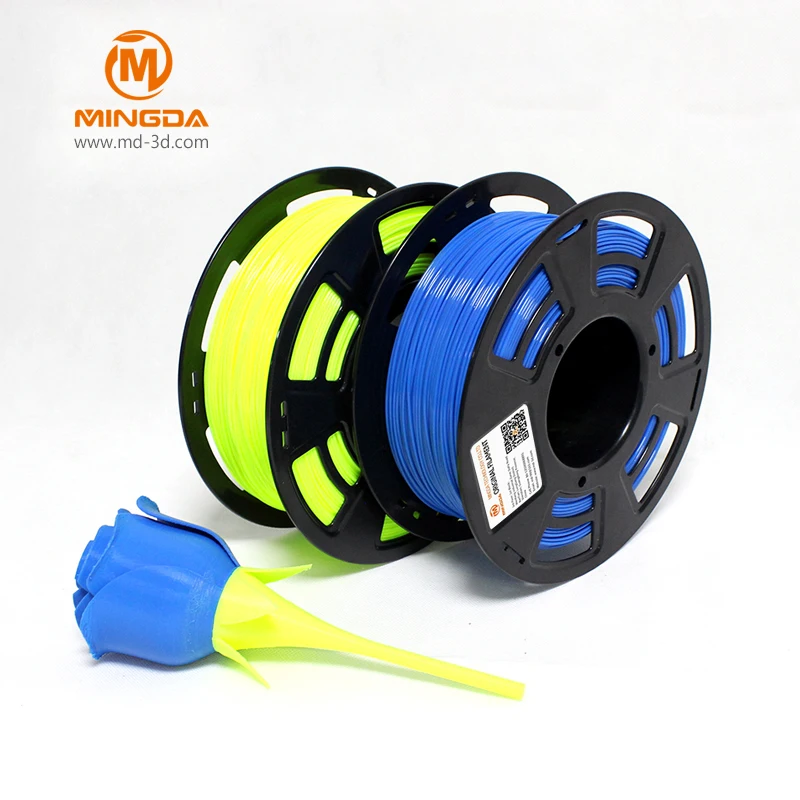
Plastic comes in 1kg spools and is easy to buy.
– Do I really need to take care of the ventilation of the room, can I, for example, put the printer at home?
– The situation is this: PLA plastic can be printed without problems at home. With ABS plastic, everything is more complicated, there are noticeably more emissions from it, you should take care of a separate, well-ventilated room. However, it is noticeably stronger.
– What is the average life of a 3D printer?
– Some American models have a life span of about two to three months with daily constant use. Domestic models, for example PrintBox 3D One, are noticeably better - the resource of the mechanism is enough for several years of operation, with Chinese ones it is more and more difficult - quality is not constant.
– How do you feel about self-assembly printers?
- Self-assembly printer - this is, in my opinion, a snag. The person who is able to assemble such a device will do it without buying a kit. 95% of those who decide to save money in this way will simply not collect it or will suffer with it for a very long time. In order for the printer to print well, you need to tinker with it properly.
The editors would like to thank Foto-Business (www.foto-business.ru) for participating in the preparation of the material.
Zmorph Fab 3D Printer - All in One
Poland's Zmorph is venturing into areas that conventional 3D printers simply can't go. At the same time, the brand's multifunctional equipment still fits on the table.
The Zmorph Fab 3D Printer is three tools in one for learning and prototyping. The machine is capable of creating almost anything. With impeccable build quality, a user-friendly interface, and industry-standard electronics, the Zmorph-Fab will be the most sought-after and reliable all-in-one 3D printer on the market.
All-in-one equipment
The manufacturer has integrated a unit for 3D printing, CNC milling, laser cutting and engraving into the machine. The development is distinguished by a list of bright advantages:
- compact device fits even on the desktop;
- simple and convenient tool change takes no more than 60 seconds;
- the machine is compatible with materials not available for single-purpose 3D printers.
Zmorph Fab starts working right out of the box. Smart hardware with automatic tool detection and auto-calibration gets the job done so technicians can focus on ideas.
Technology for Reliability
TheZmorph is a 3D printer that guarantees trouble-free 3D printing. The machine works with almost any type of plastic filament available on the market. Automatic calibration makes the printing process easy and fast even for beginners. The multi-material option allows you to print 3D objects with water-soluble backing.
Unsurpassed build quality
Heavy duty aluminum plates provide increased rigidity and protect electronics from dust and machining residue. The rugged construction is designed to enable fast 3D printing with a variety of filaments. The Cartesian motion system of the XZ head is reinforced with two fiberglass reinforced belts.
A brand new CNC worktable offers a user-friendly workpiece system, provides greater stability.
Software
The equipment is equipped with a clear interface and a single software for 3D object construction, machining, laser cutting and engraving. The unit is immediately ready for multi-material 3D printing.
Optimum combination of HEPA and carbon filter disintegrates semi-toxic particles and consumable vapors emitted during 3D printing and laser cutting. The Zmorph-Fab printer notifies the user when the filter element needs to be changed.
Innovation Features
The Zmorph Fab is equipped with a professional CNC worktable equipped with a simple system for mounting components. The technique guarantees safe interaction with various configurations, sizes and raw materials. The brand's software includes a standard workflow for step-by-step CNC procedures, the ability to change tools within a single G-code, and toolpath visualization.
The accessible and intuitive user interface allows for easy menu navigation and is suitable for professionals and novices alike.
Get the most out of Zmorph-Fab with dedicated slicing software. Voxelizer is a versatile software for 3D printing, CNC milling, laser engraving and cutting. The program supports all tool heads of the device.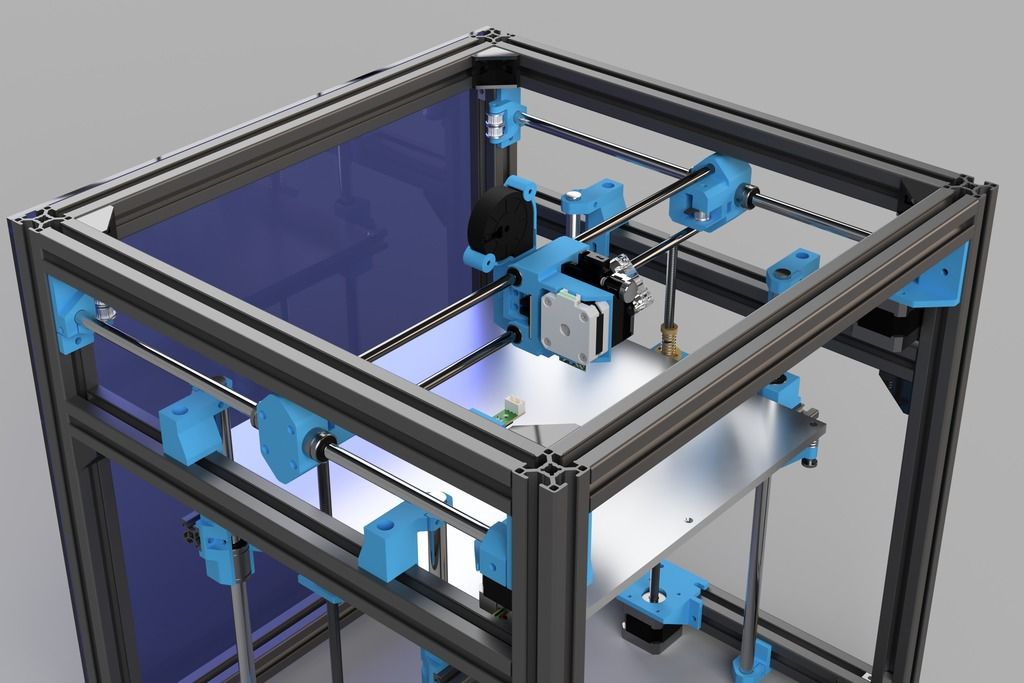 Pre-installed materials allow you to immediately test the unit. The software is optimized for Zmorph 3D printers, providing the best and fastest results.
Changing workflows in Zmorph-Fab is quick and easy with automatic tool head detection. Switching tools takes just a few simple steps and no more than a minute.
The equipment is so ergonomic that it is comfortable and safe to work near the machine as the printer is virtually silent. Behind the quiet operation lies the design of the unit, enhanced by high quality electronics and carefully programmed drivers.
TheZmorph Fab is a versatile desktop 3D printer, but its heart is an industrial grade machine. The electronics provide reliability and stable repeatability.
What's Included
Powerful hardware capabilities allow you to create multi-material functional prototypes, complex concept models to test original ideas or market-ready products.
Zmorph-Fab All-In-One 3D Printer includes:
- single extruder tool head;
- milling short toolhead;
- laser head;
- heated desktop;
- coil holder;
- 0.