3D printed bong stl
Bong best STL files for 3D printer・Cults
Voodoo Bong
€9.75
avocado mouthpiece for shisha
€0.69
One Pice shisha mouthpiece
€1.50
SHISHA HOOKAH MOUTHPIECE SHISHA VITO CORLEONE THE GODFATHER 30X40X60MM EASY PRINTING WITHOUT HOLDERS
€1.25 -10% €1.13
SHISHA HOOKAH MOUTHPIECE SHISHA MANDO 38X50X60MM EASY PRINTING WITHOUT BRACKETS
€1.25 -10% €1.13
SHISHA SHISHA BUDDHA MOUTHPIECE BUDDHA 6 PACK 6 DIFFERENT MODELS 31X33X60MM EASY PRINTING WITHOUT HOLDERS
€4 -10% €3. 60
BUDA SHISHA HOOKAH MOUTHPIECE BUDDHA 66 31X33X60MM EASY PRINTING WITHOUT HOLDERS
€1 -10% €0.90
MOUTHPIECE SHISHA SHISHA BUDDHA 56 31X33X60MM EASY PRINTING WITHOUT SUPPORTS.
€1 -10% €0.90
MOUTHPIECE SHISHA SHISHA BUDDHA 46 31X33X60MM EASY PRINTING WITHOUT SUPPORTS.
€1 -10% €0.90
HOOKAH MOUTHPIECE SHISHA BUDDHA 36 31X33X60MM EASY PRINTING WITHOUT SUPPORTS.
€1 -10% €0. 90
90
BUDA SHISHA HOOKAH MOUTHPIECE BUDDHA 26 31X33X60MM EASY PRINTING WITHOUT HOLDERS
€1 -10% €0.90
BUDA SHISHA HOOKAH MOUTHPIECE BUDDHA 16 31X33X60MM EASY PRINTING WITHOUT HOLDERS
€1 -10% €0.90
SHISHA HOOKAH MOUTHPIECE GARGOLA 40X30X60MM
€1.25 -10% €1.13
Ergonomic Bubbler Pipe
€0.63
SHISHA HOOKAH MOUTHPIECE GARGOLA 40X30X60MM
€1.25 -10% €1. 13
13
SHISHA HOOKAH MOUTHPIECE GARGOLA 25X35X60MM EASY PRINTING WITHOUT HOLDERS
€1.25 -10% €1.13
SHISHA SHISHA HOOKAH MOUTHPIECE GRENADE FORTNITE 31X33X60MM EASY PRINTING
€1.25 -10% €1.13
SHISHA HOOKAH MOUTHPIECE AMONG US 25X33X60MM EASY PRINTING
€1 -10% €0.90
SHISHA HOOKAH MOUTHPIECE MAYAN SKULL 30X35X60MM EASY PRINTING WITHOUT HOLDERS
€1 -10% €0. 90
90
SHISHA BENDER FUTURAMA SHISHA PIPE MOUTHPIECE 25X25X60MM EASY PRINTING WITHOUT HOLDERS
€1 -10% €0.90
Lookah Seahorse Pro Plus 14.5mm Taper Joint Adapter
€0.98
SHISHA HOOKAH MOUTHPIECE CHINESE SHISHA MALO 35X38X60MM EASY PRINTING WITHOUT HOLDERS
€1.25 -10% €1.13
SHISHA SHISHA HOOKAH MOUTHPIECE AZTEC 40X40X60MM EASY PRINTING WITHOUT HOLDERS
€1 -10% €0.90
Shisha gourd nozzle
€0. 69
69
MOUTHPIECE SHISHA SHISHA SHISHA JASON 13 48X38X60MM EASY PRINTING
€1 -10% €0.90
Enduro helmet mouthpiece
€0.69
Skulls for shisha hose
€1
SHISHA SHISHA MOUTHPIECE ORCO 35X32X60MM EASY PRINTING
€1
Dual Bic Lighter Case with Stoker Holders
Free
BONGS
€2.27
BONG MOUTHPIECE VADER 35X35X60MM EASY PRINTING
€1
BONG MOUTHPIECE PACMAN 30X30X60MM EASY PRINTING WITHOUT HOLDERS
€0.60
HOOKAH MOUTHPIECE SHISHA MOAI 25X39X60MM EASY PRINTING WITHOUT HOLDERS
€0. 60
60
HOOKAH MOUTHPIECE SHISHA MARTS ATTACK 35X35X60MM EASY PRINTING
€50
HOOKAH MOUTHPIECE SHISHA SHISHA GODDESS INDIANA JONES 30X35X60 MM EASY PRINTING WITHOUT HOLDERS
€1
SHISHA SHISHA SHISHA MOUTHPIECE SNOOPY 25X35X60 MM EASY PRINTING WITHOUT HOLDERS
€0.60
SHISHA DROID HOOKAH MOUTHPIECE 28X25X60 MM EASY PRINTING WITHOUT HOLDERS
€1.25 -10% €1.13
HOOKAH MOUTHPIECE SHISHA FIRE DEP EASY IMPRESSION
€0.60
SHISHA HOOKAH MOUTHPIECE CAWS CAT 34X30X60 MM EASY PRINTING WITHOUT HOLDERS
€1.25 -10% €1. 13
13
PUFFCO PROXY 14MM ADAPTER 90 DEGREE
€4.88
PuffCo Proxy 14mm Adapter
€4.88
PuffCo Proxy + Hot Knife Dock
€12.69
SHISHA HOOKAH MOUTHPIECE SHISHA CATRINA 40X45X60 MM EASY PRINTING WITHOUT HOLDERS
€1.25 -10% €1.13
SHISHA SHISHA HOOKAH MOUTHPIECE DWARF 41X31X60 MM EASY PRINTING
€0.60
SHISHA SHISHA MOUTHPIECE EDIE IRON MAIDEN 35X38X60 MM EASY PRINTING
€1.25 -10% €1.13
SHISHA SHISHA MOUTHPIECE JESEE PINKMAN 35X45X60 MM EASY PRINTING
€1. -10% €1.13 25
25
HOOKAH MOUTHPIECE SHISHA WALTER WHITE 35X40X60 MM EASY PRINTING
€1.25 -10% €1.13
SHISHA HOOKAH MOUTHPIECE EGYPTCAT 44X45X60MM EASY TO PRINT
€1 -10% €0.90
▷ bong 3d models 【 STLFinder 】
Bong
grabcad
Bong
bong
thingiverse
bong
Bong
grabcad
Thsi is a bong :v
Bong
myminifactory
Bong For ''Tobaco'' only use ¯\_(ツ)_/¯
Bong
thingiverse
A Bong for this Head: https://amzn. to/2MklkRU
Bong
sketchfab
A cool lil water pipe (bong) 420 blaze it
Bong
thingiverse
Bong Print Settings Printer Brand: RepRap Printer: WANHAO Duplicator i3 Notes: Печатать без поддержек
Bong
grabcad
A model of a glass bong, used for smoking that chronic.
Bong
thingiverse
This is a Bong Keychain!!. Lots of thanks to BuoyantBong. ... https://www.twitch.tv/buoyantbong
buoyantbong.com
Lots of thanks to BuoyantBong. ... https://www.twitch.tv/buoyantbong
buoyantbong.com
Bong
thingiverse
... with aluminium foil. :) I've also included a KEY CHAIN bong - print it at 50% size! You can also print the normal bong at 50% - makes a cool pen / wacom stylus holder :) Print settings: 0.2mm layer height 2 or 3 shells 30% infill Have fun! ...
BONG!!
cults3d
Smoking bong ;D A small tube should be placed in its hole, preferably a metal one, and it should look more or less like the one in the second picture.
Shrek Bong Water Bong
thingiverse
Shrek Bust Water Bong. Supports are not required for printing.
29.04.21 - Added olny non practical version, just lookng COOOOL. ...Will add useful versions in few days.
Supports are not required for printing.
29.04.21 - Added olny non practical version, just lookng COOOOL. ...Will add useful versions in few days.
Bong_Bong_Aircon
thingiverse
This Bong is constructed much like the other, but with the following very important differences: -It's input an output are open to the external environment -The cone-cap on the top of the left bong has two functions. To prevent stuff falling in and...
Bong
prusaprinters
<p>Fully functional bongo. You have to screw an ordinary bottle top into throat. You have to make a hole in the middle of the bottle top and insert glass pipe as illustrated in the picture above ( use bubble gum to seal the glass pipe). ...Bongo...
bong
thingiverse
Print at 7 wall just for safety measures for water leaks
BONG
myminifactory
ok
basic bong
thingiverse
working bong!!
Simple Bong
pinshape
Simple Bong
Shrek Bong
thingiverse
Shrek. ...But a bong.
BONG CAP
grabcad
ADJUSTABLE BONG CAP
Bong Sucio
sketchfab
Bong alien sucio
Mandalorian bong
cults3d
Mandalorian helmet bong, water pipe
Weed bong
thingiverse
Weed bong 3d model Main hole diameter-15mm
Proto Bong
cults3d
Stylish bong with Tri Pull Matrix produces a smoother hit. Draws like a pencil, hits like a Bong! ... Requires a 14mm bowl
Beaker Bong
thingiverse
Its a bong that is cut in 3 parts to make it mobile and small.
Glass Bong
sketchfab
Glass bong with greenish-blue tint. Modeled in Maya. ...useable for rendering.
custom bong
thingiverse
Build a Custom Bong Have you ever thought "I have the perfect idea for a bong!" but couldn't find the right combination of percs or other features? Your wait is over! With the new Build-a-Bong tool, you can customize your perfect piece! Have fun. ..
..
pumpkin bong
thingiverse
this is a the new/ updated model of the pumpking bong seperated into two parts. ... part one is the bong part two is the slide hope you enjoy,will post pictures when i complete :]
Printable Bong
thingiverse
I just had some fun in Autodesk Fusion360 and designed a printable bong. ...:D In download included are: - pictures - .stl files - .f3d files - .stp files Things you need: Bong spear: https://amzn.to/2Wcg2Ma O-Ring: https://amzn.to/38TmU3L
bong cam
thingiverse
gopro support bong cam d50 Print Settings Printer: sharebot kiwi Supports: No Resolution: 0. 3 Infill: 10%
Best STL Files for Bong・Cults
3D PrinterBong Voodoo
9.75 €
avocado mouthpiece for hookah
0.69 €
One Pice hookah mouthpiece
1,50 €
HOOKAH PIPE VITO CORLEONE EL PADRINO 30X40X60MM EASY PRINT WITHOUT HOLDERS
€1.25 -ten% 1.13 €
HOOKAH MOUTHPIECE HOOKAH MANDO 38X50X60 MM SIMPLE PRINT WITHOUT HOLDERS
€1.25 -ten% 1.13 €
BUDDHA HOOKAH MOUTHPIECE 6 PACKS 6 DIFFERENT MODELS 31X33X60 MM EASY PRINT WITHOUT HOLDERS
4 € -ten% 3. 60 €
60 €
BUDA HOOKAH PIPE BUDDHA 66 31X33X60MM EASY PRINT WITHOUT HOLDERS
1 € -ten% 0.90 €
SHISHA BUDDHA 56 HOOKAH MOUTHPIECE 31X33X60 MM SIMPLE PRINT WITHOUT HOLDERS.
1 € -ten% 0.90 €
BUDA HOOKAH PIPE BUDDHA 46 31X33X60 MM SIMPLE PRINT WITHOUT HOLDERS.
1 € -ten% 0.90 €
SHISHA BUDDHA 36 SHISHA 36 31X33X60MM SIMPLE PRINT WITHOUT HOLDERS.
1 € -ten% 0. 90 €
90 €
SHISHA BUDA 26 HOOKAH MOUTHPIECE 31X33X60MM EASY PRINT WITHOUT HOLDERS
1 € -ten% 0.90 €
SHISHA BUDA 16 HOOKAH MOUTHPIECE 31X33X60 MM SIMPLE PRINT WITHOUT HOLDERS
1 € -ten% 0.90 €
HOOKAH SHISHA GARGOLA 40X30X60MM
€1.25 -ten% 1.13 €
Ergonomic bubbler tube
0.63 €
HOOKAH SHISHA GARGOLA 40X30X60MM
€1.25 -ten% 1. 13 €
13 €
GARGOLA HOOKAH MOUTHPIECE 25X35X60 MM SIMPLE PRINT WITHOUT HOLDERS
€1.25 -ten% 1.13€
HOOKAH MOUTHPIECE HOOKAH GARNET FORTNITE 31X33X60 MM EASY PRINT
€1.25 -ten% 1.13 €
HOOKAH MOUTHPIECE AMONG US 25X33X60 MM SIMPLE PRINT
1 € -ten% 0.90 €
HOOKAH MOUTHPIECE CALAVERA MAYA HOOKAH 30X35X60MM EASY PRINT WITHOUT HOLDERS
1 € -ten% 0. 90 €
90 €
FUTURAMA SHISHA BENDER 25X25X60MM HOOKAH PIPE PIPE EASY PRINT WITHOUT HOLDERS
1 € -ten% 0.90 €
Lookah Seahorse Pro Plus 14.5mm Taper Joint Adapter
0,98 €
HOOKAH MOUTHPIECE CHINESE MALO HOOKAH 35X38X60 MM SIMPLE PRINT WITHOUT HOLDERS
€1.25 -ten% 1.13 €
HOOKAH SHISHA AZTECA 40X40X60 MM SIMPLE PRINT WITHOUT HOLDERS
1 € -ten% 0.90 €
Pumpkin hookah mouthpiece
0,69 €
HOOKAH MOUTHPIECE JASON HOOKAH 13 48X38X60 MM EASY PRINT
1 € -ten% 0.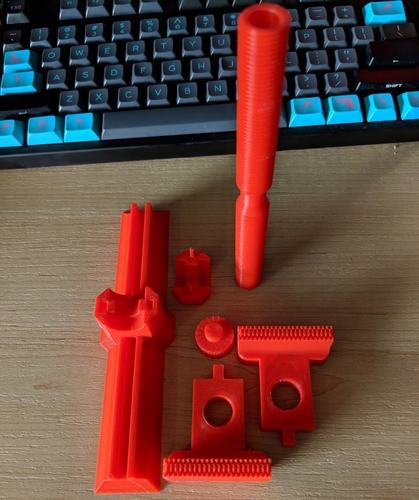 90 €
90 €
Enduro helmet mouthpiece
0,69 €
Skulls for hookah hose
1 €
ORCO HOOKAH MOUTHPIECE 35X32X60 MM SIMPLE PRINT
1 €
Double Bic lighter case with poker holders
Free
BONGS
2.27 €
HOOKAH PIPE VADER 35X35X60 MM SIMPLE PRINT
1 €
PACMAN HOOKAH MOUTHPIECE 30X30X60 MM SIMPLE PRINT WITHOUT HOLDERS
0,60 €
SHISHA MOAI SHISHA MOAI 25X39X60 MM SIMPLE PRINT WITHOUT HOLDERS
0,60 €
SHISHA MARTS ATTACK SHISHA MOUTHPIECE 35X35X60MM EASY PRINT
50 €
HOOKAH PIPE HOOKAH GODDESS INDIANA JONES 30X35X60 MM SIMPLE PRINT WITHOUT HOLDERS
1 €
SNOOPY HOOKAH MOUTHPIECE 25X35X60 MM SIMPLE PRINT WITHOUT HOLDERS
0,60 €
SHISHA DROID HOOKAH MOUTHPIECE 28X25X60 MM SIMPLE PRINT WITHOUT HOLDERS
€1. -ten% 1.13 €  25
25
HOOKAH SHISHA FIRE DEP EASY IMPRESSION
0,60 €
HOOKAH MOUTHPIECE CAWS CAT 34X30X60 MM SIMPLE PRINT WITHOUT HOLDERS
€1.25 -ten% 1.13€
PUFFCO PROXY 14MM ADAPTER 90 DEGREES
4,88 €
PuffCo Proxy adapter 14 mm
€4.88
PuffCo Proxy + Hot Knife Dock
12.69 €
KATRINA HOOKAH MOUTHPIECE 40X45X60 MM SIMPLE PRINT WITHOUT HOLDERS
€1.25 -ten% 1.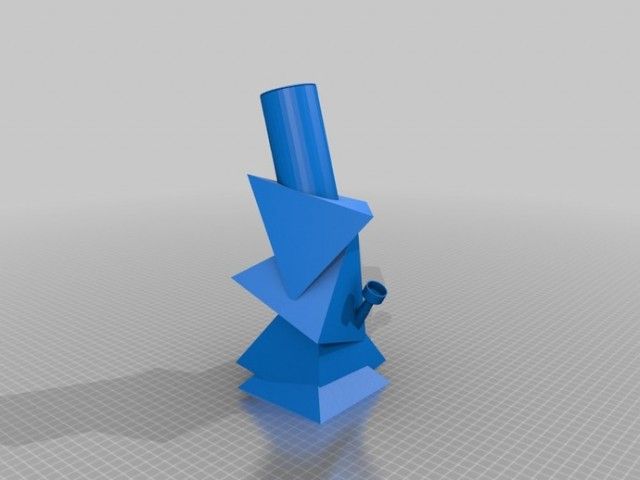 13 €
13 €
HOOKAH PIPE HOOKAH GNOME 41X31X60 MM EASY PRINT
0,60 €
EDIE IRON MAIDEN HOOKAH MOUTHPIECE 35X38X60 MM EASY PRINT
€1.25 -ten% 1.13 €
JESEE PINKMAN HOOKAH MOUTHPIECE 35X45X60 MM EASY PRINT
€1.25 -ten% 1.13 €
HOOKAH PIPE WALTER WHITE 35X40X60 MM SIMPLE PRINT
€1.25 -ten% 1.13 €
EGYPTCAT 44X45X60 HOOKAH MOUTHPIECE SIMPLE PRINT
1 € -ten% 0.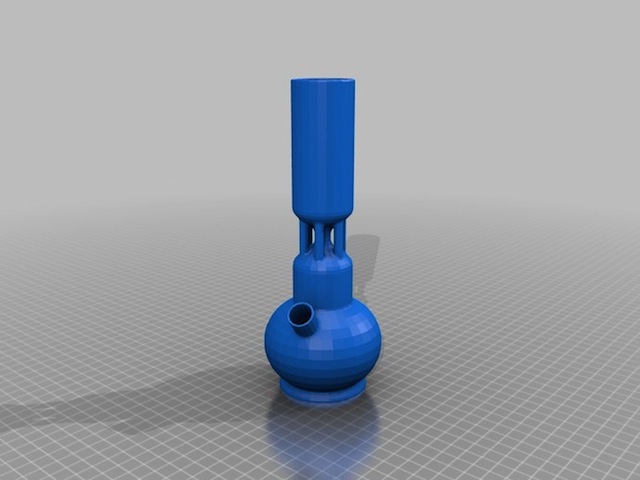 90 €
90 €
Requirements for 3D models for 3D printing and CNC processing
Introduction.
In this article, we will talk about the basic and general parameters that a model must meet in order to obtain high-quality 3D printed products. Let's discuss common errors that occur in the process of creating three-dimensional models in terms of a high-quality polygonal mesh and how to quickly fix them. Requirements for 3D models and quality issues in terms of the accuracy of manufactured parts are described in another article: The actual size of the product after 3D printing.
The process of creating a product.
Structure of the additive manufacturing process for the production of products:
| Designer / 3Dartist | 3D Printing Service | Bugs discussed |
1. Creating a 3D model Creating a 3D model | ||
| 2. Export/convert 3D model to required format | 3. Checking the model for suitability | 4. Pass/Fail to minimum allowable thicknesses. |
| 6. Preparation of control program for 3D printer (GCode) | 5. Compliance / non-compliance with the requirements for the polygonal mesh of the 3D model. | |
| 7. 3D printing process. | ||
| 9. Quality control. | 8. Post-processing process. |
In accordance with the presented algorithm, at the first stage of product creation, a 3D model is developed using modeling programs in accordance with the terms of reference and the requirements of standards. After that, it is necessary to export the data of the simulation result program file to a format accepted by the program of the additive manufacturing control machine (for example, “STL”). The modeling process can now be done not only in solid format, but also immediately in STL. Before the next stage, possible defects in the model are identified. A model intended for 3D printing must be hermetic, monolithic and not contain cavities and gaps in the walls, which is ensured using special programs. Next, the information from the STL file is converted into commands, following which the 3D printer produces a product, this is the so-called GCode.
During this procedure, you must select the desired scale of the part, the correct position in space, and accurately position the model on the work surface. The result of the whole process, strength, surface roughness of the part and material consumption depend on this . After the settings are made, the model is divided into layers of material, which are “fitted” into the body of the part in one working cycle of the additive machine. This process is called slicing. Slicing is done using the software supplied with the machine, or using special tools (Simplify, Skein-forge, Slic3r, KISSlicer, MakerWare, etc.). The G-code obtained in the previous step is transferred to the 3D printer via flash memory or via a USB cable. In the process of preparing and setting up the additive machine, calibration, preheating of the working bodies, selection of the model material and setting the parameters of the equipment operation modes that depend on it are performed. On professional level devices, this step can be combined with the slicing process procedures. After all the preparatory operations are completed, the printing process starts, that is, the layer-by-layer combination of materials. Its duration depends on the type of technology and the selected parameters for the accuracy and quality of the part.
Requirements for models for 3D printing and CNC processing.
- List of file formats by 3D technologies.
- FDM (ABS, PLA, FLEX, HIPS, etc.): .STL .OBJ
- SLS (polyamide): .STL .OBJ
- SLA, DLP (photopolymer): .
 STL .OBJ
 - SLM (metal): .STL+STP(STEP) .OBJ+STP(STEP)
- Multicolour plaster: .OBJ+texture .WRL+texture
- Polygon mesh.
- The mesh must be uniform and closed. A model consisting of several polygonal meshes is not allowed! Intersection of polygonal meshes is not allowed! Holes in the grid are not allowed!
- Multiple models in one file are not allowed. Each object needs to be saved as a separate file.
- The number of polygons must not exceed 500,000.
- Wall thickness must be at least the specified values for each technology.
- Inverted normals are not allowed! The outer normal should face outward. This problem is especially common when mirroring the model in some 3D modeling programs.
- The dimensions of the model must correspond to the dimensions of the real object.
In 95% of cases, errors in files are not critical and can be easily corrected using specialized programs that can be easily found on the Internet. Even if you are sure that everything is in order with the model, it does not hurt to check it once again for correctness.
NETFABB - as a solution to most file errors.
MESHMIXER is a powerful and convenient alternative.
- Wall thickness analysis of the model.
It should be understood that there are several 3D printing technologies. They differ not only in the materials used, but also in the accuracy of the equipment. Different equipment has its own resolution. Therefore, before sending the file for printing, it is necessary to make sure the quality of the model in terms of the specified thicknesses in the walls, rods, mesh ceilings. Detailed article about checking models for thickness.
Fixing non-critical bugs with NetFabb.
NETFABB (Download for PC or Download for Mac) is a program that allows you to solve almost any issue related to 3D printing. Let's go through the main functions of this software, which AutoDesk itself bought at one time.
The program shows the outer part of the polygon in green, its inner normal in red. Ideally, the model should be all green. If you observe red spots, then these are polygons that are turned outward. If the entire model is highlighted in red, then the entire mesh is turned inside out.
Even if the model is green, but there are errors in your file, the program will display a big exclamation point in the lower right corner of the screen, and will not be able to calculate the volume of your model.
To treat the model, click on the red cross on the toolbar at the top of the screen. The program will put you into the treatment mode, and will indicate in yellow the breaks in the polygonal mesh, if any.
This program has functions for removing or adding polygons, changing sizes or proportions. (I will leave these functions for independent study). I recommend that you study the entire toolbar in order to easily understand how, where and which polygons we can select and what we can change.
To invert normals, select the polygons that look “in the wrong direction” and click on the “invert normals” button. Then click on the “Apply Repair” button.
If your model was initially all green or inverting the normals didn't remove the exclamation point, and the volume has not yet been calculated, you need to apply automatic treatment. To do this, go back to the treatment mode by clicking on the red plus. In the treatment mode, select "Automatic treatment", then select "Default Repair" and click "Extrude".
The program has now done its best to repair the model automatically. Click "Apply Repair".
Typically, these steps should have fixed your model. If after the performed operations an exclamation mark is on and there is still no volume, then you are among those 5% when the model has critical errors and errors are laid down at the modeling stage.
Fixing non-critical bugs with MeshMixer.
Autodesk MeshMixer is a free software for working with 3D mesh models.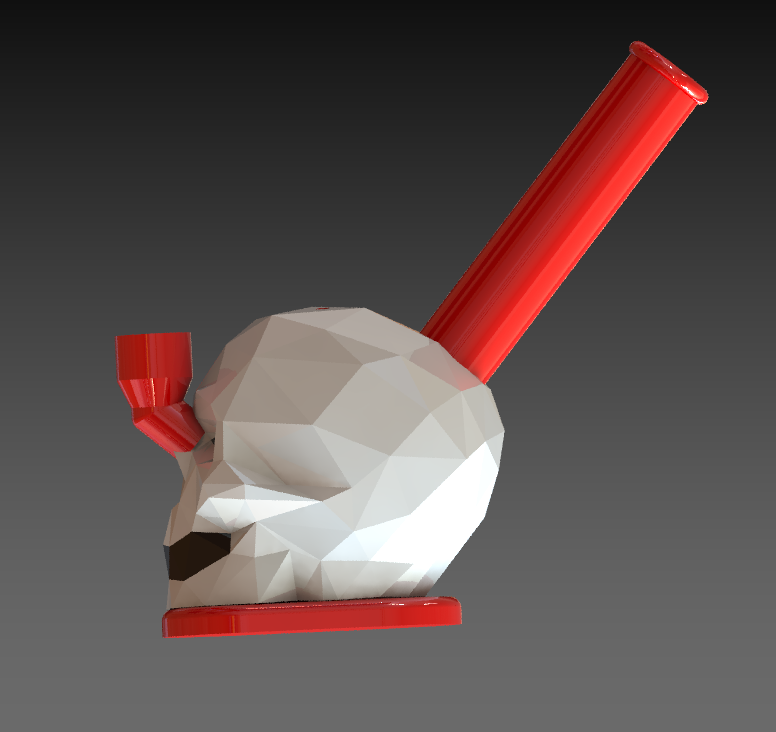 You can download the program from the link. The program does not have tools for creating 3D models, but a wide range of tools for modifying them and preparing them for 3D printing. The main difference between this software and NETFABB is that MESHMIXER officially supports the latest versions of macOS. For me, this is a decisive factor, because I always carry a MacBook with me, and a Windows computer is only in the office. In turn, NetFabb stopped supporting software for macOS.
As in the case of Netfabb, you need to drop the model in STL format into the MeshMixer program window.
At first glance, the model looks good, but let's try to test it for 3D printing suitability (mesh requirements). To do this, you need to analyze the model for errors. To do this, go to the “Analisis” section, then click on the “Inspector” button.
On the screen, we can see how the program highlighted areas on the model with bright colors that do not meet the requirements, which means they have errors.
In order to fix (cure) these errors, click on the “Auto Repair All” button. The program will try to remove errors automatically. Checking before 3D printing is a must. Even if outwardly the model seems suitable to you, it is still worth checking. In the picture below, you can see the errors that are inside the mesh, although everything looks good with the model.
However, this treatment does not always help. For example, if the model has a huge number of errors that the program is not able to remove automatically, then you will have to correct the model yourself in the program where the model was originally created. In case of a large number of errors, the program will indicate their presence even after you have tried to do automatic treatment. The picture below is an example of a very large number of shortcomings and errors that the program is not able to remove by itself.
This usually happens when the model is being prepared for rendering rather than 3D printing. That is, there is a huge number of surfaces, but they are not connected into a single grid.
Fixing non-critical errors with Materialize Magic
Materialize Magic's 3D model healing feature is located in the Fix tab.
After that, select the “Correction Wizard” command. Next, you need to alternate the “Update” and “Autocorrect” buttons.
Do this several times. Sometimes for a long time. Until the moment when the number of errors becomes minimal or disappears altogether.
After the upgrade, the result shown below can be considered successful. All checkboxes must be green.
Complete the treatment by following the recommendations and save the corrected model!
Very important point! Treatment in automatic mode occurs according to the principle of adding or removing polygons. Therefore, after automatic treatment, fully check the model for the correct form. Suddenly, the program removed something or added something superfluous.
Learn more