3D print wifi
Learn How to Make Your Ender 3 Wireless & Other 3D Printers – 3D Printerly
3D printing by itself is pretty cool, but you know what’s even cooler? 3D printing wirelessly.
I think we all love some extra convenience, so why not add some when it comes to 3D printing? Some 3D printers come with wireless support built in, but the Ender 3 isn’t one of them, along with several other machines.
If you want to learn how to make your Ender 3 wireless and operate through Wi-Fi, you’ve come to the right place.
A combination of a Raspberry Pi and OctoPrint is the usual method to make an Ender 3 wireless. You can also use AstroBox for a more flexible Wi-Fi connection option since you can access your 3D printer from anywhere. A Wi-Fi SD card can only give you the ability to transfer files wirelessly.
There are upsides and downsides to each method, so keep reading to find out the steps to take and which choice is most common.
This article will detail how people get their Ender 3’s working wirelessly which makes their 3D printing journey that much better.
There are a few ways that Ender 3 users upgrade their machines to be able to print wirelessly. Some are really simple to do, while others take a little more of a walkthrough to get it right.
You also have differences in equipment and products to purchase to connect your Ender 3
- Wi-Fi SD card
- Raspberry Pi + OctoPrint
- Raspberry Pi + AstroBox
- Creality Wi-Fi Cloud Box
Wi-Fi SD Card
The first, but less used option is implementing a Wi-Fi SD card. All you need to do here is get yourself an adapter which inserts into your MicroSD slot into your Ender 3, then present a SD slot for the WiFi-SD card since they only come in the larger size.
You can get a pretty cheap one from Amazon, the LANMU Micro SD to SD Card Extension Cable Adapter is a great choice.
Once you’ve inserted the adapter and Wi-Fi SD card, you will be able to transfer your files wirelessly to your 3D printer, but there are limitations on this wireless strategy.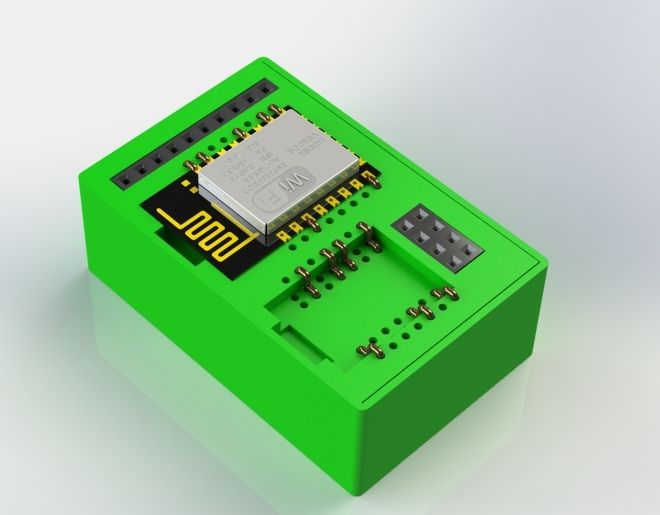 You will still have to start off your prints manually and actually choose the print on your Ender 3.
It’s a fairly simple solution, but some people enjoy being able to send files straight to their 3D printer. This is also a much cheaper option than the other methods.
If you want more capabilities with your wireless 3D printing experience, I would choose the method below.
If you’ve never heard of a Raspberry Pi, welcome to a really cool gadget that has many technological possibilities. In basic terms, a Raspberry Pi is a mini computer that packs enough power to operate as its own device.
For 3D printing specifically, we can use this mini computer to expand our capabilities to 3D printer wirelessly, plus many other cool features along with that.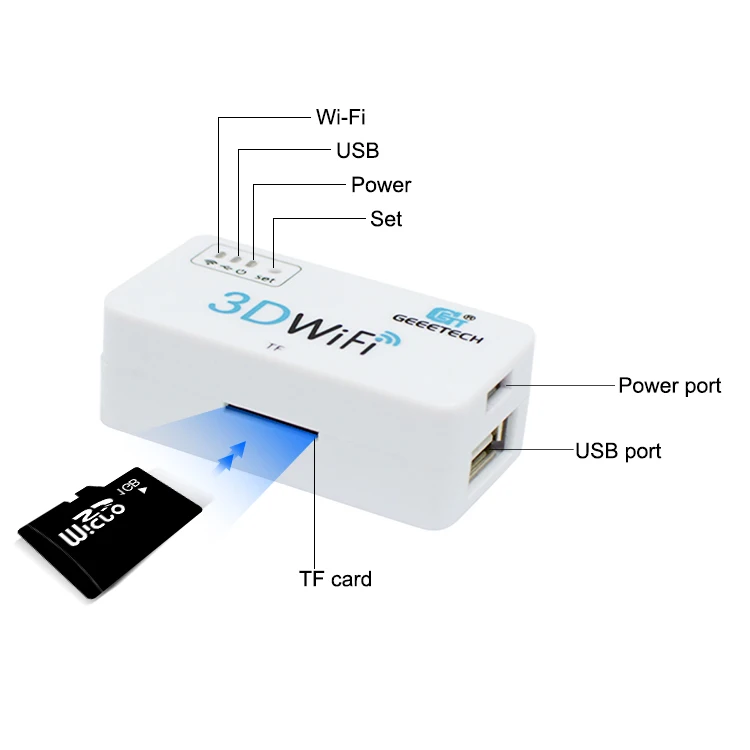
Now OctoPrint is a software that complements the Raspberry Pi enabling you to activate that Wi-Fi connection to connect to your 3D printer from anywhere. You can implement some basic commands and do even more with plugins.
There is a list of plugins on OctoPrint which give you many extra features, one example being the ‘Exclude Region’ plugin. This allows you to exclude a portion of your print area mid-print inside the G-Code tab.
This is perfect if you are printing multiple objects and one has a failure such as detatching from the bed or the support material fails, so you can exclude that part rather than stopping the print altogether.
Many people also connect cameras to their 3D printers using OctoPrint.
In this article, we take a look at how to set up OctoPrint for the Ender 3, a great candidate printer for remote operation.
The basic steps to follow are:
- Purchase a Raspberry Pi (with Wi-Fi embedded or add Wi-Fi dongle), Power Supply & SD Card
- Put OctoPi on your Raspberry Pi through an SD card
- Configure the Wi-Fi by going through your SD card
- Connect the Pi & SD card to your 3D printer using Putty & the IP address of the Pi
- Setup OctoPrint on your computer browser and you should be done
Here you will find a complete guided setup to connect your Ender 3 to the computer using OctoPrint. Below are the things that you will need.
- Ender 3 3D Printer
- Raspberry Pi (CanaKit Raspberry Pi 3 B+ from Amazon) – includes power adapter,
- Power Adapter for Raspberry Pi
- Micro SD Card – 16GB should be enough
- Micro SD Card Reader (comes with Ender 3 already)
- Mini USB Cable for Ender 3 Printer
- Male Female USB Cable Adapter
The video below goes through the whole process which you can follow along with easily.
Connecting Pi to Wi-Fi
- Download the latest updated version of the OctoPi operating system (OctoPi image)
- Download & use Win32 Disk Imager to create the image on the SD card
- Plug in fresh SD card
- Once your OctoPi image is downloaded, ‘Extract All’ and ‘Write’ the image to the SD card
- Open the SD file Directory and look for the file titled “octopi-wpa-supplicant.
 txt”.
txt”.
In this file, there will be code as:
##WPA/WPA2 secured
#network={
#ssid=“type SSID here”
#psk=“type Password here”
#}
- At first, remove the ‘#’ symbol from the code lines to make them uncommented.
- It will become like this:
##WPA/WPA2 secured
network={
ssid=“type SSID here”
psk=“type Password here”
}
- Then put your SSID and set a password in the quotes.
- After adding the password, insert another code line as scan_ssid=1, just below the password code line (psk=“ ”).
- Set up your country name correctly.
- Save all changes.
Connecting the Computer to Pi
- Now connect it with your printer using the USB cable and power it on using a power adapter
- Insert the SD card into the Pi
- Open the command prompt and check the IP address of your Pi
- Insert it in the Putty application on your computer
- Login to the Pi using “pi” as the username and “raspberry” as the password
- Now open a web browser and type the Pi’s IP address in the search bar
- The Setup Wizard will be opened
- Set up your printer profile
- Set Origin at “Lower Left”
- Set Width (X) at 220
- Set Depth (Y) at 220
- Set Height (Z) at 250
- Click Next and Finish
Fix Pi Camera and Device on the Ender 3
- Fix the Pi camera on the 3D printer
- Insert one end of the ribbon cable in the camera and the other one in the Raspberry Pi ribbon cable slot
- Now fix the Raspberry Pi device on Ender 3
- Make sure that the ribbon cable is not tangled or stuck in anything
- Connect Pi with the Ender 3 power supply using a USB cable
- Installation is done
I’d go for the LABISTS Raspberry Pi Camera Module 1080P 5MP from Amazon. It’s a good quality, yet cheap option to get a nice visual on your 3D prints.
You can 3D print yourself OctoPrint camera mounts by checking out the Howchoo collection on Thingiverse.
A more premium, yet simple option to print wirelessly from your Ender 3 is by using AstroBox. With this device, you can control your machine from any location when they are both connected to the internet.
There is a Raspberry Pi 3 AstroBox Kit which you can get directly from the AstroBox website and it includes the following:
- Raspberry Pi 3B+
- Wi-Fi dongle
- Pre-flashed 16 GB microSD Card with AstroBox Software
- Power Supply for the Pi 3
- Case for the Pi 3
The AstroBox simply plugs into your 3D printer and enables Wi-Fi along with a connection with the cloud. You can easily manage your 3D printer with your phone, tablet or any other device which has connection to a local network.
Along with a standard USB camera, you can also monitor your prints, real-time from anywhere.
AstroBox Features:
- Remote monitoring of your prints
- Ability to slice designs on the cloud
- Wireless Management of your 3D Printer (No pesky cables!)
- No more SD cards to load STL files
- Simple, Clean, Intuitive Interface
- Mobile friendly and works on any web enabled device or using the AstroPrint Mobile App
- No need for a laptop/computer to be connected to your printer
- Automatic updates
AstroBox Touch
The AstroBox also has another product which extends the capabilities to be able to have a touchscreen interface. The video below showcases how it looks and how it works.
It does have some capabilities that you don’t get with OctoPrint. One user described how his kids could fully control and Ender 3 using just a Chromebook. The touch interface is really good and modern, compared to many touchscreen UI out there.
The last option that you might want to use to make your Ender 3 wireless is the Creality Wi-Fi Cloud Box, which helps to remove the SD card and cables, allowing you to control your 3D printer remotely from anywhere.
This product is fairly new at time of writing, and really has the chance to transform many 3D printer users’ experience with FDM printing. One of the early testers of the Creality Wi-Fi Box described their experience in this post.
You can also get the Aibecy Creality Wi-Fi Box which is the same thing but just sold by another seller on Amazon.
3D printing directly from your machine will soon be a task that is out-of-date as we develop the technology to easily 3D print wirelessly, with little setup.
The benefits of the Creality Wi-Fi Box are as follows:
- Simplicity of printing – connecting your 3D printer via the Creality Cloud app – online slicing and printing
- A cheap solution for wireless 3D printing
- You’re getting a powerful performance and very stable archive of software and hardware
- Professional-looking aesthetic in a black matte shell, with a signal light in the middle & eight symmetrical cooling holes at the front
- Very small device, yet large enough for great performance
In the package, it comes with:
- Creality Wi-Fi Box
- 1 Micro USB Cable
- 1 Product Manual
- 12-Month Warranty
- Great Customer Service
OctoPrint Raspberry Pi 4B & 4K Webcam Installation
For the highest quality 3D printing experience using a Raspberry Pi, you can use the Raspberry Pi 4B along with a 4K webcam. This will allow you to make some amazing videos of your 3D prints that you can share to your friends and family.
The video below by Michael at Teaching Tech goes through the process.
You can get yourself the Canakit Raspberry Pi 4B Kit from Amazon which gives you everything you need to get started without having to worry about the smaller parts. It also includes a premium clear Raspberry Pi case with an in-built fan mount.
A really good 4K webcam on Amazon is the Logitech BRIO Ultra HD Webcam. The video quality is definitely in the top-tier range for desktop cameras, an item that can really transform your visual displaying capabilities.
- It has a premium glass lens, 4K image sensor, high dynamic range (HDR), along with autofocus
- Looks great in many lights, and has a ring light to automatically adjust and contrast to compensate for the environment
- 4K streaming and recording with optical and infrared sensors
- HD 5X zoom
- Ready for your favorite video meeting apps such as Zoom and Facebook
You can really record some awesome 3D prints with the Logitech BRIO, so if you want to modernize your camera system, I’d definitely get it.
AstroPrint Vs OctoPrint for Wireless 3D Printing
AstroPrint is actually based on an earlier version of OctoPrint, being combined with new phone/tablet apps, along with a slicer that operates through a Cloud network. AstroPrint is a lot easier to setup compared to OctoPrint, but they do both run off a Raspberry Pi.
Practically speaking, AstroPrint is a software that carries fewer functions than OctoPrint, but has more emphasis on user-friendliness. You would want to go with AstroPrint if you just want basic wireless 3D printing capabilities without the extras.
If you think you’ll want to add more advanced features to your 3D printing, you probably should go for OctoPrint.
They have a larger community of contributors who are always developing new plugins and functions. It was built to thrive on customizations and unique features.
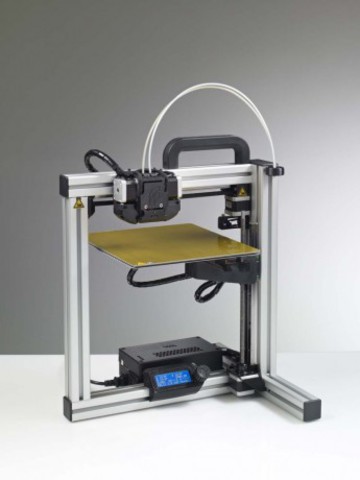
Duet 2 Wi-Fi
Duet 2 WiFi is an advanced and fully functional electronic controller specially used for 3D printers and CNC (Computer Numerical Control) devices.![]()
It is the same as its old version Duet 2 Ethernet but the upgraded version is 32-bit and offers Wi-Fi connectivity to work wirelessly.
Pronterface
Pronterface is a host software that is used to control your 3D printer functionalities. It is built from the open-source software suite Printrun which is licensed under GNU.
It provides the user with a GUI (Graphical User Interface) access. Because of its GUI, the user can easily configure the printer and can print the STL files just connecting it with a USB cable.
Does the Ender 3 Pro Come With Wi-Fi?
Unfortunately, the Ender 3 Pro doesn’t come with Wi-Fi, but we can enable a wireless connection by either using a Wi-Fi SD card, a Raspberry Pi & OctoPrint software combination, a Raspberry Pi & AstroBox combination, or by using the Creality Wi-Fi Cloud Box.
In order to keep prices down and let people make their own choices for upgrades, the Ender 3 Pro has kept functionality and extra features to a minimum, mainly focusing on the what you need to get some of the best printing quality right out the box.
10 Simple Ways To 3D Print Over Wi-Fi – Printing It 3D
Several brands like Ultimaker and MakerBot manufacture 3D printers equipped with LAN or Ethernet ports and Wi-Fi compatibility. However, your 3D printer may not have such features. Thus, you have to use a compatible intermediary device, adapter, or tool to 3D print over Wi-Fi.
Here are 10 simple ways to 3D print over Wi-Fi:
- Use remote access software.
- Consider using the AstroBox Touch.
- Opt for the AstroBox Gateway.
- Try using the Raspberry Pi and AstroPrint.
- Use the Raspberry Pi and OctoPrint.
- Use the AstroPrint Plugin for OctoPi.
- Try using Microsoft IoT Core.
- Consider the Creality Wi-Fi Box.
- Use Wi-Fi Modules.
- Consider using the Silex USB Device Server.
Technically, you need a reliable way to connect your 3D printer to the internet network so that you can access it over Wi-Fi, irrespective of your real-time location. This article offers 10 options for you to choose the simplest or most convenient and affordable solution to 3D print over Wi-Fi.
1. Use Remote Access Software
Using a computer, laptop, or smartphone with a 3D printer through a USB cable can use remote access software to connect over Wi-Fi. Of course, the intermediary device must be on and connected to the internet. However, the device you use for remote access doesn’t have to be onsite or connected to the same network. Thus, you can 3D print from anywhere.
You may consider the Chrome Remote Desktop. Google’s solution works for all computers, laptops, and phones, irrespective of the operating system. You can use the network in your house and the Wi-Fi at any place you’re at a time to access the system connected to your 3D printer.
There’s no shortage of remote access software today. You can check out the likes of TeamViewer and FlexiHub. TeamViewer is a proprietary remote connectivity software, but it has a free version for non-commercial private use. You can always test such options to 3D print over Wi-Fi.
However, what if a 3D printer has only an SD card slot, or you don’t want to keep a computer, laptop, or phone hooked all the time to access the system over Wi-Fi? Remote access software can work only when two or more systems are powered and online. Thus, you need alternatives.
2. Consider Using the AstroBox Touch
Raspberry Pi enthusiasts have been using the single-board computer to make various devices over the years, from video doorbells with two-way audio to DIY adapters for 3D printers so that they can be connected via Ethernet and Wi-Fi. Now, you can get similar solutions off the shelf.
AstroBox Touch is a plug-and-play tool that instantly transforms your 3D printer into a network device. Made by AstroPrint, AstroBox Touch is among the simplest ways to 3D print over Wi-Fi. Also, the solution is a complete interface for you to manage everything on your 3D printer.
The only significant demerit of AstroBox Touch is its price. At ~$200, the turnkey solution with USB and Ethernet ports, built-in Wi-Fi, SD card slot, standard power cable, and touch screen may not be readily affordable for everyone. However, its convenient use is undisputed.
3D printing is a complex process, and several things can go wrong every time you try a unique model with complicated design elements. The last thing you need is unpredictable hiccups or failed prints due to an unreliable solution enabling you to 3D print over Wi-Fi.
AstroBox Touch offers wireless 3D printing, remote monitoring, fleet management, data and file sync for all connected devices, and compatibility with desktop, phone, and web. Also, you get a cloud-based library for designs, files, codes, compiled analytics, online slicer, and more.
3. Opt for the AstroBox Gateway
AstroBox Gateway is the predecessor of AstroPrint’s Touch version. However, the touchscreen isn’t the only missing feature. The two models have different software, the Gateway has no access to the app store, and the setup is through hotspot only, whereas Touch has the screen.
More importantly, AstroBox Gateway isn’t a plug-and-play solution. You need to assemble it, and the device isn’t exactly for those looking for a turnkey gadget. Still, the significant difference in price of almost $100 between AstroBox Gateway and AstroBox Touch warrants a mention.
AstroBox Gateway enables you to 3D print over Wi-Fi. You can use web or browser-based access to monitor your prints remotely. Also, you get auto software updates, video streaming, camera compatibility, and multifaceted access through a desktop, mobile app, and web portal.
A noteworthy fact is AstroPrint’s transparency regarding compatibility. The brand has a list of 3D printers classified as compatible per manufacturers, community, and AstroPrint. Check the list here — it also mentions the 3D printer brands and models that are ‘not verified’ as compatible.
4. Try Using the Raspberry Pi and AstroPrint
You can use AstroPrint’s platform and resources to 3D print over Wi-Fi without buying an AstroBox Touch or Gateway, but you need a Raspberry Pi. This option is affordable if you have a Raspberry Pi already. Otherwise, a ready-made AstroBox Touch or Gateway is more practical.
AstroBox Touch needs a Raspberry Pi 3 or 4 and won’t work with any earlier version. Refer to this stepwise guide to build your own AstroBox Touch. You can use this DIY tutorial to build an AstroBox Gateway using the now-discontinued Raspberry Pi 2 or any subsequent generation.
While these DIY solutions may be simple for tech-savvy users, the processes aren’t always straightforward for those unfamiliar with Raspberry Pi, PCIe, soldering touchscreens onto the single-board computer, and circuitry related issues, among other common prerequisites.
5. Use the Raspberry Pi and OctoPrint
Like the DIY AstroBox Touch or Gateway using Raspberry Pi, you may also use the latter with OctoPrint or OctoPi. However, you’ll need an internet-enabled Raspberry Pi kit, including a memory card, cables for power, USB, and HDMI, an appropriate case, and preferably a fan.
You may buy the Wi-Fi dongle and other supplies separately if you have a Raspberry Pi. Else, you can consider something like the CanaKit Raspberry Pi 4 Kit (available on Amazon.com). This 128 GB storage & 4GB memory edition has most of the essentials you need for the project.
The other integral component is OctoPrint, available as the OctoPi image that you can download and set up. First, you must build your device, and then get the Raspberry Pi Imager and choose the specific purpose OS OctoPi to make your 3D printer Wi-Fi or internet-enabled.
Watch this YouTube video to use Raspberry Pi and OctoPrint to 3D print over Wi-Fi:
6. Use the AstroPrint Plugin for OctoPi
OctoPi or OctoPrint may or may not be convenient for everyone. The fascinating resources and unmatched control of OctoPrint can overwhelm beginners. In contrast, AstroPrint may be pretty straightforward. Fortunately, you don’t have to make such hard choices with Raspberry Pi.
There’s an AstroPrint plugin compatible with OctoPrint, thus your DIY Raspberry and OctoPi. You can check out and download the plugin here. Also, you may want to explore the significant differences between AstroPrint and OctoPrint if you’re unsure about choosing either or both.
7. Try Using Microsoft IoT Core
Microsoft IoT Core is a simple way to convert your 3D printer into a network device. Imagine the old school 2D printers connected via LAN, except for the fact that the modern version enables you to 3D print over Wi-Fi and remotely using a system running Windows 8.1 through 10.
However, you’ll still need an intermediary board, but that isn’t a problem because Microsoft IoT Core has been compatible with Raspberry for more than five years now. Thus, you can use Raspberry Pi with Windows 10 IoT Core and its Network 3D Printer app through LAN and Wi-Fi. Also, you can use the 3D Builder app on Windows devices to sync with your Microsoft account.
This method works for Lulzbot, Makergear, Printrbot Play, Prusa i3 Mk2, CraftBot, Ultimaker 3D printers, and a few other brands & models. Also, check if your Windows version works with the Raspberry Pi you use. For example, you can’t use Windows 10 IoT Core on Raspberry Pi 4 yet.
8. Consider the Creality Wi-Fi Box
The Creality Wi-Fi Box is one of the most common recommendations you’ll find online, but it’s not a perfect solution. For starters, the Creality Wi-Fi Box (available on Amazon.com), sold by the Sovol 3D Store, is now the same package as the Creality Smart Kit (available on Amazon.com) of SainSmart. The Creality Wi-Fi Box is great because it’s lightweight and easy to carry.
Until recently, the Creality Smart Kit had a Wi-Fi Box and camera. Now, if you don’t want the camera, you have to consider the Entweg Original Creality Wi-Fi Box (available on Amazon.com). Apparently, the Entweg Wi-Fi Box doesn’t feature the Creality branding on the case. That apart, the box is easily one of the most affordable and simple ways to 3D print over Wi-Fi. However, there are concerns.
The Creality Wi-Fi Box is compatible with Android and iOS, so you can use your phone to feed a design, monitor the process. It also controls the print to an extent, but the interface won’t use the code you provide. The Creality Cloud app and slicer will process the file, and this takes time.
If you don’t intend to print your unique designs with customized codes, the Creality Wi-Fi Box should work fast and without glitches for most models in its library. Also, this box is compatible with every Creality 3D printer as long as you use a connected device running Android or iOS.
Some users have reported their disappointment about the camera’s resolution. However, if you want to have a visual feed for remote monitoring, the Wi-Fi box and camera kit may be worth considering. Besides, the cost isn’t even remotely close to what you may pay for a Raspberry Pi, an AstroBox Touch or Gateway, or other mainboards and essential components for a DIY rig.
9. Use Wi-Fi Modules
Raspberry Pi, OctoPrint, AstroBox Touch, or Gateway, all such devices require a Wi-Fi module. Likewise, Microsoft IoT Core also needs a connected Raspberry Pi to have onboard Wi-Fi or an Ethernet connection for you to access the 3D printer using the internet and remotely.
However, not all Wi-Fi modules and adapters or sensors work as you may expect them to in real-world settings with actual 3D printers of different brands. Mainboards and Wi-Fi modules may not be simple for every user to work with, and the experiences can be starkly different.
Two relatively known 3D Wi-Fi modules are GeeeTech and BigTreeTech. GeeeTech’s 3D Wi-Fi Module works with the EasyPrint app. The entire setup is somewhat simple, and the interface has many features to access, initiate, control, and monitor a 3D print over Wi-Fi.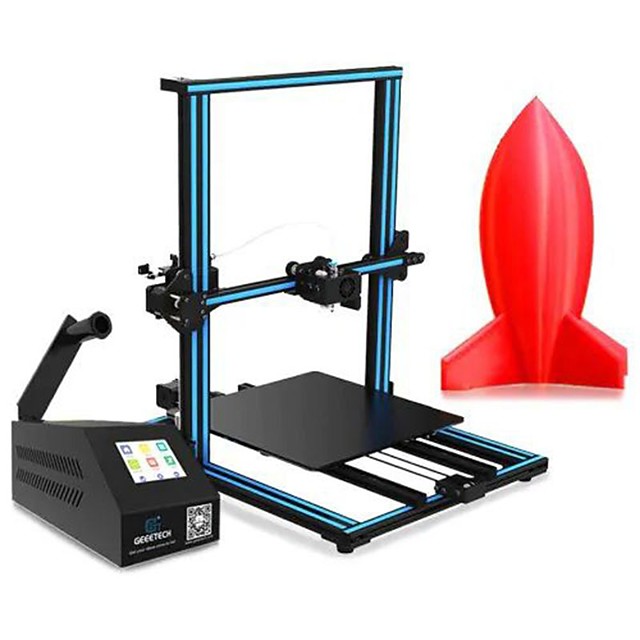 Also, GeeeTech has a comprehensive manual to configure the module with your 3D printer and Wi-Fi.
Unfortunately, the 3D Wi-Fi Module’s theory isn’t exactly what users experience in practice. Besides, the module is unavailable online at the time of writing this guide. Still, you may want to watch the following YouTube video to check out how a GeeeTech 3D Wi-Fi Module could work, if it does:
The other option is the BigTreeTech Direct Wireless Module (available on Amazon.com). This Wi-Fi Sensor works with SKR Pro V1.1 and SKR Mini E3 mainboards or motherboards. Thus, if you want a Raspberry Pi alternative, you can use BigTreeTech’s SKR board and Wi-Fi Module.
This setup is essentially a substitute for Raspberry Pi with OctoPrint, AstroPrint, or Microsoft IoT Core. The Wi-Fi Module is reasonably priced, but it operates at 3.3 V, so it’s not compatible with any board that runs on 5 V, like Raspberry Pi. Also, BigTreeTech’s Wi-Fi sensor has a frequency range of 2.4 GHz – 2.5 GHz, not the 5 GHz that many Wi-Fi adapters are compatible with.
There are other incompatibility issues related to software and hardware. However, BigTreeTech has a bouquet of essential components that you may use if you wish to try such ways to 3D print over Wi-Fi. Here’s a YouTube video to give you an idea of how BigTreeTech components work:
10. Consider Using the Silex USB Device Server
The Silex DS-520AN USB Device Server (available on Amazon.com) is a relatively expensive way to 3D print over Wi-Fi. However, it’s as reliable and simple as the AstroBox, Microsoft IoT Core, and remote access software. As an added advantage, you can use Silex for various USB-enabled hardware.
This USB server supports 802.11n Wi-Fi and Ethernet. You can set it up with 3D printers, flash drives, scanners, cameras, and other hardware. Silex has its Virtual Link software for Windows 7 through 10 and Server 2019, including many previous generations.
Also, you can connect a 3D printer to a chosen network with the AutoConnect feature and access it through multiple Windows devices. Furthermore, Silex USB Device Server works with Citrix, Hyper-V, and VMware, among other virtualization programs.
We connect the 3D printer to the home WiFi network.
Since the printer is in my kitchen, and the main working computer is in the room, a crazy thought crept into my head, should I connect it over the air?
Option with connection via "Blue Tooth", no longer available.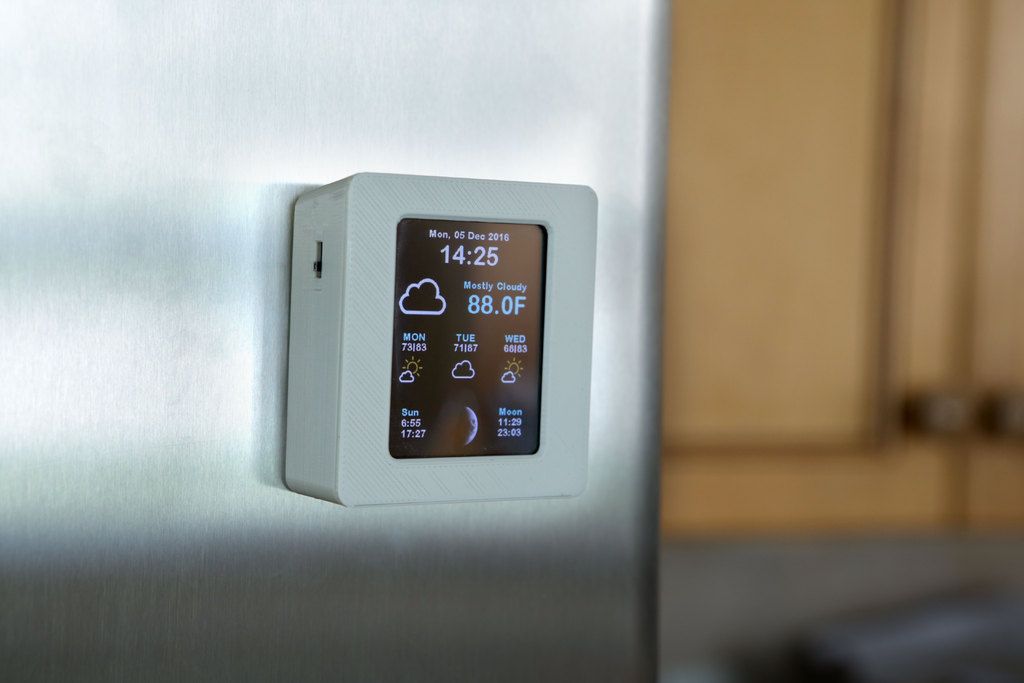 The distance is large, and the stability of such a connection leaves much to be desired. And so, wandering through the expanses of the Internet, I stumbled upon the ESP8266 module. It costs a penny, it is easy to program, a huge community, including in Russian. I began to dig further, it is logical, if there is such a miracle, then the community has long begun to use it as a standard WiFi connector for 3D printers. And it turned out to be completely different. As I did not “google”, I could not find more or less detailed instructions, and preferably also in Russian. Well, if not, then an inquisitive mind needs to fill this gap. What I will tell you now. Further under the cut, step-by-step instructions for connecting the ESP8266 to absolutely any 3D printer, the electronics of which are based on the Arduino Mega 2560 + Ramps 1.4 + Marlin software.
So let's get started.
What we need from hardware:
- A working 3D printer, the electronics of which are based on Arduino Mega 2560 + Ramps 1. 4 + Marlin software;
- ESP8266 module;
Retreat one. There are a great many modules, and in addition to its very first modification ESP8266 ESP-01, modules are sold with an external antenna connected, with a ceramic antenna, with a PCB antenna, without an antenna. Different modules have different numbers of GPIOs. Detailed information can be found at the link.
- USB-TTL converter (preferably with 5 and 3.3 volt switch, or 3.3 volt version) based on FTDI, PL2303 or similar chip. Look for a USB-TTL adapter that has DTR and RTS pins.)
Retreat two. For ESP8266, as a programmer, you can use an arduino and Arduino IDE, you can read about the use of such a bundle on the relevant forums at the link.
- 3.3 volt power supply.
Retreat three. The ESP8266 module is powered by 3 to 3.6 volts.
Applying the voltage indicated above to the module will turn your module into a useless piece of iron . The ideal option, for myself, I consider the power supply of electronics from a computer PSU. The USB-TTL converter may not "pull" the module's power (mine did not), so I had to power it separately.
- 10KΩ, 470Ω resistors, 0.1uF capacitor, buttons (or jumpers), wires, connectors, breadboard.
- Soldering iron, tin, rosin.
- Slightly, slightly straight arms and the ability to use them.
What we need from the software:
- The program for flashing the nodemcu-flasher module itself;
- Program for loading LuaLoader codes into the lua module;
- The lua codes themselves.
Next steps.
Step No. 1
We assemble the board as follows:
Depending on the modification of the module, your board may not have enough GPIO, like mine, it's not scary. Connecting unwired pins is not required, on my ESP-01 only VCC, GND, GPIO0, GPIO2, CH_PD and RESET are wired - we only connect them. In order not to click on power once again, we put an additional jumper on CH_PD.
Step #2
We connect our USB-TTL converter to the computer (so far only it) and install all the necessary drivers. If all is well, then the system should have a new virtual serial port.
We check the output voltage, it should not exceed 3.6 V!
Step #3
Turn off the USB-TTL converter and connect the ESP8266 module to it, in accordance with the diagram. We serve food. GPIO0 jumper must be open!
Step #4
We open the additional jumper that we installed on CH_PD. We close the jumper GPIO0. Close the CH_PD jumper.
With these steps, we put the ESP8266 module into firmware mode.
Step #5
Run nodemcu-flasher.
We set the COM port (usually this action is not necessary, but suddenly). The program itself will download the new firmware version, if necessary.
Press flash.
We are waiting for the green firmware bar to fill up and the inscription flash OK.
If something went wrong, follow the link and look for your problem. If the circuit and connection are correct, as well as the voltage is correct, then there should be no problems.
The main problem can be seen and diagnosed during the connection phase. If, after connecting the USB-TTL converter, and then supplying power from to the ESP8266 module, the COM port disappears from the system, this means that the converter does not pull the module and an external 3.3 V power supply is needed.
Exit the program.
We open the additional jumper that we set on CH_PD. Open the GPIO0 jumper. Close the CH_PD jumper.
Step #6
Start LuaLoader.
Go to Settings , Comm Port Setting . We select the port to which we have connected the USB-TTL converter with the ESP8266 module.
In Baud Rate set 9600, press Connect.
If everything is done correctly then Baud Rate should change color from red to green.
Next, in the field SSID enter the SSID of your network, in the field password enter the password of your network.
Click Set IP . Click Green WiFi symbol .
After all these steps, the ESP8266 module should appear on your home network. You can check this in any of the available ways, for example, go to the router and see the list of connected devices.
The next step is to upload codes to the lua module.
Click Disconnect (although this probably can not be done).
We poke in Upload File , we find the init.lua file downloaded earlier from the link and it will be loaded on the device itself, you just need to wait a bit.
Again we poke in Upload File , we find the WIFI_Reset.lua file downloaded earlier from the link and wait again.
That's it, our module is now ready to be connected to our printer.
Step #7
We connect our module to AUX1 Ramps 1. 4. Do not forget that the power supply must not exceed 3.3 V!
Turn on the printer, wait until it boots up. We supply power to the module.
If you have a printer with a screen, then its IP address will be displayed in the bottom line of the screen. If not, then we climb on the router and look in the devices connected via WiFi to the IP address of our 3D printer.
Step #8
Since I use Repetier-Host, I will describe the connection to the printer using this program as an example.
Start Repetier-Host.
Go to Configuration, Printer Settings.
On the Connection tab, select TCP/IP connection.
In the IP address tab, set the IP address that is on the printer screen or found in the router settings.
In the Port tab, write 9999.
The rest can be left unchanged.
Click Apply. We close the tab.
Click Connect.
We use it!
Useful links:
http://creatorbot.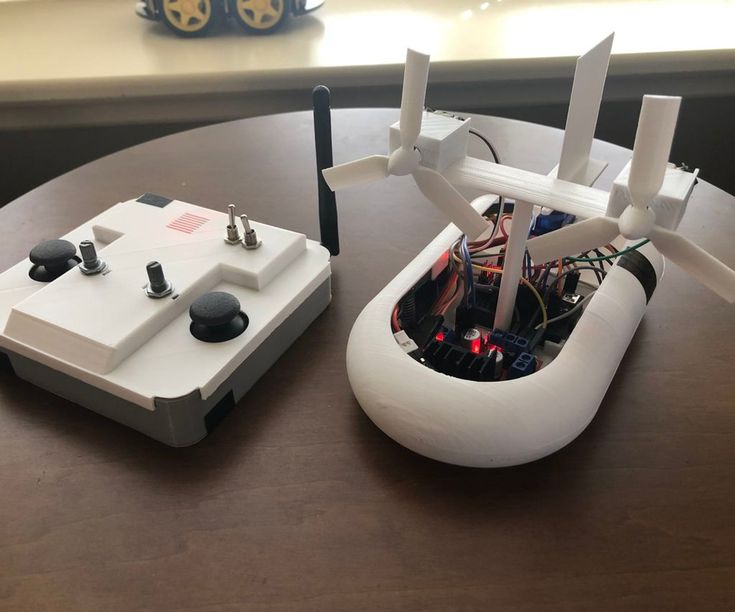 com/projects/electronics/add-esp8266-wifi-to-your-3d-printer
http://esp8266.ru/category/esp8266/esp8266-hardware/
http:// esp8266.ru/esp8266-podkluchenie-obnovlenie-proshivki/
https://habrahabr.ru/company/coolrf/blog/238443/
Your first 3D print with the Flying Bear Ghost 5 / Ampere
Let's assume that you've already completed the printer assembly quest and you can't wait to print something. Here's how to get started printing on the Flying Bear Ghost 5 and what settings to look out for in order to get the most out of your 3D printer.
Before printing on a 3D printer, the model must be prepared and divided into layers. Typically, 3D models are distributed in STL format - this is a kind of JPEG in the world of modeling. A three-dimensional object in the STL format consists of a set of polygons - triangles, the coordinates of which are described in the file.
However, printers cannot process STL files themselves. First, the selected model must be converted into a G-code - special commands for the printer that tell you where to move the head and how fast to extrude the plastic during the printing process.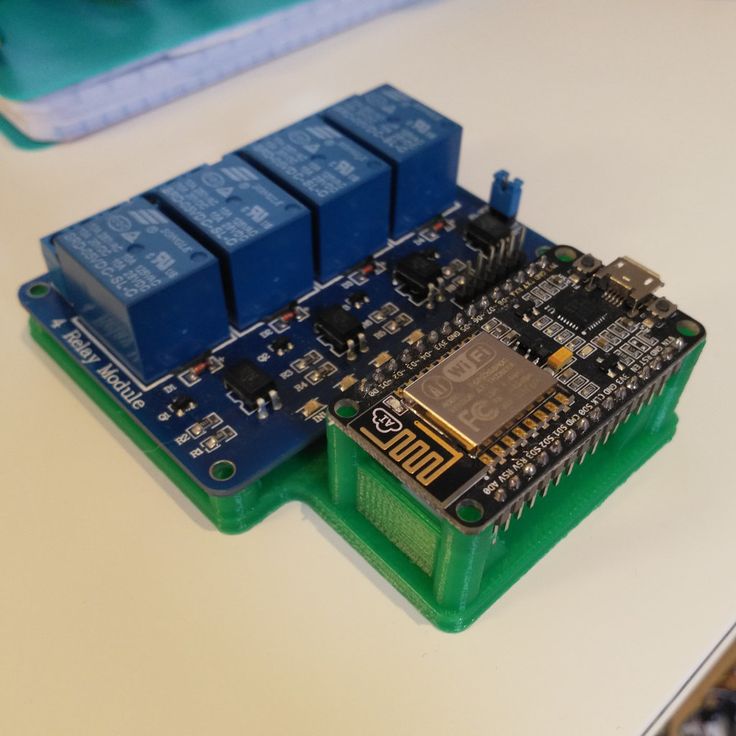 To convert an arbitrary 3D model into a G-code, there are special programs - slicers.
We will show how this operation looks like using the Flying Bear Ghost 5 3D printer as an example. We will process the popular 3DBenchy boat model in the Cura slicer.
This model is specially made to detect printing imperfections on 3D printers and calibrate settings. You can download any 3D model in STL format from specialized sites.
Slicer download
Any slicer program is suitable for converting models to G-code. In this example, we will use the Cura slicer - the most functional of the free programs. Download the slicer from the official site and run the installation.
Skip the welcome screens and accept the terms of use.
Setting up a printer in the slicer
Add a printer to the program using the "Add a non-networked printer" button.
Select "Flying Bear Ghost 4S" from the list. This is the previous model that has similar specifications to the Flying Bear Ghost 5.
Any printer name can be entered in the "Printer name" field. It is needed to distinguish between several printers or several settings profiles of one printer. Name it "Flying Bear Ghost 5".
Change the Z print area to 200mm. The "Z (Height)" field is responsible for this. The Gantry Height field will change automatically. Leave the rest of the fields unchanged. Click the "Next" button.
Changing the program language
For convenience, we will immediately change the program language. Go to the settings using the "Preferences" → "Configure Cura..." button
Select Russian in the "Language" drop-down menu.
The interface language will change only after the program is restarted. Close Cura and reopen - you will be greeted by Russian-language menus.
Adding a model to the slicer
Click the button with the folder icon and select the downloaded 3D model file.
Print settings
All program management is placed in the top panel with three buttons.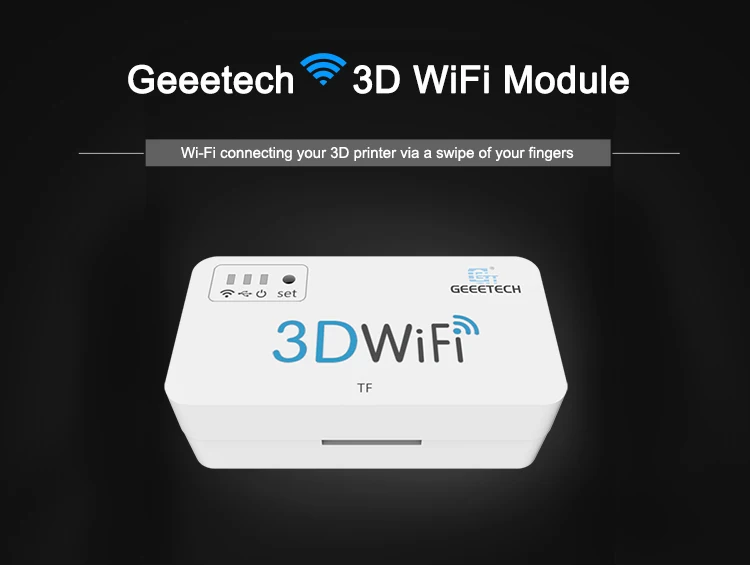
Printer selection
The name of your printer is displayed in the upper left corner. We only added one model, so this item should be Flying Bear Ghost 5.
Plastic and nozzle selection on the printer
Your Flying Bear Ghost 5 printer allows you to print different types of plastics and use different diameter nozzles. Make sure that the standard 0.4 mm nozzle is selected in the program, which is installed in the printer from the factory.
Open the plastic and nozzle selection shutter. In the "Material" section, select your plastic. If you are printing with the test spool of plastic supplied with the printer, then select "PLA" in the "Universal" section.
Selecting slicing settings
By clicking on the long button on the right, a list with basic slicing settings is opened. The developers of CURA tried to make the program clearer, so they built hints into it. When you hover over an unknown parameter, a tooltip will appear that will help you understand what setting it is responsible for and what it affects.
Custom button opens detailed settings with many options. Leave all professional options at their defaults. We have enough basic settings.
The top slider "Profiles" is responsible for the height of one layer. The thicker each layer, the faster the model is printed. At the same time, by reducing the layer thickness, a more accurate print quality is achieved.
Set the layer height to 0.16 mm. This is the golden mean between speed and quality.
The second Infill slider controls the interior of the model. The printer can print only the walls of the model, and leave the internal volume empty. This will greatly reduce plastic consumption, but will negatively affect the strength of the model. So that the finished plastic part does not fall apart in the hands, its insides do not remain empty, but are filled with a mesh. The resulting edges increase the rigidity of the model.
To strike a balance between model strength and plastic consumption, set the infill to 20%.
Also in the slicing settings menu are two additional options: supports and sticking.
If the part has protrusions that hang over the table, then the printer will not be able to print them - they will simply fall. To prevent this from happening, activate the "Supports" option with a checkmark. Under the overhanging parts, columns will be printed that will support the part.
Our test model of the ship does not have these parts, so the "Support" parameter does not need to be activated. But if you print your own model - do not forget about the supports.
Stick setting improves adhesion. This is the adhesive force between the workpiece and the table. If the adhesion is insufficient, the part may come off during the printing process. The printer will print a skirt around the model, which will increase the contact area with the table. After printing, it can be cut off, but it will not allow the model to come off the table in the middle of the process.
Activate this option, because the bottom of the boat is quite shallow, and an additional surface for stronger adhesion will be very useful.
Preview
Click the Slice into Layers button. After that, the slicer will calculate the trajectory of the head and generate a G-code.
Switch to the "Preview" tab, where you will see the built layers of the model. The preview helps you check your print settings and understand how your model will print.
Export G-code
To record the finished file, the easiest way is to connect a microSD memory card to the computer through the adapter supplied with the printer. The slicer will immediately detect the removable device and offer to save the file to it. Save the G-code to a memory card, or use the drop-down list to save to a file, and then manually copy to the card.
Table Calibration
The initial setup was already done when the printer was assembled, but over time the table may fail.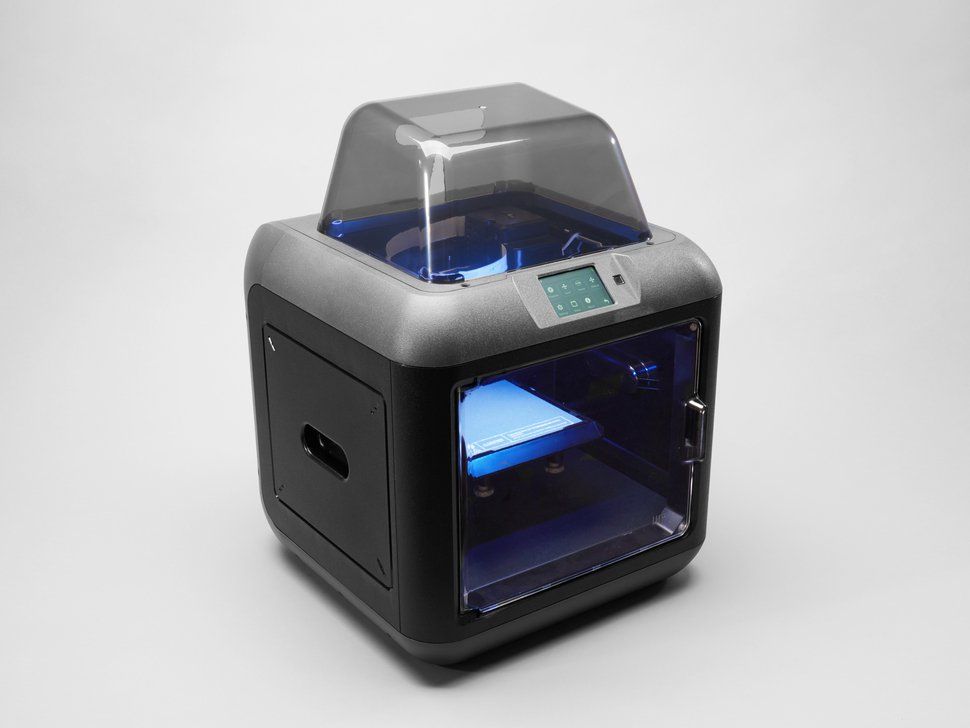 If the model does not adhere well or, conversely, the first layer is too thin and the extruder starts to click, then the table must be recalibrated using the four corner screws.
If the screws are unscrewed to the limit or, on the contrary, compress the springs to the maximum, adjust the Z-axis calibration screw. Go to the "Tool" tab.
Go to the "Leveling" tab.
Press button "1". The printer must place the nozzle in one of the corners
Place a sheet of paper between the nozzle and the table. Use the adjusting screw to adjust the table so that the sheet of paper is jammed. Repeat the calibration in each corner of the table.
Replacing the filament
Before the test print, we already loaded a test filament spool, but sooner or later you will have to change it. For example, if you want to print in a different color or try a different type of plastic. To do this, you first need to remove the remnants of the old plastic. We will change the plastic to another one, or remove the remnants of the old one.
The printer will not let you operate the extruder while the nozzle is colder than 190 degrees and will automatically raise the temperature before any operation. However, high temperature plastics can remain hard and the extruder will not be able to push or pull the filament. For them, it is necessary to additionally heat the nozzle above 190 degrees using the "Preheat" menu.
Go to the Filament menu.
The two large arrows on the screen can either push the bar down or pull it back out.
The speedometer button can be used to switch the plastic feed speed.
"High" - high. It is best used when the plastic is fed through the Teflon tube, but has not yet reached the nozzle.
"Low" Set this speed to squeeze the plastic out of the nozzle. At high speed, the nozzle section is not enough.
In order to pull out the plastic thread, press the up arrow. Wait until the plastic thread is completely pulled out of the Teflon tube by the extruder.
The printer will warn you if the nozzle temperature is less than 190 degrees.
After the nozzle has reached operating temperature, press the "Confirm" button and the extruder will turn on.
After the end of the old filament comes out of the extruder, press the down arrow. The extruder will start pushing the filament towards the nozzle.
The end of the plastic thread on a new spool is usually threaded through the holes to keep it from unwinding. Trim it as the deformed end may get stuck in the filament sensor or extruder.
Remove the uneven end of the plastic with wire cutters.
Pass the bar through the filament sensor and then into the extruder.
Wait until the bar reaches the nozzle. As soon as plastic begins to flow from the nozzle, switch the speed to low so as not to ruin the extruder.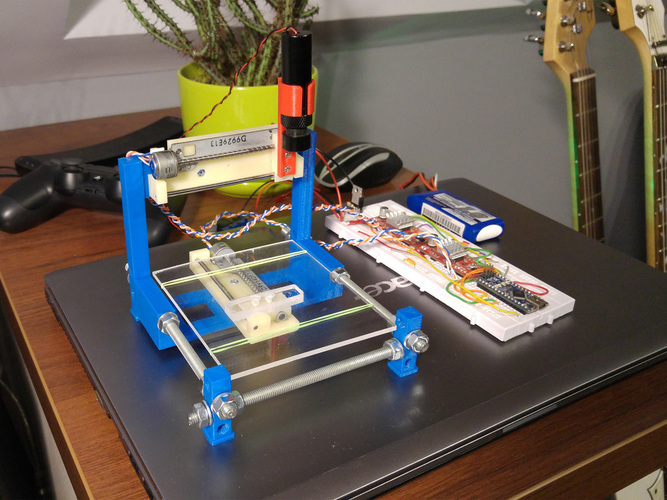 Wait a little for the remnants of the old plastic to pour out of the nozzle. The color should change to a new one.
Then press "Stop" on the screen.
Printing from a memory card
Adhesion must be considered before printing. The glass has a special coating that improves the adhesion between the first layer of plastic and the table, but larger models may have curled edges. To improve adhesion, you can thinly anoint the table with a glue stick or sprinkle with hairspray.
Insert a memory card into the bottom of the printer.
Use the arrow in the upper left corner of the screen to exit to the main menu.
Go to the "Printing" section.
Select a file to print from the memory card.
Confirm the print by pressing Confirm.
After that you will see a progress bar with the print status and some buttons.
The printing process does not start immediately. Wait a few minutes for the printer to heat up the bed and nozzle to operating temperature.
The red button with the “Stop” sign is needed to urgently stop printing if something went wrong, and the green one with the “Pause” sign to pause it.
The screen has an indication of the temperature of the table and nozzle, cooling power, print speed and extrusion ratio. If you click on the icon, you can change the corresponding parameter directly during printing. All the parameters from the slicer are suitable for us, so we don’t need to change anything on the printer.
After printing, wait for the table to cool down. Parts are much more difficult to remove from a hot or warm table. Remove the piece with a spatula.
Wi-Fi printing
The Flying Bear Ghost 5 printer supports Wi-Fi printing. You can not throw off the file on the memory card, but immediately give the command to print from the slicer. To do this, the printer must be connected to your wireless network and add support for printing over Wi-Fi in the slicer.
Connecting the printer to a Wi-Fi network
Press the Tool button.
Go to the "WiFi" section
Select your wireless network from the list.
Enter the password for the Wi-Fi hotspot.
The printer has connected to the router. Make a note of the printer's IP address. You will need it when setting up the connection in the slicer.
Cura Wi-Fi connection
Press the Store button. A window with plugins for the slicer will open. Add-ons are needed to expand the standard features of the program.
In the add-on store, select "MKS WiFi Plugin" from the list.
Install the plugin.
Agree to the terms of use.
Click the Manage Printers button.
Click the "MKS WiFi" button to connect your printer via WiFi.
Click the Add button.
Enter the printer's recorded IP address in the box.![]()