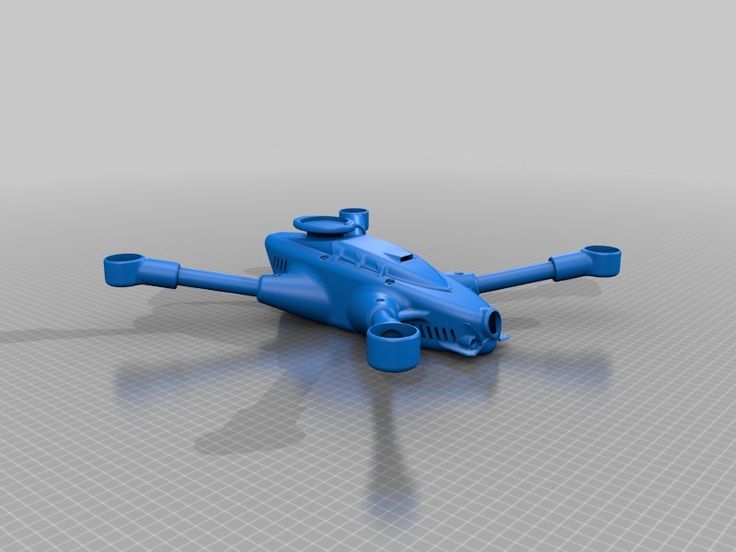
3D print quadcopter
Best 3D printed drone projects
Is a 3D printed drone as efficient as a traditional drone?
Drones and 3D printing are a perfect match! The benefits of drones are more and more attracting for numerous sectors, as it allows to go to areas which are inaccessible for humans. The problem is that a traditional drone can be very expensive if you want a high-quality device. Moreover, it may occur that the quadcopter that you chose isn’t totally adapted to your project and doesn’t have all the features you need. Or on the contrary, the drone can have too many features and you will not use all of them.
The 3D printing industry allows to create your own drone, it’s the perfect way to get a drone customized to fit your needs. It’s is cheaper and the product development process is faster with the additive manufacturing technology. It is possible to create really lightweight drones, little or bigger ones, and even faster ones. 3D printing appears to be a smart choice to develop a drone project.
And if you’re not planning to use 3D printing to manufacture your drone, at least, it is possible to use 3D printing for your prototyping phase.
Now, let’s see in our top the best projects developed with 3D printed drones!
Top 15 of the best 3D printed drone projects
1 – The 3D printed drone project of the Marine Corp
Drones are already well-used in the military sector since they allow the troops to get real-time images of dangerous areas and situations. But the major problem with a drone is its cost. If the drone is broken, it is quite expensive to replace. And even if there’s just a broken part, the budget to fix it can be really high.
source: https://www.popsci.com/marine-corps-3d-printed-drones
As they were beginning to be unwilling to use it, they looked for another solution. With a more affordable drone, they would be more confident to use it. And here came the solution: 3D printing. To 3D print a drone is way cheaper and fast to assemble.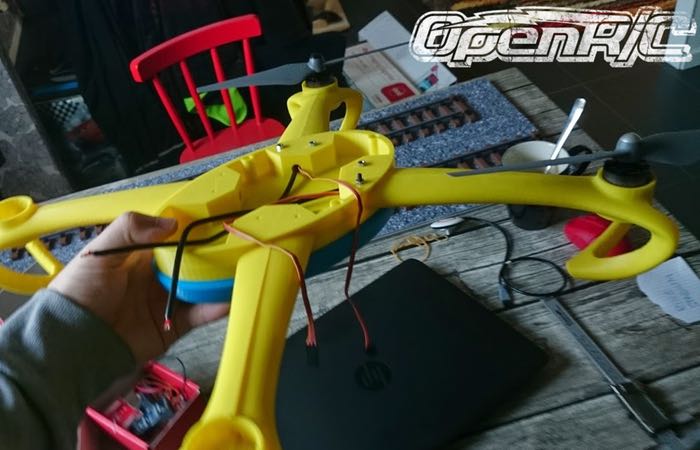 By using additive manufacturing, the entire system that they are planning to use only costs 615$ while an individual Raven drone costs 30 000 $.
This 3D printed drone project is the proof that additive manufacturing can be useful in various sector: even the Marine Corp wants to 3D print their drone. It is also the proof that these kind of drones are reliable.
2 – 3D printed drone to save lives during disaster relief
This 3D printed quadcopter drone as designed by Yuki Ogasawara and Ryo Kumeda. The idea of the project emerged after the earthquake that touched Japan in 2011.
During this disaster, nearly 16 000 people were killed and 2 500 missing. The goal of this 3D printed drone is to fly in dangerous zones to find survivors, after a catastrophe, such as an earthquake. These drones could enable emergency services to see images in real time and be more efficient by saving time in the research.
Source: https://3dprint.com/181435/generative-design-x-vein-drone/
3D printing allowed them to create a model that they could customize and adapt to their project.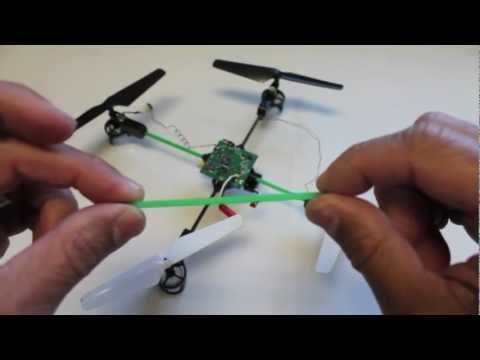 It has the perfect size and weight for these kinds of conditions, it has an extended flight time, and a reinforced frame. The drone is also capable of carrying thermographic and infrared-imaging equipment, which can be particularly useful to locate people needing help.
3 – UVify and their 3D printed racing drones using autonomous technology
UVify is an american tech company, working on racing drones, robotics, and artificial intelligence systems. Their will is to develop their drones with FPV (First Person View) in the e-sport world. This 3D printed drone is called Draco. Some of the drones created by UVify are raced by professionals in different competitions.
They are according a big importance to the drone design and the rapidity of the drones. They have to be efficient. Uvify wants to create an out of the box drone, specially made for the professional drone racing market.
“We used and are still using 3D Printing in our activity: we’re creating at least a new iteration every week thanks to 3D printing prototypes.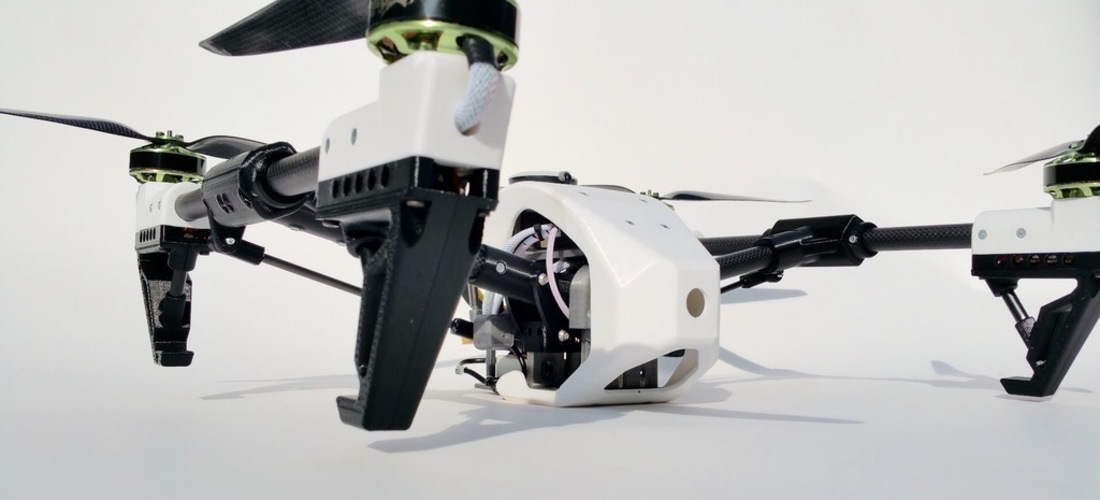 ” said Robert Cheek in one of our previous blogposts.
They are using the 3D printing technology both for prototyping and production. It allows them to get their drone with a fast lead time and get a high-quality final product.
4 – Earth observation with a 3D printed drone thanks to Svarmi
Svarmi is an Icelandic company, specialized in drones as a service, for remote sensing or earth observation. Their clients are architects, engineers, researchers, and any people wanting aerial images.
As their product development is based on their clients’ expectations, 3D printing allows them to be free and customize their drone as much as their customers need it. As this company explained to us: “Other traditional manufacturing methods are too slow and costly for our purposes since we need to be able to have something ready within a week or two. After integrating the new sensors to our drones we test them out with our customers and redefine the requirements if needed to suit the task and sometimes redo the process again by refining the design or selection of sensors.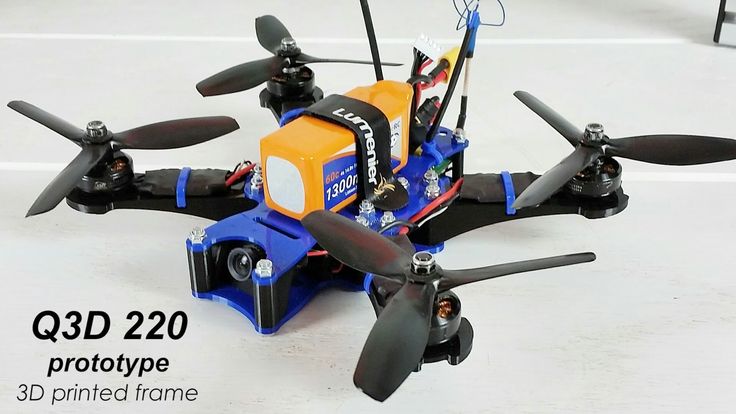 ”
”
These 3D printed quadcopters are the challenging and innovative project of two mechanical engineers. They created 3D printed drones thanks to our online 3D printing service, they state that 3D printing allowed them to save 40% time on their product development process.
5 – CargoCopter 3D printed drones: the future of delivery
Delivery services are more and more requested. Recently, we’ve heard a lot in the past few years about delivery services that could be using drones in the future. This is now a reality, and it’s the goal of the CargoCopter, a fully 3D printed drone. This drone is able to transport a charge of 5 kg and reach the speed of 150 km/h. It is an efficient drone which aims to deliver goods on a long distance.
3D printing is allowing these KU Leuven researchers to do some rapid prototyping, so they can adjust the design of the drone through the years to finally create this CargoCopter. This drone project may be the future traditional way to deliver goods!
6 – Jarriquez and their 3D printed drone
As for the military or rescuing sector, using a drone is firstly a way to go where humans can’t go. It is also the goal of the 3D printed drone developed by Jarriquez
This 3D printed drone is actually able to find its way with minimal human intervention. This unmanned aerial vehicle can generate a high quality 3D map, and can go in dangerous zones. Why did they chose 3D printing to develop their project? Because it was easy to get an object from a CAD model in a few days only, and with a reasonable price.
Jarriquez Drone with its 3D mount for the LIDAR sensor
“Our solution integrated a LIDAR sensor that could have been used for many different devices. Attaching it to the body of the drone in the proper way was essential for the feature to work. 3D printing gave us the possibility to do it in a record time and at a very reasonable price” added Mathieu Agostinucci, from the Jarriquez team in our previous interview.
7 – A 3D printed drone for rescuing missions
This drone is the result of the work of a swiss-based doctoral assistant Przemyslaw Mariusz Kornatowski. This 3D printed drone is called PackDrone.
This quadcopter can be deployed in rescue missions. It is made to deliver water, food or any first aid equipment to people trapped after a catastrophe.
source: https://www.redbull.com/gb-en/packdrone-folding-drone
A lot of parts of this drone were created thanks to additive manufacturing. It has a particular design: it actually is a folding drone, created especially to be safe and easy to put in a backpack by the teams in charge of rescuing missions.
8 – Blue Robotics and their underwater 3D printed drones
The company Blue Robotics created underwater drones. This crazy project started with a crazy idea: they decided to send a GPS-guided solar-powered robotic boat from Los Angeles to Hawaii.
“The industry of Marine Robotics has stifled innovation by keeping the mechanics and technology expensive. With 3D printing people are able to prototype and final manufacture parts inexpensively and quickly. That’s why we chose Sculpteo!” – said Rusty Jehangir, the founder of Blue Robotics
Using additive manufacturing is also a way to get small batches for the parts of the final product, which isn’t possible with traditional manufacturing. This drone is quite a challenging project, as the final result has to be resistant, light, and ready for a special journey!
9- Local Motor and their 3D printed drone connected to its… 3D printed car.
This project is quite ambitious but it is above all managed to see the limits of three different technologies : autonomous cars, drones and 3D printing.
source: https://www.cnet.com/roadshow/news/local-motors-3d-printed-car-now-has-a-drone-because-autonomy/
It is an impressive challenge, driven by Local Motor. The autonomous car is able to drive by itself thanks to a dedicated software. In the meantime, the driver of the car is able to pilot the rc drone to look around with the specific view of the drone. It enables the driver to see eventual traffic jams, or just see the landscape, and explore new areas.
10 – 3D printed drone, created only using 3D printing and laser cutting technology
Most of the time, 3D printed drone projects are using additive manufacturing to create prototypes, and some parts of the finished product.
Here, the project was to create a traditional quadrotor drone, using exclusively 3D printing and laser cutting. They 3D printed the arms, the motor mounts, and every parts of the drone. It was a success, showing that it is possible to create anything with 3D printers. This drone is extremely light and it is the proof that everything is 3D printable, thanks to all of our 3D printing materials and technologies. Moreover, this project shows the capacity and accuracy of the laser cutting technology.
11 – A 3D printed drone to capture professional images with Hexadrone
Hexadrone is a company based in France, building drones and offering their service to film for TV shows, advertisements or movies. As they are creating high quality filming, they need a stable drone.
As there is actually a weight limitation for drones, Hexadrone needed to use a light material. And that is where 3D printing shows to be a helpful solution. They used our plastic material, and the SLS technology enables them to get resistant and complex parts, perfectly fitting their needs.
“Thanks to 3D printing, parts are really quickly available, which means we can test them within a few days, and make changes reactively” said Alexandre Labesse, CEO at Hexadrone.
12 – 3D robotics and My Mini Factory create 3D printed drones
3D robotics and My Mini Factory collaborated on the development of drones and the model Iris+ is one of them. You can then download all the technical STL files with great 3D details, and you can then 3D print at home using your 3D printer, or a 3D printing service such as Sculpteo.
13 – The Dark Matter, by Clogworks
The Dark Matter is a drone developed by Clogworks, based on a modularity concept.
This drone is not fully 3D printed, but is manufactured using CNC Machining, Carbon fibre and 3D printing. The goal of this Dark Matter project, was to create a drone with a bigger flexibility and a great ease of maintenance. The performances of the drone are quite impressive, all about precision.
14 – The smallest drone, by UPenn
The 3D printed mini drone made by UPenn, Piccolissimo just has one motor and two rigid bodies. Researchers at the University of Pennsylvania’s School of Engineering and Applied Science developed the smallest flying vehicle. In order to make a really light device, this tiny drone has been 3D printed with really light plastic.
15 – Skeleton x14 quadcopter
The Skeleton x14 quadcopter can be printed by any desktop 3D printers, as its STL files are available online. The design of this drone is quite interesting as it is based on an intricate design mesh.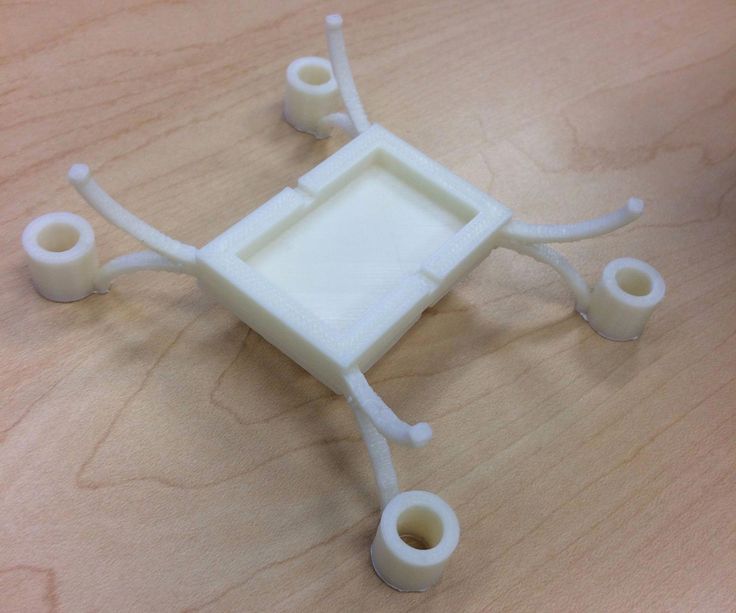 It is totally possible to customize it once you have the 3D files of the drone!
DIY: build your own drone!
You have an idea for a drone project ? Keep in mind that your ideas are 3D printable, and that we can totally help you with this, thanks to the 3D printers of our online 3D printing service. Here, at Sculpteo, an intern created a 3D printed drone from scratch and we are sure that you could do it as well.
As we just saw, it is possible to create a drone using 3D printing and laser cutting you don’t need traditional manufacturing, just 3D printers. First, you will have to use a 3D printing software. If you don’t know which software to use check out our blogpost to choose the perfect free 3D modeling software, adapted to your level of expertise. Some of them are pretty easy to use.
Once your drone is 3D designed, you can choose the 3D printing materials to print your parts. Then, you have to complete your order, and you’ll receive your 3D printed models in a few days.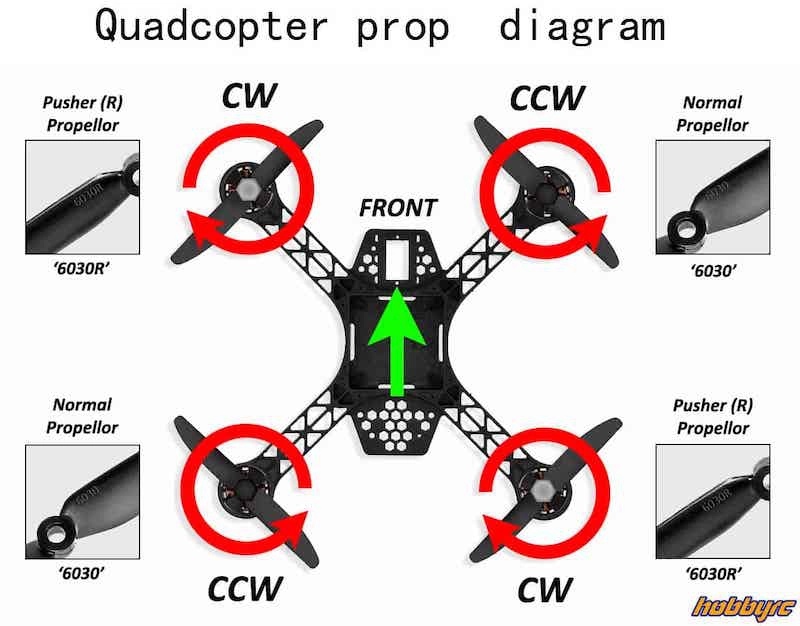 Obviously, you’ll have to assemble the different parts. If you are a little bit crafty and determined, ready to deal with electronic components, motor mounting and camera mounting, you can achieve a great 3D printed drone project.
You want to give it a try ? Upload your 3D model now and 3D print your own unmanned aerial vehicle!
If you want more informations to 3D print your drone, don’t hesitate to contact us.
How to build a cool & cheap 3D printed micro drone
Radio controlled drones are extremely popular and you can get them in all shapes and sizes. In recent years, one specific type of drone has seen a sudden rise in popularity: micro quadcopters. They fit in your palm but can be powered by high-RPM brushless motors and a two-cell Li-Po battery, so they have, potentially, tons of power. Combine it with first-person video transmission and you have one amazing toy that’s nearly indestructible. And today, we’ll demonstrate that RC vehicles and our 3D printers are a perfect match! We’re going to tell you how to build a cheap, yet powerful, 3D printed mini quadcopter suitable for both indoor and outdoor flying thanks to its diagonal size of 90mm (measured from the motor to motor).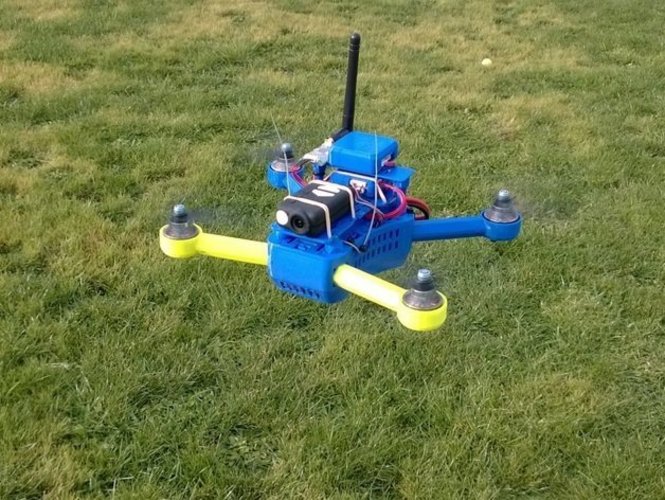
Why should you build it?
Various stores across the world have a large selection of drones. Some are powered by brushed motors, others are brushless, some are smaller, some bigger… the very basic brushless models can go as low as 30 USD, but this price can only be reached by making some really major compromises – short range, low-quality motors, bad camera and missing accessories such as RC transmitter, FPV goggles, batteries or chargers. Plus, if you break something (usually the frame), getting spare parts can be pretty challenging – that’s why we’re printing our own frame on the Original Prusa i3 MK3! 3D printed frames are actually very light and if you print them with PETG (you can try Prusament PETG if you want 😉 ), they can withstand some rough handling.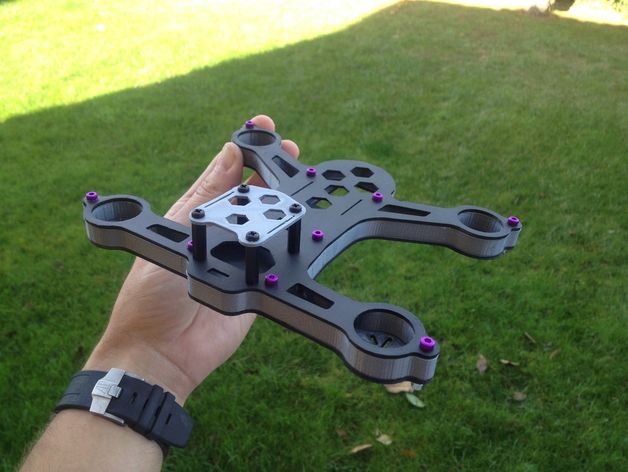 And if they don’t, you can print tons of new ones. Also, you can use all kinds of colors! More about that later.
Our tiny drone is ready for some indoor and outdoor FPV flying!
Now, back to ARF (Almost Ready to Fly) or RTF (Ready to Fly) drones. Generally speaking, you are more likely to find a good machine in the 150-200 USD range. But again, this price does not include an RC transmitter, batteries or FPV goggles, so the actual prices can easily climb to over 400 USD for more-or-less reasonable equipment. Flying pros will probably tell you that a set of good FPV goggles is actually 400 USD alone. Sounds like a lot, so let’s try to find a sweet spot and create something that can be considered a good start and can be further expanded in case you fall in love with this hobby.
What do we need?
A majority of quadcopters use the same set of parts, but there can be great differences between them in terms of quality or features. Here’s what we’re getting:
| Part name | Purpose | Price | Weight |
|---|---|---|---|
| HGLRC F413 Flytower | Flight Controller + Regulator board for motors | $57.99 | 7g |
| 4x Racerstar RC1103B 8000kV | Motors | $28.99 | 14.8g |
| 2035 propellers | 2 pairs of propellers | $3.99 | 4g |
| Giant Power 2S 300mAh Lipo | Battery | $5.99 | 19g |
| Charsoon Lipo Charger | Battery charger | $13.99 | – |
| FlySky FS-i6 | Radio Transmitter | $39.50 | |
| FS-RX2A Pro | Receiver | $6.99 | 1g |
| JST Connector | Connector for the battery | $1.59 | 1g |
| 3-wire servo cable | To connect the receiver with the flight controller | $0.89 | 1g |
| Frame | 3D printed | 16g | |
| Total | $159 | 65g | |
| Total with FPV camera | $251 | 69g | |
| Optional accessories | |||
| Eachine VR D2 Pro | FPV Goggles | $67.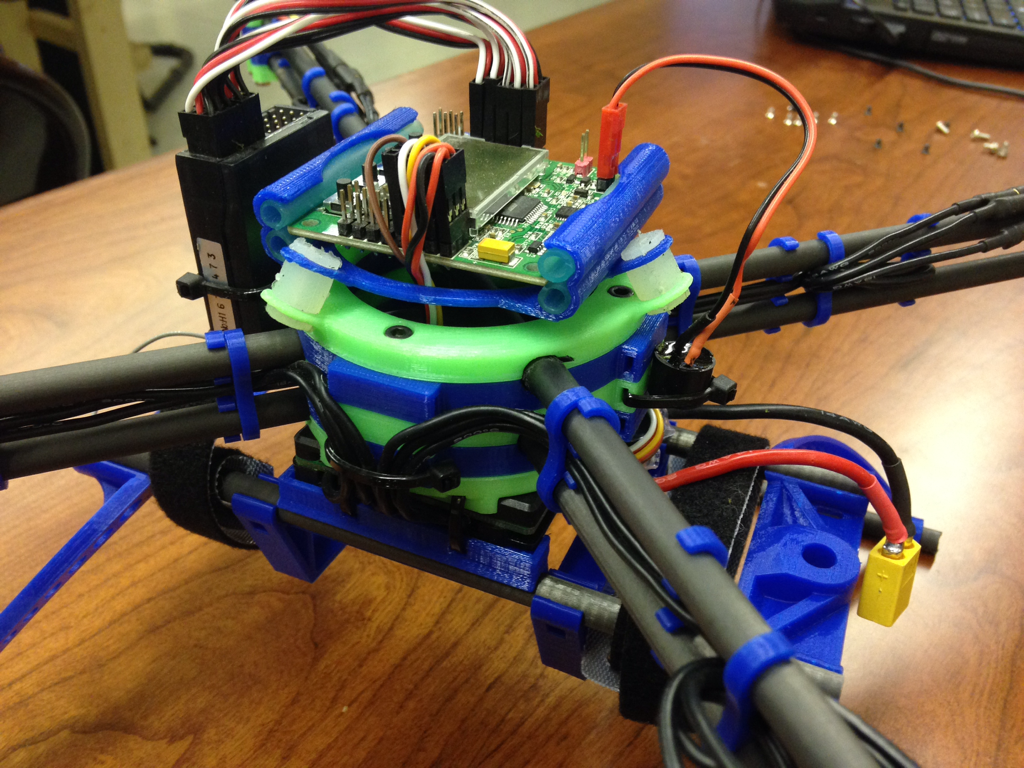 55 55 | |
| Eachine AIO 5.8GHz FPV Camera with OSD | Micro FPV camera + built-in video transmitter | $23.99 | 4g |
Plus, you’ll need a couple of zip ties to assemble the frame – but you certainly have some at home. You can use a zip tie to secure the battery as well, or you can get a sticky velcro. Needless to say, it’s better to buy more than one battery and one set of props – the battery lasts for about 4 to 5 minutes, so if you want to fly outside for extended periods of time, having a couple of extra li-po batteries is a good solution. Also, you will break a couple of props before you learn how to control the drone properly. They cost literally next to nothing, so get a couple of spare ones.
The market is actually flooded with all sorts of drone parts. Flight controllers come in dozens of variations, regulators support any kind of battery from one-cell to eight-cell, motors that were impossible to even imagine a few years ago are now cheap and available everywhere. As usual, finding the right parts in Chinese e-shops is pretty difficult. There are often no compatibility charts or proper data sheets, so how are you supposed to find the right items? Well, we have to go through the boring part…
The (not so) boring theory
What makes a quadcopter fly? A set of four motors. Two of them rotate clockwise, the other two counter-clockwise. Each pair of motors has a different set of push/pull propellers (usually called ‘props’). In an ideal case, those four motors should generate thrust at least twice the amount of the machine’s weight. However, the real fun starts at 1:3 ratio and proper racing quads go much higher than that.
These tiny motors have 11 mm in diameter, but each of them can generate over 70 grams of thrust!
Here comes the tricky part: To power the motors, you need a battery. If you want to spin the motors faster or longer, you need a bigger battery. However, a bigger battery weighs more, so you need stronger motors with bigger props, which in turn require more ‘juice’ from the battery, so they drain it faster.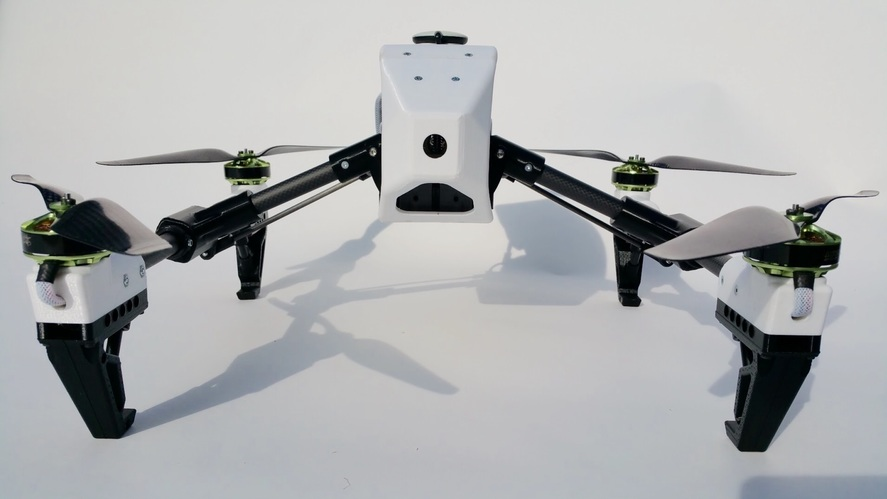 It’s an infinite loop of looking for the best power-to-weight ratio.
With micro quads, we’re usually limited to one- to three-cell batteries, marked as 1S/2S/3S. 1S is quite weak, 3S is a bit of an overkill for new pilots. A 2S (two-cell) battery’s voltage is 7.4V and it is perfect for this project. So let’s see what a 2S Li-Po battery can do with a motor of our choice, the Racerstar BR1103B 8000kV.
Based on this spreadsheet, it’s clear that BR1103B 8000kV can deliver 60g of thrust when paired with a 2S battery and 3020 props – that’s 3-inch propeller. Multiply it by four and you can reach a total maximum thrust of 240 grams. Our machine’s weight should not exceed 80 grams then, one-third of the maximum thrust. There’s a catch, though. We will be using two-inch props (2035) for the sake of size. However, we shouldn’t lose too much thrust there. Plus, our target for the AUW (all-up weight) is going to be under 70 grams, so we have some headroom.
Nailed it!
Another tricky aspect of the setup is to get parts that are compatible with the voltage of the battery. A 2S battery’s voltage will be between 6 to 8.4 volts, so make sure the parts you buy won’t be fried once you hook them up.
Motors are usually compatible with a broader range of voltages, while the electronics (flight controller, ESCs, cameras) are usually more limited. So which flight controller should you pick? Our build is limited by the 20x20mm mounting holes, so that narrows it down a bit. We want a board with a built-in OSD (On-Sreen Display), microUSB port and BetaFlight software support. HGLRC brand is a good choice, because they produce both flight controllers and ESC boards, which can be connected with a nice little socket.
An OSD system can give you plenty of useful information
And what is an ESC board? It contains regulators for all four motors, which means it controls their rotation speed and direction based on the input from the flight controller. Based on the spreadsheet above, our motors draw currents of around 5A. Keep that in mind when choosing your 20x20mm 2S regulator. The one we chose (HGLRC Micro 13A 4in1) supports 13A per motor, so we’re safe.
The receiver usually works with one of three favorite protocols – FrSKY, FlySky or DSM-X. Cheaper RC transmitters often use FlySKY protocol, so let’s stick with that one. The receiver should be able to communicate with the flight controller using an SBUS or IBUS single-wire interface.
FrSky XM+ receiver for FrSky-compatible radios
And the last thing – the camera. You can get all sorts of tiny cameras, some are just basic cameras, others can record video on an SD card, some even have and extra wire for video in – and that’s exactly what we need. To fully utilize the OSD function of our flight controller, we will need a camera with four wires: Voltage, ground, video out, video in.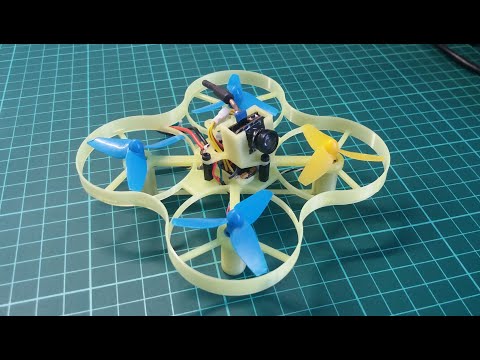 If you don’t need an OSD system, feel free to use any of the Eachine’s product line – they’re cheap and reasonably good. Just keep in mind that in many countries, there are limits on the transmitting power 😉
So those are the main components. Next, you need a 2S battery, ideally a 300mAh li-po, which will give us a little over 4 minutes of flight time. 400mAh should work as well, just keep an eye on the weight!
Turnigy 2S 300mAh Li-po battery delivers slightly more than 4 minutes of flight time
What about the transmitter and FPV goggles?
Good question. There are many RC radios on the market, so selecting the single best one is nearly impossible. You can get a decent beginner RC radio for as low as 39 USD for a simple 6-channel model (which is actually perfectly fine for our cheap micro quad) or 50 USD for a 10-channel model. Price equals quality, so if you think you will find some use for a better transmitter in the future, feel free to get FrSky Taranis Q X7 and FrSky XM+ instead of the parts we suggested in the shopping list above.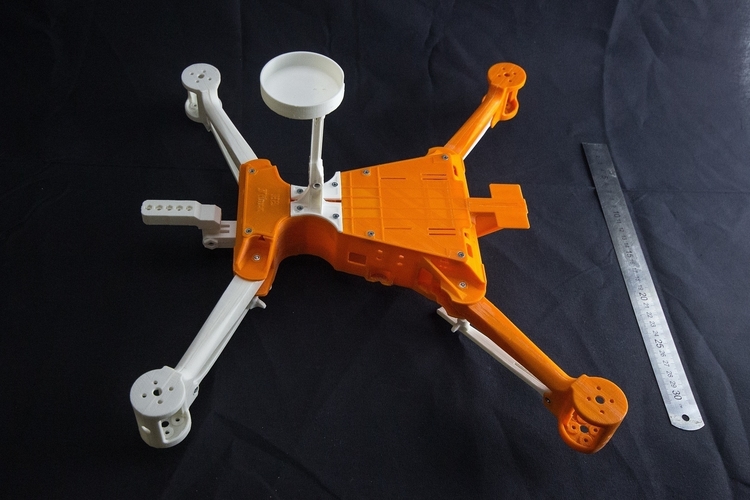 The price for both items together is actually around 130 USD, so if you want to save as much money as possible, get anything at least decent looking 🙂 We chose a Flysky i6, which is a nice cheap option for absolute beginners. More advanced pilots should stick to FrSky transmitters and receivers.
Flysky FS-i6 and a compatible receiver
As for the FPV goggles, we can apply the same rule of thumb here: more money gets you a better FPV kit. The absolutely cheapest solution is to buy a USB video receiver, plug it into your Android phone and place it in one of those cheap “VR” kits – which is essentially just an empty box for your phone – think Google Dreamview, but cheaper. This solution isn’t bad at all, but the device needs to convert an analog signal to digital, which introduces a slight lag of ca. 100ms. For beginners, this won’t probably be a major issue, but skilled pilots won’t be happy. Going analog is the right way. Eachine produces some rather good FPV goggles, while Fatshark is the expensive (and better) choice.
Going for a super-cheap FPV isn’t the best option
For this project, we have selected an FPV camera that has a built-in video transmitter that sends analogue picture on the 5.8 GHz frequency. Almost every FPV goggles have an auto-scan button. So once you turn on the drone, the camera will start transmitting the picture on a selected frequency. Use the auto-scan function of the FPV Goggles to tune to the same frequency and receive the picture from the camera.
Micro FPV camera with a built-in video transmitter.
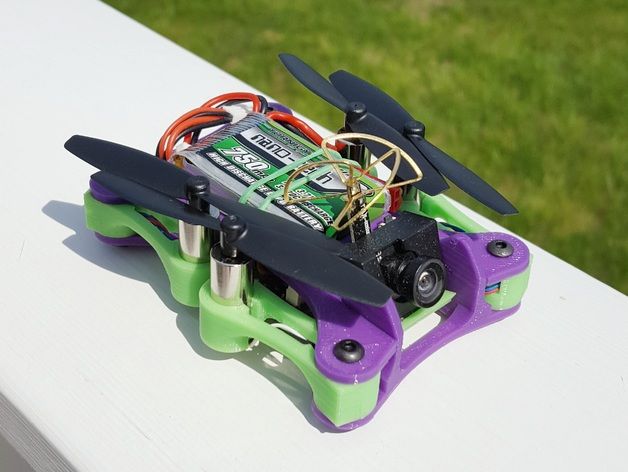
3D printed frame
Here’s our take on a micro quad, sometimes called a Tiny Whoop. I’ve built a couple of tiny quadcopters in the past few years and there were always some issues with available frames. Some were too fragile, others were without prop-guards, and finding the right 3D printed frame for 20×20mm electronics and 1103 motors wasn’t easy. Plus, the ones that I found usually required a number of tiny screws and nuts. Once you hit an obstacle too hard and the plastic cracked, it took some time to disassemble the drone and fix it. Another thing is that many designs don’t take the battery into consideration, so if you place it on the underside of the frame, the quad is a bit wobbly during takeoff or landing.
This is what I came up with – a frame for 1103 motors, 2-inch props and 20×20mm electronics. It has a holder for a camera and the battery is placed on the top. Everything is held together with small pieces of cut filament and zip ties – yep, you heard that right. Despite the lack of screws (there are only those for motors), the construction is pretty solid and there’s no wobble at all. Disassembling and reassembling takes just a minute.
DOWNLOAD FRAME STL FILES FROM THINGIVERSE
Everything can be printed without supports and since there are more parts, you can use filaments of different colors to truly customize and personalize your drone. There is no antenna shield at the moment, but truth be told – after several hard crashes, the only parts that cracked were the prop guards. The whole frame weighs only 16 grams, so it’s perfect for our case. You can save other 3-4 grams of total all-up weight by removing the prop guards. And the advantage of a 3D printed frame is obvious – if you damage it, you can easily print another. So it’s never a bad thing to carry a couple of extra parts in your bag when you go FPV flying 🙂
You can check out the first part of the assembly process in the gallery below.
Drone Assembly - Part 1
Start with printing of the frame - we used Prusament PLA Azure Blue and Galaxy Black
« ‹ of 17 › »
Powered by BetaFlight
Once you have all parts soldered together, you can move onto the binding procedure.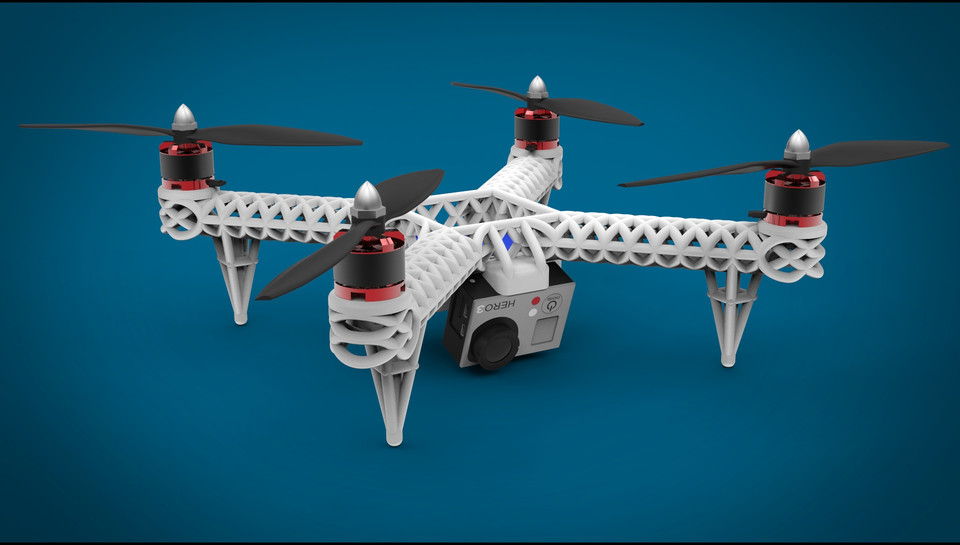 Check out the guide below:
Drone Assembly - part 2
To start the binding procedure, disconnect the battery and press and hold the binding button on the receiver
« ‹ of 5 › »
Then, it’s time to configure the software. Our favorite solution is BetaFlight.
BetaFlight is a powerful free tool for configuring the flight characteristics of a wide range of flying machines. The basic setup is incredibly easy – first, place the drone on a leveled surface and calibrate the accelerometer.
Then, select the protocol of your ESC board. In our case, we decided to go for DSHOT600 ESCs, because they allow us to do some very nice things – like changing the spinning direction of motors using a software configuration. Some of you probably still remember the need to add banana plug connectors to motor wires, so you could switch them in order to reverse the motor’s direction. No more!
Once the ESCs are configured, the next step is to set up the transmitter protocol – we are using a serial-based receiver, which communicates via an SBUS interface. The last step is to enable the receiver serial port – usually UART1.
Next, we need to tell the drone how to react to the transmitter commands. BetaFlight features an easy to use interface that allows you to map arming and flight mode switching to a single AUX1 switch (but you can, of course, use one switch for arming and another switch for flight modes). You can use the sliders to assign a certain action to transmitter inputs. e.g. AUX1 switch in default position causes the drone to stay in “Disarmed” mode. Position two and three arms the drone (props start spinning at low speed). Now, you can add two flight modes to positions two and three. Keep in mind that when you push the AUX1 switch to default (top) position, the motors will be immediately disarmed – even mid-flight!
I won’t go into explanation of every single flight mode here – there’s just way too many of them and you can find the complete description at BetaFlight’s website. Beginners should start in Horizon mode (auto-levelling), more advanced pilots will probably prefer Angle mode which allows for more direct control of the drone.
Now, you can finally finish the rest of the frame. Step-by-step instructions are in the gallery below:
Drone Assembly - part 3
Start with attaching the camera holder to the top body. You can use either glue...
« ‹ of 9 › »
You spin me right round…
We have almost everything ready for a takeoff. However, it’s time for the most important part – testing the motors and attaching the props. Each of the motors has to spin in a specific direction to generate thrust. The same applies to props.
Plug the battery in and then connect the drone with a microUSB cable to your PC. Open BetaFlight, go to Motors section and enable the test mode. Make sure there are no props on your drone, otherwise you’re risking injury (or damage to your drone). Use the sliders to test all four motors and observe their rotation. They need to match the illustration below. If some of them spin the wrong way, don’t worry. It can be fixed using BLHeli Configurator app.
The correct direction for motor rotation
Using BLHeli Configurator is pretty straightforward. Shut down BetaFlight, keep the drone connected with a microUSB cable, start BLHeli config and press the button in the lower right corner to read the values. You will see the direction of each of the motors. Change those that spin in the wrong way and save the values. Then go back to BetaFlight and check the motors again.
Finally, it’s time to add the props. Again, the props need to be attached in a specific order. There are two types: clockwise and counter-clockwise props. Check the diagram below to learn how to place them correctly.
The correct placement of clockwise (CW) and counter-clockwise (CCW) props
Once this is done, you can find some empty space, place the drone on the ground, arm it and gently raise the throttle. The lift-off should happen at around 30 % of the throttle. In case the drone flips or won’t lift off at all, its motors are probably spinning in the wrong direction or some props are placed incorrectly. Double-check everything, fix possible errors and try again.
Fly low, stay safe
Flying modern micro drones can feel almost like playing a PlayStation game. These little quadcopters are incredibly agile and they react to minimal input with great accuracy. New pilots have a tendency to push the sticks all the way forward because they don’t expect there’s so much power in such a small device. So… start slow, without FPV goggles.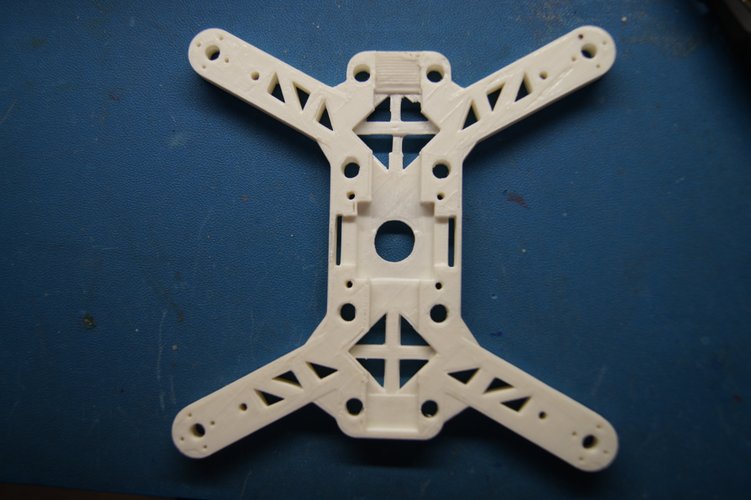 Learn how the drone reacts to tiny increments of throttle, yaw or pitch. Learn how the acceleration and inertia affect the drone and, of course, keep your distance from people, pets or inaccessible (and restricted) areas. This drone may be light, but the props spin at high speeds.
The parts that we selected have a nice little ‘side effect’ – they can run on a 3S battery and the motors can spin bigger props than the selected 2035. This means that once you’ll have enough of this tiny drone, you can step up your game and mount these parts on something bigger with much more power.
But that will probably take a while. In the meantime, we hope you’ll have fun with this little beast. We certainly did 😉
And let us know if you would like to learn more about bigger 3D printed drones (think DJI-sized) with a proper camera, because the fun doesn’t end with tiny quadcopters!
3D Printer Drone and Quadcopter Models
This article is an introduction to 3D Printing your own quadcopter drone. You will get acquainted with some basic principles of drone building, and we will describe some points step by step. The task will be relatively simple, since the description will be detailed.
What we need to get started
In addition to the 3D printer, we will need some non-printable parts such as a motor, batteries or accumulators, some electronics, sensors, a remote control and a knack to put it all together. nine0003
Why print a drone?
Actually, we will be printing the frame and body structure. Sometimes propellers can be printed. Why is it important? Because drones fall and break. Especially if you are a beginner pilot. This picture shows everything clearly:
If we 3D print parts, we will have an almost infinite supply of spare parts, which will make it easier to survive pilot training and regular plane crashes. Apart from the fact that the quadcopter will be easier to repair, a homemade drone will allow you to get a better feel for its inner workings and mechanics. nine0003
And one more important point: 3D printing allows you to quickly develop parts according to your own design. Let's say you have purchased a new camera and want to install it on your quadcopter. Then you just open up your favorite 3D modeling program and end up printing out the part and testing it. Make changes, print again, etc.
What is a quadcopter drone?
A quadcopter is a multi-rotor helicopter that rises and moves with four main rotors and does not have a tail rotor. This is the most common type of amateur radio-controlled drones. nine0003
Small in size and highly maneuverable, these quadcopter drones can fly both indoors and outdoors. In addition, at this size, quadcopter drones are cheaper than conventional helicopters and more reliable due to their simple design.
Here is a detailed overview of the details of a commercially available high-end quadcopter drone used for aerial photography.
Almost all parts that are not motor or electronics can be 3D printed. The printed version of the drone looks a little different. nine0003
3D printed Crossfire quadcopter. Link to the project: http://www.thingiverse.com/thing:32281
In addition to the visual and aesthetic differences, the printed version has the advantage of being easy to update and modular. In the next video, Dennis Baldwin talks in detail about his quadcopter.
How to Print a Quadcopter Drone
If you want to build your own drone, we offer several entry points to the project. Here is a detailed guide to 3D printed quadcopter:
http://www.instructables.com/id/3D-Printed-Quadcopter-with-Arduino/?ALLSTEPS
Titch Micro Drone
https://www.myminifactory.com/object/ 38967
Brushed Y6 Micro Quad
https://www.myminifactory.com/object/brushed-y6-micro-quad-31348
Millennium Falcon Drone Shell
https://www.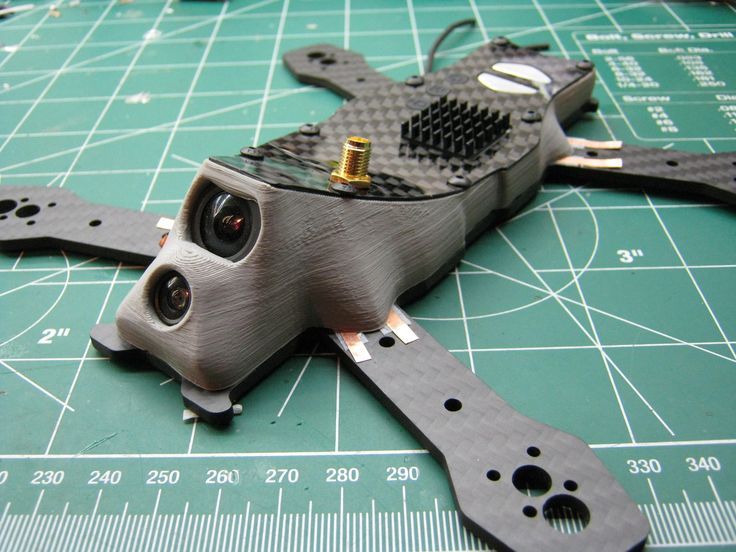 myminifactory.com/object/millennium-falcon-drone-shell-10144
Micro 105 FPV Quadcopter
https://www.myminifactory.com/object/micro-105-fpv-quadcopter-21362
Micro 105 FPV Quadcopter
https ://www.myminifactory.com/object/3drobotics-iris-19615
Hexacopter drone
https://www.myminifactory.com/object/hexacopter-drone-19600
And this is the instruction for building an H-shaped drone:
http://www.instructables.com/id/Make-an-H-Quadcopter-with-3D-printing/?ALLSTEPS
Printed remote control
If you want to 3D print
insectoid ornithopter on a 3D printer
9002 Detailed Guide to the Insectoid Ornithopter:http://www.
 instructables.com/id/3D-Printed-Ornithopter-Micro-UAV-Drone/
 Regulations
Please be aware that there are a number of laws governing the flying of amateur drones and drones, they are different everywhere and it is important to get acquainted with them. Safety is also important! High-flying objects with propellers rotating at high speed in the hands of inexperienced pilots can cause considerable damage to people and property.
How to fly the quadcopter drone? nine0044
Youtube is full of instructional videos about this, they can be your starting point. Once you get the hang of it, you can do fun things like cockpit drone racing.
From the screw!
Best STL Files for Drone・Cults 3D Printer
quadcopter full frame, with camera mount,
1.15 €
Norelco - First Shave - Charger Holder/Base
Free
Arduino nano controller
9. 59 €
59 €
Tablet support for Autel Evo Remote
Free
coperchio allegerito drone X
500 € -80% 100€
URUAV UR65 stable chassis
Free
Chassis for drone HS720E
2.46 €
Relic Seer - Apex Legends
6.15 €
Dji Phantom 1 extended battery compartment
Free
nine0043 Xiaomi Yi Filter Adapter 1080 52mmFree
3S Lipo battery cover and usage indicator
Free
Mavic Mini Terrestrial Video Mount
Free
3D printed quadcopter drone
4. 25 €
25 €
Skyzone Cobra 3S Li-Ion Holder
Free
GoPro stand Protek 35
0,50 €
Fimi A3 DIY Servo Multi Release
Free
Fimi A3 DIY Servo drop centered and more compact
Free
Fimi A3 Remote sunshade conversion
Free
UR85HD FPV Visor
Free
Leg Extension Fimi A3
Free
Base conector servos
Free
E58 Eachine Heli style Landing Gear
Free
Eachine X220HV TPU Battery Bed
2.56 €
Bayraktar Mini UAV DRONE
3 €
AOS 5.
 5 V2 SMA + XT60 + GPS
 2 €
Li-Po protective case for FPV drone
2.13 €
3D printed brushless vope
Free
Micro 110mm FPV Quadcopter 3" props.Quad for Kakute AIO FC (20x20mm) and 1104 Motors
Free
Iflight Banshee ducts propellers guard for cinewhoop
Free
Cinewhoop 1306 prop guards
Free
Eachine Assassin 180 legs
Free
Cinewhoop Et125 2.5/2.8 inch propeller for Gopro or Caddx Turtle
Free
GEPRC Crocodile Baby 4 inch Gopro Insta360 GO Mount
Free
iFlight Bumblebee GreenHornet Gopro Mount
Free
Gopro 8 mount drone
0. 50 €
50 €
Blackstone Fortress, unmanned tracks.
Free
PETER PARKER (COMIC VERSION) 4 PCS
18 €
Blackstone Keep Guardian Drone.
0.51 €
Hubsan H501S Sun Visor Adapter
Free
KahnWhoop kit from KahnFrame
Free
nine0043 drone x parte 9 200 € -80% 40 €
GoPro 7 Mount VERTICAL Wizard X220HV
0.62 €
Blackstone Fortress Spindle Drone
0.51 €
replacement chassis for mini drone
0.