3D print thorn destiny
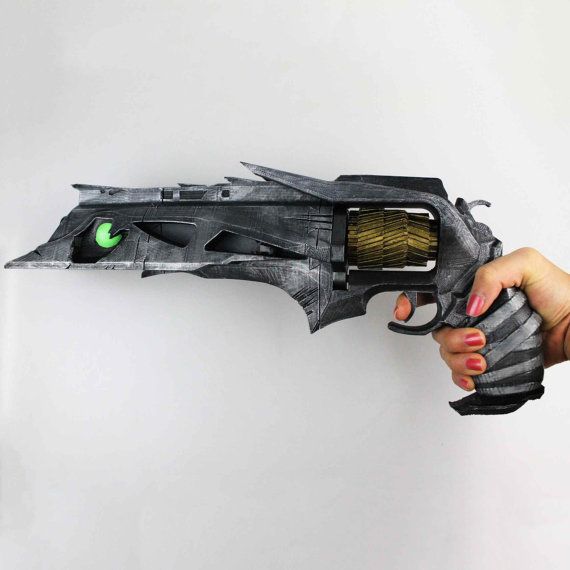
Free STL file Destiny - Thorn Pistol V4.0・3D printable design to download・Cults
Screw Lid container
Free
Cupcake Jewellery Box
Free
Cat / Dog Food + Water Dispensers
Free
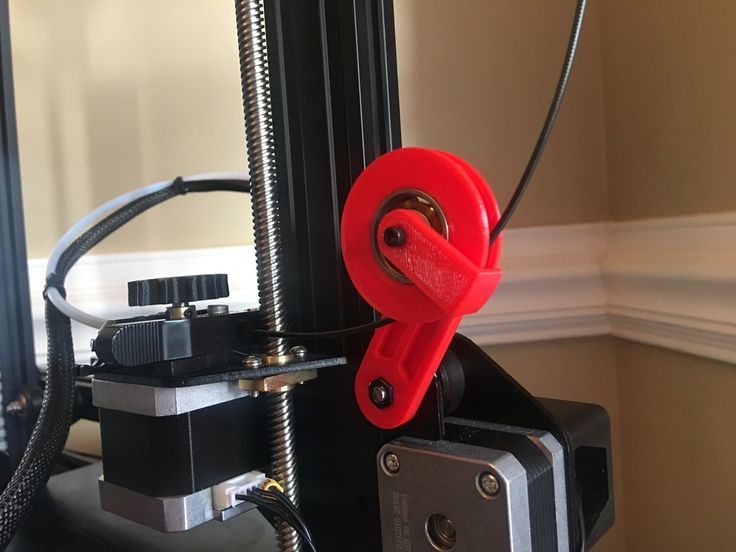
Ender 3 Direct Drive Filament Guide (any 2020 3D Printer)
Free
Samsung Galaxy Buds - Keyring Carry Case
Free
Ancient Alien Flyer
Free
DJI MAVIC Lanyard Bracket
Free
Fillet & Radius Guage
Free
Best 3D printer files of the Game category
Lazy Dogs
€4. 74
Cromulon's Head
€4.43
Deactivated
RC Avatar Scorpion
€5
VICTORIAN STYLE ADVERTISING KIOSK SCALE FIGURES PLAYMOBIL
€3.13
Train tracks for OS-Railway - fully 3D-printable railway system!
Free
Werelion - DnD Miniature
€2.99
Best sellers of the category Game
chaos terminators
€16.36 -50% €8.18
Dirt Bike
€1.40
Nice Flexi Dragon
€1.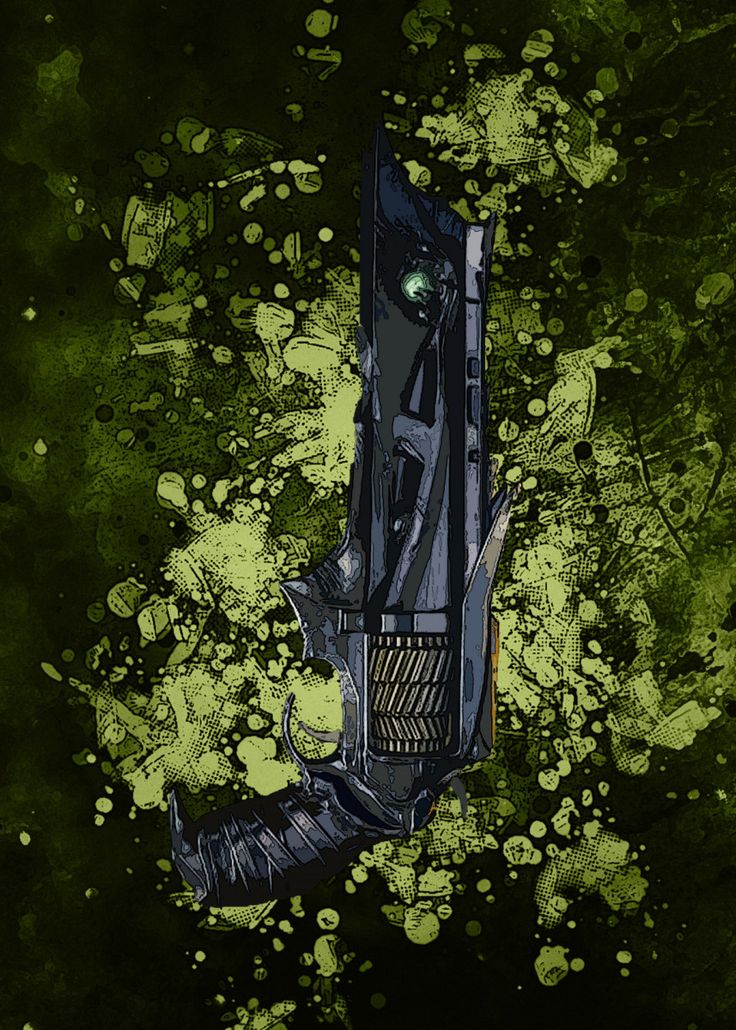 77
77
Tordeyr Stormfolk
€9.50
Enourmous Imperial Heavy Tank
€10
Nintendo Switch Crystal Dock - Classic and OLED version
€3.15
Beaky Boyz Builder: PF_MK-Six
€12.36
Snake and Rattlesnake
€3.79
Nice Flexi Unicorn
€1.05
Catafrac Heavy Armoured Warriors - Civil War Wargear Pack
€2.50
Chopper Motorcycle Print-In-Place
€1
Army Jeep
€2
WARFORGED VOIDWALKER EXOSUITS UPGRADE KIT
€9.50
Sea dragon
€1.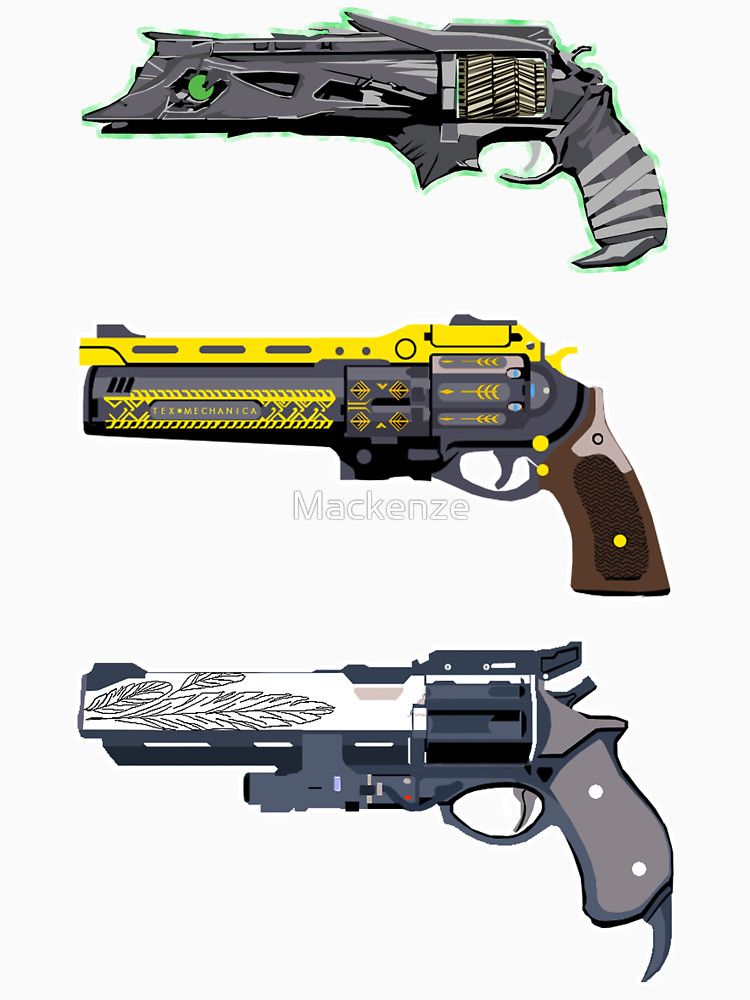 50
50
Octopus 2.0
€3.79
Heavy Imperial Fire Support Weapons [Presupported]
€5
Would you like to support Cults?
You like Cults and you want to help us continue the adventure independently? Please note that we are a small team of 3 people, therefore it is very simple to support us to maintain the activity and create future developments. Here are 4 solutions accessible to all:
ADVERTISING: Disable your AdBlock banner blocker and click on our banner ads.
AFFILIATION: Make your purchases online by clicking on our affiliate links here Amazon.
DONATE: If you want, you can make a donation via PayPal.
WORD OF MOUTH: Invite your friends to come, discover the platform and the magnificent 3D files shared by the community!
▷ destiny thorn 3d models 【 STLFinder 】
Destiny Thorn Hand Cannon
thingiverse
This is a downloadable 3D printing file of the Thorn Exotic Hand Cannon from Destiny.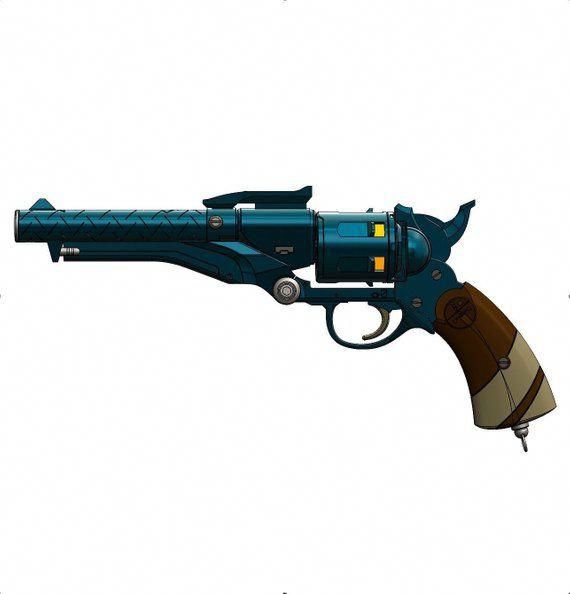
Destiny Thorn Handle Split
myminifactory
This is a modified version of the handle from Kriby Downey's excellent Thorn Hand Cannon model, from the game Destiny. I had problems printing the handle because of the complex geometry and overhangs. Supports just didn't do the trick, so I split...
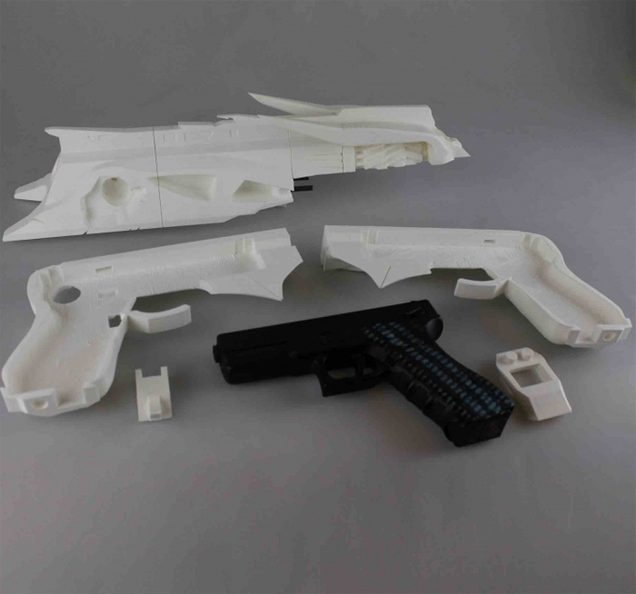
Destiny - Thorn Pistol V4.0
thingiverse
Destiny - Thorn Pistol V4.0 (Full size) - further updated shells (3 v4.0 & 4 v4.0) - Parts (shell 3) & (shell 4) have been trimmed to fit better that's parts: Thorn_Shell_3_V3.3.stl and Thorn_Shell_4_V3.3.stl -Included original .blend Blender file -. ..
..
Destiny - Thorn Pistol V4.0
prusaprinters
Destiny - Thorn Pistol V4.1 (Full size) For better pics of this model, see other users makes below Latest update: More updates to shells 3 & 4 to V4.1 Seperated all Thorns and Pivots etc into individual files Included new blender file of...
Destiny Thorn exotic year 3
thingiverse
AKA i did not like how the destinystl generator made the thorn not to scale so i scaled this one so it fits your hand well. I have a few more destiny 3d objects to post this one by far took the longest. Thanks for the support. If anyone would like to.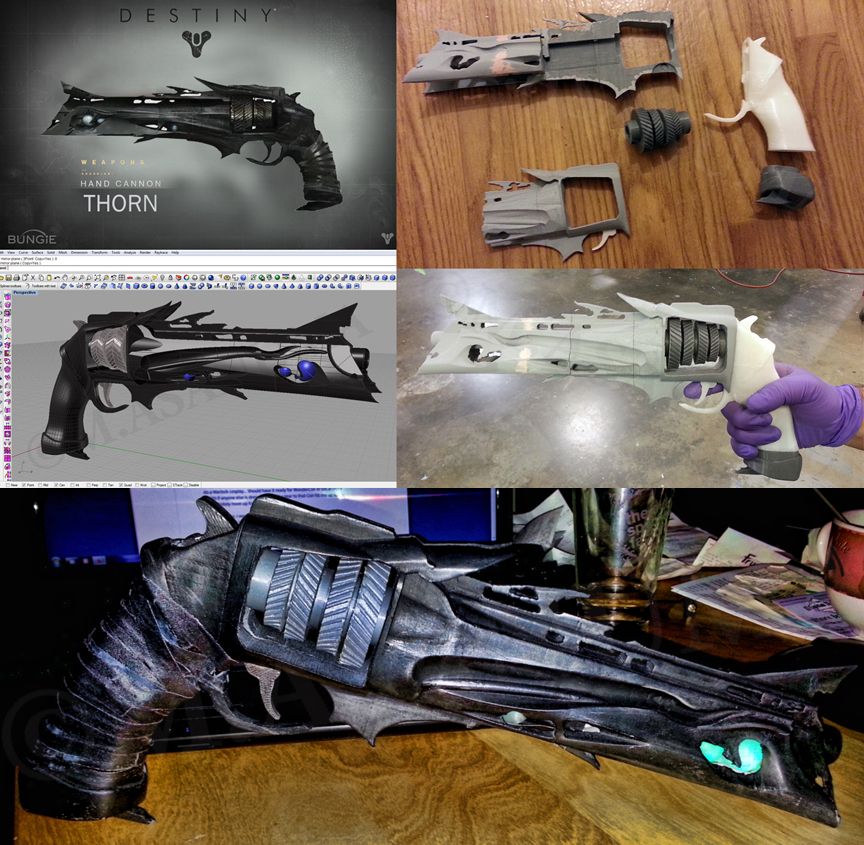 ..
..
Destiny 2 - Thorn Cup
thingiverse
This is a cup themed from Destiny 2 - Thorn chamber. Enjoy it for idk, like playing with some dice or just for drinking. Whatch out for the scale it may be a little bit to large for some applications. Update 04.07.2019: -added more triangles...
Destiny Thorn Hand Cannon - split into 9
thingiverse
Destiny Thorn Hand Cannon split into 9 parts to print on 20cm x 20cm x 20cm build area.
Destiny Thorn Hand Cannon
thingiverse
THIS WAS NOT MY OWN CREATION this is simply an edit so that people can print these props in parts Enjoy
Destiny Thorn Hand Cannon: Cut for Printing
thingiverse
Exactly the same file as from DestingStlGenerator, but just split in half for easier printing.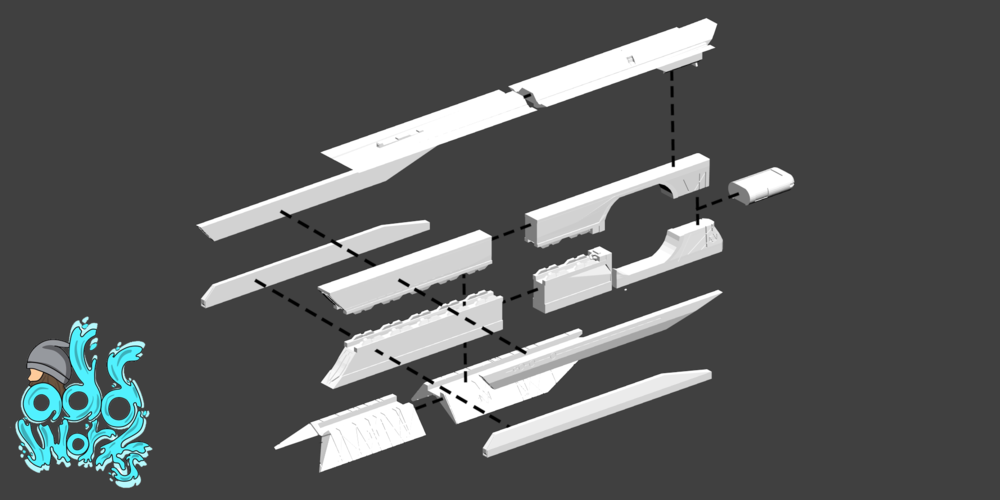
Thorn from Destiny 2
myminifactory
Thorn from Destiny 2
Thorn from Destiny
prusaprinters
Thorn is a hand-cannon from Bungie's latest game: Destiny. It is said to be the hardest weapon to grind for in the game. I designed the gun in 10 hours using solidworks. The printing took 24 hours and all the parts stick together with a glue free...
Thorn from Destiny
myminifactory
Thorn is a hand-cannon from Bungie's latest game: Destiny. It is said to be the hardest weapon to grind for in the game. I designed the gun in 10 hours using solidworks. The printing took 24 hours and all the parts stick together with a glue free...
Thorn Hand Cannon Destiny Splitted
thingiverse
Remix thorn hand cannon
Thorn Destiny 2 Hand Cannon
thingiverse
Thorn Hand Cannon from Destiny 2. Did some mesh fixing and cleanup. Not perfect but it is printable. I have not cut it in half but in the slicer I put half the model below the bed to print each half separately. ...The file is quite large so I...
Thorn_destiny
thingiverse
This thing was made with Tinkercad. ...Edit it online https://www.tinkercad.com/things/13cpz0WilTA
thorn
thingiverse
thorn
Thorn
thingiverse
Thorn
Destiny 2 Semi-functional Thorn Handcannon mashup
thingiverse
A combination of a few models found, essentially resulting in a shorter Thorn (Destiny 2) than from the actual game.
It's based on a semi-functional printable revolver, which rotates the cartridge when the hammer is pulled down and the trigger is.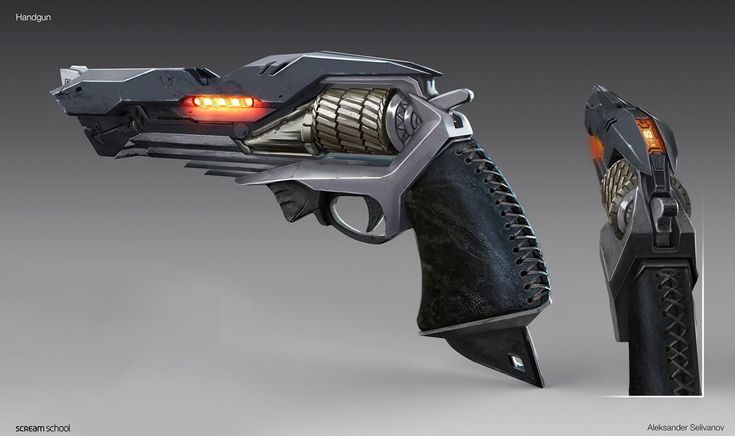 ..
..
Thorn - Destiny 2 3D print model
cgtrader
Thorn exotic hand cannon from the video game Destiny 2. OBJ Files 1:1 Scale 16long x 7 tall x 3" wide If you have any questions, email me at [email protected] For Personal Use Only. Do Not Copy or Redistribute. ...
Thorn
thingiverse
This is my version of Thorn from Destiny 2. Will update with the final prints when completed. ... Included are two versions of the grip with and without the wrapping.
Thorn
prusaprinters
This is my version of Thorn from Destiny 2.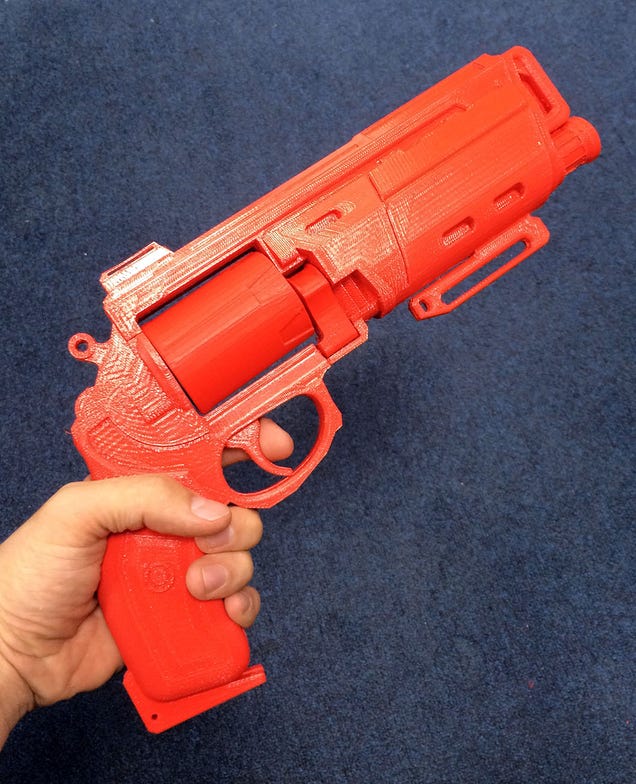 Will update with the final prints when completed.</p> <p>Included are two versions of the grip with and without the wrapping.</p> <h4> Print Settings</h4> <p><strong>Printer:</strong></p> <p>FLSUN Super...
Thorn Destiny Pendant
myminifactory
An Exotic Hand-Cannon from the game Destiny! ...Made as a necklace pendant.
Destiny Exotic Hand Cannon Thorn 1:1 Scale
thingiverse
This is a 1:1 scale model of the Destiny exotic hand cannon Thorn. ...The model was generated from DestinyStlGenerator.com and cleaned up using NetFabb cloud.
Thorn's Thorn/Bullet
thingiverse
The thorn,s thorn model looked good, but had many cracks/gaps that when printing lead to the print looking kind of crappy and or not printing correctly at true in game scale about 2x the original size. I cleaned it up the best I could (still a rookie...
Thorn,s Thorn
thingiverse
this is the closest I could get to the projectile fired from the Thorn (Destiny/D2) This thing was made with Tinkercad. ...Edit it online https://www.tinkercad.com/things/7UOe0whNMDF EDIT: User 'Flatliner' did a good job trimming it up to make it...
Thorn Ball
grabcad
Thorn Ball
Thorn ball
thingiverse
Thorn ball
Thorn
sketchfab
This model was procedurally generated as a part of a concept
thorn
sketchfab
No description provided.
thorn
grabcad
Solid Works 2016
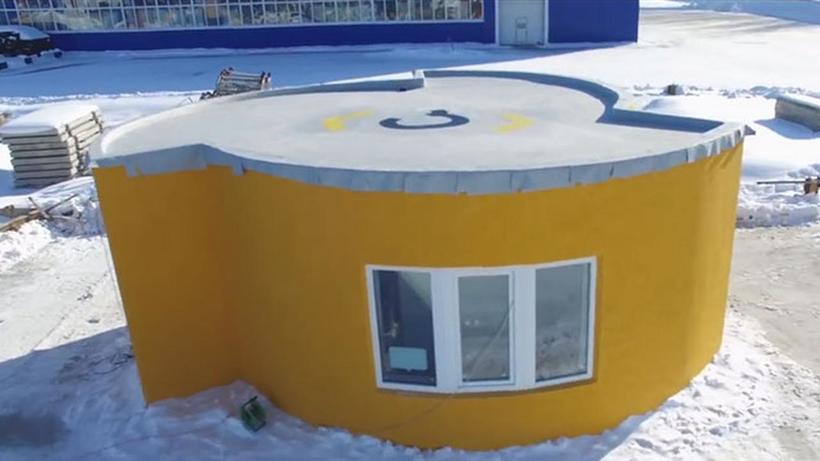
You need to learn in practice. 3D Printer "Practice" Russian production.
3D Printer "Praktika" Russian production.
Progress is unstoppable. CNC equipment is becoming more and more accessible to hobbyist home workshops. Although Russian manufacturers regularly delight the domestic consumer with their own developments, the emergence of new domestic products in the field of Hi-tech is of interest and increased attention. And that's why it was extremely interesting for me, as that same amateur enthusiast, to get on my desktop so far the only instance (prototype) of a 3D printer in the world, with which a new Russian manufacturer plans to enter the market soon. I will not disclose the name of the enterprise yet. The pre-production printer was provided to me for testing and evaluation from both an engineer's and user's perspective.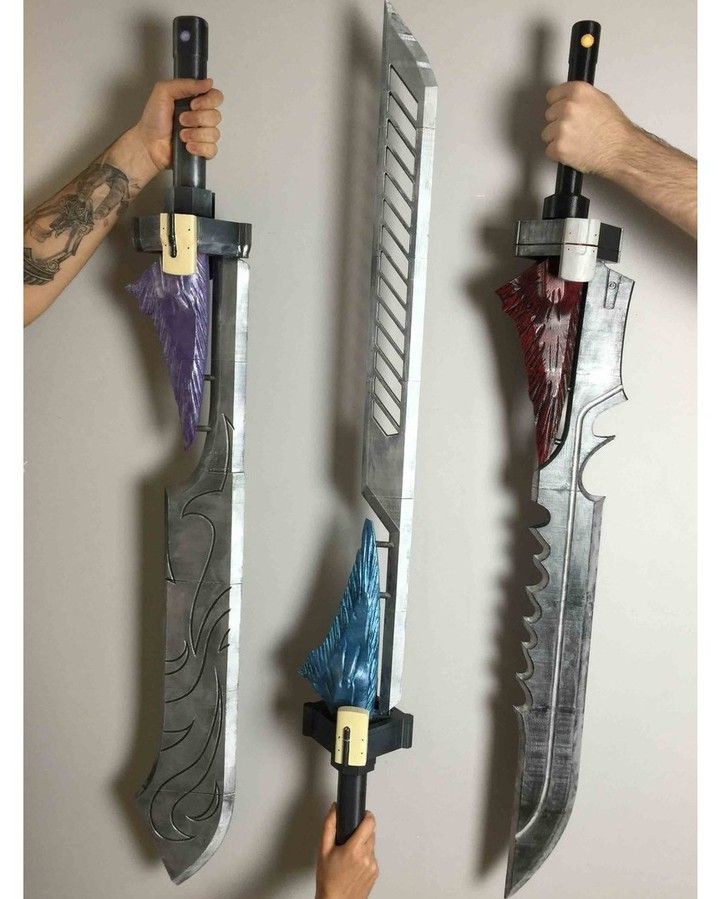 And, "taking the opportunity" (c) and the approval of the owner, I post a review of this printer for the #competitionCreality. The printer is clearly still damp, but it is already possible and necessary to note its merits, well, everything that needs to be improved there. nine0005
So, I present to everyone's attention 3D printer "Praktika" - the youngest printer in a family of three models that are planned for production.
Concept
This is an FDM printer designed to teach the basics of 3D printing. It is planned to ship assembled and ready to print, which can be significant for many beginners. Immediately for practical application, so to speak. Hence the name of the model. Built on the traditional i3 Prusa kinematics with a movable table, but having some peculiarities in implementation. nine0005
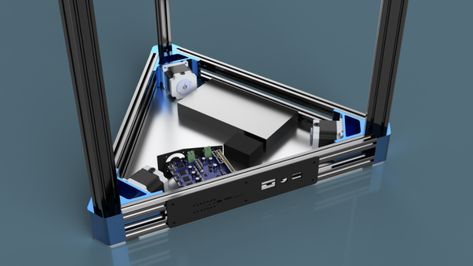
Housing
The base of the printer is a non-separable rigid box-shaped frame assembled from a cut-out milled composite sheet. The assembly uses tongue-and-groove joints and adhesive seams. There are no metal unique components in the design. Elements (corners, brackets, etc.) made by printing are used. The body is painted in assembled form in silver color with black details.
Thanks to the box structure, the frame has unprecedented rigidity and strength, which is a serious advantage for the "Pryusha" as a kinematics with a heavy sliding table. The box made it possible to hide almost all the mechanical and electronic components inside the case, as a result of which the printer does not look like a Christmas tree hung with toys. Outside, nothing superfluous, only design. The exceptions are the display in a swivel case, mounted on the upper crossbar of the frame and a spool with filament on the side. The user is protected from the danger of demolishing or damaging something with an awkward movement. At the same time, access for maintenance and repair is provided in the design. nine0005
Composite sheets are milled in a special way to give them smooth curves, which also has a positive effect on the aesthetics of the machine - the developers were able to get away from rectangular "brick" forms. An excellent solution was the idea of organizing an “engine room” and a “trunk” in the printer case. Developing the concept of the box to the end, the designers placed two compartments with opening lids in the massive lower part of the frame. One contains all the electronics, the second compartment is a spacious box for useful little things - tools, parts, stash ...
Sliding engine room cover. The lid of the box is hinged. This is a bit confusing. A couple of times, having opened the box and admiring the pleasant emptiness in it, out of habit I pulled up the lid of the filling compartment, almost breaking it. Then I realized that it needs to be moved. But this is not critical. You don't have to go there at all. A photo of this compartment will be in the "Electronics and Electrical" section.
At the bottom of the case there is a niche for three stepper motors - two for the Z-axis and one for the Y-axis. At the top of the case there is a slot for the entry of the cable harness and a Teflon tube with filament. All axle mechanics are hidden inside the box. Cable laying is neat: everything is laid, fixed, tightened. On the side there is a coil holder (printed), an overlay on the body that protects the coil from friction against the body. It's good. nine0005
The legs are non-adjustable and imprinted in hard plastic, meaning they won't protect against vibration. Better fix it.
The body as a whole is really very strong and rigid. The printer can be carried simply by the top of the frame, like a suitcase. The design is elaborate and well thought out. In some places, you can see the results of painstaking manual work on accurate gluing of small parts. This causes respect, and on the other hand, the question of the repeatability of such an assembly in mass production. It is clear that I have the first prototype, where they tried especially. Everything is fitted, assembled and painted neatly, the seams are tight, nothing dangles. At the moment, my body is 5 points .
Electronics and electrical.
"Brains-and-", - stretched out the zombie ... checking the fit of the radiators on the drivers. A sandwich of Arduino Mega 2560 and RAMPS 1.4 was found in the engine room.
When asked about this, the developer replied that "it was in stock." In the future, they plan to equip with more modern controllers, but also 8-bit ones. Drivers installed A4988. The power supply unit is a simple unnamed 12V at 180W. It is clear that this is an entry-level printer. Fan 80mm for blowing down heated air. On the side wall there is a cold air intake grille. There is also a power socket, a switch. The wires in the compartment are partially laid, partially in the form of spaghetti. But everything is available, everything is distributed, everything is serviceable. Practical minimalism. nine0005
Firmware - Russified Marlin 1.1.9 without any sophisticated settings. You can reflash the printer yourself if you wish, which I did by setting the PID, thereby removing the temperature sinusoid on the hot end, and correcting some crookedly translated menu lines to more .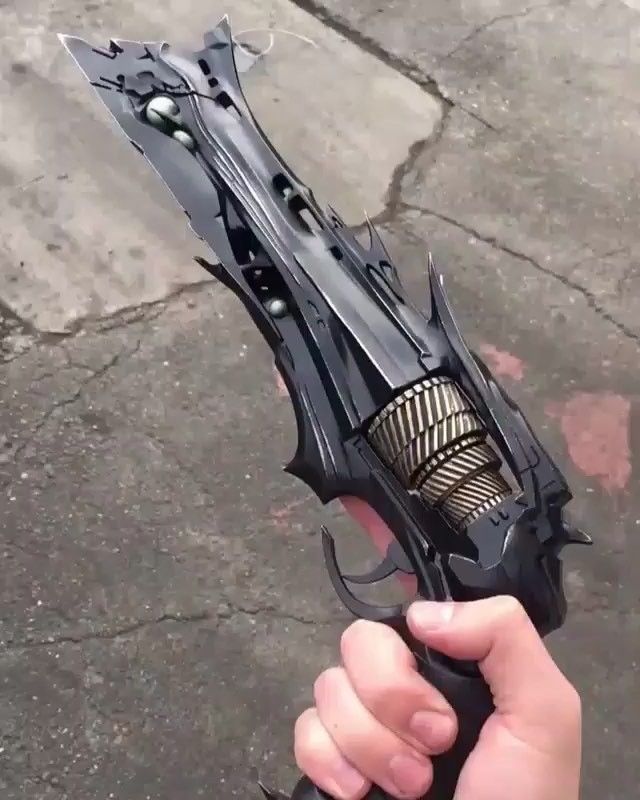 .. competent ones.
The printer is controlled from a computer via USB or standalone from the display. The popular RepRap Full Graphic 12864 with encoder and "Reset" button is mounted in a convenient swivel housing. The display case is printed, post-processed and painted. The paint on the body lies evenly, but it is clear that the plastic was sanded by hand. Not critical, but more suitable in terms of performance style for a good home amateur production, rather than an industrial one. But still a plus. Moreover, now the case for the display is going to be produced by casting. The location of the display is convenient, rotates smoothly, fixed in any position. For display my 4 points . Or even 5 , given the planned casting.
Someone must have noticed the item about the Power Supply. Why 180W? It turns out that the printer does not have a heated table. To my surprised question, the developer explained that the printer is planned to be produced in different configurations.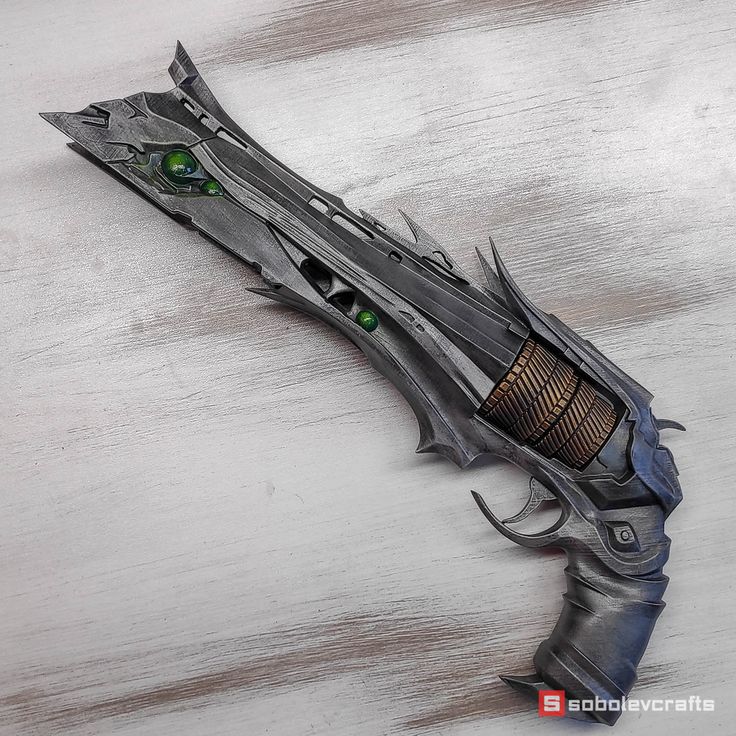 In the basic version, a heated table is not provided. It will go as an option when ordering a printer. Explanations accepted, I won’t put a minus, although I’m surprised - by today’s standards, a heated table is not a luxury, but a means of achieving ... Well, of course, a prototype, but I’m not used to typing on a cold table ... Okay, I’ll practice. And the built-in LED backlight, mounted on the frame crossbar, will help me a little. She is a plus. But rather weak - I would make the tape longer. And it turns on together with the printer, there is no separate inclusion. These are small cons, but fixable. nine0005
For the electronic part of the machine with the electrics, I will put together 4 points . Minus a point for an archaic sandwich. Let's hope for the installation of normal controllers in the future.
Table. A very unexpected design has been introduced as a table at Praktika. The table does not have a traditional leveling system - table suspension on screws with springs.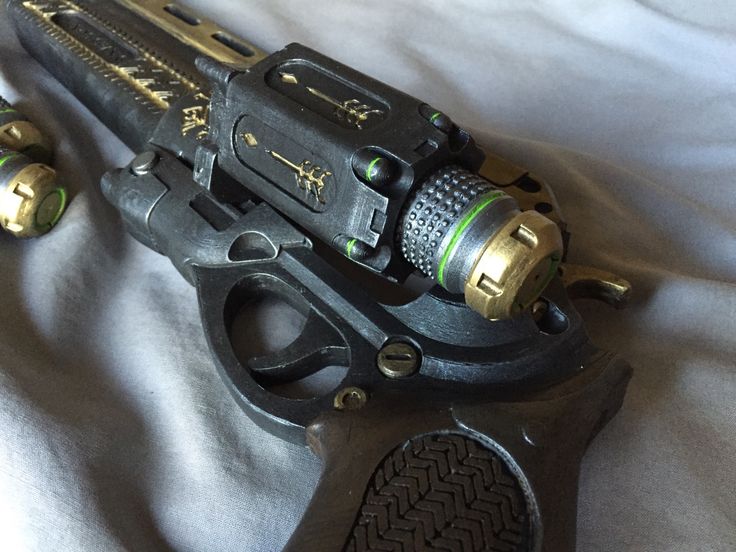 As there is no auto-calibration of the nozzle gap. The table is leveled and rigidly fixed during assembly. This was achieved by an original method. When assembled, the printer prints 4 table supports on itself, which ensures its self-alignment relative to the axes. Glass is placed and fixed on these supports. The idea is interesting, and what came out of it “in practice”, I will tell below. nine0005
The glass I got on the printer is not just any, but Ultrabase 220x220 mm. But in the absence of heating, it makes no sense. Well, the Ultrabase does not work "on the cold". Yes, and the glass was not original - it was immediately scratched.
We discussed this with the manufacturer, and decided that the non-heated versions will be equipped with ordinary glass 200x200 mm, while the Ultrabase will go in the heated version. Reasonable.
The print area was measured by me and after running the head in all axes was: 195 in X, 190 in Y and 145 in Z. Modest, but within the standard.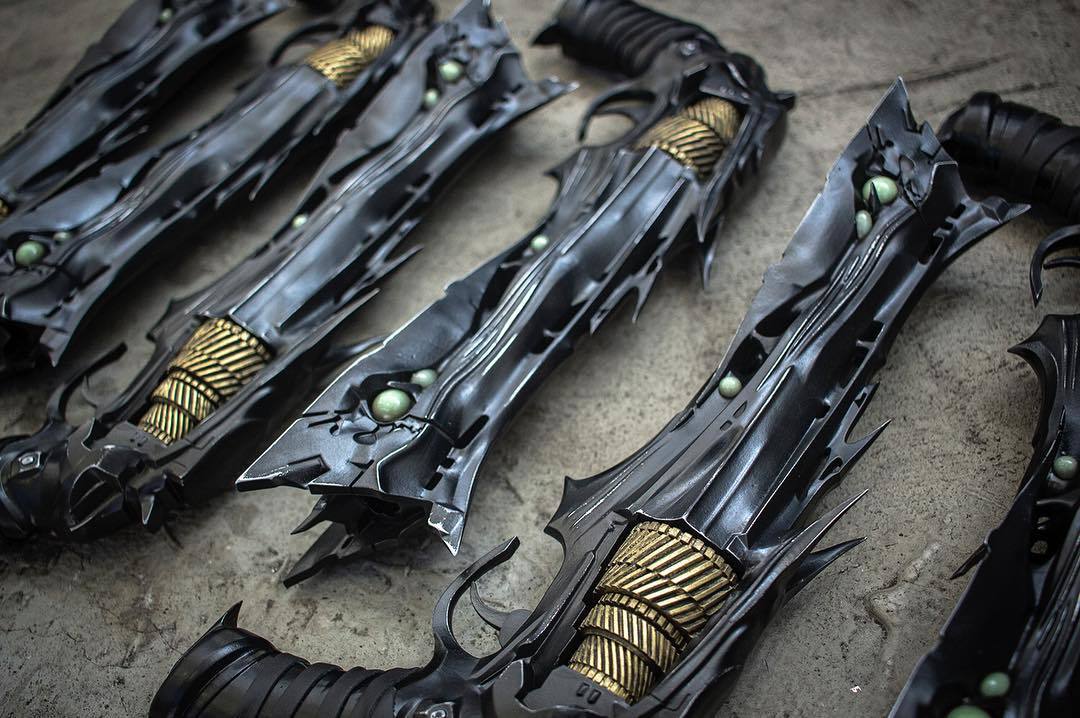 The weight of the printer is small - exactly 10 kilograms. Overall dimensions allow you to place on a small table.
As a result, the table still turned out to be skewed on both axes. Along the X axis, the height difference was 0.4 mm. And along the Y axis more than 1 mm. And this is no good. That is, the idea with self-alignment was interesting, but “in practice” (c) ... Shrinkage of the structure after assembly, shrinkage of printed supports, microdeformations of elements of everything and everything, shrinkage, shaking ... And the departure of unregulated dimensional chains was not long in coming. I also leveled the X axis by tightening one of the Z screws, but everything is bad along the Y axis. I calibrated the nozzle in the center of the table. It is possible to print only within a square of 70x70mm. Closer - the nozzle clings to the table, further - the plastic prints in the air. The Z tightening has obviously created tension in the structure, now the Z movement is coming with a loud bang.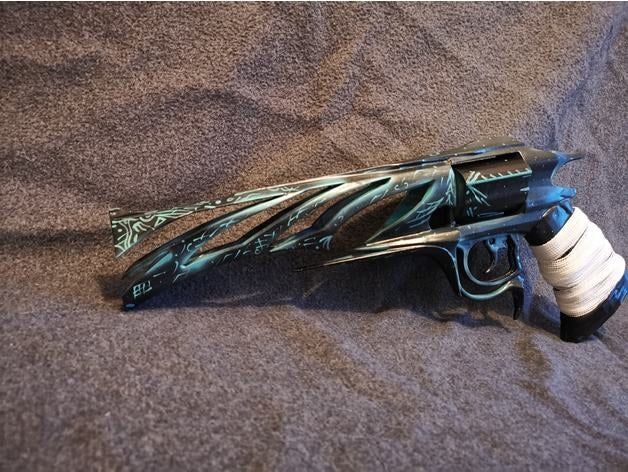 So the self-alignment idea didn't work. Reported to the developer, provided photos and videos. Behind the table hard 2 points . Even a genuine Ultrabase, which only interferes here, would not have saved. A manual or automatic leveling system is needed.
Head.
Head carriage is a printed closed design. Also post-processing and painting. Packed inside is the popular direct version MK8 extruder with a surprisingly large 40mm NEMA17 motor. In my opinion, heavy and overly powerful. It is better to replace with 34 mm or even 22 mm.
One-sided blowing of the print area. Hotend is covered in a silicone shirt and wrapped in a fur coat with kapton. It will not work to get burned - I tried, everything is quite safe. But replacing the elements of the hot end will be difficult. The nozzle is set to 0.4mm, the fans are all hidden under the housing grilles. The design of the head is visually thought out well, it looks great. The head is simple, reliable, protected.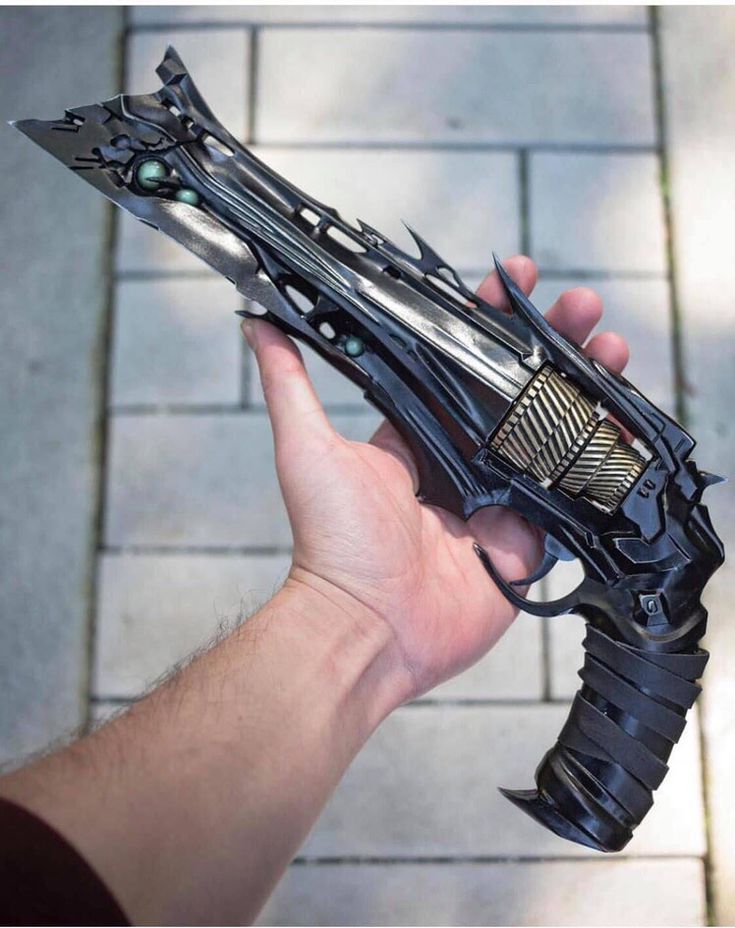 Dismantled and serviced if necessary.
Of the disadvantages of the head: Printed bearings. And not nylon. They will wear out quickly. But spare parts are included with the printer, and they are easy to change, which, of course, is good. Replacing the filament: The MK8 lever is supported by a very tight spring. Pressing it is simply impossible. Therefore, all operations for loading and replacing the filament are only through commands to the extruder. The extruder itself is closed with overlays and it will not work to manually help the rod into the channel. This complicates the procedure, but you can get used to it. And more about blowing the print area. In general, blowing done unsuccessfully. A small, only 25mm fan works. He pushes weakly. The airflow nozzle is directed horizontally and looks directly at the hotend nozzle and they are separated by only 4mm. nine0005
Tests have shown the inefficiency of such blowing, which will be shown below in more detail when analyzing the tests.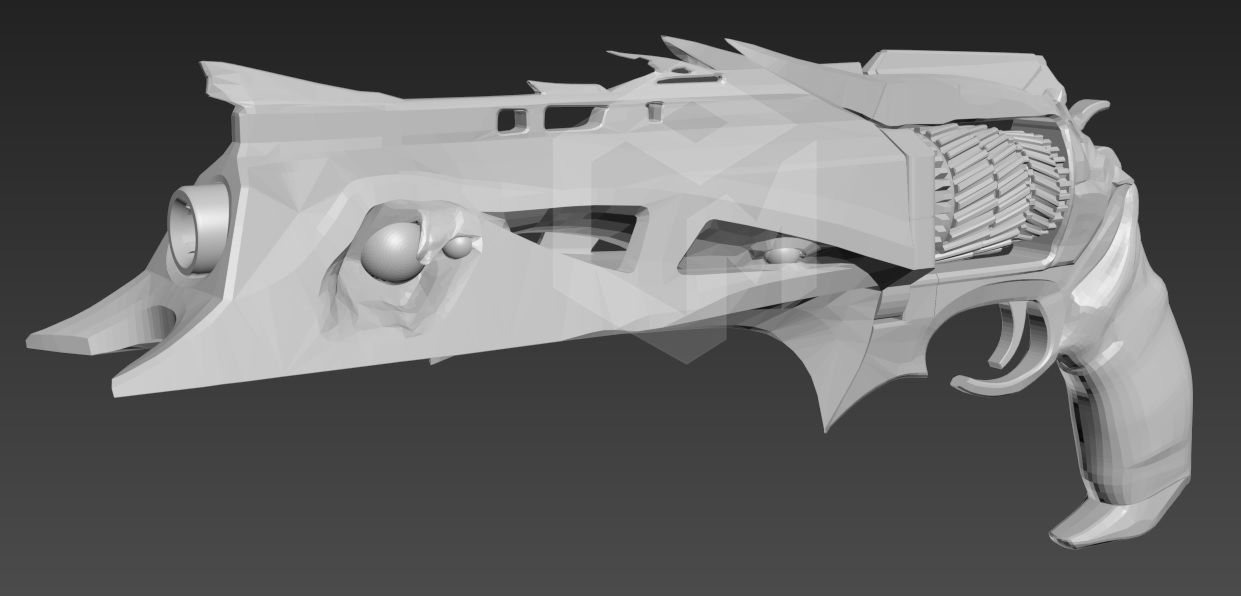 As a result, for the head as a whole 4 points , for the process of replacing the filament 3 points , for blowing 3 points .
Mechanics.
Everything is traditional. Everything is designed neatly and aesthetically. Steel shafts 8 mm. Screws Z - T8 trapezoid, are connected to the engines through aluminum split compensating couplings. Nuts Z are spring loaded. Belts GT2 6mm. Everything is fine, except that printed bearings bring a fly in the ointment. nine0005
All 4401 motors. For the Z axis and for the extruder, they are clearly redundant. For some reason, the engine is sewn into the casing along the X axis. He would have to cool, and he was insulated for the sake of design and security. Nozzle gap adjustment in Z is convenient. There is a belt tension system. According to X, the tension is also done conveniently - there is an adjusting screw. And along Y, the tensioning belt must be rearranged in toothed clamps in 2mm steps, which is almost unrealistic. The belt doesn't stretch. Discussed with the developer, they also promised to replace it with a tension screw. In general, the mechanics are almost 5… With minus . With the promised improvements.
"Practice" in practice. We print tests.
I have only had the printer for a few days, or rather short evenings after work. Therefore, I cannot boast of extruding tens of kilograms of plastic. It was printed:
Several XYZ cubes in different plastics and in different modes, overhang angle tests, bridge printing tests, a pair of 3DBenchy boats, a pair of Dorus dragons, three left Boots, an OK hand. All attempts to print dimensional parts failed - the skewed table affected. Also, 200 photos were taken, a couple of hours of video filming, two reports were written - for the competition and for the manufacturer, a lot of correspondence and online video chats with developers were conducted. What happened in the tests, now I'll tell you. nine0005
The printer is working and printing.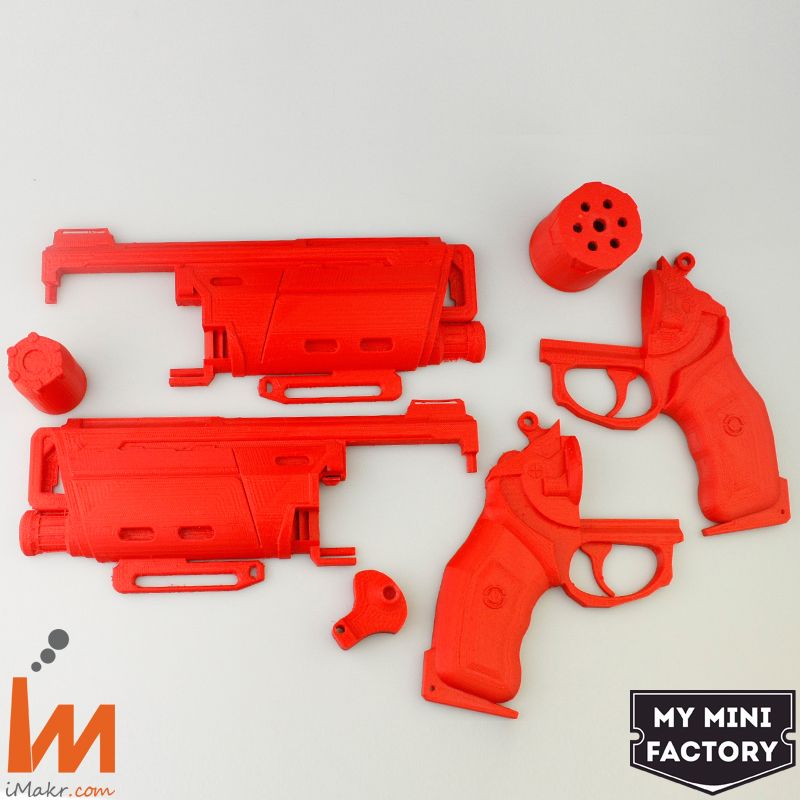 Out of the box. He came to me assembled and configured, as promised by the manufacturer. Home delivery, no instructions, no box. But with two coils of plastic for tests. I add a couple more of my own from the bins, and open the XYZ cube in Kure. Printing on the “Practice” is best done with PLA plastic. Printing with PETG is also successful, but I did not devote much time to it. It was more interesting to try ABS, which surprisingly turned out to be quite edible if the part does not have a large contact area with the table. On a cold table, the bottom layers of ABS cool instantly, and the corners of a large print come off the table due to shrinkage. You can vary with rafts, borders, heating the table with a hair dryer, smearing the first layer, covering the printer with cellophane ... But time is short. It was quite possible to defeat ABS using the head-on method - a lot of glue on the table and just printing, without blowing, smearing the first layer into the glue. ABS plastic blue from GREG laid down evenly and printed without whims - no sticking, no delamination.
 Printing with all plastics was carried out on a thick layer of adhesive stick "Komus". nine0005
According to the results of test printing. I printed XYZ cubes in the size of 40 * 40 * 40 - so the printer has more opportunity to accelerate, for the effects of printing at speed to appear. Printed cubes from PLA and ABS. Layer 0.2, walls in 2 lines, no filling and no roof. The Z roof was then printed separately. Here are 2 samples. The first printed at 60 mm/sec, the second at 90 mm/sec.
First. 60mm/sec. What do we have.
The sides of the print are perfectly sized. Wall thickness when printing in 2 lines of 0.4 and 94% flow is exactly 0.79-0.81 at various points. No complaints. Everything is fine. But a strong echo everywhere, especially along the Y axis. Tightened the belt along the X - the echo decreased. It was not possible to tighten the belt along Y, so from here on there is an echo along Y. But it became clear that a strongly hanging head is not a source of an echo. The layers lay flat. The corners are clear and even. The separately printed cover Z looks normal, everything lay flat and tight, the edges are even. Hatching with walls is fused normally. I printed several cubes on slightly different modes and different grades of PLA. At some speeds, on different cubes, a slight constant vertical even ripple appears with a step of a couple of mm. Most likely, some kind of stepper is junk. nine0039 Medium quality on smooth surfaces with edges.
Second cube. 90mm/sec.
The quality is gone. Strong echo, especially along the Y axis. Layers are uneven. The corners are swollen, the edges of the embossed letters are clumsy - the cooling is no longer in time. The separately printed cover Z contains plastic bulges, gaps - as if under extrusion. In general, 90mm/sec is not for this printer in its current state. 60 mm / sec - while its ceiling for high-quality printing. It is necessary to look at what is there in the mechanics, why it is a problem with laying layers and refine the cooling.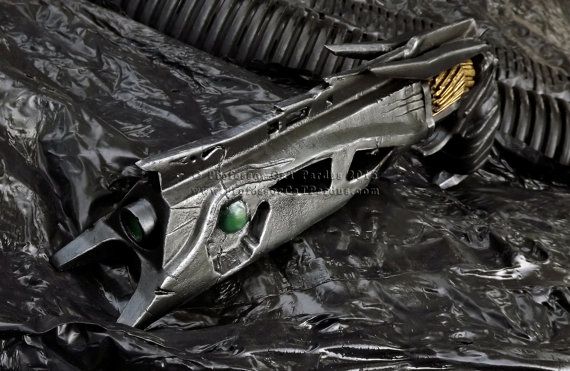 nine0039 Failed.
Print test of model with increasing overhang angle from 50 to 85deg. PLA plastic from H-T-P. The part is printed completely, nothing hangs from it. Despite the design flaws, blowing coped well. But this is rather a consequence of the low print speed, small model and the use of PLA plastic. But, nevertheless, passed the test .
Bridge printing test. PLA plastic from H-T-P. The length of the bridges on the model increases from 40 mm at the bottom to 100 mm at the very top. Print speed 80mm/sec. Everything is stretched, everything is stretched, nothing sags. One thread doesn't count. In general, it works fine. nine0039 5 points .
Boat 3DBenchy. PLA plastic from REC. Layer 0.2mm, walls in 3 lines, infill 16%, inner walls at 60mm/sec, outer walls at 40mm/sec. The ship is printed, all the elements are in place. The layers are laid flat. Arches and bridges are in order. Retracts worked cleanly. Of the defects: Echo from the hole, barely noticeable ripples along X and Y, A couple of bubbles from wet plastic - clicked periodically. Test passed by 5 minus .
Boot. A well-known test for the accuracy of printing small elements. Printed 2 times. The plastic is purple PLA from REC and gray from H-T-P. Layer 0.1 mm, 2 walls, infill 18%, bottom and roof 5 layers. Speed 30mm/sec. In my opinion, printed well for this printer. The boot in both cases visually looks monolithic and neat. Layers are almost invisible. The buckles on the belts are clear. The imperfection of the print becomes visible only under strong magnification, but this was also printed with a 0.4mm nozzle. I will assume that test passed on 5 . But blue ABS with a layer of 0.1 and a speed of 30 printed really badly. Airflow is needed.
Switching to PETG. Red filament from GREG is involved. Printing the test "Dorus the Little Dragon". It is not as popular as a boat, but it is also quite complicated for a printer. Here and a small area of support with letters on the sole, and overhanging expanding surfaces and numerous retracts with transitions. I love this test. And the dragon is cute. Hotend 240deg, table 20deg, layer 0.24mm, wall in 2 lines, speed 40mm/sec, airflow 40%. PETG sticks perfectly to the table with glue, the layers of red plastic lay down beautifully, evenly, there is no hairiness at the transitions - the retracts are ideal. Everything went fine until a strong expansion of the wall from the neck to the head began. And then the seal broke. In this place, part of the part was constantly under the blowing nozzle and was not cooled. And as a result, the plastic just dripped there. In the photo where I specially printed this section of the model, everything is visible. nine0005
Several attempts to repeat the printing of this particular fragment of the model consistently showed the same result - there is no airflow, the plastic flows down. This is where the design flaw of this system came into play. It is necessary to move the airflow nozzle further from the hot end nozzle and direct the flow not horizontally, but at an angle from top to bottom - into the print area and a little around it.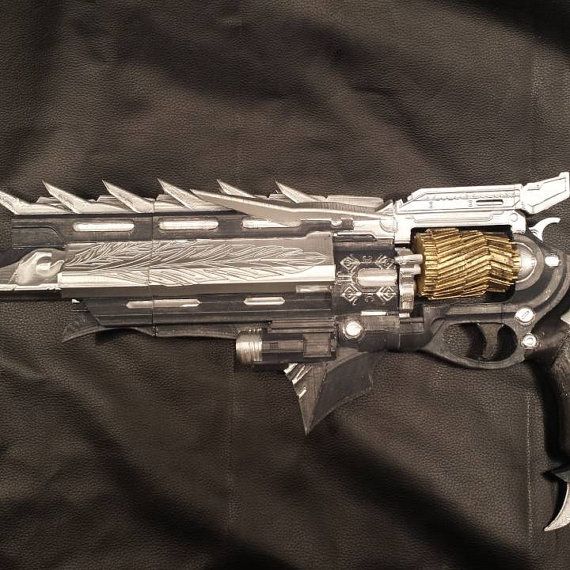 Discussed with the developer. They will think. And so the test showed the inefficiency of the blowing system. Failed.
This is what happens when the blower does not work well.
Further ABS. I repeat the dragon Dorus, since ABS formally does not need to be blown at all, especially on an open Pryusha. Hotend 245deg, table 20deg, wall in 2 lines, speed 40mm/sec, airflow 0%. In general, printing is more successful, but there are also sagging and damaged wall on the extension of the model from the neck to the head. A little blowing in the heat chamber will still not interfere with this dragon ... In general, the test was passed, especially since it was possible to completely print with ABS on a cold table. The print quality is excellent, the layers are even, the retracts are worked out. nine0005
Next, I got bolder and printed the following models with ABS: an enlarged “OK” hand to assess the overall print quality and the likelihood of ABS delamination in an open printer, an XYZ cube to see the angles at the separation from the table, another Boot with layer 0, 1.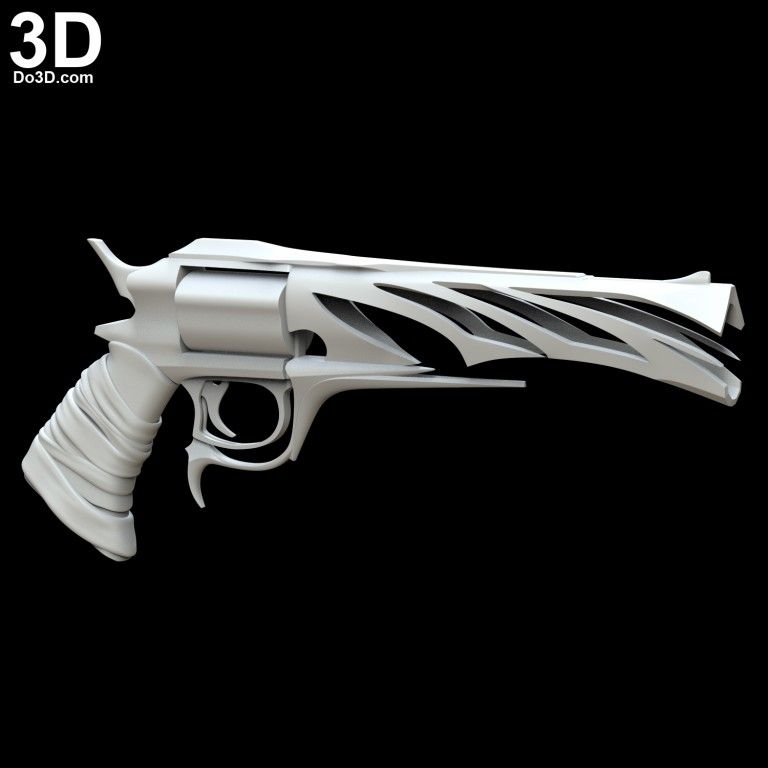 Everything prints successfully, there is no delamination, the quality is good, on small details and overhangs it is better to turn on a little airflow, but here I did not do this. ABS is still outdoors.
You can sum up the review of the printer "Practice". The printer is interesting. A little unusual in design, the main advantage is a rigid body, on the basis of which you can bring the rest to mind. With the elimination of identified shortcomings - promising. It may well find demand among those who find it difficult to independently carry out operations to assemble and configure the printer. While the device is clearly damp. Something like Beta version. Everything that is listed here from the seen advantages and disadvantages is transferred to the developer. Print quality can be assessed as good at medium-low speeds. Slower = better. Small models with fine detail at low speeds print great. In this scenario, this printer asks for a 0.3 or 0.25 nozzle, and print highly detailed models on layers of 0.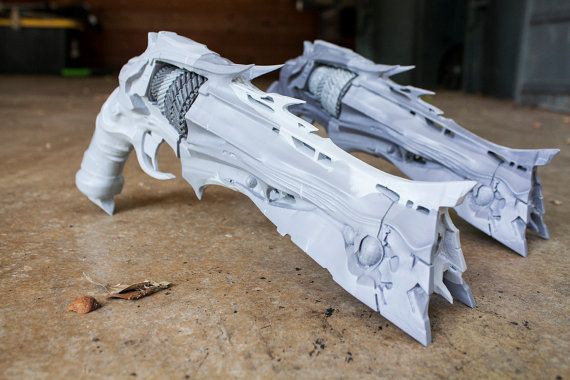 08-0.12 mm. Well, maybe put the T8 screws with a smaller pitch for this. nine0005
Advantages of the machine: Body, design, layout, classical mechanics, common easily accessible components in the design, maintainability, maintainability, direct extruder, small nice little things (light, box) light weight and dimensions. Prints with all types of popular plastics (PLA, PETG, ABS tested).
Disadvantages (already taken for correction) : Non-adjustable unheated table, poor airflow, no proper Y belt tensioner, other minor imperfections. Small print area. For some, this is a virtue, but for others, more is needed. For most tasks, it is enough. This is a training machine. nine0005
After making changes to the design, you should get a great printer.
That's it, all success in business and achievements. 03/29/2021.
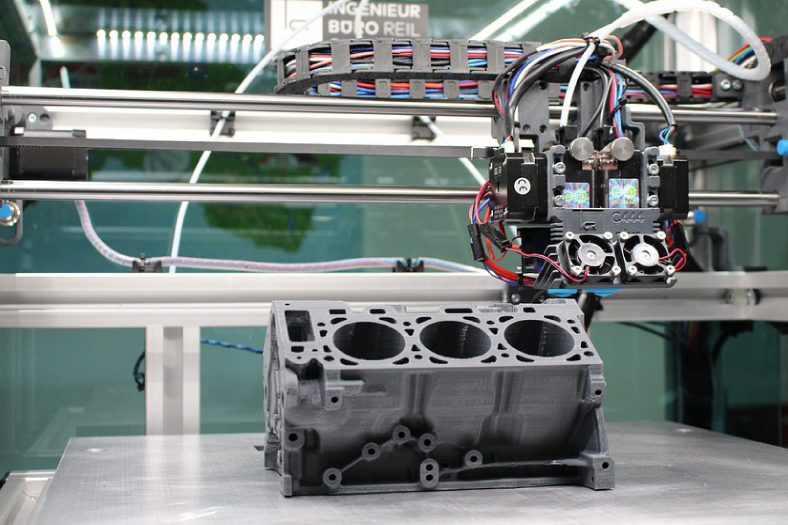
REC Wiki » Getting Started with FDM 3D Printing: A Beginner's Guide
Especially for those who are just starting to learn the basics of 3D printing, we offer a selection of useful tips to solve the most common problems when working with FDM 3D printers.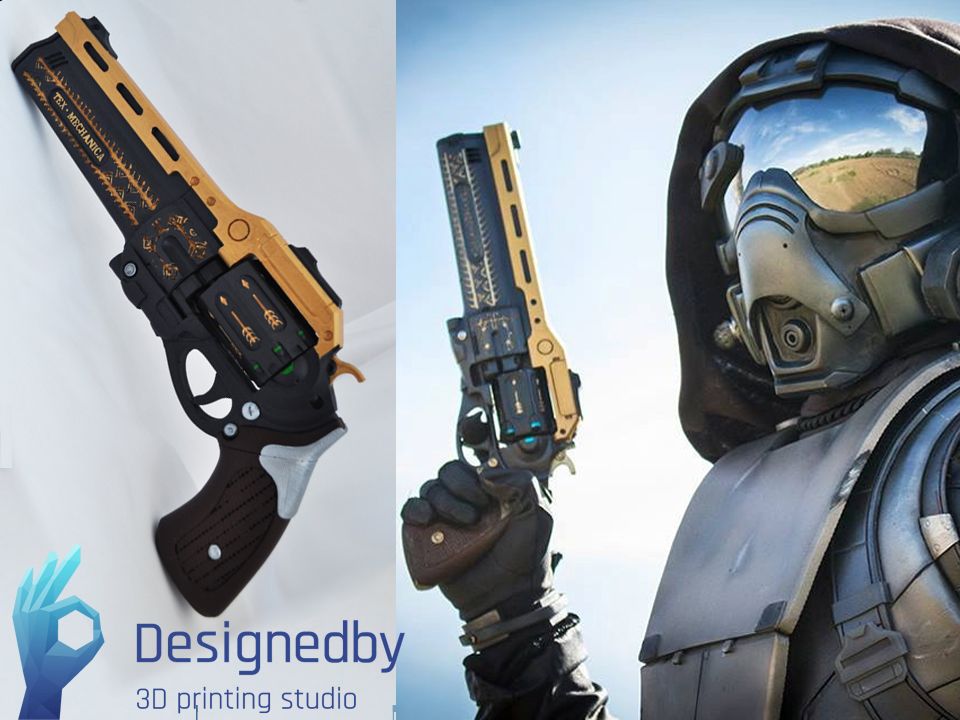
1. Increasing 3D printing speed
Quality 3D printing is, among other things, a balanced combination of filament feed speed, fuser power, nozzle diameter and layer height. If you try to increase the print speed too high without correspondingly changing the heating settings and nozzle diameter, the result will be unstable material feeding with gaps in the layers. nine0005
Points to consider:
- An extended hot end will be required for a significant increase in speed. Simply raising the temperature above the values recommended by the filament manufacturer will not lead to anything good: damage to the material itself and the formation of carbon deposits are most likely. The key role is played not by temperature, but by the length of the hot section of the hot end - the longer it is, the more time the plastic has to heat up and the higher the melt supply rate can be. nine0208
- The higher the speed and the smaller the nozzle diameter, the higher the load on the feed mechanism of the extruder.
 Accordingly, with a significant increase in the laying speed of the thread, it is advisable to use a nozzle with a larger diameter.
 - Increasing the diameter of the nozzle and the length of the hot end of the hot end negatively affects the efficiency of the retract, so do not be surprised if smudges form when the head is idle.
- For good layering, try to keep the ratio between nozzle diameter and layer thickness around 3:1. nine0208
2. 3D printing of oversized products
Sooner or later every user faces a situation when a part does not fit into the working volume of a 3D printer. If there is no access to larger format equipment, there is only one way out - to print the product in parts. Of course, to do this, you will have to divide the digital model, and after 3D printing, assemble it - either with glue, or integrated mounts, or both.
With 3D division - models, it is recommended to adhere to the following rules:
- If the part is symmetrical, cut into symmetrical parts if possible.

- If the part has a complex geometry that complicates gluing, you can add tongue-and-groove joints to facilitate assembly at the joints. At the same time, such connections will increase the strength of the product after gluing, which is important for functional, loaded parts.
- Fewer supports means easier post-processing and less waste, so try to divide models so that the component parts can be printed with a minimum of support structures. nine0208
3. Proper positioning of the model on the stage
Minimization of support structures is always desirable as it reduces post-processing effort. On the other hand, when 3D printing functional parts, strength can play a more important role, and then the part will have to be installed on the table in a way that is not the most advantageous in terms of removing supports.
3D models of loaded parts should be positioned so that they can withstand maximum loads. It is worth remembering here that FDM 3D printing is a layer-by-layer process, and finished products withstand higher tensile loads along the layers than across them.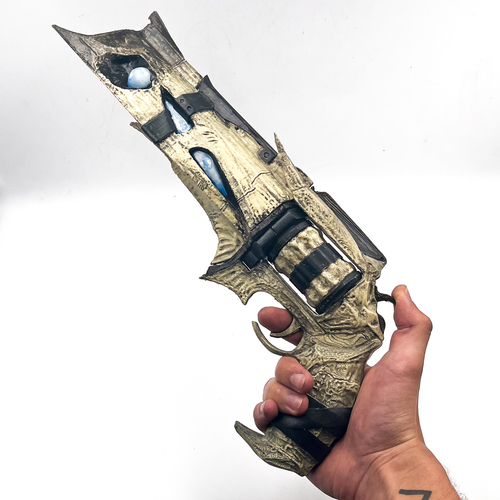 Orient the model on the table appropriately, taking into account the load vector. nine0005
If you need to further increase the strength of the product, use composites, such as our glass- and carbon-filled polymers in the X-Line, Clotho and Technika ranges.
4. Support Structures
Support Structures are essential for correct 3D printing of complex shaped parts. This is due to the fact that conventional three-axis FDM 3D printers are limited in their ability to build inclined segments. If the permissible angles of inclination are exceeded, subsidence of the laid material will occur. A similar problem manifests itself in the construction of so-called "bridges" - sections connecting two vertical structures, but without their own support. If a bridge is built too long without supports, sagging will occur. nine0005
Simply put, FDM 3D printers can't print over the air. If the part has a complex shape, and dividing the model into parts (see point 2) is not practical, the problem of 3D printing of areas with a strong inclination is solved using removable support structures.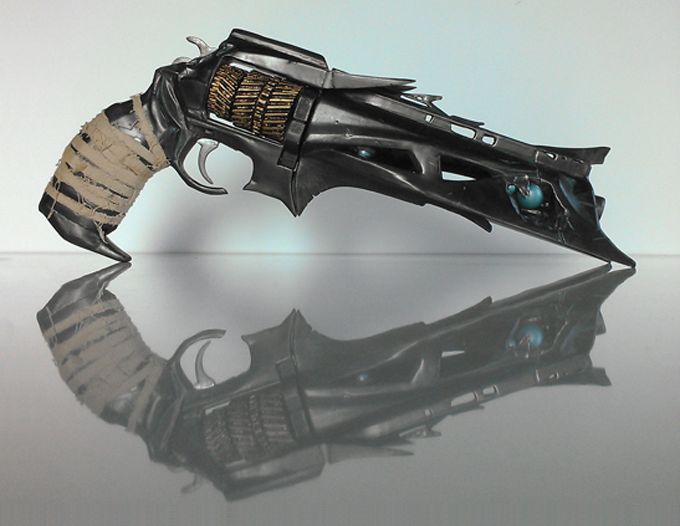
Almost all existing slicers (programs for preparing 3D models for 3D printing) have the ability to automatically add supports. Algorithms are not flawless, so if necessary, automatically generated supports can usually be edited manually or even take over the entire process. nine0005
When placing the support structures, it is necessary to take into account such moments as the distance between the workpiece and the table at the locations of the supports and the saturation of the support structures. Proper settings will make it easier to remove supports and reduce waste.
This last point is especially important when using convenient but relatively expensive water soluble support resins such as polyvinyl alcohol (PVA). With a dual-extruder 3D printer, many slicers allow you to build the model and supports with a basic, often cheaper material, and use PVA either for supports or for spacers between the model and supports. Upon completion of the 3D printing, the result can be soaked in water, after which the PVA will dissolve and the supports will fall off the model without the risk of surface damage caused by mechanical separation of the supports.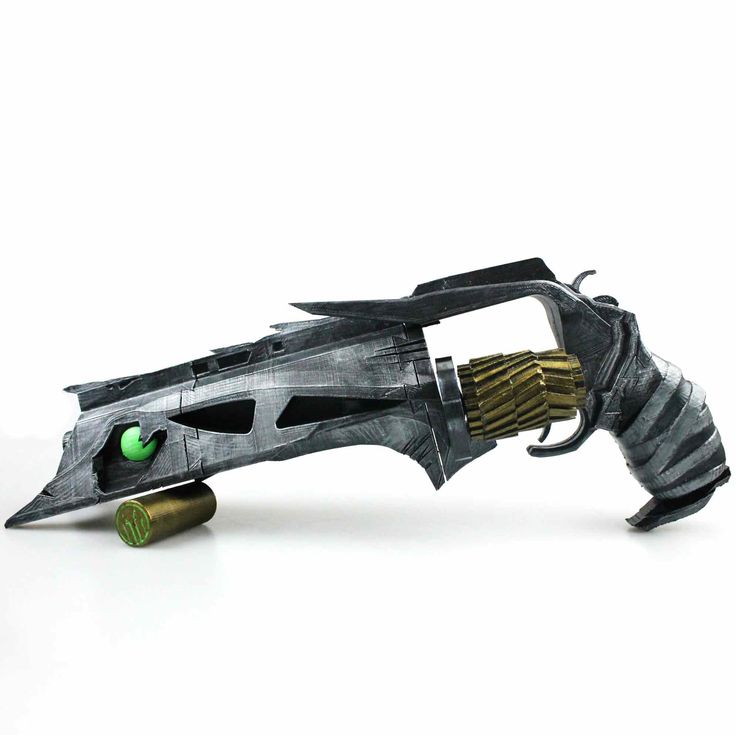 Using PVA to 3D print the interlayers (see illustration above) instead of the supports themselves is often much more profitable, so take note. nine0005
For effective and economical placement of supports, try to adhere to the following rules:
- Supports are needed where overhang angles exceed 45 degrees.
- Supports are optional for bridges less than 5 mm in length.
- If possible, try to orient the part in such a way as to minimize the number of supports (see illustration above).
- Make sure that supports do not touch adjacent vertical sections of the model. nine0208
5. Cleaning the nozzle
The easiest way to clear a clogged nozzle is to heat the hot end to the extrusion temperature of the plastic being used, turn on the feed mechanism and pierce the cork with a thin needle.
This method is effective in most cases and does not require disassembly of the extruder.
6. 3D printing with flexible resins
Flexible resins, often referred to as 'flex', require special handling. Our range includes Rubber (synthetic rubber), Flex (thermoplastic polyester elastomer), Easy Flex and TPU D70 (both thermoplastic polyurethane, but with different hardness) filaments. nine0005
Elasticity can create certain problems during extrusion, therefore, when working with these materials, we recommend that you consider the following points: higher).
 Retract values must be set to generous tolerances, allowing for filament expansion and contraction—two to three times greater than when working with solid polymers. Alternatively, the retract can be turned off: although this will lead to the formation of abundant "snot", in most cases (depending on the material and complexity of the model) they are easily cut off with a sharp knife. nine0208
 Learn more about working with flexible filaments in this article.
7. Uneven first layer
The first layer is the most important, as the rest of the model will be built on it. The layer should be even and adhere well to the table surface:
- If the 3D printer lays uneven first layers despite the table adjustment, the problem is most likely a curvature of the table itself. One popular solution is to use mirrored glass as a table. You should not use window, it just does not shine with evenness. nine0208
- If this does not solve the problem, it is necessary to check the mechanics: the evenness of the shafts, the tension of the belts, the smooth running of the carriages.
- Finally, check if the table is tilted by the adjustment screws - this can happen if the table is tilted in four points.
8. Adhesion
Adhesion is a complex issue depending on the filament used, stage material and temperature, and background temperature. In some cases, such as when 3D printing PLA on glass, additional adhesive agents may not be required at all. The most popular options are stationery glue stick or diluted PVA glue. nine0005
As mentioned above, in some cases, glue is not even needed to set the plastic with the table, but rather to facilitate the separation of the model from the surface. In addition, shrinkage must be taken into account: when working with some materials, such as the popular ABS, glue alone may not be enough, and then a 3D printer with a thermal camera is required.
This topic deserves a separate article, and we already have a detailed manual.
9. Infill
In order not to waste plastic, but at the same time save time, you can print parts with partial infill. Each slicer offers different types of filling, you just need to choose the most suitable one and specify the density. nine0005
There is no fundamental difference between them, but the density itself plays an important role, directly affecting the strength of the product. If we are talking about a loaded part, for example, a gear, it is more expedient to set the maximum filling, that is, to print a conditionally monolithic part.
10. Top, bottom layers and perimeters
The thickness of the surfaces can again be adjusted in the slicer, although different programs do this in different ways.