Will 3d printers get cheaper
The Best Cheap 3D Printers for 2023
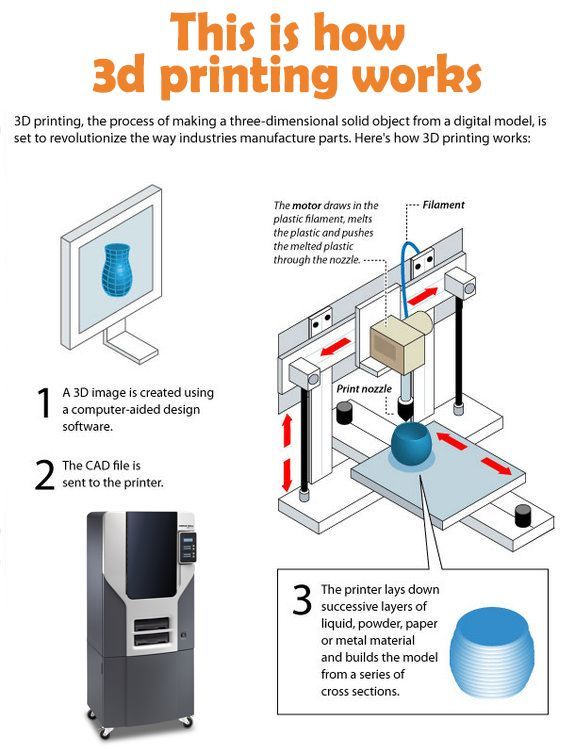
While we'd hesitate to call 3D printing a mature technology, you might say it has reached its teenage years. Through their first decade-and-change, 3D printers have come down in price, grown easier to set up and operate, and become more reliable. And you may pay less than you expect: Many once-high-end features have migrated down to inexpensive models.
PC Labs has been reviewing 3D printers since 2013. Today, the state of 3D printing is strong, but that wasn’t always the case. For the first several years, it was often an adventure getting one of these printers up and running, let alone successfully through our testing regimen. Issues with filament-based—aka fused filament fabrication (FFF) or fused deposition modeling (FDM)—printers were abundant.
Filament feeders had to be coaxed into delivering filament from the spool to the extruder. Print beds had to be manually aligned. The extruder or hot end had to be positioned just right to minimize the gap between the nozzle and the build plate (the flat surface on which the object is printed). Objects frequently stuck to the build plate, and required careful, sometimes unsuccessful, efforts to pry them off. These and other issues required painstaking effort to resolve, often combined with calls to tech support.
Not so much anymore. While they can still be rebellious at times, 3D printers have grown up a lot, and achieving the 3D printer basics has gotten a lot less likely to end in a shouting match over small things. And they've gotten a lot more affordable, too, for curious DIY-ers and hobbyists to try.
If you're in the market for a beginner or low-cost 3D printer, it's important to know how lower-end models differ. Read on for mini-reviews of the top budget 3D printers we've tested. After that, we go into more detail on understanding the 3D printer specs and tech relevant to beginning buyers. Ready to take the plunge? Read on.
Original Prusa Mini
Best Overall Budget 3D Printer
4.5 Outstanding
Bottom Line:
It requires assembly and calibration care (plus shipping from the Czech Republic), but the Original Prusa Mini is a compact, open-frame 3D printer that consistently produces superb-quality output for a great price.
PROS
- Top-notch object quality
- Supports a variety of filament types
- Useful, professionally printed user guide
- Great support resources
- Versatile, user-friendly software
CONS
- First-layer calibration can be tricky
- Only includes starter packets of filament
- Requires monitoring if young children or pets are around
| Sold By | List Price | Price | |
|---|---|---|---|
| Prusa Research | $399.00 | $399.00 | See It (Opens in a new window) |
Read Our Original Prusa Mini Review
XYZprinting da Vinci Mini
Best Budget 3D Printer for Schools, Community Centers
4.0 Excellent
Bottom Line:
The XYZprinting da Vinci Mini is a consumer-oriented 3D printer that provides a winning combination of low price, ease of setup and use, solid print quality, and smooth, misprint-free operation.
PROS
- Very low price.
- Reasonably priced filament.
- Good print quality.
- No misprints in testing.
- Easy setup and operation.
- Quiet.
- Prints over a USB or Wi-Fi connection.
CONS
- Occasional problems in trying to launch prints.
- Removing printed objects from the print bed is sometimes tricky.
| Sold By | List Price | Price | |
|---|---|---|---|
| Walmart | $199.95 | $199.95 | See It (Opens in a new window) |
| Amazon | $199.95 | $199.95 | Check Stock (Opens in a new window) |
Read Our XYZprinting da Vinci Mini Review
Toybox 3D Printer
Best Budget 3D Printer for Children
4.0 Excellent
Bottom Line:
The Toybox 3D Printer works well as a model designed for children, offering reliable printing from a browser or mobile device and a few thousand toys to print, plus creative options to output drawings or photos. Just bear in mind the tiny build area.
PROS
- Reliable, misprint-free printing
- Easy setup
- One-touch operation
- Well-composed help resources
- Access to more than 2,000 printable toys and projects
- Lets you create your own printable designs
CONS
- Tiny build area
- Not ideal for importing 3D files created elsewhere
| Sold By | List Price | Price | |
|---|---|---|---|
| Amazon | $299.00 | $299.00 | See It (Opens in a new window) |
| Toybox Labs | $379.00 | $299.00 | See It (Opens in a new window) |
Read Our Toybox 3D Printer Review
Monoprice Mini Delta V2 3D Printer
Best Budget 3D Printer for Beginners, Non-Techies
4.0 Excellent
Bottom Line:
3D printing gurus will be intrigued by the Monoprice Mini Delta V2's use of the delta rather than Cartesian coordinate system, but beginners will just enjoy its low price, ease of use, and speedy printing.
PROS
- Sub-$200 price
- Quick, nearly misprint-free printing
- Easy setup and operation
- Sturdy steel-and-aluminum frame
- Supports multiple filament types
CONS
- Tiny build area
- So-so print quality
- Mere one-year warranty
| Sold By | List Price | Price | |
|---|---|---|---|
| Amazon | $279.99 | $279.99 | See It (Opens in a new window) |
Read Our Monoprice Mini Delta V2 3D Printer Review
Anycubic i3 Mega S
Best Budget 3D Printer With an Open Design, Big Build Area
3.5 Good
Bottom Line:
The Anycubic i3 Mega S, an inexpensive open-frame 3D printer, produced decent-quality prints in our testing. To get the most out of it, though, may require precise calibration.
PROS
- Modestly priced
- Large build area for an inexpensive printer
- Supports a variety of filament types
- Generally solid print quality
- Uses well-known Cura software
CONS
- Finicky print-platform alignment
- Supported coils of filament are small
- Poorly placed spool holder
| Sold By | List Price | Price | |
|---|---|---|---|
| Amazon | $229. 98 98 | $229.98 | Check Stock (Opens in a new window) |
| AnyCubic | $279.00 | $279.00 | Check Stock (Opens in a new window) |
Read Our Anycubic i3 Mega S Review
Anycubic Vyper
Best Budget 3D Printer for the Biggest Build Area Possible
3.5 Good
Bottom Line:
Anycubic's modestly priced Vyper whips up large 3D prints on its open-frame design, and provides automatic print-bed leveling. Just know that some minor assembly is required—and printed objects may require a bit of cleanup.
PROS
- Relatively large build area
- Automatic bed leveling
- Simple assembly
CONS
- Short (one-year) warranty
- Includes only a small starter filament coil
- Using Cura software with the Vyper requires tweaking a couple of settings
- Test prints showed some "hairy" filament residue
| Sold By | List Price | Price | |
|---|---|---|---|
| Amazon | $339. 99 99 | $339.99 | See It (Opens in a new window) |
| AnyCubic | $369.00 | $319.00 | See It (Opens in a new window) |
Read Our Anycubic Vyper Review
Creality Ender-3 V2
Best Budget 3D Printer for Tinkerers and DIY Types
3.5 Good
Bottom Line:
Hands-on tweaking defines Creality's budget-price Ender-3 V2, an open-frame 3D printer that you build from a kit. It produces generally above-par prints, but its print bed can be tricky to keep leveled.
PROS
- Inexpensive
- Slightly above-average print quality
- Good-size build area for its price
- Supports several filament types
CONS
- Manual print-bed leveling can be tricky
- Setup instructions could be deeper, more legible
- Questionable quality control on some parts
| Sold By | List Price | Price | |
|---|---|---|---|
| Amazon | $299. 00 00 | $246.00 | See It (Opens in a new window) |
Read Our Creality Ender-3 V2 Review
Flashforge Finder 3D Printer
Best 3D Printer for the Very Tightest Budgets
3.5 Good
Bottom Line:
The Flashforge Finder 3D Printer is moderately priced and offers good print quality, but it proved tricky to get up and running in our tests.
PROS
- Quiet.
- Good print quality.
- Connects via USB 2.0 cable, USB thumb drive, or Wi-Fi.
- Reasonably priced.
CONS
- Some objects pulled off the platform during testing.
- Poor documentation.
- Modest build volume.
- Limited to printing with polylactic acid filament (PLA).
| Sold By | List Price | Price | |
|---|---|---|---|
| Amazon | $729.00 | $729.00 | Check Stock (Opens in a new window) |
Read Our Flashforge Finder 3D Printer Review
Polaroid PlaySmart 3D Printer
Best Budget 3D Printer for Dabbling in Small Objects
3. 5 Good
Bottom Line:
The Polaroid PlaySmart 3D Printer is a compact, stylish 3D printer with above-par overall print quality, but, alas, a tiny build area for the money.
PROS
- Small, lightweight for a desktop 3D printer.
- Easy to set up and use.
- Supports PLA, PETG, and wood composite filaments.
- Multiple-color support.
- Wi-Fi camera monitors print jobs.
- Prints from USB drives, SD cards, or mobile devices.
CONS
- High price for its capabilities.
- Small build area.
- Too-brief warranty.
| Sold By | List Price | Price | |
|---|---|---|---|
| Amazon | $699.00 | $699.00 | See It (Opens in a new window) |
Read Our Polaroid PlaySmart 3D Printer Review
XYZprinting da Vinci Jr. 1.0 A Pro
Best Budget 3D Printer With Closed Design, Roomy Build Area
3. 5 Good
Bottom Line:
The XYZprinting da Vinci Jr. 1.0 A Pro is a moderately priced closed-frame 3D printer with a large build volume and overall good performance, but a potentially balky filament-feeding system.
PROS
- Spacious build area
- Works with third-party filaments
- Self-leveling print bed
CONS
- Build plate is not heated
- Limited to PLA- and PETG-based filaments
- Guide tube is prone to detaching
| Sold By | List Price | Price | |
|---|---|---|---|
| Amazon | $299.95 | $199.95 | See It (Opens in a new window) |
| Best Buy | $449.95 | $449.95 | Check Stock (Opens in a new window) |
Read Our XYZprinting da Vinci Jr. 1.0 A Pro Review
Monoprice Voxel 3D Printer
Best Budget 3D Printer for Cheap Filament
3. 0 Average
Bottom Line:
The Monoprice Voxel is an under-$400 3D printer that's easy to set up and use. It exhibits generally good print quality, but it was unable to print two of our test objects.
PROS
- Easy to set up and use.
- Budget price for printer and filament spools.
- Supports PLA, ABS, and several composite filament types.
- Versatile software.
- Prints over Ethernet or Wi-Fi, or from a USB thumb drive.
CONS
- Frequent misprints on certain test objects.
- Slightly balky touch screen.
| Sold By | List Price | Price | |
|---|---|---|---|
| Amazon | $449.99 | $369.26 | See It (Opens in a new window) |
| Walmart | $429.99 | $369.26 | See It (Opens in a new window) |
Read Our Monoprice Voxel 3D Printer Review
Buying Guide: The Best Cheap 3D Printers for 2023
How to Buy a Cheap 3D Printer
The biggest changes to 3D printers over the last few years have come to the cheaper models. Nowadays, many of those classic, ornery 3D-printing issues have been resolved (most of the time, anyway), even for consumer and bargain-priced 3D printers. Automatic print-bed leveling is the norm, and you can usually remove 3D-printed objects from heated and/or flexible build plates with a minimum of coaxing. And most 3D printer manufacturers have either developed and refined their own software, or have adapted an open-source printing platform such as Cura(Opens in a new window).
(Credit: Zlata Ivleva)
What separates more expensive 3D printers from cheap ones ("cheap" defined as $500 or less, for the purposes of this article) is often a select group of features. These include the build volume, the type of frame, the varieties of supported filament, the software, and the connectivity mix. Let's run through those in turn.
What's the Right Build Volume for a 3D Printer?
A 3D printer’s build volume is the maximum dimensions (HWD) of a part that it can print. (We say “a part” because a 3D-printed object can consist of multiple parts that are printed, then glued or otherwise pieced together.) While the smallest build volume of any 3D printer we have tested is 3.9 by 3.9 by 4.9 inches, we consider any build volume smaller than 6 by 6 by 6 inches to be small, any between that and 10 by 10 by 10 inches as medium, and any printer with at least one build dimension of more than 10 inches as having a large build volume.
(Credit: Molly Flores)
As a general rule, inexpensive 3D printers have small build volumes, while more expensive ones have larger build volumes. This depends in part on the type of printer. Closed-frame 3D printers—and most semi-open models, which have a rigid top, base, and sides but are open in front and, often, back—tend to have small build volumes, while open-frame printers, lacking as rigid a physical structure, often have relatively large build volumes for the price. You'll want to weigh the build volume against the kinds of objects you will print.
Should I Get an Open-Frame or Closed-Frame 3D Printer?
Which brings us to the frame "form factor" question: open-frame versus closed-frame. Closed-frame 3D printers are boxlike devices, with a rigid base, walls (with a see-through door in front), and top. Among their advantages? They muffle the operating noise, as well as reduce the odor from melted filament (which is potentially an issue with ABS plastic), and they provide some protection for people or pets who might inadvertently touch the hot extruder. A downside: They tend to have smaller build volumes than open-frame 3D printers, which have fewer (often, no) walls to constrict them.
(Credit: Zlata Ivleva)
Low-cost 3D printers include both open-frame and closed-frame models, as well as a few stereolithography printers. If a relatively large build volume is a priority, you’re likely to get more bang for the buck with an open-frame model. Open-frames do have some clear downsides by definition: They tend to be noisy, emit odors when certain plastics are melted, and provide little protection for someone who might touch the hot extruder.
(Credit: Molly Flores)
Also, recognize some potential negatives of open frames, depending on the model. Some require assembly, being essentially kits, and most require more setup care than a closed-frame printer, plus more maintenance to keep them running smoothly. Still, these very traits should not deter—and may even appeal to—hobbyists and DIY folks.
What Should I Look for in 3D Printer Software and Connectivity?
Gone are the days when tinkerers had to cobble together several different programs to get a 3D printer to run. Manufacturers either include their own 3D printing program or modify an existing platform such as the open-source Cura.
3D printing software performs three main functions: processing an object file (resizing, moving, rotating, and in some cases duplicating it), slicing it (into virtual layers, based on your chosen resolution), and printing it. These are almost universally combined into a seamless process. Some high-end printers have software that supports a wider range of settings you can tweak, but even the basic suites work at least reasonably well.
More likely to vary among the cheaper set is the array of connection options from model to model. Nearly all have a USB Type-A port to fit a thumb drive for printing from document files. Most also have a USB Type-B port for connecting directly to a computer, and some offer Wi-Fi, too (or as an alternative), while a handful let you connect via Ethernet to share the printer across a local network.
Some printers support storing 3D files on an SD or microSD card (which may also contain the printer’s system files). Most 3D printer manufacturers (even the discount ones) have a mobile app to launch and monitor print jobs, and a few provide access to cloud services from which you can print.
While high-end 3D printers tend to have an abundance of connection choices, discount models vary widely in their choices. Some are generous and some are basic, so it pays to assess what a given model offers.
What Should I Look for in Filament Support?
Filament support tends to be a key area that separates the cheaper models from the higher-end ones. (See our guide to understanding 3D printing filaments for more particulars.) Inexpensive 3D printers tend to support a limited number of plastic filament types, some of them only PLA and/or ABS.
Recommended by Our Editors
3D Printing: What You Need to Know
3D Printer Filaments Explained
(Credit: Molly Flores)
PLA (polylactic acid) is a biodegradable, plant-based polymer, while ABS (acrylonitrile butadiene styrene) is the same tough plastic that Legos are made from. Objects printed from ABS are durable and nontoxic, though the material can be tricky to work with. ABS can emit an acrid, unpleasant odor during printing, and the bottom corners of objects being printed with it have a tendency to curl upward a bit, especially if you are using a non-heated print bed. This can lead to unsightly prints, and/or prints prematurely pulling off the build plate, ruining them.
Many entry-level and low-price 3D printers stick exclusively to PLA. If you want to experiment with a larger variety of filaments—which include water-soluble filament, wood- and metal-laced composites, and both tough and flexible varieties—you may have to pay more, although a few discount models support a wide range of materials.
Should I Consider a 3D Printing Pen Instead?
Although they aren’t printers per se, inexpensive 3D pens are close kin to 3D printers—using the same filament types and a similar extrusion system—and we include them in the 3D printing category. Rather than tracing out a programmed pattern, you use the 3D pen much like a normal pen, except that you draw with molten plastic. You can trace a pattern or draw freehand, and even draw in three dimensions as the plastic quickly solidifies and hardens once extruded.
(Credit: 3Doodler)
Most 3D pens cost less than $100, and some cost $50 or less. At a glance, 3D pens may appear to be toys, but some artists and craftspeople have taken to them, as it is possible to make quite complicated and beautiful objects with them. If your aim in 3D printing is something closer to freehand design and free expression than computer-centric, structured, and repeatable output, you might give one a try.
So, What Is the Best Cheap 3D Printer to Buy?
Buying a budget 3D printer needn’t mean a world of sacrifice. Plenty of capable and reliable models sell at less than $500, and while they may not be as feature-rich as their more expensive cousins, there's no sense in paying for things you don’t need.
Many casual 3D-printing experimenters will be fine with printing over a USB cable or from a thumb drive, and sticking to PLA may be the best choice for a starter 3D printer. If you focus just on the features you want, you may be pleasantly surprised at what you find. Below, check out a spec breakdown of the best under-$500 3D printers we have reviewed, paralleling our picks above. Also, for a look at the broader market, see our guide to our favorite 3D printers overall.
Are Budget 3D Printers Worth It? — Creality Experts
As consumer 3D printing has evolved and matured, the cost of budget 3D printers has dropped significantly.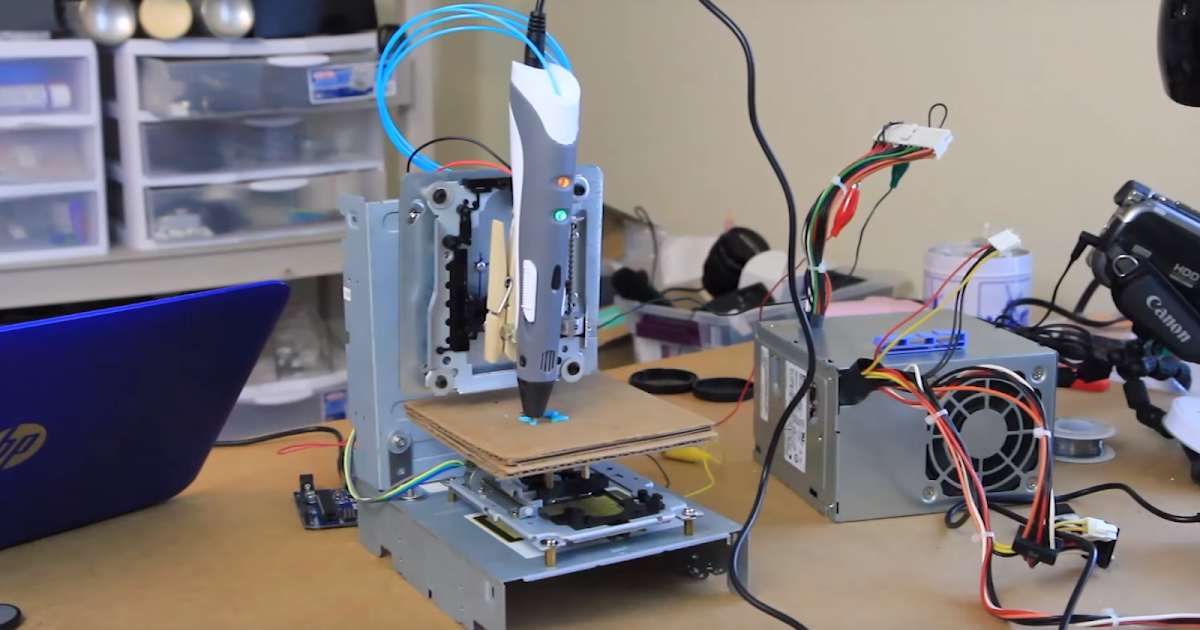 Only a few years ago, a low-cost 3D printer would still cost at least $400, but now you can find many budget 3D printers under $200. While there are trade-offs with budget 3D printers, you can still get excellent quality prints from cheaper 3D printers, and these machines are definitely worth considering.
The Creality brand has been a leader in the industry for producing low cost 3D printers that can still produce great results. In this guide, we will look at more detail on what to know about these printers before buying, then take a look at our two top picks for the best budget 3D printers.
Note: Creality Experts receives a commission for items you purchase from this page, at no additional cost to you. For more information, please see our affiliate link policy.
Print Quality of Budget 3D Printers
You may think that with a low cost 3D printer you’ll have to sacrifice on quality, but this is not the case. You may be surprised to learn that budget 3D printers such as the Creality Ender 3 can produce equally high quality 3D prints as more expensive machines. You may need to work a little harder with a budget machine, but once you have everything dialed in, a 3D printer such as the Ender 3 can produce very good results.
Some of the more premium 3D printers offer additional stability enhancements which make it easier to ensure the printer is rigid and there is no undesired movement. For example, the Creality CR-10 V2 includes two lead screws on either side of the printer and Z stabilizing rods. It also has a wider bed support rod which gives more tolerance for the print bed being loose. We have found that as long as you check that the moving parts are correctly tightened, you’ll be able to get great results.
Another improvement on many premium printers is an enhanced part cooling fan, which can improve the appearance of overhangs on your 3D prints. However, the Ender 3 cooling fan is capable of handling most standard print overhangs, such as the front of this 3D printed Benchy boat.
Millenium Falcon showing detail produced on the Ender 3.
3D Benchy Printed on the Ender 3.
Knight minis printed on a Creality CR-10.
Some Assembly Required
Budget 3D printers tend to require a bit more assembly, and the Creality Ender 3 is no different. To reduce the size of the shipping box, the printer is shipped in 12-15 pieces and takes about an hour to assemble. More premium printers typically come in fewer pieces, such as the Creality CR-10S Pro, which only requires about 10 minutes to assemble.
That said, the assembly process is fairly straightforward. You’ll primarily be connecting the pieces with bolts to attach them using the included tools, and plugging in wires. There's no soldering or engineering knowledge required. We have found that the assembly process is helpful in getting to know how the hardware works, and will make it easier to repair any issues down the road.
Manual Bed Leveling
Many premium 3D printers on the market include automatic bed leveling , which ensures that your prints have a consistent base that adheres to the build plate. With lower cost 3D printers such as the Ender 3, you will need to manually level the bed using the four leveling knobs on the corners to adjust the height of the bed before printing. Fortunately, this is something you will only need to spend significant time on when setting up the printer. After that point, you’ll typically only need minor adjustments. To get a better idea of what this process entails, refer to our bed leveling guide.
The Ender 3 supports upgrading to an auto leveling system, but we have found that manual leveling is not too difficult once you get a bit of practice. If you do want to upgrade to an auto-leveling system, check out our guide to installing the BLTouch auto leveling probe on the Ender 3.
Software Setup
This is an area where budget 3D printers are not too different than the more premium machines. Since the Ender 3 is such a popular printer, almost all 3D print slicers (the program you’ll use to prepare models for 3D printing) include preset profiles for the Ender 3. You will still need to spend some time learning the different slicer settings and how they impact the final print, but this is true for any 3D printer.
Maintenance
Unsurprisingly, budget 3D printers tend to use less durable components in some cases which can require more frequent repairs. In addition to the frame rigidity we touched on before, there are a couple other components that are lacking. However, The Ender 3 Max does not have many of these shortcomings
The plastic extruder that is included with the Ender 3 is prone to breaking, but it can be upgraded.
The extruder has a plastic frame which can break over time.
 Fortunately, you can upgrade to an all-metal extruder found on more premium machines for about $15 (upgrade guide here). The Ender 3 Max includes this upgrade already.
The ender 3 power supply is often not as reliable as the one found on premium printers. It isn’t bad by any means, but it is more likely to fail over time, which will cause the printer to fail to turn on. You can also upgrade this to a Meanwell PSU if this is a concern, or just replace it if you have a failure. It’s not too difficult to replace this component. The ender 3 max includes a premium Meanwell power supply
The default Ender 3 firmware does not have thermal runaway protection enabled, a safety feature which causes the printer to shut down if the printer detects a problem with the hotend heater. This comes standard on most Creality printers such as the Ender 3 V2 or the Ender 3 Max. While you can update the firmware to support this feature, it is a fairly involved process to do so.
 We recommend that you do not leave most budget printers unattended for this reason.
Usability and Appearance
If you want a printer that looks sleek and modern, the Creality Ender 3 or other budget 3D printers probably aren’t for you. The Ender 3 lacks the polish of more premium 3D printers, like the CR-10S Pro which features a unibody design and improved cable management. While there is some standard cable management, you’ll see a lot more loose wires, and components such as the printer motors and power supply are visible.
The Creality Ender 3 has a less polished exterior, with many visible wires and components.
Premium 3D printers such as the Creality CR-10S Pro are more sleek with improved cable management.
A $500 Makerfarm 3D printer in 2015. We’ve come a long way in a short time.
That said, these machines have still come a long way from the build-it-yourself kits from just a few years ago. It’s very exciting to see how fast the technology has matured in just a few years.
Other usability tradeoffs include:
A knob-controlled user interface, which can take longer to navigate then the touch screens on more expensive machines.
The printer controller uses older motor controllers, which cause the printer to make a songlike sound when the motors move. Premium 3D printers typically include silent motor drivers.
Our Recommended Budget 3D Printers
The budget friendly Creality Ender 3 (Amazon) is a great value 3D printer for under $200.
Top Choice: Creality Ender 3If you are looking for the absolute lowest cost printer, look no further than the Creality Ender 3 (view on Amazon). This printer typically will cost around $150-200 in the US. The Ender 3 is our recommended budget 3D printer because it has all the basic features you’ll need, has a great community behind it, and plenty of available upgrade possibilities. The build volume is a generous 220 x 220 x 250mm (8.6 x 8.6 x 9.8 inches), giving you more room than the standard 200mm cube build volume of many 3D printers.
While the Ender 3 lacks some of the convenient features and polish of its more expensive counterparts, its a great choice if you are looking to get into the hobby without breaking the bank. We’ll look at some of these considerations later in the article to help you decide if the Ender 3 or a more premium 3D printer is a better choice for your needs.
Click here to view the Creality Ender 3 on Amazon.
Large Format Choice: Creality Ender 3 MaxWhile substantially more expensive than the Ender 3, the Creality Ender 3 Max offers a number of features and a larger build volume.
If you want to print larger parts, the Creality Ender 3 Max has a large 300 x 300 x 350mm (11.8 x 11.8 x 13.7 inch) build volume, and is much cheaper than any of the other options from other brands in this size class. The Ender 3 Max packs a lot of great features on top of the larger build volume that make its price point around $350 an extremely good value. We previously recommended the older Creality CR-10 for this category, but the Ender 3 Max is a substantially better machine at the same price point.
While the Ender 3 Max is a newer printer, it is built on the hardened components of the Ender 3 series, and is quite reliable. Some of the features we really like include:
Durable all-metal extruder
Dual-fan cooled hot end
Premium Meanwell power supply
Click here to view the Creality Ender 3 Max on Amazon.
The Bottom Line
Budget 3D printers can definitely require a bit more time to set up and calibrate, but can typically match more expensive printers in quality if you are willing to put the time in. We encourage you to take a look at the budget options on the market to compare what’s available; a great starting point is the Creality Ender 3. Click here to take a look at the current prices for the Ender 3 on Amazon and start comparing.
If you are looking for a 3D printer capable of producing larger parts, the Ender 3 Max is a great choice, since it offers a larger 300 x 300 x 350 mm build volume. While it does cost substantially more than an ender 3, it includes a lot of updated features in addition to the larger build volume, while still maintaining a budget price point for its size category. If you can spring for it, it is well worth the extra cost. Click here to view the Creality Ender 3 Max on Amazon.
If you are looking for more of a balance between price and features, we recommend also looking at the Ender 3 V2 on Amazon, which adds a number of nice features for approximately $50-100 more. Read our full Creality Ender 3 model comparison for more information.
3D Printers / Peripherals
Author: Konstantin Afanasiev
Computer technologies are increasingly merging with real life. However, the line between real reality and reality, so to speak, computer or virtual remains. Moving an object from one plane to another is not easy. Of course, if we are talking about text, pictures and other two-dimensional things, then printers and scanners have long made such an exchange a simple and completely ordinary thing. However, in the case of three-dimensional physical objects, everything is much more complicated. nine0003
Even technologies that allow you to see a three-dimensional computer model in real volume cannot be called very common (although they are already at the user level both in terms of price and availability). As for the possibility of touching such a model and interacting with it, then so far there is no question of home or amateur use.
And I think that most readers have not even thought about technologies that allow reproducing the model in real material. At best, they heard something out of the corner of their ear. This article will be devoted to such technologies. So to speak, for the general development. nine0003
Let's start with the question, why is this needed? Why do you need to take a three-dimensional model of something and make a real object out of it? It turns out there are plenty of uses. The first, and most basic, in the industry - mainly for rapid prototyping - is to see how the model will look in the material. According to a spokesman for the aerospace company Pratt & Whitney, "the cost of developing a complex product can be greatly reduced if engineers are asked to look at a real part instead of dozens of drawings." nine0003
In addition, various tests can be carried out on the finished model even before the final product is ready. What's more, prototypes allow you to perform tests that you can't do on a finished product. For example, Porsche used a transparent plastic model of the 911 GTI transmission to study oil flow during its development. However, the main thing is that such a model can be made very quickly - and in our time of high speeds this is very important. Actually, there is a whole industry of rapid prototyping (Rapid Prototyping - RP), which is precisely engaged in the development and use of volumetric printing technologies for these purposes. nine0003
However, prototypes are not everything. The next step is rapid production. Already, some RP technologies allow the manufacture of finished items from various materials. This is an ideal solution for small-scale production, since the standard manufacturing process makes it possible to do anything (within reasonable limits, of course) in a relatively short time. Again, some of the 3D printing technologies allow you to quickly produce molds - well, then the production process is already rolled out. True, prices and availability (as well as the choice of materials) still leave much to be desired. nine0003
But in the future, who would refuse the opportunity to quickly make some necessary trifle at home, instead of looking for it in stores or ordering a bottle from a familiar locksmith Uncle Vasya. Actually, here you can draw a direct analogy with systems based on FPGA (that is, on programmable logic), which have made a real revolution (although it may be imperceptible for non-specialists) in electronics. FPGA technology allows you to describe electronic circuits on a computer, and then quickly implement everything described in a standard chip. The same fast prototyping, but for electronics. Moreover, if earlier all this was quite expensive and complicated, now, if desired, you can make anything - a microprocessor, DSP, microcontroller - practically at home. Volumetric printing will allow, in the future, to do the same with conventional production. However, it's time to move on from romantic dreams to the harsh truth of life and what 3D printing is now. nine0003
Micromachines
The simplest, cheapest and most affordable devices that claim to be a 3D printer actually have almost nothing to do with printers. We are talking about machine tools with program control. However, if you imagined some kind of screw-cutting monster the size of half a room (I immediately recall labor lessons or the Code of Criminal Procedure), then this is in vain. We are talking about very compact desktop machines, which are called desktop CNC machines (CNC means computer numerically controlled, or, in Russian, a machine with numerical control). These devices can be controlled directly from CAD programs and cut, cut and drill models in the material that are developed in these programs. Materials can be almost anything - from plastic or wood to soft metals (bronze, aluminum). For example, the MicroMill 2000 Desktop Machining System from MicroProto, shown in the picture (this is called a CNC milling machine), connects to a computer instead of a printer, can process a volume of 23x14x15 cm and is able to position the tool with an accuracy of hundredths of a millimeter. Machines aluminum and even mild steels. This wonderful thing costs a little less than $ 2,000. nine0003
Desktop multifunctional machine, connects instead of a printer
Part model and finished part made on a CNC machine
Another example of such devices is Roland's MDX line of machines. The older models are designed for semi-industrial use and cost, respectively, around $20K. But the MDX-15 machine is estimated at about $ 3,000 and it can already be categorized as amateur and even home equipment. The MDX-15 also allows you to process various materials up to aluminum and bronze, has a working area of 15x10x6 cm and an accuracy of the order of hundredths of a millimeter. It connects to a computer via a serial port. By the way, Roland supplies a special piezoelectric scanning head to its machines, which allows you to do the reverse transformation - translate real objects into computer three-dimensional models. nine0003
Roland MDX 20
Machine at work
There are three main types of CNC machines: routers, mills, and lathes. What a lathe is, I think everyone understands that. And what is the difference between router and mill is easiest to understand from the figure. Of the two devices described above, the first is mill, and the second is router. By the way, machines with four degrees of freedom are also produced - to a certain extent combining the capabilities of mill and lathe. All this technique can be used both for the direct manufacture of objects according to three-dimensional models, and for the preparation of molds for casting - this significantly expands the scope. Other possible uses are engraving, fast PCB fabrication (no photomasks or etching), modeling (anyone who has built a model airframe at least once must hate jigsaw sawing for the rest of their lives), and a host of others. Well, you can get more information on desktop CNC machines at www.desktopcnc.com. nine0003
What is the difference between CNC-Mill and CNC-Router
Computerized lathe Flashcut
They use several different technologies. Historically, the so-called stereolithography (StereoLithography or SLA) was developed first.
 The principle was invented and patented by Charles Hull back in 1986. Then Hull founded the company 3D Systems, which was engaged in the release of the corresponding equipment. Later, the German EOS GmbH, the Japanese Sony-DMEC and Mitsui Engineering, as well as several others, joined it. The essence of stereolithography is as follows - there is a liquid photopolymer in the working area of the printer. When illuminated with ultraviolet light, the photopolymer hardens and turns into a fairly durable plastic (photopolymers are actively used by dentists for fillings, so I think many of the readers are familiar with them). To illuminate the polymer, either an ultraviolet laser or an ordinary ultraviolet lamp is used (more on that later). The laser beam actually scans the work plane pixel by pixel and forms separate solid "pixels" until it draws a section of the model on the plastic. Then the level of the photopolymer rises (more precisely, the desktop falls along with the formed part of the model), and the next layer is drawn on top of it until the model is completely ready.
 Stereolithography makes it possible to obtain an accuracy of "imprint" of the order of tenths of a millimeter, reproduces small details well and provides a fairly even surface of the object. This technology is the best tested and the most widely used. However, it is not without its drawbacks - installations, as well as consumables, are quite expensive (the price of such a printer is about hundreds of thousands of dollars). In addition, the processed material is limited only to photopolymers. nine0003
 How the SLA machine works
This is what a stereolithography machine looks like from the inside.
CAD model is the same, but already made in plastic using SLA technology
A faster version of this technology was originally developed by Cubital Inc. (Now apparently deceased.) It was called Solid Ground Curing or SGC for short. It also used a photopolymer as a working material, but the illumination was carried out with an ultraviolet lamp immediately for the entire working layer. Illumination was carried out through a photomask, which for each layer was printed on glass using a technology reminiscent of laser printing. Processing the entire layer simultaneously instead of pixel-by-pixel scanning with a laser beam just made it possible to achieve a fairly high speed of building an object. Now a system based on a similar principle is offered, for example, by the German company Envisiontec. The device is called Prefactory (very telling name) and is a rapid prototyping system for the end user. The machine occupies only 0.3 square meters of space, so it can be installed even in a small office. Illumination is produced using DLP (Digital Light Processing) technology, similar to those used in computer projection systems. Resolution (for one working layer) is 1280x1024 pixels at a pixel size of 150 or 90 micron. The thickness of the layers varies from 150 to 50 microns.
 The Prefactory can make prototypes around 190x152x230mm and print speeds up to 15mm per hour (height). The printer is controlled by a built-in computer running Linux, and communication with the outside world is via Ehternet via a local network. In fact, you can send jobs to the Prefactory just like you would to a regular network printer.
Envisiontec Prefactory Compact 3D Printer
Laser Sintering
An alternative method of three-dimensional printing is called laser sintering (Selective Laser Sintering - SLS). Here, as you might guess, a laser is also used, but the working material is no longer a photopolymer, but a powder of some relatively low-melting plastic. The plastic in the working volume of the SLS-machine is heated almost to the melting point, and so that it does not catch fire and does not begin to oxidize, nitrogen is supplied to the working zone. Then a powerful laser again draws a section of the part on the plastic powder, the plastic is heated above the melting point and sintered. The next layer is poured on top and the procedure is repeated. At the end of the work, the excess powder is simply shaken off the finished model. This process was developed in the late 80s at the University of Texas at Austin and patented in 1989 by university graduate Carl Deckard. The process was then commercialized by DTM Corp. Laser sintering also provides a fairly high quality parts, although their surface is porous. But the models obtained by the SLS method are the most durable and this technology, in principle, can be used for small-scale production. True, the SLS plant is quite complex and expensive, and the production rate is only a few centimeters (height) per hour (plus several hours to heat up and cool down the plant). nine0003
This is how the laser sintering machine works
This is how the SLS machine and parts made in it look like
In addition to good manufacturing accuracy and high strength of the "printouts" obtained, SLS has several other important advantages.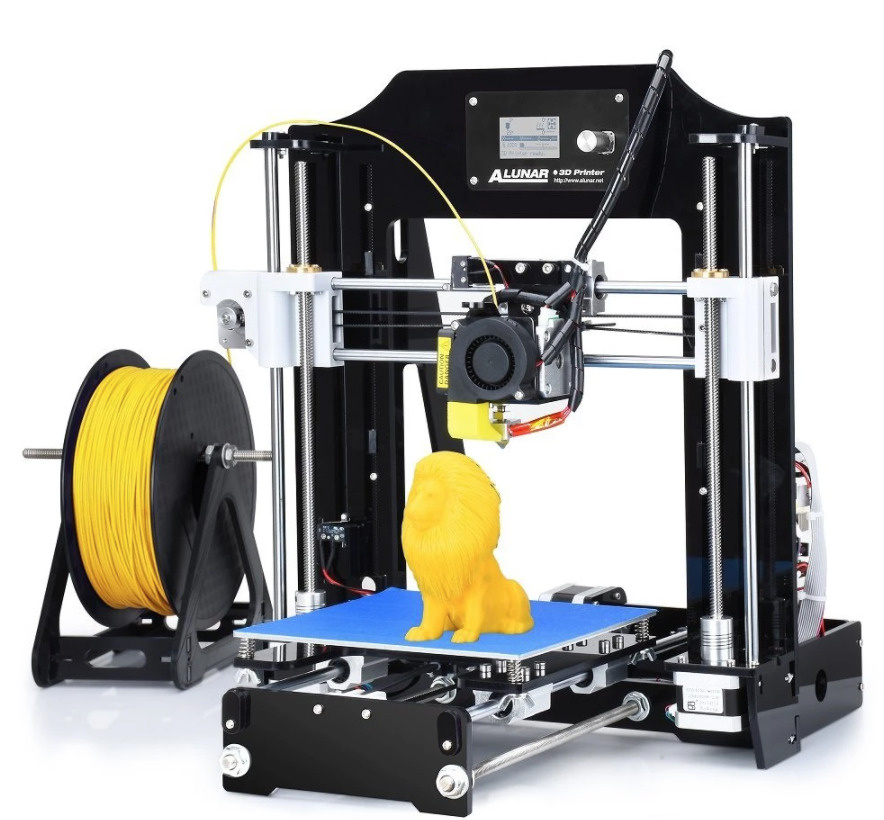 First, laser sintering makes it possible to produce models with moving parts - for example, working hinges, push buttons, and so on. Secondly, special materials have been developed for the SLS process, allowing the direct production of metal parts. As a powder, steel microparticles are used here, coated on top with a layer of binding plastic. The sintering of the plastic takes place as usual, and then the "printed" part is fired in an oven. In this case, the plastic burns out, and the freed pores are filled with bronze. The result is an object consisting of 60% steel and the remaining 40% bronze. In terms of its mechanical characteristics, it surpasses aluminum and approaches classic stainless steel. In fact, SLS already now allows the production of full-fledged metal objects, and of arbitrary shape. In addition, there is a similar material with a ceramic or glass core - it can be used to make models that are resistant to high temperatures and aggressive chemicals. If only the process itself wasn't so expensive.
 .. nine0003
Laser sintering model and implementation
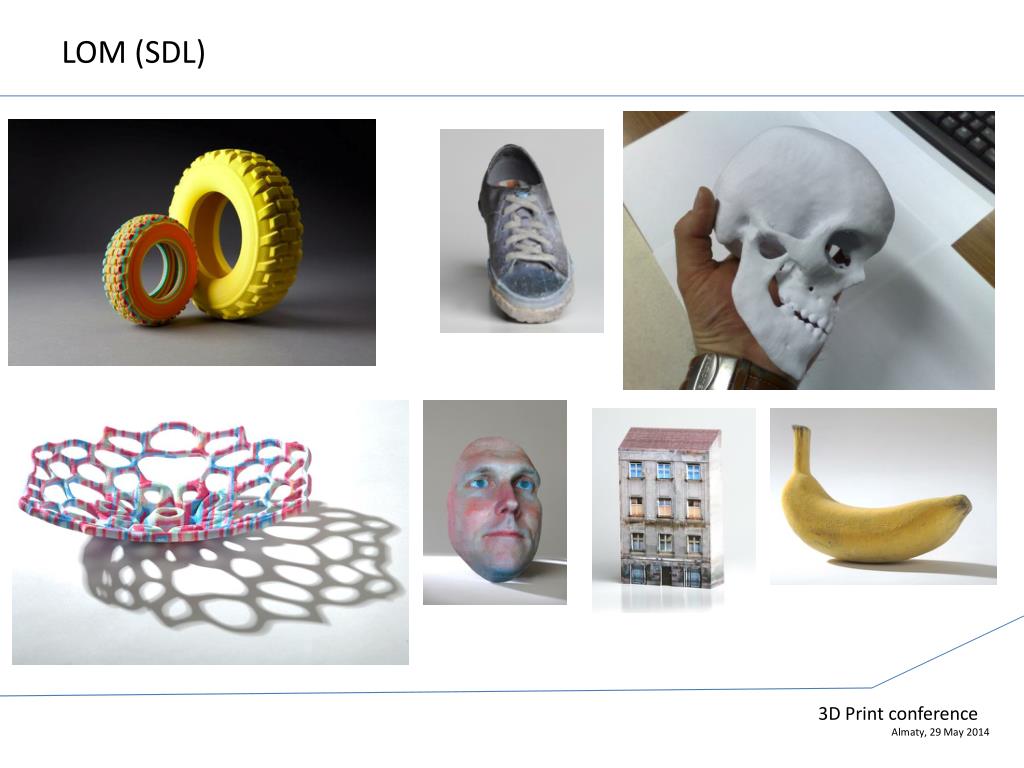
Lamination
Another laser 3D printing technology is lamination. It was developed by Helysis and sold under the brand name LOM (Laminated Object Manufacturing). Helysis itself ceased to exist in 2000, and several other manufacturers are now developing their equipment based on its technology. The essence of the technology is as follows - thin sheets of working material are loaded into the machine in turn, from which layers of the future model are then cut out by a laser. After cutting, the layers are glued together. Initially, special paper with a layer of adhesive was used as the material. However, thin plastics, ceramics and even metal foils can also be cut in this way. nine0003
The principle of operation of a three-dimensional laminating printer
Inkjet printing
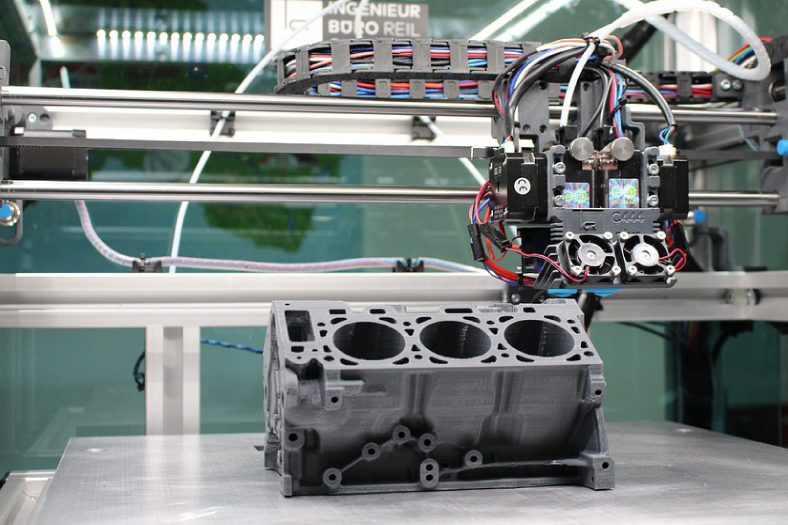
Above, so to speak, three-dimensional laser printing systems have been described. However, inkjet printers are not far behind laser printers in this area. The simplest of the "inkjet" 3D printing processes is the so-called Fused Deposition Modeling (FDM). The idea of FDM is very simple - the dispensing head squeezes drops of heated thermoplastic onto the cooled base platform (almost any industrial thermoplastic can be used as a material). Drops quickly harden and stick together, forming layers of the future object (printing here is also carried out in layers). The FDM process makes it possible to produce quite large ready-to-use parts (up to 600 x 600 x 500 mm) with sufficiently high accuracy (minimum layer thickness 0.12 mm). The fundamentals of this technology were developed 19 more88 by Scott Crump. The main manufacturer of FDM equipment is Stratasys.
How the FDM machine works
By the way, NASA is considering FDM technology as a "space factory" candidate. After all, you cannot take an unlimited number of spare parts for all equipment on a space expedition. And it is unlikely that it will be possible to place a full-fledged mechanical workshop on a spaceship. But loading a couple of hundred kilograms of the original plastic and a compact machine that can make any part out of this plastic is easy. nine0003
FDM printer at work
Another technology clearly derived from inkjet printing is Objet Geometries' Polyjet. Here the inkjet head is used to print photopolymer plastic. The model, as usual, is printed layer by layer, and the resolution in the layer is 600 x 300 dpi, and the layer thickness can be reduced to as little as 16 microns. Each printed layer is polymerized into a hard plastic under the action of an ultraviolet lamp. In principle, all this is quite similar to SLA, but much faster, more accurate, simpler and more compact. At the same time, the price for Objet printers is at the level of $60K - several times less than for SLA installations. A similar system called InVison is also produced by 3D Systems, so the founding father of stereolithography also does not stand still. The price tag for this machine is about $40K - rapid prototyping systems have clearly become cheaper in recent years. nine0003
Objet Eden Rapid Prototyping System 260
And a skull model printed on it
And another "inkjet printing" technology, but using powder materials. It was developed at the famous Massachusetts Institute of Technology, and the Z Corporation became the first and main manufacturer of equipment. Its 3D printers are relatively inexpensive (from $10K to $30K) and are significantly faster than the devices described above. The essence of the technology is as follows - a special inkjet head (by the way, adapted from Hewlett-Packard inkjet printers) sprays an adhesive onto the powder material. Ordinary gypsum or starch is used as a powder. In "splashed" places, the powder sticks together and forms a model. Printing, as in previous cases, goes in layers, and the excess powder is shaken off at the end. However, there is a significant difference - this printer can use an adhesive liquid with the addition of pigment dyes - which means it can print color models. The color printer from Z Corporation has 4 inkjet heads with ink-glue of primary colors, so that the resulting model can reproduce not only the shape, but also the color (that is, the texture) of its virtual prototype. True, plaster models are not very strong, but they can immediately be used as molds for casting. As for the detailing of the "imprint", it is enough to look at the given photographs to appreciate it. nine0003
It remains only to shake off the excess powder from the finished print of the model.
Head and spare parts for it, 3D color printing
Z Corporation serial 3D printer
By the way, ProMetal is developing an interesting version of the above powder inkjet printing. Its proprietary manufacturing process called the Direct Metal Process works exactly the same way. Only instead of gypsum powder, metal powder is used. Next, the molded product is fired in a furnace, so that the powder either melts itself or binds with a more fusible metal (as in laser sintering of metal powders). Here is another method of direct production using 3D printing. nine0003
A part made of metal using ProMetal technology
In general, the prospects for 3D printing are very bright - this technology already saves a lot of time and effort for designers and engineers. And what will happen when it becomes available at the household level. Or, at least, in the form of an inexpensive service. Imagine that you can make any object that you can think of and draw on a computer ... All you have to do is draw a model, determine the material and send an order over the Internet. This is called Distance Manufacturing on Demand. In general, such a technology is simply bound to become mass-produced sooner or later - and then everyone will have their own personal mechanical factory on the table, replacing ordinary production in small things. In the same way that printers have replaced printing houses and typewriting bureaus. nine0003
Meanwhile, further developments in this area are in full swing, so you can always expect something new and unexpected. For example, a group of scientists from the University of California at Berkeley is developing a 3D printing technology that would allow both form and content to be created simultaneously. The content here means neither more nor less - electronic stuffing. Let's say the printer prints the plastic case of a mobile phone and prints all the electronics inside at the same time. In principle, there are already ways to print plastic semiconductor devices and the wires connecting them. It remains only to combine them with existing 3D printer technologies and a revolutionary breakthrough in modern production is ready. No, of course, this is not an easy task, but it is quite possible to solve it. nine0003
Or, for example, the developments of the University of Missouri, which allow using an inkjet printer to print original blanks of biological organs. In this case, clumps of cells of a given type are used as ink. Instead of "paper" there is a special bio-gel that fixes the position of cell clumps in space. The printing is done in several layers, so that the result is a three-dimensional construction of cells, which, in principle, can imitate any organ (after the cells grow, the gel dissolves, so that hollow structures can be obtained). Of course, printing a full-fledged organ for transplantation seems too difficult for now, but work is underway. nine0003
Cellular ink printing system
For those who are interested in this topic, I can give some useful links. First, at this address is a collection of links to equipment manufacturers, technology developers and researchers.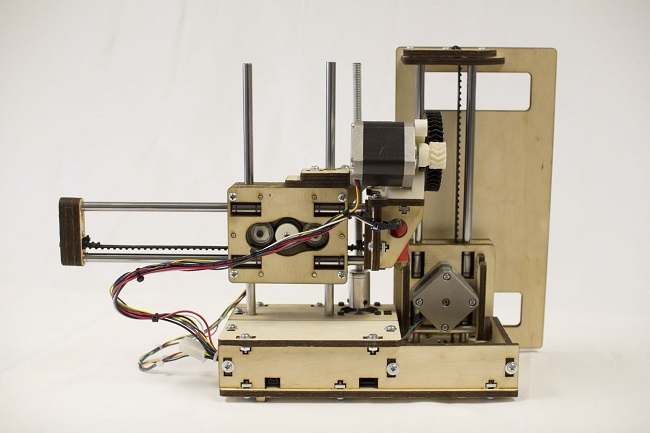 Moreover, the links are broken down by materials and production methods, so that a fairly clear picture of the state of affairs in this area immediately emerges. Secondly, at www.rpm-novation.com there is quite a good site dedicated to rapid prototyping technologies in Russian. And here you can find a good table with the characteristics of existing equipment. nine0003
And finally, a bit of high art combined with exact science. Look at the photo - in front of you is a model (or, rather, a map) of our metagalaxy. This glass rectangle 7x7x10 centimeters in size depicts a piece of space 100x100x100 megaparsec. Everything is done in full accordance with the exact astronomical data. And the picture itself is burned into the glass with a laser. Also, in general, a kind of 3D printer. Made this wonderful thing by the artist Bathsheba Grossman. See more of her work at www.bathsheba.com. nine0003
Space in the thickness of the crystal, laser printing . .. on glass
How to choose a 3D printer, or why you need a heating table and a closed chamber / Sudo Null IT News seal. In this article I will talk about the different categories of printers for this very important parameter. After all, the range of materials that the printer can print also depends on the heating of the table. I will also touch on the question of why a closed chamber is needed. nine0003
Printers without underbed heating
They are able to print only one type of plastic - PLA. This material is suitable for prototypes, souvenirs, and when heated to 60 ° C, it becomes soft and the product loses its shape. With great effort on such printers, you can try to print with other materials, but the result will not please you. Usually these are Prusa-type printers with a movable table, but there are also "cubes".
Problems occur due to shrinkage (reduction in size) of the plastic product after cooling. If the plastic shrinks (and this is almost all plastics, except for PLA), then the edges of the product begin to tear off the table on which the print is being made, the geometry of the product is irreparably damaged or it completely peels off from the table, risking damage to the print head, which continues to move. nine0003
The plus (or minus?) of such printers is that manufacturers save not only on the table heater, but on everything else. Therefore, these are cheap printers.
At the same time, in the description of such printers, the absence of table heating may not be indicated in any way (be careful!), but sometimes the possibility of printing with other plastics, except for PLA, is indicated, which misleads the buyer. And you will encounter printing problems after purchasing such a printer.
The best known non-heated printer is the Makerbot Replicator 2
From Chinese models - TEVO Michelangelo
Next, the story will go about more interesting printers with a heated table from 100 ° C to 170 ° C, which are designed for printing with plastics with shrinkage - from classic ABS to Polycarbonate. The higher the maximum temperature of the table, the more plastics you can print, because. heating of the table prevents damage to the part due to shrinkage during printing. At the same time, the higher the melting temperature of the plastic, the stronger the table should be heated. nine0003
Printers with heated table up to 100°C
Suitable for printing with many plastics, except for technical ones. At the same time, printing large products with popular ABS plastic at such a low temperature will be problematic. In reality, ABS requires from 110°C to 130°C on the table, especially for cheap brands with high shrinkage, which are very widely represented on the market. Printing with more interesting technical plastics - nylon, polypropylene, polycarbonate, on such printers will not work at all. nine0003
Chinese printers include Anycubic, various Flashforge models.
Printers with heated table up to 120°C
Perfect for ABS printing. But, if you need to print large ABS products, then such a printer also needs a closed print chamber. It is needed to maintain a high air temperature around the printed product, which reduces shrinkage during printing along the entire height of the product. The higher the chamber temperature is kept, the better for printing! nine0003
And this is where things get interesting. Those manufacturers who have conventional models with an "open chamber" cover them with a plastic transparent "aquarium" on top, and sellers offer them under the guise of printers with a closed chamber! Of course, such a solution is cheap, but the larger the volume of the chamber, the more difficult it is to maintain a high temperature in it, and in this case the volume increases significantly. This means that in such printers, the temperature in the chamber will be lower than necessary for high-quality printing.
Even more interesting is the situation when the printer is closed on the sides, but completely open on top and does not have any cover at all. At the same time, sellers pass them off as printers with a closed camera (be careful!).
The question is, why not cover any printer from above completely, without increasing the volume with an "aquarium"? Yes, because all simple models are designed so that a bundle of wires rises vertically from the extruder (print head), as well as a tube through which a thread with plastic is fed (look carefully at the photos of the printer from all sides when choosing). All this sticks out from the top of the printer and does not allow it to close normally. This is especially true for printers with remote Bowden plastic feed, where the motor pushing the plastic thread is placed on the printer body. nine0003
It would seem, so what? Well, turn the wires to the side of the extruder so that they do not stick up and do not interfere ... However, for this you need to apply design solutions with a horizontal arrangement of wires and tubes suitable for the extruder, and design the printer initially taking into account the closed chamber.
Interestingly, even some expensive closed imported printers have a large height and an increased clearance inside the chamber between the extruder and the top cover, because. in them, the designers could not (did not want to) turn the plastic supply tube horizontally. So, in them the volume of the chamber is larger than necessary. nine0003
Most of both imported and domestic printers fall into this category.
Printers with heated bed from 130°C to 150°C
These printers are already quite well developed by designers. Most of these printers do have a well-heated closed chamber with side wires and extruder tubes. They can print both large products made of ABS plastic, and small products made of technical plastics - nylon, polypropylene, polycarbonate. nine0003
Of the domestic printers in this category, we note Picaso3D and PrintBox3D.
Printers with heated table up to 170°C
Here we come to closed printers with a very high table temperature. These printers have been engineered to take into account the trend in 3D printing to increase operating temperatures, which means the ability to print with increasingly durable, heat-resistant plastics. There are few such printers, they are expensive, with rare exceptions.
Why heat the table so much? The fact is that the higher the melting temperature of the plastic, the more the table and the surrounding air in the chamber must be heated, otherwise the product will peel off the table during printing and printing will be interrupted. So, for polycarbonate, the extruder print temperature can reach 310 ° C. If small details can be printed at a table temperature of 130°C, then medium ones are already from 150°C, and large ones can be kept on the table only at 170°C.
In addition, these printers have the potential to print other refractory plastics. For example, at an extruder temperature of 400°C, PEEK (polyether ether ketone) can be printed. This refractory and durable plastic is used in aviation and space technology.