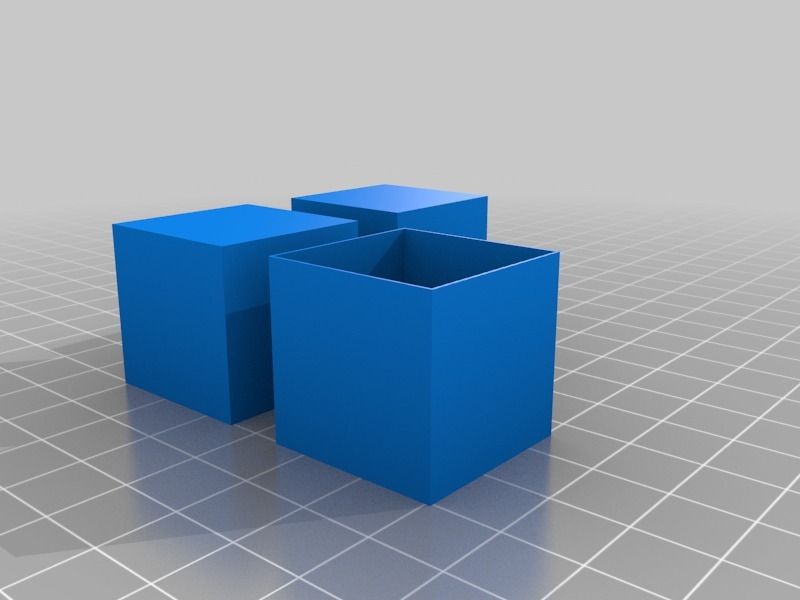
3D print out
What is 3D printing? How does a 3D printer work? Learn 3D printing
3D printing or additive manufacturing is a process of making three dimensional solid objects from a digital file.
The creation of a 3D printed object is achieved using additive processes. In an additive process an object is created by laying down successive layers of material until the object is created. Each of these layers can be seen as a thinly sliced cross-section of the object.
3D printing is the opposite of subtractive manufacturing which is cutting out / hollowing out a piece of metal or plastic with for instance a milling machine.
3D printing enables you to produce complex shapes using less material than traditional manufacturing methods.
Table of Contents
- How Does 3D Printing Work?
- 3D Printing Industry
- Examples of 3D Printing
- 3D Printing Technologies & Processes
- Materials
- Services
Jump to your field of interest:
- Rapid Prototyping & Manufacturing
- Automotive
- Aviation
- Construction
- Consumer Products
- Healthcare
- Food
- Education
Jump to process:
- All Technologies & Processes
- Vat Photopolymerisation
- Material Jetting
- Binder Jetting
- Material Extrusion
- Powder Bed Fusion
- Sheet Lamination
- Directed Energy Deposition
How Does 3D Printing Work?
It all starts with a 3D model. You can opt to create one from the ground up or download it from a 3D library.
3D Software
There are many different software tools available. From industrial grade to open source. We’ve created an overview on our 3D software page.
We often recommend beginners to start with Tinkercad. Tinkercad is free and works in your browser, you don’t have to install it on your computer. Tinkercad offers beginner lessons and has a built-in feature to export your model as a printable file e.g .STL or .OBJ.
Now that you have a printable file, the next step is to prepare it for your 3D printer. This is called slicing.
Slicing: From printable file to 3D Printer
Slicing basically means slicing up a 3D model into hundreds or thousands of layers and is done with slicing software.
When your file is sliced, it’s ready for your 3D printer. Feeding the file to your printer can be done via USB, SD or Wi-Fi. Your sliced file is now ready to be 3D printed layer by layer.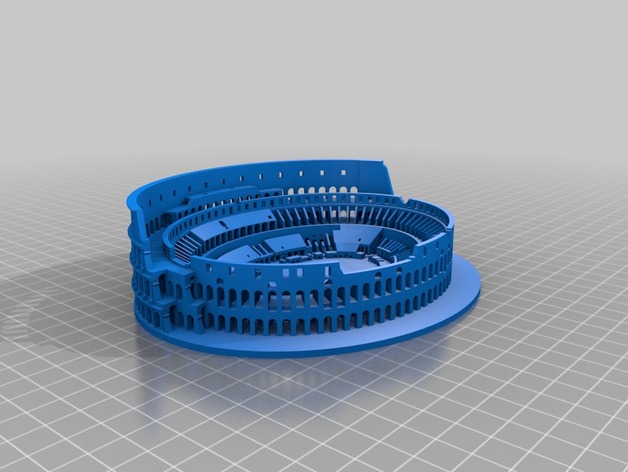
3D Printing Industry
Adoption of 3D printing has reached critical mass as those who have yet to integrate additive manufacturing somewhere in their supply chain are now part of an ever-shrinking minority. Where 3D printing was only suitable for prototyping and one-off manufacturing in the early stages, it is now rapidly transforming into a production technology.
Most of the current demand for 3D printing is industrial in nature. Acumen Research and Consulting forecasts the global 3D printing market to reach $41 billion by 2026.
As it evolves, 3D printing technology is destined to transform almost every major industry and change the way we live, work, and play in the future.
Examples of 3D Printing
3D printing encompasses many forms of technologies and materials as 3D printing is being used in almost all industries you could think of. It’s important to see it as a cluster of diverse industries with a myriad of different applications.
A few examples:
- – consumer products (eyewear, footwear, design, furniture)
- – industrial products (manufacturing tools, prototypes, functional end-use parts)
- – dental products
- – prosthetics
- – architectural scale models & maquettes
- – reconstructing fossils
- – replicating ancient artefacts
- – reconstructing evidence in forensic pathology
- – movie props
Rapid Prototyping & Rapid Manufacturing
Companies have used 3D printers in their design process to create prototypes since the late seventies.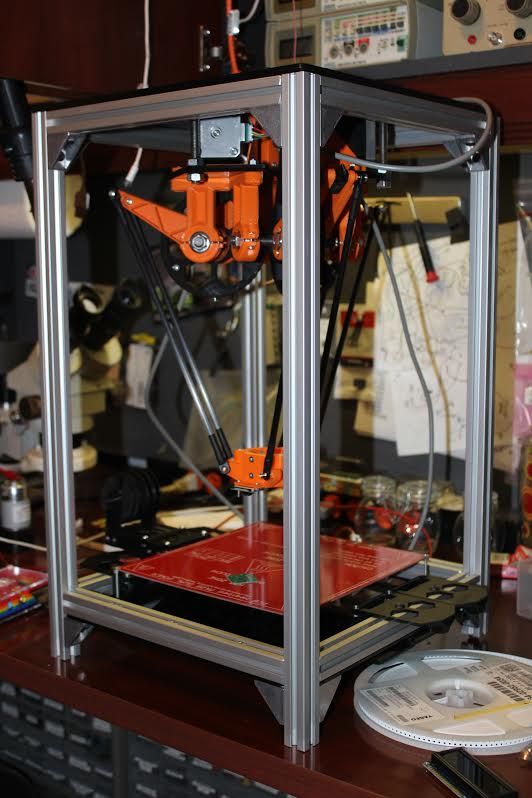 Using 3D printers for these purposes is called rapid prototyping.
Why use 3D Printers for Rapid Prototyping?
In short: it’s fast and relatively cheap. From idea, to 3D model to holding a prototype in your hands is a matter of days instead of weeks. Iterations are easier and cheaper to make and you don’t need expensive molds or tools.
Besides rapid prototyping, 3D printing is also used for rapid manufacturing. Rapid manufacturing is a new method of manufacturing where businesses use 3D printers for short run / small batch custom manufacturing.
Automotive
Car manufacturers have been utilizing 3D printing for a long time. Automotive companies are printing spare parts, tools, jigs and fixtures but also end-use parts. 3D printing has enabled on-demand manufacturing which has lead to lower stock levels and has shortened design and production cycles.
Automotive enthusiasts all over the world are using 3D printed parts to restore old cars. One such example is when Australian engineers printed parts to bring a Delage Type-C back to life. In doing so, they had to print parts that were out of production for decades.
Aviation
The aviation industry uses 3D printing in many different ways. The following example marks a significant 3D printing manufacturing milestone: GE Aviation has 3D printed 30,000 Cobalt-chrome fuel nozzles for its LEAP aircraft engines. They achieved that milestone in October of 2018, and considering that they produce 600 per week on forty 3D printers, it’s likely much higher than that now.
Around twenty individual parts that previously had to be welded together were consolidated into one 3D printed component that weighs 25% less and is five times stronger. The LEAP engine is the best selling engine in the aerospace industry due to its high level of efficiency and GE saves $3 million per aircraft by 3D printing the fuel nozzles, so this single 3D printed part generates hundreds of millions of dollars of financial benefit.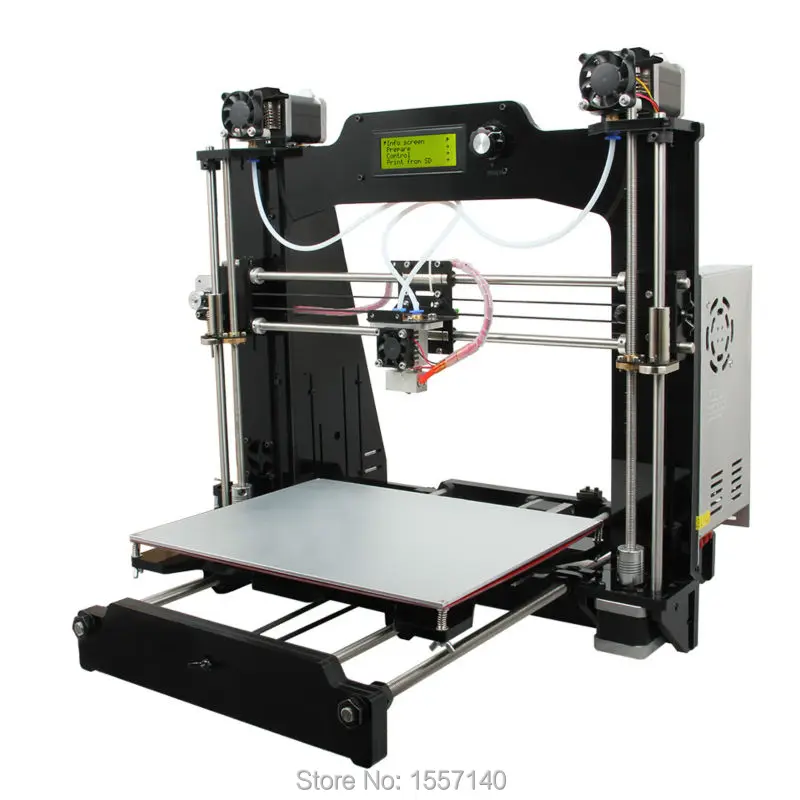
GE’s fuel nozzles also made their way into the Boeing 787 Dreamliner, but it’s not the only 3D printed part in the 787. The 33-centimeter-long structural fittings that hold the aft kitchen galley to the airframe are 3D printed by a company called Norsk Titanium. Norsk chose to specialize in titanium because it has a very high strength-to-weight ratio and is rather expensive, meaning the reduction in waste enabled by 3D printing has a more significant financial impact than compared to cheaper metals where the costs of material waste are easier to absorb. Rather than sintering metal powder with a laser like most metal 3D printers, the Norsk Merke 4 uses a plasma arc to melt a metal wire in a process called Rapid Plasma Deposition (a form of Directed Energy Deposition) that can deposit up to 10kg of titanium per hour.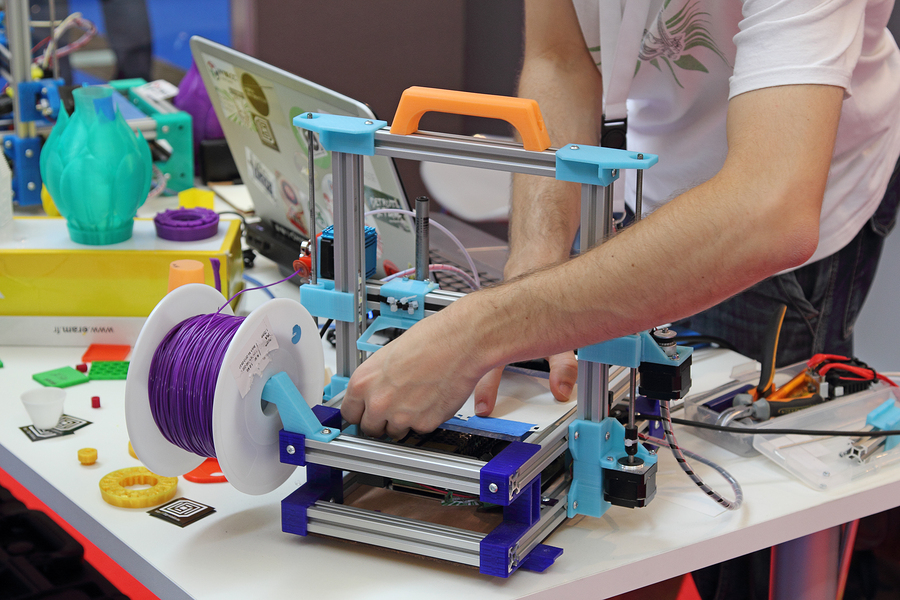 A 2kg titanium part would generally require a 30kg block of titanium to machine it from, generating 28kg of waste, but 3D printing the same part requires only 6kg of titanium wire.
Construction
Is it possible to print a building? – yes it is. 3D printed houses are already commercially available. Some companies print parts prefab and others do it on-site.
Most of the concrete printing stories we look at on this website are focused on large scale concrete printing systems with fairly large nozzles for a large flow rate. It’s great for laying down concrete layers in a fairly quick and repeatable manner. But for truly intricate concrete work that makes full use of the capabilities of 3D printing requires something a little more nimble, and with a finer touch.
Consumer Products
When we first started blogging about 3D printing back in 2011, 3D printing wasn’t ready to be used as a production method for large volumes. Nowadays there are numerous examples of end-use 3D printed consumer products.
Footwear
Adidas’ 4D range has a fully 3D printed midsole and is being printed in large volumes. We did an article back then, explaining how Adidas were initially releasing just 5,000 pairs of the shoes to the public, and had aimed to sell 100,000 pairs of the AM-infused designs by 2018.
With their latest iterations of the shoe, it seems that they have surpassed that goal, or are on their way to surpassing it. The shoes are available all around the world from local Adidas stores and also from various 3rd party online outlets.
Eyewear
The market of 3D printed eyewear is forecasted to reach $3.4 billion by 2028. A rapidly increasing section is that of end-use frames. 3D printing is a particularly suitable production method for eyewear frames because the measurements of an individual are easy to process in the end product.
But did you know it’s also possible to 3D print lenses? Traditional glass lenses don’t start out thin and light; they’re cut from a much larger block of material called a blank, about 80% of which goes to waste. When we consider how many people wear glasses and how often they need to get a new pair, 80% of those numbers is a lot of waste. On top of that, labs have to keep huge inventories of blanks to meet the custom vision needs of their clients. Finally, however, 3D printing technology has advanced enough to provide high-quality, custom ophthalmic lenses, doing away with the waste and inventory costs of the past. The Luxexcel VisionEngine 3D printer uses a UV-curable acrylate monomer to print two pairs of lenses per hour that require no polishing or post-processing of any kind. The focal areas can also be completely customized so that a certain area of the lens can provide better clarity at a distance while a different area of the lens provides better vision up close.
Jewelry
There are two ways of producing jewelry with a 3D printer. You can either use a direct or indirect production process. Direct refers to the creation of an object straight from the 3D design while indirect manufacturing means that the object (pattern) that is 3D printed eventually is used to create a mold for investment casting.
Healthcare
It’s not uncommon these days to see headlines about 3D printed implants. Often, those cases are experimental, which can make it seem like 3D printing is still a fringe technology in the medical and healthcare sectors, but that’s not the case anymore. Over the last decade, more than 100,000 hip replacements have been 3D printed by GE Additive.
The Delta-TT Cup designed by Dr. Guido Grappiolo and LimaCorporate is made of Trabecular Titanium, which is characterized by a regular, three-dimensional, hexagonal cell structure that imitates trabecular bone morphology. The trabecular structure increases the biocompatibility of the titanium by encouraging bone growth into the implant. Some of the first Delta-TT implants are still running strong over a decade later.
Another 3D printed healthcare component that does a good job of being undetectable is the hearing aid. Nearly every hearing aid in the last 17 years has been 3D printed thanks to a collaboration between Materialise and Phonak.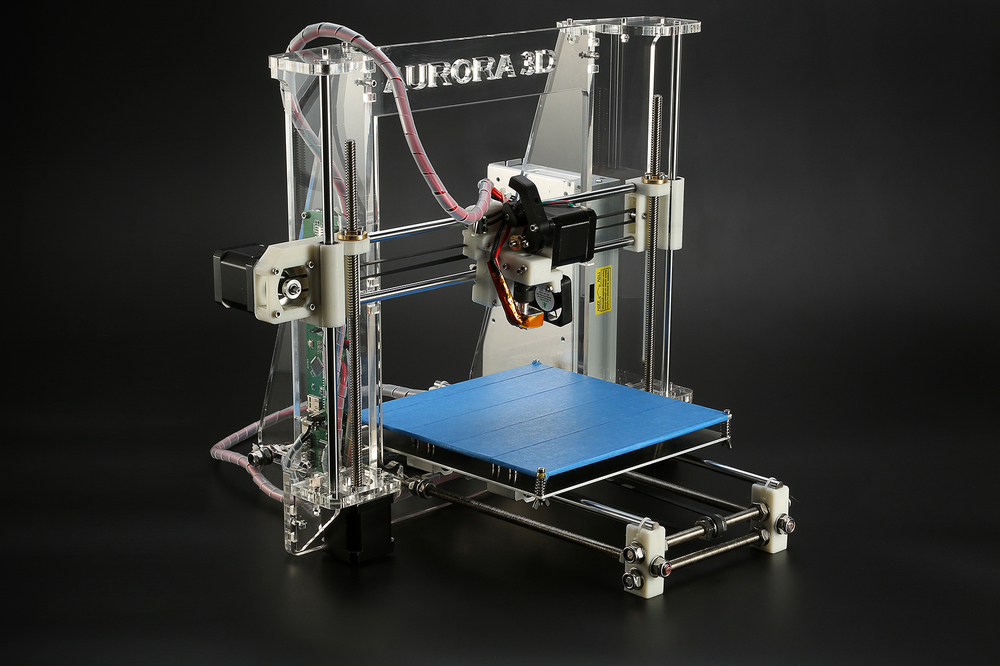 Phonak developed Rapid Shell Modeling (RSM) in 2001. Prior to RSM, making one hearing aid required nine laborious steps involving hand sculpting and mold making, and the results were often ill-fitting. With RSM, a technician uses silicone to take an impression of the ear canal, that impression is 3D scanned, and after some minor tweaking the model is 3D printed with a resin 3D printer. The electronics are added and then it’s shipped to the user. Using this process, hundreds of thousands of hearing aids are 3D printed each year.
Dental
In the dental industry, we see molds for clear aligners being possibly the most 3D printed objects in the world. Currently, the molds are 3D printed with both resin and powder based 3D printing processes, but also via material jetting. Crowns and dentures are already directly 3D printed, along with surgical guides.
Bio-printing
As of the early two-thousands 3D printing technology has been studied by biotech firms and academia for possible use in tissue engineering applications where organs and body parts are built using inkjet techniques.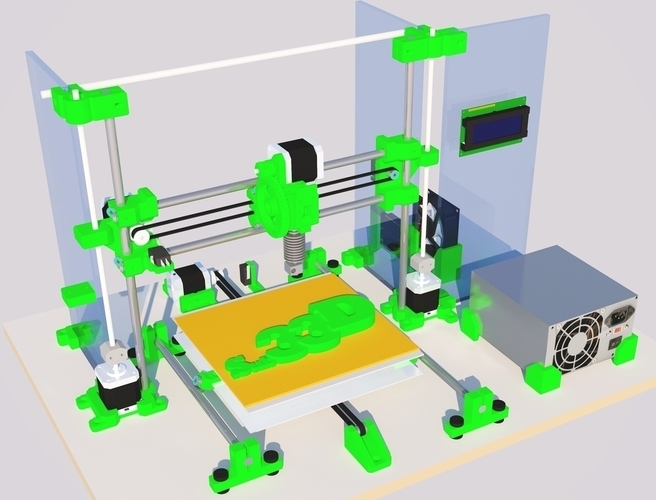 Layers of living cells are deposited onto a gel medium and slowly built up to form three dimensional structures. We refer to this field of research with the term: bio-printing.
Food
Additive manufacturing invaded the food industry long time ago. Restaurants like Food Ink and Melisse use this as a unique selling point to attract customers from across the world.
Education
Educators and students have long been using 3D printers in the classroom. 3D printing enables students to materialize their ideas in a fast and affordable way.
While additive manufacturing-specific degrees are fairly new, universities have long been using 3D printers in other disciplines. There are many educational courses one can take to engage with 3D printing. Universities offer courses on things that are adjacent to 3D printing like CAD and 3D design, which can be applied to 3D printing at a certain stage.
In terms of prototyping, many university programs are turning to printers. There are specializations in additive manufacturing one can attain through architecture or industrial design degrees. Printed prototypes are also very common in the arts, animation and fashion studies as well.
Types of 3D Printing Technologies and Processes
The American Society for Testing and Materials (ASTM), developed a set of standards that classify additive manufacturing processes into 7 categories. These are:
- Vat Photopolymerisation
- Stereolithography (SLA)
- Digital Light Processing (DLP)
- Continuous Liquid Interface Production (CLIP)
- Material Jetting
- Binder Jetting
- Material Extrusion
- Fused Deposition Modeling (FDM)
- Fused Filament Fabrication (FFF)
- Powder Bed Fusion
- Multi Jet Fusion (MJF)
- Selective Laser Sintering (SLS)
- Direct Metal Laser Sintering (DMLS)
- Sheet Lamination
- Directed Energy Deposition
Vat Photopolymerisation
A 3D printer based on the Vat Photopolymerisation method has a container filled with photopolymer resin.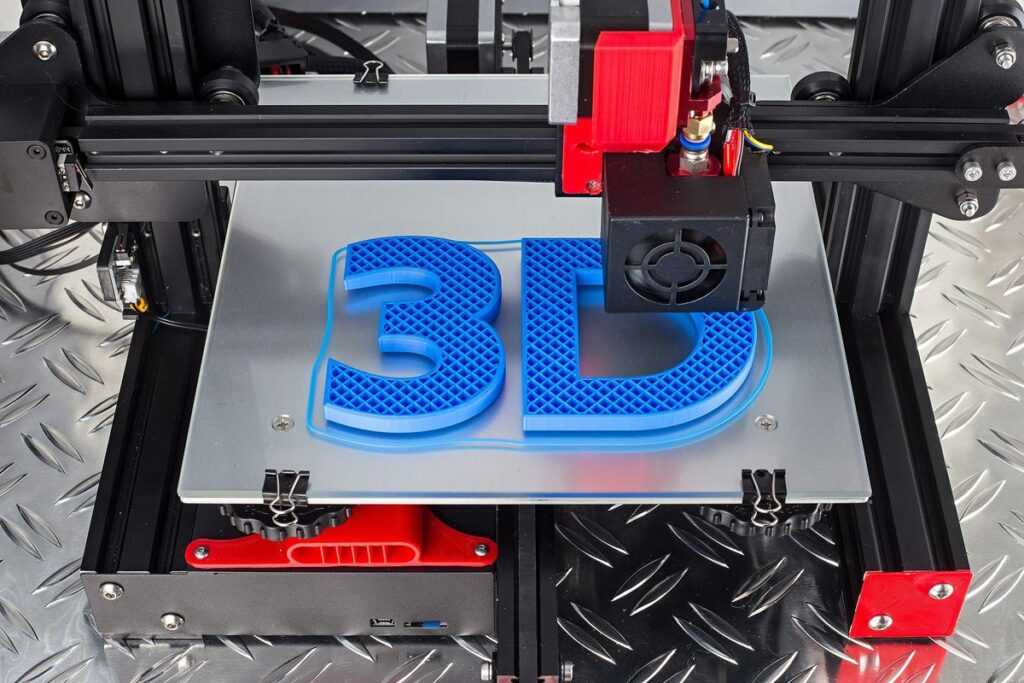 The resin is hardened with a UV light source.
Stereolithography (SLA)
SLA was invented in 1986 by Charles Hull, who also at the time founded the company, 3D Systems. Stereolithography employs a vat of liquid curable photopolymer resin and an ultraviolet laser to build the object’s layers one at a time. For each layer, the laser beam traces a cross-section of the part pattern on the surface of the liquid resin. Exposure to the ultraviolet laser light cures and solidifies the pattern traced on the resin and fuses it to the layer below.
After the pattern has been traced, the SLA’s elevator platform descends by a distance equal to the thickness of a single layer, typically 0.05 mm to 0.15 mm (0.002″ to 0.006″). Then, a resin-filled blade sweeps across the cross section of the part, re-coating it with fresh material. On this new liquid surface, the subsequent layer pattern is traced, joining the previous layer.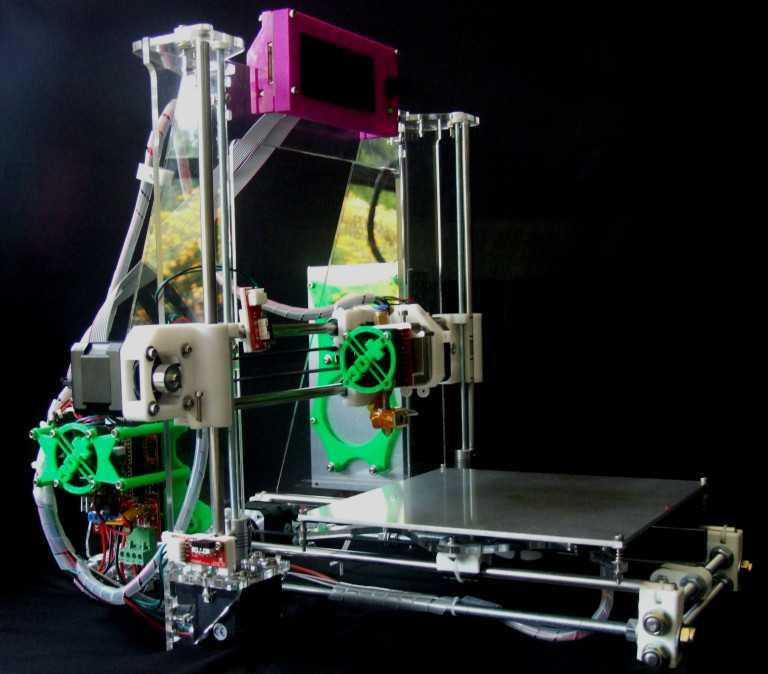 Depending on the object & print orientation, SLA often requires the use of support structures.
Digital Light Processing (DLP)
DLP or Digital Light Processing refers to a method of printing that makes use of light and photosensitive polymers. While it is very similar to SLA, the key difference is the light source. DLP utilizes other light sources like arc lamps. DLP is relatively quick compared to other 3D printing technologies.
Continuous Liquid Interface Production (CLIP)
One of the fastest processes using Vat Photopolymerisation is called CLIP, short for Continuous Liquid Interface Production, developed by Carbon.
Digital Light Synthesis
The heart of the CLIP process is Digital Light Synthesis technology. In this technology, light from a custom high performance LED light engine projects a sequence of UV images exposing a cross section of the 3D printed part causing the UV curable resin to partially cure in a precisely controlled way.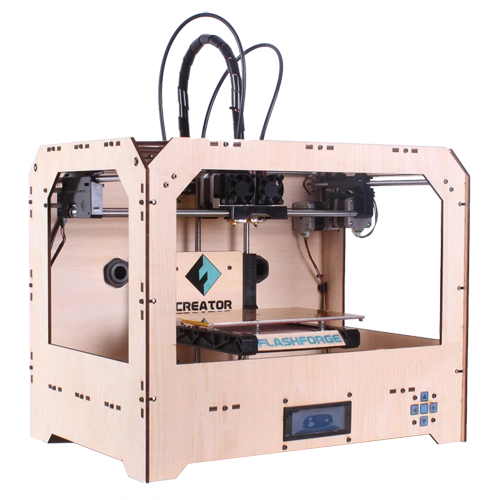 Oxygen passes through the oxygen permeable window creating a thin liquid interface of uncured resin between the window and the printed part known as the dead zone. The dead zone is as thin as ten of microns. Inside the dead zone, oxygen prohibits light from curing the resin situated closest to the window therefore allowing the continuous flow of liquid beneath the printed part. Just above the dead zone the UV projected light upwards causes a cascade like curing of the part.
Simply printing with Carbon’s hardware alone does not allow for end use properties with real world applications. Once the light has shaped the part, a second programmable curing process achieves the desired mechanical properties by baking the 3d printed part in a thermal bath or oven. Programmed thermal curing sets the mechanical properties by triggering a secondary chemical reaction causing the material to strengthen achieving the desired final properties.
Components printed with Carbon’s technology are on par with injection molded parts. Digital Light Synthesis produces consistent and predictable mechanical properties, creating parts that are truly isotropic.
Material Jetting
In this process, material is applied in droplets through a small diameter nozzle, similar to the way a common inkjet paper printer works, but it is applied layer-by-layer to a build platform and then hardened by UV light.
Material Jetting schematics. Image source: custompartnet.comBinder Jetting
With binder jetting two materials are used: powder base material and a liquid binder. In the build chamber, powder is spread in equal layers and binder is applied through jet nozzles that “glue” the powder particles in the required shape. After the print is finished, the remaining powder is cleaned off which often can be re-used printing the next object. This technology was first developed at the Massachusetts Institute of Technology in 1993.
Binder Jetting schematicsMaterial Extrusion
Fused Deposition Modeling (FDM)
FDM schematics (Image credit: Wikipedia, made by user Zureks)FDM works using a plastic filament which is unwound from a spool and is supplied to an extrusion nozzle which can turn the flow on and off.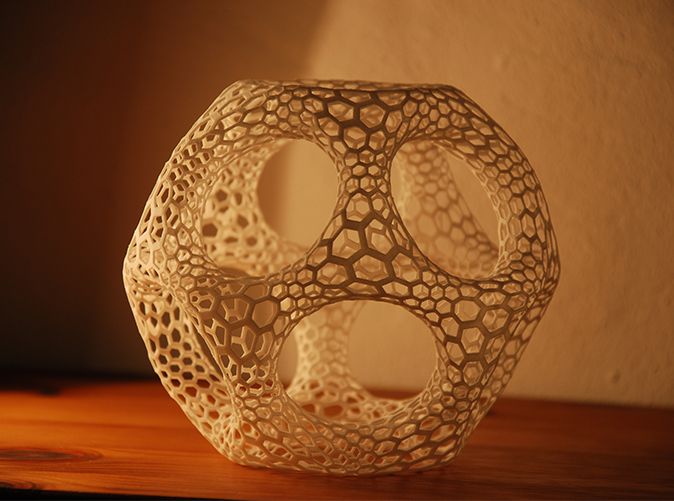 The nozzle is heated to melt the material and can be moved in both horizontal and vertical directions by a numerically controlled mechanism. The object is produced by extruding melted material to form layers as the material hardens immediately after extrusion from the nozzle.
FDM was invented by Scott Crump in the late 80’s. After patenting this technology he started the company Stratasys in 1988. The term Fused Deposition Modeling and its abbreviation to FDM are trademarked by Stratasys Inc.
Fused Filament Fabrication (FFF)
The exactly equivalent term, Fused Filament Fabrication (FFF), was coined by the members of the RepRap project to give a phrase that would be legally unconstrained in its use.
Powder Bed Fusion
Selective Laser Sintering (SLS)
SLS uses a high power laser to fuse small particles of powder into a mass that has the desired three dimensional shape. The laser selectively fuses powder by first scanning the cross-sections (or layers) on the surface of a powder bed.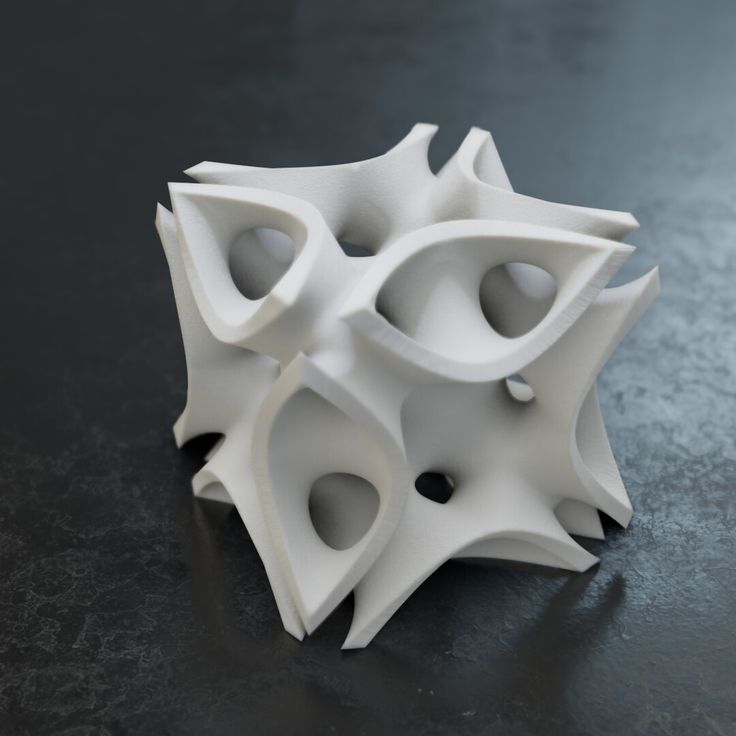 After each cross-section is scanned, the powder bed is lowered by one layer thickness. Then a new layer of material is applied on top and the process is repeated until the object is completed.
Multi Jet Fusion (MJF)
Multi Jet Fusion technology was developed by Hewlett Packard and works with a sweeping arm which deposits a layer of powder and then another arm equipped with inkjets which selectively applies a binder agent over the material. The inkjets also deposit a detailing agent around the binder to ensure precise dimensionality and smooth surfaces. Finally, the layer is exposed to a burst of thermal energy that causes the agents to react.
Direct Metal Laser Sintering (DMLS)
DMLS is basically the same as SLS, but uses metal powder instead. All unused powder remains as it is and becomes a support structure for the object. Unused powder can be re-used for the next print.
Due to of increased laser power, DMLS has evolved into a laser melting process. Read more about that and other metal technologies on our metal technologies overview page.
Sheet Lamination
Sheet lamination involves material in sheets which is bound together with external force. Sheets can be metal, paper or a form of polymer. Metal sheets are welded together by ultrasonic welding in layers and then CNC milled into a proper shape. Paper sheets can be used also, but they are glued by adhesive glue and cut in shape by precise blades.
Simplified schematics of ultrasonic sheet metal process (Image credit: Wikipedia from user Mmrjf3)Directed Energy Deposition
This process is mostly used in the metal industry and in rapid manufacturing applications. The 3D printing apparatus is usually attached to a multi-axis robotic arm and consists of a nozzle that deposits metal powder or wire on a surface and an energy source (laser, electron beam or plasma arc) that melts it, forming a solid object.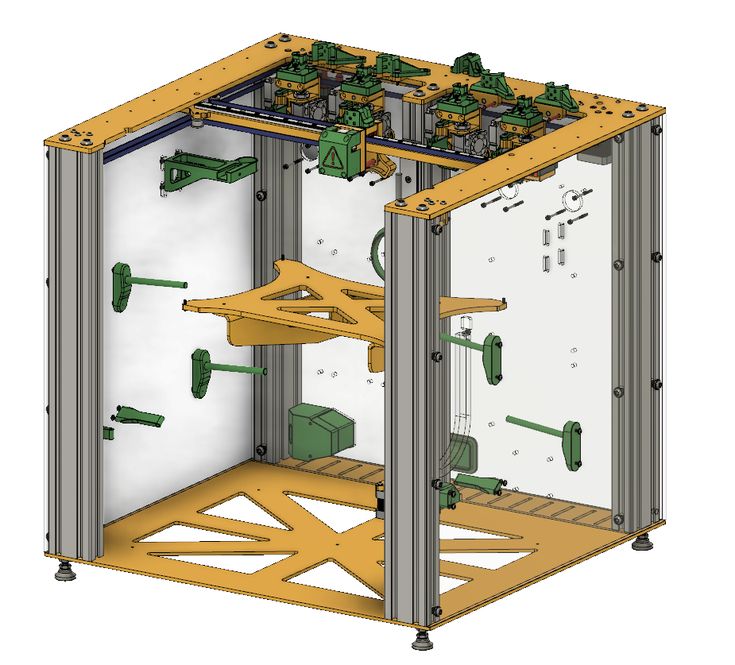
Materials
Multiple materials can be used in additive manufacturing: plastics, metals, concrete, ceramics, paper and certain edibles (e.g. chocolate). Materials are often produced in wire feedstock a.k.a. filament, powder form or liquid resin. Learn more about our featured materials on our materials page.
Services
Looking to implement 3D printing in your production process? Get a quote for a custom part or order samples on our 3D print service page.
3D Printing | 3D Print Services
Find a 3D Printing Location
Print Functional Prototypes
You can use 3D printing for prototypes or one-of-a-kind items. Let The UPS Store® bring your ideas to life. We can even use your 3D CAD file.
Construct Manufacturing Jigs and Fixtures
We understand when you do your own manufacturing, jigs and fixtures are critical for insuring high-quality and efficiency during assembly and testing. Our 3D printer can create complex parts so you are not dependent on a CNC machine.
Create Custom Accessories
Want to design your own smartphone case or money clip? Most items that are smaller than a breadbox and can be made out of single color of plastic are perfect for 3D printing.
Build Architectural Models
You can work in just about any 3D architectural design program and then export to common 3D CAD file types. The finished product is ready to show off or you can sand and paint your building to give it just the right look.
3D Printing Services Expanded Across Nation
The UPS Store continues to expand 3D printing services nationwide to meet the growing demands of its small business customers. 3D printing now available at approximately 20 The UPS Store locations. Use the interactive map below to find a participating location near you, or check out the full list of all The UPS Store locations offering 3D printing services.
3D CAD and 3D Scanning Services
The UPS Store 3D print locations can now also offer you 3D CAD and 3D scanning services through HoneyPoint3D.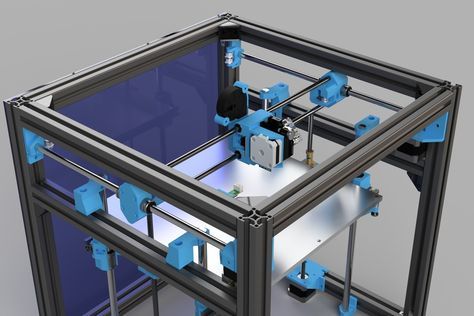 Getting a custom 3D print has never been easier - you dream it, HoneyPoint3D designs it, The UPS Store prints it. Enjoy the HoneyPoint3D benefits of an easy quoting process, affordable and quality engineering, online viewing of your 3D files, and efficient turn-around times. Get your 3D CAD or scan quote today!
Netfabb® at The UPS Store®
Participating The UPS Store 3D print locations are utilizing Netfabb software for 3D print file preparation and customization. Services available at these locations include:
- File fixing
- Text labeling
- Logo labeling
- Cutting
Contact or visit these Netfabb locations to learn more about their advanced 3D offerings.
3D Printing Frequently Asked Questions
Here a few questions we frequently hear about 3D Printing.
Please feel free to contact your local The UPS Store for any other questions you may have
-
What is 3D printing?
-
3D Printing is a manufacturing process that uses a digital file to create three-dimensional objects one layer at a time.
 We run a system that uses ABS plastic and soluble supports to create realistic prototypes and marketing models.
 -
What kinds of things can I 3D print?
-
Small business owners and aspiring entrepreneurs will have the opportunity to print prototypes as part of the new product development process. With this printer, The UPS Store locations will be equipped to produce items like engineering parts, functional prototypes, acting props, architectural models, fixtures for cameras, lights and cables.
-
How long does it take to print?
-
The time it takes to print an object will depend on the complexity of the design. A simple object may take 4-5 hours, while a complex object may take 24 hours.
-
Which UPS Store locations are offering 3D printing?
-
The UPS Store is in the process of rolling out nearly 100 3D printing locations across the country. Visit /print/3d-printing/locations for more information.

What is 3D printing and how it can be used! Interesting!
What is 3D printing
3D printing technology was patented in the 80s of the last century, but gained popularity relatively recently. New, promising techniques have been developed and the possibilities of 3D technologies have reached a completely new level. However, to this day, the technique is not known in all circles, and not everyone is aware of what 3D printing is. In today's article, we will try to explain in detail and in an accessible way what 3D printing is and where it is used.
In short, 3D printing is a technique for manufacturing three-dimensional products based on digital models. Regardless of the specific technology, the essence of the process is the gradual layer-by-layer reproduction of objects.
This process uses a special device - a 3D printer, which prints certain types of materials. More details about it are written here. Other names for the technology are rapid prototyping or additive manufacturing.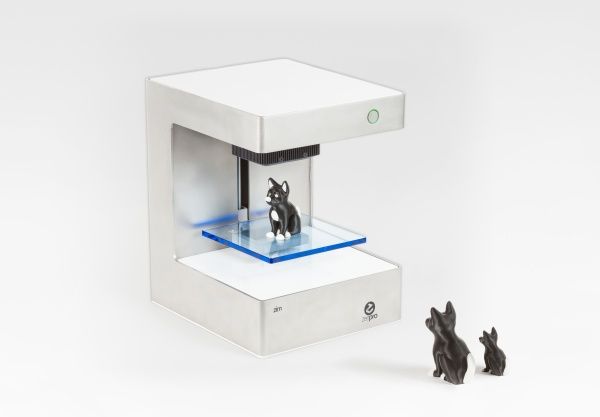 Often the phrase "additive technologies" is used in the meaning of "3D technologies".
3D printing steps
To make it clearer what 3D printing is, let's take a look at the playback process step by step. Below are the specific stages of 3D printing. How it works:
- 3D modeling of the required object is performed according to certain rules;
- The file with the digital model is loaded into the slicer program, which generates the control code for the 3D printer;
- Sets required 3D printing options;
- The code is written to a removable memory that connects to the 3D printer;
- 3D model reproduced.
Objects are reproduced gradually. According to the required shape, the selected material is applied layer by layer, forming the finished product. It is worth noting that the possibilities of 3D printing are almost limitless, that is, anything can be made. In some technologies, very thin overhanging elements are provided with supports, thanks to which they can be avoided from sagging.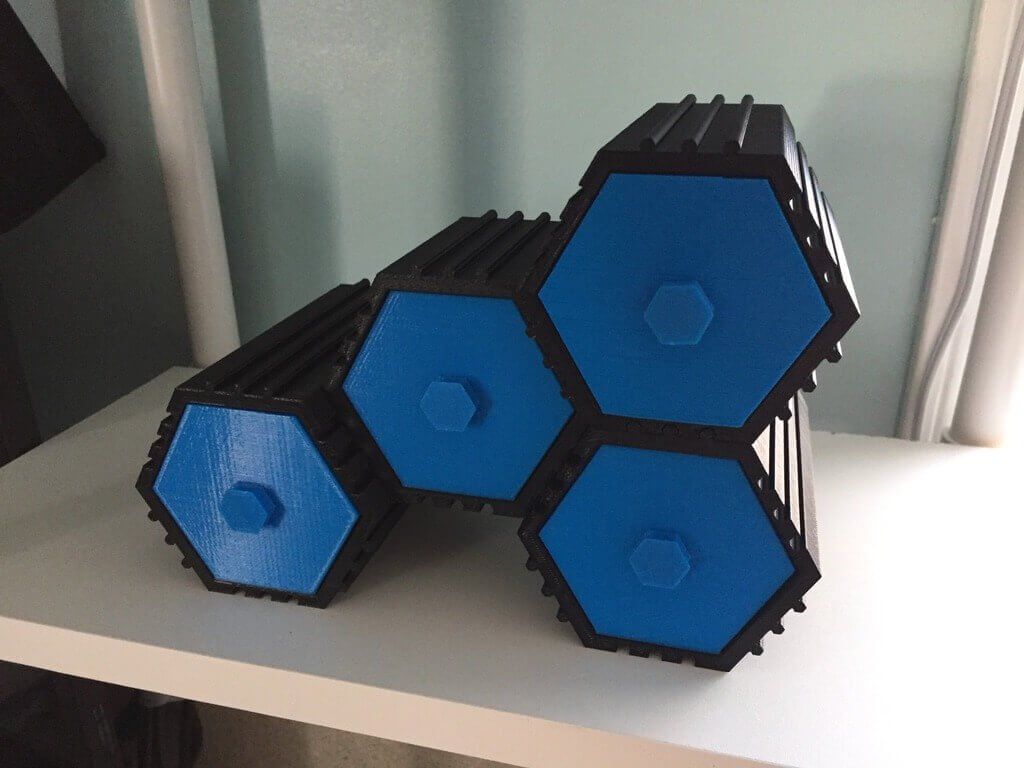
Naturally, this is a very simplified description of the stages of 3D printing, but they give a very clear idea of the essence of the technique.
Other questions and answers about 3D printers and 3D printing:
- Basics What is 3D scanning?
- Basics What is a 3D model?
3D Printing Technologies
Different 3D printing technologies are used to reproduce different objects. They differ both in the consumables used, and in the speed and accuracy of printing. Here are the main 3D printing technologies:
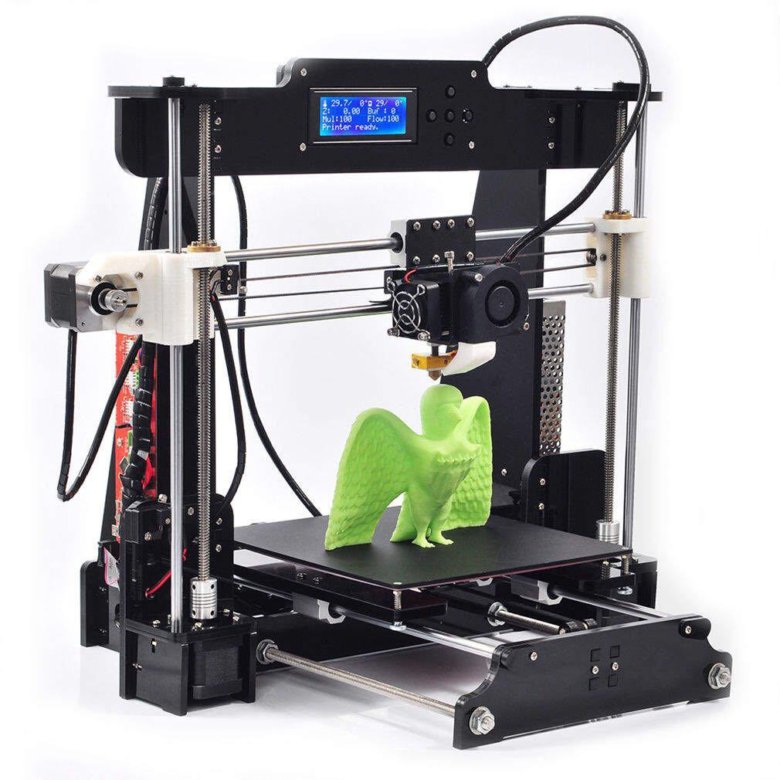
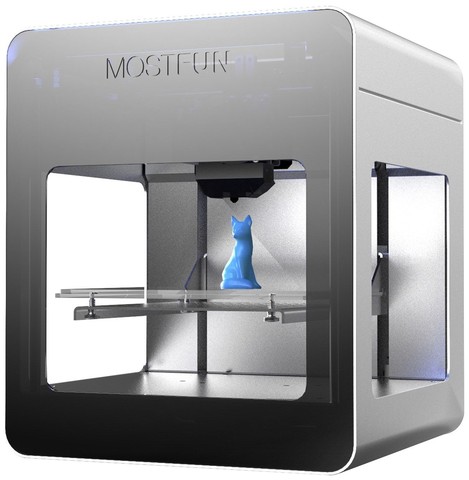
- Fused deposition modeling (FDM) . One of the most common 3D printing technologies, used in most desktop 3D printers, and represents an ideal price / quality ratio. Printing occurs by layer-by-layer supply of a thread of molten plastic;
- Laser stereolithography (SLA) . The formation of the object occurs due to the layer-by-layer illumination of a liquid photopolymer resin by a laser, which hardens under the influence of radiation.
 One of the variations of this technology is DLP 3D printing. It uses a special projector instead of a laser. Both 3D printing methods are used to create objects with a high degree of detail. In the case of DLP printing, speed is also an added advantage;
 - Selective laser sintering (SLS) . Reproduction is performed by layer-by-layer melting of a special powder under the action of laser radiation. This 3D printing method is widely used in the industry for the manufacture of durable metal elements
3D Printing Applications
As you may have guessed by now, 3D printing is extremely versatile. The second name of the technology - rapid prototyping - speaks for itself. In the manufacture of prototypes and models of models, 3D printing can be simply indispensable. It is also a very cost-effective solution for small-scale production. In the aerospace and automotive industries, 3D technologies are already being used with might and main due to the high profitability and speed of manufacturing components. Culinary professionals are working on the development of 3D food printers, and in medicine, 3D printing has become something of a technology of the future. With the help of 3D bioprinting, it is planned to produce bones, organs and living tissues, but for now, implants and full-fledged medicines are printed on 3D printers. Desktop 3D printers can be used for domestic purposes: for repairs, making various household items, and so on. And designers, fashion designers, sculptors and artists appreciate the possibilities of 3D printing and 3D modeling as an unusual way to realize their talent.
Well, that was a brief description of what 3D printing is. We hope we were able to provide the necessary information in an accessible way. If you have additional questions that we have not covered, write to us by e-mail and we, if necessary, will add your questions! Best regards, 3DDevice team.
We also want to remind you about the possibility to order 3D printing, 3D scanning, 3D modeling services or purchase of related equipment and consumables with delivery throughout Ukraine in 3DDevice. If you have any questions, please contact us at one of the phone numbers listed here. We look forward to collaborating!
Back to home page
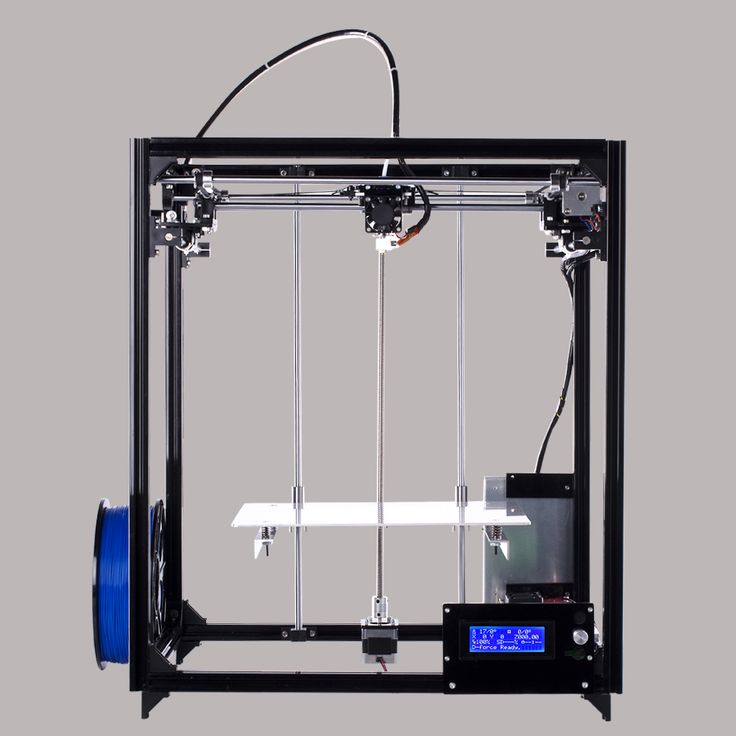
How to 3d print another 3d printer
Already have a 3D printer? Want another one?!
Why is this needed?
Well, let's say you have your own large printer and you can print fairly large objects. Do you believe in the idea of the reprap movement, the printer should be able to reproduce itself!
Or do you want to challenge yourself and finally figure it out, how a 3D printer works .
Or your current 3D printer is just sitting in the corner of the room gathering dust, because you have already printed everything that came to mind, and the most difficult task that worries all professionals 3d printing is how to clone existing equipment on itself.
Step 1: Preface
Let's be honest. .. the is not the ultra cheap printer. This is not Chery 3D printer for $60. This not is a way to save money or time. This is not first printer.
Now let's talk about what is .
3Dtje mini 3D printer is:
- Damn easy to print
- Printed parts from PLA
- Everything fits within 200x200 print volume
- Most parts can be printed in 100x100 print volume
- Most parts are printed without supports , only in some cases they may be needed to improve the quality of
- Very few few needed tools
- Unlike most crafts that require a laser cutter, the CNC
- You can probably get away with a drill and a hacksaw to prepare 2 rods of the required size
- No source of MDF, or wood, or acrylic sheets or aluminum profiles, which can cost a lot
- A Prusa i3 Clone
- This design is not new, nothing revolutionary, but it is reliable, prints well and works with any slicer
- Open source
- All files of models can be downloaded free of charge
- You can download them and modify them as you like
- You can even sell them if you need to!
- Simple and interesting printing
- 19 models
- All parts are different and look very interesting together
- Easy to assemble
- All parts are connected with M3 screws and nuts.
- Cutting 2 to 4 metal rails
- Some 3d printed parts are assembled intuitively , you can even ignore photo
- All parts are connected with M3 screws and nuts.
- Really fucking cool!
- Small, portable, low moving parts! This printer can print fast! (when properly configured)
- This 3D printer you will DIY , completely!!
Let's get started!
Step 2: Prerequisites
You will need a 3D printer , well, or find someone with this device.
- Printable area must be at least 200x200mm XY and maybe 200mm Z if you want to print with refills
- PLA 1 kg, can be different, but this is the most convenient option
- I honestly don't know how much it will take. Likely 500g or so
- Tools
- Screwdrivers for screws
- Pliers, cleaning tools for printed objects (a clerical knife is enough)
- Metric drills for opening / cleaning the printing hole (you can also use a screwdriver)
- Knowledge on how to build a 3D printer from scratch
- These are not hard requirements, but knowing how to deal with common printer problems will reduce the amount of swearing when things aren't perfect the first time.
- If you understand firmware Marlin it would be very cool to talk about this, as there is a desire to improve some things.
- These are not hard requirements, but knowing how to deal with common printer problems will reduce the amount of swearing when things aren't perfect the first time.
Step 3: Parts
Just to be clear, I've made a list of exactly what you need and what you can buy to make the best possible quality. But it will be more expensive. Therefore, you choose which set to buy - in principle, they will not differ. In addition, you can order all this from China, it will be cheaper, but the wait will be longer. In any case, you need to look for all the components in English, so we take them from the table and, for example, insert in alliexexspress search .
The table is located at this link.
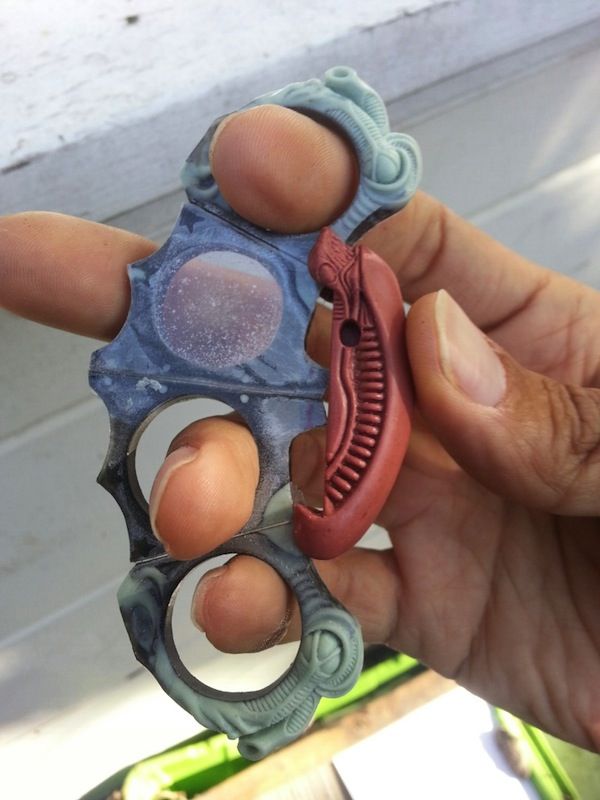
Step 4: Printing Parts
Now let's move on to the most interesting part, in my opinion - prototyping models. To be honest, I really like to print different things, you feel that you can handle any task when you have a 3d printer at hand.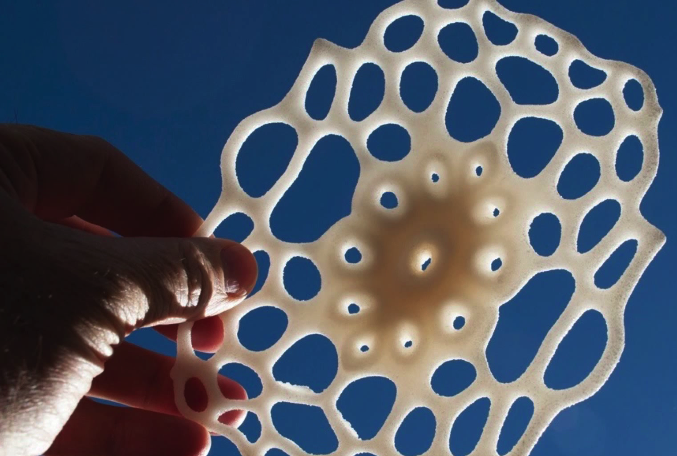 Okay, it's all lyrics.
Here is the project itself, where you can download 3d models for printer for free . Download and start preparing for printing.
The most important thing is to arrange the parts correctly on the table . The idea is to make the models have as few parts hanging in the air as possible. This will allow to drop support for . After all, they spoil the quality very much if you do slicing through Repetier Host with their auto-generation, and not draw them yourself.
You can watch a video showing the optimal arrangement of parts. Print settings I think you know how to do it, if not - there are articles about it with configuration files.
Step 5: Mounting
Assume we have printed everything. Someone may have decided to use metal guides, buying them, for example, from IKEA, and cutting them into sections of the desired length. In any case, writing how to assemble this 3d printer does not make much sense, and it's too lazy, to be honest. In my opinion, there is nothing better than pictures!
Frame Assembly
First, I'll lay out how our miracle should look at the moment of medium readiness. Then we will see how the modules were assembled.
Association of the Y
Axis this Axis drives The so -called bed . First we need to install the motor, put a pulley on it . Then we install a freely rotating pulley on the other side and measure 9 for them0046 belt .
And now we will install the bed itself, which will fasten the two ends of the belt to us. Just don't forget to tighten the pulleys and anything that isn't tight yet. The substrate will be massive and it will be inconvenient to crawl there already. The connection will require 200mm x 6mm bolts, so have them ready right away.
It should be noted that the belt must be very tight . This will greatly affect the print quality of . If you cannot do this at the time of assembly, you can use special tensioner . It's basically a simple spring. As for the axes, in this case they are printed, although this is far from mandatory, just the name of the project obliges))
X-axis assembly
Depending on your printer, you may need to make a hole with a 3mm drill in the belt tensioner. This hole should be quite free.
- Attach the motor to the end of the x axis with the connector down
- Attach 20T gear
- Insert 6mm rods 6mm x 180mm into the holes on the motor side. You need to cut these rods if you bought 200mm.
- Assemble the x-axis tensioner with either your own or printed tensioner bearing.
 Make sure the m3 nut is in the tensioner before proceeding.
 - Pass the belt from the left side (engine side), through the gearbox, through the idler bearing to the right side
- At this point, install belt tensioner to the right of the x-axis on the rods
- If you are happy with the length (make sure the x-axis of the tensioner is recessed quite a bit) you can cut the belt. Don't forget to leave extra belt length
- Attach LM6UU bearings in bottom bracket x
- All assembled, attach the straps to the carriage x
- Then it remains to adjust everything a little to make sure that nothing touches each other
Assembling the Z axis
Now we assemble the Z axis. If you have not installed the engines in the course of past work, it's time to do it. As you understand, they should stand on the left and on the right. We will install adapters for screw rods on them, where we will put them, holding them with a hexagon.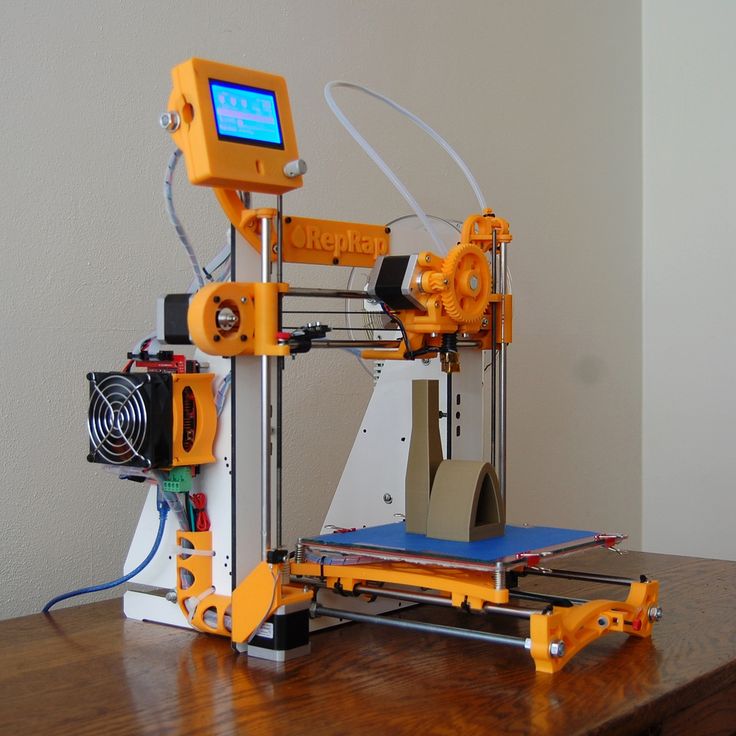
We stick the guides (parallel to the screw rods). We can say that we have finished assembling the case.
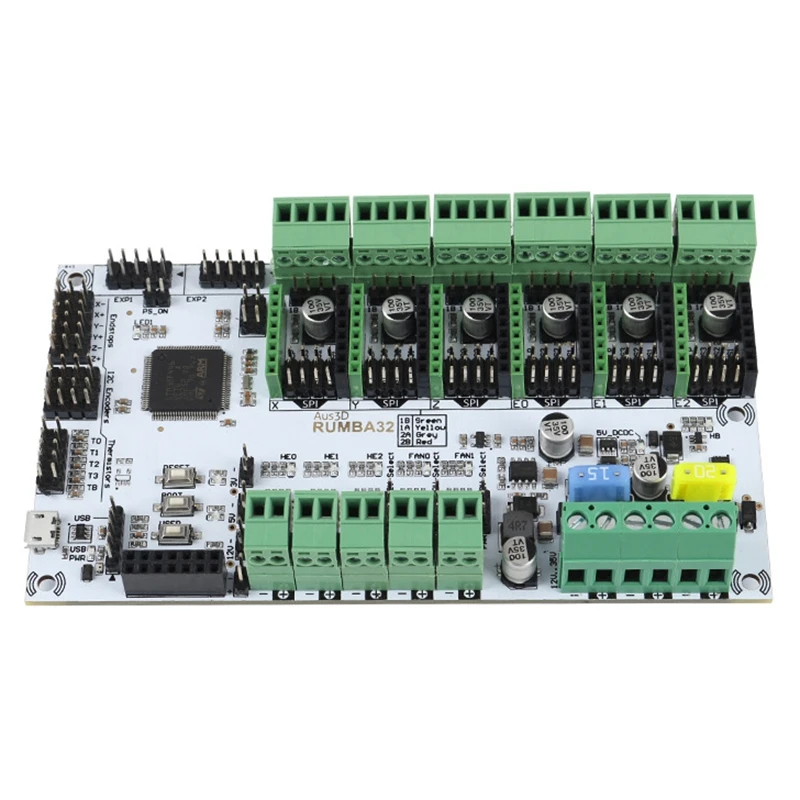
Step 6: Assembly of the electrical circuit.
How to lay the wiring is everyone's business. Here the options will be shown in the photo, but it's up to you to decide. The most important thing is to connect everything correctly. I'll also lay out the scheme, but it's better to see how this is done in ordinary 3d printers. For example, in order not to go far, you can go over the following articles directly on this site:
-
Exploring the features of a 3D printer
-
3D printer setup and calibration
-
Ramps 1.4 connection in 3d printer
It is not necessary to read everything - you can see the key places from the pictures and delve into their study.
The picture below shows the green power terminal. This is a very dangerous and unreliable thing that sometimes ignites - it is dangerous to leave a working 3d printer at home unattended. Therefore, in an article about Ramps, it is better to read how to be in this case.
Step 7: Firmware
Since you will (most likely) have an Arduino Mega as the brain of a 3d printer, uploading firmware to it will be quite simple. All you need is the Arduino IDE. The most standard firmware from Marlin. The main thing is to choose the correct configs for the board. I have not seen an article about the firmware on this resource, but it can be easily found on the Internet. Here are useful links:
- Firmware Marlin manual
- May be useful to someone info about electronics reprap , how is it functioning
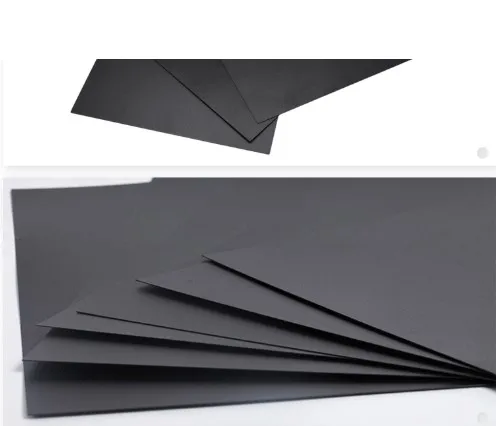
Step 8: Testing
Finally time to print something! We note right away that the table must be covered with molar tape or Kapton, since we have it without heating.