3D scanner photography
Photogrammetry, 3D Scanning With A Photo Camera
I’m sure you’ve heard of the possibility of scanning an object to create a 3D model. This is something that has been done for quite some time in the industry, using different scanning technologies.
Only recently has access to this technology been democratized through a new scanning system that will allow you to scan models at no cost and in a very simple way, photogrammetry.
What is photogrammetry?
Photogrammetry is the technology that allows us to create 3D models of real objects from photographs of this same object. As simple as it sounds, photographs are taken of the object in a certain way and then, using free software, these photos are converted into a 3D model.
By taking pictures (or videos) of the object from different perspectives and under constant lighting, the specialized software is able to find representative or characteristic points of the model that are repeated in all the photos.
Using key point extraction techniques, the software is able to infer the distance between these points through the separation between them in different photos, thus creating a cloud of characteristic points. Finally, this point cloud is converted into a mesh, which can be processed or cleaned to be printed in 3D or included in virtual representations.
What can I use photogrammetry for?
There are a lot of possible applications for any 3D scanning technique, but photogrammetry is especially useful as it does not require specialized tools and anyone can do it with their mobile phone and a computer.
What is usually needed is powerful hardware: most photogrammetry programs require a computer with enough capacity to process the images and generate the scanned 3D model.
3D scanning and photogrammetry have been around for some time, but only marginally until recently. Nowadays, there are a lot of possible applications for photogrammetry that you can implement yourself to take your projects to the next level.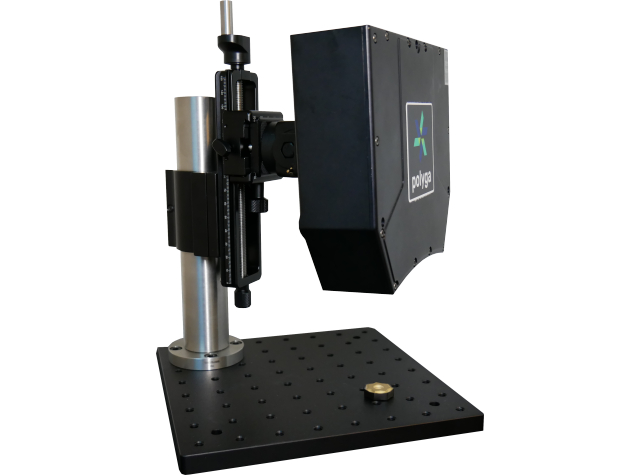
Scanning sculptures
Scanning three-dimensional sculptures or works of art can be a very simple way to digitalize these parts. There is already a wide repertoire of works of art scanned in myminifactory, but there are probably sculptures near you that no one has scanned yet.
To scan these models you will only have to go out and take pictures of the statue from different perspectives, trying to cover all possible angles. If the sculpture is very tall you may need to figure out how to photograph the top. You can use a drone: they are very cheap and easy to use. Similarly we can use a ladder, moving it around to cover all possible angles.
Scanning historical buildings
There are many historical buildings scattered along the streets of your city, and surely there is no 3D scan of these beyond that made by Google Maps.
These buildings are usually very touristy elements, with a lot of historical relevance and with a strong artistic character. As it happens with sculptures, scanning buildings is a very interesting way to virtualize part of the culture of your city.
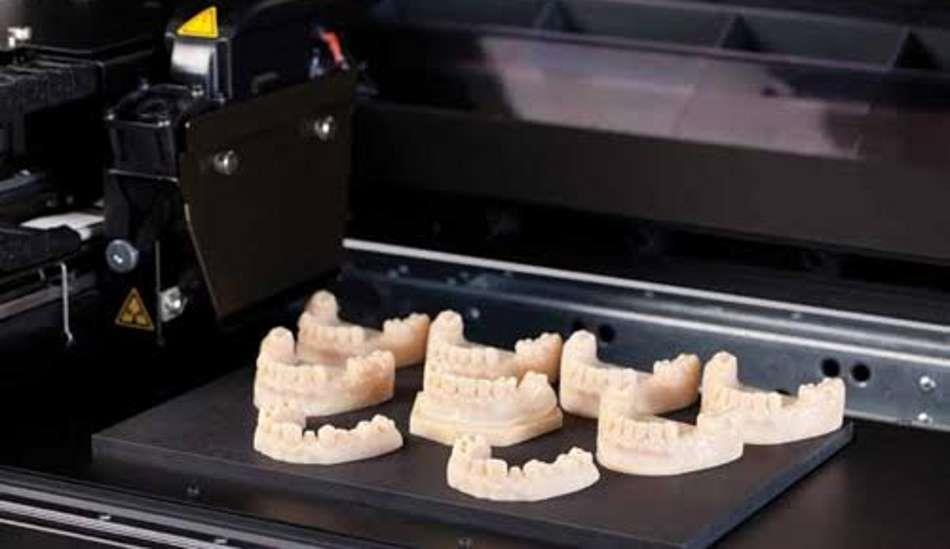
Scanning industrial parts
Many times we want to repair some equipment or element of which we are missing a part. This is something very common in the automotive market, where many times we are charged outrageous prices for certain structural parts or bodywork due to the low availability of these.
A very direct application of 3D scanning is to scan an original part that we know has a high market value and proceed to replicate it by 3D printing to obtain an almost exact copy for a very low price.
Digitizing applications
The digitization of culture is a growing issue, and more and more companies are deciding to invest in equipment and personnel for commercial photogrammetry applications. In the case of digitizing industrial parts, the business application this would have is clear.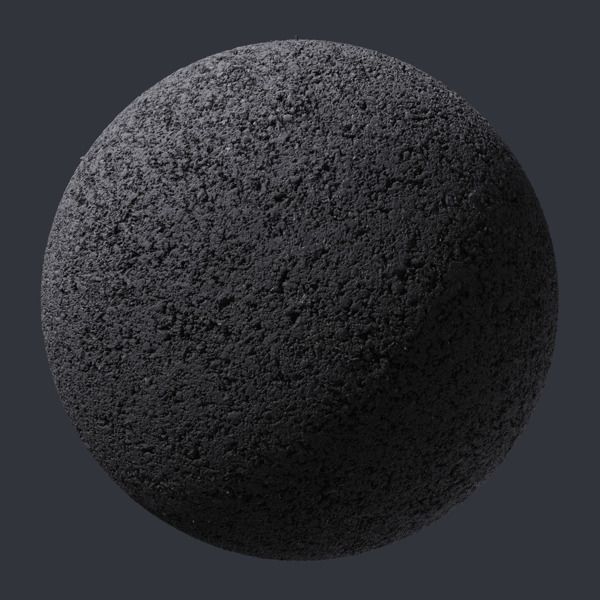
As we have said before, the sculptures or buildings you can find in the streets of your city are, in many cases, cultural elements of remarkable relevance, so by scanning them we will be contributing a lot to society. When you have the 3D models you will have many possible ways to make this investment profitable, but we leave you a list of ideas below:
- Create a virtual 3D gallery: If you scan a few historical models of your location you can create a virtual gallery so that people can see these models in a much more realistic way than just photographs.
- Create replicas by 3D printing: The models we have scanned can be printed in 3D in different formats of shape, size and materials. Nowadays, there are some very famous monuments of which copies are sold everywhere in the form of key rings or figurines. If you have visited Madrid for example you that it’s difficult to find a key ring of something that is not La Cibeles, so there are a lot of works of art of which many people would like to buy a replica.

- Preservation of works in poor condition: Currently there are already companies, especially in Andalusia, that are dedicated to scanning models of statues or sculptures belonging to the brotherhoods that are in a poor state of conservation. These scans have many purposes. On the one hand, an exact 3D copy of the model can be printed, and this copy can be displayed while the original work is being repaired. On the other hand this scan can be used as a “backup” to be able to restore the exact look of the piece if in the future you decide on this restoration.
- Sale of spare parts: If you have scanned original parts of equipment such as cars or other electronic devices, you can replicate these parts very accurately using 3D printing to create parts that are almost indistinguishable from the originals. The sale of spare parts is a very lucrative business and photogrammetry can help us get into it.
Photogrammetry software
What software is used to process the scanned photos? Here are some examples of the programs we use for scanning:
- Meshroom – by Alice vision
- Metashape – from Agisoft
- Reality Capture
- 3D Zephyre
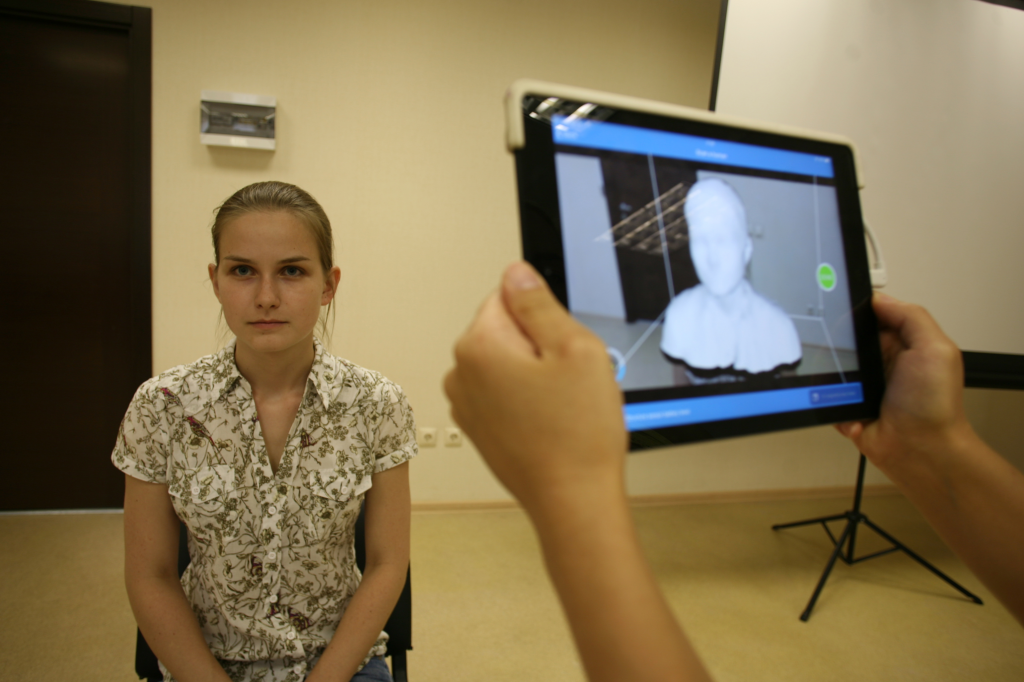
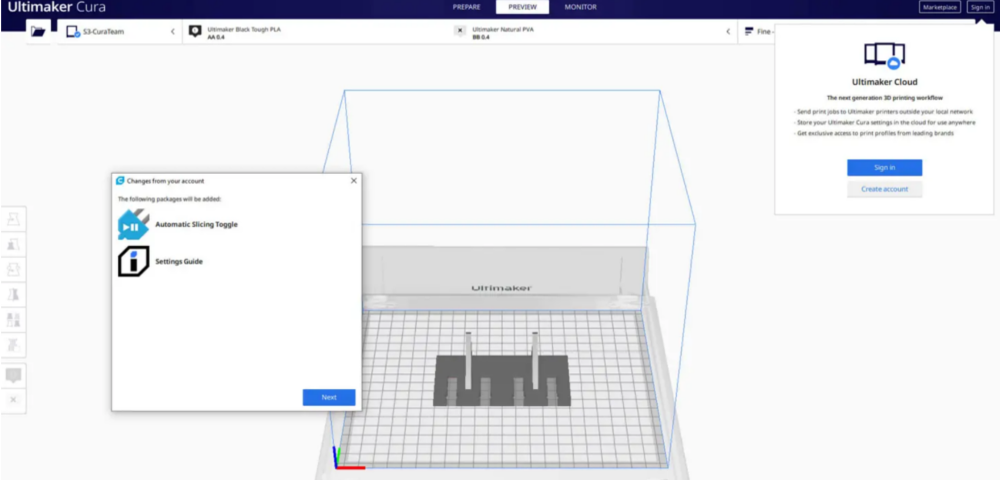
And if you want a simpler solution you can always scan your parts with your mobile.![]()
Want to try 3D scanning your parts?
Photogrammetry is one of the easiest ways to get started in 3D scanning and has many advantages over other techniques, mainly its low cost and immediacy.
We have told you some options so you can apply photogrammetry to your projects, taking them to a higher level. Some of these options can also be done along with other 3D scanning technologies, which we will talk about in future articles. Keep an eye on our posts if you want to learn more about how to apply 3D scanning in your daily life and your projects, whether personal or business.
PhotoModeler Scanner – PhotoModeler
Please note - PhotoModeler Scanner product is no longer offered. It has been replaced by PhotoModeler Premium. You can find out more about the replacement here.
PhotoModeler Scanner provides the tools for you to create accurate, high quality 3D models and measurements from photographs. The process is called photo-based 3D scanning.
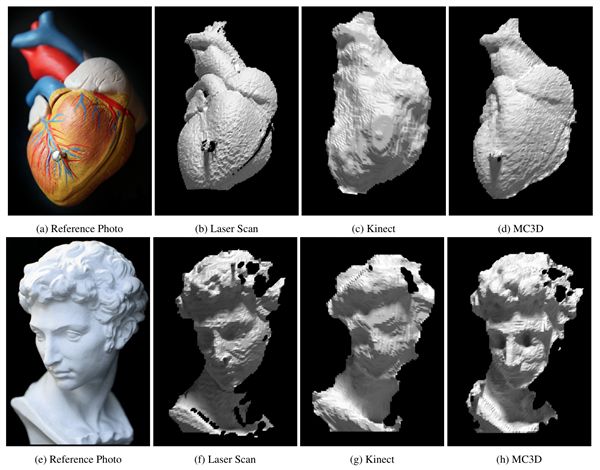
PhotoModeler Scanner is a 3D scanner that provides results similar to a 3D laser scanner. This 3D scanning process produces a dense point cloud (Dense Surface Modeling, DSM) from photographs of textured surfaces of virtually any size.
The PhotoModeler Scanner software has all the capabilities of the base PhotoModeler product plus the capability to do Dense Surface Modeling (DSM), 3D scanning and SmartMatch. See the chart on the product overview page for a quick comparison of the products.
PhotoModeler Scanner is a sophisticated tool to build accurate Dense Surface Models and get measurements from your photos. Use PhotoModeler Scanner to build:
- Dense Surface Models where a large number of 3D points are needed.
- Models that traditionally would require a 3D laser scanner
- Scale-independent object modeling - model small objects or big scenes
- Perform measurements over time with the Motion capability.
Read about a new way to 3D Scan
PhotoModeler Scanner is widely used in these areas:
Surveying, Construction, Mining, Geology | |
| |
Forensics, Biology, Medicine | |
| |
Architecture | |
| |
Archaeology, Curatorial | |
| |
Films, Gaming, Animation | |
|
PhotoModeler Scanner's main features
- SmartMatch: Automatic feature detection and matching.
 Use SmartMatch generate a low density point cloud, and to orient your photos.
 - DSM: Produces dense point clouds and detailed triangulated surfaces of textured objects in photographs without the use of a laser, projected light, or targets.
- Motion. Produce data tracking changes over time.
PhotoModeler Scanner also comes with the Idealize capability used for back-plate matching in gaming and film.
...and it includes all of PhotoModeler's main features:
- Easy to Use and Learn: Includes an advanced Windows user interface, Wizards for easy project set-up, extensive multimedia tutorials (over 4 hours playing time!), printed user guide, and extensive on-line help.
- Modeling Tools: Create models using PhotoModeler's Point, Line, Curve, Edge, Cylinder, and Shape marking tools.
- Surface Tools: Add surfaces to features defined by Points, Lines, Curves, and Edges. Create NURBS Surfaces from Lines, Edges, and Curves.
- Photo-textures: Add photo-textures and colors to surfaces. Export textures with 3DS, OBJ, VRML, and 3DM.
- 3D Viewer: View, measure, select objects, and interactively rotate the created 3D models with full photo-textures.
- Measurement Tools: Perform point, distance, length and area measurements right within PhotoModeler.
- Coded Targets: Automate the setup (initial marking and referencing) of the project, or the extraction 3D data points using targets with a special code ring that the software recognizes in the images. See Automation and Coded Targets.
- Scale/Rotate/Translate: This feature provides you the ability to apply proper scale to your project and set your model in the proper coordinate system for exporting.
- Export Capabilities: Export your model to Autodesk DXF (2D and 3D), 3D Studio 3DS, Wavefront OBJ, VRML (1&2), IGES, OpenNURBS/Rhino, StereoLithography STL, RAW, Maya Script, Max Script, FBX, and Google Earth’s KML and KMZ. See the Exports page.
- Import Capabilities: Import 3D data for use as control points, affine (coordinate systems), mesh comparison, or photo projection. See Export / Imports page.
- Photograph Handling: Work with any number of photographs, add new photographs at any time, and import many different image formats. * Image Control: Use extensive Zoom Tools for accurate sub-pixel marking, Photo Rotate for easier viewing, and Image Enhancement for increased visibility.
- Camera Support: Use images from digital, film, or video cameras. Automatic Camera Orientation determines the position of the camera when the image was taken.
 Use different cameras in the same project.
 - Camera Calibrator: Accurately measure your camera's focal length, principal point, digitizing aspect ratio and lens distortion.
- Photo-Projections: Check project quality by projecting 3D data onto your photos.
- Customizable Interface: Control the layout and appearance of your PhotoModeler screen. Customizable items include toolbars, short cut keys, and colors for items such as 3D objects, Projections, and the 3D Viewer.
< Return to the Products Overview
What is 3D Photogrammetry - Canon Ireland
What is 3D Photogrammetry - Canon IrelandARTICLE
Learn how Canon EOS camera configurations are used to create realistic 3D models for video games, film, production and art.
3D scanning service provider Sample & Hold specializes in 3D photogrammetry services for the creative and arts industries. “This includes product advertisements or people involved in the development of computer games and films, as well as sculptors who want to 3D print or CNC machine 3D models and mock-ups to create larger versions before applying a layer of clay on them” ," says Sam Jackson, co-founder of Sample & Hold.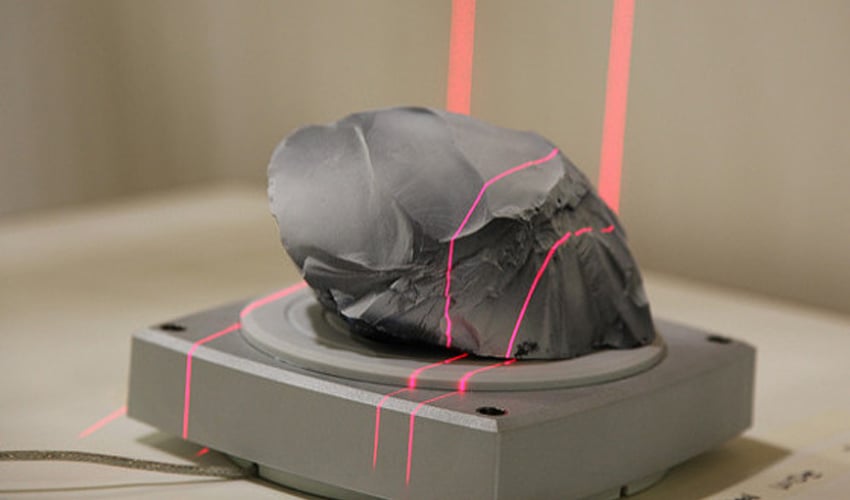
3D photogrammetry is the process of recreating a physical object to produce an accurate 3D model. This method can be used to capture everything from people and historical artifacts to aircraft, buildings and even larger objects.
“It's a great way to study an object and make a small copy of it to inspect it and appreciate the texture,” says John Maurice, Product Marketing Manager at Canon Europe. “The same result can be achieved with computer graphics, but with it you will never retain the nuances and details that photogrammetry allows you to recreate.”
The possibilities of digital photogrammetry and 3D modeling are endless - this technique is used in industrial production, engineering projects, as well as in the fields of design, entertainment and healthcare. “Creating a 3D model of a person can help diagnose and track treatment progress,” explains John. “And in the industrial sector, the ability to create a 3D model allows you to avoid the extra cost of making a prototype. ”
”
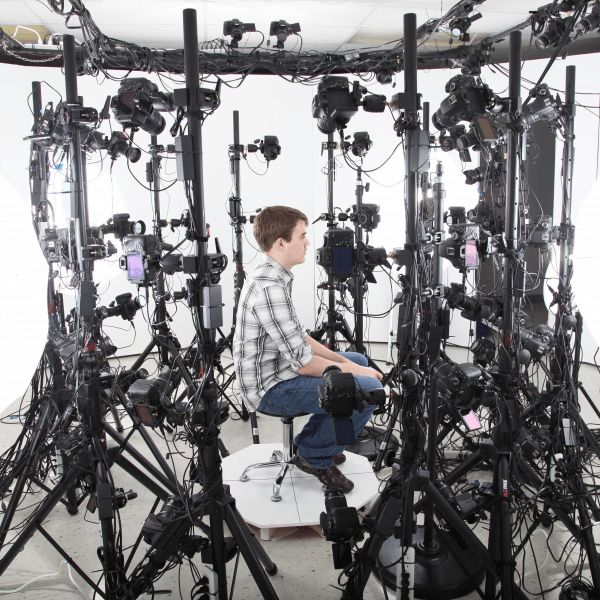
Sample & Hold full body photogrammetry uses 154 cameras. “The best part is that this way you can capture everything at once using flashes,” says Sam. “This means that during the scan, a person or animal can move, and this will not interfere with the result.”
Scissor lift is used to position a person at the correct height inside a full length camera configuration. “The configuration uses the principle of duplication,” says Sam. “It is designed to scan at a height of about 2 meters, so we lift people of short stature to the point where their head is in the right place in the scanning area so as not to use the lower cameras.”
3D photogrammetry is a highly specialized field that is characterized by a process that requires a careful approach. “You need to take a lot of photos of the object, including a total area of 2/3 adjacent images, to create a 3D map,” says John. “So when shooting with one camera, you need to move it a little and very precisely to correctly overlay.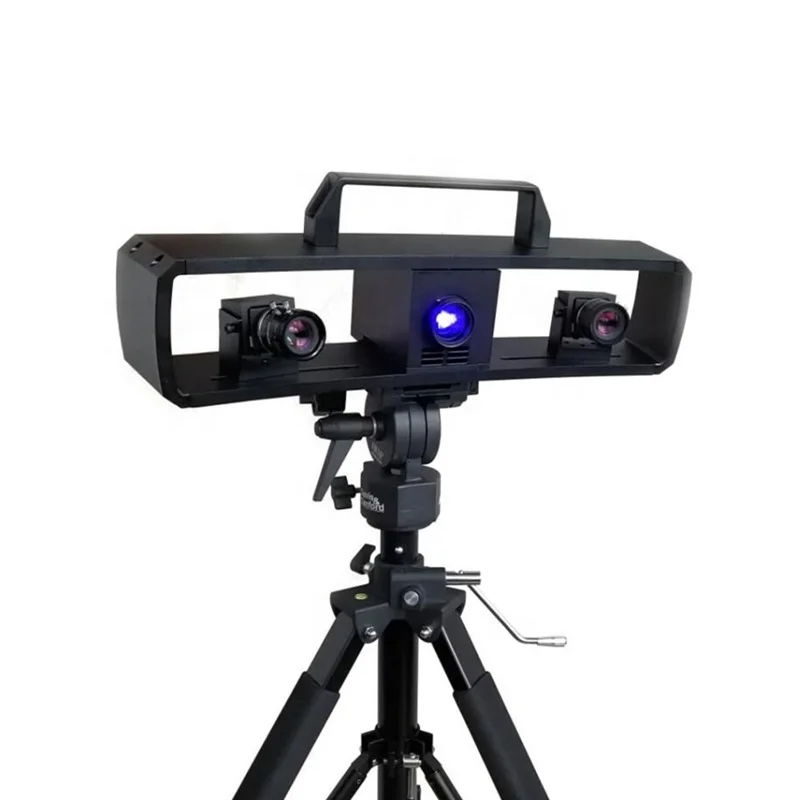 ”
”
For this reason, special designs with multiple cameras are commonly used for 3D photogrammetry. The cameras are arranged in such a way that the object can be captured from all angles in one go. Then all images are uploaded to a special program that checks the overlay and generates 3D geometry.
Sample & Hold, a leading provider of 3D scanning services, uses two of these configurations, one for full-length scanning and one for head scanning. “There are 154 cameras in a full-height scan configuration,” says Sam Jackson, co-founder of the company. “This is a relatively compact mount, but it has a significant number of cameras. They capture a person from all angles and fire simultaneously to produce a range of time-shifted images that can then be uploaded to the Reality Capture software. This program uses all the image data and finds the same areas, and then creates a 360° spherical image from them.”
Do you have Canon equipment?
Register your equipment and get access to free expert advice, equipment maintenance, exciting events and special offers - join the Canon Professional Services program.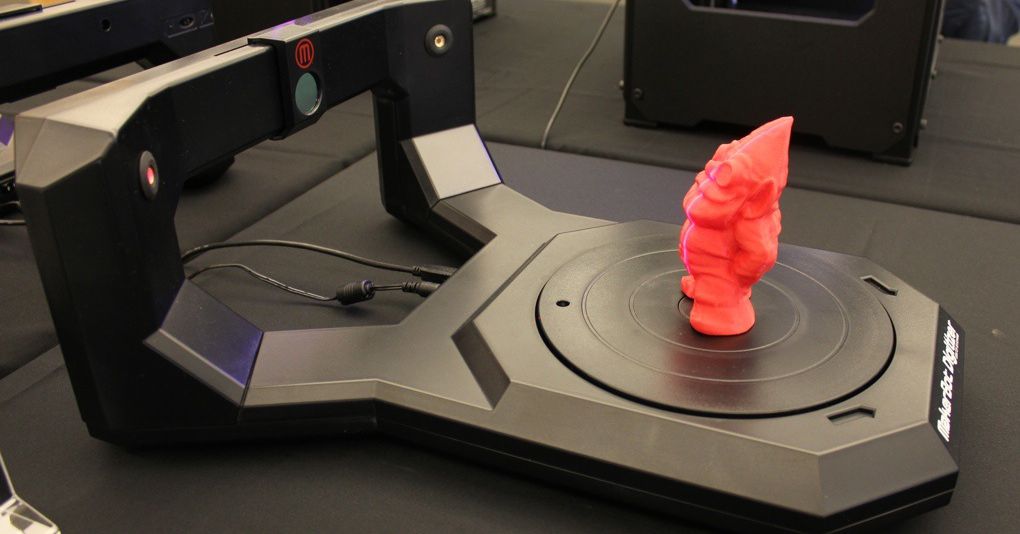
JOIN CPS
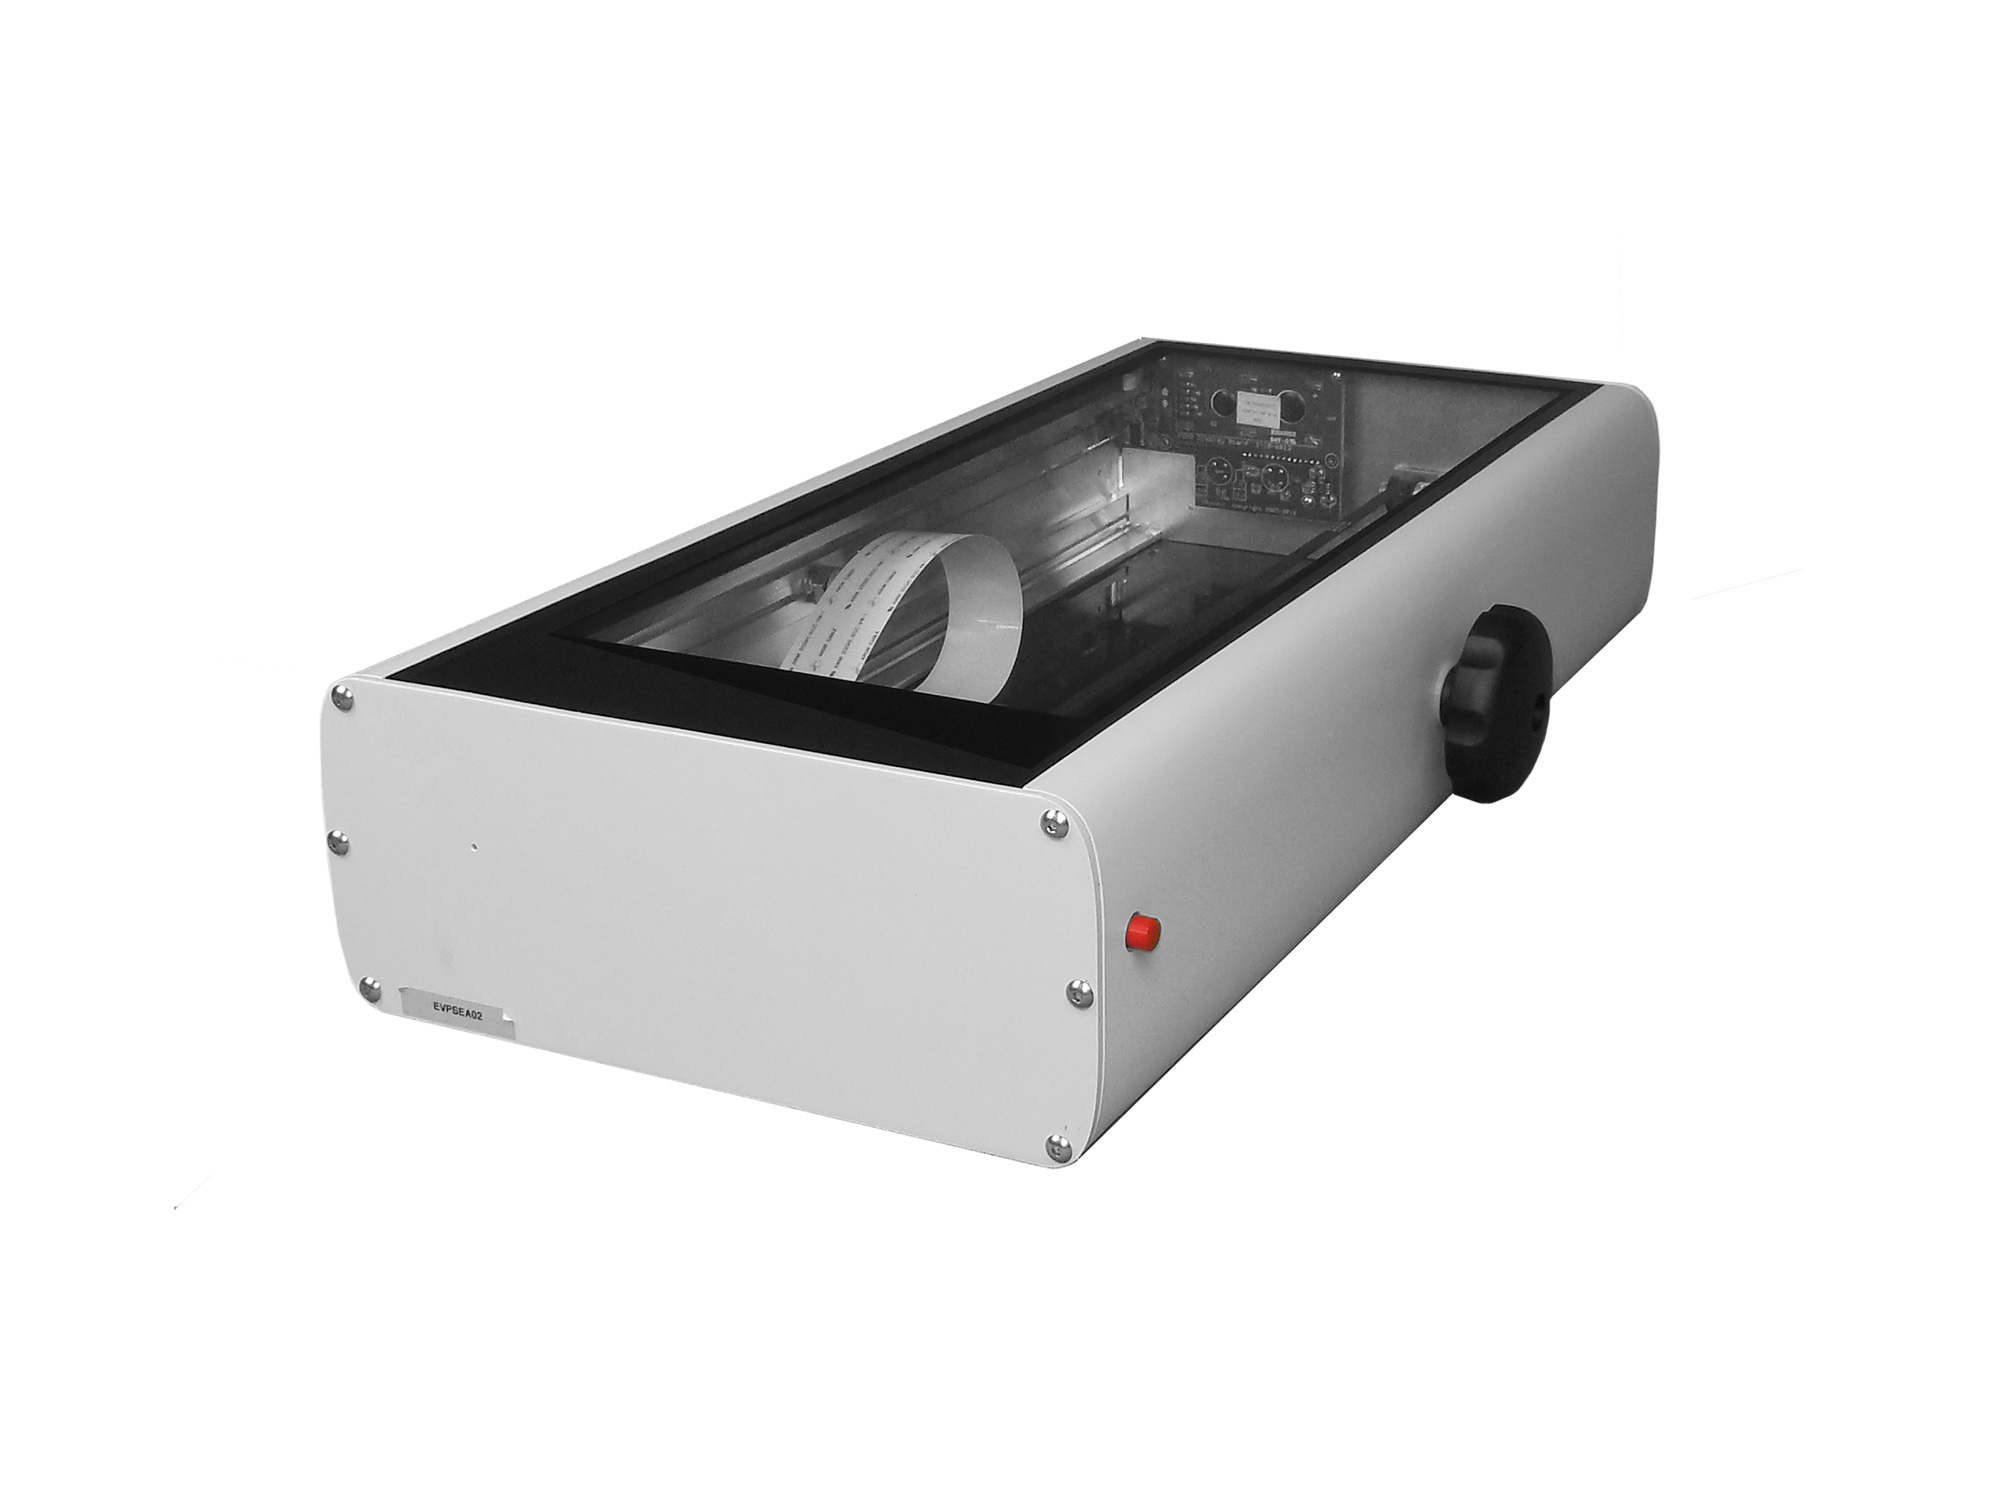
“We make our own lighting designs because the stores don't stock these configurations,” says Nick Foots of Esper, which provides multi-camera configurations and 3D scanning equipment. - It can be lighting with and without polarization; different types are needed for different levels of surface detail.” According to Sam Jackson of Sample & Hold, where Esper equipment is used on homemade mounts (see image), sometimes more than just additional lighting is needed. “If an object has a single monotonous plane or surface, photogrammetry won't work without projecting a pattern onto it to help create texture,” he explains.
Sample & Hold multi-camera configurations allow the company to photograph small objects as small as a coin and large objects up to 3x3 meters.
What is the best camera for 3D photogrammetry?
When creating a mount-based configuration with more than 100 cameras, look for cheaper options. “Entry-level DSLRs are great for these kinds of tasks,” says John. - And the lenses are about the same level. 50mm lenses are popular because they are quite inexpensive and provide the required level of quality.”
One of the benefits of choosing Canon EOS cameras for 3D photogrammetry is the wide range of solutions that support this system. “There is a whole range of products with different price points,” says John. — If you need AC adapters, you can order them from us. We also offer a Canon SDK [Development Kit] that allows third-party developers to create custom workflows tailored to specific Canon hardware. And when you replace cameras with new ones, you can simply update the SDK to add support for new devices, so the workflow remains the same.”
Sam says that 3D photogrammetry doesn't require special features that are only available on professional grade cameras. “Right now we use the Canon EOS 2000D and the Canon EOS M6 Mark II, which are entry-level cameras,” he says. — EOS 2000D is equipped with a 24MP image sensor, which provides a decent level of quality. The same can be said about the EOS M6 Mark II, although its sensor has a resolution of 32.5 MP. We purchased this camera as an experiment as we have never worked with a mirrorless camera before. Now we're thinking about shooting exclusively with the EOS M6 Mark II as it's a really good camera.
Job Description Canon EOS Digital SDK
Learn how to unlock the remote shooting capabilities of your EOS and PowerShot cameras with Canon's Software Development Kit (SDK).
Learn more
Part of the reason we didn't switch to full frame is because APS-C cameras provide greater depth of field, which is critical for data processing."
In addition to using Canon EOS 2000D and EOS M6 Mark II cameras, Sample & Hold also uses older models and early generation mounts (for example, Canon EOS 100D and EOS 1300D) for shooting, for example, the back of a person’s head for multi-camera configurations.
The Canon SDK (Development Kit) allows you to control some Canon cameras remotely via third party software. John points out that an open source Canon control SDK for Linux is also available.
Sample & Hold full-length configuration uses 100mm, 85mm, and 50mm lenses such as the Canon EF 85mm f/1.8 USM and Canon EF 50mm f/1.8 STM, where different focal lengths are used to emphasize important areas such as the feet and hands. The head configuration uses 40mm and 50mm lenses such as the Canon EF 40mm f/2.8 STM.
“We always work with prime lenses,” says Sam, “because they provide consistent results even when the mount is transported.
Entry-level cameras are not designed for such use, so it happens that their shutters do not work simultaneously, but with some delay. To avoid this problem, we use flashes to control the exposure. We shoot in a dark studio and fire up the cameras at 1/3s or 1/5s and fire all the flashes at the same time for exposure. We control cameras with Smart Shooter software and sync devices with Esper TriggerBox.”
The images created with these cameras are combined in a special program that combines them into one 3D model containing all available data.
Multi-camera photogrammetry
Esper provides multi-camera configurations and 3D scanning solutions to video game developers and visual entertainment companies, as well as advertising service providers, research centers, instant photo kiosks and other companies. Company director Nick Footes says that when setting up a system for 3D photogrammetry, the most important thing to consider is the use of the resulting files.
“During the consultation, I immediately ask what the purpose of the use is. This will determine the resolution and format. Based on this, the main workflow will be formed,” he says. “So if the files will be used in an online store, and the customer does not need ultra-high resolution, I believe that it makes no sense to use a configuration of even 60 cameras aimed at an object.”
“If you're going to make a 4K video game, you might need up to 160 cameras, but to create small 3D human models on an FDM printer, 30-50 cameras are enough. A 3D printer simply won't be able to replicate the resolution you get with a multi-device configuration. "
"
Sam says photogrammetry is the hardest thing to capture the texture of certain materials. “For example, let’s take running shoes. Stylish sneakers are often made from many different materials, including matte, glossy, transparent or shiny, all of which are extremely difficult to capture in our process.” Unlike them, capturing the human figure is quite simple.
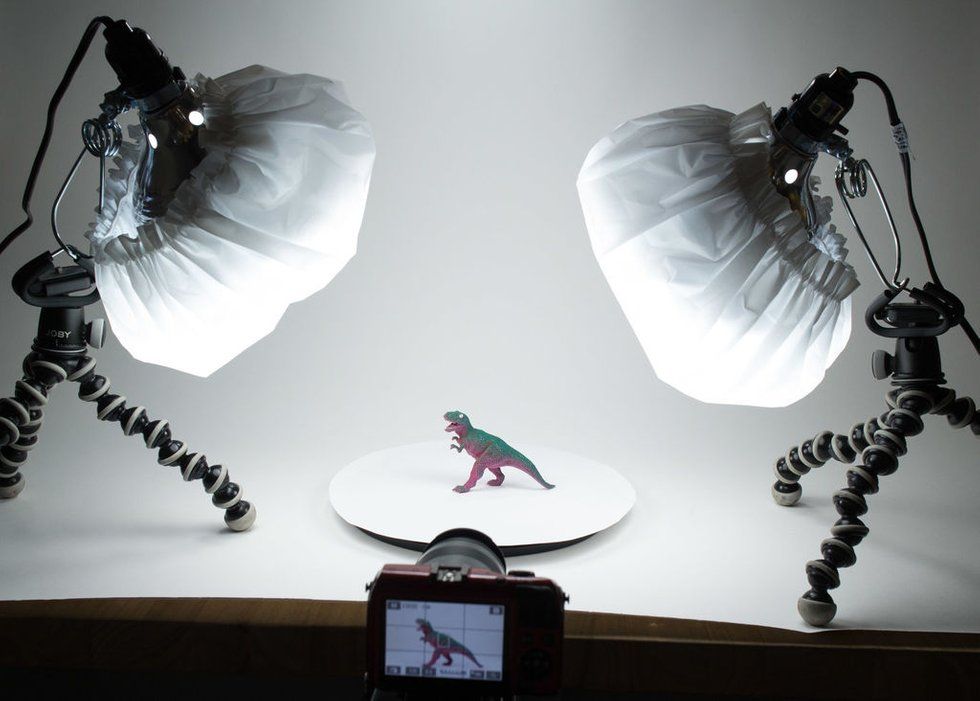
“If it's a fairly small, static object, you can find a cost-effective solution with 3-4 cameras arranged in a semi-circle, additional lighting, and a turntable,” continues Nick. “Moreover, it is possible to capture high-quality images for photogrammetry even with just one camera, but you need to understand the scope of the work and how shooting will fit into the overall workflow.”
Sam from Sample & Hold also recommends starting your journey in this area with a single camera configuration. “Anyone can do photogrammetry on location using daylight and just one camera,” he says. - If a stationary object is selected, such as a house, you do not need to work with multiple cameras, because you can simply capture it on one camera, changing its position.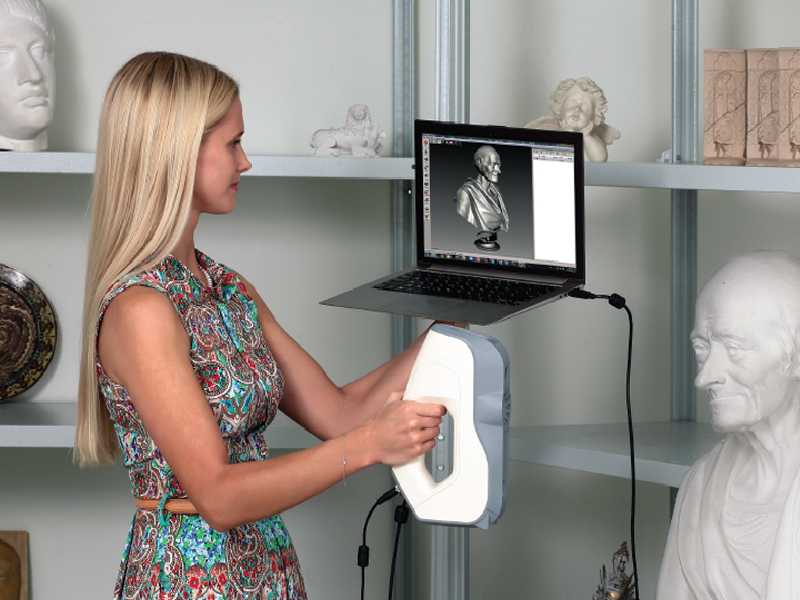
Even on YouTube there are a number of video tutorials that will help you achieve the desired result. These images can then be processed in a free and open source 3D modeling program like Meshroom. In this way, a number of beautiful models can be created.”
By Marcus Hawkins
Sign up for our newsletter
Click here to receive inspirational stories and exciting news from Canon Europe Pro
If you see this message, you are browsing the Canon website using a search engine , which blocks optional cookies. Only essential (functional) cookies will be used on your device. These cookies are essential for the website to function and are an integral part of our systems. To learn more, check out our Notification about cookies.
Delete item or clear [category] because there is a limit of 8 products. Press Change
Reset all selection?
How to make a 3D model from a photo
Photo-based 3D modeling is used in many areas.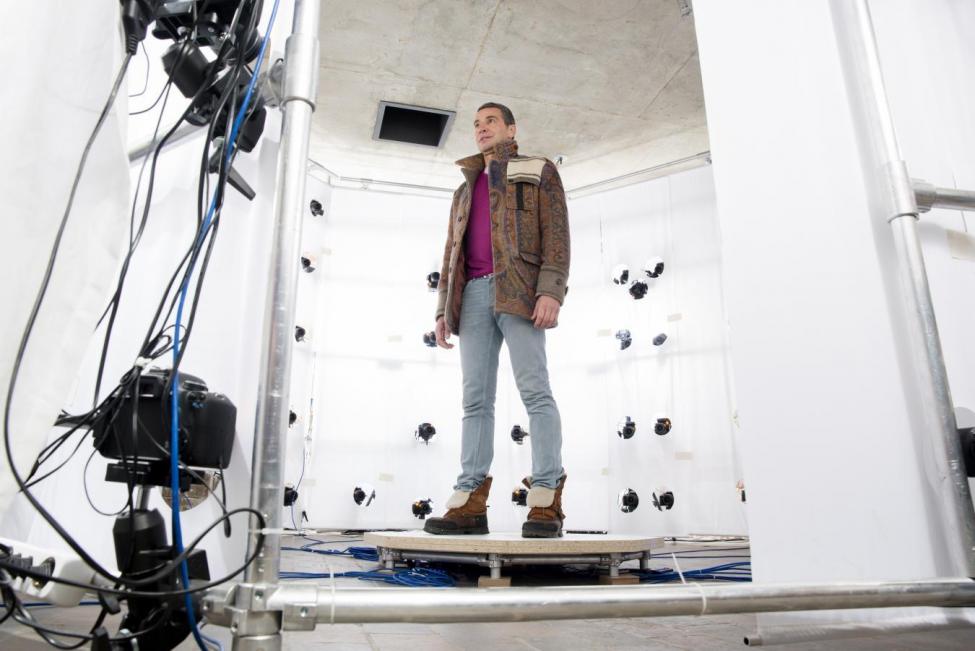 A virtual copy reduces the cost of parts production, helps to turn creative ideas into reality, and turns wastelands into blooming gardens.
Applications
Movies and games
How to make a character come alive? How to make the viewer see a person in him? At all times, in order to achieve the credibility of the characters portrayed, the authors placed people from real life in their works. And today the content industry continues this tradition. Animation studios of the 20th century used actor references to understand how a character would look and act in a certain situation. The actors acted out scenes from the future cartoon, all actions were photographed. The resulting images were then used to draw the characters.
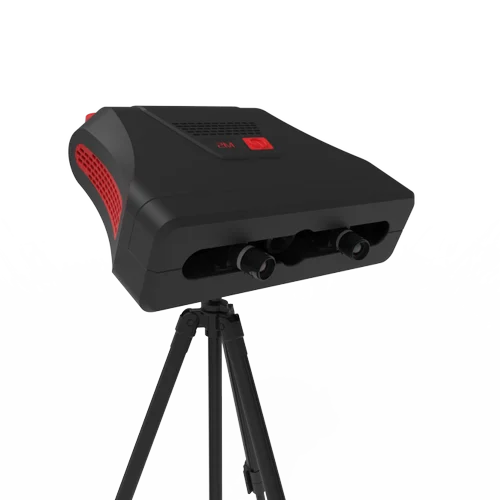
Today, work with references has moved to another technological level. Now CG artists need to create a virtual model of a person once, and then work with it, and not with a real actor. To give the 3D hero recognizable features, both 3D scanning and photo modeling are used.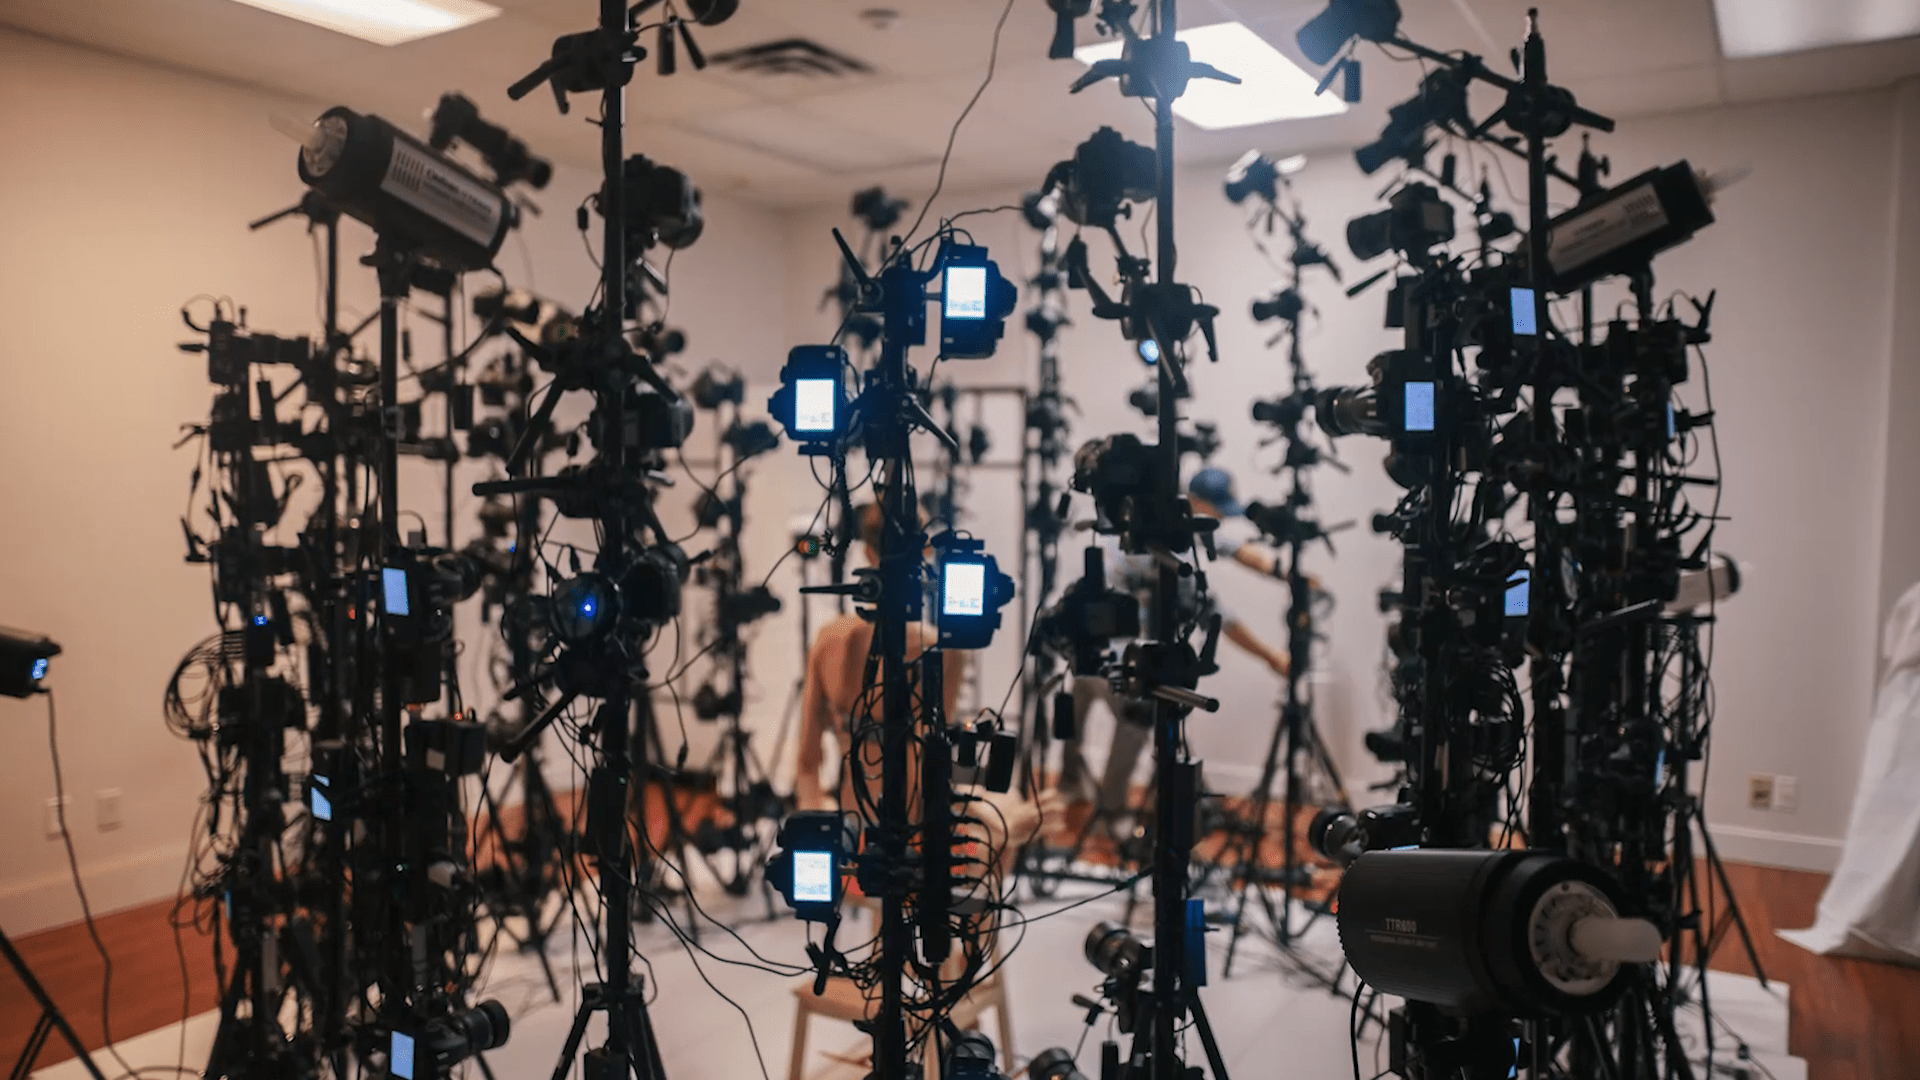 You can find out how work with professional 3D scanners works on our website. To make a model from a photo, they use designs of several cameras arranged in a circle. Inside such a circle of equipment is a person whose virtual image needs to be created. The greater the number of lenses, the greater the number of angles, the faster and more accurate the future 3D model will be.
When the photo shoot is over, the photos are loaded into a special processing program and transformed into a 3D format. After that, it's time to style the look. The facial features of a real person are changed in such a way as to highlight or change the character's character. A CG artist can lengthen or shrink the nose of a 3D model, change the shape of the ears, change the color of the eyes, make the character fatter, or "remove" a few pounds.
3D models of parts in production
Designers often face the challenge of industrial design when a new part needs to fit into a strictly limited space.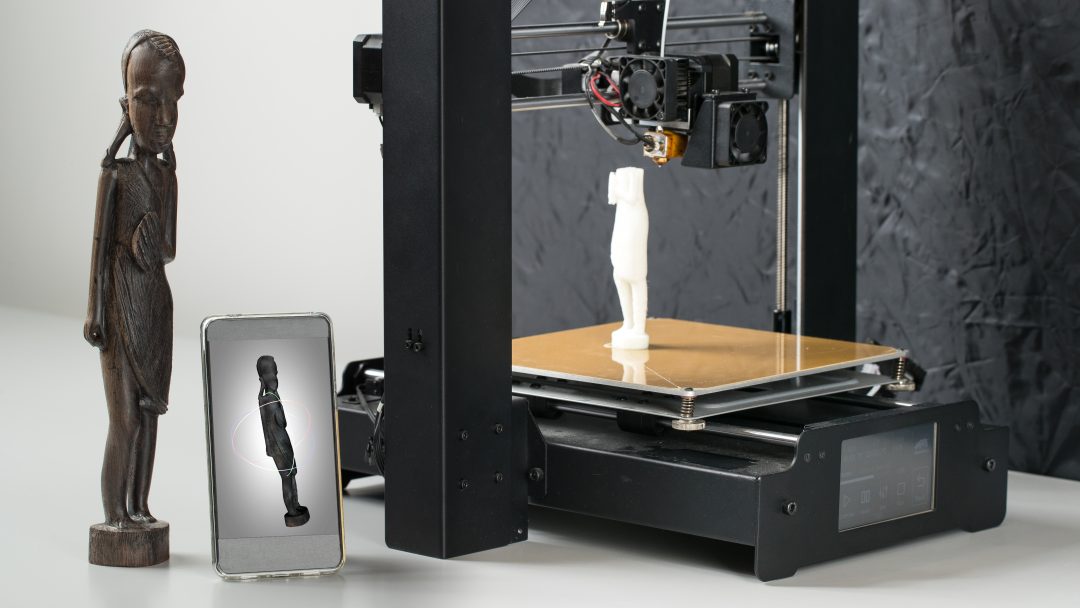 As an example, the modification of an internal combustion engine under the hood of a car. To change the design of the engine and consider its placement in the case, it is most reasonable to create a 3D model and do all the calculations in virtual space. This can be done by ordering a 3D scanning service, or by applying modeling from a photograph.
landscape design
Unlike most types of design, landscape design is the work of reshaping the environment. Landscape designers rarely work with an open field where vegetation, buildings, and decorative elements need to be placed. As a rule, their work is work with already available material. That's why it's so important to have a 3D workspace model - you can change it an unlimited number of times at no additional cost.
Modeling from photographs is also relevant for creating 3D images of extended spaces. Such large areas are difficult to 3D scan, but still need to be carefully reproduced in virtual environment programs.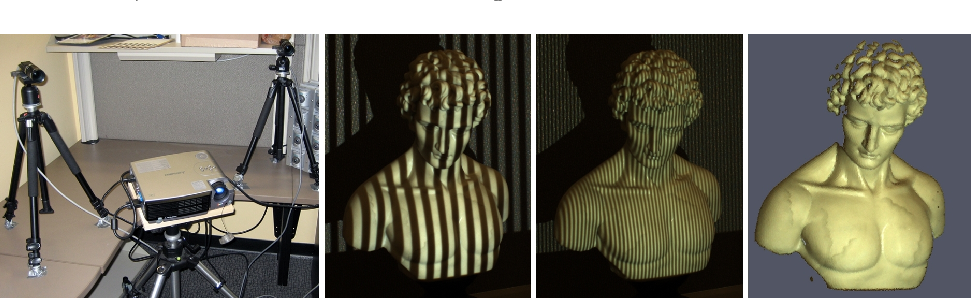
Separately, we can say about the restoration of the landscape gardening space. Creating a 3D model in this case will help to understand: which of the existing buildings is subject to restoration, what is better to remove, and which elements are subject to modification.
For fun
Modeling from a photo is a cheap and easy way to create a 3D model. This technology is available to both adults and children. Why not use it for fun, just to create a virtual copy of your favorite toy, pet, or even yourself.
Programs for 3D-modeling from a photo
CrazyTalk
Face animation software solution. Among the functions is image modeling from a photo. It can compile a 3D model both from one angle (frontal) and from several. No longer supported by the developer.
ActorCore
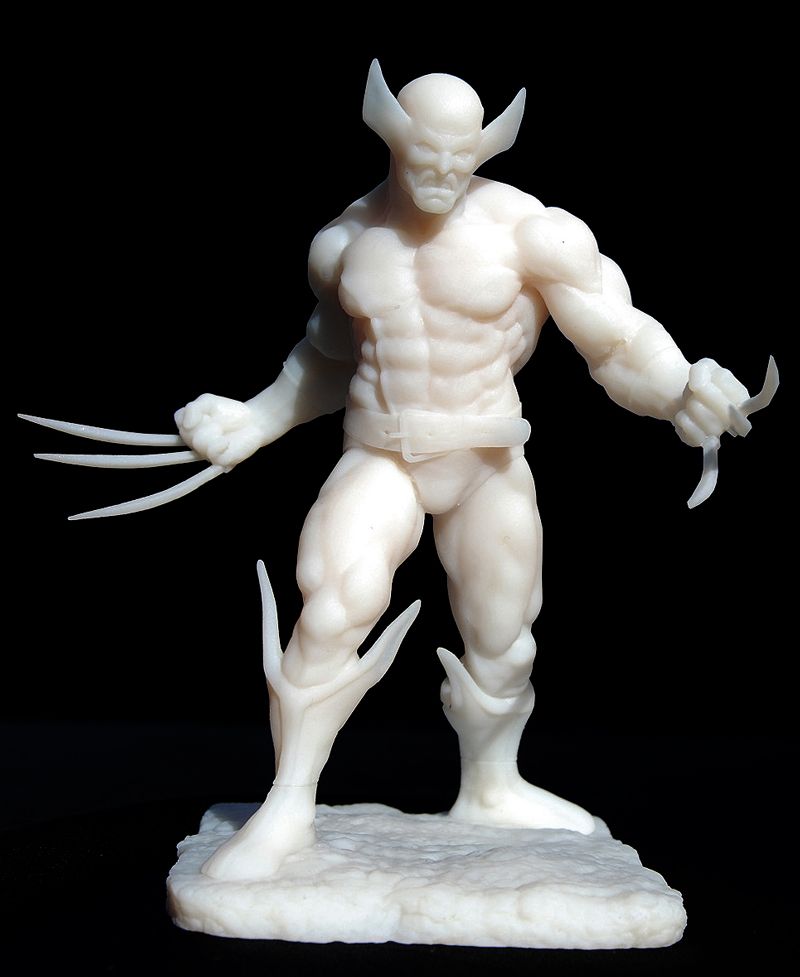
Program for generating 3D characters for games and animation. It has a built-in ActorScan module that allows you to work with photos of real people.![]() Due to the complexity of the settings, it is more suitable for employees of professional film studios
Due to the complexity of the settings, it is more suitable for employees of professional film studios
FaceGen Modeller
The most simple constructor program for creating a virtual head. PhotoFit module for uploading your own images. The resulting model can be exported to any 3D graphics processing program.
Blender
One of the whales of the 3D industry. With the help of the KeenTools FaceBuilder add-on, six photos from different angles are turned into one 3D head.
123D Catch
Autodesk product, no longer supported by the authors. To create a 3D image, you need 15 photos along the horizontal axis and 20 along the vertical axis. The model is generated automatically and uploaded to any 3D processing program.
Stages of creating a 3D model from a photo
The creation of a virtual model takes place in different ways, depending on the program used. However, several basic steps can be distinguished.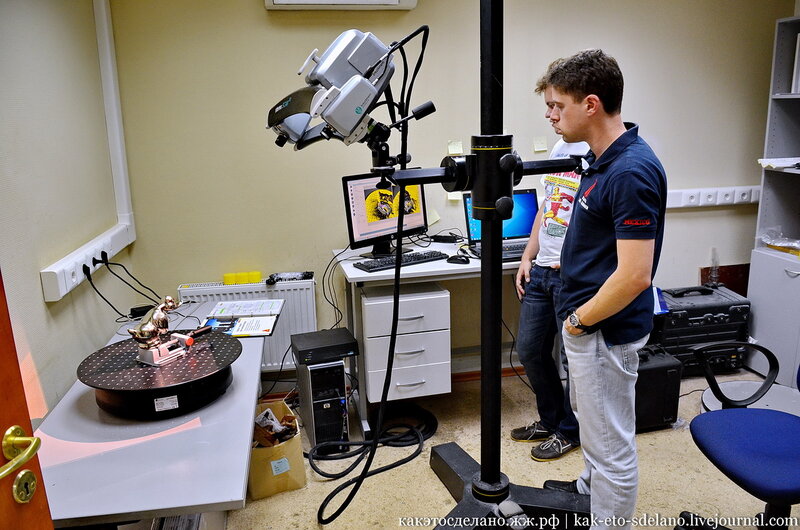
Step 1 Shoot
The subject must be on a solid background. For facial modeling, it is better if a person does not shoot himself, but with someone else's help. If the modeling program requires multiple photos, you should try to take all the photos from the same distance. Ideally, it's best to shoot using one or more tripods. If the software solution allows, separately capture difficult parts or hard-to-reach places, such as the inside of a sneaker or a vase.
Tip:
If the subject is not too big, you can put it on the turntable. So you don't have to keep the same distance to the object - just mount the camera on a tripod and turn the platform to shoot the object from different angles.
Step 2. Modeling
This step depends on the software you are using. Some programs, such as 123D Catch or FaceGen Modeller, automatically create a 3D model from the submitted images. Others, such as Blender, provide the ability to edit using virtual camera views.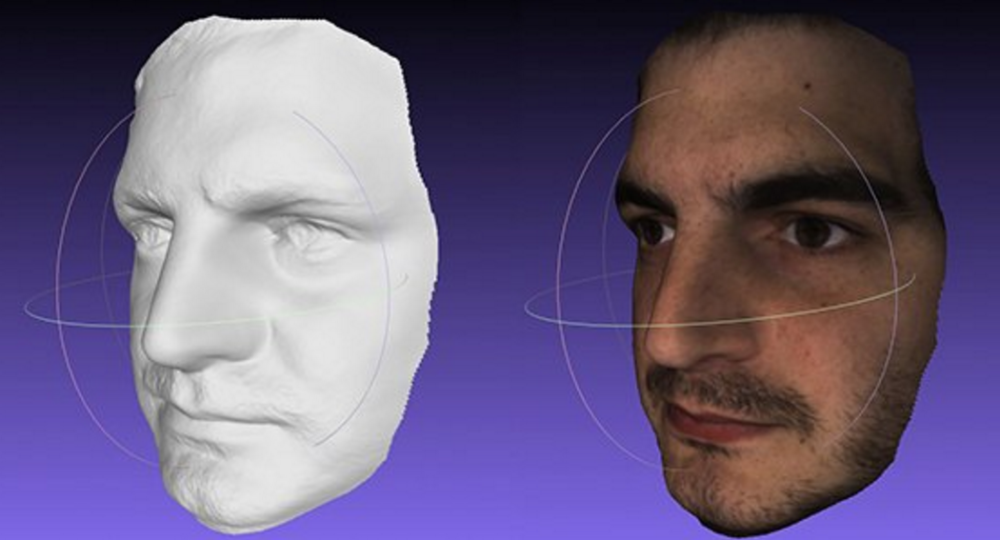
Step 3. Image editing
Most of the programs presented in this review support the correction of the created 3D model. You can also export the model to any 3D editor.
Advantages and disadvantages
Advantages:
- Cost. An alternative to 3D modeling from a photograph is 3D scanning of objects. However, buying or renting a 3D scanner is not cheap. If generating a 3D model is a one-time task, then it will be financially more profitable to do it based on photographs
- Ease of execution. You just need to take photos, upload them to the program and follow the prompts
- Speed. No matter how complex the object is, it is unlikely that the process of modeling from a photograph will take more than one day
Flaws:
- When photographing, it is difficult to maintain the same distance to the subject, which leads to perspective distortion
- Objects modeled from photographs usually require editing
- Unable to simulate space inside an object
How to order a service?
TWIZE implements your ideas at affordable prices.