3D print cone
Cone best 3D printing files・Cults
Truncated cone feet with screwhole
Free
cone cooler
€0.54
Chod Rig Cone - Carp Fishing Tool Boilies
€1
Pine cone + leaves decor
€0.93
BT-50 Nose Cone with Adjustable Weight
Free
Skull Doob / Cone holder (with & without 8x2mm magnet insert)
Free
Ovoid Clock
€1.50
RC cone
Free
3D printed cryogenic reflux capsule (Chinese incense)
Free
Small Traffic Cone
Free
workshop tool holder
€0. 50
pine cone cookie cutters
€1.81
Cute Icecream
€3.71
ice cream and cone.
Free
Ice cream Squishmallow
Free
Gaslands Construction Cone
€1.39
Cookie Cutter Construction Construction x5
€1.76
Ice Cream Cone with Swirl
€0.70
Key clip Carabiner Ice Cream
€0.75
Traffic Cone
€1.06
ice cream cone sundae wall art ice cream wall decor
€1.16
CSM Yarn Bobbin & Cone Winder Adapter Legare Knitting Machine
Free
3 Monster High basic Earrings Replacments
Free
OCR Ninja grip training 130mm hold 13cm/5,1" roller - armlifting gripbro - file for 3D printing - 3D STL Model Climbing Cone Hanging Hold
€2
Ice Cream Cone
€0. 70
70
Trafficone Mecha Beta
Free
Dropped ice cream cone sculpture corner
€1.30
28mm scale Construction Barricade Set
€2.32
Airvape Legacy Pro Cone and scoop
Free
SALT FUNNEL
Free
IGHINA'S ERIM - ENERGY CONE
€1.49
helical bevel gear
€1
Hot Wheels Cozy Cone (also for Gaslands)
Free
Cleaning mandrel ( Cleaning cone ) HSK-A63 spindle
€1.05
Ice Cream Cookie Cutters
Free
Cone of Apollonius - Conic curves
Free
Candle Cedar Cone
€2.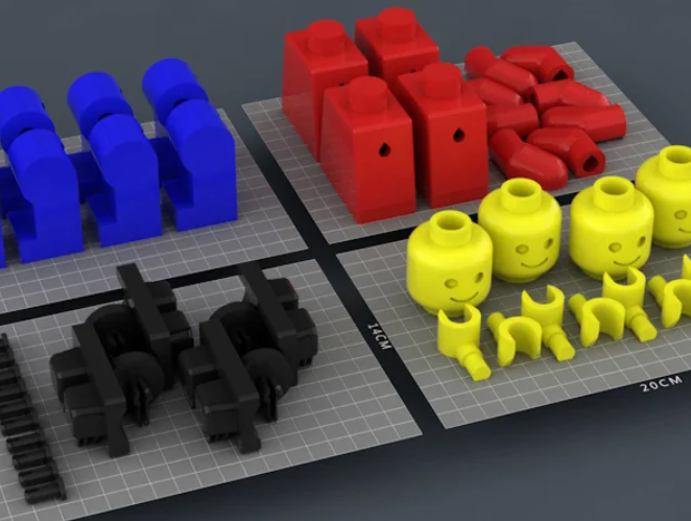 79
79
incense burner
€1.86
Ice Cream Cone 2 - 10mm
€0.85
Traffic Cone Crocs Pin
€1.29
Mini toppers Candy Golosina Ice Cream cone
€0.86
Ice Cream Cone - 11mm
€0.91
Ice Cream Cone - 10mm
€0.91
Cone for flowers candies etc
Free
Ogive Nose Cone
Free
Cone for flowers bigger
€2.24
1-18 Scale Cone
Free
Ice cream key ring
Free
3d Printed Cone - Etsy.de
Etsy is no longer supporting older versions of your web browser in order to ensure that user data remains secure. Please update to the latest version.
Take full advantage of our site features by enabling JavaScript.
Find something memorable, join a community doing good.
( 373 relevant results, with Ads Sellers looking to grow their business and reach more interested buyers can use Etsy’s advertising platform to promote their items. You’ll see ad results based on factors like relevancy, and the amount sellers pay per click. Learn more. )
REC Wiki » Taper Slicing as a More Efficient Method for 3D Printing Hanging Structures
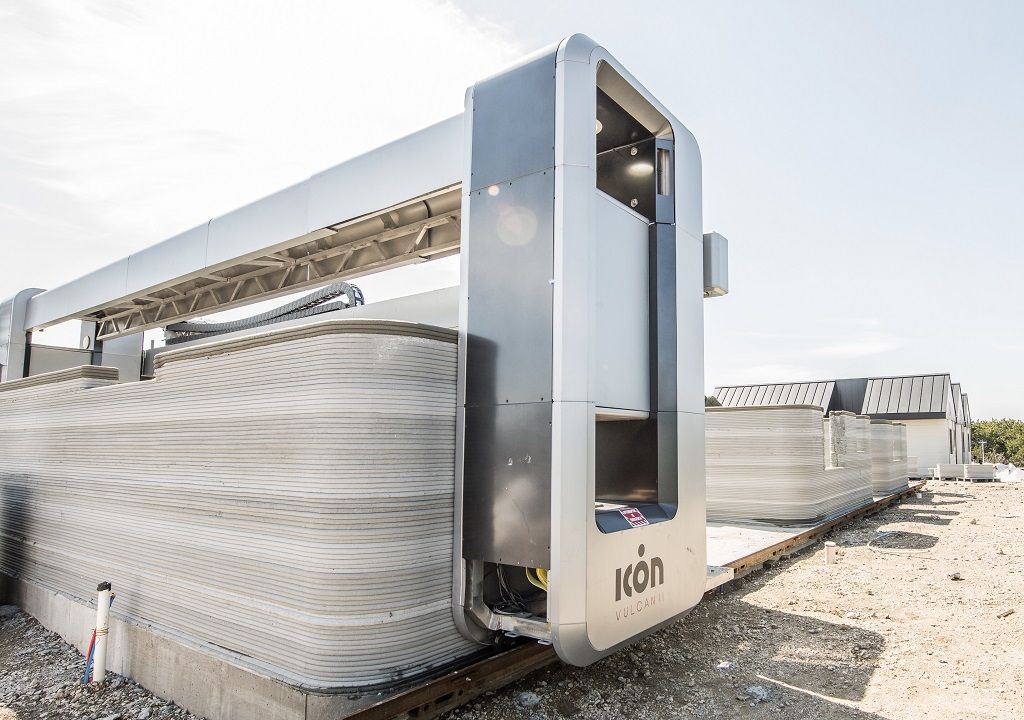
Standard slicers and FDM 3D printers slice 3D models horizontally, often requiring heavy use of support structures. Is it possible to do without supports and reduce material consumption? You can if you use the conical threading method.
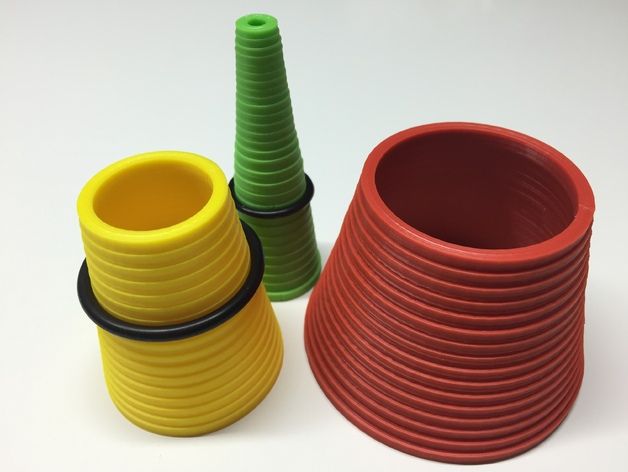
In recent years, several non-planar cutting methods have emerged, although none of them has yet been widely adopted. One of the simplest and most interesting is the so-called conical threading. Such a scheme was implemented by scientists from the Zurich University of Applied Sciences (ZHAW), who assembled a four-axis 3D printer based on the Prusa i3. By mounting the hot end at a 45-degree angle on the rotating head, this system is able to print parts with large projections without building support structures. What is most interesting, the same approach can be used on conventional, unmodified FDM 3D printers with vertical hot ends and get very similar results.
Conventional and bevel cutting and stacking
Conventional 3D printers can print inclined surfaces, but only to a certain extent. At too large angles of inclination, the plastic will be extruded not so much on the already formed layers, but into the air, which means it will slide and sag.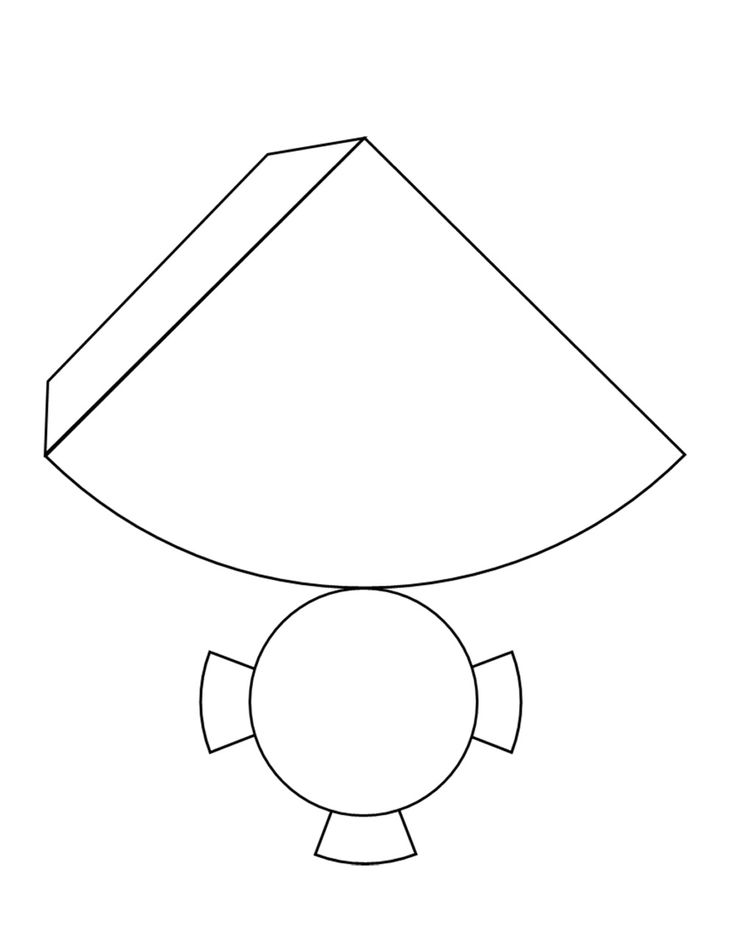 Hence the need to build supports that, after 3D printing, are separated from the model and turn into garbage. With conical cutting, the layers are slightly tilted so that when 3D printing hinged elements, only the edges of the layer line up “in the air”, and even then they maintain contact with neighboring perimeters. All this allows you to print parts of much more complex shapes without support structures.
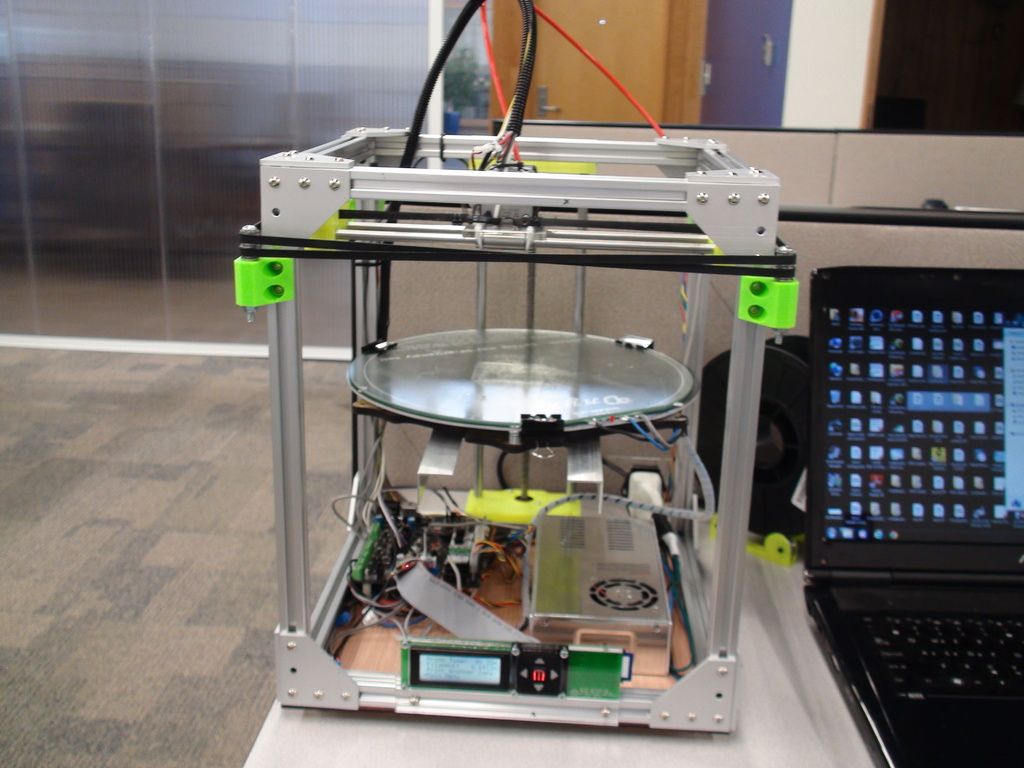
One of the key considerations when using this method on conventional FDM 3D printers is the nozzle length. The nozzle must be long enough (that is, high) so that the rest of the head structure does not touch the laid material, because now the printer prints not strictly horizontal, but inclined layers. A lot here depends on the design of the head: in most cases, the fans and blower pipes leave a very small gap, which seriously limits the slope of the layers. The longer the nozzle, the higher the clearance and the possible angles of inclination of the layers. For example, in the Prusa Mini 3D printer, the cooling system is located quite high, which allows you to tilt the layers at angles of more than twenty degrees. On the other hand, when using the popular Ender-3 3D printers or their many imitations, the easiest solution is to install a nozzle with a long tip. At the same time, it is highly desirable to dismantle the calibration sensors from the head, since they are likely to interfere.
Artillery Hornet 3D printer with extended Airbrush nozzle
The problem is that the higher the cooling systems are, the worse the airflow will be. In some cases, depending on the material, this moment will have to be compensated by a reduction in the paving speed.
The main question is in which slicer to generate machine code? Fortunately, you can use almost any program, but you have to cheat a little. Simply checking the box and switching to the conical cutting mode will not work, since there is no such option yet in any popular slicer, however, any slicer can be fooled and forced to generate the desired G-code using a couple of scripts written in Python. The first script deforms the 3D model in the STL file into the shape of an inverse cone, moving the points of the polygon mesh up by a distance depending on the distance of the point from the central axis.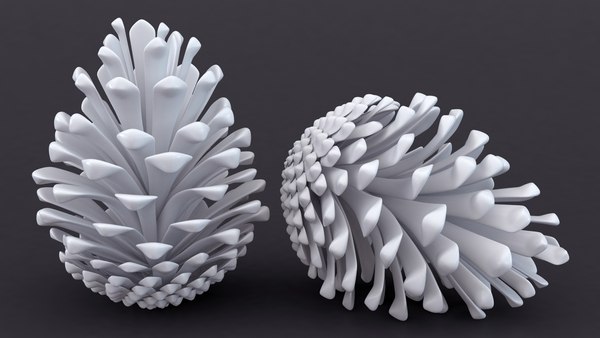 The resulting 3D model is cut in almost any slicer - Cura, PrusaSlicer, Simplify3D or some other. Then the second script converts the machine code back so that the 3D printer prints an undistorted, original model, but with an inclined stacking instead of a horizontal one.
The necessary scripts were developed by the Swiss researchers from ZHAW mentioned above, then modified by Stefan Hermann, the author of the CNC Kitchen Youtube channel, for conventional FDM 3D printers and made available to the public. At the same time, Stefan shared a good example. This example uses SuperSlicer, a variant of PrusaSlicer with some additional and very useful features, such as the ability to export G-code with empty layers.
The STL file is loaded into the slicer with a slightly modified 3D printer profile, where the origin is in the center of the table. The model is placed on the table so that the global Z axis is aligned with the axis of the future cone, and saved.
Then the first script comes into play: you need to specify the angle of inclination in it, after which the script transforms the part into a pre-deformed, “conical” model.
The part is then sliced in the slicer as usual and saved as a G-code.
At the final stage, the name of the file with the machine code is inserted into the second script, which converts the code for building the deformed model into the code for building the original part. The whole process takes just a couple of minutes.
It must be understood that this method is not ideal: not only does it add work, albeit a little, but in some cases it can be less practical than conventional horizontal 3D printing. Please note that the illustrations above show examples with external tabs. If tapered threading is applied to 3D models with internal hinged structures, an even larger volume of support structures will be required than after horizontal slicing. Keep this in mind and choose the most appropriate method according to the circumstances.
10 models for 3D printer calibration. Set up your printer
Before you start printing on a 3D printer, you need to test it.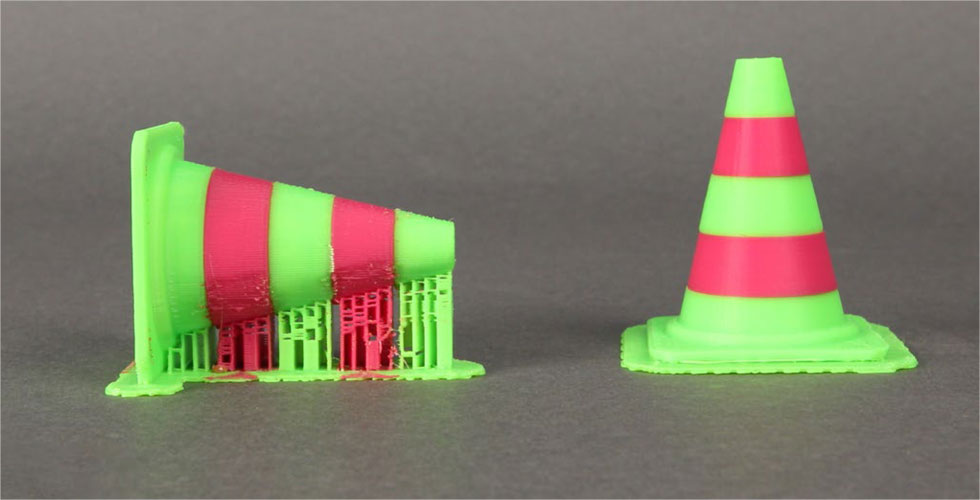 For this, special models are most often used to diagnose and calibrate the device. Next, we will list the top 10 models for calibration, in our opinion.
3D Benchy
Among all 3D printing tests, the flagship is 3D Benchy. This model is a boat that can test everything from protrusions to extrusion. If you want to test your 3D printer, then the benches will help you determine the optimal settings for the ideal result. On Thingiverse, more than three thousand users posted photos with their samples, and the boat itself was printed by more than a hundred machines and no fewer materials.
Model reference
All-In-One
A very interesting model, which is called “all-in-one”. Everything is presented in the model: canopy, bridge, string, temperature and belt tension test, extrusion. This is an ideal model for testing the device at several levels at once. A manual is included with the model to help you troubleshoot any issues you find. On Thingiverse, more than 75 users have posted test results on different 3D printers and different materials.
Model Reference
XYZ Calibration Cube
Very simple and fast model for testing. This is a cube with a side of 20mm. It helps to gain dimension by adjusting the steps in millimeters. Also, the model allows you to test extrusion, vibration, temperature. This cube was printed simply by countless 3D printers and a variety of materials.
Model Link
Cali Cat
Nice little calibration cat or simply Cali Cat is a simple model that allows you to test the accuracy of the device, as well as detailing, lugs, bridges, vibration and extrusion. And all this in just one hour. More than 2.5 hundred users have submitted their test results on the service.
Model Reference
Phil A. Ment
The MatterHackers Mascot is a Phil A. Ment test model. It was originally intended for manufacturers. The description mentions the fact that Phil has several functions. And they were originally designed specifically for 3D printers. The model has small inserts, relief details, cylinders of vertical and horizontal orientation, ledges. In addition, the model contains chamfers, bridges and fillets. And this miracle is performed by a domed helmet. The record size on the service is 5,1397mm. A total of 84 models were published.
Model Link
Calibration Temperature Tower
You can use this model to adjust the heat of your 3D printer. You can also test for different materials at what temperature the print comes out better.
NEW model Autodesk
This is a new model, or rather not even a model, but a whole procedure that will allow 3D printer manufacturers to show all the capabilities of devices to Kickstarter supporters. And of course, calibrate. The test was developed by Andreas Bastian and is a consolidated STL file that is able to test the system for the following indicators:
- authorization;
- alignment;
- accuracy;
- bridge, etc.

The model has it all. For example, if the 3D printer is set up well, then the horizontal function will be performed with a minimum of problems.
Model Link
PolyPearl Tower
If you want to test curves, cuts, bridges, cuts, then this model can be a great solution. In the description for this test model, the name "torture tower with a twist" appears. It is worth trying to use it for calibration.
Model Link
Rapid Screening
This model is a very quick test to check temperature, cooling, and retract function. Among the advantages of the model is its cost-effectiveness. The model will weigh only 0.23g. With its help, you can immediately remove the "strings".
Model Reference
Parametric Calibration Object
A particular difficulty in calibrating a 3D printer is lowering the stage level. With this model, you can draw the right conclusions to improve the first layer of printing, and as a result, get better prints.