3D print conductive filament
3D Print with Conductive Filaflex
Have you ever wanted to create something with your 3D printer that included electronic components? Perhaps sensors, conductive traces or shielding against radio frequency noise?
The FFF/FDM conductive filaments for 3D printing have been designed for users interested in combining 3D printing and electronics. Conductive assemblies that integrate switches, potentiometers, LEDs, capacitive touch sensors... All this and much more is possible thanks to them.
Specifically developed to enable 3D printing of electronically conductive components, conductive filaments are materials that are very easy to print and compatible with almost any FDM/FFF 3D printer on the market.
Applications
Its applications are many and varied, but the following stand out in particular:
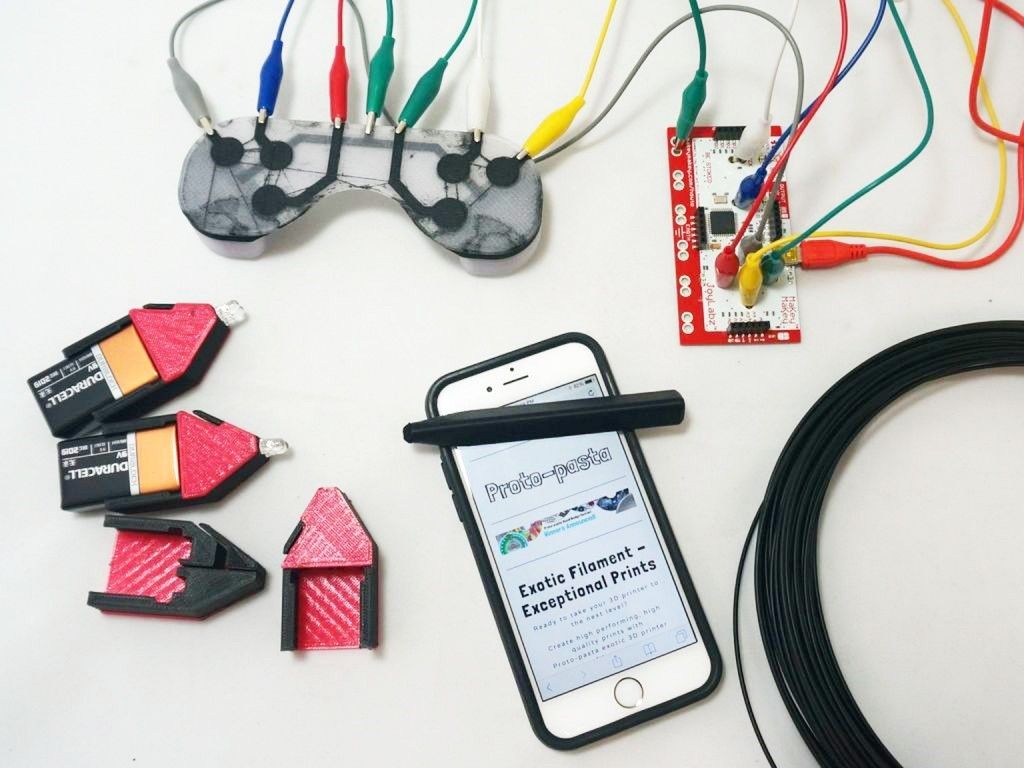
SensorsThe conductive filament can be used to create capacitive (touch) sensors used in a wide range of electronic products that are used in everyday life; It is an excellent material for the design of human interface devices (stylus pens for mobile phones and tablets).
Video 1: Pointer pencil. Source: Proto-Pasta.
Capacitive sensing sensors can also be used to measure proximity, position, humidity, liquid levels, and acceleration.
Conductive tracksAnother application of the conductive filament is in the creation of circuits conducting electricity for uses in electronics which, in the case of flexible conductive filaments, will also be applicable to flexible electronics.
Image 1: Driving circuit. Source: Recreus.
Traditionally, in order to add conductive circuitry to their creations, 3D printing enthusiasts had to design parts with the necessary grooves to add copper wire after printing. With the conductive filament, the wiring can be printed simultaneously with the construction process of the piece.
Shielding against radio frequency noise and electromagnetic interferenceThe high conductivity offered by the conductive filament is not only excellent for 3D printed circuits and sensors, it is also useful for use against EMI (Electromagnetic Interference) and in very important RF (Radio Frequency) shielding applications in a wide range of applications. range of industries. EMI/RF shielding is used to block the electromagnetic field and radio frequency electromagnetic radiation within a space; It is important to use EMI and RF shielding in hospital, laboratory, or aerospace industry settings to protect against competing signals, as these can lead proprietary equipment to give false measurements. EMI/RF shielding accomplishes this by blocking AM, FM, TV, emergency services, and telephone signals. Conductive filament is ideal for designing RF/EMI shields used in highly custom items.
Tips for use
Designed for use with prints intended for room temperature operation and for use on low voltage, low current projects only (not to exceed 12 volts ), conductive filaments should be avoided for power supply exceeding 100mA.
Printing with conductive filaments (PLA) is almost as easy as printing with standard PLA. It is not necessary to have a 3D printer with a heated bed, although if you do have one, it is recommended to use the heated bed at 50-60º C since greater adhesion is obtained.
Possible contamination of the conductive filament with dirt from hands or dust from the environment should be avoided as much as possible, so it is recommended storage in a dry place and away from these and/or other particles. It is also recommended to wash your hands before and after use and treat it with gloves. The user should avoid prolonged exposure to moisture.
A nozzle is recommended for printing conductive filament of at least 0.4 / 0.5 mm. The 3D printer nozzle should always be washed before and after using the filament to avoid printing complications. Conductive filament has a tendency to stick to brass nozzles so it is recommended to clean the external surface of the nozzle before printing with oil (technical or domestic) or lubricant to reduce build-up of the material on the outside of the nozzle during printing. You can also use plastic-repellent paint.
Image 2: Plastic repellent paint.
 Source: Sliceengineering.
The intrinsic properties of the conductive filament are such that it should not be left idle in the extruder of the 3D printer (while not printing) as it can expand and cause clogging of the nozzle ( clogging). Therefore, after printing, the filament should be removed as soon as possible from the extruder and use cleaning filament. cleaning.
Image 3: Cleaning filament. Source: Smart Materials.
It is also very important to print at the recommended temperature, since if you print at a lower temperature, the viscosity of the melt will not be optimal, so it will expand and clog the nozzle; and in case of printing it at a higher temperature, it will result in a partial degradation together with a substantial aggregation of nanomaterials also producing nozzle clogging.
In the event of a total obstruction of the nozzle, try to unclog it by heating the nozzle to 200ºC and try to remove the obstruction with a copper wire, or try to melt ABS or PLA (rigid filaments) to drag the material trapped, or soak it in acetone, etc. In case of not being able to solve the problem, it will be necessary to change the nozzle for a new one. To avoid this, all the advice mentioned above must be taken into account.
On the other hand, it is also very important to have the base of the 3D printer perfectly level, otherwise a significant amount of material will accumulate on the external surface of the nozzle, which when solidified will clog the flow of the melt. Therefore, the outer surface of the cooled mouthpiece should be cleaned with alcohol if this happens.
Conductive filaments on the market
Conductive PLA (Proto-Pasta): With a softening temperature similar to PLA, Proto-Pasta's conductive filament is more flexible, but has less adhesion between layers. Feasible to control any element through a 1Kohm resistor, it is ideal in low voltage circuits, digital keyboards that require low conductivity, arduino, touch sensors, robotics and electronics.
Koltron G1 graphene filament (Addnorth): Doped with Aros Graphene, a graphene developed and patented by the company Graphmatech and with a matrix based on polyvinyldiene fluoride (PVDF), an advanced plastic that has excellent mechanical, chemical and thermal properties, the Koltron G1 filament has a volume resistivity of only 2 Ω-cm.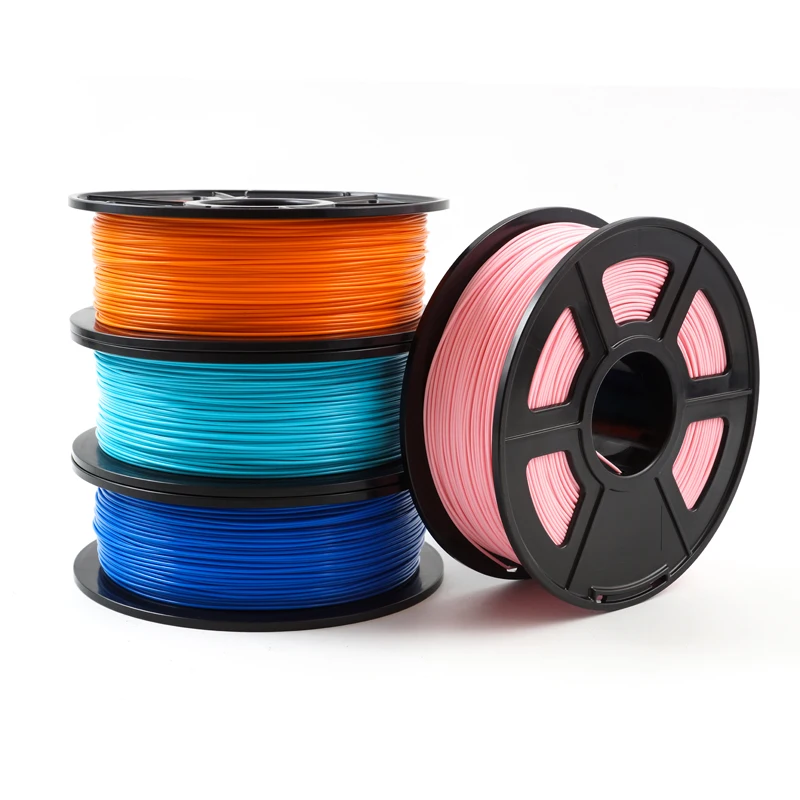
Filaflex Conductive (Recreus): Next, we will take a closer look at this filament.
Filaflex Conductive (Recreus)
The Conductive Filaflex is a flexible TPU elastic filament. With a 92A hardness, it reaches 100% elongation at break. After stretching it returns to its original shape, without deforming or breaking, presenting excellent mechanical properties. The Filaflex Conductive filament offers a volumetric resistivity of approximately 3.9 Ω-cm, much higher than that of other conductive filaments.
From the manufacturer itself, we are offered a series of tips capable of solving any questions that may arise when printing with this filament:
- Hardened nozzle: It is not necessary to use it with the Filaflex Conductive filament. However, in case of intense use, it would be recommended to avoid excessively rapid wear of it.
- Security: Printing with Conductive Filaflex filament is totally safe and will not damage the printer, but to keep it in optimal conditions it is advisable to clean the nozzle very well when you finish printing with the filament.
 Thus, any type of rest that may have remained in the hotend will be eliminated. Using X after printing is an extra step that will also help with cleanup.
 - Conductive material: For the filament to be conductive, Recreus informs that they use a special formulation that contains carbon black and it is this element that gives conductivity to the Filaflex Conductive filament.
- Flexibility: After printing with the filament, its characteristic elasticity is not lost. The resulting final piece will always be flexible and electrically conductive, keeping its other properties intact.
- Shore Hardness: It has a Shore hardness 92A, making it compatible for use in almost any printer (bowden included).
- Resistance: Filaflex Conductive has an electrical resistivity of approximately 3.9 Ω-cm, but to ensure compliance with its functions, the user must take into account that the resistance changes depending on the print.
 In addition, we must also consider the electrical resistance of the circuit and do not forget that the filament is designed for low current applications.
 - Adhesion between layers: Due to its high carbon load, the heat will be dissipated very quickly and the adherence of the piece will be affected depending on its geometry. By adjusting some printing parameters (speed 20-25 mm/s, temperature 240-255 ºC, don't use layer fan) the user will be able to solve such rapid dissipation.
Video 2: Flexibility and conductivity with Filaflex Conductive. Source: Recreus.
In conclusion, conductive filaments are materials specifically designed to allow 3D printing of electronically conductive components using almost any FDM/FFF 3D printer available on the market, expanding the capabilities of additive manufacturing or 3D printing and allowing to shorten the path from development to commercial application.
Do you want to receive articles like this in your email?
Subscribe to our monthly newsletter and you will receive every month in your email the latest news and tips on 3D printing.
* By registering you accept our privacy policy.
All About Conductive PLA 3D Printing Filament: Materials, Properties, Definition
Resources3D Printing DesignAll About Conductive PLA 3D Printing Filament: Materials, Properties, Definition
Learn about conductive PLA 3D printing filament and how it's used in manufacturing.
By Team Xometry
September 19, 2022
8 min read
RECENT STORIES
Video: The Injection Molding Process, From Start to Finish
December 1, 2022
1 min read
5S Principles in Lean Manufacturing
December 1, 2022
12 min read
Rapid Injection Molding: Definition, Components, and Materials
November 23, 2022
11 min read
Conductive PLA (Polylactic Acid) is a 3D printing material specifically designed to transmit electric current. This property allows the manufacture of parts with integrated electrical circuits or anti-static enclosures for use with sensitive electronics. The first graphene-infused PLA filament was developed by Graphene 3D Lab in 2015. Graphene 3D Lab has since changed its name to G6 Materials.
Conductive PLA is a low-cost way of powering low voltage (0 to 60 V) electronic devices while also maintaining some of the mechanical strength of PLA. The additives do, however, negatively affect the mechanical properties of the PLA to some degree. Printing with conductive PLA requires no special processes. The same settings that are used for standard PLA can be used for conductive PLA. A typical resistivity for conductive PLA is 0.6 Ω-cm. The main advantages of conductive PLA are its low cost and ease of use. Some typical applications are shown in Figure 1 below:
Slide 1 of 1
A variety of conductive PLA printed parts.
Image Credit: www.3dinsider.com/Types of 3D Printer Filaments
What is Conductive PLA 3D Printing?
Conductive PLA (Polylactic Acid) 3D printing filament refers to PLA filament that is able to transmit electrical current.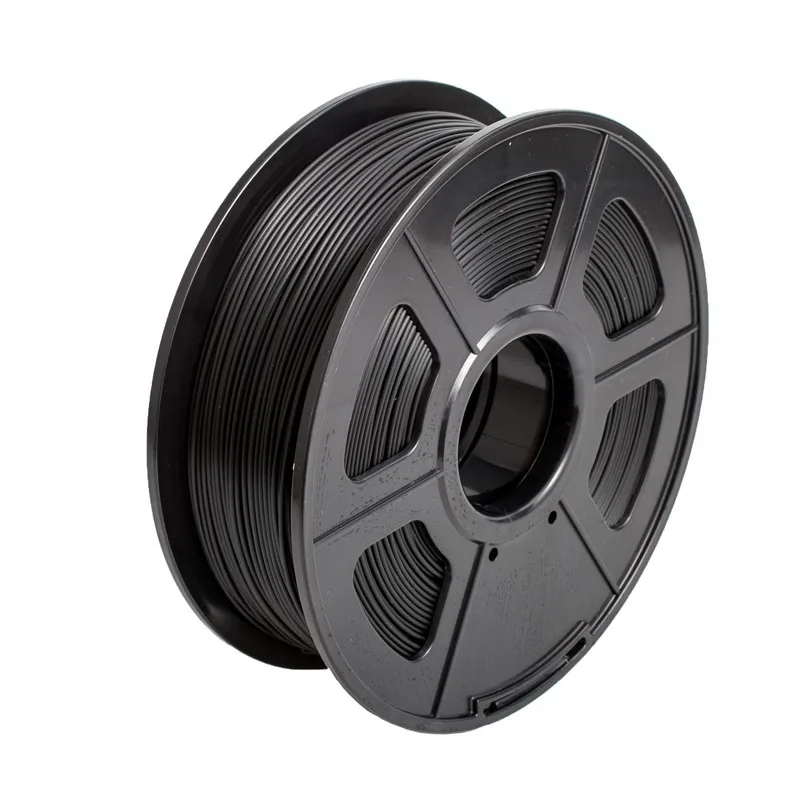 Conductive PLA is one of the most popular conductive filaments due to its ease of use and relatively low cost. According to a recent study, conductive PLA shows promise in the development of sensors for use in wearable electronics.
What is the Composition of Conductive PLA Filament?
Conductive PLA 3D printing filament is made by mixing conductive additives into the PLA base polymer. These additives make standard PLA slightly conductive. Some of the common additives are listed below:
- Carbon Black: Carbon black is powdered carbon that is often used as a pigment. However, when a specific grade of carbon black is mixed in with PLA, the conductivity of the composite filament material is increased. Carbon black is the cheapest form of conductive PLA 3D printing filament.
- Graphene: Graphene is a planar sheet of carbon atoms arranged in a hexagonal pattern. The arrangement of the carbon atoms means that each atom has one free electron, which aids in the transmission of current.

- Metal-filled: Metal powder like copper or bronze can be mixed into the PLA to increase conductivity. Metal-filled PLA has some of the best conductivity ratings.
What are the Properties of Conductive PLA Filament?
Polylactic Acid (PLA) is one of the most popular 3D printing filaments due to its low cost and ease of use. PLA is a semicrystalline thermoplastic. Its partially ordered molecular structure gives it a distinct melting point, unlike amorphous polymers, which have no such distinct phase transition. Listed below are some common properties of conductive PLA 3D printing filament:
- The percentage of conductive PLA particles added to the base polymer is typically up to 80% by volume.
- The resistivity of the material on a part’s XY plane, i.e. parallel with the bed plate is typically up to 30 Ω-cm.
- The resistivity of the material along a parts’ Z axis, i.e. parallel with the bed plate is typically up to 115 Ω-cm.
- The maximum safe current that can be transferred through the conductive PLA is typically up to 100 mA.
 The maximum safe voltage that can be applied across the PLA is typically up to 60 V.
 - The resistance of a 10 cm length of 1.75 mm diameter filament is typically between 2000 and 3000 Ω.
Comparison of Conductive PLA Filament Properties
The properties of some common conductive PLA 3D printing filaments are listed in Table 1 below:
Table 1: Comparison of Different Brands of Conductive PLA
| Property | Protopasta Conductive PLA | Electrifi Conductive Filament | Black Magic 3D (Conductive Graphene PLA Filament) |
|---|---|---|---|
Property Resistivity (Ω-cm) | Protopasta Conductive PLA 30 | Electrifi Conductive Filament 0.006 | Black Magic 3D (Conductive Graphene PLA Filament) 0.6 |
What are the Limitations of 3D Printing with Conductive PLA?
Conductive PLA 3D printing filament is a popular choice for experimenting with electrical applications.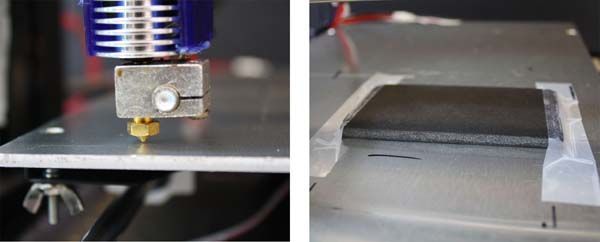 However, there are some shortcomings that need to be understood prior to using the material. The key challenges to using conductive PLA filament are listed below:
- Conductive PLA is still not very conductive, despite its name. These materials offer a small amount of conductivity for special applications but are not meant to efficiently transfer electrical current. Nothing is better than a metal conductor like a copper wire.
- The addition of additives like carbon black, graphene, or metal powder will increase the brittleness of PLA. PLA is already classified as a brittle material, and conductive PLA will be even more susceptible to cracking when subjected to impact loading.
- Only low-voltage components can be powered through conductive PLA. This characteristic considerably limits the potential applications of the material.
- A part printed with electrically conductive PLA 3D printer filament will have lower conductivity along the z-axis due to the fact that the individual part layers are not as seamlessly bonded to each other as the material within a particular layer.
One big advantage of conductive PLA 3D printing filament is that it has ESD (Electrostatic Dissipative) properties. This property means that it does not allow a static charge to build up on its surface.
Why is Conductive PLA Used in 3D Printing?
Conductive PLA filament is mainly used for a range of low-voltage electrical applications, some of which are listed below:
- Conductive PLA 3D printing filament can be used to create parts that can transmit current through their structure without the need for electrical cabling. However, this application is limited to low-power applications like powering an LED light.
- Conductive PLA 3D printing filament can be used for electromagnetic and radio wave shielding to eliminate the interference of other signals on sensitive electronic equipment. This type of interference can produce erroneous readings which can skew scientific results.
- One of the best uses for conductive PLA is for capacitive sensors, i.
 e., sensors that respond to touch. These are low-power applications that do not require high levels of conductivity.
How to Use Conductive PLA in 3D Printing
Printing with conductive PLA (Polylactic Acid) 3D printing filament is generally as simple as printing with standard PLA, with a few special requirements. These requirements are listed below:
- Carbon-filled conductive PLA is very abrasive. Therefore, a hardened steel nozzle is recommended.
- Conductive PLA is very brittle. Therefore, it is important to ensure that the filament is guided to the nozzle as gently as possible. Any sharp bends will snap the filament.
What are the Best Configuration Settings for Conductive PLA 3D Printing?
The specific settings to use when printing with conductive PLA 3D printing filament depends on the filament brand. However, some general guidelines for printing with conductive PLA filament are listed in Table 2 below:
Table 2: Conductive PLA Printer Settings
| Printer Setting | Value |
|---|---|
Printer Setting Extruder/Nozzle temperature | Value 215 °C |
Printer Setting Bed temperature | Value 60 °C |
Printer Setting Print speed | Value 25 and 45 mm/s (10 mm/s for metal filled) |
Printer Setting Flow of filament | Value 2 and 3 mm3/s |
Printer Setting Extrusion Width | Value 0. |
 45 mm
45 mmWhat is the Best Conductive PLA 3D Print Speed?
Conductive PLA 3D printing filament tends to be brittle. The filament can easily snap during high-speed printing maneuvers. It is therefore recommended to print at speeds as low as 10 mm/s for more complex printing tasks. This lowered print speed may take longer, but it will ensure a successful print.
What is the Melting Temperature of Conductive PLA Filament?
Typical melting temperature of conductive PLA is between 230-250 °C, but still varies based on brand. The extruder temperatures of various conductive PLA (Polylactic Acid) 3D printing filaments are listed in Table 3 below:
Table 3: Recommended Extruder Temperatures for Typical Conductive PLA 3D Printing Filaments
| Filament Type | Conductive PLA Filament Extruder Temperature (°C) |
|---|---|
Filament Type Protopasta Conductive PLA | Conductive PLA Filament Extruder Temperature (°C) 215 |
Filament Type Electrifi Metal-Filled Conductive PLA | Conductive PLA Filament Extruder Temperature (°C) 130 to 160 |
Filament Type Black Magic 3D Conductive Graphene PLA | Conductive PLA Filament Extruder Temperature (°C) 220 |
Filament Type Amolen Conductive PLA | Conductive PLA Filament Extruder Temperature (°C) 220 to 250 |
Is a Heated Printing Bed Required When Printing with Conductive PLA?
No, a heating bed is not strictly required for printing conductive PLA. However, for larger parts, it may be required to prevent warping.
What is a Good Wall Thickness for 3D Printing Conductive PLA?
The optimal wall thickness for a conductive PLA part depends on how the product will be used. If it is used for an ESD (electrostatic discharge) enclosure, a thicker wall thickness may be required to improve structural integrity. This requirement is because conductive PLA is structurally weaker than standard PLA. However, in general, a wall thickness of 1 mm will be good enough for most applications.
What is a Good Wall Density for 3D Printing Conductive PLA?
The infill density for conductive PLA is best kept at 100%, meaning the part is completely solid. A solid structure will more effectively transmit current. It may be therefore beneficial to print the conductive parts of a design separately to save on material as conductive PLA is more expensive than standard PLA.
What is the Difference Between Conductive PLA and ABS in 3D Printing?
Conductive PLA and conductive ABS (acrylonitrile butadiene styrene) will both transmit electric current in a similar matter. However, conductive ABS will have better toughness than conductive PLA.
Summary
This article presented conductive PLA 3D printing filament, explained what it is, and discussed all of the different factors to consider when using it. To learn more about conductive PLA 3D printing filament, contact a Xometry representative.
Xometry provides a wide range of manufacturing capabilities, including 3D printing and other value-added services for all of your prototyping and production needs. Visit our website to learn more or to request a free, no-obligation quote.
Disclaimer
The content appearing on this webpage is for informational purposes only. Xometry makes no representation or warranty of any kind, be it expressed or implied, as to the accuracy, completeness, or validity of the information. Any performance parameters, geometric tolerances, specific design features, quality and types of materials, or processes should not be inferred to represent what will be delivered by third-party suppliers or manufacturers through Xometry’s network. Buyers seeking quotes for parts are responsible for defining the specific requirements for those parts. Please refer to our terms and conditions for more information.
Team Xometry
This article was written by various Xometry contributors. Xometry is a leading resource on manufacturing with CNC machining, sheet metal fabrication, 3D printing, injection molding, urethane casting, and more.
3D printing and conductive threads create clothes with buttons
Engineers from the Netherlands and Canada have developed a method to create a two-layer garment with buttons integrated into the fabric. They suggested embroidering an electrical circuit with conductive threads and using a 3D printer to print plastic buttons on fabric with thin metal plates that complete the circuit. An article on the method was presented at the DIS 2020 conference.
There are quite a few attempts to create smart clothes: mostly research projects, although there are already commercial examples, such as the jacket from Google and Levi's. As a rule, they have the same, still unsolved, problem: it is difficult to make clothes with electronic components as flexible, stretchable and, as a result, comfortable to wear as regular jackets or sweatshirts. In particular, there is a problem with the buttons, so you have to use either flat touch surfaces that do not give the usual tactile response, or ordinary hard buttons that are uncomfortable to wear on the body.
Engineers led by Rong-Hao Liang of Eindhoven University of Technology have created a simple method that allows buttons to be embedded in clothing, and is based on standard sewing methods. The clothing created by this method consists of two layers of fabric. On the bottom layer, on the inside, it is necessary to embroider a simple electronic circuit, consisting of intersecting, but not touching, conductive threads, embroidered along and across.
On the top layer outside, engineers printed with a 3D printer or embroidered with a sewing machine buttons in the form of hexagons with a circle in the middle. As in the case of the bottom layer, before that the fabric was stretched. Due to this, after the button was printed and the fabric stopped stretching, the area of \u200b\u200bthe fabric with the button rose above the rest part and took shape.
The authors pasted thin copper plates onto the inside of the button layer. When the user presses the button, the plate comes into contact with two intersecting conductive traces of the adjacent layer, and a circuit is closed, which is registered by the Arduino board connected to them.
For example, the authors sewed a sleeve with an array of hexagonal buttons: such a sleeve can track pressing both individual buttons and several buttons at the same time in real time.
Recently, American engineers have learned how to create clothes with dozens of temperature and motion sensors. It has strips with conductive paths and sensors hidden from others between layers of fabric. Data from them is collected by a small device that is fastened to clothing through ordinary fasteners.
Grigory Kopiev
Found a typo? Select the fragment and press Ctrl+Enter.
3D printing filaments
Dear friends, welcome!
This article would like to highlight the appearance of threads in printing. I will try to note the main factors influencing the appearance of threads.
1) Idling speed and acceleration. The idle run consists of the following stages - first there is a retract, then the movement of the extruder, then again a retract. The plastic is spontaneously squeezed out precisely during the idle time, forming various kinds of defects. Now imagine an example if the idling takes zero seconds. Under this condition, the plastic will not have time to spontaneously extrude. Therefore, the higher the speed and acceleration, the less time the idling lasts, which means there will be fewer threads. But speed and acceleration are limited by the motor driver, the motors themselves, and the rigidity of the printer frame.
Therefore, you can try to slightly increase the speed and acceleration with each print, but at the same time make sure that the motors do not overheat, otherwise microsteps may be skipped, which will lead to print rejects.
2) Idling path. Different slicers process parts according to different algorithms, which means that the idling trajectory may differ. Some slicers build more rational extruder motion than others. Therefore, you can try to prepare the same part in several slicers and stop at the option that will be more rational.
3) Feeder dependent, i.e. from the plastic supply system. Printers most often have one of two options: "bowden", i.e. far-distance or "direct", this is when the "feeder" is located near the extruder. Under the same printing conditions with direct, there will always be fewer threads than with bowden. But this does not mean that you can always switch from Bowden to Direct. It may also be that your printer will not be able to work with "direct" for one reason or another. The transition to "direct" must be considered with each printer individually.
4) Retract setting, i.e. plastic rollback - its task is to remove the residual pressure in the extruder during idling. Without retract, the threads will appear more intensely. For most printers, the values are as follows - for direct, the range is from 1 to 6mm, and for bowden, from 4 to 12mm. (the amount of retract also depends on the diameter of the nozzle).
5) Plastic quality. If you are constantly printing only budget plastics and are unhappy with the result, then try to buy plastic in a higher price category, and more importantly, with good reviews. And then compare the print quality. But the main thing - from different manufacturers, compare the same types of plastic - you should not compare, for example, ABS from one manufacturer, and PLA from another.
6) Plastic drying. By the way, this applies to almost all plastics, not just nylon. If you have unnamed or cheap plastic in your hands, it is recommended to dry it after opening it, because. it is not known whether the plastic was dried before packaging.
7) Nozzle diameter. The larger the diameter, the more plastic will spontaneously squeeze out during idling. There is nothing you can do about it, it just needs to be taken into account when choosing a nozzle diameter.
8) Extruder temperature. If you heat the extruder to the upper limit of the recommended range (indicated on the plastic that is being printed), then the fluidity of the plastic will be higher, and it will be more easily extruded from the nozzle. Plastic manufacturers give a temperature range for a reason. If you set the print speed to high, then the extruder temperature should be in the upper limit of the range. But if the print speed is low, then there is no need to heat up the extruder much, otherwise filaments may appear due to overheating of the plastic.
Therefore, you can try to reduce the temperature of the extruder as follows - during printing, every couple of minutes, reduce the temperature by 5 degrees over and over and watch the print closely. If the threads disappear, remember the temperature and stick to it. But if the temperature is greatly lowered, then the plastic will not be able to extrude at all. Don't overdo it.
9) Dependence of temperature on the type of extruder. There are many different models of extruders. For example, consider the E3D V6 and E3D V6 Volcano extruder. The E3D V6 Volcano has an extended nozzle and an extended aluminum block. And this means that the zone where the plastic is in the molten state is larger, so it can push through a larger volume of plastic per unit of time. As a result, this extruder will be able to print at higher speeds than the regular E3D V6. But here you need to understand the following - if you have a "powerful" extruder, and you print at low speeds, then the plastic will overheat, which will lead to the appearance of threads. Therefore, for powerful extruders, it is better to set the temperature in the lower limit of the recommended range. And on the contrary - for an extruder that cannot heat up a large amount of plastic, the temperature should be kept in the middle or at the upper limit of the recommended one.
The conclusion here is the following - for different models of extruders, different printing temperatures are needed.
10) Free travel distance. If you are printing multiple parts at once, try to space them closely to reduce the dry travel distance. Well, if a solid part is printed, with individual elements at a great distance from each other, in this case, you can try to change the location of the part in space so that there are fewer idle moves.
11) File analysis before printing. When your G-code is ready, do not be lazy and meticulously analyze it before printing, because. at the verification stage, you can detect unwanted elements that can create various kinds of defects, including the appearance of threads. By the way, in whatever slicer I prepare the file, I almost always check the finished code with the help of “Repetier-Host”, because it shows all the movements that can lead to certain defects.
12) Plastic type. All plastics have both strengths and weaknesses.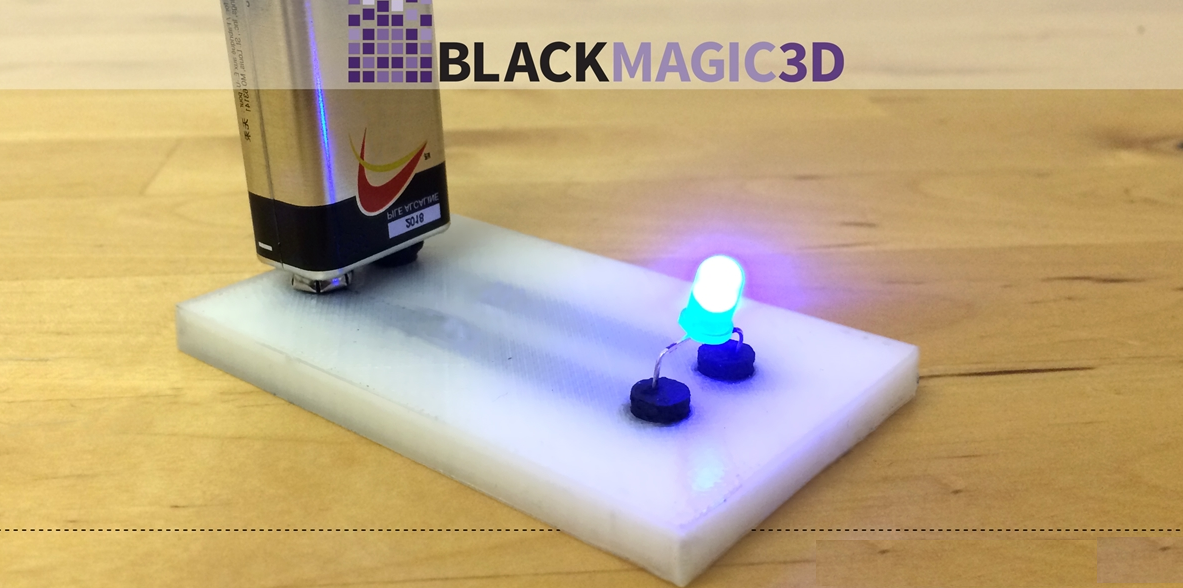 For example, PETG plastic has a high tendency to filament. ABS, on the other hand, has a low predisposition to threads, but it will have to concentrate on the problem of shrinkage and a low degree of sintering of the layers.
Therefore, before printing, familiarize yourself with the pros and cons of the plastic with which you plan to print.
13) Using the "Lift Z" function. When enabled, a gap will be created between the extruder and the printed part. It is needed so that during idle the extruder does not cling to the outer walls of the part. This feature can significantly reduce the number of threads. But it should be used if the printer has a powerful driver and a motor along the Z axis, as well as a screw with a thread pitch of at least 8mm. This is necessary to achieve high speed and acceleration on the Z axis. Well, if you try to use this function at low speeds, the problem will only get worse and there will be more threads, because. idle time, taking into account "Lift Z", will increase greatly.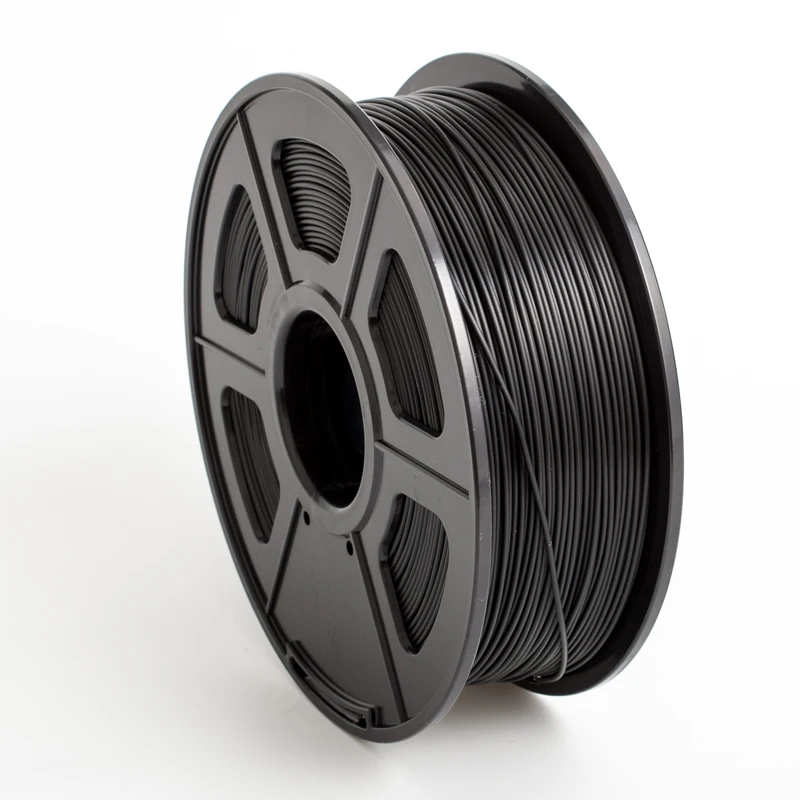 The idling time with the "Lift Z" function consists of: movement along the Z axis + retraction + idling + retract + movement along the Z axis.
Therefore, you can try to experiment with this function and see the result.
14) Problems with the extruder. Imagine a situation where you put a large retract, but a large plug of melted plastic formed in the thermal barrier between the nozzle and the Teflon tube. In such a situation, no matter how big you put the retract, this plug will not disappear, but will remain in its place. And, therefore, the retract will not be able to completely relieve the pressure in the system. Therefore, keep your extruder clean and in good working order.
15) Problem with the driver on the motor in the feed system (motor on the feeder). It's a rare phenomenon, but it's still there. I've run into a problem where the driver only spins the motor in one direction, regardless of the command, whether it's spinning one way or the other -- the motor only spins in one direction.