Best budget 3d printer kit
The 10 Best DIY 3D Printer Kits 2022 (Starting at $150!)
Increasingly, makers are turning away from desktop FDM 3D printers, preferring to buy a cheap 3D printer kit and build their own DIY 3D printer from scratch. Some of these are RepRap 3D printer kits, and some are specially designed kits.
The 3D printer kit revolution has reduced prices, led to a number of key breakthroughs, and has made 3D printing more accessible than ever before.
Great Ender 3 Alternative
Amazon here
Best Budget 3D Printer
Amazon here
Best 3D Printer Kit Overall
Buy pre-assembled here
These 3D printer kits can take just a few minutes to assemble, or take hours or even days. They can also vary greatly in price, print accuracy, maximum build and print speed. Some even use technologies other than fused deposition modeling — you can now buy DIY SLS 3D printers and SLA 3D printers.
| 3D printer kit name and brand | Build Volume (mm) | Price | Where to purchase for best price | Alternative Purchase Option |
|---|---|---|---|---|
| Creality Ender 3 | 220 x 220 x 250 | $189 | Creality Store here | Amazon here |
| Prusa Mini | 180 x 180 x 180 | $399 | Prusa Store here | |
| Creality Ender 3 V2 | 220 x 220 x 250 | $279 | Creality Store here | Amazon here |
| Creality Ender 5 | 220 x 220 x 300 | $349 | Amazon here | |
| Flsun QQ-S | 255 x 255 x 360 | $369 | Amazon here | |
| Tronxy X5SA Pro | 330 x 330 x 400 | $399 | Amazon here | |
| Anycubic Vyper | 245 x 245 x 260 | $429 | Anycubic here | Amazon here |
| Creality CR-10 / V3 | 300 x 300 x 400 | $369 / $459 | Creality here | Amazon here |
| Prusa i3 MK3S | 250 x 210 x 210 | $749 / $999 | Kit available available on Prusa Store here | Fully assembled on Prusa Store here |
| Peopoly Moai | 130 x 130 x 180 | $1,295 | Matterhackers here |
Advantages of DIY 3D printers
- Open source: Most homemade 3D printers are also open source 3D printers, meaning they can be tinkered with, upgraded, and modded freely with the creators’ permission. Many Creality, Prusa and Anet printers are open source, as well as desktop 3D printers like BCN3D and Ultimaker printers.
- Open build areas: 3D printer kits rarely feature closed chambers or enclosures as standard. This would affect the printing of filaments like Nylon or PEEK, but is less of an issue for standard filaments like PLA or PETG.
- Easily upgradable parts: DIY 3D printer owners are frequently switching out parts, such as nozzles, hot ends and extruders for better quality parts.
- Lower price: For the quality and size, you get a better deal if you build your own 3D printer.
- Larger build volume: The open build area means that you can have a larger 3D printer build area for the same size, neglecting the need for an enclosing frame.
 Therefore, low cost kits like the Creality CR-10 can have huge build volumes.
Build your own 3D printer: what makes a good DIY 3D printer?
We used several criteria to determine which 3D printer kit made it into our ranking:
- Cheap DIY 3D printer kits: We only included FDM 3D printer kits under $1,500. The printers are listed in price order, cheapest first.
- Print quality
- It it easy to build your own 3D printer: Not everyone is a technology wizard. Therefore, any kit that can be assembled quickly, easily, and is simple to operate, is at an advantage.
The best 3D printer kits
3DSourced is reader-supported. When you buy through links on our site, we may earn an affiliate commission. Learn more
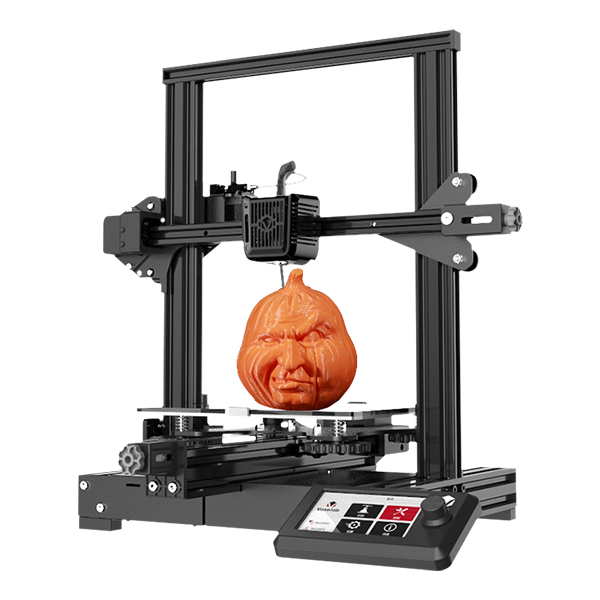
1. Creality Ender 3
- Price: $189 — Available on Creality Store here / Available on Amazon here
- Build volume: 220 x 220 x 250 mm
The original Ender 3 is still one of the most popular 3D printer kits in the world, more than three years after it was originally released.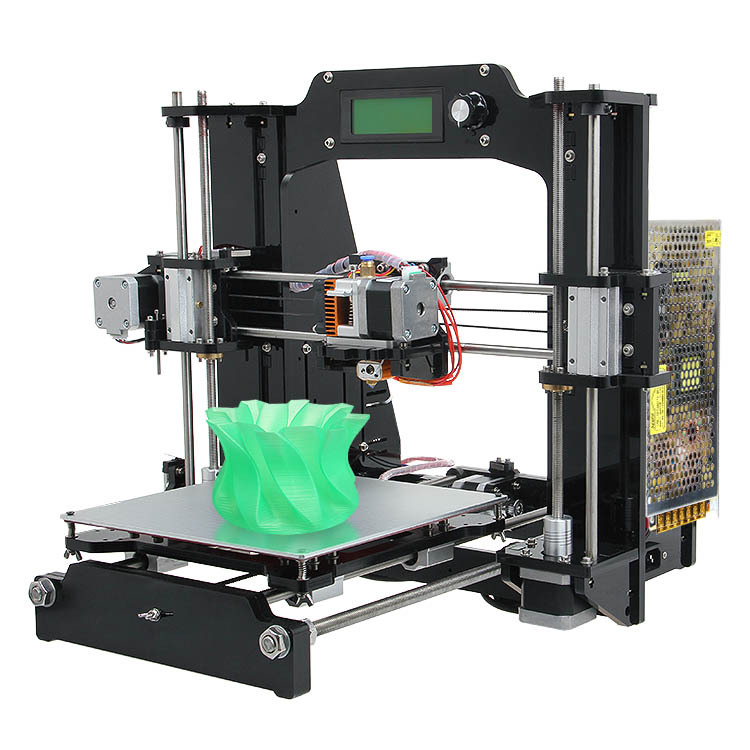 The low price, great build area, and reliability have cemented the Ender 3 as one of the best 3D printer kits around.
The reliability is a major selling point in such a cheap 3D printer kit. Whereas most DIY printers in this price range are plagued by issues caused by low-quality parts, the Ender 3 is dependable and consistent, partly due to its upgraded extruder to prevent clogging or poor extrusion.
The resume printing function is useful if you’re prone to power cuts or want to print for several days straight and don’t want to risk a huge ruined print, and the Ender 3 is fairly quick to assemble, and shouldn’t take more than an hour or so.
However, it doesn’t feature auto-leveling — you’ll need to install a BLTouch or similar kit for that.
Best Budget 3D Printer
Creality Ender 3 3D Printer
The best budget 3D printer kit around - and the best-selling, too. If you have the budget, pick up the V2 or V2 Neo version, or even the Ender 3 S1 if you prefer a direct drive extruder.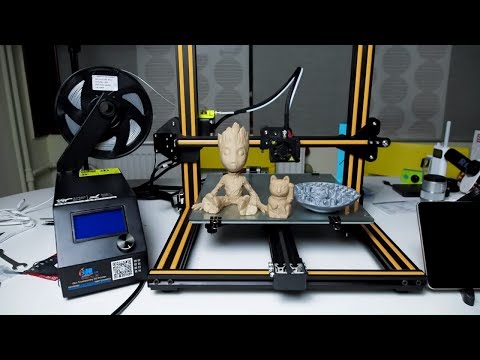
Creality hereAmazon here
We earn a commission if you make a purchase, at no additional cost to you.
2. Prusa Mini — Great Prusa 3D printer kit
- Price: $399 — Available on Prusa Store here
- Print volume: 180 x 180 x 180 mm
- Print speed: up to 200mm/s
The Mini 3D printer version of the wildly successful Prusa MK3S, the Mini retains the 0.05mm layer precision and can still calibrate itself, but costs less than half of the i3 MK3S. With the Mini, you can build your own 3D printer — and one with Prusa-level reliability! — for just $349.
It’s more compact, with a smaller build volume, and features removable spring steel sheets that make removing finished prints extremely easy — just flex the build plate and prints will come off with ease.
The extruder cannot reach the same temperatures during printing as the MK3S, though you can still print a number of tougher filaments like ABS, PETG, ASA and flexible filaments. The Mini retains the fast 200mm/s max printing speed, and can be upgraded to feature a filament sensor.
Overall, it’s another reliable 3D printer by the trusted Prusa brand who have proven over the years that their printers are some of the best 3D printer kits around. If you have the money, go for the MK3S, but for those on a budget, the Mini does a great job.
Best Mini 3D Printer Kit
3. Creality Ender 3 V2 — Best DIY 3D Printer Under $300
- Price: $279 — Available on Creality Store here / Available on Amazon here
- Build volume: 220 x 220 x 250 mm
Building on the success of the Ender 3 and improving and fixing its few flaws, the Ender 3 V2, while the same size build volume, is a much enhanced DIY 3D printer.
The upgraded motherboard makes the printer quieter than ever, and the extra power makes for a much more stable and precise printing experience.
Read more: the quiet 3D printer buyer’s guide
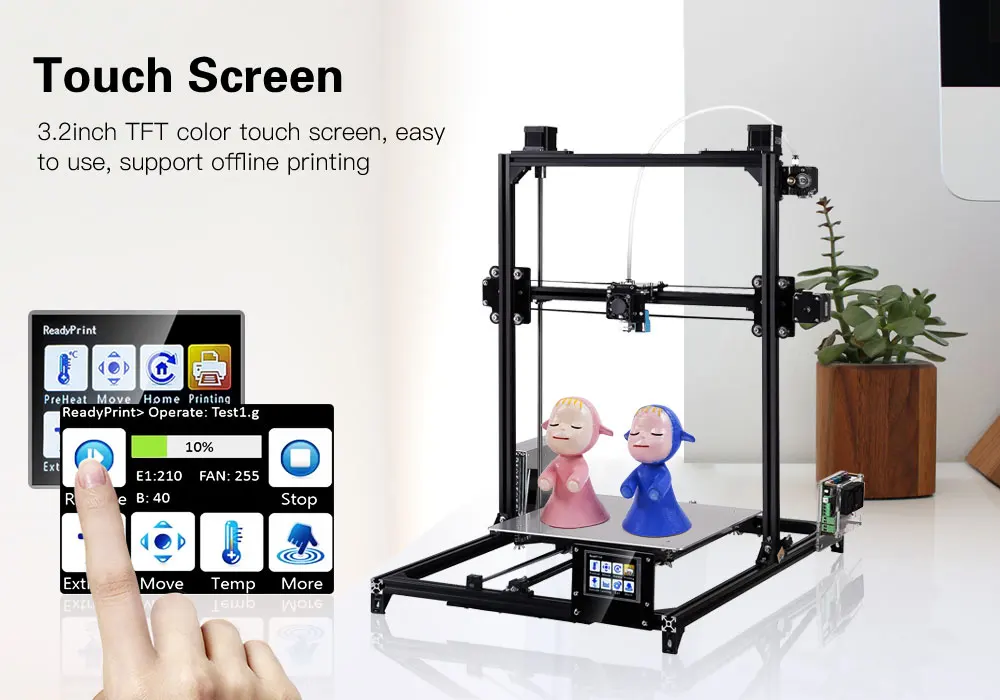
The upgraded extruder is also a great touch.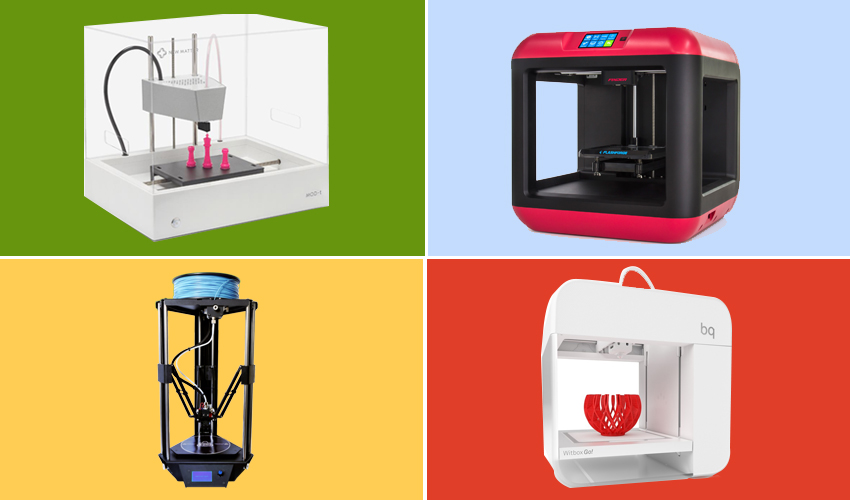 It’s easier to load and feed filament into via the rotary knob, ideal for PLA and flexible filaments. The large 4.3-inch screen makes the interface more intuitive, and the Ender 3 V2 is really easy to use overall.
Another extra is the carborundum glass platform, which can heat up faster than ever and improves adhesion so you can be sure of a great first layer. Overall, if you have the extra $100 to spare, consider going for the Ender 3 V2 over the original.
Top Pick
Creality Ender 3 V2 3D Printer
$279.99
Upgraded version of the original Ender 3 with a number of key quality-of-life improvements.
Creality Store hereAmazon here
We earn a commission if you make a purchase, at no additional cost to you.
4. Creality Ender 5 — The Best DIY 3D printer under $500
- Price: $349 — Available on Amazon here
- Print volume: 220 x 220 x 300 mm
Another Creality kit, the Ender 5 is another great 3D printer you can build at home. The Ender 5 is $100 more expensive, but boasts a number of improvements that make the extra money seem worth it.
Firstly, it can print taller prints than the Ender 3 — 300 mm high rather than 250 — important if you print tall structures like tall vases or monument 3D models. The structure is also stronger, having adopted a cube shape like the Tronxy X5SA which helps with stability, reducing vibrations or movements from external events, and improving part surface finish and quality.
Moreover, the minimum layer height of 50 microns is extraordinary for such a cheap machine. Review after review repeats how crisp the surface finish of their prints look with the Ender 5, so it’s fair to say the Ender 5 is a smash hit.
- For an extra $50 you can upgrade to the Ender 5 Pro printer kit, at $399. It’s available to buy here.
Note: while the Ender 5 can be tweaked to increase print speed without a noticeable loss in print quality, we recommend you don’t get too extravagant with this. Stick with 60 mm/s or below for models with intricate parts — it’s worth a bit of extra printing time to guarantee crisp prints.
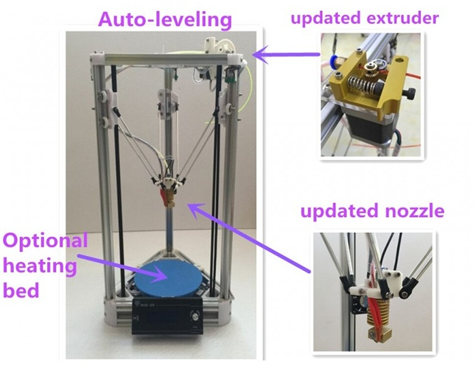
5. FLSUN QQ-S — Great Delta DIY 3D printer
- Price: $369 — Available on Amazon worldwide here
- Print volume: 255 x 255 x 360 mm
- Print speed: up to 300mm/s
One of the best DIY delta 3D printer machines out there, the Flsun QQ-S features notable improvements on the original Flsun QQ. It comes 90% assembled, so though technically still a 3D printer kit it will take under an hour to get up and running.
- We were lucky enough to test the FLSUN QQ-S, make sure to also check out our FLSUN QQ-S review.
Not only does it have a fantastic build volume for the price — especially the ability to print tall parts! — but it also comes with an upgraded lattice glass print bed, allowing for faster heating up to 100C in under 5 minutes, less warping and better adhesion during 3D printing. This is perfect for materials such as ABS filament, which are known to warp significantly under the wrong conditions.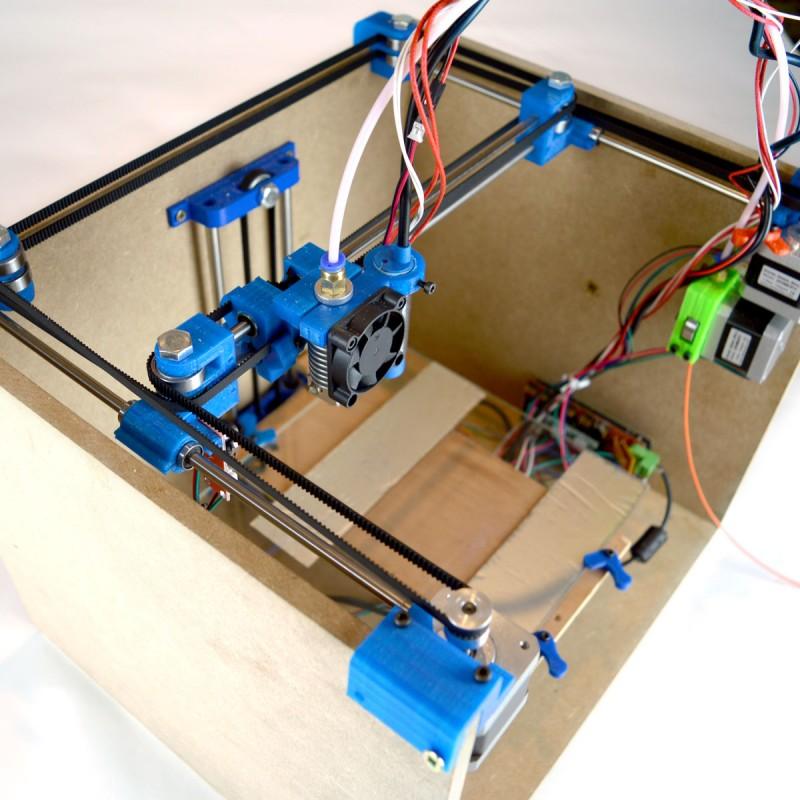
Another advantage that beginners will enjoy is that as delta 3D printers don’t move the print bed — the print head does all the moving — the printer only needs to be auto-leveled once. It comes with a titan extruder, and can print with common printing materials like PLA and ABS, PVA, and HIPS for supports, as well as wood-filled filaments and flexible filaments.
It’s accurate, too, able to print at up to 50 microns. Overall, it’s a fantastic delta 3D printer kit that prints accurately, and super fast — it even made it into our fastest 3D printer ranking. It’s also one of the easiest DIY 3D printers to build, coming almost fully assembled — you just need to attach the gears and rods to hold the structure up, and then attach the extruder and filament holder.
Best Delta 3D Printer Kit
FLSUN QQ-S-PRO Pre-assembled Delta 3D Printer
$399.00
Amazon here
We earn a commission if you make a purchase, at no additional cost to you.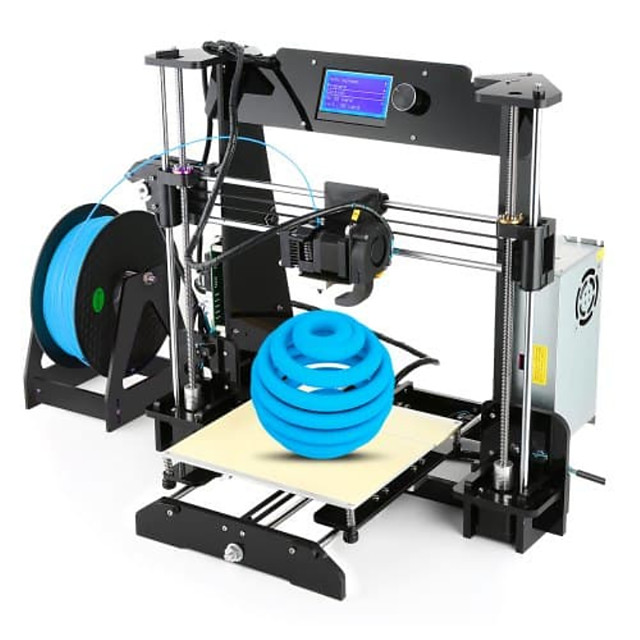
12/04/2022 06:00 am GMT
6. Tronxy X5SA Pro — Huge Self-Assemble 3D printer
- Price: $399 — Available on Amazon here
- Build volume: 330 x 330 x 400 mm
Kit 3D printer kings Tronxy showed humility and dedication to improve the X5SA Pro, fixing a number of small issues that affected the original. The X5SA Pro addresses the X-axis issues and has made it more stable, and upgraded the materials forming the printer kit’s structure. Now on the X5SA Pro, most of the printer is made from aluminum and is heavier and more stable, reducing vibrations and generally improving print performance.
As for the X5SA’s specs, it’s a large 3D printer DIY kit with similar printing sizes to the Creality CR-10, and boasts a 330 x 330 x 400 build volume. It claims increased precision vs the original Tronxy X5SA, and has a maximum accuracy of 125 microns.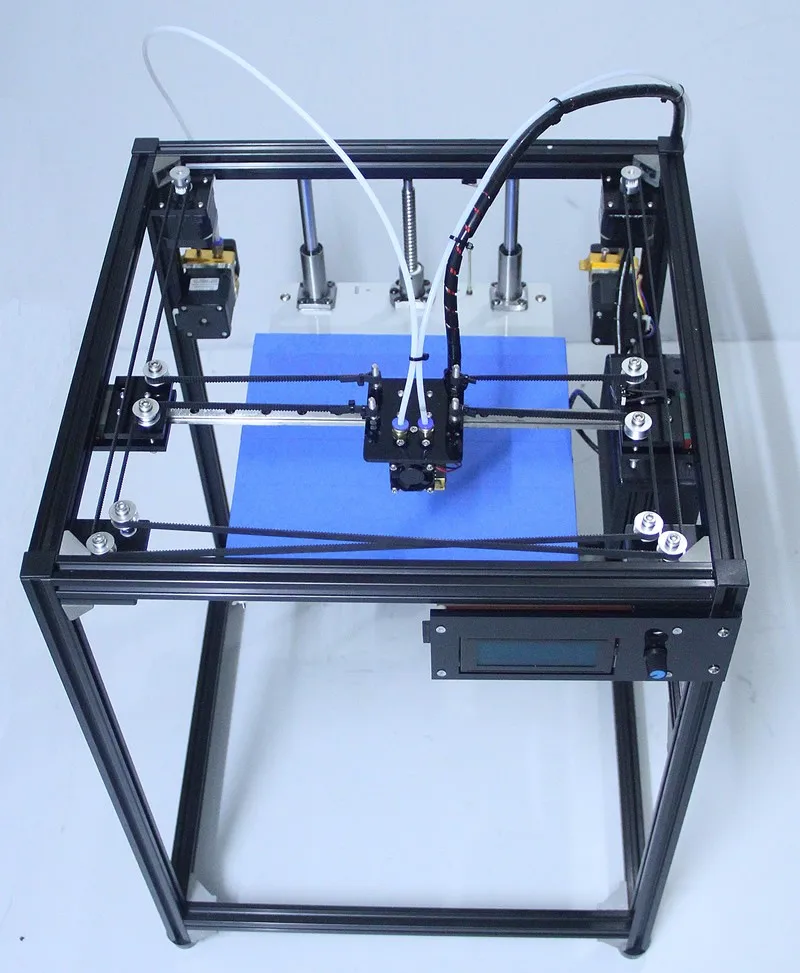 It’s impressive, reliable and one of the best cheap 3D printers you can get with such a large size — so those with big 3D printing ideas will enjoy both this and the Creality CR-10.
It’ll probably take you around four hours to build this printer kit, but it’ll be worth it once you start printing!
Big 3D Printer Kit
TRONXY X5SA PRO 3D Printer with Glass Bed Upgrade
$429.00
Amazon here
We earn a commission if you make a purchase, at no additional cost to you.
12/04/2022 05:15 am GMT
7. Anycubic Vyper
- Price: $429 — Available on Anycubic store here / Available on Amazon here
- Build volume: 245 x 245 x 245 mm
A key feature on the Anycubic Vyper missing from many printers in this price range is that the Vyper self-levels. This is a huge relief for busy makers who would rather not re-level their printer every few prints, and who just want to get to the fun part — printing! The 16-point bed leveling process accounts for differences between the nozzle and bed and can be done in just one click.
The 32-bit motherboard is beefed up compared to previous Anycubic 3D printer kits, offering silent printing and improved stability. We tested the Anycubic Vyper and found it to be consistent in printing, easy to operate with the 4.3-inch touchscreen, and it was incredibly easy to assemble — we built it in 10-15 minutes.
The new PEI spring steel magnetic print bed can be lifted off the platform easily for easy removal of your finished parts, and is designed to be scratch and heat resistant and to work well with standard filaments such as PLA, ABS, PETG, and TPU.
The Vyper also features an innovative new two-fan dual cooling system, cooling down parts quicker and enabling faster printing without causing errors — the Vyper can comfortably print at 100mm/s.
Great Ender 3 Alternative
8. Creality CR-10 / V3
- Price: $369 / $459 — Available on Amazon here / Available on Creality Store here
- Print volume: 300 x 300 x 400 mm
The Creality CR-10 has a passionate group of supporters who hail it as the best DIY 3D printer kit in its price range. Manufactured by Creality, the CR-10 is a fantastic 3D printer build kit that can be built within 45 minutes.
The Creality CR-10 has an accuracy and print volume which is competitive with printers 5 times more expensive. With it’s minimum layer thickness of 0.05mm and fantastic 300 x 300 x 400 mm build volume, the Creality CR-10 is a great printer for just $370. It’s easy to use, making it the perfect 3D printer for beginners.
9. Prusa i3 MK3S — best 3D printer kit
- Price: $749 as a kit — Available on the Prusa store here / $999 fully assembled — Available on the Prusa store here
- Build volume: 250 x 210 x 210 mm
The Prusa i3 is known as the undeniable king of DIY 3D printer kits. These RepRap kits are fantastic, sporting an impressive print volume of 250 x 210 x 210 mm, and being able to print at speeds up to 200mm/s! It’s also accurate, durable and a complete workhorse, with layer heights from 0. 05 mm and a bendable print surface to make removing finished prints as easy as possible.
Accessible via USB stick or by SD card, the Prusa i3 MK3 kits are designed to be simple to use as well as effective. With layer resolutions up to 50 microns, the Prusa i3 homemade 3D printer is so effective that it outperforms far more expensive 3D printers. It can print tougher filaments than more expensive printers too, with a Bondtech extruder that can reach temperatures of up to 300C, making printing Polycarbonate, ABS, Nylon, and other difficult filaments no problem.
Additionally, you can print up to 5 colors simultaneously with your Prusa if you purchase their multi-material upgrade kit, costing $300. This makes colorful model printing a breeze, and opens up for far more extravagant printing projects.
The Prusa, with Multi Material Upgrade kit, allowing it to print multiple colors simultaneously. We explain this in our color 3D printer guide.- With a Multi Material Upgrade kit, it can also print multiple colors.
 We explain more in our color 3D printer buyer’s guide.
 - You can buy the Multi Material Upgrade Kit 2.0 here.
You can choose to either assemble the kit yourself or buy the printer pre-assembled, though this costs a few hundred dollars more. Overall, the Prusa remains the undisputed king of DIY 3D printer kits, with its competitors needing to do a lot of catching up to dethrone it.
Best 3D Printer Kit Overall
Original Prusa i3 MK3S+ kit
The best 3D printer kit of all time. If you have $1,000, this is some of the best value you can get.
Buy as a kit hereBuy pre-assembled here
We earn a commission if you make a purchase, at no additional cost to you.
10. Peopoly Moai SLA Kit — Homemade resin 3D printer kit
- Price: $1,295 — Available on Matterhackers here
- Build volume: 130 x 130 x 180 mm
The only resin 3D printer featured in our 3D printer kit guide, the Peopoly Moai is an incredible feat of engineering. It’s huge, offers incredible accuracy and precision, and best of all, you can build your own 3D printer at home from scratch.
For those looking for an effective SLA 3D printer, and who do not want to pay full price, the Moai kit could be the perfect printer for you. It is so accurate that it can mechanically print up to an astonishing 5-micron layer height, according to Peopoly, though you’ll likely never reach this accuracy because you won’t need to, nor would most resins or models accommodate this.
Featuring a 70-micron laser spot size, once you’ve built this homemade 3D printer you’ll be ready to create resin molds for 3D printed jewelry, dental models, engineering pieces, as well as prototypes for rapid prototyping or fun characters if you use the Moai as a 3D printer for miniatures.
The Peopoly Moai is open to use third-party resins, for those who want to save money on lower-cost resins and are fine with the slight quality drop-off. The printer itself however does not come with any resin, so you’ll need to purchase that with the kit. It is only to be expected that the Moai will take some time to assemble, as resin 3D printers are more complex than their FDM 3D printer counterparts, but most makers will be able to build their own 3D printer within 4 hours.
Best DIY Resin Printer
Creality Ender 3 3D Printer sale
Home Collections Ender 3 DIY 3D Printers Kit | 8.66x8.66x9.84inch | Resume Printing Function$ USD
$ USD
35 Reviews Pricing Not Include Tax
Ship From
United StatesCanadaCzech RepublicAustraliaUnited KingdomChina
Model-1
Ender-3 NEOEnder-3
Ship to
It is expected to arrive within and will cost $ USD to ship
This item can't be shipped to this Country/Region
Bundles
Quantity
28 Available
Add To Cart Buy It Now
Continue To Shopping View Cart
People who bought this item also bought
Official Creality Ender 3 3D Printer Fully Open Source with Resume Printing
- Easy and Quick Assembly: It comes with several assembled parts, you only need about 2 hours to assemble 20 nuts well.
- Advanced Extruder Technology: Upgraded extruder greatly reduces plugging risk and bad extrusion; V-Shape with POM wheels makes it move noiseless, smoothly, and durable.
- Safety Protected Power Supply: Only needs 5 minutes for the hotbed to reach 110℃.
- It is a great project for middle school and high school-aged students. The perfect gift to spark a lifelong love for science and engineering, and provide a deeper understanding of machinery and robotics.
Creality Ender 3:Complete beginner's guide to 3D printing - Assembly, tour, slicing, levelling and first prints
CR Touch Install Guide - From 3D Printscape
Why Most People Choose Ender 3 3D Printer
From 2018 till now, the Ender-3 model has remained in the "Best Selling".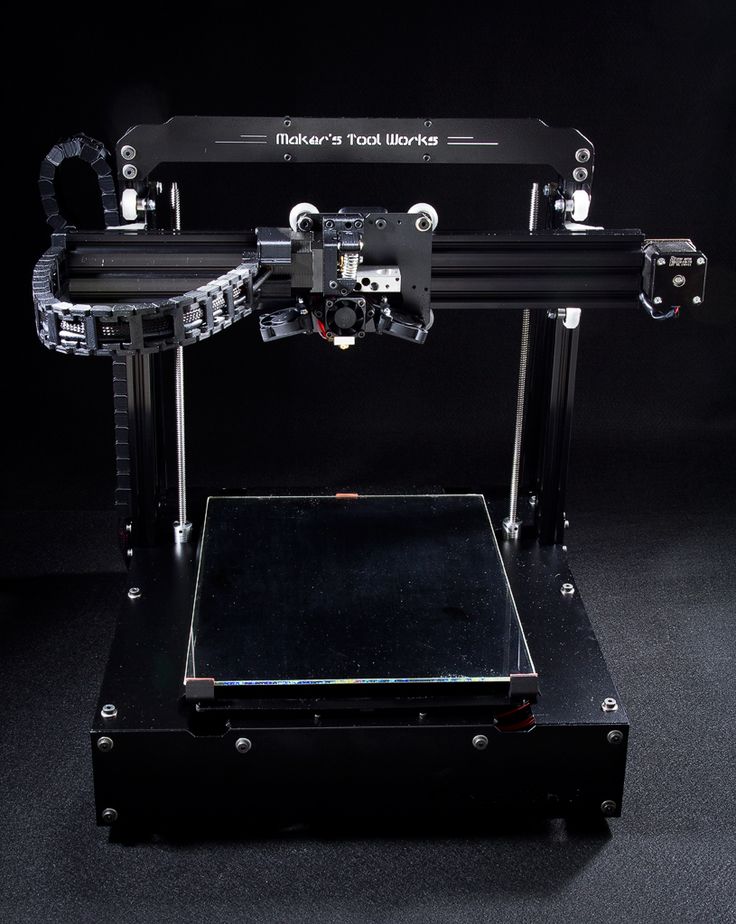 Although we are launching new Ender-3V2, Ender-3S1. So why do many choose Ender 3?
1. In terms of price: the price is lower than 200, stable printing quality and 220*220 printing size, supports different filament materials
2. In terms of performance: support resume printing, 5mins rapid heating, reliable power supply
3. Upgrade convenience: ender 3 direct drive, cr touch auto leveling kit, touch screen , tempered glass bed and more. There's do much you can do with it
4. Who chose him: News for 3d printing, 3d printing enthusiast; for DIY makers, for education... Customer
Ender 3' S FAQ:
Filament did not stick on the hotbed?
For newcomers, this is the most common problem. Do not worry, you can solve it easily. Generally,the distance between the nozzle and platform is too far or near. So rotary the knob under the platform to adjust the distance between the nozzle and platform again,at a piece of A4 paper distance or less).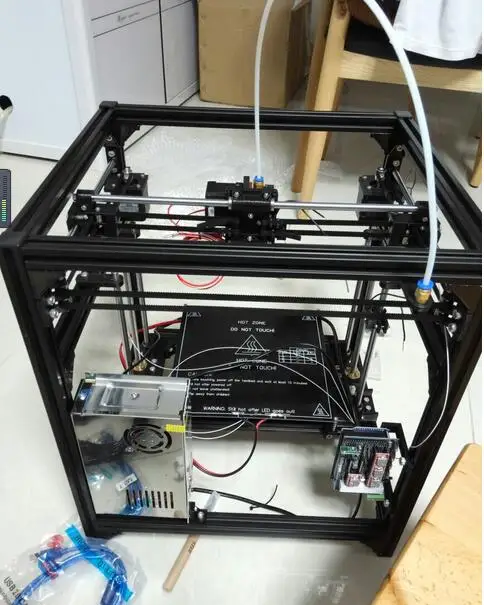
Creality Ender 3 Bed Leveling – All You Need to Know
Any structure needs a strong foundation. The same is true for 3D-printed objects. Leveling the bed on your Creality Ender 3 will ensure that that all-important first layer is solid...
How to level Creality Creality Ender 3?
Move the nozzle so that it’s positioned over the left corner of the bed. A half-inch or so from both sides is a good location.
Slide the paper between the nozzle and the bed. If it doesn’t fit, drop the corner until it does.
Once the paper is able to slide under the nozzle, very slowly raise the corner with the adjuster. Remember: Clockwise moves the bed up. As you do this, gently slide the paper back and forth. The moment you feel even the slightest resistance to your moving the paper, stop turning the knob. That corner is (almost) ready to go.
Do the same for the other three corners of the build plate. Always advance the hot end to a new corner slowly. This will prevent damage to the build plate in case the nozzle starts to drag. If this occurs, simply lower the next corner (before starting the leveling process) to make some room.
After you’ve adjusted each corner once, go back and check the four corners again. You may have to do further adjustments to get all four correct.
Article: Creality Ender 3 Bed Leveling – All You Need to Know.
Download
Download
Download
Download
Download
Download
Download
Download
Download
Customer Reviews
Based on 35 reviews
77%
(27)
17%
(6)
Write A Review
Ask A Question
Reviews (35) Questions (5)$ USD
$ USD
ADD TO CART BUY IT NOW
Write a review
Ask a Question
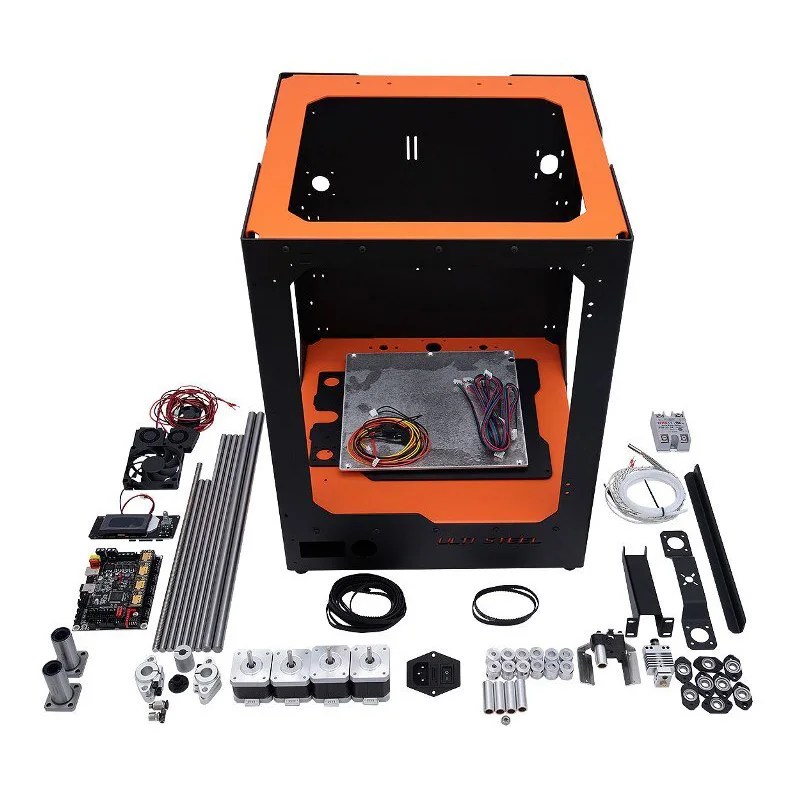
3D printer assembly kit vs self-assembly, which is cheaper? / 3D printers, machines and accessories / iXBT Live
3D printing and 3D printers have long been in use, from year to year the price of the printers themselves, components and consumables is falling lower and lower. Reading numerous forums where owners of eminent branded printers costing from 50,000 to 250,000 rubles complain about the same problems as with cheap self-assembly ones, I thought. If there is no difference, why pay more? I have already tested 2 ready-made sets of 3D printers from China in practice and I was very pleased with the quality. One interesting point remains, what comes out cheaper? Assemble yourself from components or buy one of the sets?
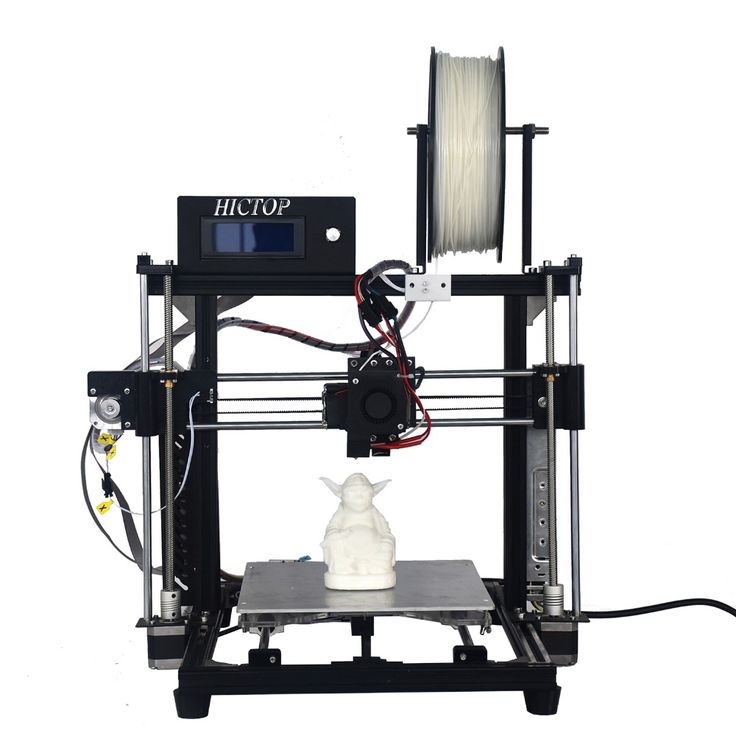
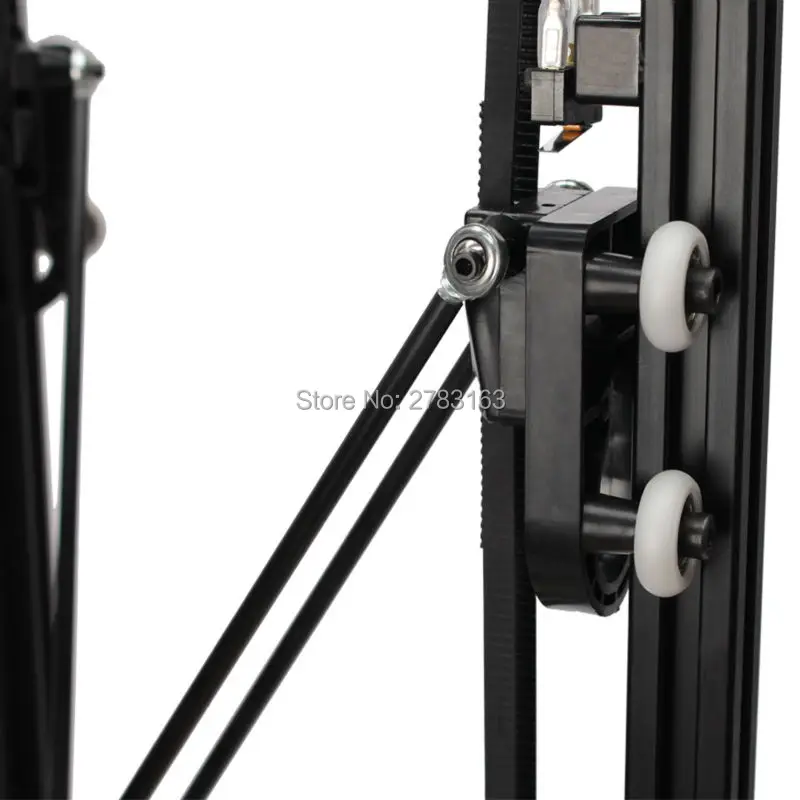
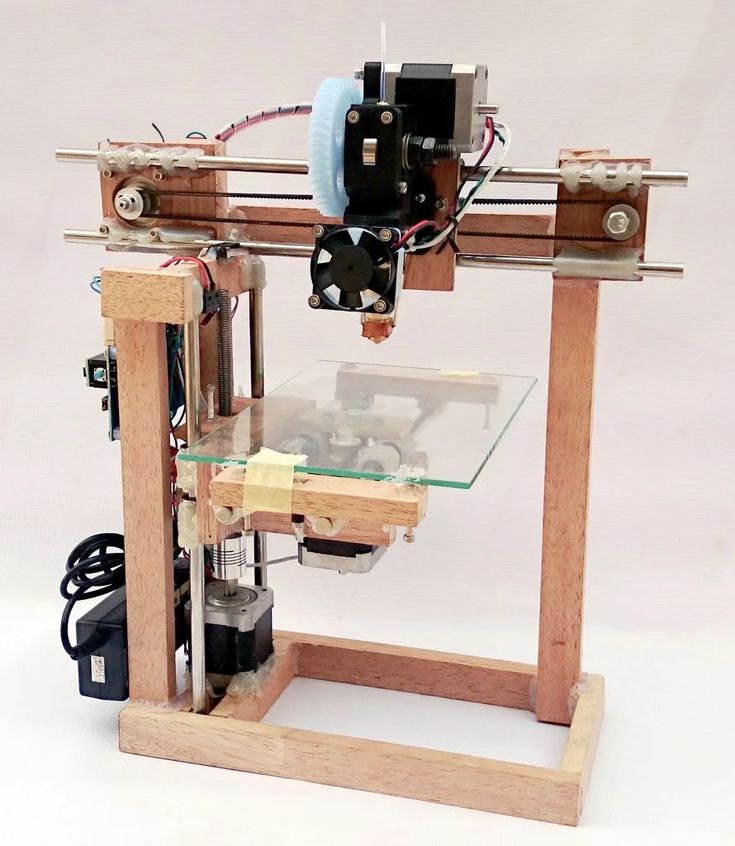
The photo shows my printer from the previous review - JG Aurora, dressed in a steel frame. In principle, I just replaced the frame and that's it, but the printer began to look much better. He didn’t get much better at typing, before that everything was in order, but it prompted me to certain thoughts. Why is it necessary to take sets with a brand, as if Chinese or European, and overpay them, albeit a little in the case of China, but still. And if you take components without a frame, and buy the frame already here in Russia? Wouldn't it come out cheaper?
I started looking for the cheapest 3D printer kit on a well-known site and found a suitable one for 8,700 rubles. about. The price already includes delivery.
Let's take a closer look at this set.
The basis of any 3D printer is the brain. The brains here are standard - Arduina Mega 2560 and the shield for it - Ramps 1.4.
In principle, this is a standard and most printers are assembled on this scheme. More expensive boards, such as MKS Gen or Base, are also based on the same Arduin.
The main thing here is to look at the Ramps for the presence of unsoldered places or, on the contrary, extra influxes, because of this, most often people have problems.
Next. I see in this set there is a four-line LCD2004 screen with a card reader. This is a very convenient addition, I have not used a 3D printer + computer for a year now. I throw a G-code for printing on a memory card and the printer prints offline.
The red scarf is an adapter for Ramps with leads for this screen, it is included in the kit, as well as wires for the screen.
Drivers, wires, limit switches. It's all there. Drivers are ordinary - DRV8825, limit switches on boards, wires without braid. Cheap and cheerful, but effective. Radiators were also put to the drivers. The motors here are also standard for most 3D printers, these are NEMA17 stepper motors.
Also in the set there is a heating element for the table - MK2A board on a textolite basis. For me, this is a more successful heater than the MK3 version, which is integrated on an aluminum plate. The fact is that I print on glass and I don’t need an additional layer between the glass and the heater. MK2 will heat up faster.
And the crown of this set is the E3D version 5 clone print head. The head comes assembled with a heating element and a thermistor. The only thing missing is a pushing mechanism for plastic - an extruder. And since there are 5 motors here, it means that only a small part of the extruder is needed. Under this element, a Bowden-type extruder is required, which means the plastic will be fed through a PTFE tube to a heated nozzle. I don’t see a PTFE tube in the picture, although the seller writes that it is included, perhaps he means a small Teflon tube inside the thermal barrier.
Now what is missing in the set.
Well, the main missing piece is the frame. I bought 2 types of steel frames from Nioz and Soberistanok. The Nioz is easier to assemble and doesn't require any printed parts, but there are no bolts included. The assembler puts bolts in the kit, but the frame itself uses a few printed elements, without a printer, which are not so easy to get. Both frames are cut in Chelyabinsk and at a price of about 3000-3500 rubles. without painting and weight 3-5 kg. delivered by a transport company. For delivery from Chelyabinsk to Moscow, I paid a little less than 600 rubles for the frame.
The cost of the frame 3800 + delivery is 4400 rubles.
In addition to the frame, shafts, bearings, trapezoidal or conventional screws and belt spools must be added.
Shafts, like the frame, are better to take from us in Russia, they come out cheaper than on Aliexpress. For example, a set of shafts for a given frame from the same Nioz will be 1380r.
Trapezoidal screws with a nut on Ali are almost 2 times cheaper and come out at about 800r per pair.
Only a Bowden extruder and a pair of belted spools need to be added.
The extruder is also better to take on Ali: Bowden Extruder - 600 rubles.
There is already a motor mount to the frame and a good hardened steel gear with fine teeth is used.
GT-2 belt can be taken from the same seller: GT-2 belt — 200 rubles, especially since it already has 2 spools.
Bearings - 400 rubles for 12 pieces, which is quite enough.
And you also need to add a power supply, this is about 1400r.
Total comes out to about 17900r.
All that remains is to upload the Marlin firmware to the board via the Arduino IDE and adjust the parameters for your printer. It is convenient to substitute the necessary parameters into the firmware using a calculator, for example this one: http://prusaprinters.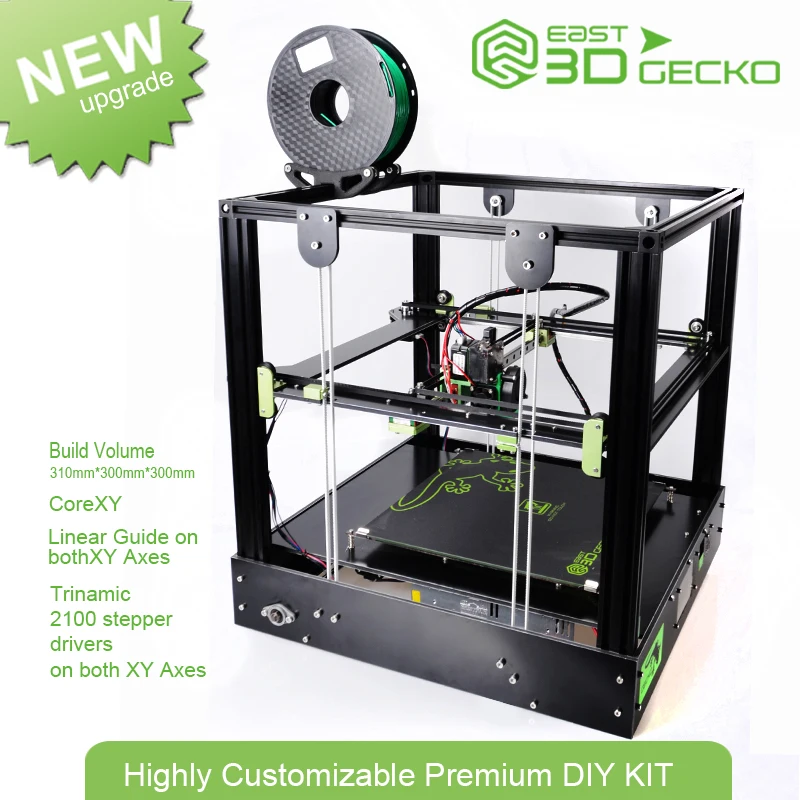 org/calculator/
Now consider the assembly kit, for example the cheapest one - Annet A6.
According to the link, the manufacturer is listed as Infitary, but this is definitely a clone of the rather popular Annet A6, possibly with some modifications.
Let's compare it with the set above. There are already trapezoidal screws and even with aluminum dampers. A more expensive Direct-type extruder is installed and already with blowing, which has a positive effect when printing with PLA or HIPS plastics.
The heating table is more expensive - MK3, although MK2 is more attractive for me. The control board is not a sandwich from Mega + Ramps, but something more impressive, there is no name of the board in the description, but everything looks in order, it resembles something from the MKS line.
There is also a screen 2004 with a card reader and additionally there is a stand for a reel with plastic.
The price for such a set of 3D printer is about 14200r.
That is, it turns out a difference of about 4000 rubles. Which just matches the steel frame. And printers with a steel frame are already being sold for 25,000 rubles, for example, in the same Chelyabinsk.
In principle, I suspected that taking a 3D printer kit from the Chinese is about the same as assembling it yourself in parts, only in the kit everything is already set up and fits together, and in a self-assembly printer you will also have to figure out what to connect and tinker with firmware.
Another option to get an inexpensive 3D printer remains - buying on Avito, etc. through ads, but here you need to monitor message boards more often in search of good offers, and even then, you can end up with a problem copy.
News
Publications
Australia is the only country that covers an entire continent, but most of it is undeveloped. 50% of the country's population lives in large cities near the coast, which in total occupy 0.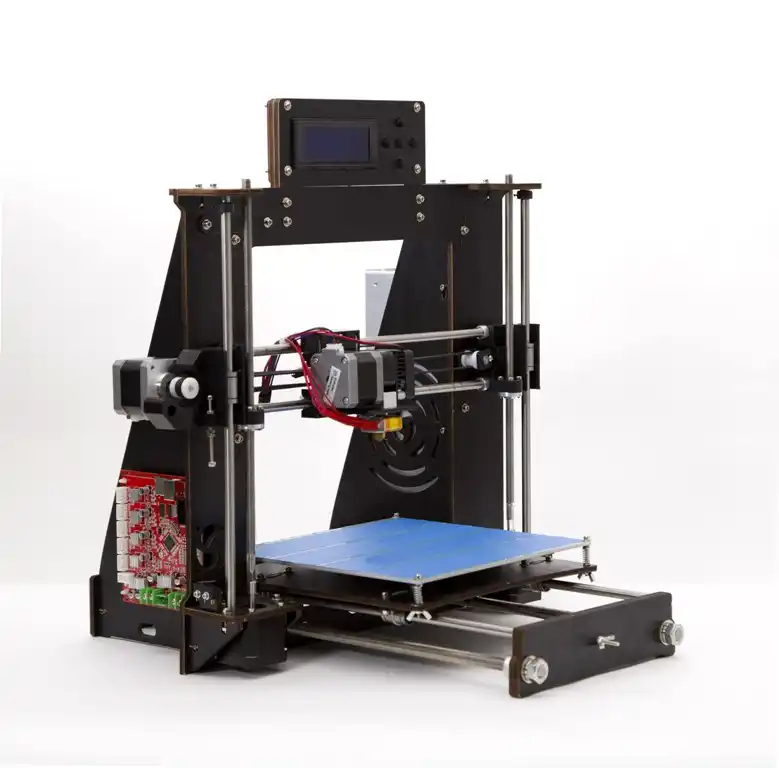 22%...
support for voice...
The chain drive from the pedals to the bicycle wheel has become a familiar picture for everyone. For the past hundred years, this mass and inexpensive solution has been used. Yes, sometimes the chain is replaced with a toothed belt or shaft ...
The general public is aware that services mechanisms and systems that are designed NOT to bring the matter to an accident are included in the pool active safety; minimization of the consequences of WHAT ALREADY HAPPENED...
There was no sadness and hello to you. A well-known Internet site for the placement of goods for placing private ads, announced the introduction of a commission of 2% for the sale with the avito delivery service....
Browsing through the local electronics flea market on another boring evening in search of something interesting, I was quite puzzled , after discovering that the once-flopped PlayStation handheld...
Top 20 Inexpensive 3D Printers ($199 to $1000)
3DPrintStory Reviews Top 20 Inexpensive 3D Printers ($199 to $1000)
Just 10 years ago, a 3D printer cost over $100,000. Today, you can easily find a cheap 3D printer for under $200. This is amazing.
Naturally, the lower the price, the more restrictions. Some of the printers on our list will not have a heated bed and the workspace will be small. Naturally, the quality of most of the models presented below cannot compete with more expensive counterparts.
But with a little patience and diligence, it is quite possible to achieve high-quality 3D printing on a printer that costs half the price of a flagship smartphone. And it's really cool!
Important note : All 3D printers in this top are supplied assembled by the manufacturer. If you have free time and want to spend less money, you can buy DIY kits and assemble the 3D printer yourself according to the instructions.
List of the best cheap 3D printers in the price range from $ 200 to $ 1000
| 3D Printer | Print | 9000 | 0132 | 459 | ||||
|---|---|---|---|---|---|---|---|---|
| Flashforge Finder | PLA | 140 x 140 903 | 49000 | 1.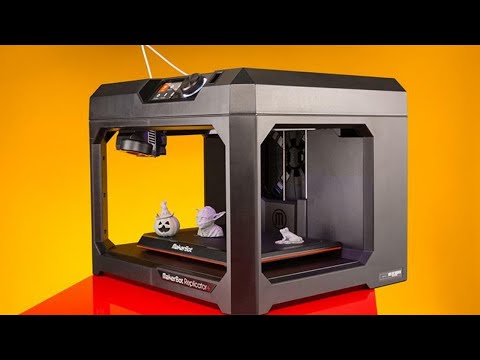 0 Pro 0 Pro | PLA | 150 x 150 x 150 | 499 | |
| Mix 2.0 | PLA | 150 x 150 x 150 | 599 | |||||
| Printrbot Simple | PLA | 150 x 150 x 150 | 599 | |||||
| UP mini 2 | PLA, ABS | 120 x 120 x 120 | 599 | |||||
| Monoprice Maker Select Ultimate | PLA, ABS, exotic | 200 X 200 x 175 | 699
| |||||
| ROBO C2 | PLA | 0126 |||||||
| Dremel Idea Builder | PLA | 230 x 150 x 140 | 899 | |||||
| Printrbot Simple Pro | PLA | 200 x 150 x 200 | 999 | |||||
| Prusa i3 MK2 | PLA, ABS, exotic | 250 x 210 x 200 | |
In the article we consider incorrect, but high -quality 3D printers from AMA.
etc.
If you want to buy them, even if you live in large cities such as Kyiv, Moscow, St. Petersburg, Minsk, it may turn out that these models will not be in the online stores of your city, or they may be with a decent mark-up relative to the cost that indicated in the article.
Since most of them are European / American, it is possible that they will not be in stores at all.
Therefore, before making a choice, I recommend looking directly at eBay, Amazon, Aliexpress, etc. - many sellers on these planforms deliver to the CIS countries within 1-4 weeks on average.
It is especially worth monitoring these platforms during the discount period - Black Friday or Chinese New Year (Aliexpress or Gearbest) - prices on such days can be 2 or more times lower than usual and it is worth waiting a few weeks.
Monoprice MP Select Mini ($199)
Probably the best 3D printer on our list. Why? Because the Monoprice MP Select Mini is an impressive development with a thoughtful, compact design at a very low price. This model has a quick-change steel material feed wheel, a cooler for cooling the nozzle, a color LCD screen, a heated table, plus the ability to transfer models for 3D printing via microSD or USB.
The heated bed and the wide temperature range of the extruder are especially pleasing, because for such a small price you get the opportunity to print in different materials: from ABS B to PLA or exotic materials like conductive PLA plastic, wood, metal-based composites and PVA.
For those who are worried about the lack of a guarantee - for such a price it is possible without it. This model is upgradeable. For example, you can install a new nozzle, change the table and add WiFi connectivity.
Small working space - 120 x 120 x 120 mm. Over time, this will definitely not be enough for you.
Specifications of cheap 3D printer Monoprice MP Select Mini
- Printer type: FDM;
- 3D printing materials: ABS, PLA, exotic;
- Working space: 120 x 120 x 120 mm;
- Minimum layer height: 100 microns;
- Number of extruders: 1;
- 3D printing speed: 55 mm/s;
- Compatible with materials from other manufacturers: yes;
- Heated table: yes;
- Nozzle diameter: 1.
 75 mm;
 - 3D printer control panel: yes;
- Connection: SD card, USB.
Back to the list of 3D printers
M3D Micro Retail ($249)
The M3D Micro 3D printer hit the market thanks to Kickstarter. This model was presented with an incredible price of $349.
The working space of the M3D Micro is 109 x 113 x 166 mm. There are several body color options. The company has implemented "Micro Motion Technology" - a set of innovative solutions - thanks to which you get excellent quality 3D printing at a small price.
Today, this low-cost 3D printer already costs even less than the price announced on Kickstarter. You can buy it for $249 with a 12 month warranty. By the way, it is already possible to pre-order the next "pro" version.
Specifications of cheap 3D printer M3D Micro Retail
- Printer type: FDM;
- 3D printing materials: PLA;
- Working space: 116 x 109 x 113 mm;
- Minimum layer height: 50 microns;
- Maximum layer height: 350 microns;
- Number of extruders: 1;
- XY accuracy: 15 microns;
- Open Source: no;
- 3D printing speed: 55 mm/s;
- Compatible with materials from other manufacturers: yes;
- Heated table: yes;
- Nozzle diameter: 1.
 75 mm;
 - Control panel on 3D printer: no;
- Connection: USB.
Back to 3D printer list
XYZprinting da Vinci Mini ($289)
Da Vinci Mini is a successful attempt to make the 3D printer user-friendly. This model has only one button and 5 multi-colored indicators that reflect the current status of 3D printing. In addition, this affordable 3D printer is WiFi capable so you can control it over a network in your home, office or lab.
Unfortunately, you can only use the manufacturer's own 3D materials. On average, they cost 20% more than usual. However, the company also argues that the materials used (PLA) will be 100% non-toxic.
Specifications of cheap 3D printer XYZprinting da Vinci Mini
- Printer type: FDM;
- 3D printing materials: PLA;
- Working space: 150 x 150 x 150 mm;
- Minimum layer height: 100 microns;
- Number of extruders: 1;
- Open Source: no;
- Compatible with materials from other manufacturers: no;
- Heated table: no;
- Nozzle diameter: 1.
 75 mm;
 - 3D printer control panel: yes;
- Connection: USB, WiFi.
Back to 3D printer list
Monoprice Maker Select V2($299)
The next cheap 3D printer with a good reputation is the Monoprice Maker Select V2.
This model is an analogue of the Wanhao Duplicator i3, which, in turn, borrowed the design from the Prusa i3. But this does not affect the quality, as the Monoprice Maker Select V2 is easy to use and gives excellent 3D printing results.
Monoprice Maker Select V2 design feature is that the power supply and control panel are placed outside the 3D printer. The working space of this model is 200 x 200 x 180 mm. And this is really a good indicator for the money.
Specifications of cheap 3D printer Monoprice Maker Select V2
- Printer type: FDM;
- 3D printing materials: ABS, PLA, exotic;
- Working space: 200 x 200 x 180 mm;
- Minimum layer height: 100 microns;
- Number of extruders: 1;
- Open Source: software;
- Compatible with materials from other manufacturers: yes;
- Heated table: yes;
- Nozzle diameter: 1.
 75 mm;
 - 3D printer control panel: yes;
- Connection: USB, SD card.
Back to the list of 3D printers
New Matter MOD-t ($299)
New Matter is a young startup that offers a 3D printer MOD-t - An interesting design with a minimalistic design. This cheap 3D printer is WiFi enabled so you can manage print settings and print from your computer, tablet or smartphone. The working space is 150 x 150 x 125 mm. Thanks to the case, the noise during its operation is reduced. But the most interesting and attractive thing about MOD-t is the price. Only $299. In general, this is an interesting, high-quality model.
Specifications of cheap 3D printer New Matter MOD-t
- Printer type: FDM;
- 3D printing materials: PLA;
- Working space: 150 x 100 x 125 mm;
- Minimum layer height: 100 microns;
- Number of extruders: 1;
- Open Source: no;
- Compatible with materials from other manufacturers: yes;
- Heated table: no;
- Nozzle diameter: 1.
 75 mm;
 - Control panel on 3D printer: no;
- Connection: USB, WiFi.
Back to the list of 3D printers
Printrbot Play ($399)
The Printbot Play is a very popular budget 3D printer that is often used in education. This inexpensive, reliable model, which is almost entirely made of metal.
The working space is 100 x 100 x 130 mm. Printbot Play has an extruder manufactured by the company itself - Alu Extruder v2. The body is made of powder coated steel and aluminium. SD slot provided.
You can upgrade the basic design of the Printrbot Play with a heated stand or increase the Y-axis stroke.

Back to the list of 3D printers
Wanhao Duplicator i3 Plus ($459)
The Wanhao Duplicator i3 Plus is an upgraded version of the popular Wanhao Duplicator i3 (which in turn is based on the Prusa i3).
The main features of this cheap 3D printer are a large working space of 200 x 200 x 180 mm, a steel frame, electronics integrated into the design itself (previously it was taken out separately), a slot for a full-size SD card and a touchscreen display for control.
Wanhao Duplicator i3 Plus Cheap 3D Printer Specifications
- Printer type: FDM;
- 3D printing materials: ABS, PLA, exotic;
- Working space: 200 x 200 x 180 mm;
- Minimum layer height: 100 microns;
- Number of extruders: 1;
- Open Source: design and software;
- Compatible with materials from other manufacturers: yes;
- Heated table: yes;
- Nozzle diameter: 1.75 mm;
- 3D printer control panel: yes;
- Connection: USB, SD card.

Back to the list of 3D printers
Flashforge Finder ($499)
FlashForge Finder is one of the newest 3D printers on our list. This affordable 3D printer offers an average working space of 140 x 140 x 140mm.
This Finder features a transparent sidewall design so you can view the 3D printing process from any angle. A color display is installed, it is possible to transfer data via WiFi network. The printer comes with some supplies and a USB flash drive, so you can start 3D printing almost immediately.
Specifications of cheap 3D printer FlashForge Finder
- Printer type: FDM;
- 3D printing materials: PLA;
- Working space: 140 x 140 x 140 mm;
- Minimum layer height: 100 microns;
- Number of extruders: 1;
- XY accuracy: 11 microns;
- Open Source: no;
- Compatible with materials from other manufacturers: yes;
- Heated table: no;
- Nozzle diameter: 1.
 75 mm;
 - 3D printer control panel: yes;
- Connection: USB, WiFi.
Back to 3D printer list
XYZprinting da Vinci Jr. 1.0 Pro ($499)
What's so special about the da Vinci Jr. 1.0 pro? This is a new model from XYZPrinting, which includes many advanced features, such as support for printing materials from other manufacturers and increased speed of 3D printing.
Also features an auto-calibration mechanism, a closed chamber with a unique cooling system, and a 0.3mm nozzle option for high-quality printing of small model details. All in all, this is a great 3D printer with a lot of useful features and at a low price.
Specifications for cheap 3D printer da Vinci Jr. 1.0 Pro
- Printer type: FDM;
- 3D printing materials: PLA;
- Working space: 150 x 150 x 150 mm;
- Minimum layer height: 100 microns;
- Number of extruders: 1;
- Open Source: no;
- Compatible with materials from other manufacturers: yes;
- Heated table: no;
- Nozzle diameter: 1.
 75 mm;
 - 3D printer control panel: yes;
- Connection: USB, SD card.
Back to 3D printer list
XYZprinting da Vinci Jr. Mix 2.0 ($599)
XYZprinting provides a wide range of low cost 3D printers. And paying attention to each model is quite difficult, although many of them are very interesting.
XYZprinting da Vinci Jr. Mix 2.0 stands out because it can print with two different materials and mix them to create multi-colored models. This dual-color 3D printing technology is rare in this price range ($500 to $1,000), so if you're interested in experimenting with multicolor printing, XYZprinting da Vinci Jr. Mix 2.0 is a great choice.
However, there is a drawback. This 3D printer is not compatible with materials from other manufacturers, so you will have to buy special materials from XYZprinting (as we mentioned above, they cost 20% more, but are not toxic).
Specifications of cheap 3D printer XYZprinting da Vinci Jr.
 Mix 2.0
 - Printer type: FDM;
- 3D printing materials: PLA;
- Working space: 150 x 150 x 150 mm;
- Minimum layer height: 200 microns;
- Number of extruders: 1;
- Open Source: no;
- Compatible with materials from other manufacturers: no;
- Heated table: no;
- Nozzle diameter: 1.75 mm;
- 3D printer control panel: yes;
- Connection: USB, SD card, WiFi.
Printrbot Simple ($599)
Printrbot Simple is the flagship of the Printbot empire. This model has a great open design with a solid aluminum frame and a working space of 150 x 150 x 150mm. This inexpensive 3D printer comes fully assembled at a very good price. As you need and want to experiment, you can add a heated table and expand the workspace in the horizontal plane.
Specifications of cheap 3D printer Printrbot Simple
- Printer type: FDM;
- 3D printing materials: PLA;
- Working space: 150 x 150 x 150 mm;
- Minimum layer height: 100 microns;
- Number of extruders: 1;
- 3D printing speed: 80 mm/s;
- Open Source: design and software;
- Compatible with materials from other manufacturers: yes;
- Heated table: optional;
- Nozzle diameter: 1.
 75 mm;
 - Control panel on 3D printer: no;
- Connection: USB.
Back to the list of 3D printers
UP mini 2 ($599)
The UP mini 2 is a low cost 3D printer that packs in impressive design and functionality. For starters, it has a touch screen panel and the ability to connect via WiFi.
But the most interesting is further. Implemented power failure protection system. 3D printing will continue after the emergency stop. Built-in HEPA air filtration system. Automatic detection of the height of the extruder nozzle. A separate, closed container for the material, thanks to which it does not deteriorate under the influence of moisture from the environment.
Great 3D printer for a small price. The only thing that upsets me a little is the small working space - 120 x 120 x 120 mm.
Specifications of cheap UP mini 2 3D printer
- Printer type: FDM;
- 3D printing materials: PLA, ABS;
- Working space: 120 x 120 x 120 mm;
- Minimum layer height: 150 microns;
- Maximum layer height: 350 microns;
- Number of extruders: 1;
- Open Source: no;
- Compatible with materials from other manufacturers: yes;
- Heated table: yes;
- Nozzle diameter: 1.
 75 mm;
 - 3D printer control panel: yes;
- Connection: USB, WiFi.
Back to 3D Printer List
Monoprice Maker Select Ultimate ($699)
The Monoprice Maker Select Ultimate is an extraordinary beast that combines elements from the two leaders in the world of 3D printing, Zortax and Ultimaker. The Monoprice Maker has an aluminum perforated printing table, which was offered in the Zortax M200 (thanks to this table, the grip of the base of the model with the table is much better), and the software part is almost identical to Ultimaker 2 (very user-friendly interface and functionality).
This model uses a "Bowden extruder", that is, the feed units and nozzle are separated, unlike the direct feed. This improves reliability and reduces the likelihood of 3D printing errors (although, most likely, it was necessary to sacrifice printing speed, as the weight of the printing unit increases). Given the cost, this is a good model, the analogues of which are much more expensive.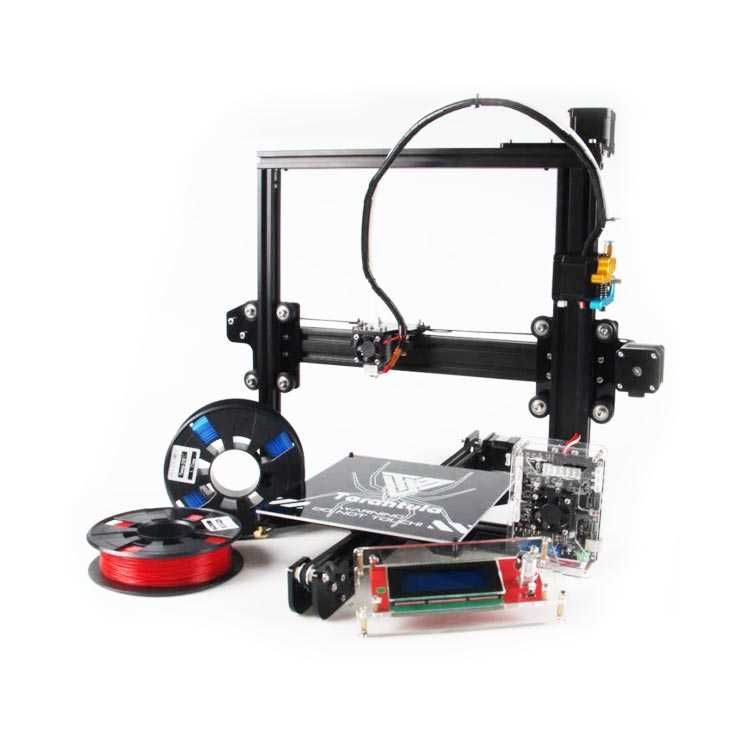
Specifications of cheap UP mini 2 3D printer
- Printer type: FDM;
- 3D printing materials: PLA, ABS, exotic;
- Working space: 200 x 200 x 175 mm;
- Minimum layer height: 20 microns;
- Number of extruders: 1;
- Open Source: no;
- Compatible with materials from other manufacturers: yes;
- Heated table: yes;
- Nozzle diameter: 1.75 mm;
- 3D printer control panel: yes;
- Connection: USB, SD card.
Back to the list of 3D printers
Robo C2 ($799)
The Robo C2 is a small 3D printer with tons of connectivity options. Using a specialized application, you can monitor the status of 3D printing from your smartphone or tablet. It can be connected to a Chromebook. Thanks to the built-in slicing program, you do not need to install additional printing software.
Probably the most impressive is the integration with Amazon Alexa. Users can stop, cancel and check the status of 3D printing in real time using voice commands.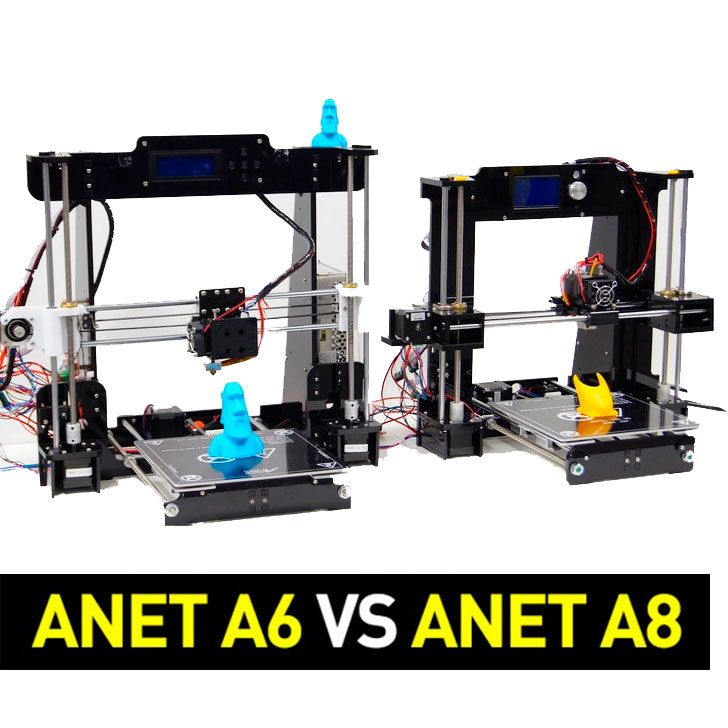
What does this inexpensive 3D printer offer? Working space 127 x 127 x 150 mm. The 3D printing speed is 300 mm/s and the resolution is 20 microns. There is a built-in 3.5'' color touch screen, a system for monitoring the amount of remaining material for printing, automatic calibration and a removable self-aligning print platform. The only drawback is that the table is not heated, so you have to use PLA plastic.
Specifications of cheap 3D printer Robo C2
- Printer type: FDM;
- 3D printing materials: PLA;
- Working space: 127 x 127 x 150 mm;
- Minimum layer height: 20 microns;
- Number of extruders: 1;
- Open Source: software;
- Compatible with materials from other manufacturers: yes;
- Heated table: no;
- Nozzle diameter: 1.75 mm;
- 3D printer control panel: yes;
- Connection: USB, WiFi.
Back to the list of 3D printers
Wanhao Duplicator 4S ($829)
The Duplicator 4S has 2 extruders.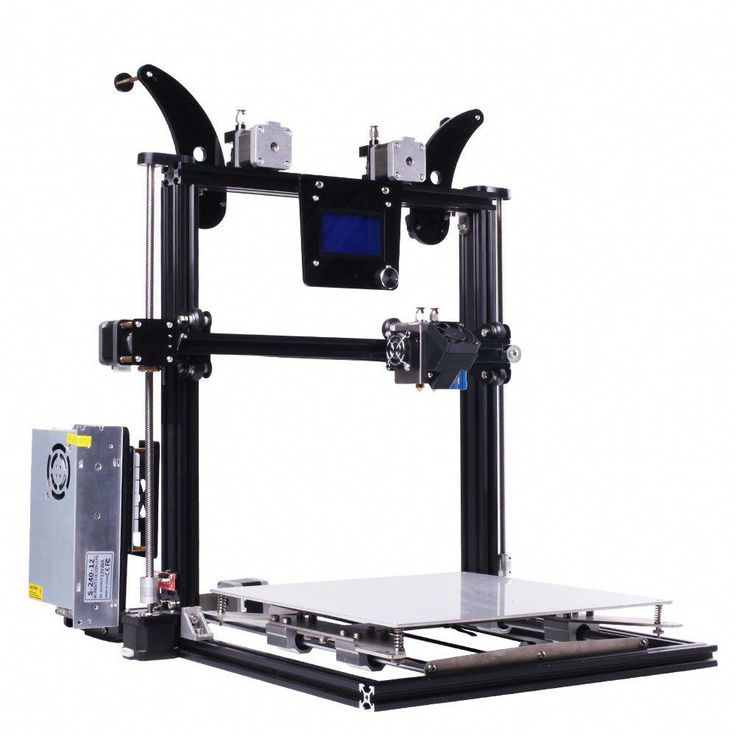 It's essentially a copy of the MakerBot Replicator. Behind the steel body is the MK10 material feed mechanism, which is currently the easiest to use and most sought after in the market for 3D printer components.
One of the features of this model is a high-precision material feed wheel, which ensures the same filament feed speed. The Duplicator 4S is equipped with a 0.4mm precision nozzle.
Specifications of cheap 3D printer Duplicator 4S
- Printer type: FDM;
- 3D printing materials: ABS, PLA, exotic;
- Working space: 225 x 145 x 150 mm;
- Minimum layer height: 100 microns;
- Maximum layer height: 500 microns;
- Number of extruders: 2;
- XY accuracy: 11 microns;
- 3D printing speed: 40 mm/s;
- Open Source: software;
- Compatible with materials from other manufacturers: yes;
- Heated table: yes;
- Nozzle diameter: 0.4 mm;
- 3D printer control panel: yes;
- Connection: USB, SD card.

Back to the list of 3D printers
Polar 3D Printer ($899)
Polar 3D belongs to a separate category of 3D printers in this top, since this model implements the polar coordinate system. This causes the table to rotate and the print head to move up, down, right, and left.
Thanks to the polar coordinate system, this 3D printer is powered by two stepper motors, so it consumes less power. In addition, it turned out to realize a larger size of the working area: 203 (table diameter) x 152 (Z coordinate) mm.
Rated $899, but there are special discounts for educational institutions. The discounted price is only $599.
Specifications of cheap 3D printer Polar 3D
- Printer type: FDM;
- 3D printing materials: PLA;
- Working space: 203 (table diameter) x 152 (Z-coordinate) mm;
- Minimum layer height: 50 microns;
- Maximum layer height: 400 microns;
- Number of extruders: 1;
- 3D printing speed: 40 mm/s;
- Open Source: no;
- Compatible with materials from other manufacturers: yes;
- Heated table: no;
- Nozzle diameter: 1.
 75 mm;
 - Control panel on 3D printer: no;
- Connection: USB, WiFi, SD card.
Back to 3D printer list
FlashForge Creator Pro ($899)
You've probably heard of this 3D printer. FlashForge Creator Pro is very similar to Makerbot Replicator 2X. This inexpensive 3D printer has 2 extruders, it has a steel closed case.
Other features include a table calibration system, and a guide screw that makes the guide system more stable and durable. The design is nothing special, but this model has earned positive reviews from the 3D community due to its reliability, versatility and ease of use.
Specifications of cheap 3D printer FlashForge Creator Pro
- Printer type: FDM;
- 3D printing materials: ABS, PLA, exotic;
- Working space: 225 x 145 x 150 mm;
- Minimum layer height: 100 microns;
- Maximum layer height: 500 microns;
- Number of extruders: 2;
- XY accuracy: 11 microns;
- 3D printing speed: 40-100 mm/s;
- Open Source: design and software;
- Compatible with materials from other manufacturers: yes;
- Heated table: yes;
- Nozzle diameter: 1.
 75 mm;
 - 3D printer control panel: yes;
- Connection: USB, SD card.
Back to 3D Printer List
Dremel Idea Builder ($899)
The Idea Builder is plug and play. This 3D printer is designed by Dremel. It has a color touch screen display. Sufficiently large working space - 230 x 150 x 140 mm. Unfortunately, the table is not heated. On the other hand, since only PLA plastics can be used, this model is great for classrooms and teaching labs.
Specifications of cheap 3D printer Dremel Idea Builder
- Printer type: FDM;
- 3D printing materials: PLA;
- Working space: 230 x 150 x 140 mm;
- Minimum layer height: 100 microns;
- Number of extruders: 1;
- Open Source: no;
- Compatible with materials from other manufacturers: no;
- Heated table: no;
- Nozzle diameter: 1.75 mm;
- 3D printer control panel: yes;
- Connection: USB, SD card.

Back to 3D Printer List
Printrbot Simple Pro ($999)
Printrbot Simple Pro is a major upgrade of the original Simple. Same open design, no body. Like its predecessor, the Printrbot Simple Pro is compact and portable. All-metal construction for excellent vibration damping and shock resistance.
The main differences are the built-in color touch screen, the ability to connect via WiFi and the free cloud service (optional), which greatly improves the 3D printing process. Simple Pro has a 32-bit processor, which ensures smooth and fast movements. And at the same time, this model is included in our top 20 cheap 3D printers, since its cost is $999.
Specifications of cheap 3D printer Printrbot Simple Pro
- Printer type: FDM;
- 3D printing materials: PLA;
- Working space: 200 x 150 x 200 mm;
- Minimum layer height: 50 microns;
- Number of extruders: 1;
- Open Source: design and software;
- Compatible with materials from other manufacturers: yes;
- Heated table: optional;
- Nozzle diameter: 1.
 75 mm;
 - 3D printer control panel: yes;
- Connection: USB, WiFi.
Back to 3D printer list
Prusa i3 Mk2 ($999)
This is one of the best 3D printers you can buy in this price range. All nodes are open-source licensed and part of the Rep-Rap project, so there are many copies around ... but all replicas are worse than the original.
The Prusa i3 Mk2 is equipped with a heated table that has technology to compensate for temperature differences in the center and corners. There is an automatic calibration system. And of course, amazing documentation. This is an extremely versatile 3D printer that you will 100% appreciate when you start printing with unusual materials such as PLA, PET, HIPS, Flex PP or Ninjaflex, etc.
Prusa i3 Mk2 is a 3D printer that is constantly being developed and maintained by the manufacturer. Its developer Josef Prusa regularly adds new features, software and design improvements (for example, the ability to color 3D print).