Meld 3d printing
MELD Manufacturing – Print Wrought Metal
R&D 100 Winner
The patented MELD technology has earned a spot in the R&D 100 and received a special Market Disruptor recognition.
Learn More
K2
Produce and repair large parts with unrivaled cubic build space.
Learn More
Bigger
No chambers. No powder beds. One of the greatest things about…
Read More
Better
No porosity. No sintering. No HIPing. Since there is no melting…
Read More
Faster
Fewer steps. Better results. High material throughput is one of the…
Read More
MELD Overview
Our Technology
This legacy part was printed quickly with the MELD technology for the US Navy. Its shape and features make extrusion and machining from billet challenging. This geometry is a good example of the value of the MELD process.
MELD Manufacturing holds more than a dozen patents for the MELD technology, a truly novel and innovative process for metal manufacturing. Traditional processes melt metal, introducing weakness and other issues. MELD makes the material malleable without melting, offering stronger, better quality parts.
MELD is uniquely open atmosphere, meaning no special chambers or vacuums are needed. This flexibility not only means less equipment and cost, but also that MELD is scalable and can make parts bigger, better, and faster than other processes.
The MELD process is unlike any other and opens up the possibilities of working with materials that were once off the table and can even allow customers to work with unweldable metals.
The combination of material freedom and scalability make MELD a revolution for a wide range of industries, including aerospace, defense, turbomachinery, and many others. Learn more…
Machines & Services
MELD Machines represent more than a decade of research and development. They are streamlined, painstakingly designed, and crafted with user experience in mind. Even more impressively, MELD Machines outperform other technologies in both deposition rates and quality of components produced.
A wide range of materials can be used in MELD machines and materials are not limited to powders, unlike many similar processes. We want our customers to enjoy the freedoms that MELD provides and won’t require you to purchase your materials from us.
Beyond machine sales, the MELD team is eager to help you explore what our technology can do for your application. We offer contract manufacturing and support for proof of concept projects across industries.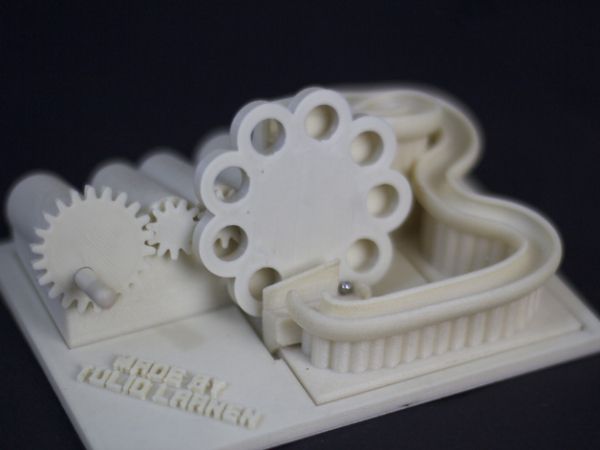 Learn more…
Machines – MELD Manufacturing
3PO
3PO features a MELD system with an integrated subtractive machine. It offers an immense cubic build space along with freedom in material choice. It boasts a 3-axis additive head with a loader capacity of 400 bars. The standard 3-axis subtractive head can be upgraded to an optional 5-axis head. 3PO eliminates the need for a second machine for the subtractive processing step.
Machine Specifications:
- Table Size: 165in x 89in
- Build Volume: 157.5in x 106.0in x 39.4in
- Cubic Build Space: 380ft³
- Overall Dimensions: 26.5ft x 36.0ft
- Build Material: Solid Metal Bar
- Material Range: Wide Variety of Metals
- Operation: Open Atmosphere
K2
K2 is designed for the production and repair of large parts, boasting an impressive cubic build space along with extreme material flexibility, open-atmosphere operation, and low power consumption.
Machine Specifications:
- Table Size: 86.6in x 43in
- Build Volume: 82.68in x 43.30in x 39.37in
- Cubic Build Space: 81.6ft³
- Overall Dimensions: 20.5ft x 15.3ft x 14.5ft
- Typical Power in Operation: 10-20A
- Build Material: Solid Metal Bar
- Material Range: Wide Variety of Metals
- Operation: Open Atmosphere
L3
L3 offers a generous workspace and build volume for manufacturing with increased access for fixturing. This machine offers a tremendous increase in production capability without requiring a larger footprint on the manufacturing floor.
Machine Specifications:
- Table Size: 51in x 23in
- Build Volume: 45in x 23in x 23in
- Cubic Build Space: 14.2ft³
- Overall Dimensions: 10ft x 8ft x 13ft
- Typical Power in Operation: 10-20A
- Build Material: Solid Metal Bar
- Material Range: Wide Variety of Metals
- Operation: Open Atmosphere
B8
B8 offers extreme material flexibility, with freedom of choice for acquisition of materials. The B8 model uses solid bar without waste, and raw material costs are minimal as compared to powder and wire-based processes.
Machine Specifications:
- Table Size: 42in x 18in
- Build Volume: 36in x 12in x 12in
- Cubic Build Space: 3ft³
- Overall Dimensions: 10ft x 11ft x 11ft
- Typical Power in Operation: 10-20A
- Build Material: Solid Metal Bar
- Material Range: Wide Variety of Metals
- Operation: Open Atmosphere
CD-14
The MELD CD-14 System enables users the ability to integrate the MELD deposition hardware and control system onto an existing machine platform. The MELD CD-14 System is comprised of a MELD CD-14 mounted assembly, Electrical Cabinet, and HMI.
Machine Specifications:
- Table Size: n/a
- Build Volume: n/a
- Cubic Build Space: n/a
- Overall Dimensions of Mounted Assembly: 32.2in x 29.2in x 83.
 8in
8in - Typical Power in Operation: 10-20A
- Build Material: Solid Metal Bar
- Material Range: Wide Variety of Metals
- Operation: Open Atmosphere
Unlike traditional processes, MELD is solid-state and yields fully-dense products with near-wrought properties, reduces distortion, and saves time and expense as compared to processes requiring secondary steps to achieve full density or improved properties. With high deposition rates, large parts can be fabricated rapidly for evaluation of new materials and new geometries.
MELD increases capability by allowing manufacture of functionally-graded multi-material parts or addition of material to non-weldable parts.
Machines can be customized to meet your size and geometry requirements.
Request more information about machines, parts, and services here
Bonding a 3D printed model
Share on Facebook Share on Twitter Share on Vkontakte
This guide will help you properly glue the separately printed parts of a 3D printed product using 3D printing and made of a white, strong and flexible material known as nylon 12 or polyamide 12. We will look at the elements that were made by 3D printer EOS based on selective laser sintering (SLS) technology . For EOS, PA 2200 is used.
Note that these recommendations only apply to nylon 12 or polyamide 12. Other materials have completely different properties that require special consideration.
Introduction
First of all, I would like to advise users to glue the model only in exceptional cases: if it breaks or you need a product that exceeds the maximum printing capabilities of selective laser sintering technology (20x25x33 cm). As a good example for our guide, we will take the model of a stress ball (you can see it in the photo above).
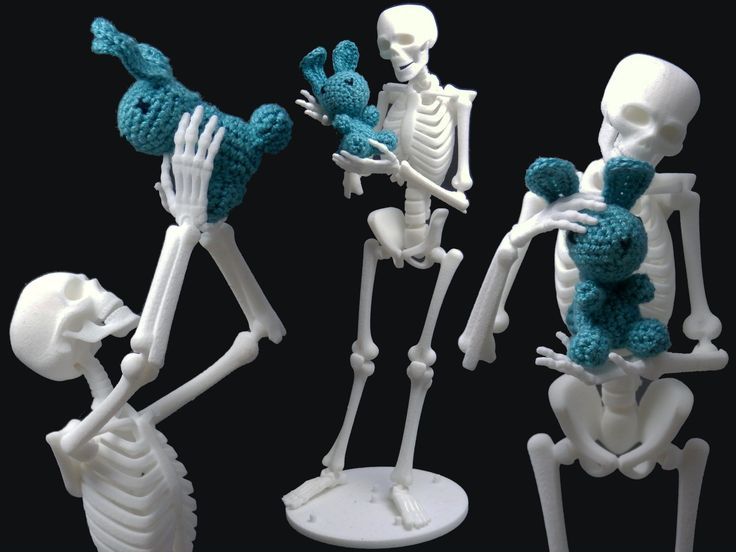
How often and easily elements of a model printed on 3D printer break depends on its design and the material from which it is made. For example, the thin tail of a monkey figurine can easily break if you press hard on it with your finger. However, if the model has as few protruding parts as possible (the same limbs), then it will be possible to break it only with a hammer. Selective laser sintering makes nylon extremely durable and resistant to various influences. Therefore, when the product breaks, cracks form on it, first of all. Thanks to the diamond-shaped structure, the ball turned out to be quite impact-resistant. Yes, and the model broke only after someone stepped on it through negligence.
Let's look at how we can glue our 3D product.
Superglue
The real name of superglue is cyanoacrylate. This variety also includes substances such as ethyl-2-cyanoacrylate, n-butyl-cyanoacrylate and 2-octyl-cyanoacrylate. The most common superglue is ethyl 2-cyanoacrylate. The other two varieties are mainly used in medicine, so you are unlikely to find them in a regular store. However, all of these adhesives can be used to repair or join parts made from nylon 12.
Araldit (epoxy resin)
An alternative to superglue is ordinary epoxy resin. However, we decided to still use superglue for our small repair, because it is somewhat more convenient to use.
Very Important
Be sure to read the instructions on the packaging carefully and follow them. For example, you need to use the adhesive in a well-ventilated area and store the substance out of the reach of children. Moreover, do not let the glue get into your eyes, otherwise the consequences will be terrible.
Getting Started
The adhesive should be applied sparingly, removing residue with a paper clip. After drying, the color of the glue is slightly different from the material of the model, so its excess does not look very aesthetically pleasing. The glue connects the parts of the product so firmly that it does not even need to be sanded. If the surfaces to be glued are cleaned in advance, this will only enhance the effect. Having studied the next photo of the ball, you can make sure that the repair was successful. At the same time, the gluing line is almost imperceptible.
Glue doesn't always work
However, glue doesn't always work. Basically, problems arise due to the fact that the properties of the adhesive and the material from which is made 3D model are different. Nylon 12 (polyamide 12) is not as flexible as glue. As a result, although our ball was completely repaired, its properties were not completely restored. After half an hour of continuous bouncing, the ball disintegrated again, because. the glue could not withstand the pressure of external forces on the sphere of the model. Thus, superglue only returns the appearance of the product, but the functionality is different. Therefore, it is not recommended to restore products such as springs or hinges with glue.
Painting the glued part
If you paint a model that has been glued in some places, the join lines, like the glue itself, may become more visible. In other cases, as can be seen in the photo of our ball, painting, on the contrary, only hid the defects. We used regular paint like Tamiya Spray.
When gluing before painting, it is very important to carefully apply the adhesive, making sure that it does not spread and remove residues in time. Otherwise, the paint will stick to the glue and it will become more visible. In addition, using a regular paper clip, carefully remove the remaining paint in the holes.
Finally
We recommend using adhesive only in exceptional cases, such as when you need to restore the product to its original appearance. At the same time, apply the glue carefully - this is very important, especially if you plan to paint your model in the future. Also, be aware that bonding does not fully restore the functionality of products printed with 3D printing technologies .
SLSWhite durable plastic
3D Printing vs.
 Injection Molding - Differences & Opportunities
 Industry 4.0, Automotive, Innovation May 15, 2022
The automotive industry has always sought to introduce new technologies and methods into the production process. High competition and ever-increasing user needs effectively stimulate innovation in many areas. This also applies to the production of individual components - in this context, 3D printing and injection molding are currently being used, among others. What are the features of these technologies? Can they be combined?
Automotive 3D printing and injection molding
These technologies can be applied to the production of both interior and exterior parts of a vehicle. They are used to make parts such as bumpers, door panels, floor rails, air vents, door handles or dashboard elements. What are the features of these two technologies?
Front shock absorber. The origins of 3D printing, also known as additive manufacturing, date back to the late 1980s. Although the development of this technology has spanned several decades, it is still innovative and extremely useful - its main advantage lies in the ability to create three-dimensional tactile models that mimic digital ones. 3D printing is used in many industries, including the automotive industry, where it is used in almost every step of the production of . The technology is used, among other things, for prototyping, production of spare parts and finished components. This solution has many advantages, including the low weight of parts made using additive manufacturing technology, as well as high strength.
See also: Injection mold production in cooperation with Knauf Automotive - from design to finished product
3d printing vs injection molding - what is the difference between these technologies?
Injection molding is an alternative to 3D printing. It is also well known in the automotive industry. Here, the manufacturing process involves injecting a plasticized mass of material into a mold cavity, which is then cooled to solidify the product. Here, the manufacturing process involves injecting a plasticized mass of material into a mold cavity, which is then subjected to high temperatures. The whole process must take place under a certain pressure, and after the plastic mass has solidified, the desired shape is achieved. The differences between these methods are quite significant, since they concern not only the technology itself, the scale of production, but also the tools used. This is reflected in the cost of manufacturing elements, their durability and the speed of the whole process. However, both of these methods have their advantages - moreover, it is possible to combine the advantages of 3D printing and injection molding.
Read also: Reverse engineering - how we use it to support our Clients.
3D printing vs injection molding - when to use each method
3D printing is most often used in situations where short production times are critical or where design is subject to frequent changes . It is also a good choice for small production runs (up to 100 parts) and relatively small items to be produced.
Injection molding, on the other hand, is a suitable option if longer production times are possible and also for high-volume production without prototyping. The process is also flexible enough to allow this method to be used to produce parts of any size and complexity.
As a result, 3D printing will be a good starting point for manufacturing, especially for small-scale production and prototyping.
See also: Added value in the production of automotive parts
Advantages and disadvantages of 3D printing and injection molding
3D printing (additive manufacturing) has a low cost of implementation, which can be especially important for small, growing companies . In addition, you can easily make changes or fix design-related errors, so it is ideal for the prototyping stage. However, it is worth noting that this method is not without drawbacks, the most important of which is the limited number of products that can be printed at the same time, which affects the speed of the entire production process.
The main advantages of injection molding are high speed of production, exceptional strength of the final product and the ability to mass-produce defect-free parts, which greatly minimizes costs. The disadvantages, however, are the design limitations due to the geometry of the mold, as well as the difficulty of making changes. The latter aspect, however, can be mitigated with proper project preparation. In addition, injection molding can be expensive to implement, but with large production volumes, it quickly proves to be a very cost-effective method.
See also: Automotive injection molded parts by Knauf Automotive
Is it possible to combine the advantages of these two methods?
Until recently, 3D printing and injection molding were considered two competing methods, but the automotive industry is proving that these technologies can successfully complement each other, bringing new business benefits. 3D printing is an indispensable technique primarily in the prototyping phase of an injection molding project, which must always be driven by detailed analysis to ensure that the target part fulfills its utilitarian and aesthetic functions. Before making a decision on the implementation of the project, it is a good idea to create a prototype on a 3D printer. This will help eliminate any errors and ensure that the solution meets the customer's goals and expectations.
See also: Computer Engineering in Plastic Injection Molding
Automotive Components - From Mold Design to Parts Production
Knauf Automotive is committed to innovation in the automotive industry. The combination of 3D printing and injection molding opens up significantly more possibilities and results in higher quality end components such as dashboard parts, door and window pillars, roof modules, wheel arches and grilles.
See also: Case study: Pedestrian protection module front - Renault Captur front air guides and front bumper shock absorber.
Each mold design is thoroughly analyzed to ensure that there is no room for error in the final production step.
Learn more