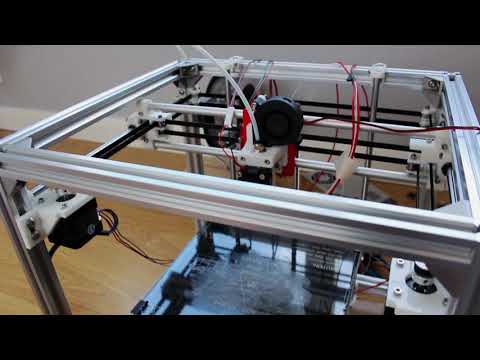
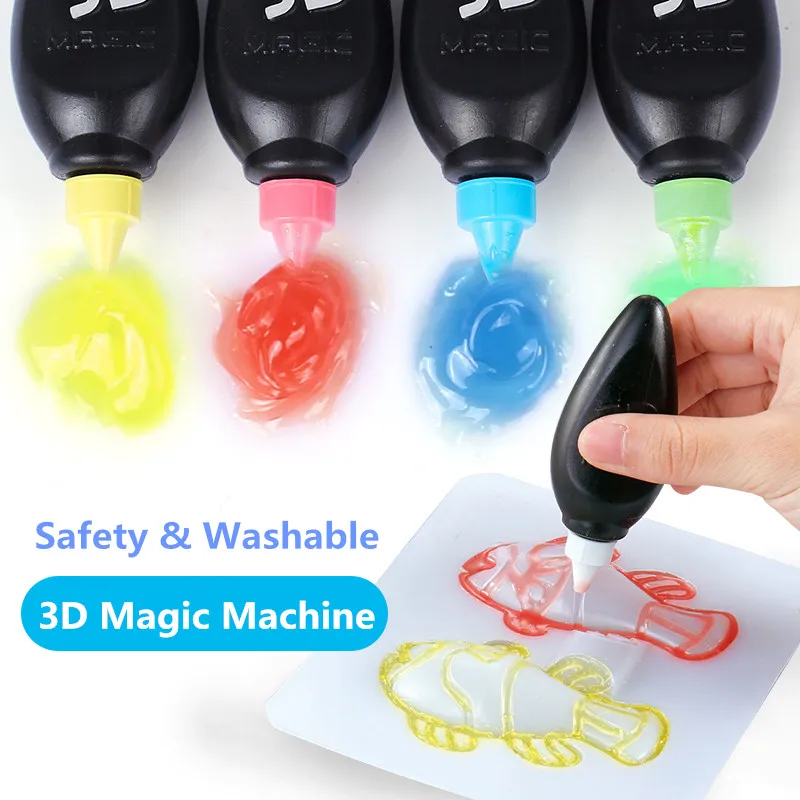
3D magic printer
3D Printer Review: JGMaker Magic 3D Printer
Table of Contents
- Pros & Cons
- Verdict
- Features
- Tech Specs
- Assembly
- Design
- First Print
- Software
- Where to Buy
Save $39 off the JGMaker 3D Printer with coupon code KEVIN39P (on the official store only) or click here to head straight to checkout.
If you’re interested in picking this 3D printer up for yourself, check out the following shopping links*.
- Amazon
- JGMaker Official Store
Pros & Cons of JGMaker Magic 3D Printer
JGMaker Magic is ready to compete with popular alternatives, such as the Ender 3 Pro. At a glance, these printers look very similar in both shape and size. At a closer look, you’ll find some features that JGMaker has that are not available on the Ender 3 and other 3D printers at the same price point.
JGMaker Magic 3D PrinterPros
- Incredibly affordable
- Decent print volume
- High-quality prints are achievable
- Resume printing feature
- Filament detection sensor
- Easy assembly
- Compact design
- Dual Y-axis design
Cons
- Build-plate not magnetic
- Adhesion (sometimes) needed to get prints to stick to bed
- Side filament holder (if size is an issue)
Verdict
After building the JGMaker Magic 3D printer, we were impressed with the quality of prints right out of the box. It required little to no calibration and tweaking, thanks to its semi-auto leveling feature. All in all, the JGMaker Magic 3D printer is an extraordinary 3D Printer for beginners looking to purchase one in the sub-$200 price range. For more expensive printers, see the other 3D Printers we recommend.
There are a few features that really make the JGMaker Magic 3D printer stand out from other printers in this price range. The auto-feeding technology makes it easy for beginners to load and unload filament. In addition, the filament detection sensor will pause and save the printing from running out of filament during the printing process. Typically, filament detection is only found on $500+ printers, and we’re impressed with how well it works on Magic.
The 3D Printer is easy to assemble, although the manual did not come in the box and had to be viewed or downloaded online. The dual Y-axis rail provides Magic with a stable print bed, something that often becomes a problem with affordable 3D printers.
The spool holder sits on the right, which is something that may be a problem for some, particularly if you’re planning to put this 3D printer in a full enclosure. However, this design does allow you to replace the filament quickly. Worst case, one could always 3D print a top-load spool holder that sits on the top gantry, mimicking the other 3D printers in this price range.
There are certainly better 3D printers available on the market, but few come close to the quality and ease of use at this price point (less than $200). This printer may require some upgrades to the build platform, which is not magnetic, but they also sell an Ultrabase glass bed upgrade kit on their site.
Features
For the price point, the JGMaker Magic 3D Printer is packed with features, some of which are often only available to mid-level 3D Printers.
Filament run-out sensor on the JDMaker Magic 3D printerFilament Run-out Detection
Never worry about your filament running out in the middle of a 3D Print. The Magic includes a filament sensor that will detect the filament and pause the printer before it completely runs out. This allows you to swap filaments and resume printing, saving any prints that were currently in process.
Thermal Runaway Protection
Entry-level 3D printers, especially the cheap ones, run the risk of catching fire due to their cheap components and often lack of quality control. Fortunately, the Magic will put your mind at ease as it includes thermal runaway protection, which prevents the print temperature from getting out of control (it will shut off once it reaches a specific temperature).
Resume Printing
Power-outages are the enemy of additive manufacturing, especially with 3D printers. Fortunately, Magic includes a feature that will resume printing where the last print was stopped due to a power shortage. Such a feature is not new or unique to 3D printers, but it is typically not included with printers at this price point.
Auto Filament Feeder mechanism on the JGMaker Magic 3D printerAuto-Feeding Filament
Affordable printers often require you to feed the filament directly into the hotend when unloading and loading filament. This experience is often frustrating for beginners, or when filament clogs in the hotend. Magic includes an auto-feeder that will pull/push the filament through the hotend, leaving your hands away from the hot extruder.
Dual Y-axis Rail
Entry-level printers often catch flack for their lack of rigidity. However, the Magic is one of the few to include a dual Y-axis rail on top of its all-metal base. This was one of the most rigid 3D printers we’ve built/used, and we’re impressed with the printing accuracy.
Semi-Auto Leveling Function
Although Magic does not have a fully automated leveling function, it does include an easy-to-use leveling process that will help you level the build (print) platform. By moving to 5 critical points (four corners and the center) it will make it easy to quickly level your build platform, without having to run custom G-code, as required by the Ender 3 printers
Technical Specifications
| Layer Resolution | 0. 1mm 1mm |
| Layer Thickness | 0.05-0.3mm |
| Stock Nozzle Diameter | 0.4mm |
| Nozzle Temp | ≤245℃ |
| Heated Bed Temp | ≤110℃ |
| Print Speed | 10~120mm/s (suggested 60mm/s) |
| Input Voltage | AC110/220V (optional) |
| Output Voltage | 24V |
| Wattage | 200W |
| Supported Print Materials | PLA/ABS 1.75mm |
| Positioning Accuracy | X/Y: 0.012mm Z: 0.001mm |
| Connectivity Working Mode | SD Card or Data Cable |
| File Format | STL, OBJ, AMF, DAE |
| OS Compatibility | Microsoft Windows, Mac OS, Linux |
| Product Weight | 8KG (~17.6lbs) |
| Printer Size | 443x450x472mm |
| Package Weight | 9.6KG (~21lbs) |
| Package Size | 525x530x192mm |
In addition to the parts of the 3D printer, you will also find the following in the box:
- Test filament (white)
- Putty/Utility knife
- USB Stick (with test models)
- Alan Wrenches (required for assembly)
- A spare hotend nozzle
- Leveling card
- Wire (filament) cutters
Assembly
The JGMaker Magic 3D Printer is technically considered a kit because it does not come fully assembled. That said, the “kit” is a far-stretch, as it requires very little assembly, allowing you to be up and running in no time.
Some printers, including the Prusa i3 MK3S, come as kits or are fully assembled. On average, a Prusa kit will take about 8 hours to assemble. Contrary, the Magic printer took only 20 minutes.
The base of the 3D printer comes pre-assembled. You’ll be required to assembly the X and Z gantries, followed by attaching the Extruder to the Z gantry. With the provided instructions (online), we found this process to be quick and easy.
For us, the belt assembly was the only part that took a second glance. The pictures included in the instructions were not the clearest and we had to figurine out how the belt clamped together using experience from other 3D printers. This could be a challenge for someone brand new to 3D printing or CNC machines in general.
Unfortunately, the JGMaker Magic 3D printer is new to the market so you will not find much assembly content on YouTube or elsewhere. In such cases, you may be able to reference an Ender 3 assembly video, or a similar printer, to get past any assembly hurdles.
The JGMaker Magic 3D printer is a well-built “tank” compared to other 3D printers in its price-point. We found this printer’s base to be well-built compared to the Ender 3, which often receives complaints about their wobbly base.
The Dual-Y system (mentioned above) has proven to provide a rigid build platform, which helps increase print quality and accuracy. This adds a great degree of stability to the machine and lowers the chances of needing to re-level the build platform after removing a print.
With an Extruded aluminum frame, one could add accessories to the side and top gantries as needed. Though, you won’t find many modifications available online since the JGMaker community is smaller (but growing!) when compared to other Chinese Manufacturers.
The LCD panel and control knob are well manufactured and intuitive when compared to other entry-level 3D printers. We found this control knob to be the sturdiness and most-sleek design out there, as many other printers we’ve tried have a 3D printed knob or one that makes it challenging to select menu items.
Lastly, we found the 3D Printer to be about average in terms of sound output while running. There are definitely 3D Printers that are loud (looking at you MakerBot), but Magic is comparable and bearable for anyone getting into a beginner-friendly 3D printer.
First Print
As someone who has been 3D printing for nearly 10 years, I was impressed with the quality of the first print. I leveled the build platform once and the first test print, which was the included cube, came out extremely well.
The temperature settings could certainly be tweaked to get a “crisper” edge, but the layer adhesion, accuracy, and the rest of the 3D print were all successful.
Software
The JGMaker Magic 3D Printer will work with any slicer, including the popular Utimlaker Cura (that we recommend). We could not find a pre-made Printer Profile (for Cura) online that included the best settings for this printer, but due to its closeness to similar printers, you can follow recommended print settings for the Crearlity Ender 3.
Cura 3D Printing slicer can be downloaded from Utlimaker’s website for free. Cura is available for both Mac, Windows, and Linux users.
For free models to download, check out Thangs.com, which boast a variety of 3D models, including many geared towards 3D printing hobbyist.
Where to Buy
Despite boasting mid-level features and a relatively capable 3D printer, the JGMaker Magic 3D Printer is available for a retail price of under $200. While the 3D printer certainly has some cons, this price makes it a bargain for anyone looking to get their first 3D Printer.
After spending some time assembling and printing on the JGMaker Magic 3D printer, we feel confident to recommend this machine to anyone on a budget or anyone who is looking to get their first FDM (FFF) 3D Printer.
There are many 3D Printer options out there, but few come close to including the number of high-quality features for this price point and friendly user experience.
If you’re interested in picking this 3D printer up for yourself, check out the following shopping links*.
Save $39 off the JGMaker 3D Printer with coupon code KEVIN39P (on the official store only) or click here to head straight to checkout.
- Amazon
- JGMaker Official Store
We may earn a small commission if you purchase after clicking one of our affiliate links. We only recommend products that we’ve tested, use, and believe in.
JGMaker Magic 3D Printer | Project 3D Printers
Save 0% Save %
Original price $239.00 - Original price $239. 00
00
Original price
$239.00
$239.00 - $239.00
Current price $239.00
| /
SKU JGAurora Magic
Availability In Stock
- Description
- Videos
- Shipping & Returns
- Price Match
Description
Inventory in the USA!
Ships from the USA!
JGMaker Magic 3D Printer is a new 3D printer with high quality and stability
Industrial grade silicone wire: Features an aviation-grade aluminium profile, all-metal base and a built in power supply to ensure safety and longevity of the printer
Filament RUN-OUT detection: Auto warning if filament runs out or break. Intelligence help to save time and filaments.
Power failure detection: Resume from accidentally power loss: one click to continue and no longer to worry about long time prints.
Resume print due to SD card removed accidentally: If for any reason you happen to remove the SD Card during the printing process, by reinserting the SD Card you can continue printing.
Right Filament Holder: Convenient to refill or change the filament, and it is more stable for feeding.
Sturdy metal base: The bottom of the machine is a sturdy metal base and enclosure. The additional weight at the bottom of the machine remain its stability that provides a safe place for key electrical components.
Removable build platform: The removable and flexible build platform ensures your prints adhere to bed while printing and are easy to remove when complete.
Videos
Shipping & Returns
Order Confirmation:
As soon as you place your order, you will receive an order confirmation e-mail. This means that we have received your order in our system and pre-authorized your credit card for the purchase. As soon as we receive your order, we automatically reach out to our suppliers to confirm that it is in stock and available for immediate shipment. If your item is on backorder or unavailable, we will void the pre-authorization and reach out to you via e-mail. If your item(s) are available for immediate shipment (within 5 business days), we will process the charges and submit the order for shipment.
Order Shipment:
If your order is in stock and we process the charges to your credit card, it will ship within five business days from the date of your order. We will send you tracking information within 24 hours of your order leaving the warehouse to the e-mail address you provided when checking out. If you do not receive tracking information from us within six business days of your order, feel free to follow up with us at [email protected].
Cancellations & Refunds/Returns:
Before accepting a return on a product that isn't functioning as it should, Project 3D Printers reserves the right to exhaust any and all means to resolve and/or repair the malfunction through technical support and replacement parts provided by both the manufacturer and Project 3D Printers. No return will be accepted without reasonable attempts to resolve the issue(s) first.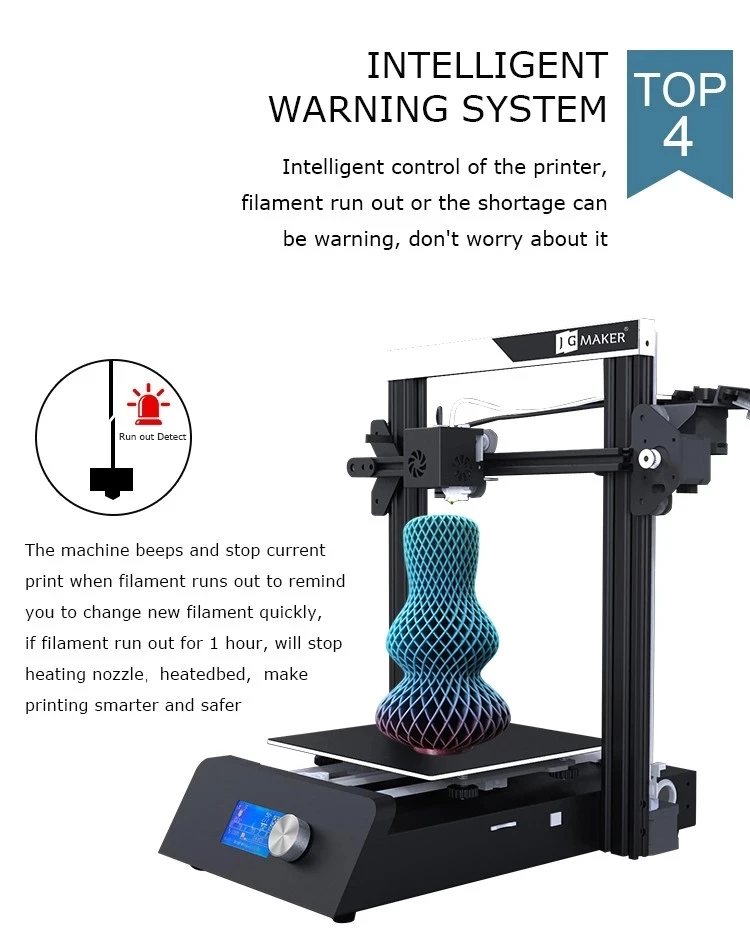 All returned products must be returned within 10 days of date of purchase.
Project 3D Printers enforces a strict "No Returns Accepted" policy for opened and/or partially used products, including filament, resin, or any consumable of any size and weight that has been used or opened from its factory and vacuum seal. Only products and consumables that are unused, and in brand new factory condition are eligible for return to the manufacturer of origin within 10 days of the purchase date.
If a product is found to be non-functional or defective, the product must be returned with its full original contents within 10 days of the delivery date for inspection of the non-functionality. If the product is found to be defective or non-functional a full-refund will be given, not including return shipping at the customer's expense.
All orders cancelled after 48 hours are subject to a $20 administration fee, whether or not your order has shipped. If you order has shipped, you (the buyer) will also be responsible for actual return shipping charges. Refunds will only be issued to the original credit card that you use when placing your order. Buyer is responsible for and pays a 20% restocking of the value of the returned item(s). Buyer pays all shipping fees for the returned item(s).
Customs Fees, Tariffs, Duty Fees and Import Taxes:
Only customers are responsible for their local import taxes, tariffs, duty fees and import taxes incurred during shipping. To know about your customs import duties please contact your local customs office with this details (HS Code :8477 Product description: 3d printer or 3d printer kit). If the tax amount is high, we can provide assistance to reduce it.
Price Match
We work very hard to ensure that we offer the absolute best prices online. If you find another online store that offers a lower price than us within six months of your purchase date please let us know and we will refund your original payment for the difference. We want you to feel confident that you are getting the absolute best price for the product you are ordering.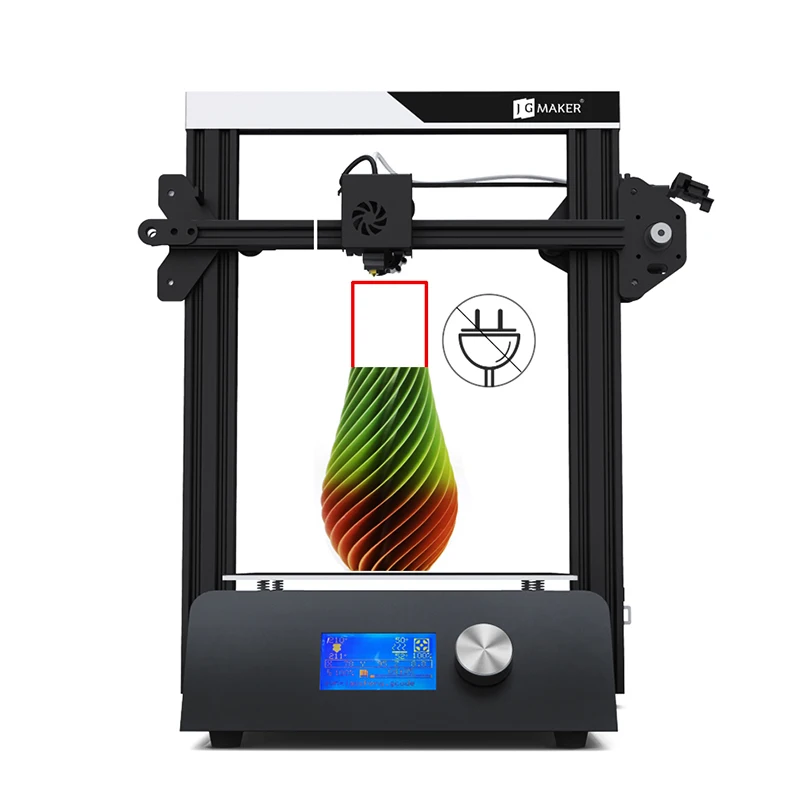 If you find that our own website has a lower price for the same item you have ordered within six months of your purchase date will refund the difference as well.
To request your partial refund simply e-mail us a link to the same product on our website, or on our competitors website within six months from the date of your order and we will process the credit accordingly.
Our 100% Price Guarantee has some limitations:
- You must purchase the item from our website before requesting your Price Match Guarantee
- Promotions such as rebates and buy one, get one free offers are not eligible
- The item must be in stock on the competitors website
- The competitor must be an online store, they may not have a retail location
- The website can not be a discounter or auction website (ie; eBay, overstock, etc..)
- The competitor must be an Authorized Retailer of the product in question
- The Price Match Guarantee includes the item price and the shipping charges, it excludes sales tax
Magic printer.
 A short course in 3D printing techniques
 My previous posts on the topic:
First 3D printing event in the Netherlands
3D printing event (final)
New budget 3D printer
To answer frequently asked questions, I will describe popular 3D technologies here - printing - printing with molten plastic, powder, photopolymer, laser sintering. Of course, this information is not the ultimate truth. This is the picture that has developed in my head today from various sources.
Printing with molten material (plastics, chocolate)
This is the most popular method among hobbyists. Its essence is simple. Can you imagine how a glue gun works? A plastic rod is pushed from one end of the gun, and at the other end it is heated to a fluid state and squeezed into the gluing site.
The printer is a machine with 3 axes. The print head is fixed on the machine's coordinate system. When it moves along the X/Y coordinates, the molten plastic is squeezed out of a thin (0.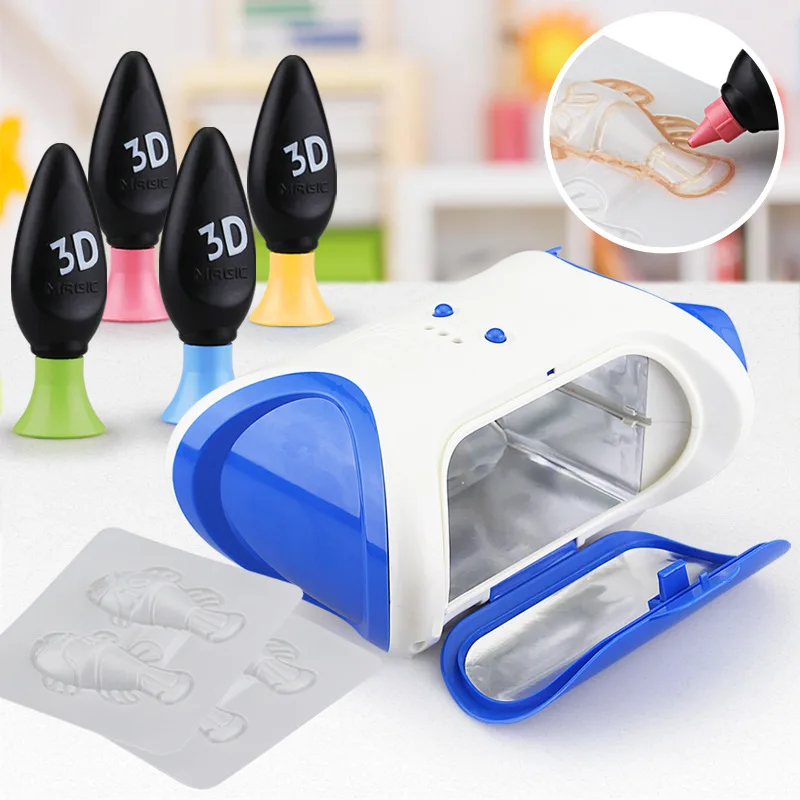 3-0.5mm) nozzle and solidifies. After printing one layer, the printer changes the Z coordinate (lowers platform / raises head) and prints the next layer.
Differences between printers
The main difference between printers is how the 3-axis movement is implemented, how the material is fed, whether the table is heated or not, whether printing is supported by 2 materials.
Most printers of the RepRap family only move the head along the X axis. The platform with the object moves along the Y axis. The print head structure and the drive along the X axis move along the Z axis. Due to the movement of such a mass, accuracy and print speed suffer.
In Ultimaker and the latest version of Makerbot illuminated with great fanfare at CES 2012, the print head moves along two axes (X/Y) at the top of the machine, and the platform with the product descends gradually down (along Z). This achieves high quality and printing speed, which can be up to 10 times faster than that of Mendel.
In addition to the classic schemes of machine tools inherited from CNC, there are experiments with delta robots.
Plastic
Different plastics are used for printing. The most popular are ABS, from which most toys are made, and PLA, a biodegradable plastic used for packaging and disposable tableware. In addition, special types are used that dissolve in water (PVA) or a special solvent. With such plastic, auxiliary structures can be printed, which are removed at the end. The black plastic in the next photo is such an auxiliary material.
Dual-extruder printer is used to print two colors or one color with support material. To date, this technology has not yet been worked out in amateur printers. The STL format, chosen as the standard by hobbyists, does not support multiple colors. But the devices are already available, so these problems are already in the process of being solved.
Plastic for printing is sold in coils in the form of a rod of various diameters at a price of about $ 40-60 per kg, water-soluble is more expensive (9$0). Different types of plastic (and other materials such as chocolate) have different operating temperature ranges. A temperature sensor is used to maintain the optimum temperature.
To ensure print accuracy, the part must not move, so make sure it sticks to the surface of the platform.
Since the plastic part is printed for a long time, it cools unevenly. Layers printed earlier cool earlier. Therefore, the part tends to deform - to bend. On the one hand, the adhesion must be strong enough to prevent the part from tearing off the platform when cooling, on the other hand, it must be weak enough so that it can be torn off by hand at the end of the process without damaging it.
For this reason, the platform for working with ABS plastic is made heated and thermal tape (Kapton tape) is glued onto the platform, and masking tape is glued onto the platform for working with PLA plastic (blue in the picture above). In professional printers, the process generally takes place in a closed box, where a high temperature is maintained, ensuring slow cooling and better plastic adhesion. So tape is another consumable for 3D printing.
Powder printing
This technology is used in ZCorp's professional printers. It allows you to print with high resolution in several colors at the same time. The essence is simple - a finely dispersed powder is poured in a thin layer, leveled, then the head goes and, like in an inkjet printer, pours the powder with a binder colored in the desired color. Then everything repeats - a layer of powder, alignment, binder. At the end, the remaining powder is blown out and you're done. Additional material to support hanging elements is not required here - its role is played by powder, which evenly fills the container and serves as a support for subsequent layers. Printers cost from $15k (monochrome ZPrinter 150), color ZPrinter 250 - from $25k.
In addition to the plastic filler, happy owners also play with other materials. I heard about the use of ceramics and metal. After annealing, a ceramic or metal product is obtained, respectively.
Laser sintering
Almost identical to powder printing. Only instead of a print head, a laser sintering powder is used instead of a binder. They sintered a layer, poured a new one, sintered - poured, etc.
The Bristol branch of the famous aerospace and defense company EADS baked a bicycle using this technology.
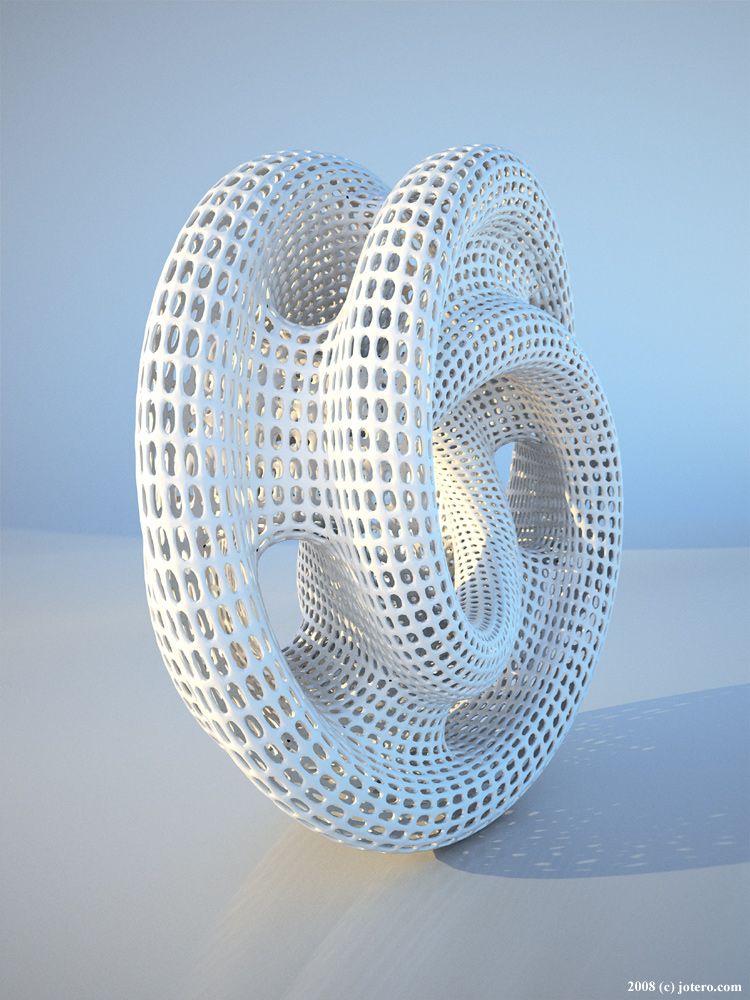
These openwork objects are also made using this technology.
In the same way you can make products from refractory materials. Only the laser needs more power.
In 2011, Markus Kaiser made a splash with his solar 3D printer project. Instead of sintered powder, he used sand, which he collected right there in the desert. Instead of laser beams, he used a large Fresnel lens, which concentrated the sun into a point and melted the sand. The author of the project himself acted as a filling and leveling device :) The coordinate system of the printer and the computer were powered by solar batteries.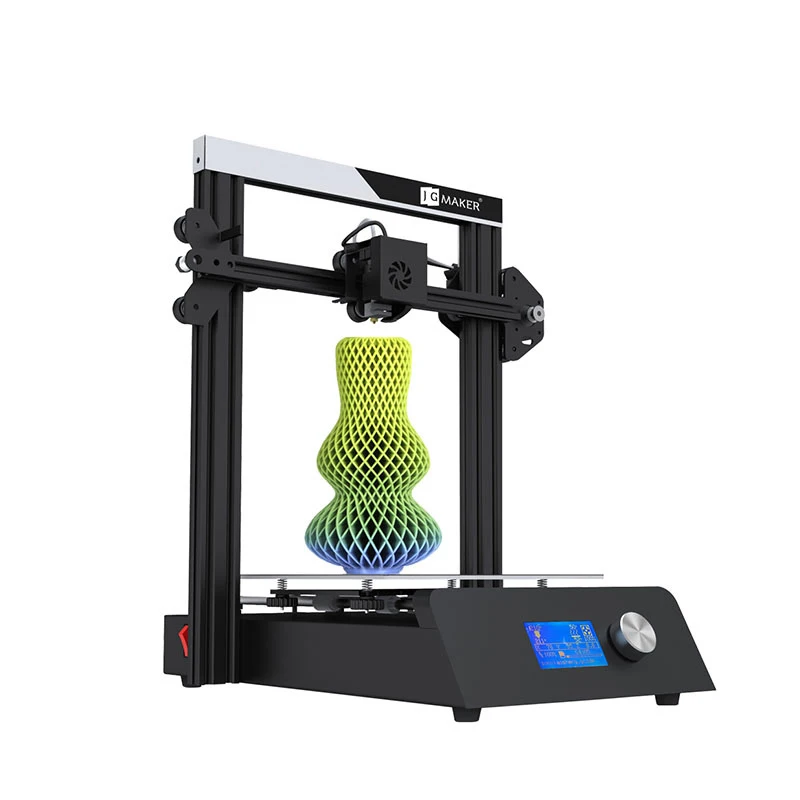 The result is a bowl like this:
The whole process is captured on video:
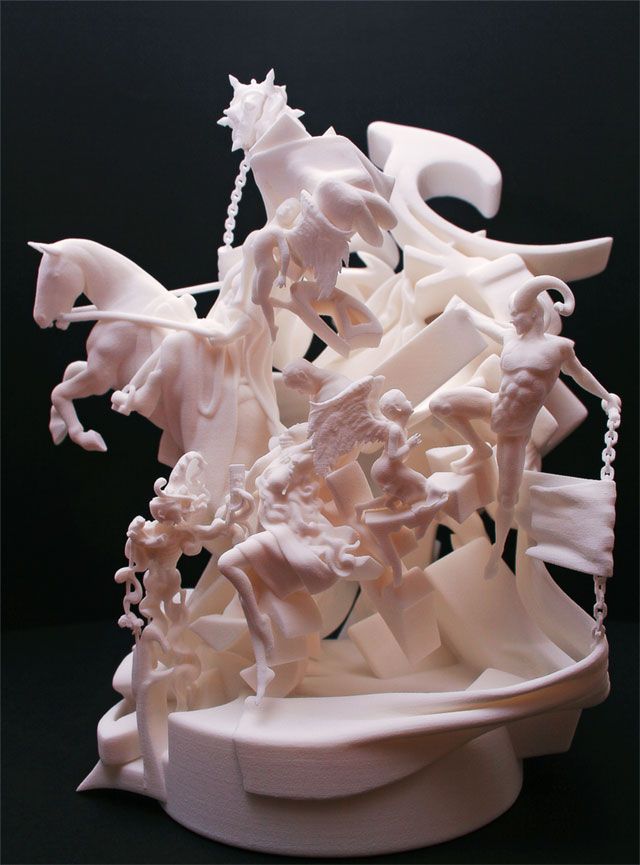
Printing with photopolymer
The principle of operation is simple - we project a section of the model onto the resin, it freezes where it was illuminated. Raise the model and add resins, highlight the next cut, and so on.
This printing method is also found among amateurs and in laboratories due to the simplicity of the device and the accuracy of the result. Here is the scheme of the device:
There is a cuvette with a photopolymer and a glass bottom. On this bottom, the projector projects the image from below. The software switches images on the projector (sections of the object) and gradually raises the glass platform on which the object grows. As the photopolymer is consumed, it is added to the cuvette. From above, the apparatus is usually closed with a cap that does not transmit a certain spectrum in order to avoid parasitic illumination.
Here is the work of such a printer, created at home:
An example of an object printed on such a printer:
There are many different photopolymers. They cost differently, react to different wavelengths of light, and have different activation times. Therefore, when creating a printer, it is necessary to select the material and the lamp for illumination. Instead of a projector, you can use a laser (a flashlight with a narrow beam) and a scanning system. Then the cut will need to be drawn with a laser, as in laser sintering. If I'm not mistaken, then the consumables for the top printer cost about $300 per liter. But the community interested in building such printers also found a cheap option - about $20 per liter. Community, various information on photopolymers, projector, printer, etc. can be found here - 3dprinter.wikidot.com
nano-cemms.illinois.edu - here, with the help of a series of videos, the 3D printing process in the laboratory is assembled literally on the knee. The polymer is poured into a glass and a conventional projector illuminates the polymer from above through a mirror. The platform on which the object is grown is attached to a small tripod and lowered into the glass. Manually on the projector, the pictures of the slices change and the platform gradually lowers. At the end of the process, the object is immersed in resin. Then it is removed, washed and dried. Of course, the actual process takes many hours. Printing occurs at a speed of several millimeters per hour. So there is no need for automation here.
Added later:
Industrial printers of the Objet Connex family built using this technology can use several different types of photopolymers in one product. In fact, this is a large inkjet printer, with dozens of nozzles connected to containers with different materials. During the printing process, the polymer is applied to the product and immediately illuminated.
Here are examples of objects printed with this printer at one time:
Printing process:
Many publications note that 3D printing is the current trend. So we are waiting for accelerated progress in this area, new printers and materials.
Update 2:
LEGO 3D Chocolate Printer
Update 3:
Homemade Resin Printer at instructables.com
Does your business need a 3D printer?
We have already become accustomed to the fact that in the modern world, technologies that surprise today become necessary tomorrow. Until recently, a 3D printer was an expensive curiosity, and today it is being used with might and main in enterprises. Is it worth it to envy modern companies that have access to a boon called 3D printing? Yes, and in general, who and why needs a printer that creates everything from a rattle to a firearm?
3D printing technology is being used by professionals in a wide variety of fields. The European Space Agency wants to build a lunar colony using a 3D printer. NASA is planning to take a 3D printer into space, and a Dutch architect is planning to print a house. This is not to mention the fact that there are regular reports of the use of 3D technology to create clothes, parts, prosthetics, sweets, and even human bones. 3D printing technology and the “magic” printer itself are still not understood by everyone today, but in 10 years it may be as common as a washing machine in every home.
But here is the main question for business: is it worth throwing away your multi-million dollar equipment for the sake of a newfangled, albeit very promising direction? We will try to answer this question in this article.
The 3D printing market is developing very fast
The advent of 3D printing is gradually changing the face of modern business. Many have paid attention to this technology because it provides an opportunity to improve internal production processes. According to a study by Wohlers Associates, global sales of 3D printing services and products will reach $6 billion by 2017 and will surpass $11 billion by 2021.
Among the main areas of application of 3D technology are light industry, medicine, IT and construction. Devices for 3D prototyping and just making souvenirs are actively used.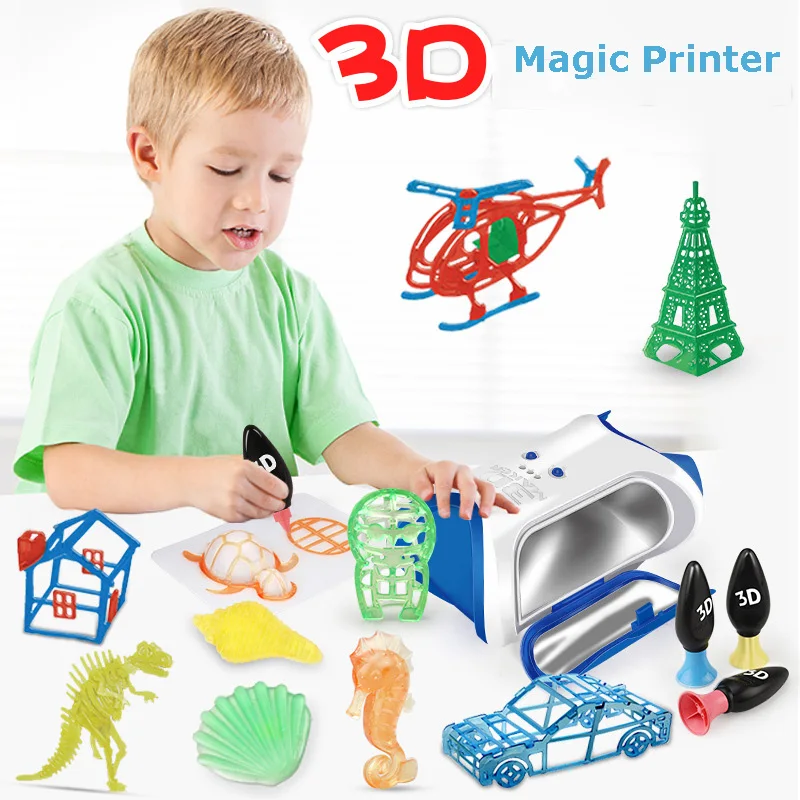 Now you can easily find a three-dimensional model of the product you like and print it. According to many experts, in the near future mass production will recede into the background, giving way to workshops, where it will be possible to create many household items, clothes and even food.
Now this market segment is growing much faster than others. Tired of mass production, self-identification through objects and things is important for many people. 3D printers open up new avenues for self-expression in the physical world, where there is no longer a need for knitting, jigsaw sawing or clay sculpting. Almost everyone can materialize any of their ideas with the help of 3D modeling and 3D printing. But it is worth noting that due to the rapid dynamics of the development of this industry, there are fewer and fewer places for the implementation of new projects.
Is there a place in the market for your company?
Major users of 3D printing technology include Stratasys, 3D Systems, Ponoko and Shapeways.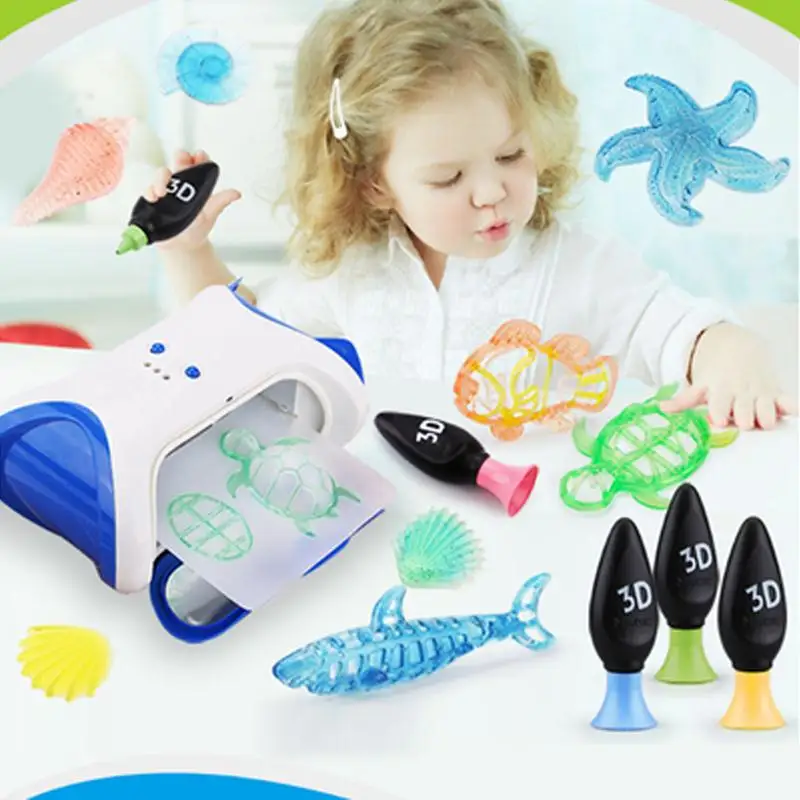 Compete or not compete with them - each business decides for itself. But it is worth remembering that there is always a place for inventive owners in the world market, and in Ukraine the “field for experiments” is more than wide. By the way, the most reliable way is to develop an original product for the medical sector or the aerospace industry.
The well-known company Shapeways uses 3D printers to create the widest variety of products: from jewelry to the Rubik's Cube. Make Eyewear creates nylon frames for sunglasses or optical glasses. Freedom of Creation offers home furnishings to customers, and Spuni has carved a niche for ergonomic baby feeding spoons. In turn, Tecnologia Humana 3D creates 3D models of ultrasound results for expectant mothers and fathers.
There are a lot of opportunities, and against the background of the fact that 3D printing is not yet so developed in Ukraine, this technology looks especially attractive. What's the catch? That despite the enticing description of the possibilities, there are few customers who "trust" the new technology.
What's the catch?
The promise of 3D printing technology has a downside. The fact that at the moment there are still a lot of niches for developing your business in this industry is due to the fact that there is not much demand for it yet. And here there are a couple of nuances that you need to understand:
- buying a 3D printer to compete with high-circulation products does not make sense;
- 3D printing is ideal for personalized objects, small batch production or prototyping.
And before you rush to modernize your business, you need to understand some issues.
There is a myth that you can print anything on a 3D printer. Well, that's not entirely true. There are limitations regarding print resolution, fine details, object size and geometry. To work with this technology, a certain skill is required, which means that in order to instantly launch this process into production, it will be necessary to hire certain specialists.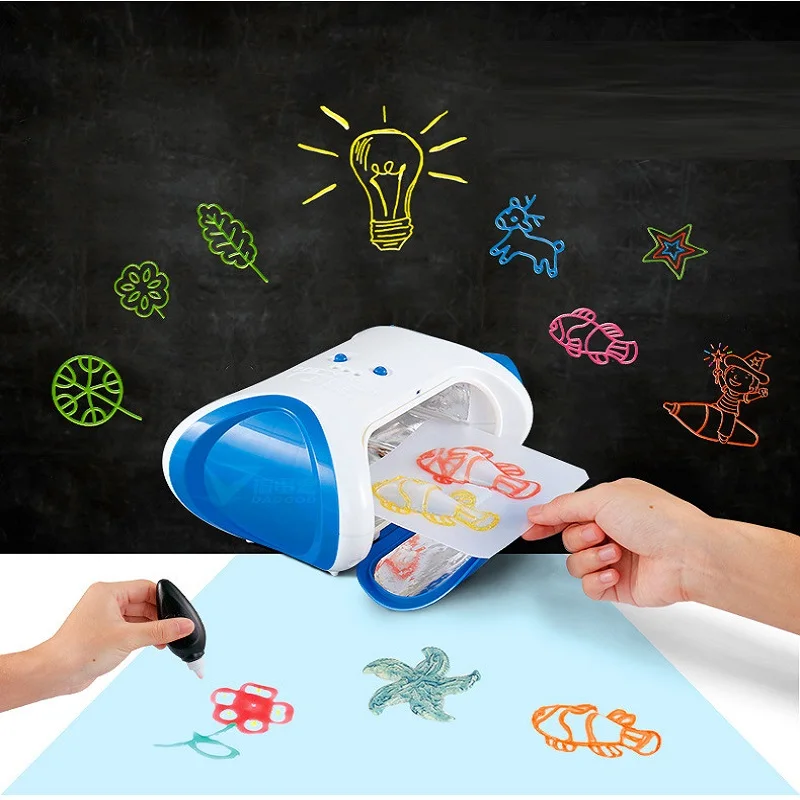 In order to independently understand this technology, it will take not only a lot of time, but also some additional costs, since marriage in this case will be inevitable.
Another fact to think about if you decide to implement a new work process is the strength of the parts. The degree of strength of a part made using a 3D printer depends on where the force is applied: across the layers or along. And the main thing to remember is that such a part will still be inferior in strength to the same cast model.
So don't expect the same magical results from a magic printer. The printed models will not be perfect. Most often, their surface has burrs, ribbing, sagging, they still need to undergo mechanical or chemical treatment. In any case, it is necessary to modernize your production gradually.
How to start upgrading
Based on the above, 3D printing technology is most useful for those enterprises that manufacture goods to order or according to individual drawings.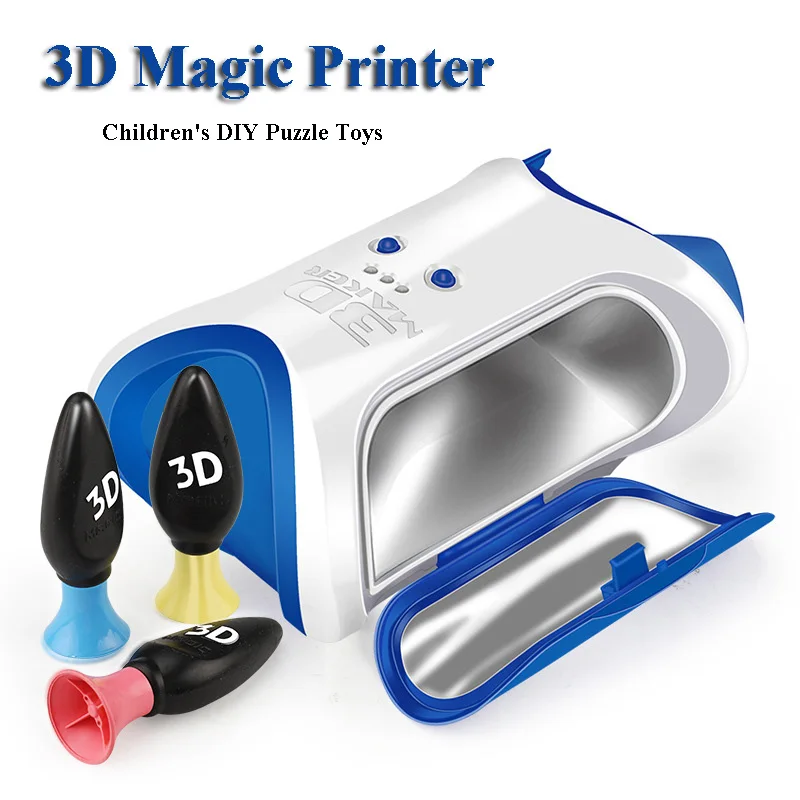
According to Wohlers Associates, the production of finished products makes up about 28% of the total 3D printing market, most often the technology is used to create certain parts. For example, Pad and Quill, a company that specializes in leather cases, uses 3D printing to create hardware and rubberized frames for tablets.
The amount of starting capital for buying a printer directly depends on your ambitions, because the price range for equipment is very wide. For example, you will need $20,000 to $600,000 worth of machinery to create spaceship parts, and $500 will be enough to make toys and decorations.
Tatyana Rumyantseva, founder of the Russian Can-Touch service, advises buying a printer depending on the tasks you plan to perform on it. For large items with a high level of strength, the EOS Formiga P100 is more suitable, which uses polyamide for printing. And the Projet 3500 HD MAX produces products with very high print resolution, allowing you to create a layer thickness of 16 micrometers (a commonplace example: the thickness of a human hair is from 80 micrometers).