3D floor print
3d Floor - Etsy.de
Etsy is no longer supporting older versions of your web browser in order to ensure that user data remains secure. Please update to the latest version.
Take full advantage of our site features by enabling JavaScript.
Find something memorable, join a community doing good.
(1,000+ relevant results)
FAQs - 3D Floor Printer
These questions may you be concern about for the 3D floor printing machine. If you still have more questions we didn’t list below, feel free to contact us.
These questions may you be concern about for the 3D floor printing machine. If you still have more questions we didn’t list below, feel free to contact us.
What kinds of floors I can print on with TFP floor printer?
TFP floor printer can print on Wood floor, cement, ceramic tile, asphalt road, brick, lime, Epoxy resin for packing lot etc…
What should I treat the substrates before and after printing?
You need to paint a layer of white epoxy sealer on rough surfaces such as cement and asphalt to increase the adhesion of the ink. Before printing on ceramic tiles, acrylic, plastic and other materials, a special coating needs to be sprayed in advance. Or after printing, a layer of epoxy clear varnish must be applied to increase the firmness of the image. On parking spaces with epoxy primer, TFP can be printed directly, and a layer of varnish can be applied after printing.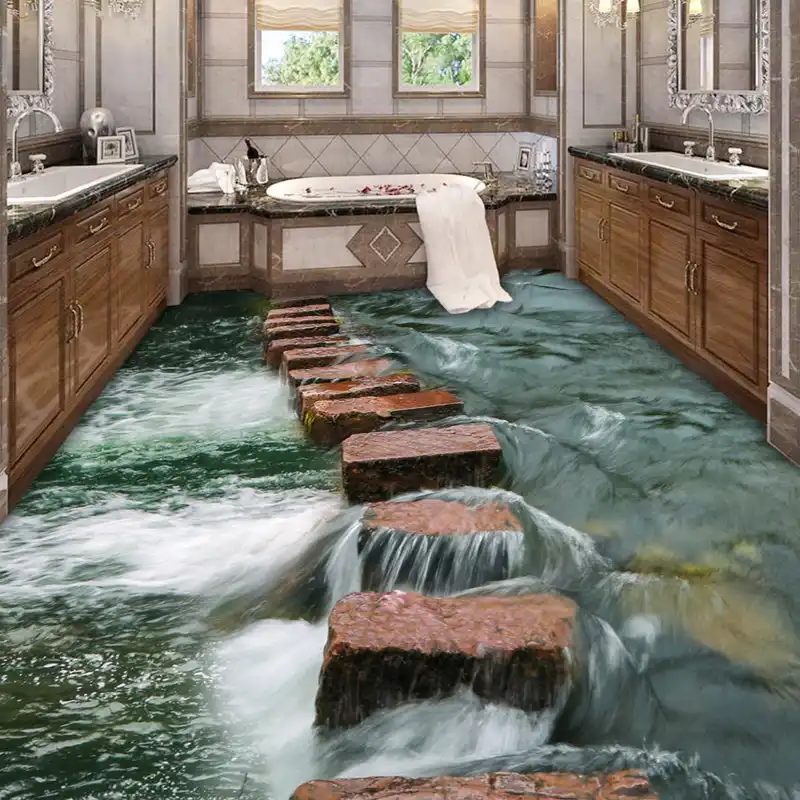
Our engineers will give you more comprehensive guidance.
What type of ink does the 3D floor printer use, is that a common ink? Where can I buy it?
The Floor printer uses the special ink. You can order ink from us, we can ship it by FedEx to your place. We can also recommend you some alternative ink which you can purchase in your local.
What the other comsumables does the floor printer need other than the ink?
You need to replace the printhead and the damper, they are the regular consumables for the floor printer. We will put some other spare parts for the printer in your initial order.
What is the maximum size of the graphic can I print with the floor printer?
TFP2.3 model can print the graphic with 2.3 meters wide, no limited to the length. With the stitching program function, you can connect two parts of your graphic to get a larger format in width which will beyond the standard size.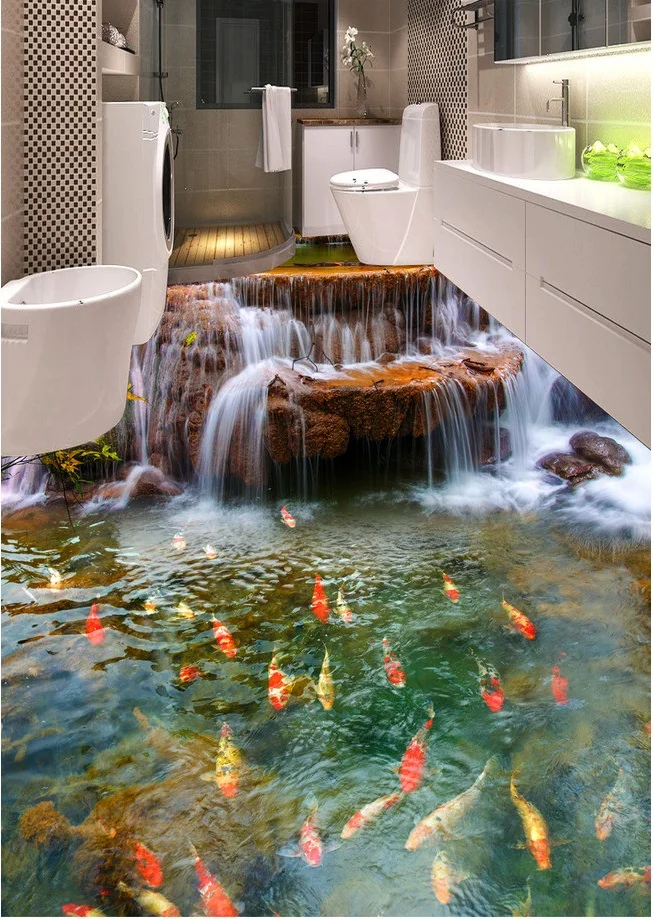
What is the printing speed?
Based on size of W: 1.5m * L : 3.0m, one printhead model @ 1440Dpi: 1.8 hours (2.5m2/h)
What kind of image I can print?
You can print the image with JPG, PNG, TIFF, PDF format.
What kind of software does the floor printer use for printing and operating?
The operation software is developed by us. The RIP software is MainTop(Made in China).
Optional RIP software: FlexiPrint RIP (PhotoPrint, Made in USA).
How long can the image last indoors and outdoors?
We use the very good quality ink to keep the ink indoors for at leat 8 years not fading, and 2~3 years outdoors not fading.
Can the image be resistant scratch? And waterproof?
Yes, after painting the epoxy clear varnish, the image on the ground can be scratch resistance. We tested it on the parking lot with tires to Rolling it, that would be no problem.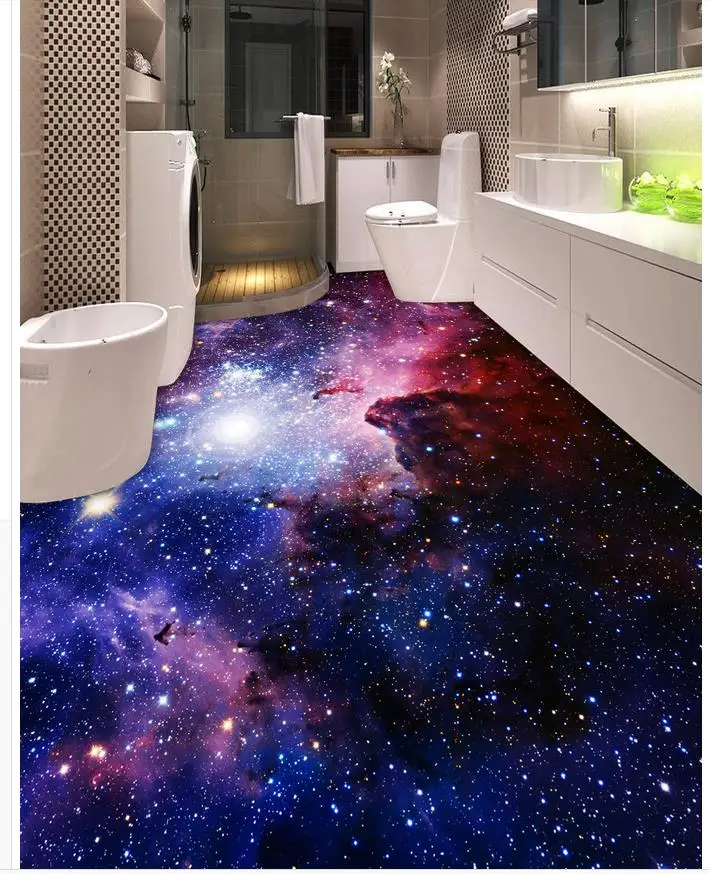
The image is waterproof when it is finished printing.
What type of printhead does the floor printer use?
Epson 7th generation printhead
Can I transport the floor printer easily?
The longest part is 1.5 meters. 5-6 parts totally. The total weight is 130kg. You can carry them part by part.
Do I need to prepare a traveller battery?
For outdoor printing, we highly recommend you to prepare a traveller battery with the power of at least 180 Ah which can support the printer 4 hours working time.
What is the consumption of ink?
Without printing the white ink: 20ml/m2; With printing the white ink: 40m2/m2
Can the ink resist UV outdoor?
Yes, the UV ink can resist UV light outdoors.
Can I get trained after getting the floor printer?
We have Excellent engineer team who will train you online through video call after you got your printer.
How Can I get technical support when I have some issues with the floor printer?
You can contact your engineer through WhatsApp, WeChat, Telegram, or Email. They will reply you in a very short time.
How can I order the spare parts?
You can contact your sale manager through Email to order the spare parts. You will have the invoice to pay including shipping cost by FedEx.
How can I place an order?
Please contact us via Email, our sales manager will contact you to confirm the specifications with you. We can arrange the shipment for you.
DIY 3d floors - photo tutorials and instructions!
Floor coverings with 3d effect are increasingly being used in the interior design of houses and apartments. 3D floors are valued not only for their decorative effect, but also for their high reliability and durability, which other types of floors do not possess. Of course, the cost of such a coating is much higher than a laminate or tile, and the pouring technology is quite complicated. And yet, if desired, anyone who has at least a little construction experience can make 3d floors with their own hands.
Contents
- What does a self-leveling 3d floor consist of
- How to make and print a picture
- Step 1. Selecting a picture
- Step 2. Taking a picture of the room
- Step 3.0 Processing photos in a computer 9007 4. Printing a picture on fabric
- Do-it-yourself 3d floor laying technology
- Video - How to make a 3d floor. Expert Tips
- Step 1 Surface Preparation
- Step 2 Primer Application
- Step 3. Filling the bottom layer
- Step 4. Laying the decorative layer
- Step 5. Applying the finishing layer
- Video - DIY 3d floors
the beginning of work, you should study the process of pouring the floor well, familiarize yourself with the numerous nuances, and select an image.
 First of all, you need to know what such a coating is. Self-leveling decorative floor consists of three layers: the base layer, the layer with the image and the finish layer. Very often, the finish layer is additionally coated with a special colorless varnish, then no mechanical effects will leave marks on the coating. What is the self-leveling 3D floor
 For the manufacture of the base and finish layers, a two-component polymer mixture is used, consisting of a hardener and a transparent base. When mixing the polymer, it is very important to keep the proportions, otherwise the mixture will turn out either too liquid or too viscous. In both cases, the quality of the fill will be reduced, which will adversely affect the strength and durability of the floor.
Large format printing example. Banner for self-leveling decorative floor The decorative layer may consist of a banner fabric, self-adhesive vinyl film, durable acrylic paint and various small elements - pebbles, shells, coins, pieces of wood. When using small decor, you will additionally need polymer clay or gypsum for grouting, since voids are necessarily formed between the elements. The finished drawing on film or fabric from the company will cost the most, because it is the printing of the image that increases the cost of the self-leveling floor. The use of natural materials will significantly reduce the cost of the process, but it will require much more time for laying. If you have enough time and patience, this option is optimal. You can draw a picture yourself or hire an artist, as well as use ready-made stencils and stickers.
How to make and print a picture
If you decide to make a 3D floor with photo printing, you can try to choose and process the picture yourself. This will take some time, but it will save a lot of money on repairs. For work, you will definitely need a graphics program (Photoshop) and a camera.
Step 1. Selection of a picture
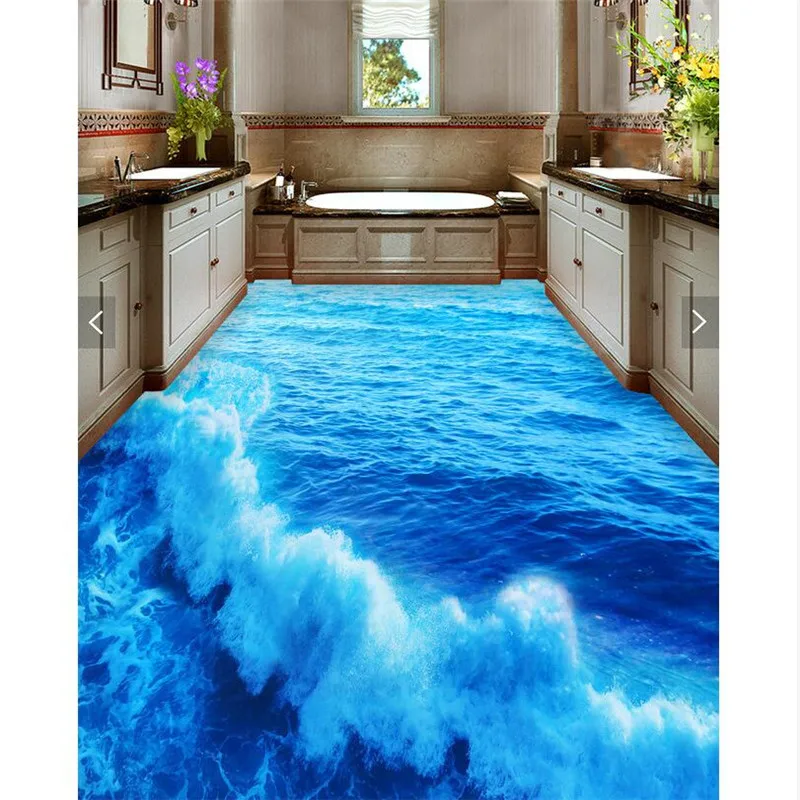
3d floor with a shark image - one of the creative options A variety of images are suitable for a 3d floor: flowers in the grass, sea waves or sand on the beach, abstractions, leaves, stones, ornaments.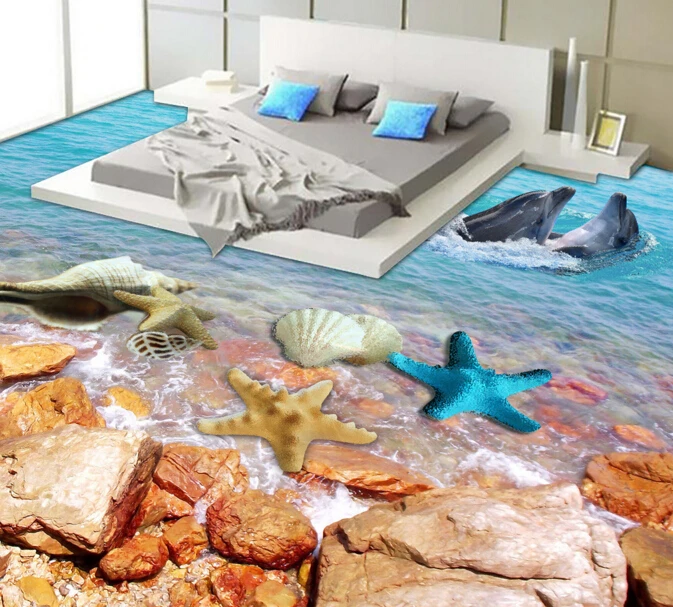 It is important to choose a picture that best matches the interior, pleasing to the eye, calm colors. You should not choose aggressive or creepy images, pictures with whirlpools, abysses, too contrasting drawings. The photo you like should have a high resolution - at least 300 dpi.
Step 2. Taking a picture of the room
We need to take a picture of the floor of the room where the casting will be done. To do this, it is recommended to become so that the entire area falls into the lens; It is best to shoot from the doorway. The photograph must also be sufficiently clear, without light spots and blackouts.
Step 3. Processing the photo in a computer
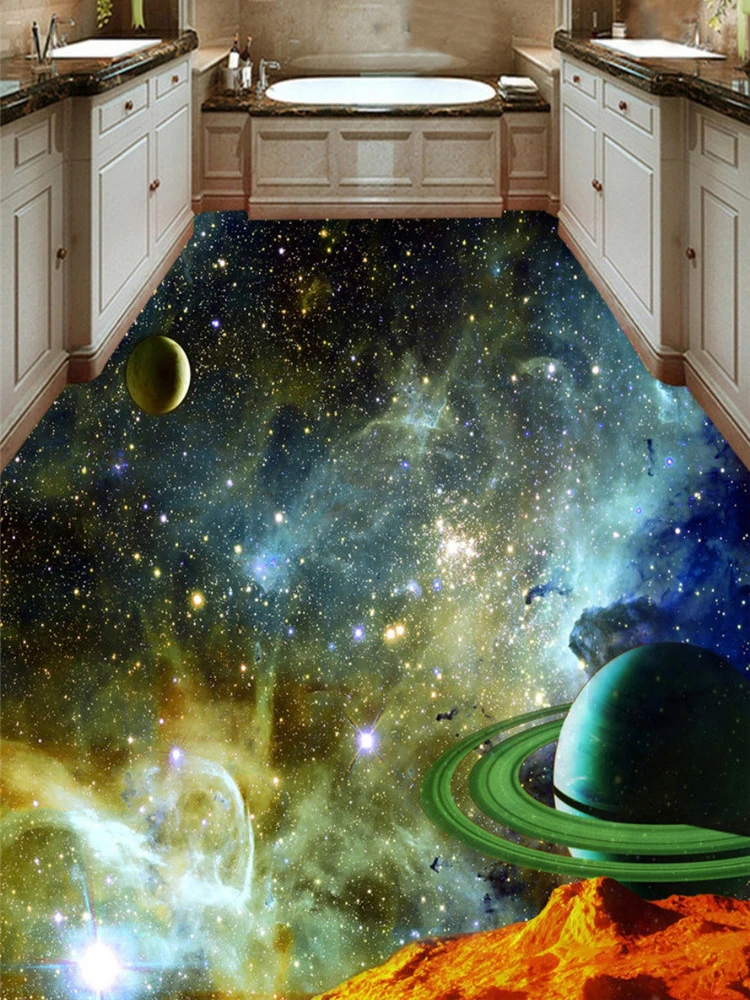
One of the unusual pictures suitable for a self-leveling 3-d floor After loading a photo of the room into a graphics program, overlay the selected picture on top. Carefully align the borders of the images, fix and remove everything superfluous with the help of the program so that only the floor with the picture remains.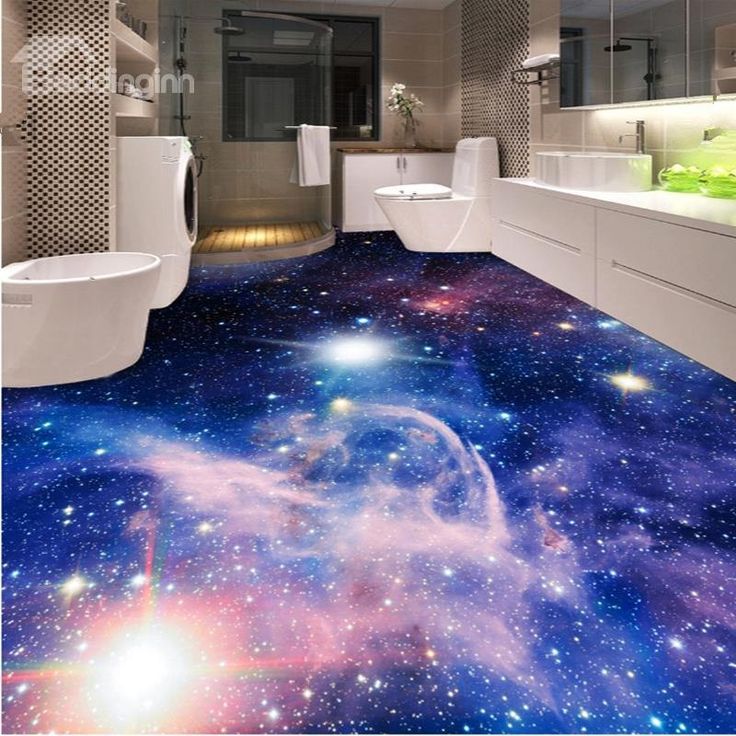 As a result, the image will be expanded at the bottom and narrowed at the top. Align the borders of the picture into a rectangle, edit the clarity of the picture and copy the picture to a USB flash drive.
Step 4. Printing the picture on the fabric
To transfer the picture to the fabric of the desired size, you need to contact any outdoor printing company. The cost of their services is much lower than the finished canvas for decorative flooring. First, order a black and white image of the required dimensions on plain paper. Spread the paper on the floor and check how realistic the picture turned out. If everything is correct, you can order color photo printing on banner fabric.
DIY 3d floor technology
Video - How to make a 3d floor. Expert Tips
Once the pattern has been printed, preparations for pouring the floor can begin.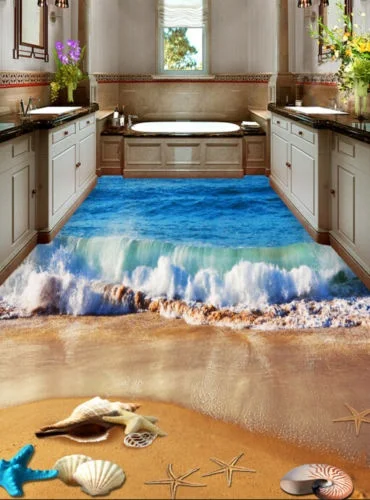 Please note that the whole process will take a lot of time, and you will not be able to use the premises for at least three weeks.
First prepare everything you need for work:
- vacuum cleaner;
- putty;
- needle and regular roller; Roller
- paint shoes; Paint step
- protective gloves and respirator;
- drill with attachment;
- level;
- container for mix;
- polymer composition;
- clear varnish.
In order to correctly calculate the amount of materials to be poured, it is necessary to know their approximate consumption per square meter.
| Floor materials | Consumption per 1 m2/kg |
|---|---|
| Primer mix | 0.35 |
| Base coat compound | 2.2 |
| Clear coat | 2.0 |
Step 1. Surface preparation
Preparing the room for arranging a 3d floor The old floor is dismantled to the screed, debris and dust are removed.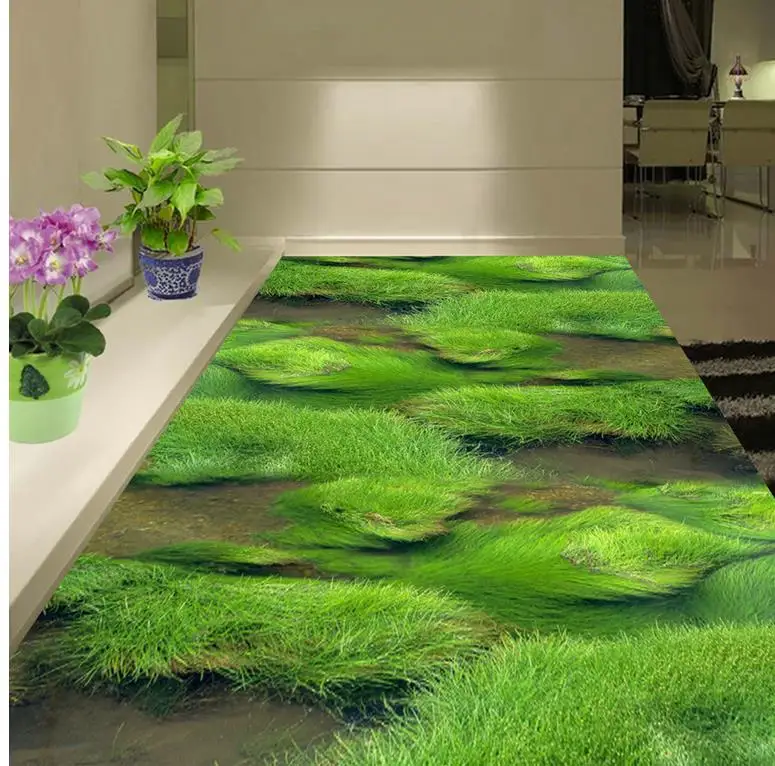 Carefully inspect the surface and seal all detected defects with cement mortar. After the solution dries, it is recommended to grind the base to eliminate all roughness and small irregularities. Be sure to check the horizontalness of the surface, because even a slight slope will complicate the pouring of the polymer and increase its consumption. Finally, the screed must be thoroughly vacuumed.
Step 2. Applying the primer
Applying the primerBefore applying the base coat, the substrate must be coated with two coats of primer. It is poured onto the floor and stretched over the entire surface with an ordinary roller or a wide brush (if the room is small). The primer should be distributed in a continuous even layer, well filling the joints between the floor and walls. The second layer is applied no earlier than the first one dries, after which the base is left for a day.
Step 3. Filling the bottom layer
Mixing process Base layer components are poured into a container and mixed with a construction mixer or a powerful drill with a nozzle. It will not work to prepare a high-quality solution manually: firstly, many small lumps are formed that are difficult to break, and secondly, it will take too long to mix, and the polymer will begin to solidify. The finished mixture has a uniform structure and color, flows smoothly from the nozzle.
The polymer solution is poured onto the base in the corner farthest from the doors and rolled over the surface with a spiked roller. If the area is too large, the floor should be poured in strips, carefully smoothing the borders of the strips with a wide spatula. Since the working composition hardens quickly, the pouring of adjacent areas should be completed within 10 minutes. During the rolling of the mixture, it is necessary to ensure that the layer is as uniform as possible and that no air bubbles remain inside.
Step 4. Laying the decorative layer
Laying the decorative layer For gluing the canvas, take the same polymer composition as for the bottom layer, dilute it twice with an organic solvent and apply a thin layer on the floor.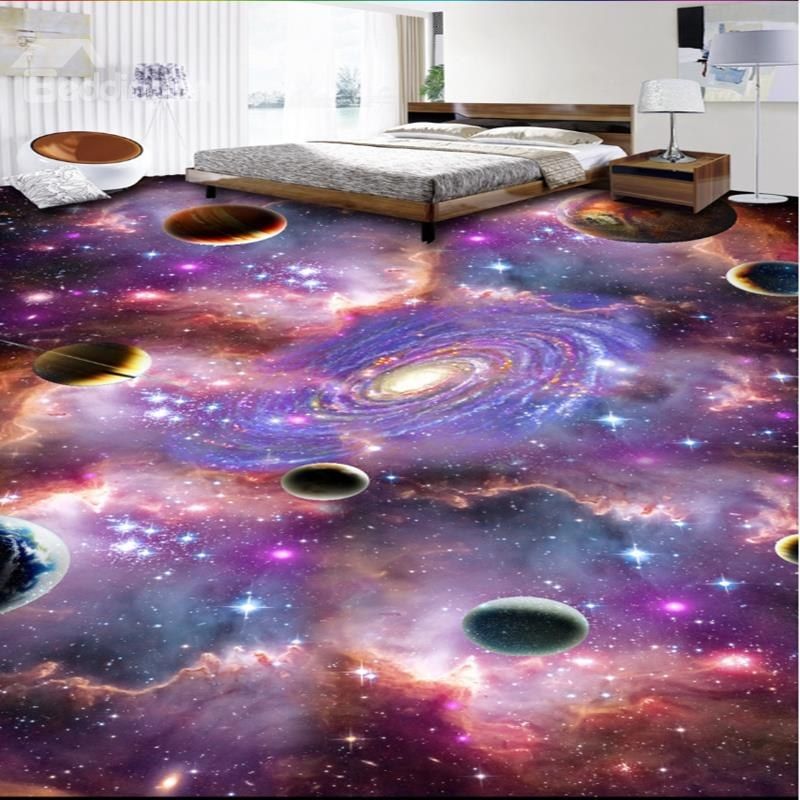 Next, take the canvas with the image, straighten it on the working surface, align the edges. With a dry roller, press the fabric to the base and carefully roll it out, starting from the center of the room. It is very important to squeeze out all the air from under the canvas, otherwise bulges form on the coating, which can crack over time. The edges of the material should protrude slightly beyond the perimeter of the floor and go onto the walls; they are carefully cut after fixing the decorative layer.
If small decorative elements are used instead of photo printing, you first need to consider their placement on the surface. The easiest way is to lay the material in a chaotic manner, placing the elements close to each other. All of them should have the same thickness and not rise too much above the base. The floor area is primed with a diluted polymer composition, after which they begin to lay out the decor.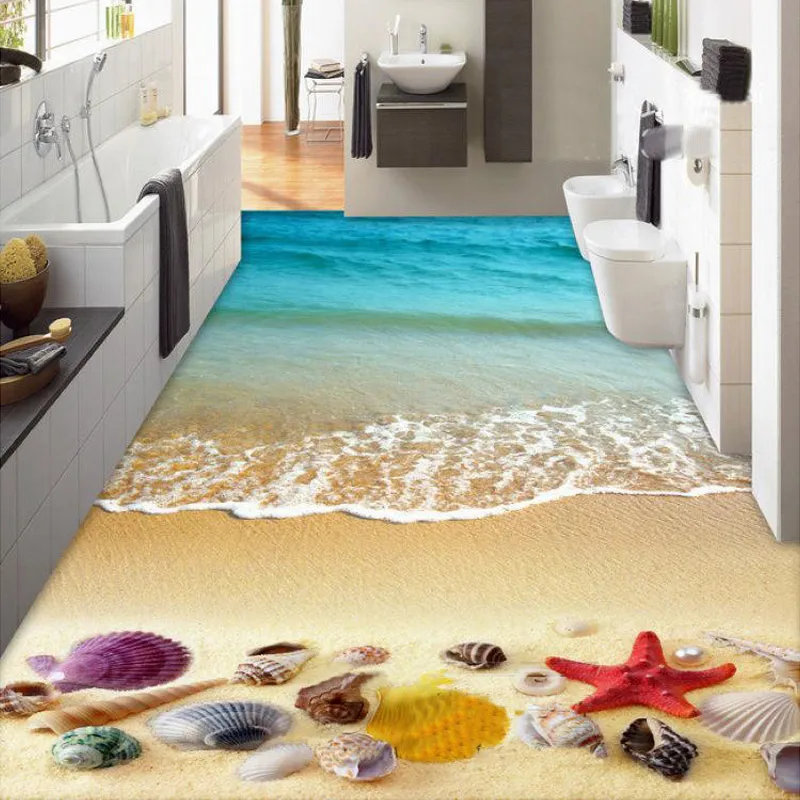 This process requires great perseverance, accuracy and patience, otherwise a beautiful coating will not work. When the entire area is filled, the voids are rubbed with polymer clay and left to dry.
Step 5. Apply the top coat
Apply the clear resin. Finishing WorkClear Finish Resin is mixed in exactly the same way as the base compound. The surface is pre-cleaned from the remnants of grout and dust, the mixture is poured out, rolled out with a roller. In order for the three-dimensional effect to be more pronounced, the transparent layer should have a thickness of 3-4 mm. Half an hour after application, polymerization occurs, and the surface can be coated with a protective varnish. The floor will be ready for operation when the top layer is completely dry, before that any load on the coating should be excluded.
Finished result. 3d floor with a musical theme in the restroomMarine theme is very popular and suitable for any roomVideo - DIY 3d floors
Self-leveling floors 3d - how to make a 3d drawing: photo, print or banner
Self-leveling floors 3d is not only very effective and beautiful covered, having performed such a coating, you can provide a high-quality floor for many years, and with a high-quality selection of a pattern, even visually increase the m3 of the room. Self-leveling 3d floors are very much appreciated, because if the technology is followed, the design of the room turns out to be stunning and does not require additional carpeting.
Self-leveling floorThe price of a self-leveling floor with a three-dimensional pattern is not cheap, but the end result is worth it, because the coating has a number of advantages over other analogues:
- 3D self-leveling floors last up to 30 years and do not lose their attractiveness;
- they can be cleaned with chemicals, the screed will not lose its gloss and brightness;
- 3D floors can be installed in any residential type premises;
- 3d floor does not emit harmful substances into the air, it is considered environmentally friendly;
- 3d self-leveling floor is fire resistant, which increases the safety of the home.
Do-it-yourself 3D self-leveling floors are easy to do if you familiarize yourself with the technique of applying all layers in stages. The most difficult and expensive stage is the development and printing of a picture that is planned to be placed on the floor.
Contents
- Choosing a pattern for a self-leveling floor 3D
- Photo of a room and installation of a pattern for a 3D floor
- Printing on paper and fabric for a self-leveling floor
- Stages of laying the poured 3D floor
- Preparing the surface of the floor for pouring the 3D floor
- Applying a primer coat on the base
- Applying the base layer of the poured 3D floor
- Gluing the pattern on the floor
- Applying the finish coat 8 3D floor self-leveling floor 3D
- large container for preparing the emulsion;
- rollers with which layers will be applied;
- needle roller to remove air bubbles from the mixture;
- paint shoes - special shoes with small spikes;
- vacuum cleaner;
- putty;
- top coat;
- fixing varnish;
- protective clothing and respirator.

The image is what distinguishes ordinary self-leveling floors with a pattern from 3 d, but it is he who complicates the entire technology of construction work.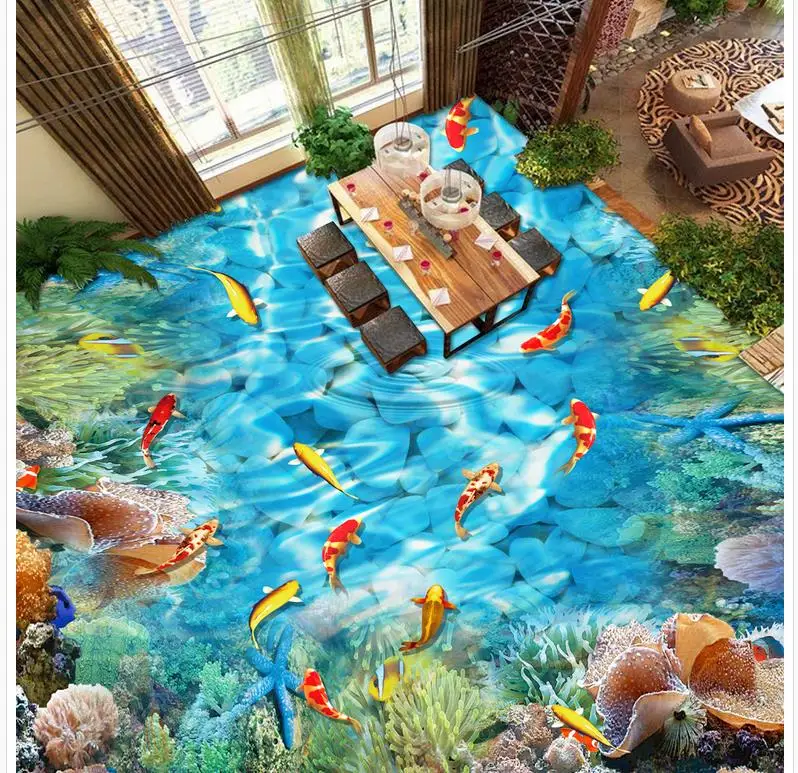
Developing a pattern for 3D floors is not a cheap process, but you can try to prepare it yourself. To do this, you need to familiarize yourself at least at a basic level with the Photoshop program. It will be just great if a more experienced friend helps at this stage. It is important to understand that the image must be large and with good quality, bright outlines. Otherwise, the floor will turn out grainy and ugly, and the money will simply go down the drain.
There are two ways to choose a picture - find it in Internet resources and take a photo of a place or object you like. To avoid graininess, the image must have a resolution of at least 300 dpi. No less responsibly you need to approach the choice of drawing. It is worth considering the overall design of the room and choosing a pattern that is most suitable and emphasizes the beauty and overall idea.
Self-leveling floor. FigurePhoto of a room and installation of a picture for a 3D floor
The selected image must be compared with the dimensions of the room, so you need to do a few simple steps.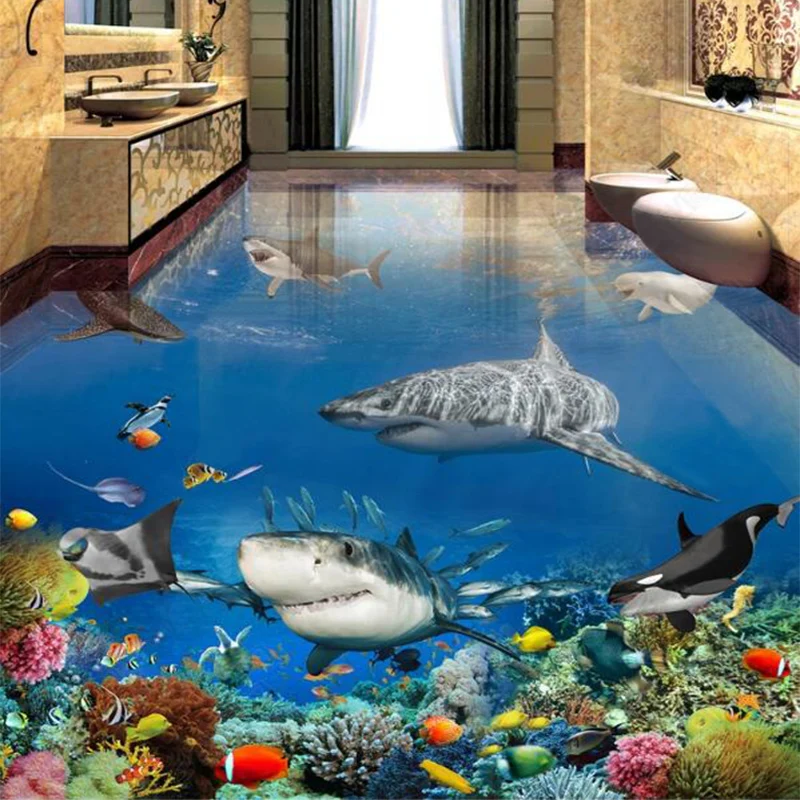 First you need to take a photograph of the room in which it is planned to lay self-leveling 3D floors. Photographs must be taken from the doorway. We load the picture into the program, where we put a drawing on the floor plane, it is worth carefully cutting off all the corners so that the drawing matches the shape of the room as much as possible.
The finished result must be saved to a USB flash drive and the material on which the canvas will be printed will be determined.
Printing on paper and fabric for self-leveling floors
Canvas printing is best done in a company that deals with prints, for example, for outdoor advertising. Such a move will save money, since self-preparation of the canvas will be several times cheaper than ordering a ready-made picture from specialists.
To make sure that all the miscalculations were correct, it is better to pre-print the drawing on paper. The paper layout must be spread on the floor and all errors determined. After eliminating all the shortcomings, you can order a final print on the fabric.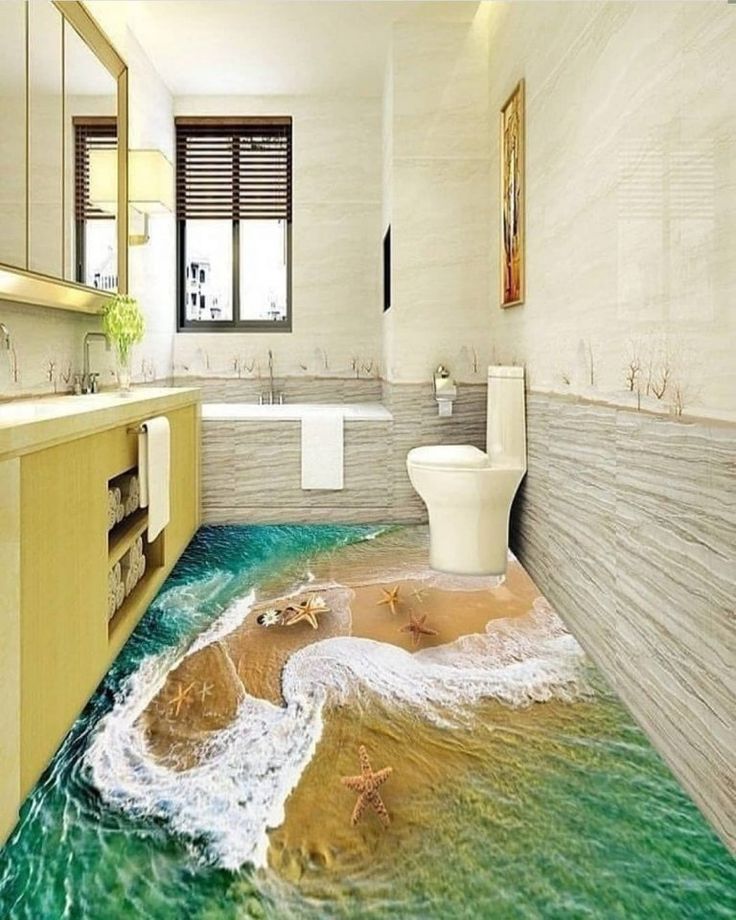
Stages of laying a 3D screed floor
Do-it-yourself 3D self-leveling floors are easy to do if you follow the instructions and do not deviate from the laying technology.
It is important to understand that the smoother the surface on which the drawing will be applied, the better the self-leveling 3d floor will be. It is also necessary to take into account that the floors will be made by hand for 3 weeks, during this period it will be impossible to use the room.
Before you make a self-leveling floor, you need to stock up on the necessary equipment, for this you will need:
Preparation of the floor surface for pouring 3d floor
In the room where the floor is planned to be poured, it is necessary to remove the previous coating up to the screed. After the old coating is removed, the surface must be carefully removed from dirt, lumps and small parts. For this, it is better to use a vacuum cleaner.
Preliminary preparation of the floor for pouring the self-leveling floorIf small potholes and cracks form on the screed during the removal of the old coating, they must be repaired with cement mortar. Otherwise, 3D self-leveling floors will have to be redone. After the cement has dried, the area is carefully rubbed and vacuumed again.
Applying a primer coat to the base
Before making a self-leveling floor, the base must be covered with a primer. The primer evens out all the imperfections of the floor. It is necessary to apply a primer in two layers with a roller, carefully smearing the joints between the wall and the floors.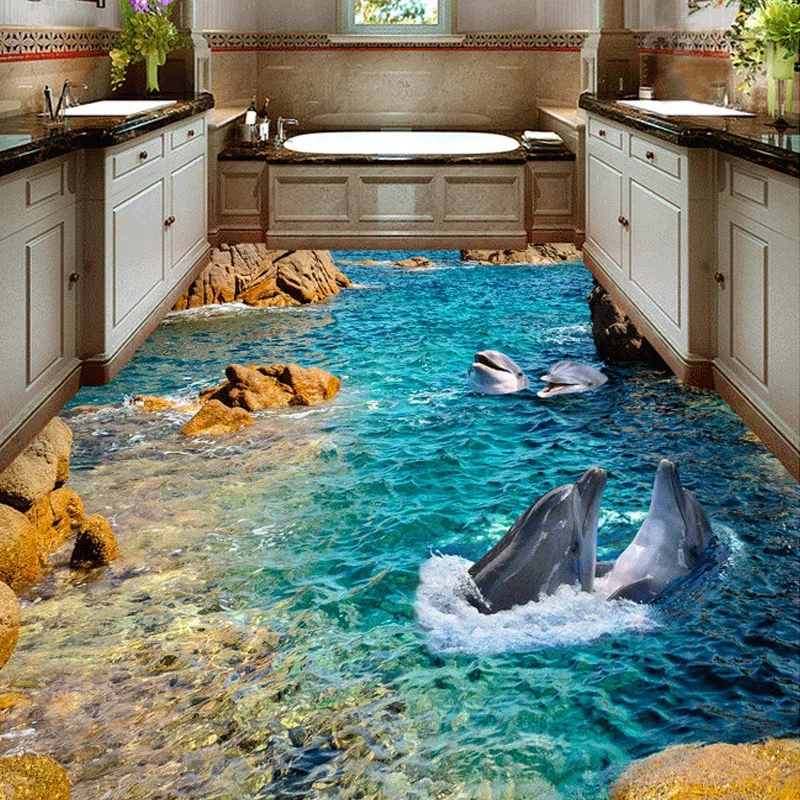 Primer consumption is approximately 1 kilogram per 3 square meters. Each layer must dry, it takes at least a day.
Applying the base layer of the self-leveling 3D floor
This stage is needed when the selected pattern is not solid, but only some elements that will be located on a certain background. The base layer is the background of the filler floor, so the tone must be chosen no less carefully than the drawing itself.
It is necessary to mix the base layer in small portions, as it cools quickly, and only with the help of a special mixer (manually obtaining a homogeneous mixture is almost impossible). After applying the base coat, it must be rolled with a spiked roller to get rid of air bubbles. It takes at least a day to polymerize the base layer, but you need to pay attention to how long the instructions require for drying.
The dry surface is measured by water level to avoid height differences. If errors are identified, then an additional layer of base will need to be applied to level the base.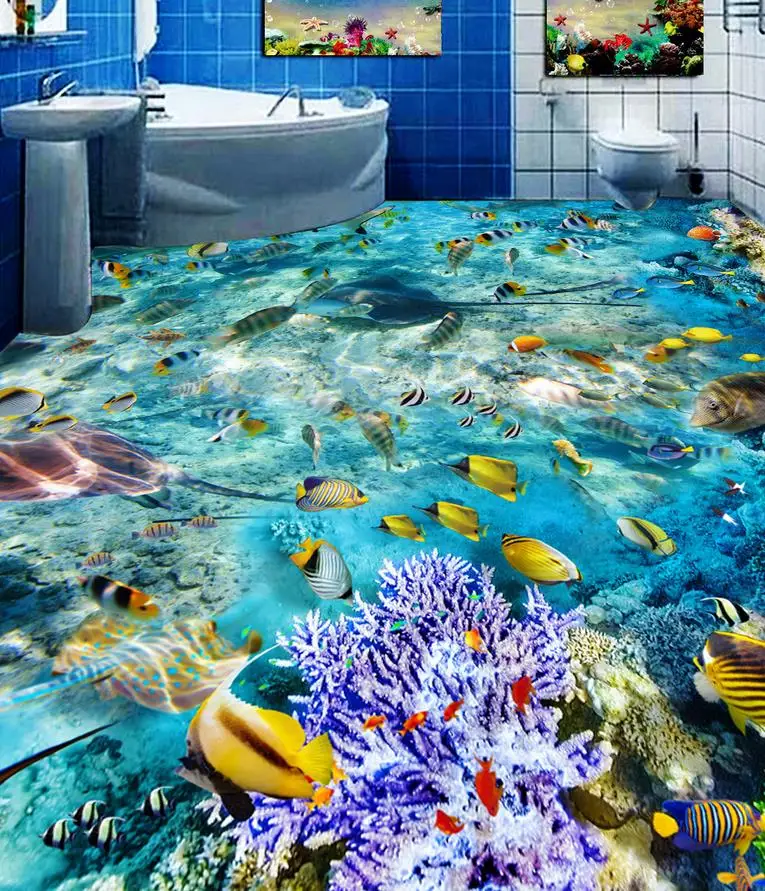 An uneven floor can significantly reduce its lifespan by up to three times.
Sticking a pattern on the floor
Of all the technologies used to make self-leveling floors, sticking a pattern is considered the most difficult and crucial moment. Often, for drawing a picture, a banner fabric with thermal printing is used, the density of which is quite high and it is almost impossible to tear or deform such an image when applied.
Getting rid of air bubbles is considered the main rule in applying the image. If in the process of work defects were found in the form of air, then this area must be redone.
The edges of the image should go a little beyond the floor and bend over the walls, it is better to cut off the excess later than to try to hide the joints.
Application of the 3D floor finish coating
the amount of kg may vary depending on the selected manufacturer, because the density of the finish layer may vary. Therefore, before applying, you must read the instructions on the package and the advice of manufacturers.