Zonestar p802qr2 double extruders 3d printer diy kit
Zonestar P802QR2 Double Extruders 3D Printer DIY Kit
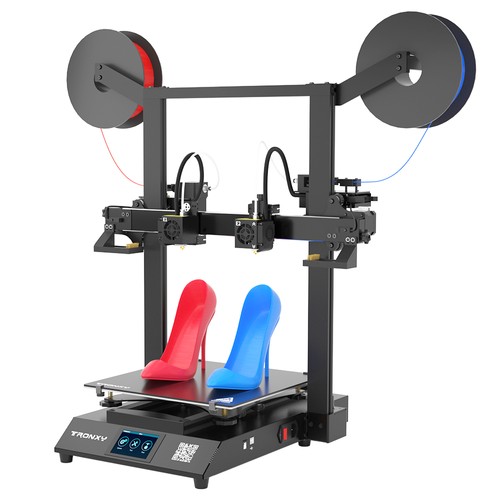
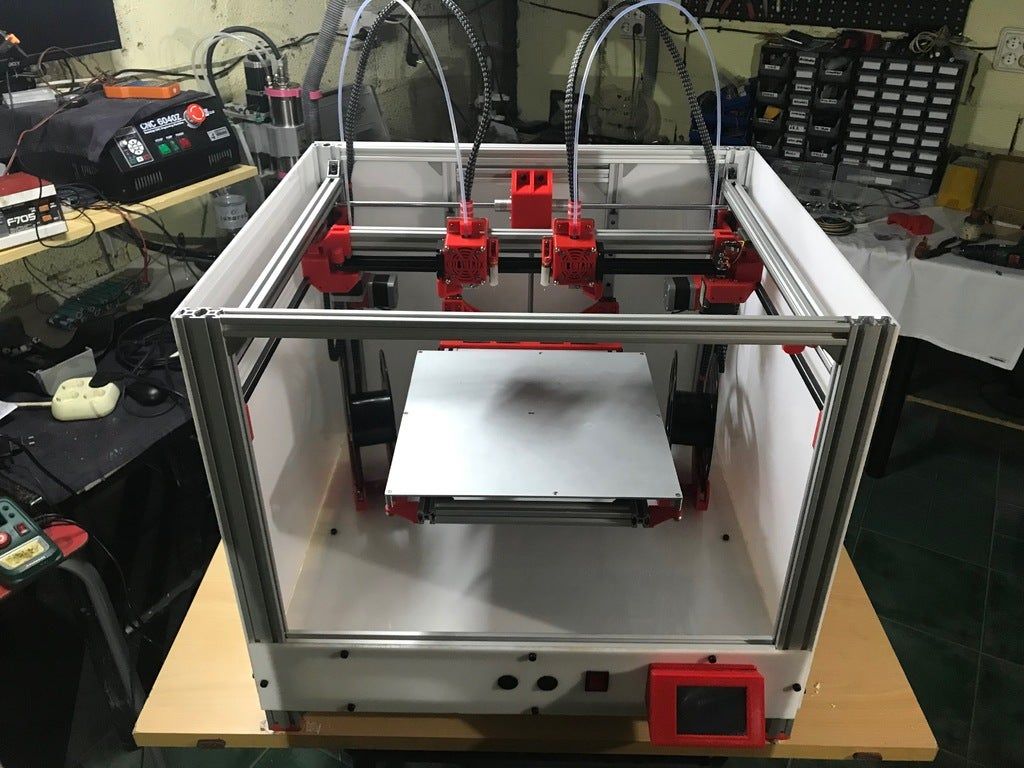
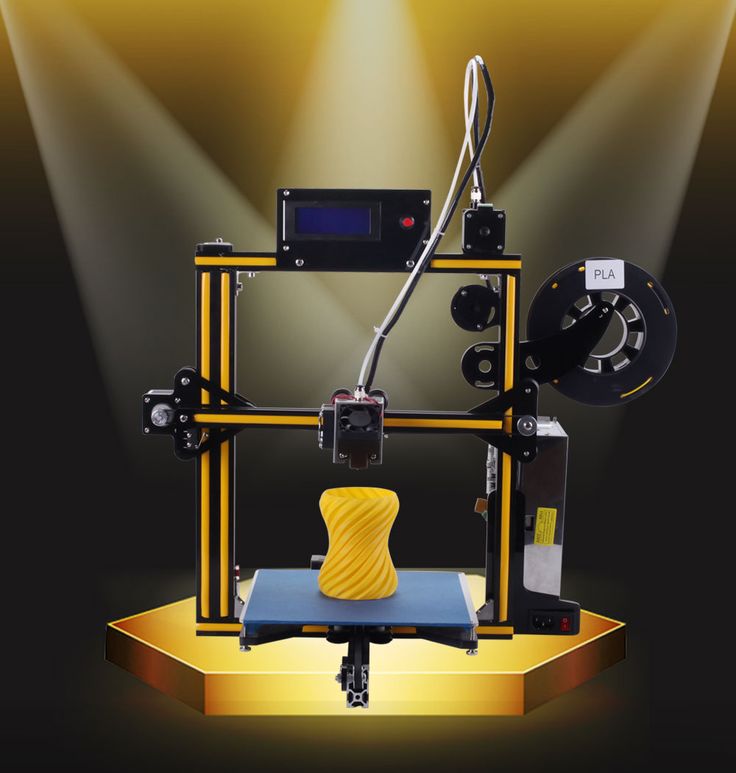
Almost everyone who gets a 3D printer thinks about two or more extruders to create multi color prints. The Zonestasr P802QR2 is a simple to build kit that has two extruders that feed into two nozzles. It consists of a full metal 1 ½ mm thick. It has a 220X220mm bed and 240mm Z, although the Z only has 185mm actual usage. The placement of the LCD catches the PTFE tubes that guide the filament into the hot ends. I’m going to bend it 180 deg up to keep it from catching and I think it will look better. That or I’ll cut it off and design and print my own display holder in 3D computer aided design. Which is my favorite thing about 3D printing.
| Zonestar P8020R2 Specifications | |
|---|---|
Brand | Zonestar |
Model | P8020R2 |
Package size | 58. |
Package weight | 9.4000 kg |
Product size | 46.00 x 42.00 x 42.00 cm |
Product weight | 9.4000 kg |
Type | DIY Kit |
Frame material | Sheet-metal structure |
Nozzle quantity | Double |
Nozzle diameter | 0. |
Product forming size | 220 x 220 x 240 mm |
Layer thickness | 0.1-0.36 mm |
Auto level sensor | Yes |
Memory card offline print | SD card |
LCD screen | Yes |
Print speed | Max 150 mm/s |
Supporting material | ABS, Flexible PLA, PETG, PLA, PVA,Wood |
Material diameter | 1. |
Language | Chinese, English, Portuguese, Spanish |
File Format | G-code,OBJ,STL |
XY-axis positioning accuracy | 0.012mm |
Z-axis positioning accuracy | 0.0025mm |
Working Power | 250W |
Host computer software | Repetier-Host |
Packing Type | unassembled packing |
System support | Windows, Linux, Mac |
Voltage Range | 100 - 220V |
Certificate | CE,FCC,RoHs |
Learn More on Gearbest | |
 4mm
4mm 75 mm
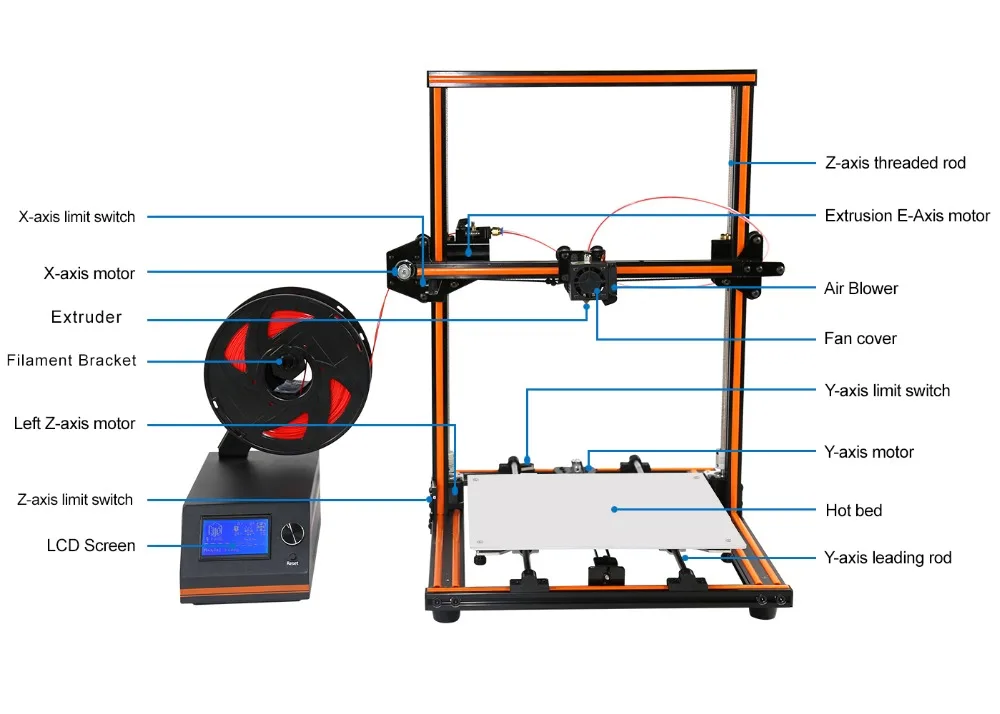
75 mmI’m not a fan of the frame style.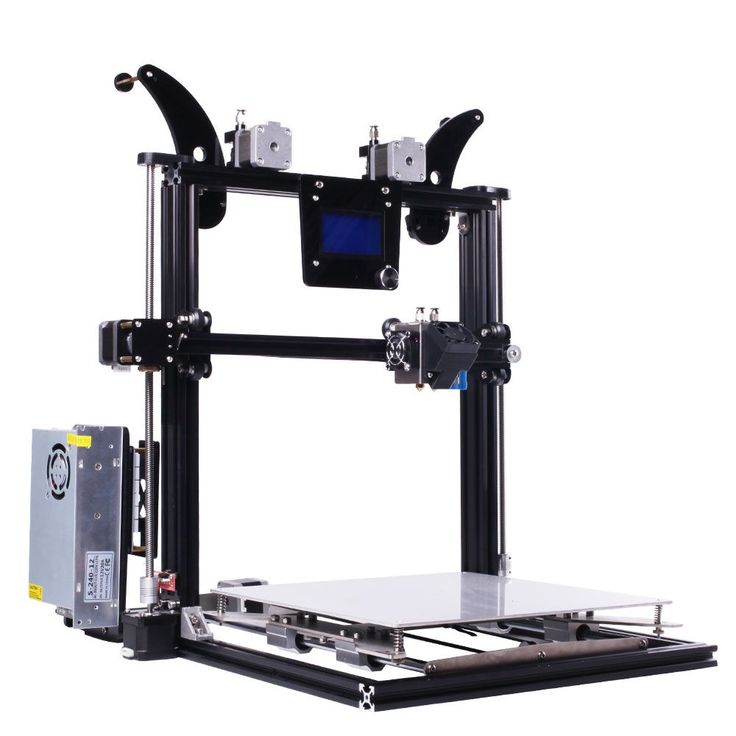 Like the Anet A8 it has little support from wobbling side to side. But you can easily print supports which you can find on the Thingiverse website. Although many complain online about the 3D printed printer parts, I’m fine with them. Sure, some parts don’t get very accurate but the great thing about these things is they can self- heal by making new parts. The Zonestar P802QR2 also comes with an auto level sensor which is a nice feature.
Unboxing
Like most DIY kits, the Zonestar P80QR2 has a lot of parts. The only part assembled for you is the Extruder. That is because the dual hot ends are very hard to get even. They did a good job assembling mine. The parts were separated by foam to keep the parts from damage during shipping. None of my parts came broken or damaged.
SD Card
The SD card comes with all the documentation for all of Zonestars 3D printers. It makes sense but I believe some users may choose the wrong model because they are very close in name.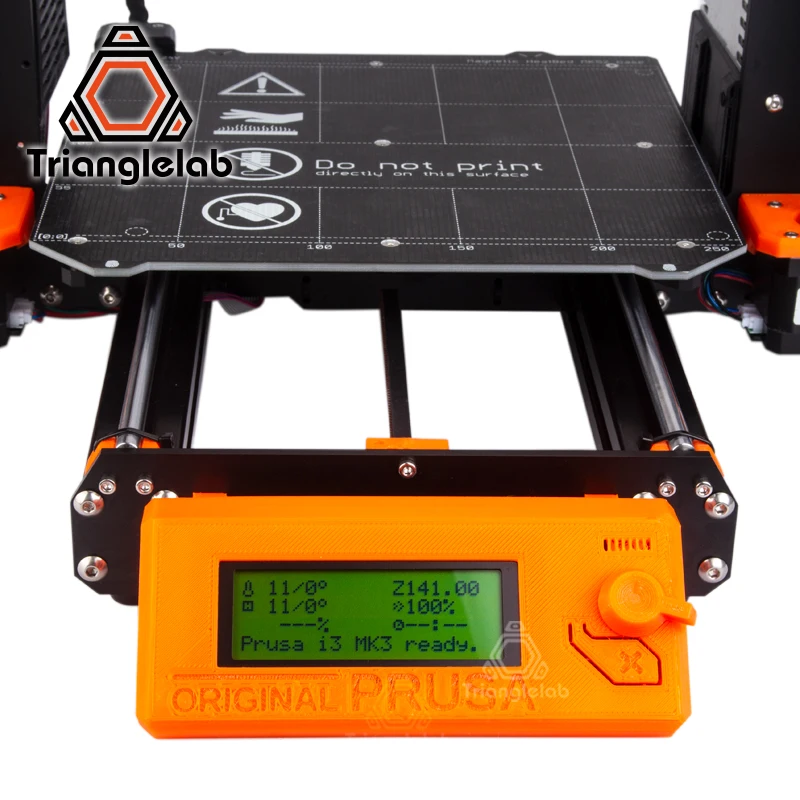 It also comes with test print files. Overall, it was well done and very well organized.
Assembly
Assembling this printer is about the same as every other kit out there. Kits like these are fun to build, at least for me it is. I was busy at the time so I built it over a couple of days. The guides are very easy to follow and it should only take 3-4 hours to build. Having dual nozzles add a bit of complexity. Nowadays, you get kit printers that are mostly completed at the factory leaving you to put 2 to 4 pieces together.
Software
The recommended Repetier-Host software on the SD card is not my favorite program to use with printers. The software just “hosts” a slicer engine. The slicer is the program that slices the 3D object into layers, then turns it into instructions the printer can understand. If you need a free program then I would recommend Slic3r or Cura, but if you can afford it I would recommend Simplify3D.
Multiple Extruders
This printer has two hot ends and two nozzles.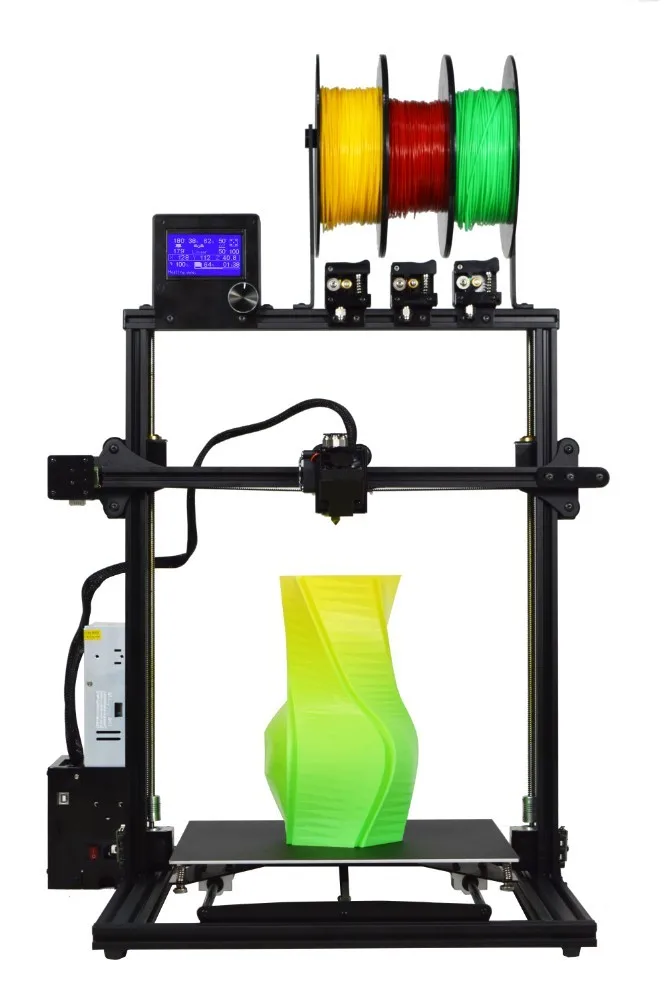 Multi extruder machines come in two ways. The first being each extruder having its own nozzle. The second is each extruder feeds into a splitter and out ones nozzle. The multiple nozzles type has more downsides then the single. For instance, it takes more room so you have to enlarge the printer to get each extruder to reach all of the bed. Another and the most important is leveling the bed. When you have two or more nozzles, your bed and X axis have to be 100% parallel. On top of that the nozzle tips have to be 100% even. When the layer thickness is 0.1mm and some even 0.05 then you can imagine how even they need to be.
The reason is if one is off by more than 0.1, then it will drag one of the nozzles across the top of you prints leaving ugly marks. Another problem is that if you are printing one color and the second nozzle is not hot, it can catch your prints and knock it off the bed ruining your print. It can also happen if the second is heated also. Just heated, there's a chance it will melt it and cut through the print. Plus the supports that help your print overhangs get knocked down easy if the second nozzle is lower then the main nozzle. So you are better off having the second nozzle a bit higher rather than lower. Having two nozzles has oozing problems. While one is printing the second one oozes filament from the nozzle being hot. Therefore when you start printing with the second nozzle the tip is empty leaving holes in your print. Not to mention the oozing filament get all over your print.
The many extruders to one nozzle type gets rid of the oozing and leveling problems but is not without its own problems. For instance, when one filament is retracted back it leaves a small thin string of filament. So when the next filament get inserted it sometimes jams from it not fitting in the tube with the string left behind. Also, the nozzle being filled with melted filament from the last color will bleed that colour into the print where it shouldn’t be. To counter that, the slicers now have a purge block where it prints the block between color changes so the bleed goes into the block and not the print. The problem with that is the block is a big waste and sometimes is more plastic then the print itself.
It is for that reason multi color printers are not as popular as they should be. This printer comes in three models. One with one extruder. This one with two extruders and two nozzles. And the third being two extruders into one nozzle. Oh, and one nozzle gives you the big bonus of mixing the two colors.
This is what it looks like if your bed and nozzles are not 100% level. I let this go to show you what happens when it is not level.
Calibration and Printing
PLA
PLA is the easiest of all filaments to print with. It sticks to the bed well, it doesn’t shrink and warp as easy as other filaments. Most use PLA unless they need to print something that needs special properties such as UV tolerance or extra strength.
My first few prints were to calibrate the two nozzles. To calibrate the slicer and printer needs to know the distance to the second nozzle on both the X and Y axis.
The first print I did was with the two calibration blocks that come on the SD card. There is a dual color print wizard in simplify3D. It’s a bit buggy because sometimes I open the app and the dual processes disappeared. The first one had a large layer shift. The second one printed ok and showed an x axis offset.
The Block did give me a proper picture so I printed this target looking test print. (Not on the SD Card)
After setting the offset in the firmware through the menu, I printed the two-color globe. I didn’t have enough blue so I used pink for my daughter. As you can see the ooze from the nozzle not in use takes its toll on the print.
After some light sanding I got most of the pieces sticking out but it didn’t come out all that great.
Next, I decided to try one filament just to see how the printer prints. I printed the 20mm XYZ cube and it printed pretty well.
In one of my reviews I printed the Star Wars clock from Thingiverse. I've seen this dual color Batman once and had to try it. It was a tough print and the two colors do not stick together as well as it should have. Also the second nozzles leave marks on the top layer.
The last PLA print was a simple single color minion. The print quality while not great is acceptable. The thing about these printers is you can always improve them if you have the patience.
Flexible Filament (TPU)
Flexible filaments are very cool. I usually print quishi toys for the kids. The problem with the filament being so flexible is that it can spool around the feeder gear. The Zonestar P802QR2 has extruders with a small enough gap, but because it’s so small I had trouble loading the filament. I had other ones laying around so I installed them.
One plus side to having separate nozzles is that you can mix types of filaments. That is great if you want to print something like a 3D printed hand to have hard fingers (PLA) and flexible joints. I tried but failed twice and moved on. I will give it another try when I have some time.
PETG
PETG is a tougher alternative to PLA and is widely used. The first print failed because the second nozzle kept ripping the supports down so I stopped it. Then I printed the Kratos bust that didn’t need much support. This print came out nice and you can barely see the layer lines on some parts. PETG is stringy and hard to get the retraction settings correct.
- Dual hotends
- Extra stepper driver. This lets you add another extruder.
- Metal frame.
- Auto level sensor
- Prints well
- Price
- Dual nozzles
- Frame design is flimsy in the X axis.
- 3D printed parts can be inaccurate.
Zonestar P802QR2 Silver US Plug 3D Printers, 3D Printer Kits Sale, Price & Reviews
Share to:
- Description
- Reviews(0)
- Shipping & Payment
- Wholesale Inquiry
Zonestar P802QR2 Descriptions
Disclaimer:
● Please read and follow the user manual carefully before you assemble or operate the 3D printer.
● Modification and customization of the 3D printer are strictly forbidden. We will take no responsibility for any problems resulting from modifications.
● Always use the correct AC voltage for your region.
● Please do not place the 3D printer near flammable / combustible materials, or any heat sources.
● Use the 3D printer only in properly ventilated areas. Maintain a safe distance from the printer.
Main Features:
● Extremely simple assembly, high performance
● Metal frame structure provides more stable working environment
● Support off-line print and automatic leveling function
● With automatic platform leveling and height detection
● Dual-color printing with double extruders
● EM4 Bowden extruder, easy to load filament, adjustable pressure and support flexible filament
● Z axis lead screw fixed module
● New upgraded hot end frame, easier access to faster build
● 500mW - 2500mW selectable upgradable laser engraver
● All in one electronic solution control board, compatible with RAMPS V1.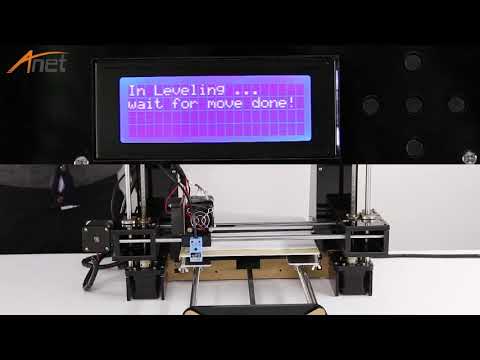 4, MKS V1.3, ATMEGA2560 MCU, 5 motor drivers connector, 4 MOSFET switch, 3 AUX connector and support to upgrade more features
Specification
Disclaimer:
1. Please read and follow the user manual carefully before you assemble or operate the 3D printer.
2. Modification and customization of the 3D printer is strictly forbidden. We will take no responsibility for any problems resulting from modifications.
3. Always use the correct AC voltage for your region.
4. Please do not place the the 3D printer near flammable/combustible materials, or any heat sources.
5. Use the 3D printer only in properly ventilated areas. Maintain a safe distance from the printer.
- All (0)
- Photos (0)
- Videos (0)
- Sort By: All
All Hottest Most helpful Most recent
-
Translate into EngLish
Get G Points! Be the FIRST to Write a Review!
Do you want to bulk buy Zonestar P802QR2 ? Please submit your wholesale Zonestar P802QR2 inquiry below. Please note we usually don’t offer free shipping on wholesale Zonestar P802QR2 orders, but the wholesale price will be a big bargain.
Your Target Price:
Order Quantity:
Country:
Your Name:
Your Tel:
Your E-mail:
Company Name:
Detailed Inquiry Information:
Your Recently Viewed Items
Pre-sale Service
Zonestar P802QR2. Results of the first month.
So. It's been a month since I bought my first 3D printer. I wanted to tell you more about what has been done and get advice from veterans of 3DE printing. Many thanks to everyone on the portal who share their knowledge and skills. Much of what has been done is taken from here and from the same forums. Also, please don't throw shoes at me. Because the Chukchi is more of a reader than a writer. And I write to make it easier for those who follow. Everything is on the network, but finding what you need and trying it out - you have to kill a lot of time.
I took the printer from Ali here. Delivery from a warehouse in Russia. That is, without customs clearance and faster. But it worked out as usual. After payment, it turned out that the warehouse was empty and waiting for a ship with fresh printers. In general, it turned out in time as from China, but bypassing customs. Everything came well packed, everything was in place and after assembly there was a bunch of bolts, a thermistor and a cable to the motor. The seller is sociable and likes to joke. In a good way. Download links for
printer 1. User manuals 2. Errors and Troubleshooting 3. Firmware 4. Certificates 5. Facebook group 6. Channel on YoutubeThe printer took, because the topic of CNC became interesting, as well as to expand the home workshop. I plan to assemble a laser engraver and maybe a milling cutter. For the milling cutter, you just need a separate room. But this is how it goes. Up to this point, the 3D theme is a complete zero. The only experience is the creation in 3D Max of the first versions of intros for home video.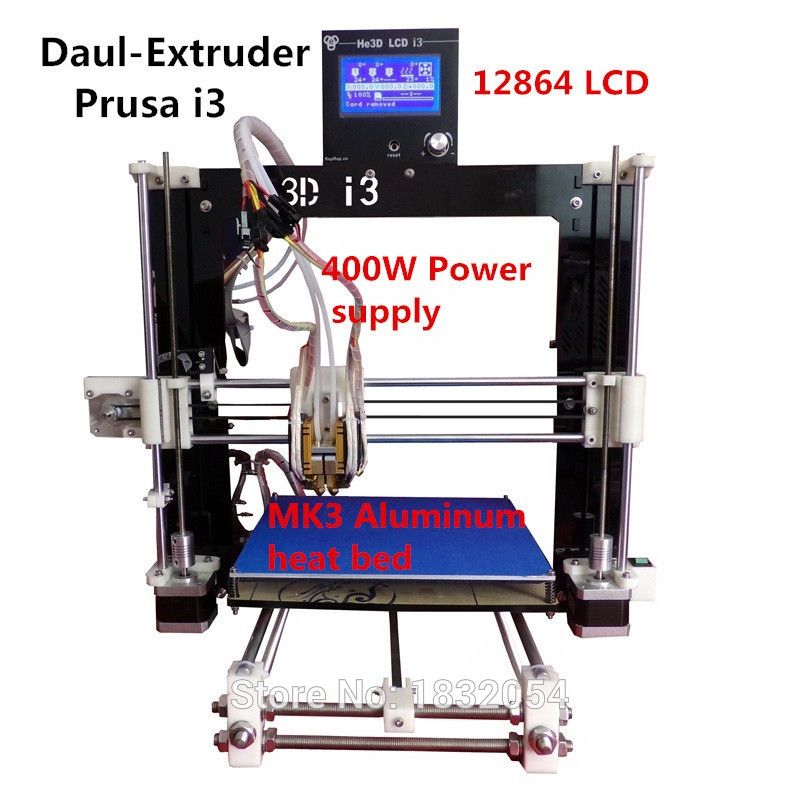 And that was a long time ago and is no longer true. I decided to take it with two extruders at once. And did not regret. There are many more possibilities than with one. There are also disadvantages, but they disappear by twisting the second extruder. You can unscrew the nozzle (hot!) And in the settings indicate that only one is available. Business for 5 minutes. Disadvantages - the second one scratches what the first one prints and vice versa. Surfaces are glossy and matt. But these are trifles. Well, snot from one color falls on the second. Still more merit. I thought to put a dual extruder with one nozzle like this. But if you print with different plastics, who knows what kind of reaction can go there. Yes, temperatures are different. And it's harder to clean.
1. Assembly.
In general, instructions and assembly video are attached on a USB flash drive to the printer. I did not experience any particular difficulties. But there are a few things to note. There is no mention of how to tighten the belts at all. There is not even a hint of how to lay the wires. Full freedom.
Belt tensioner. We loosen the roller and the motor mount along the Y axis (loosening only the roller is enough). We tighten the belt and then we fasten the roller and the motor. There are fewer options along the X axis - you can loosen the motor there, but you also need to tighten the belt. The main thing is without fanaticism. The belt should not sag, but it should not ring like a string either. You can get X on the racks along the Z axis. The plans were to print tensioners in X and Y, but somehow I got used to it and the need disappeared. Maybe when there is nothing to do at all, I will do it.
Wires. After assembling the mechanics, I want to start the unit faster and the wires seem to be wired neatly, but in the end I got what I got.
The main work. The first picture shows that this disgrace is no longer there.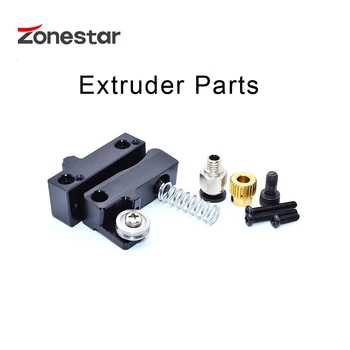
Only one spool holder was included with the printer. The issue of printing the second became acute. I really liked this one and this one. I printed both. But I've only used the first one so far. You can see it on the left in the first picture. The bar gives off with some effort, but it is always taut and does not twist. Compact and convenient. It's good that the bearings were already in stock.
Extruder clogged for the first time while printing. I printed the PLA that came with the printer. Horrified. What to grab and where to poke? I found it here on the forum. We take out the filament on a hot one, unscrew the tube and gently clean the top with a toothpick. And from below a wire from a stranded wire. All on heat.
After cleaning, take a piece of bar and carefully feed it by hand. If it doesn’t go, we clean further and so on until it goes easily and naturally. It turns out that it is necessary to put dust filters on the bar. I printed these. Since then there have been no blockages. There were difficulties with PLA residues when switching to SBS. The remains crystallized from the higher temperature and had to be carefully cleaned out. Again, nowhere without a toothpick. To make it easier to clean, you can print this holder. Hands do not burn so much and you can stick the wand further.
By that time I had received a bar from FDPlast HIPS and SBS. Decided not to mess with ABS yet. After all, I did not know that HIPS is almost the same ABS. It sticks to the table just as hard and the temperature is even a little higher. And warps, though less, but almost the same.
The printer does not have an off button. We print this box, and twist the connector and switch from a faulty power supply from the printer. Well, or buy in the store. I just had a couple of blocks lying around on a stash. Came like family.
Printer without base. With each move, the geometry changes and must be reconfigured.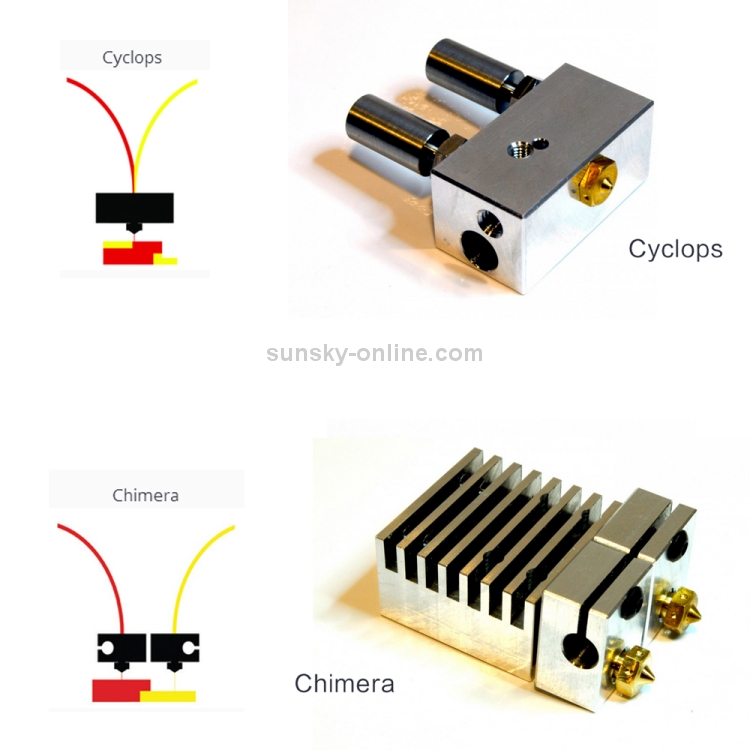 I chose plywood more even than 5 mm and cut out a 50x50 square. Chipboard would be better. But it will do for now. Covered with varnish. Dried up. I printed this fastener. The main thing to pay attention to is the rear mount near the Y-axis motor. The base needs to be slightly adjusted in height. The rest comes right away. I printed SBS with HIPS infill. It turned out cool. HIPS gives rigidity, and SBS absorbs vibration like rubber. Above in the photo is a box for a switch (PLA) and part of the attachment to plywood. Further according to the plans - to remove the cosmic wires and make the brain cool.
By that time I had run out of scotch tape and I started to buy mirrors for the table. Went to a mirror company. They didn't have anything less than 4. I ordered 2 pieces. It took 2 days to complete. load, you know. I went to Uncle Vasya's market.))) Uncle Vasya's like in Greece - he found me a moisture-resistant mirror 3 mm, cut it to size and polished it. Delov for 10 minutes ... Now I have a stack of mirrors for all occasions.
I took the CPU cooler from here - it's beautiful though. And my first print with supports and different plastics. It turned out not the first time and not without jambs, but it turned out ...
Printed on a mirror with a pencil. Only thanks to SBS (red), which sticks to everything, HIPS (yellow) somehow held on. It became a little better with PVA, even better with Moment Joiner. But finally HIPS agreed only on BF-2 with a skin. And then at 75 C it flies off the table with a crunch. But that will be later. How I was looking for this cherished BF-2 (originally from pioneer childhood). Rarity in one word. But found! And when I opened and sighed its fragrance - a bunch of memories of my modeling youth flooded in. The smoker lives! And so without SBS it was possible to print only small details from pure HIPS.
Disconnected the wires and twisted them into bundles. I tried to collect as much as possible into the bus and wrapped it with a complete spiral cable channel. In the end, it kind of worked out. I bought a 92mm cooler from a store. Connected directly to power. Total what happened below in the photo.
SBS is translucent and the LEDs illuminate the box from the inside during operation. It's beautiful at night. Of course, it didn’t work out perfectly, but the first pancake. Yes, and printed almost 12 hours.
Now a few words about settings and programs
I used this model to adjust the offset of the extruder nozzles. Enough to print twice. The first time is rough. The second time is final. How to enter into EEPROM in the instructions for the printer is described in detail.
I mainly use the Repitier-Host slicer. How to set up is also in the instructions. The only thing to do is to increase the flow in the filament settings to 1.1. By default, the feed is not enough and because of this, the vertical layers do not sinter together well. Cura versions prior to 1.6 also work. They don’t see the printer above, as they didn’t go out of their way. Cura throws firmware well. In the Repeater, I could not go to the server page in any way. It turns out there is a glitch in the localization files for the Russian language. The solution to the problem is here. It’s strange what version has already been released, but they didn’t remember about us. Now I have a server configured and I can print from any computer and control the work via the Internet. I also connected the webcam - everything shows. I put it on print and went about my business - through smart, you can periodically see how work is going there. And if that stop remotely.
Now about the fucking drygost. It's impossible to set up perfectly, or just so that it's impossible. Included is an auto level sensor. Initially, after turning on the printer, it worked on the strength of about 15 minutes and that's it. Then it just ignites and burns, regardless of the presence or absence of metal next to it. Now it won't turn off at all. Well, people live without sensors, however. But after turning off the auto level in the panel, setting the table is another adventure. Here people write that the springs must be thrown out and the table fastened firmly and forever. But does anything happen? If the extruder pokes into the table, the spring will somehow soften the blow. In general, I set myself specific springs and printed lambs more abruptly than regular ones. Only in this way could I set the table so that the first layer would somehow come out. It is necessary to think about the sensor something and about the mechanics of the table. I don't like her. What is the best sensor to install? Wouldn't this be better? There are not many options. There is also a retractable probe. But there are five wires and it is not clear where to stick them. For the source codes for the firmware are given individually and on special occasions. You can pour in the 'left'. But I haven't matured yet.
In general, in the intermediate result I have such a printer.
Fits perfectly on the shelf above my computer. Above is a bookshelf.
What do we have in the next step? Correctly! The printer is, something like prints. What does it print? Any left. And you need your own, dear. So I became preoccupied with studying the vast topic of 3DE modeling. It was generally easy for me. I didn't know shit at all in this area. Therefore, the look is not blurry and clean. Generally began to poke back and forth. Pure intuition - and trample or not trample. I tried a bunch of CADs more difficult and simpler. Tutorials on YouTube and more. The only package where I flooded - Solidworks. After the 3rd lesson, it went and went and went. I do not want to offend any software package for IMHO. Either there is or not. Of course, I understand that I will never be a professor there, but now I can draw something and it turns out exactly as I need it. And this is the main point. I still keep blender and Rhinoceros in mind. I made my first model in a couple of hours. My daughter asked me to buy an organizer, but why do I need a printer then? Posted what happened here. There is also an abstract model on the theme of the pyramid of Cheops. In general, the process has begun. And there you will see.
A little about spare parts. I took care of spare parts and purchased from Ali a few nozzles of different diameters, thermistors, heaters and other consumable small things. Let it be than to wait months for the ship.
Including bronze linear bearings. Until I change. The balls are still running and there is no backlash. I wanted to ask which ones should be changed first? Z doesn't seem to make sense at all. Dragostals will be erased most quickly. Then the X axis.
Printer ZONESTAR P802QSU - samopal.pro
This article is an overview of the ZONESTAR P802QSU printer, a Prusa I3 clone with a steel frame. An inexpensive printer was needed to print a prototype case for various devices.
The first thought was to assemble it myself. After all, I already had experience in designing and assembling a CNC machine. But studying RepRap.org and marking some projects, as well as reading specialized forums and sites, showed the following
- Savings when buying individual parts are very small (if any) than buying similar ready-made kits for assembly
- Self-assembly of your first printer can take several months
- The quality of the self-assembly printer model is a function of so many unknowns
Therefore, it was decided to buy a ready-made kit. The choice fell on the ZONESTAR P802 printer for the following reasons -
is a clone of the "folk" Prusa i3 model, well run in and out.
- A manufacturer with its own website and model range.
- Steel frame, heated table, Bowden extruder, table auto leveling function.
- In addition, the printer was sold from the Moscow warehouse.
The cost of the printer at the time of the review was $ 200 (there was a discount)
CDEK brought the printer in 5 days. The packaging is a nondescript box weighing 10 kg
Inside the box, the designer is a childhood dream.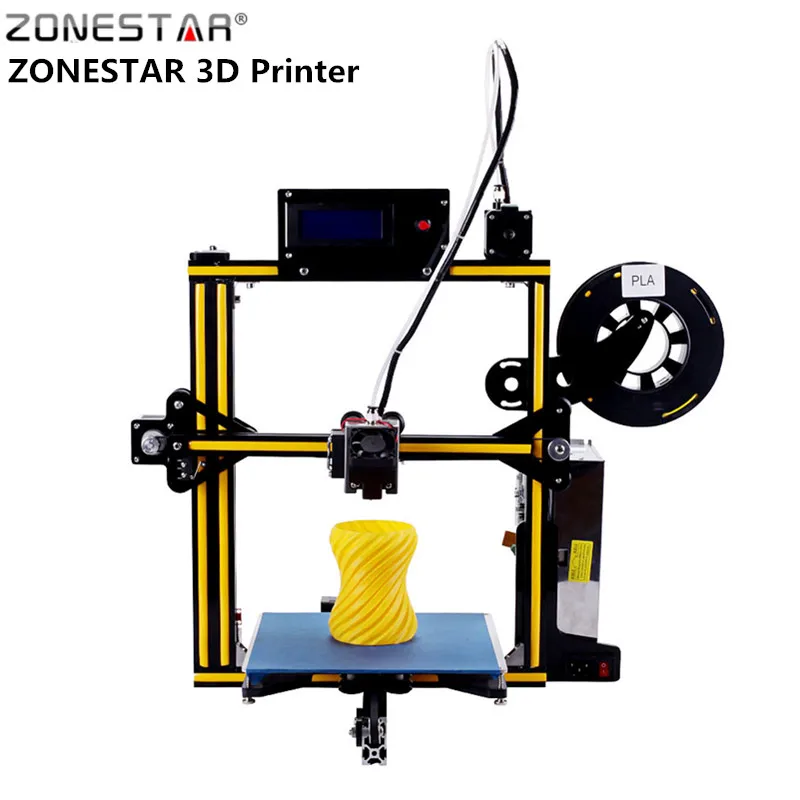 In addition to the printer itself, the kit included two rolls of PLA plastic 250g each, a plastic holder, a 512MB memory card, an assembly tool (screwdriver, hex keys, plastic tweezers, wire cutters), a set of nozzles 0.2, 0.3 and 0.4 (+ nozzle 0.4 on the hotend) , wires for cleaning nozzles of different diameters, a piece of white masking tape.
Kit specification
The frame consists of prefabricated elements of (I hope) stainless steel 1.5mm thick (table mount 2mm) with places for reinforcement with a profile bend. All steel elements are machined.
The frame elements are threaded. It assembles easily and simply. All screws included are for hex sockets, which are also included in the set
Mechanics - SC8UU linear bearings (LM8UU in Z axis), polished shafts 380mm with end threads, leadscrews (Z) - 8mm trapezoid with 2mm pitch / turn 345mm long , belts (X and Y) GT2 6mm with matching pulleys.
SL42STh50-1684A (NEMA 17) motors with 40mm length, 1.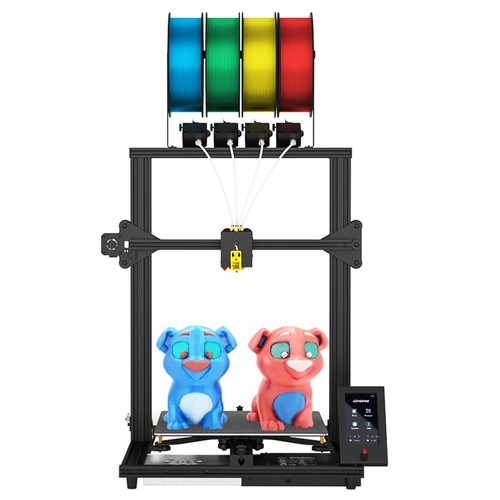 8 degree pitch, 1.68A current, and 4kg/cm holding torque , and on the frame with the supply of plastic through a fluoroplastic flexible tube. I am glad that the mechanism is “factory”, and not printed on a printer.
The printhead with hotend was already assembled.
Steel holder, two fans, detachable design - radiator, heater and nozzle. The X limit switch and the non-contact sensor for auto-leveling are also attached here.
Aluminum table MK3 of our own production, as evidenced by the logo on the back.
Size 220×220 thickness 3mm. The heater is 12V, 140W, has a built-in NTC100 thermistor.
PLA plastic adheres perfectly to the glue stick.
Electronics:
Self-produced four-line text display + 5 control buttons and an SD card slot82 compatible with RAMS 1.4
As I already wrote, the controller is designed for 6 motors, 3 temperature sensors, three fans and two heaters, which in the future may allow the use of a double extruder.
Power supply 12V 20A with forced cooling. There is a panel with a switch and a power socket IEK 320
Plastic spool holder made of 3mm black acrylic is designed for large 1kg spools
0077 NPN type. Works well on a metal table. The inscription 8mm should also be taken through the glass.
The printer is running Repetier 0.92.9 firmware. Moreover, the assembly and configuration from ZONESTAR.
I will not describe the assembly of the printer. The manufacturer did this for me, and in such detail that I, a beginner, practically did not have to surf the Internet during assembly. On the memory card that came with the kit, there was a whole wealth:
- Specification of the kit in PDF format
- Illustrated Oven Troubleshooting Guide
- Firmware binaries of different versions for different models with instructions on how to download.
- Empty "Source" directory. I asked the seller - I immediately received the source code for firmware
- Detailed assembly instructions with illustrations in PDF
- Printer manual in PDF and two demo videos
- Instructions for leveling the table in PDF with illustrations in PDF
- PDF manual for table level sensor and video link
- Test models
- USB drivers for Windows, Linux and MAC OS
- Printer profiles for Cure and Simplify3d
All documentation in English, with explanatory files and internet links. Just a balm for the soul of an engineer!
Let's get down to business or the difficult path of a beginner
Well, the printer is assembled, all the wires are connected and even more or less tidied up with ties and braids. The table is somehow leveled and the plastic is filled.
Slowly mastering the online 3D editor tinkercad and the CURA slicer, I am trying to create something.
The first pancake was lumpy The first test cube came out crooked.
It turned out that the pulley was not tightened well along Y. We tightened it - it got better
Next came the beginner's jambs - the model does not stick to the table, the edges are raised, some threads are all around. Half of the test coil went to the marriage. The next day I bought it in the domestic BESTFILAMENT (It turns out that in Perm you can easily buy different plastic with delivery to the office, starting from Technopoint, ending with various specialized offices). And things went.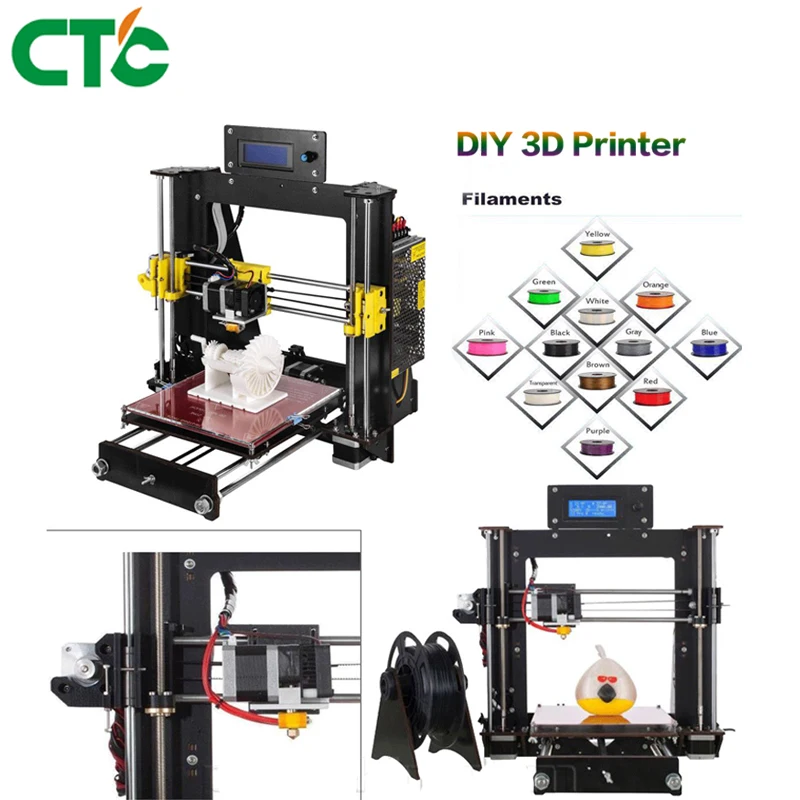 To stick the plastic to the table, I used an ordinary stationery glue stick (the main purpose, as I understand it, is that the finished product can be torn off the table without damaging it).
The auto level sensor proved to be easy and convenient to use. The corresponding menu item is launched on the display
A few print results
about the first, for printing test cubes. It's scary to think how much plastic goes into these cubes. Much like evolution. I have nothing to improve so far, but cleaning for the filament can be done.
Something broken can be fixed. I lost a platform from a Chinese clone of a gorillapod. I printed a new pad and a 1/4″ screw (it’s hard to buy this in a store). True, the screw turned out to be quite fragile, but as a temporary option, while the steel screws are moving, it is quite possible to carefully use the printed ones
Printing a broken corner for an old kitchen hood. True, the model in thinkcad turned out to be “faceted” and a snot of an old plastic of a different color dripped into the plastic.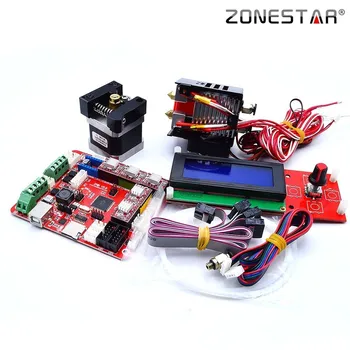 It is necessary to sort out the hot end so that the plastic snot does not climb through all the cracks.
And this is an adapter from a Chinese socket to ours. It remains to solder the round legs of the euro plug directly to the Chinese flat plates. (First photo from the author's website)
Well, that's what the printer actually took on for - printing small-scale instrument cases and developing prototypes.
Case for Orange PI ZERO taken from the Internet and slightly modified by me
Most importantly, you can meditate for hours on how it prints
The main thing that I understood for myself is that there is no need to rush anywhere. Speed - 50mm / sec + layer 0.1-0.15 mm. Do not save on filling and supports in the slicer. Well, study, study and study!
It's time to take stock
I liked the printer.