3D printer printing speed
What is the Best Print Speed for 3D Printing? Perfect Settings – 3D Printerly
One of the key settings you’ll find with your 3D printer is the speed settings, which simply enough, changes the speed of your 3D printer. There are many types of speed settings within the overall speed setting which you can adjust.
This article will attempt to simplify these settings and guide you on the right track for getting the best speed settings for your 3D printer.
What is the Speed Setting in 3D Printing?
When we talk about the printing speed of a 3D printer, we mean how fast or slow the nozzle moves around the part to print each layer of thermoplastic filament. All of us want our prints quickly, but the best quality usually comes from slower printing speeds.
If you check Cura or any other slicer software that you’re using, you’ll find that “Speed” has a section of its own under the Settings tab.
It all depends on how you tweak this setting. Different changes will have their own variations of results. This is what makes speed a fundamental aspect of 3D printing.
Since it is such a vast factor, speed cannot be covered by one setting alone. This is why you’ll observe several settings within this section. Let’s take a look at these below.
- Print Speed – the speed at which printing occurs
- Infill Speed – the speed of infill printing
- Wall Speed – the speed at which walls are printed
- Outer Wall Speed – the speed at which outer walls are printed
- Inner Wall Speed – the speed at which inner walls are printed
- Top/Bottom Speed – the speed at which the top and bottom layers are printed
- Travel Speed – the moving speed of the print head
- Initial Layer Speed – the speed for the initial layer
- Initial Layer Print Speed – the speed at which the first layer is printed
- Initial Layer Travel Speed – the speed of the print head when printing the initial layer
- Skirt/Brim Speed – the speed at which skirts and brims are printed
- Number of Slower Layers – the number of layers that will be specifically printed slowly
- Equalize Filament Flow – controls the speed when printing thin lines automatically
- Enable Acceleration Control – adjusts acceleration of the print head automatically
- Enable Jerk Control – adjusts the jerk of the print head automatically
Print speed directly affects infill, wall, outer, and inner wall speed. Should you change the first setting, the rest will adjust on their own. You can still, however, change the subsequent settings individually.
On the other hand, travel speed and initial layer speed are lone settings and have to be adjusted one by one. Although initial layer speed does influence initial layer print speed and initial layer travel speed.
The default print speed in Cura is 60 mm/s which is a satisfactory all-rounder. That said, there are great differences in changing this speed to other values, and I’ll talk about all of them down below.
Print speed is a simple concept. What’s not so simple is the factors that it directly affects. Before getting into the perfect print speed settings, let’s see what does it help with.
What Do 3D Printing Speed Settings Help With?
Print speed settings help with:
- Improving print quality
- Making sure your part’s dimensional accuracy is on point
- Strengthening your prints
- Helping reduce problems such as warping or curling
Speed has a lot to do with your part’s quality, accuracy, and strength. The right speed settings can strike the perfect balance between all said factors.
For instance, if you see that your prints are suffering from poor quality and aren’t as accurate as you’d like them to be, reduce the printing speed by 20-30 mm/s and check out for the results.
Several users have said how tinkering around with print settings has brought forth amazing outcomes especially when they were experiencing issues with their parts.
For part strength and good adhesion, consider changing the “Initial Layer Speed” and experiment with different values. The right setting here can definitely help with your first few layers which are the foundation of a solid print.
As the speed of the print head increases, more momentum starts to build up, which usually leads to a jerky movement. This can cause ringing in your prints and other similar imperfections.
To solve this issue, you can reduce your travel speed a bit, alongside decreasing print speed in general as well. Doing this should increase your printing success rate, as well as improving the overall print quality and dimensionally accuracy.
Some materials such as TPU require a significantly lower printing speed to even come out successful.
I’d recommend using other methods to speed up your 3D prints. I wrote an article titled 8 Ways How to Speed Up Your 3D Printer Without Losing Qualitywhich you should check out.
How Do I Get the Perfect Print Speed Settings?
The best way to find the perfect print speed settings is by starting your print at the default speed setting, which is 60 mm/s and then changing it in increments of 5 mm/s.
The perfect print speed settings are the ones that you observe yourself after consistent trial and error. Repeatedly going up or down from the 60 mm/s mark is bound to pay off sooner or later.
This usually depends on the type of print you’re trying to go for, either strong parts in less time or more detailed parts that take considerably more time.
Looking around, I’ve found out that people usually go with 30-40 mm/s to print parts that look really nice.
For the inner perimeters, the speed can be increased up to 60 mm/s easily, but when it comes to the outer perimeters, a lot of people half that value and print somewhere around 30 mm/s.
You can reach higher 3D printing speeds with a Delta 3D printer vs a Cartesian printer, though you can increase your speed capabilities by increasing stability, and improving your hotend.
Getting the perfect printing speed all comes down to many factors, such as how much you want the highest quality, as well as how fine-tuned your machine is.
Experimentation is what can lead you to find the optimum print speed settings that works better for your 3D printer and material.
This is because not every material is the same. Either you can get high-quality prints at lowered speeds, or average quality prints at fast speeds for more efficient purposes.
That said, there are materials that allow you to print fast and get amazing quality as well such as PEEK. This, obviously, falls down to the material you’re printing with.
This is why I’m going to tell you good printing speeds for 3D printers in general and for some popular materials as well down below.
What is a Good Print Speed for 3D Printers?
A good print speed for 3D printing ranges from 40mm/s to 100mm/s, with 60 mm/s being the recommended. The best printing speed for quality tends to be in the lower ranges, but at the cost of time. You can test print speed by printing a speed tower to see the effect of different speeds on quality.
However, you should know that your print speed shouldn’t be too slow. This can overheat the print head and cause major print imperfections.
On the same side, going too fast might ruin your print by giving rise to certain print artifacts like ringing. Ringing is mostly caused by overly excessive vibrations of the print head when the speed is too fast.
I wrote a post about Ghosting/Ringing/Echoing/Rippling – How To Solve which can help you improve your print quality if you are being affected by this issue.
With this out of the way, let’s take a look at some good print speeds for popular filaments.
What is a Good Print Speed for PLA?
A good print speed for PLA usually falls in the 40-60 mm/s range, giving a good balance of print quality and speed. Depending on your 3D printer type, stability, and set up, you can reach speeds above 100 mm/s easily. Delta 3D printers are going to allow for higher speeds compared to Cartesian.
For most users, I’d recommend sticking to the range, but there are instances where people have used a higher print speed and had great results.
You can also try increasing the speed, but yet again in increments. PLA’s low-maintenance nature allows one to increase speed and get good quality prints as well. Be careful, however, not to overdo it.
What is a Good Print Speed for ABS?
A good print speed for ABS typically lies between the 40-60 mm/s range, the same as PLA. The speed can be increased even more if you’ve got an enclosure around your 3D printer and other factors such as temperature and stability are kept well in check.
If you print ABS at a speed of 60 mm/s, try keeping the first layer speed to 70% of that and see if it works out for you.
In some cases, this can greatly help with adhesion by making sure that enough plastic is being extruded out of the nozzle to adhere properly.
What is a Good Print Speed for PETG?
A good print speed for PETG is in the range of 50-60 mm/s. Since this filament can give rise to stringing issues, many people have tried printing relatively slow—about 40 mm/s—and have found good results as well.
PETG is a blend of ABS and PLA, borrowing the latter’s user-friendliness while consisting of ABS’s temperature resistant properties. This is also a reason that this filament prints at higher temperatures, so watch out for that too.
For the first layer, go with 25 mm/s and see what that brings as a result. You can always experiment as well to see what works better for your 3D printer.
What is a Good Print Speed for TPU?
TPU prints best in the range of 15 mm/s to 30 mm/s. This is a soft material that’s usually printed much slower than your average or default print speed which is 60 mm/s. If you have a Direct Drive extrusion system, however, you can increase the speed to about 40 mm/s.
Anywhere between 15 mm/s to 30 mm/s is usually fine, but you can experiment and go a bit higher than that, similar to the strategy with the rest of the filaments.
Bowden setups struggle with flexible filaments. If you’ve got one, it’s best that you print slowly while keeping your 3D printer’s composure.
What is a Good Print Speed for Nylon?
You can print Nylon anywhere between 30 mm/s to 60 mm/s. Higher speeds like 70 mm/s are also sustainable if you increase your nozzle temperature side by side. Most users print with 40 mm/s for great quality and high details.
Increasing the nozzle temperature is necessary if you want to achieve high speeds when printing with Nylon. This can help prevent under-extrusion since that becomes an issue when going very fast.
What is the Best Print Speed for the Ender 3?
For the Ender 3 which is a great budget 3D printer, you can print as low as 40-50 mm/s for detailed parts with aesthetic appeal, or go as fast as 70 mm/s for mechanical parts that can compromise on details.
Some users have even gone way beyond that by printing at 100-120 mm/s, but this speed mostly works well on upgrade parts that do not affect their function.
If you want your prints to be upright beautiful, I recommend going with a 55 mm/s print speed that balances speed and quality perfectly.
Apart from all this, I’d like to mention that experimentation is key here. You can use the Cura software and slice any model to find out how long it’ll take to print.
You can then go through some test models with varying speeds to check where quality drops and where it does not.
I wrote an article about the best filament for Ender 3, so you can definitely refer to that for more details on the subject.
For PLA, ABS, PETG, and Nylon, a good range for speed is 30 mm/s to 60 mm/s. Since the Ender 3 features a Bowden-style extrusion system, you’ll have to be careful with flexible filaments like TPU.
For these, go slow at about 20 mm/s and you should be fine. Many users say that decreasing your speed while printing flexible works great with the Ender 3.
What it is and why it matters
When talking about 3D printing speeds, it’s easy to get vague with the language we use. For example, when we say that a small, simple part can be printed “quickly,” what we mean is that the part can be printed in a short amount of time (because it is small and requires fewer movements of the printhead than a larger part). Make no mistake, this is a helpful way to think about printing, but it doesn’t tell us much about actual print speed.
Lots of factors can affect the time it takes to finish a print. Using a wide-diameter nozzle, for example, allows you to extrude a greater volume of material at once.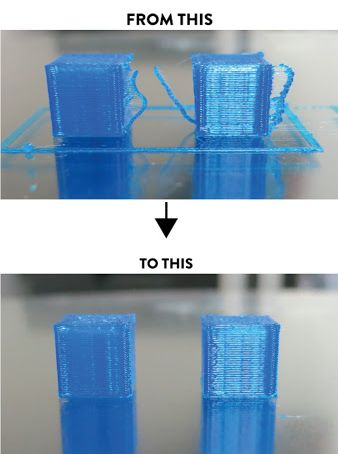 And adjusting settings like infill and layer height can also shave minutes or hours off total print time: setting a greater layer height reduces the total number of layers, while minimizing infill density means the printhead is laying down less material per layer. Furthermore, adding extra material via supports, skirts, and rafts, will increase the overall printing time.
However, printing time is not the same as 3D print speed. If it takes you a day to build a LEGO house and it takes a building contractor a week to build a real, bricks-and-mortar house, this doesn’t mean that you have demonstrated a faster building speed than the professionals. On the contrary, the builders will probably have laid down each brick far more speedily than you. And this speed of action is what we need to focus on when it comes to printing speed.
Print speed affects printing time and print quality
3D print speed is simply the rate at which the printhead moves along the X and Y axes as it puts down a layer of material.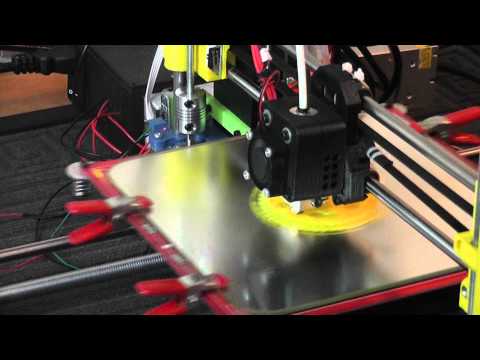 A fast 3D print speed will reduce overall print time, but prints printed “fast” can still take a long time — when the part has large dimensions, for instance, or if using a very low layer height. Usually defined in millimeters per second (mm/s), 3D print speed can also vary across the build: sometimes a slower speed is used for the first layer (to ensure good adhesion to the build surface) and a faster speed used for infill (where accuracy matters less).
This article goes over the basics of printing speed. It looks at the typical printing speeds of FDM printers, the ways you can adjust print speed settings (and how this affects the print), and the different speeds used for different 3D printing filaments.
In the world of FDM printing, which we will focus on here, printing speed refers to how quickly the printhead moves along the X and Y axes while it is depositing material.[1] It has a big impact on overall printing time, but it is not the only factor.
The printing speed of an FDM printer can be adjusted using printer firmware or slicing software. In general, slower printing speeds produce better results, so very high speeds are typically reserved for rapid prototyping. Printing too fast can lead to defects, lower dimensional accuracy, and weaker parts.[2]
The best print speed for everyday prints (medium quality) is about 50–60 mm/s. However, users should note that some materials can be printed very quickly (e.g. PLA) while some require a slower rate to prevent warping or print failure (e.g. TPU).
Different pieces of hardware offer different print speed capabilities, though this is not usually a key metric to look out for when selecting a printer. Most common entry-level printers (such as the Creality Ender 3 and Prusa Mini) offer a maximum print speed of around 200 mm/s. In reality, however, users will not actually be able to print at that speed. This is partly because filament can’t be melted and extruded that quickly.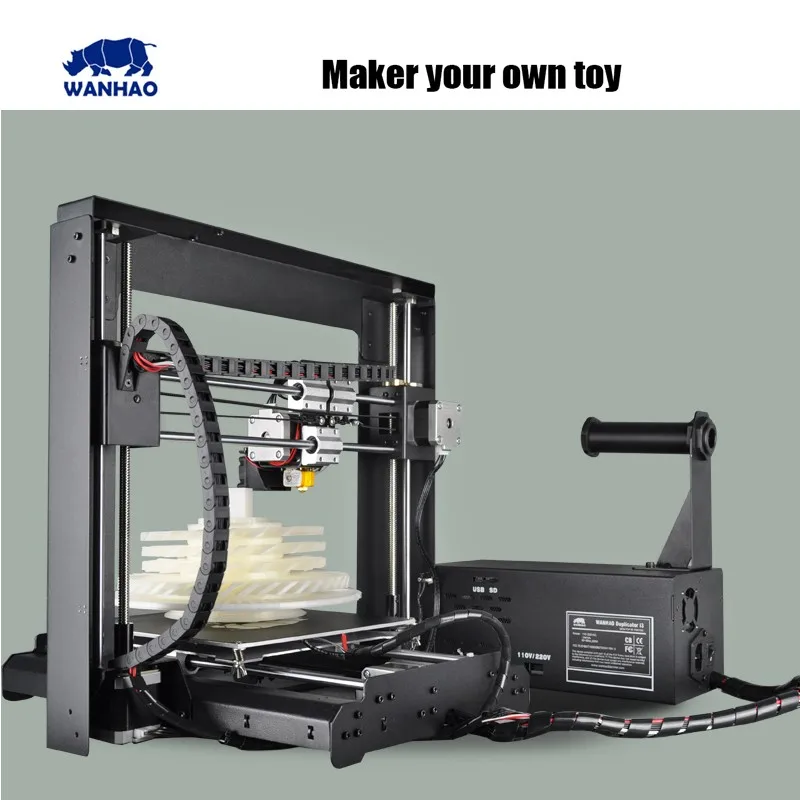 Furthermore, because the printhead typically makes quite short movements while it prints, it rarely has enough time to accelerate to its maximum speed.
Other additive manufacturing technologies define print speed in different ways. With vat photopolymerization technologies like SLA and DLP, there is no printhead movement, so print speed is often defined by how many millimeters can be printed along the Z-axis per hour. Such a measurement is more useful with SLA and SLP (as well as SLS) than it is with FDM, because there are fewer factors that can influence it (such as nozzle size).
3D print slicing software applications like Cura and Simplify3D offer a range of print speed settings beyond the default print speed, which is usually set in mm/s. These settings allow the user to fine-tune the rate at which the printhead moves in different situations: during the first layer, when printing infill, when printing outer walls, and also when moving without printing.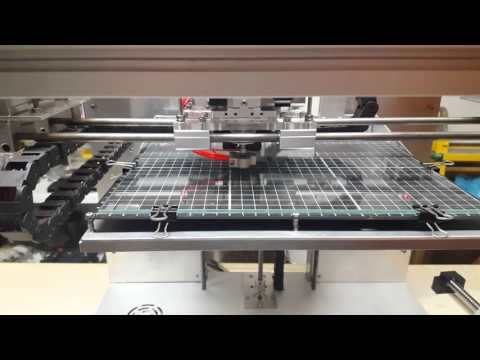
Although different slicers sometimes use their own terminology, below are the most common print speed settings available for FDM printing.
Slicers like Cura offer several different print speed settings and parameters
Print speed
Otherwise known as default printing speed or overall printing speed, this is the most important setting for determining your 3D printer speed and achieving faster prints. Usually defined in mm/s, the print speed setting tells the printhead how quickly it should move along the X and Y axes while it is depositing material. Most slicers will automatically calculate how much filament will need to be extruded in order to keep up with the selected print speed.
We can call this value the “default” print speed because other settings will at times override the value. In fact, some of the following settings can — depending on the specific slicer used — be defined relative to the default print speed (i.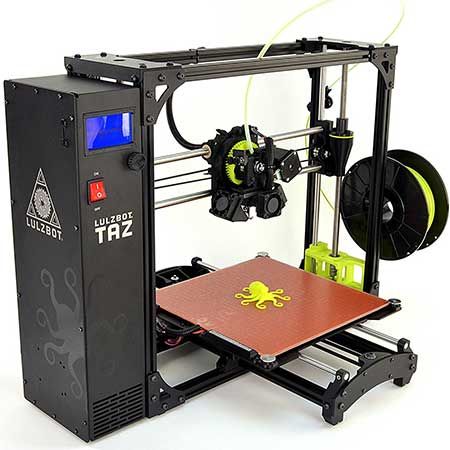 e. as a percentage of it).
Infill speed
Most 3D prints are not printed fully solid, as this uses up a lot of material, requires lots of time, and provides few physical benefits. Instead, the interior structure of a print consists of a pattern known as infill, which can vary in terms of shape and density.
Because the infill pattern cannot be seen once the print is complete, it can be beneficial to print the infill faster than the exterior. Although this may result in some imperfections, these imperfections will be less of a problem than they would be on the outside of the print.
Travel speed
Travel is when the printhead has to jump from one part of the build to another without depositing any material. Increasing the travel speed can help reduce oozing and stringing (when unwanted material drips from the nozzle) but can also lead to other imperfections.
In Simplify3D, travel speed is referred to as “X-Y Axis Movement Speed. ” The value is usually defined in mm/s and can sometimes be found under “retraction” settings if not in speed settings.
Initial layer speed
The first layers of a print are critical. If the first layer does not adhere well to the build surface, the entire part can dislodge during printing, causing print failure. It can therefore be beneficial to print the first layer(s) at a reduced speed, to give the printed object the best chance of success. This value may be set in mm/s (Cura) or as a percentage of the default print speed.
Number of slower layers
As explained above, most FDM users configure their print settings to have a slower initial layer. But rather than immediately going full speed on the second layer, it can be beneficial to gradually increase the print speed over a few layers until the normal speed is reached.
The number of slower layers setting determines how many layers it should take to go from the initial layer speed to the normal print speed.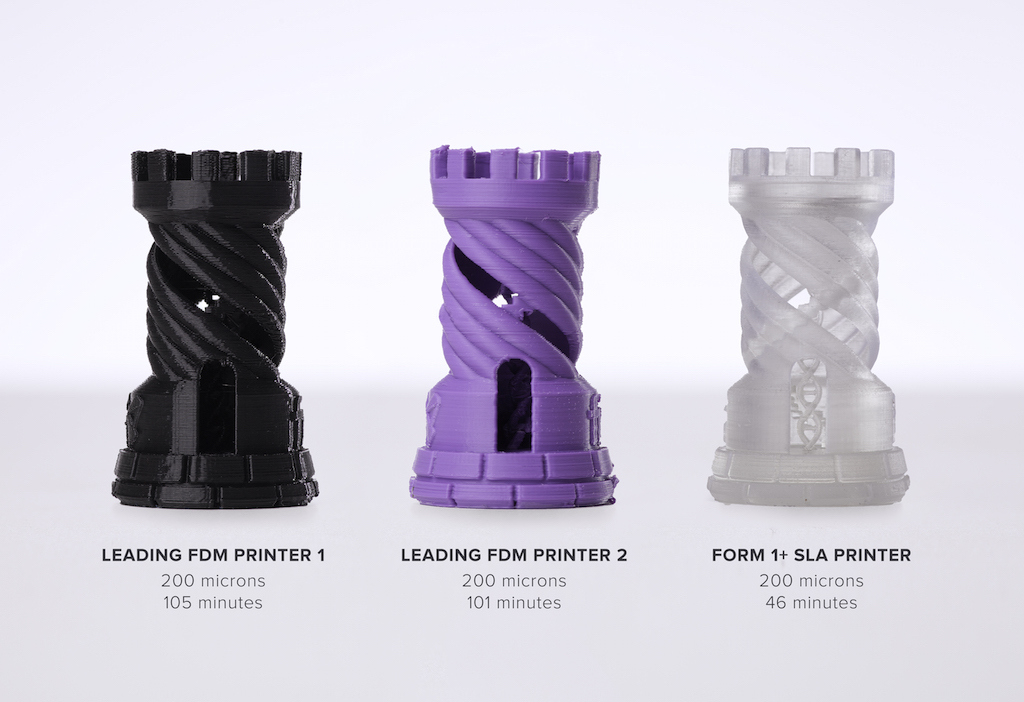 For example, if the value is set to 5, the printer will increase the speed in small increments over the first five layers before reaching the normal print speed on the sixth layer.
Support structure speed
Printer users often favor a higher speed for support structures, since these disposable sections of material do not need to be particularly accurate or visually pleasing. On Cura, there is a distinction between the “support infill” (the bulk of the support structure) and the “support interface” (where the support meets the actual part). The support interface speed should be slower, as good adhesion between the support and printed model is important.
Other section-specific speed settings
Some slicers allow for adjustment of print speed for the following parts of the print. Most are set in mm/s or as a percentage of the default print speed.
Outer/inner wall speed (may also be called “outline” or “perimeter” speed)
Top and bottom layers speed
Top surface skin speed
Skirt and brim speed
When running a print for the first, it can be tempting to crank up the print speed in order to reduce the overall printing time. However, print speed affects the print in many ways: FDM users must consider how print speed will affect bed adhesion, print quality, and the potential for errors.
Risks of printing too fast
Perhaps unsurprisingly, printing too fast is more likely to lead to issues than printing too slowly, with negative effects including lower dimensional accuracy and part strength.
The most common defects from printing too fast include:
Ringing or ghosting
The phenomenon of ringing (sometimes called ghosting or rippling) is a 3D printing defect characterized by a rippled or wavy appearance to the exterior surfaces of parts. It occurs when layers are not properly aligned, which is itself caused by excessive vibration or out-of-control printhead movements.
Reducing print speed is one of the most effective ways to prevent ringing. This is because faster speeds cause greater vibrations and lead to greater speed variations when the printhead changes direction.
Poor layer adhesion
As mentioned in our discussion of print speed settings, it is vital to print slowly on the first layer in order to guarantee good bed adhesion. But inter-layer adhesion is also important, and too-fast speeds can reduce the ability of each layer to bond with the next.
Reducing print speed on the first layer can help ensure good adhesion to the build plate, and reducing overall print speed can help prevent delamination.
Under-extrusion
If not enough filament is fed to the hotend, printing can suffer from under-extrusion. The result is gaps, holes, missing layers, and other deformities.
Under-extrusion can occur when the print speed exceeds the flow rate, i.e. when the printhead is trying to lay down more material than is being supplied to it. Generally, however, this should not be an issue, as your slicer should automatically calculate a flow rate suitable for the print speed.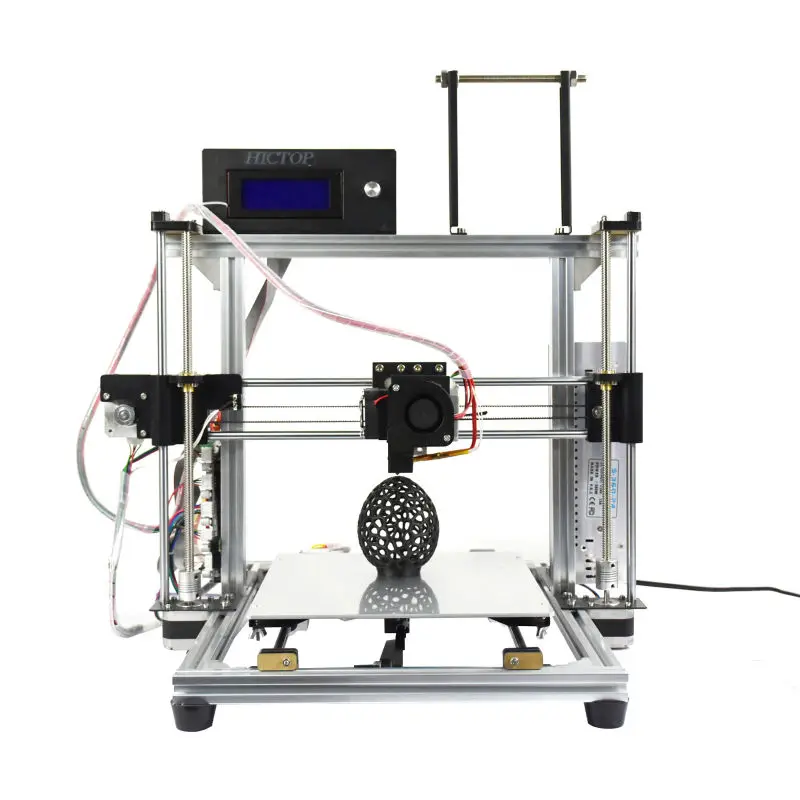
Clogging with flexible filament
When printing flexible materials like TPU and TPE, excessive print speeds can cause the soft and pliant material to bend the wrong way and get stuck during extrusion. Using a slow and consistent print speed (i.e. not deviating from the default speed for first layer, infill, support structures, etc.) can help prevent this issue.
Flexible filament needs to be printed slowly
Recommended reading: What are flexible filaments and which one should you choose?
Risks of printing too slow
In general, a slower 3D printer print speed results in higher quality. Nonetheless, printing too slowly can cause issues of its own. These issues generally relate to overheating: if the filament stays in the nozzle chamber too long, it can get too hot and cause deformations on the part.
Finding the best print speed by testing
A good way to find the best print speed for your chosen combination of hardware and material is to download a print speed test model (or print speed tower).
These printable 3D models work in a similar way to temperature towers. They consist of several identical sections designed to be printed at different speeds (by inputting specific instructions to your slicer). Each section is labeled with the relevant value in mm/s. When the tower is printed, a visual inspection can determine to what extent print quality suffers at higher speeds.
STL files for print speed towers (like this one) can be found on Thingiverse and other 3D model sharing platforms.
Recommended reading: How to find free STL files
Some 3D printing materials are more suited to high-speed printing than others. For instance, those that can be melted quickly are suited to faster flow rates, which in turn allows for fast printing of the material.
3D printing material | Typical print speed | Upper limit | Explanation |
PLA | 60 mm/s | 150 mm/s | When print quality is important, most users will print PLA at a maximum of 60 mm/s. |
ABS | 60 mm/s | 60 mm/s | For high-quality prints, ABS requires a similar print speed to PLA. But the material has a higher extrusion temperature than PLA and is more prone to warping, capping its maximum speed limit. |
PETG | 50 mm/s | 60 mm/s | PETG requires fairly fast travel speeds due to its proneness to oozing and stringing, but it suits a slower print speed, generally around 50 mm/s for end-use printed parts. |
TPU / flexible filament | 20 mm/s | 20 mm/s | Flexible filaments like TPU require very slow print speeds compared to rigid filaments like PLA. |
Nylon | 40 mm/s | 50 mm/s | Nylon can be printed at faster speeds than TPU but not as fast as common materials like PLA, ABS, and PETG, partly due to its high extrusion temperature. |
 However, the low extrusion temperature of PLA makes it easy to rapidly print the material without the risk of it warping as it cools.
 This is because extruding too fast can lead to clogs and jams, especially with Bowden extruders.
3D print speed is one of the most important 3D printer settings. While we all want to print our parts as quickly as possible, it is important to recognise the limitations of print speed and the negative effects of printing too fast, such as ghosting, poor adhesion, and jams. Beginners should start by printing at the recommended speed of around 50–60 mm/s then experimenting with different settings when they have more experience and confidence.
[1] Agarwal KM, Shubham P, Bhatia D, Sharma P, Vaid H, Vajpeyi R. Analyzing the impact of print parameters on dimensional variation of ABS specimens printed using fused deposition modelling (FDM). Sensors International. 2022 Jan 1;3:100149.
[2] Miazio Ł. Impact of print speed on strength of samples printed in FDM technology. Agricultural Engineering. 2019;23.
3D printer speed: how to set it up correctly?
3DPrintStory 3D printing process 3D printer speed: how to set it up correctly?
3D printing is often referred to as "rapid prototyping". The irony is that the creation of individual models can take up to several hours. Fortunately, 3D printing speed can be adjusted to reduce production time, but setting the speed incorrectly can also lead to defects and 3D printing failures.
In this article, we will introduce you to the general speed settings of a 3D printer. By the end of this guide, you'll know how to find the perfect balance between print speed and quality. Please be aware that different 3D printers, slicing software and materials may behave differently and retesting may be required.
Well, run the slicing software and let's get started!
3D Print Speed
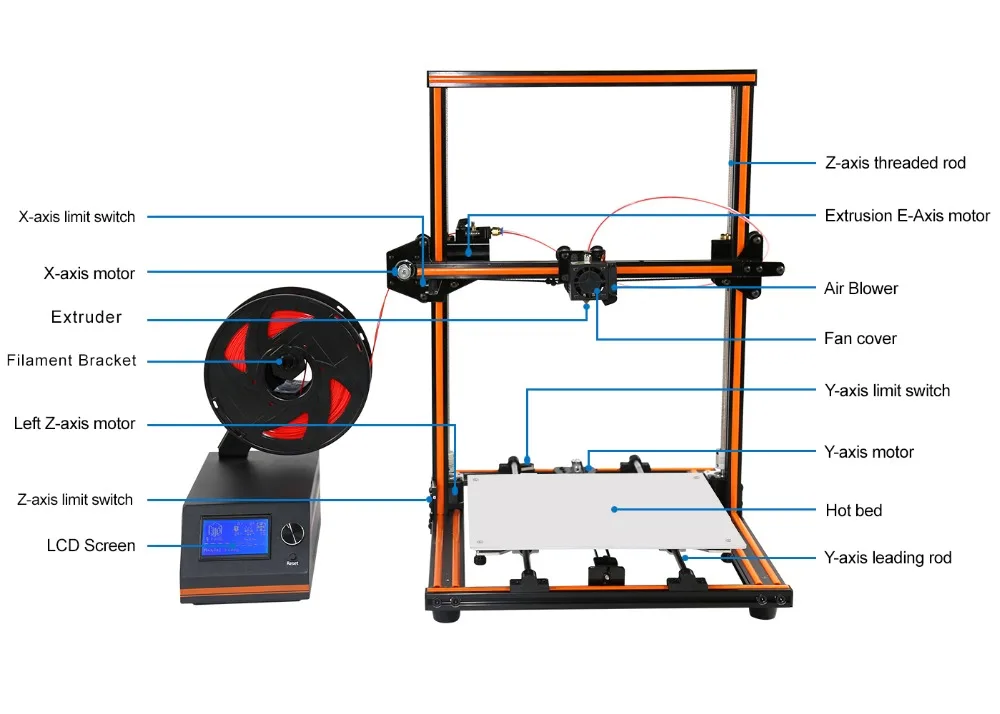
3D Print Speed is the main setting that affects the printing of your 3D model. As the name suggests, print speed determines how fast your printer's motors move. This includes the motors that control the X and Y axes, as well as the motor(s) of the extruder.
To test your 3D printing speed, download the test model to determine the optimal print speed above. The description of this 3D model also contains recommendations for speed settings. In essence, the experiment is that the same model will be printed, but at a gradually increasing speed, which will allow you to visually determine the optimal speed setting.
Too low a 3D print speed can cause deformation due to the nozzle being on the plastic for too long. If too fast, other overheating artifacts may appear, caused by insufficient cooling, as well as extrusion and poor adhesion of the layers. The optimal speed should be as fast as possible for your 3D printer without compromising print quality too much. This 3D model will help you determine what speed will be optimal for your particular case.
To optimize print speed, this parameter is usually divided into several sub-parameters:
- Outer Wall/Shell 3D Print Speed : This parameter controls the print speed of the outer perimeter of the model. Usually it is slightly reduced to improve the surface quality.
- Inner Wall/Shell 3D Print Speed : This parameter controls the print speed of the inner perimeter(s) of the model. It is usually the same as the overall print speed to reduce print time while maintaining durability.
- Infill 3D Print Speed : This parameter controls the infill print speed of the model. This is usually the same as the overall print speed to reduce 3D printing time while maintaining strength.
- Top/Bottom 3D Print Speed : This setting adjusts the print speed of the top and bottom of the model. Usually it is slightly reduced to improve the surface quality.
Travel speed (idle)
Travel speed controls how fast the print head moves when it is not extruding plastic. Increasing the movement speed can save a lot of 3D printing time, but increasing it too much can lead to many defects, including misaligned layers (and therefore 3D printing failure).
To determine the optimal idle travel speed for your printer, print this test pattern at various travel speeds, starting at 100 mm/s and working up in increments of 5 mm/s. Continue to increase the speed if the surface quality is acceptable, and decrease if the 3D print quality is deteriorating. Pay attention to defects such as mismatched layers.
Retract Speed
Retract Speed controls how fast the 3D printer pulls material back before moving. This setting is critical for reducing material waste and improving 3D print quality. Too slow and you may be left with unsightly threads and blemishes on your models. Too fast and you can get excessive material wear on the extruder drive gear, resulting in voids.
To determine the optimal retract speed for your 3D printer, print this test model at various retract speeds, starting at 25mm/s and adjusting in 5mm/s increments. Pay attention to the remnants of plastic in the form of a web, stretched between the spikes of the model. The ideal retract speed should be the maximum value that minimizes these artifacts without deforming the material in the feed mechanism.
To better tune the retract speed, this parameter is usually divided into two additional parameters:
Retraction Retract Speed : This parameter controls how fast the retraction (actually pulling the thread back) occurs. This is usually the same as your overall retract speed and is set the same way.
Retraction Prime Speed: This setting controls how fast the filament is re-feeded after the initial retraction in preparation for further printing. Increasing this speed will result in shorter 3D printing times and fewer defects due to prolonged exposure to heat on the plastic. However, increasing it too much can also cause the newly fed media to not heat up enough before printing resumes. For most cases, this setting should be left the same as Retraction Retract Speed.
To learn more about reducing retract speed defects, see our separate retract speed tuning guide.
Walls, infill and layer height
The speed of your 3D printer is not only affected by "speed". It is also significantly affected by how much and how thick plastic is extruded onto each layer of the 3D model. These settings are incredibly detailed, so we'll only cover general information about how each of them affects 3D print speed.
- Walls : The wall setting specifies how many perimeters of plastic are extruded to form the outline of your part. Increasing the number of layers increases the strength of the part, but also increases the 3D printing time.

- Infill : Infill is an internal structure designed to save material when 3D printing the interior of 3D models. The infill pattern will slightly affect the speed of 3D printing, while the density of the infill will significantly change the print time. Higher infill density increases part strength, but also increases print time.
- Layer Height : The layer height greatly affects the speed at which your parts print. The higher the layer height, the thicker each layer of your 3D models and therefore the faster they will be completed. Adjust this depending on what print resolution you need.
What speed do FDM 3D printers print
What resolution do 3D printers print
Threaded connection of printed parts
6 Safe Ways to 3D Print
3D printing at home gives us the ability to produce custom objects at a very low cost. However, the time it takes to turn a 3D model into a physical object is not as short as one might think. The size and quality of the print has a decisive influence on the speed of printing, and it can take many hours to get the final result. In fact, various tests show that printer speed has a much smaller effect on print time than size and quality settings.
Desktop printers
3D print speed settings
In general, there are currently three blocks of speed settings supported by 3D printers. The first block includes speeds from about 40 to 50 mm / s, the second - 80-100 mm / s, the fastest printing is carried out at about 150 mm / s. Some printers can even print at speeds over 150mm/s.
Usually, however, faster 3D printing means lower quality. At speeds above 150 mm/s, the quality drops significantly, and problems can arise, since the filament is prone to slip at such speeds.
How to set the print speed
Normally, the 3D print speed is set in the slicer software used to prepare the 3D model for printing. In Cura, for example, you just need to enter the desired print speed in the Print speed field in the Basic tab (in previous versions, you first had to switch to the Advanced mode and open the Speed tab).
Cura calculates the duration of the print process based on print speed and quality settings.
As soon as the print speed ( Print speed ) or other setting is changed, Cura recalculates the print time and displays it (see arrow). Cura's calculations turn out to be very close to real-time printing.
How long does 3D printing take in practice?
To find out how fast 3D printers actually print, two popular desktop printers, the Ultimaker 2 and the Wanhao Duplicator 6, were tested on two more or less complex objects.
These two models were printed:
3DBenchy. This 3D model is designed to test and measure the speed of 3D printers; it is quite complex and requires attention. The boat is 6 cm long, 4.8 cm high and 3.1 cm wide. Here you can get the 3DBenchy STL file for testing for free.
3DBenchy's 3D printing speed is relatively slow, the model is quite difficult to print (Photo: 3DBenchy. com).
com).
Universal tablet stand (up to 1.2 cm thick). The stand is 14 cm long, 4.2 cm high and 9.8 cm wide. The STL file is available for free on Thingiverse.
The stand is quite large and difficult to print (Photo: Thingiverse).
These objects were printed at two speeds, 100 mm/s and 50 mm/s, at similar settings. Here are the results:
Printer
Model
50 mm/sec
100 mm/sec
Ultimaker 2
3dbenchy
9000 2 h 9 min 9 min.00051 h 55 min
Wanhao Duplicator 6
3DBENCHY
2 h 13 min
1 h 51 min
Ultimaker 2
Stand
9000 6 h 23 min 9000 4 h 36 min 9000 2 minWanhao duplicator 6
Stand
6hrs 27mins
4hrs 45mins
- For the smaller models, the difference between slow and fast prints is not particularly striking: almost 2.25 hours versus less than 2 hours.
 Unless you're insanely short on time, choose a slower speed for better print quality.
 - For large models, the print speed differs more significantly: 6.5 hours versus 4.75 hours.
Cunning. If you don't have your own 3D printer, download the free Cura software from the Ultimaker website. Cura has profiles for most desktop printers (FDM), so you can check how long it takes to print a specific 3D model on a particular device - just import the STL file and play with Cura settings. To try another 3D printer, select Machine > Add new machine.
Does high-speed sintering promise the fastest 3D printing?
On an industrial scale, even more impressive prospects dawn on the horizon. The University of Sheffield has announced that its scientists have built a £1m-funded 3D printer that can produce plastic parts as quickly as traditional mass-production methods such as injection molding.
The process is called high speed sintering (HSS) and melts the polymer layer by layer (similar to additive printing), but instead of using lasers, HSS prints on a powder substrate with infrared absorbing inks. After the layer is printed, it is exposed to infrared radiation, the ink-coated powder is heated, resulting in melting, while the non-irradiated powder remains cold.
A team led by Prof. Neil Hopkinson claims that their machine is capable of producing parts up to 1 m³, i.e. with a washing machine, which is three times more than existing printers can. The print speed is dependent on the size of the object, but Hopkinson estimates that small components will be created at speeds of less than one second per part.
What use is this to us? The good news is that HSS technology has been licensed to industrial 3D printer manufacturers on a non-exclusive basis, and new machines are expected to hit the market in 2017.