Zeus 3d printer review
A Review: Zeus 3D Printer AIO Robotics
0Shares
It’s been a while in the making, but on the morning of 10th November, the AIO ZEUS arrived in our office. AIO Robotics had launched this 3D multifunction device back in October last year on Kickstarter. Unlike other Kickstarter printer projects, which either went belly-up completely or failed to impress their backers with half finished products, the ZEUS is very different. Earlier this year, we had a call from Kai, the CTO of AIO enquiring about some of our ExcelFil samples as they were looking for a reliable filament to bundle with their high-end printer. Back then I had a chance to see some early prototypes of the printer.
But now for the finished product:
Opening the retail carton this morning it was quite obvious that this was not a printer assembled in somebody’s garage, but a genuine consumer-grade product, manufactured by one of the large contract manufacturers here in Taiwan that have decades of experience in delivering products for the biggest of Brands. It was neatly packed along with two accessory boxes holding the smoked glass turntable, Glue Stick, USB WIFI Adapter and a power supply in the second box.
Lifting the ZEUS out of the box, the attention to detail from the AIO design team showed immediately. It has two ergonomic indentations at the bottom, which act as handles to move the ZEUS around safely. Also, I quite like the clean white design with a black smoked hood which keeps the build chamber dust-free and creates a fully enclosed controlled temperature environment for prints.
Loading the Filament
As I mentioned, AIO and Voltivo decided to partner up on the filament for the ZEUS. So on opening the hood there is a spool of ExcelFil Snow White PLA 1.75mm.
Loading the filament was fairly easy by inserting the filament into the PTFE tube, which leads to the build chamber. After inserting the filament strand into the top of the extruder and pressing the release button to its right, it moves down a little more, ready to be transported through the extruder once heated.
AIO provides a useful getting-started video:
Powering up for the first time
I then inserted the WIFI dongle into one of the two USB slots under the generously sized touchscreen and connected the power cord to the back of the printer. Here you also find an ethernet and USB port as well as the master power switch. Judging from the serial number I have printer No. 27. I wonder who got No. 1 🙂
After switching on, the printer powered which took about 40 seconds, and the start screen appeared with the 4 operation modes Scan/Print/Copy/Fax.
Obviously using WIFI is my first choice so the printer can be pretty much located anywhere without having to worry about USB or network cabling. After startup I selected my SSID from the touch screen and entered my WPA2 password and the printer connected to my home network and got himself a DHCP address.
First thing I did was to calibrate the scanner part. For that I inserted the calibration mat that fits on the turntable and pressed “Calibrate” in the settings menu. I am not even sure if that would have been necessary, but nice to see the printer coming alive the first time. After a couple of minutes the calibration completed and I was keen to start the first print.
Software
When accessing the printer via the network on Port 8080 (http://10.1.1.45:8080 in my case), one can upload STL files via the web interface.
The web-interface seems to be built with Twitter Bootstrap, hence being fully responsive and easy to use on Tablets, Phones and the like. It does not look quite as refined as it probably could be, but it’s very usable and all the important functions are there. I guess the AIO guys will spend more time on upgrading the software as we go along. In fact the printer has an auto-update function included, which will download incremental updates from the internet as they become available. I hope AIO will make some of it available to the Open Source community so we can tinker and expand the printer’s functionality.
A quick look under the hood of the OS shows a standard Ubuntu system running on an ARM board. The touch screen is very responsive and I did not experience much lag at all unless it is doing something resource-intensive like slicing for example.
First Print
Once you go to the Print section on the touch screen a selection window pops up where one can select the desired model to print. AIO has included a few test objects to be able to print quickly. Overall this is a great step towards a real consumer printer. Theoretically you won’t need a Computer at all to control your printer. It has everything on board it needs to load, prepare, slice and print any model from a USB stick for example.
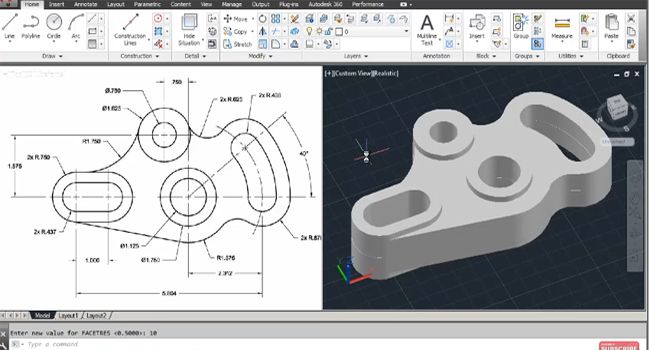
After I selected the Voltivo Tag model I had uploaded via the web browser, I pressed the “Slice” button and I was able to select the slicing profile. With only two settings in this Wizard, the AIO guys made it simple for users not to have to worry about the 10s if not 100s of different settings that slicing software usually requires.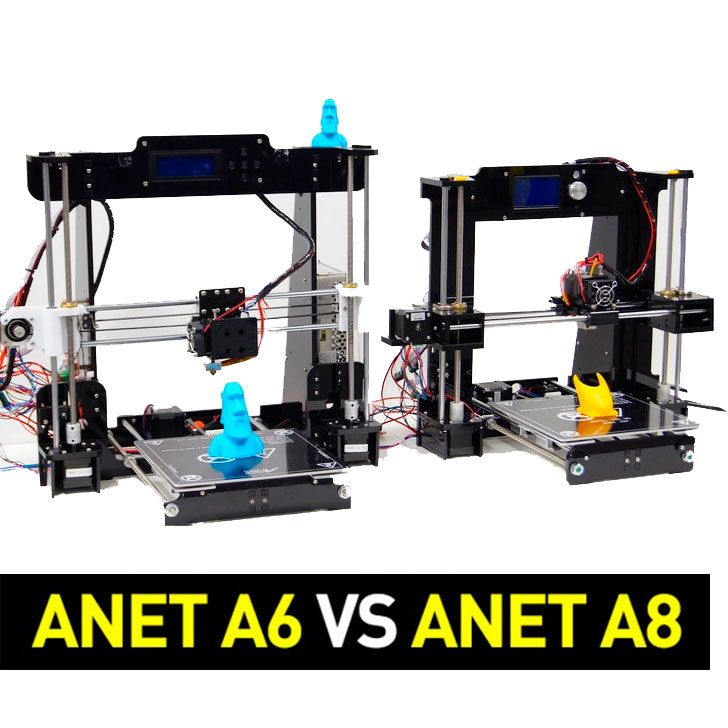 I selected the 0.2 mm layer height and 30% infill profile and the slicer went away and prepared my GCODE right there on the printer. It did not take much longer than on my desktop and after about 20 seconds my model was sliced and ready to go. Seems the ARM platform chosen has enough power to also slice more complex models.
The printer comes with a UHU Glue Stick and I applied a small amount of glue to the center of the smoked glass print plate. The Glass has a slightly rough surface. I will try later without the glue, as adhesion would probably be good enough without it.
After pressing “Print” the ZEUS started heating for the first time. Heating took about a minute, maybe, and then the extruder started with an automatic bed calibration routine. For that purpose, a microswitch is attached to the extruder to sense the distance to the glass build plate and adjusts the Z height accordingly.
After reaching the target temperature the printer also executed a head cleaning procedure. For that purpose the ZEUS has a rubber-like contraption on the right front side of the chassis. The extruder moved over it a few times and the excess filament was wiped off. It would have been nice to have a container underneath to catch excess filament and to keep the print room pristine. But it’s easily accessible and I just grabbed it with my fingers and removed the small blob from the rubber.
What you see above is indeed the **very first** print I made after unboxing. Filament stuck well to the build plate and the perimeter laid down cleanly. While this is what a consumer expects, I do remember tinkering with my Ultimaker and the Da Vinci for quite a few hours before I even got a remotely decent print out of it. The ZEUS is definitely well calibrated from the factory and together with auto-calibration and the nozzle wipe I have the feeling that totally un-supervised prints may, finally, be a reality.
By default the printer ran at a decent speed. Without looking at the details it seem to be around the 100mm/s mark, which is a remarkable speed for a non-bowden extruder. There was quite a bit of noise owing to the fast extruder moves, however after closing the top cover, that reduced to an acceptable level. Still you probably would want to keep it away from very quiet working environments. Which is easy, due to its wireless printing features. There are lots of little design features that are not obvious on the first look, like the built in belt tensioners for example. Things that a lot of printers are lacking out-of-the-box.
And here is the finished print:
It’s a small tag we usually print for promotional and demonstration purposes.
I also like to use it to compare prints. Below an older example from the Ultimaker 1 at the same resolution and speed. I certainly can see quite some improvement. Smooth surfaces and well defined outlines of the embossed company name and logo. Retraction seem to work very well on the ZEUS, which is probably due to the direct drive design on the ZEUS compared with the Bowden system on the Ultimaker.
That’s all I have time for right now. There are still quite a few other features to try like the scanning but that has to wait for another day.
At a retail price of US$2499 the ZEUS is not a cheap printer by any means. But my first impressions are very good. Taking into concern that you also get a 3D Scanner similar to the MakerBot Digitizer, which retails separately at US$800, it’s price becomes quite reasonable, to me at least.
We have created a sub forum for the ZEUS, to share our experiences on an ongoing basis. Unlike the Da Vinci, the ZEUS is a nice open platform and I can see lots of user contributions on the software side specifically.
Oliver Fueckert
Oliver is the managing director of Voltivo Group Ltd. in Taiwan leading a small group of enthusiastic individuals that are having fun developing best-in-breed consumer products for a global market. What initially started as a hobby, developed in to a new business line of 3D manufacturing consumables and accessories for the 3D printing enthusiast community. Oliver, originally from Germany, has been living in the Asia Pacific Region for the last 15 years. Before founding Voltivo in 2011, he worked for Cisco Systems and Ericsson.
3D Scanner, Printer and Copier – AIO Robotics ZEUS review! – Tom's 3D printing guides and reviews
The AIO Robotics ZEUS is an easy to use 3D printer, scanner and copier – but is it actually useful?
🛒 Buy from Amazon [🇺🇸] http://amzn.to/2gw7NlN
🛒 Buy from Amazon [🇩🇪] http://amzn.to/2fFW6vs (check US Amazon first – it’s cheaper there, even after shipping and imports)
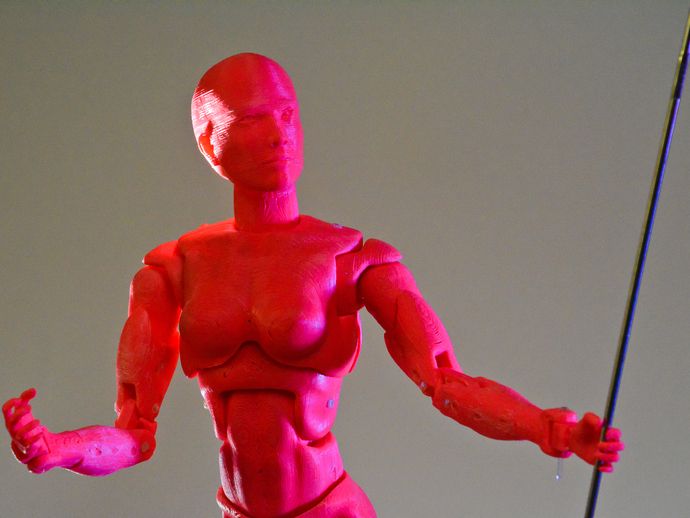
So i’ve got this little angle figure, and what’s better than one of these cheesy decoration pieces? You guessed it – two of them! But, when it comes to consumer 2D desktop inkjet printers, it’s pretty clear that the “all in one” class of devices has won by a far stretch, combining printing, scanning, copying and faxing documents into a single, convenient package. There’s not been a real equivalent in the 3D world yet – but that’s exactly what AIO Robotics announced with their ZEUS machine on Kickstarter in 2013, which smashed through their funding goal on the first day and then got funded with pretty much the same amount of pledges they had after that one day. Three years later, we now have a matured version of that same design, and judging by how many users go out of their way to create an Amazon account just to give their praise for the ZEUS, it looks like their concept is working out pretty well with the current iteration of their machine. There’s a lot to talk about, so let’s get right into it. And copy a few of these angels in the process.
So even on the first look, you’ll notice that the ZEUS is quite different from what’s currently the standard approach to 3D printing. It’s a design that reminds me of the crazy 5-axis industrial CNC mills from someone like DMG MORI, but scaled down. The entire construction is sheet metal, similar to how those 2D inkjet printers are built, there’s a door on the left side to house the filament spool and this large, sliding acrylic portal to the machine’s actual build and scan volume. The ZEUS is quite heavy, but it’s easy to lug around with the built-in handles on the bottom. On the front, there’s a really comfortably sized 7” capacitive touchscreen with two USB host ports and on the back, there’s a Kensington lock cutout, an USB slave and Ethernet port, a power switch and the power input jack, which unfortunately is rather loose and not a locking type like the Ultimaker’s, it doesn’t quite slide out on its own, but i did manage to pull it out in a heartbeat once, thinking it was the USB cord. Most of this hooks up to the built-in single-board computer, which is packed into the bottom of the filament compartment. The USB port actually doesn’t go anywhere, and the power input goes through the custom-made control board, which uses an Arduino-compatible ATMEGA chip and seems to run a customized version of Marlin. However there’s no attribution given or source code published. Still, if you ever wanted to, you could simply hook up the control board to your own computer and use it without the built-in software, but that’s what makes the AIO Zeus special in the first place.
As you boot up the ZEUS, it starts a full-blown install of Lubuntu and then goes on to load the AIO Robotics interface, which presents you with four options: Print, scan, Search and Apps. Gone is the Fax functionality that used to be part of the original announcement, but i don’t think that’s going to be missed much, since it would have required a ZEUS machine on either end and relied on the built-in scanning only. Now, the print menu takes you through exactly what you’d expect it to do – it lets you print 3D files, be it from the onboard storage, from previous scans or from USB thumb drives you connect to the machine. You get previews of the files, pick one, slice it right on the machine itself and then print it. You can do basic scaling or rotating on the parts, and insert pauses at certain heights of your prints, either to swap in a different filament color, or to insert parts like nuts or magnets into your print. And that workflow for 3D printing actually works pretty well. The slicer, which is a version of Slic3r underneath, again with no attribution given, has just its most important settings exposed in the simple wizard, but you can always dig in and adjust more, which i quite liked. Due to the limited hardware, neither the 3D previews nor the slicing process are particularly fast, actually, you could say it’s painfully slow, with most of my slicing jobs running between 15 seconds for something really simple and 15 minutes or more for something a bit larger.
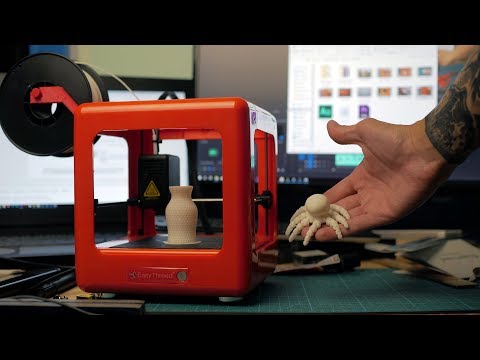 It would have been nice to see an option to automatically start the print job once the slicing is done, since you’re just waiting on that process to click two more buttons.
Let’s move on to the scanning part of the software, the other big menu point, you place your object on the ZEUS’ build table, select a scan diameter to minimize ghost features that might be picked up from the background, pick how many sides the part should be scanned from and hit go. If you want to change the scan height, you have to recalibrate the entire scanner unit, which takes quite a while, so i rarely did that. What also takes an enormous amount of time is the scanning itself and the post-processing the software goes through afterwards, which might actually be based on the Meshlab. An eight-sided scan, which is the highest coverage you can select, takes about 45 minutes to complete, and then roughly another 45 minutes to post-process. Once that’s done, you can head back to the print menu, and print a copy of your heavenly scan, or use an undocumented feature to copy the entire package of raw and processed scan files to a USB drive, which allows you to then post-process them however you like on a computer with your own software. Also, you can upload and download files through a simple file browser if you connect the ZEUS to your network with the included USB wifi stick or through the traditional Ethernet jack.
These next two points in the main menu also use the internet connectivity, but feel a bit lackluster, with the first one being a search function to find printable models on Thingiverse or MyMiniFactory. While it just didn’t seem to find that one design i actually wanted to print, which was featured on the Thingiverse front page, once you do pick a file, the print process is straightforward. Again, the interface for this is slow and takes a while to load results and previews for your searches.
And the last option in the main menu, “Apps” is currently only home to one app that gives you a few pages of tips, but the idea is to have more and eventually also third-party apps in here, for example Thingiverse-Customizer-like options, generators for various 3D files or an e-Nable prosthetic hand print assistant.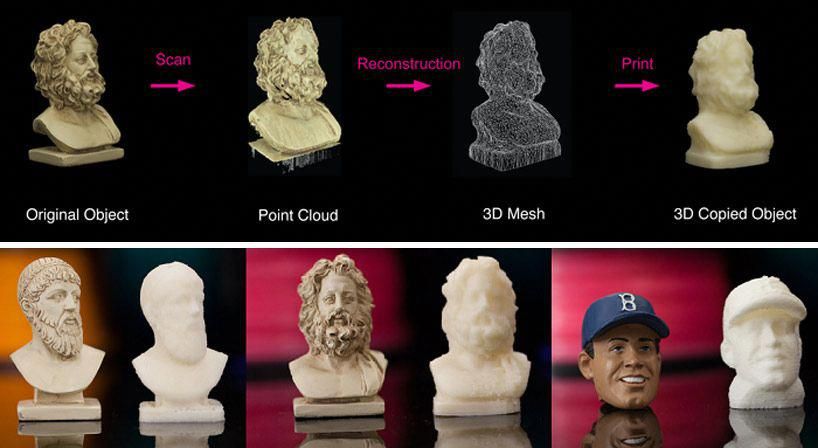
While the software overall is really comfortable to use if you don’t mind the long processing times, i did have a few issues with how undercooked it felt. On the very first bootup, the AIO software failed to load and i had to start it manually from the Linux desktop, it also crashed a few times during use, but thankfully never while scanning or printing. It also routinely refused to let me start another scan or print process after completing one, so i found myself rebooting the entire printer many times, and it often failed to start up again during that reboot.
On the upside, though, the system is not far off from being a totally standard computer just integrated into the machine, so if you ever feel like replacing at least the 3D printer part of the software, you could just as easily run a full Cura, Pronterface or OctoPrint install on here. Both the username and password for the default user are just aio, so you’re pretty free to do whatever you like with the system.
I also did some digging to see how much the AIO software phones home, but i don’t think anyone will actually care about that in the age of the Facebook.
Hardware-wise, this all runs on an Odroid-XU4, which does have a fan that you can occasionally hear spinning up, but it’s barely noticeable. By the way, you can also connect a mouse, keyboard and whatever else you desire to the front USB ports, and they work just fine, even within the touchscreen-optimized AIO software.
On the topic of the touchscreen, it does have good viewing angles, but it’s a bit too recessed to comfortably see and use especially the top edge at a normal stance.
Alright, scanning. So the ZEUS uses a laser + camera approach, so with the laser slightly offset from the camera’s position, it can reconstruct the surface by looking at how far the laser line is offset at any given point. But instead of rotating your scanned object, like many other simple scanners do, it actually pans the laser itself over your object, then rotates the platform, scans again, and so on. So instead of one continuous scan, it gets four to eight individual ones that it then stitches together. According to AIO Robotics, this gives far better resolution than just rotating the table, but in the scans i did, it performed only slightly better than conventional laser line scanners, giving you good dimensional accuracy overall, but you end up with a fairly mushy and low-detail scan, maybe picking up features around 1 to 2mm in size, which is far off from the advertised 150µm resolution. Even the sample scan they provide on their website, which looks much better than anything this machine ever produced, only comes with roughly 300µm triangles, so i’m not sure where that 150µm resolution is coming from. You also get visible seams, apparently where the areas from each individual scan meet, and extra geometry based on what seems to be guesswork anywhere the scanner didn’t perfectly reach. The large scanning area of 9 inches in diameter is noice, but unfortunately it’s not very tall at 4.4 inches max. That’s 23 by 11 cm for anyone not from the US. Anything that’s even remotely glossy will throw the scanner off, even if it’s just, like slightly metallic or shiny, it really needs to be completely matte, so you do have to give those objects a good wipe-down with the included powder brush.
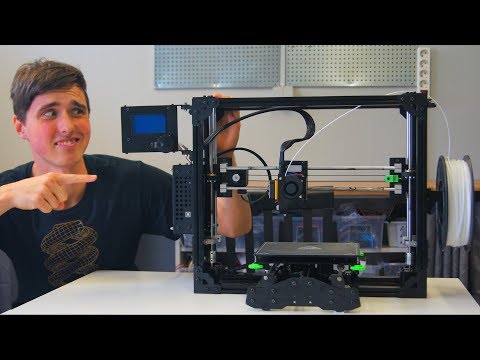 Also, it works best with white objects, anything that’s darker or, worst case, glossy black won’t get picked up at all.
AIO sorta see this quality of scanning useful for schools or pre-schools where you’d copy something like clay or play-doh models, and for that it’s probably well-suited when it comes to what sort of detail reproduction you get, but the issue of turnaround time still stands, where even with a compact part, a single scan, slice and print process can easily take over two or three hours, which may be slightly impractical for copying the work of more than one student.
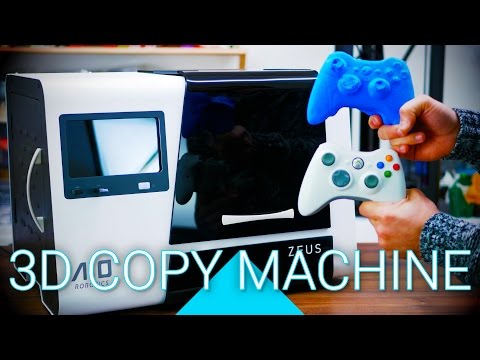
For anything other than the simplest of objects, i honestely don’t see much use in the 3D scanner part of this machine, but that seems to be a common problem with this laser-plus-camera types of setup. So while the white Xbox 360 controller looks decent around the sides, with details like the data port and battery release picked up, the top shows some issues just from aligning those individual scans and the bottom is pretty much gone. There’s these extra bulbs around the handles and obviously mostly guessed geometry on the bottom. The angel scan and print has a few issues with the more constricted areas and, as expected, do lack detail overall.
For 3D printing the scanned models, you will need to enable all the extra helper features around your actual print, so whenever it came to “copying” something, i enabled raft, brim and support material, as the scanned files would often end up in mid-air with no contact and no adhesion to the bed. And those features obviously mean extra material use, print time, and effort for cleanup afterwards.
But you can of course also use the AIO Zeus as a pure 3D printer. And it does fairly well, even though there are a few questionable design decisions like the clothespin “belt tensioners”. It obviously uses the same area for printing as it does for scanning, and even the same build platform, which is not heated and requires you to lay down a fresh layer of gluestick before each print for optimum adhesion, and something like a sheet of buildtak would probably have prevented the ever-present slight amount of warp that i was seeing with more massive prints. The bed is locked down during a print to keep it from sliding around, and it uses a mechanically retracted probe to measure the bed and to compensate for any alignment issues, which seemed to work well. Though the machine doesn’t care if the bed is actually in there, it finishes the probing cycle and tries to start printing either way.
For the toolhead, you get a quick-swappable hybrid metal hotend, which you can get replacements for at $149 or in the convenient Makerbot-style three pack, though really, these shouldn’t ever need to be replaced unless you really abuse them. I got a spare toolhead with the review machine, which i needed, since the stock one seemed to be misaligned in such a way that the filament would end up with a considerable kink after each print, which meant removing, cutting and reinserting the filament each time. The hotend doesn’t seem to be super special, with this enormously long thermistor package sticking out the side, and there were a few occasion where the reported temperature dropped from the set 197°C to less than 190°, having the machine stop mid-print. The official solution from customer support was to simply turn off that safety feature, and basically have the machine ignore faults like this. Uhm, yeah.
On the topic of filament, you’re only going to be printing PLA with this machine, maybe a PET if you really want, and the 500g PLA spools from AIO robotics at a reasonable $13 each actually printed well, but so did other PLAs i tried, only having to adjust the temperatures and hitting print. The filament path is… interesting, passing from the filament chamber through a teflon tube over into the build chamber and then being left to itself before it enters the extruder, which, i mean, it works, but it’s not super elegant. On the extruder itself, you’re also going to find a filament odometer, which can detect if the filament runs out or stops feeding, but that functionality is disabled by default, even though it would be quite quite useful.
Some other things that are not put to use are these two switches that detect when the filament door or the main door are being opened.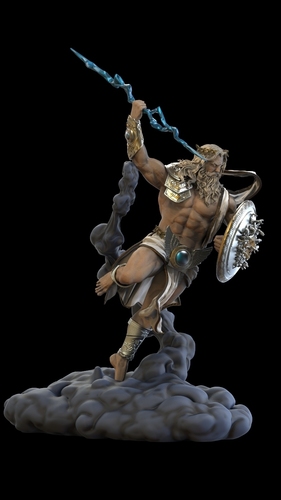 That smoked black acrylic hatch is supposed to stay open during prints to allow fresh air in and stay closed during scans to block out ambient light. You do have to slide it up in the exact right way or it’s going to jam. With the door open, 3D printing ends up quite noisy with not only the motors and their vibrations being very audible, but also the sheet metal parts rattling around. One of the prints does look like the printer might have skipped a step, but the resonance torture test doesn’t seem to be able to reproduce it. So overall, print quality is decent, and as a 3D printer, the ZEUS does a much better job than as a scanner. The quality doesn’t quite live up to the gold standards, as there’s some visible ringing due to the soft tensioning of the belts, as well as room for improvement with part cooling and overhangs.
So, let’s recap before we turn this into an unwatchable 30-minute beast of a video. Does the AIO Robotics ZEUS deliver on being a user-friendly 3D all-in-one machine? Sorta. I really like the interface and how streamlined it makes the scanning and printing process. However, i wish they focused a bit more on making it stable and reliable, but of course, that’s something future software updates might improve. The internet connectivity also feel a bit underutilized at the moment. As just a 3D printer, it works well, but is somewhat limited in material choices and part geometries due to the unheated bed and slightly sketchy way of adhering parts with gluestick. Also, i’d like to see things like the under-temperature issues fixed instead of just ignored and better use being made of the integrated sensors that are currently mostly disabled.
Now, the scanning part, to me, feels like a commitment on AIO’s side that they couldn’t fulfil to the level they originally wanted. Sure, it scans, it’s easy to use, but the scan results were all but usable for me. Maybe if you’re really only wanting to scan super-simply play-doh parts, it could be pretty useful for you, but for anything that requires an accurate reproduction of the geometry or has details you want scanned, forget about using this or even any other scanner that uses the same principle.
So is it worth its price tag of currently a bit over $2000? I’m not sure. If the scanning part seems useful to you, maybe. Or if you’re looking for that super-simple user experience in a 3D printer. For me personally, i feel like there are too many rough corners and unfinished bits to truly be able to universally recommend it, but i’m certainly interested in seeing what AIO Robotics come up with next.
Alright, that’s that! If you enjoyed the review, hit that share button and give it a thumbs up, if you, like really adored it, subscribe, so you don’t miss out on any of the reviews, guides and livestreams that go up on this channel. Thanks for watching, and i’ll see you in the next one!
More info at http://www.zeus.aiorobotics.com/
Model shown: Battery holder (don’t print this, it doesn’t work) by Adoniram
Adalinda by Louise Driggers
💙 Affiliate links:
Amazon US
eBay US, UK, Canada, Australia
Matterhackers
👐 This video is licensed as Creative Commons Attribution Share-alike thanks to my supporters on Patreon!
Music by: David Cutter Music
ZEUS 3D printer from the manufacturer AIO Robotics
Construction area, mm: 203x152x145
Material for printing: PLA plastic, nine0005
All specifications
Description of ZEUS 3D printer
Zeus is a 3D printer MFP that combines the capabilities of four devices - a printer, a scanner, a copier and a fax machine. Zeus uses an HD camera and a laser to scan objects. The web interface is based on Twitter Bootstrap, which makes it easy to use with tablets, smartphones and other mobile devices.
About the ZEUS printer
Zeus MFP Specifications:
- Print Method: FFF
- Construction area size: 203x152x145 mm
- Minimum layer thickness: 80 microns
- File types: .STL and .AIO
- Consumable: PLA
- Scanning method: laser triangulation
- Scan size: 228 mm (diameter) x 127 mm (height)
- Scan resolution: 125 microns
- Camera: 2 megapixel HD CMOS
- Memory: 8 GB (on-board storage) + Micro SD card slot up to 16 GB
- Maximum work table load: 2 kg
- Touch screen: 7" color
- On-board processor: Exynos, 4-core, 1.7 GHz
- Interface: USB sticks, direct USB connection, Ethernet, Wi-Fi
Articles of the owners of the 3D printer "ZEUS"
Show more
Popular 3D printers
Anet A8
1464 articles 1719 owners
Anet A8 3D printer is a budget 3D printer from China. Region...
3 offers from 12000 ₽
Anet A6 nine0005
1130 articles 1609 owners
Anet A6 3D printer - Chinese version of RepRap project P...
3 offers at the contractual price
Ender 3
1180 articles 1008 owners
Creality Ender 3 is a budget 3D printer from Chinese manufacturer...
6 offers from 14500 ₽
Show more
What is a 3D printer?
Zeus Multifunctional 3D Printer Review by AIO Robotics
Recently, we talked about the Flux 3D multifunctional device and mentioned one of the competitors - the Zeus MFP manufactured by the Taiwanese company AIO Robotics. While the Flux 3D is slated to ship next year, the Zeus is already available, albeit at a higher selling price of $2,500. It's time to take a closer look at this promising device. nine0005
Packaging
The first thing you notice is the neat packaging of the device. It is immediately clear that the car is produced by a serious company, and not by garage enthusiasts. The kit includes two boxes with accessories: one contains a glass desktop, glue stick and USB Wi-Fi adapter, the other contains a power supply. There are even two tabs at the bottom of the device, which are convenient to grab when carrying the printer. The appearance is quite nice: the body is white with a translucent black lid that closes the working chamber during operation, helping to maintain the background temperature. nine0005
Bar loading
AIO has partnered with Voltivo, a 3D printed filament manufacturer. A 1.75mm trial spool of ExcelFil PLA comes with the MFP. Loading the bar is quite simple: push the bar into the guide tube until it exits inside the working chamber, place the spool in its place in the niche provided, then push the end of the bar into the extruder.
So that users do not have to bother with the last step, the designers have provided the extruder “parking” mode (the head moves to the center and forward) and a special button on the print head that spreads the pushing mechanism to the sides. Next, push the bar to the stop with the hot end and release the button. Ready. nine0005
Commissioning
Wi-Fi adapter is supplied separately for some reason - you need to insert it into one of the two USB ports right under the screen. The power cord connector is on the back, along with an Ethernet port, another USB port, and a power switch.
It takes about 40 seconds for the machine to boot up, after which four options appear on the screen: Scan, Print, Copy, and Fax. Let us immediately clarify that the "Fax" function is intended for sending digital models, and "Copy" is a simplified scanning and printing function, which is characterized by higher speed, but reduced quality. nine0005
Scanner calibration is carried out using a special tab supplied in the kit. Install the tab on the turntable and click "Calibrate" in the settings menu. After a couple of minutes, the device is ready for use.
The web interface is based on Twitter Bootstrap, which makes it easy to use with tablets, smartphones and other mobile devices. The design is not perfect, but it is quite convenient, all the main functions are available. Most likely, developers will improve the software. This is quite transparently hinted at by the fact that the printer is equipped with an automatic software update function via the Internet. It remains to be hoped that AIO will put its developments in the public domain in order to give free rein to enthusiasts who want to make their own changes.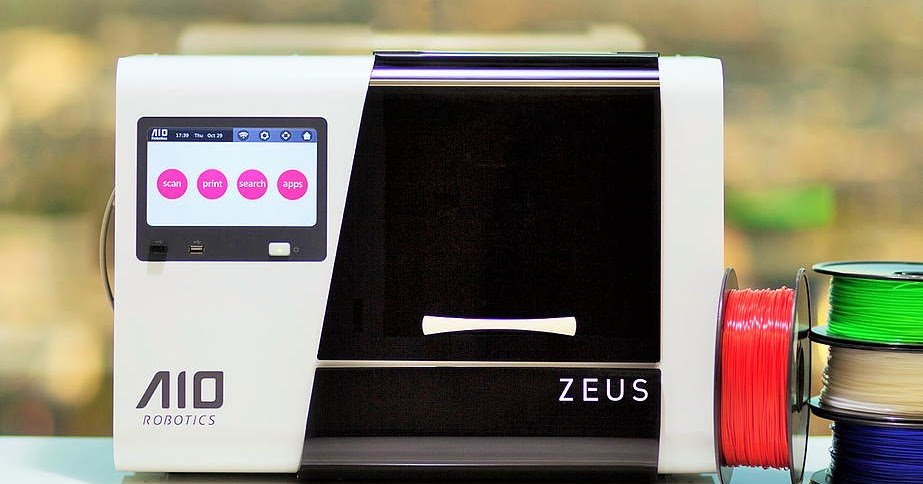 nine0005
The operating system is Ubuntu on ARM architecture. The touchscreen is quite responsive and generally doesn't slow down unless the system is heavily sliced.
Operation
When you enter the print function, the model selection window pops up. AIO has included several test models in the kit. Overall, the focus was on building a true consumer printer. Theoretically, you can do without a computer, as the device is equipped with all the necessary hardware and software for offline operation: Zeus is able to load and prepare models, including slicing, as well as print from a drive. nine0005
Voltivo logo plate used as an example. The model has been loaded via a web browser. Selecting the "Slice" function gives a choice of only two settings: layer thickness and filling. Again, this is a step towards inexperienced users who do not want to bother with fine settings. After selecting the layer thickness and degree of filling, the device automatically prepares the G-Code. Slicing time using the on-board computer is comparable to performing a similar task on a PC. In this case, the preparation time was about 20 seconds. nine0005
UHU glue stick is supplied with the printer. The platform is made of tempered glass with a slightly rough surface, so glue may not be needed.
After selecting the "Print" function, ZEUS starts to warm up, which takes about a minute, and the print head performs a ritual auto-calibration dance, using the built-in contact sensor to measure the distance to the platform.
After the printer reaches the required temperature, it performs a nozzle cleaning procedure. For this purpose, a rubberized contraption is installed on the right side of the chassis, on which the print head wipes the nozzle, removing excess filament that has leaked out. It would be great if the garbage was dumped into some kind of container, but this scheme also works well: the “snot” is easy to get and separate from the rubber.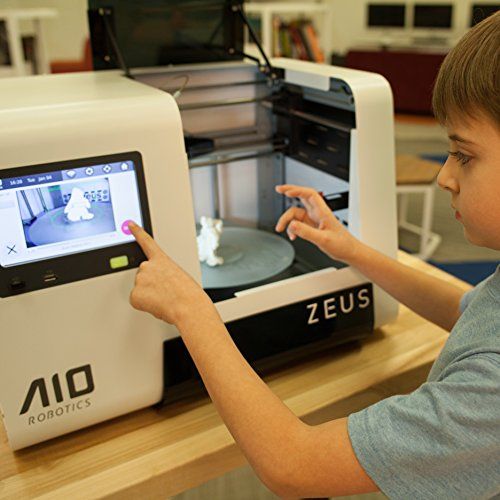 nine0005
The illustration above shows the first print sample immediately after unpacking (and the rubber contraption on the right). There were no problems with plastic sticking to the platform, and the walls came out neat. We can say that Zeus is perfectly set up at the factory, and coupled with the functions of automatic calibration and cleaning of the nozzle, printing without constantly monitoring the printer for failures can finally become a reality.
The print speed is somewhere in the region of 100 mm/sec, which is not bad for a non-Bowden extruder. The rapid movement of the extruder creates quite a lot of noise, but for the most part it is canceled out by closing the lid. And yet, it is desirable to keep the device away from the "quiet zones", which is facilitated by the presence of a wireless interface. In general, there are many hidden "chips" in the design - for example, a simple but effective belt tightening device, consisting of an elementary spring. nine0005
This illustration shows the finished model with the Voltivo logo printed in 200 micron layers at a speed of 100 mm/sec. For comparison, the same model printed at the same speed and resolution on a first generation Ultimaker printer is illustrated below.
The difference is quite obvious. The bar reverse works well, which is caused by the use of direct drive instead of the Bowden system on the original Ultimaker.
Considering the $2,500 price tag, it's hard to call the Zeus a cheap 3D printer. But it's not just a printer, is it? Purchasing a 3D printer with similar specifications and a separate 3D scanner can cost even more. From here, for those wishing to purchase a multifunctional device, a choice follows: either purchase Zeus, or wait for the start of sales of the more affordable Flux 3D. The Flux 3D project has already received the necessary funding to set up production, but anything can happen in life. nine0005
Technical characteristics of the ZEUS:
- Printing method: FFF
- Size of the construction: 203x152x145 mm
- Minimum layer thickness: 80 micron
- types of files: .
Learn more