Xyz 3d printer 3 in 1
XYZprinting da Vinci 1.0 Pro 3-in-1 3D Printer Review: Good Prints, Disappointing Scans
Skip to main contentWhen you purchase through links on our site, we may earn an affiliate commission. Here’s how it works.
This 3-in-1 from XYZprinting handles two of its tasks (3D printing and laser etching) fairly well, but you'll be disappointed by the 3D-scanning features.
Tom's Guide Verdict
This 3-in-1 from XYZprinting handles two of its tasks (3D printing and laser etching) fairly well, but you'll be disappointed by the 3D-scanning features.
Pros
- +
Most 3D prints had excellent quality, with fine detail
- +
Can use third-party filament
- +
Laser etcher works well
Cons
- -
Prints at the smallest layer height often did not work
- -
Printing is slow
- -
3D scanner did not work well, often missing parts of objects and not capturing fine details
- -
Scanning works only over USB, not Wi-Fi
Why you can trust Tom's Guide Our expert reviewers spend hours testing and comparing products and services so you can choose the best for you. Find out more about how we test.
Today's best XYZprinting da Vinci 1.0 Pro 3 in 1 deals
No price information
For more information visit their website
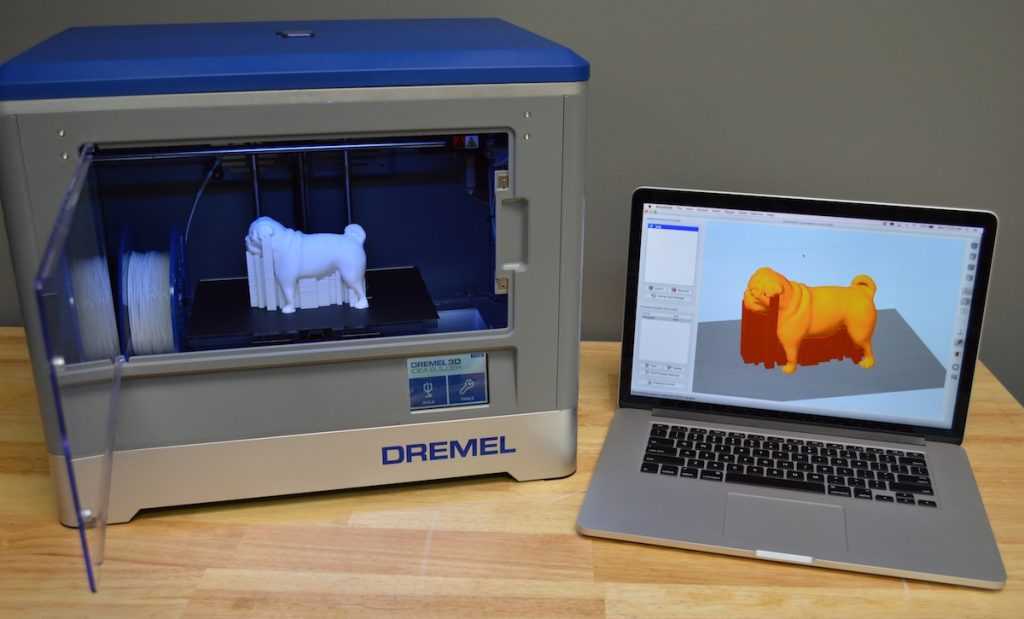
The XYZprinting da Vinci 1.0 Pro 3-in-1 has a lot of numbers in its name, because it does a lot of stuff. For $899, you get a 3D printer that can print with ABS and PLA filament, along with a 3D scanner. For an extra $99, you can add a laser engraver that can etch wood, plastic and other materials with 2D images.
The da Vinci Pro 3-in-1 does a decent job at two of its tasks: 3D printing and engraving. But the 3D scanner did not work well, making this device a jack of all trades, master of none.
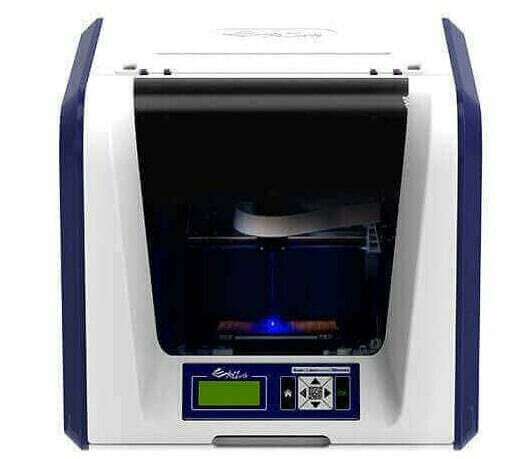
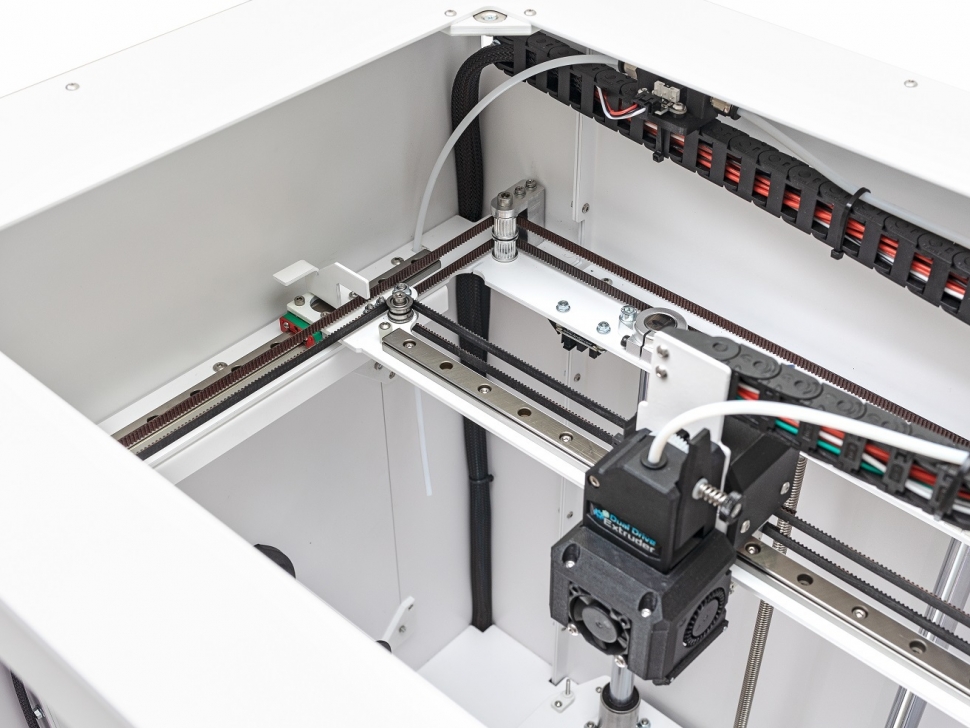
This large, imposing printer will take up a lot of desk space: At 22 x 20.5 x 18 inches, the da Vinci Pro 3-in-1 isn't going to fit into a tiny corner. A bulky, red-and-black plastic case encloses all of the features, with a door at the front that opens to reveal the 3D printing, scanning and etching area. Another door on the top provides access to the cavity where the filament cartridges fit.
The heated print bed can handle a print of up to 5.9 inches high, wide and deep, providing an impressive 205 cubic inches of print volume. XYZprinting recommends using painter's tape and white glue to help prints stick to the print bed, and the company includes three sheets of tape with the printer. Most of the prints we made stuck well to this combination of heat, tape and a bit of glue, though it's rather easy to damage the tape when removing the print, meaning you have to replace the entire sheet. The da Vinci Pro 3-in-1's print bed is definitely not as tough or resilient as the plastic bed on printers such as the LulzBot Mini.
The 3-in-1 includes USB and Wi-Fi, but the latter is a little limited. You can use the 3D-printing and laser-etching functions over a Wi-Fi network, but not the 3D scanner, which requires a USB connection.
Print Materials: Broad Support
Support for third-party materials distinguishes XYZprinting's Pro lineup from its amateur offerings. Whereas printers such as the da Vinci 1.0 AiO work only with filament in XYZprinting's own print cartridges, the Pro can handle these cartridges and 1.75-mm filament from other manufacturers. That said, XYZprinting does still try to nudge you toward using its own filament; when you start the companion software, a pop-up message warns you, "Print quality may vary with third-party filament."
For print materials, XYZ includes 18 colors of ABS and seven colors of PLA. These range from the natural white to a particularly lurid neon magenta, and cost between $20 and $40 for a roll that contains 600 grams of filament. That's a decent value and comparable to most third-party filaments.
MORE: Best 3D Printers
Setup: Calibration Complications
It's fairly simple to get the da Vinci 1.0 Pro 3-in-1 up and running. With the exception of the etching laser, the printer comes fully assembled, so all you have to do is unbox it, remove the numerous bits of packing foam and tape, and plug it in.
It's also easy to load the filament. You just install the cartridge or reel, and then feed the filament into the tube that leads to the printhead. A motor pulls the filament into the printhead. Once you see the melted filament coming out of the printhead, you're ready to go.
The Pro 3-in-1 is not a particularly fast printer.
Our test unit didn't need any calibration before printing, but XYZprinting does recommend you calibrate every time the printer is moved, to make sure the print bed is level. Whereas printers such as the LulzBot Mini automate this process completely, the Pro 3-in-1 requires some manual intervention, which can be a little cumbersome.
The da Vinci printer uses a sensor on the print head to detect the print bed, and then asks you to adjust the print bed leveling dials. It might ask, for instance, that you "turn the right dial 0.5 steps forward." With each "step" representing a quarter turn of the dial, this gets a little confusing, as you have to figure out what something like 0. 1 steps backward actually represents. Once you have made the adjustments, the printer tests the level of the bed again.
Interface: Two Different Controls
You control the Pro 3-in-1 two ways — through the XYZware Pro software, available as a free download for Windows and Mac, or through a small LCD and buttons on the device itself. The XYZware Pro software is straightforward and simple to use, taking you through the process of loading a model, scaling and shifting it, and sending the file to the printer for building. When you load a model, the program shows a rotatable preview of it on the print bed, which you can scale, rotate, shift or delete.
The program hides most of the technical aspects of 3D printing from the casual user, but they are available if you dig. If you want to change the layer height or the infill (how much of the interior of the model is filled with material), you have to select Print and then go to the General tab of the Print Settings screen.
MORE: 8 Awesome 3D Printing Trends to Watch
Once you're ready to print, the program sends the file to the printer, and you can then exit XYZware Pro. From there, you can monitor the print, pause it or cancel it through a simple menu on the Pro 3-in-1's LCD screen. You can also do things such as change the filament or monitor the temperature of the various parts.
Print Process: Solid, with Some Failures
I found the process of printing on the Pro 3-in-1 to be mostly straightforward. For most materials, you place a sheet of bed tape (similar to painter's tape) on the print bed, and also apply white glue to the print area to help the print material stick to the bed. I found that this combination worked well, with most prints sticking to the bed properly.
Most of the Pro 1.0 3-in-1's prints were very clean, with smooth surfaces and very few printing glitches.
I did have occasional failures where the print failed to stick, or a small bit of melted filament stuck to the print head and blocked the extruder. When this happened, I ended up with a large gunky mass of melted filament stuck to the print head that required cleaning. XYZprinting includes tools for this, such as a copper wire brush and a pin for unblocking the extruder head.
Print Speed: Slow Output
The Pro 3-in-1 is not a particularly fast printer; the print time ranged from 6 hours and 45 minutes (on the largest 0.3-mm layer height) and 11 hours and 23 minutes (on the 0.2-mm layer height) to produce a 4.5-inch-high print. That's significantly slower than the comparably priced LulzBot Mini, which managed to produce a similar print in about 2 hours, albeit with a slightly larger 0.38-mm layer height.
Print Quality: Some Issues with Small Layers
I was impressed with the quality of most of the prints produced by the Pro 3-in-1. Most of these were very clean, with smooth surfaces and very few printing glitches. However, I found that prints at the smallest, 0.1-mm layer height did not work very well, with some parts of these prints not sticking together, often causing the print to fail.
To test 3D printers, I use a series of test models: a geometric sculpture, a 3D scan of Rodin's "The Thinker" sculpture and a set of gears. The Pro 3-in-1 aced this test, producing a clean, well-formed 3D print of the sculpture that had smooth edges and nice sharp points at the end. I did, however, see some odd filaments hanging off the edges of the sculpture, caused by the melted filament stretching as the print head moved away to print another part of the sculpture. These were easily trimmed off the final model.
(Image credit: Richard Baguley)The Rodin sculpture test looks at the printer's ability to reproduce natural objects, such as the muscles in the sculpture's shoulder. Again, I saw few issues here, with the printer producing a clean, accurate print of the sculpture with the layer height set to 0.3 mm and 0.2 mm. However, the printer struggled to produce a print at a layer height of 0.1 mm; the supports for parts of the sculpture were formed incorrectly, and several parts came loose and stuck to other parts of the print.
Finally, I printed a set of gears, and then assembled the final gear set to see how well the printer could create details such as the cogs of gears and the thread of screws. The 3-in-1 did well here, producing a clean set of gears that fit together well. Some of the gears did need a bit of cleaning with a sharp knife, as there were odd bits of loose filament stuck to some parts.
MORE: How to Buy a 3D Printer
3D Scanning: Disappointing Results
The da Vinci Pro 3-in-1 also acts as a 3D scanner; it can build a 3D model of an object by scanning and reconstructing it in software. The Pro 3-in-1 disappointed in this area, however, producing scans that lacked detail and often completely missed parts of the object. When it did work, the scanner did best with smooth, matte objects such as sculpture or pottery, but it couldn't scan dark, shiny or glass objects.
(Image credit: Richard Baguley)You can scan 6 x 6-inch objects — basically, anything the size of a hardback book. The 3D scanner shines two laser lines on the scanned object, which sits on a rotating platform in the bottom of the case. Then, two cameras detect this laser light, using the position of the detected laser line to calculate the shape of the object. One laser/camera combo looks up at the object from the left, while the second combo looks down from slightly above on the right side. The XYZscan software controls the process, which takes about 4 to 5 minutes.
Your initial scan produces a rough version that you can edit using the software, smoothing parts of the scan. You can't do large-scale edits, such as filling in large holes.
The 3D scanning features disappoint, producing scans that lacked detail and often completely missed parts of the object.
If a scan misses parts of the object, the software's Multiscan feature lets you move the object, scan it again and mark similar points on the two scans. The software then tries to combine the two scans into one. This process had mixed results: On complex objects, it wasn't able to combine the results, but simpler objects could be combined for better scans.
The resolution of the scan isn't great: intricate details smaller than a quarter of an inch or so won't be captured very well. In one example below, I scanned a 4.5-inch print of "The Thinker." Though the general shape of his body is captured, his head is missing, and large areas of his body just aren't captured at all.
Laser Etching: Good with Some Tweaking
XYZprinting's 3-in-1 also offers laser etching if you opt for a $99 attachment. It can etch images into materials like wood, paper or cardboard. It does a pretty good job, but the process requires a lot of tweaking and experimentation to get good results. The quality also varies depending on the material you're etching.
The laser etcher contains a small (0.25 watt) blue laser, similar to the one in a Blu-ray player. The laser isn't powerful enough to do other tricks that bigger laser etchers can do. For example, it can't cut through things or etch materials harder than wood.
To use the etcher, you have to remove the 3D printhead. Just set the 3-in-1 to the Change Print Head option in the on-screen display, turn off the printer, remove a cable from the printhead, release a latch and lift the printhead out. To install the etcher, you simply reverse the process; the whole thing takes just a couple of minutes. It's unfortunate that you can't have both printheads installed side by side.
(Image credit: Richard Baguley)Once the etcher head is installed, you can start etching, using the same XYZware Pro software you use for 3D printing, but with a slightly different interface. Using a 2D representation of the print bed, you can load image files (JPEG, GIF, PNG, TIFF and BMP formats are supported) that you want to etch.
MORE: 3D Printing - News, Reviews and 3D Printer How-Tos
You can choose between two modes: Vector and Raster. Vector mode works best with simple, one-color logos; it processes the image by detecting the edges of the areas of colors. Raster mode is more complicated; it tries to turn different colors in the image into different shades, which will be etched by using the laser at different strengths. This creates a gray-scale version of the image. Either way, expect to spend some time experimenting with this for the best results, as the software offers a number of controls for tweaking the result.
Once the file is processed, it is sent to the printer, and the etching starts. This is pretty quick for simple images; a Tom's Guide logo took less than 10 minutes. Etchings with larger areas to fill in or more complex images take longer; a 6.5 x 3-inch sample image took about 4 hours to etch into cardboard.
(Image credit: Richard Baguley)Etching can also be a little stinky, as you are burning the image onto the material being etched. It didn't set anything alight or trigger any smoke alarms in my tests of etching light wood and cardboard, but you should definitely make sure the area is well ventilated and keep a close eye on it.
The XYZprinting da Vinci 1.0 Pro 3-in-1 packs a lot into its large case, and the 3D-printing and laser-etching features of this do-it-all device work fairly well. Though it's slow, the 3D printer produced decent 3D prints at all but the smallest layer height, and the laser etcher produced nice, clean etchings on soft materials. However, we were disappointed by the lackluster performance of the 3D scanner, which produced scans that were missing parts and lacked detail and could not scan many common materials, such as glass, glossy metal and very dark objects.
Still, when you consider the low price tag, two out of three ain't bad. The da Vinci 1.0 Pro 3-in-1 represents a decent value compared to competitors such as the LulzBot Mini that may offer better performance, but at a higher price.
Today's best XYZprinting da Vinci 1.0 Pro 3 in 1 deals
No price information
For more information visit their website
Richard Baguley has been working as a technology writer and journalist since 1993.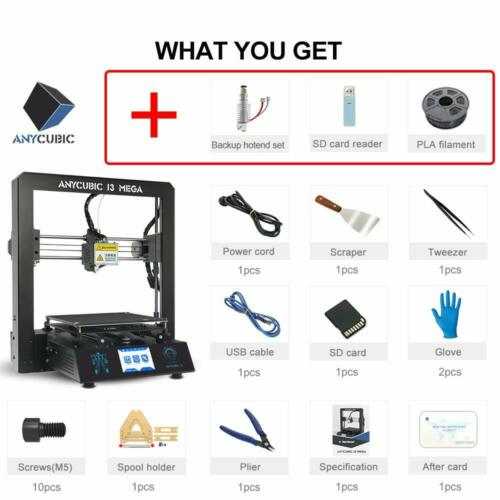 As well as contributing to Tom's Guide, he writes for Cnet, T3, Wired and many other publications.
Tom's Guide is part of Future US Inc, an international media group and leading digital publisher. Visit our corporate site .
© Future US, Inc. Full 7th Floor, 130 West 42nd Street, New York, NY 10036.
3D Printer Review: XYZprinting's da Vinci 1.0 Pro 3-in-1 Offers Solid Performance in 3D Printing & Laser Engraving, Lackluster 3D Scanning - 3DPrint.com
A few months ago, I received a long-anticipated package in the mail: the first desktop 3D printer to land on my doorstep. While we cover 3D printing day in and day out here, and I’ve had the privilege of both watching and using several 3D printers around the world, I have a somewhat embarrassing confession: I don’t own one myself. (…Yet.) So when this package arrived on a bright summer day, I was thrilled: my review unit from XYZprinting had arrived. I had some time to test out the da Vinci 1.0 Pro 3-in-1 unit, introduced and made available earlier this year.
XYZprinting, as you may have noticed, has held a prestigious position in the market for some time now, holding steady as the market leader in desktop 3D printing. 3D technologies from the company encompass a variety of desktop 3D printers (some, like the unit I tested, incorporating 3D scanners and/or laser engravers), 3D printing pens, and handheld 3D scanners — with more products coming to market all the time, as it’s seemed this year in particular.
Unboxing the da Vinci 1.0 Pro 3-in-1 was a pleasant experience. The company that leads in desktop unit sales certainly knows how to get a printer to a customer safely; despite some dings in the large box from its experience in shipping, the machine itself was spotless, safely housed in styrofoam and taped and zip tied to keep all moving parts secured in transit. This AiO unit is certainly big, too; I hadn’t cleared enough desk space for its 18.4 x 20 x 22 inch footprint at first, and it covered the fairly small desk in my office for the duration of its stay here. I quickly set to work getting the machine and my system set up.
Please note that the following includes my personal experience testing this machine out, and may not be indicative of every user’s experience.
3D Printing
Setup was a breeze, and any questions I had were quickly answered as the XYZprinting website comes with a ton of useful information and videos to ensure a smooth unboxing and setup process for a new user. The bed leveling process did take some time, but here the tutorials again came in handy, as it took a few tries to get the print bed level and ready to go. The filament also gave me a bit of hassle about loading properly, but we sorted through our differences amiably enough, and I was soon ready to go with the white ABS filament that had been included in the package. (This machine is capable of printing with non-proprietary filament, as well, which is a nice new feature from an XYZprinting printer. For the purposes of this review, I used only ABS filament that I received from the company, but it was easy to see where to tweak settings for filament not in their chipped cartridges. ) I also learned that I do not have the knack for putting down layers of tape easily, which I should have known from previous attempts at putting up vinyl wall clings in my home; XYZprinting had included large sheets of masking tape in just the right size to lay down in one piece on the print bed. Mine never came out smoothly, but the few bumps and rips that resulted from my inexpert application rarely had implications on the print jobs attempted.
Included with the machine was a CD with XYZ’s 3D printing software; the CD wouldn’t read or install on my computer, so I had to download the XYZmaker software from the site. This was no biggie, and the site certainly made the process easy. Granted, I didn’t even need the software as I initially got set up, as the printer came with a couple of pre-loaded test prints. I set the first, a lion, to printing as soon as I had everything set up. I quickly followed that successful test print up with the other pre-loaded file, a lighthouse. There were no problems with either print, both coming out pretty quickly as easy, hollow prints to showcase the ease with which the printer could be controlled just by the unit’s buttons and easy-to-read screen.
The next obvious step was to turn to non-loaded files and start printing out chosen projects. I turned to Thingiverse to start, and soon had a Mounted Dragon Head designed by lukibob in the works. This design offered a nice base to print, as well as some detail work to highlight what the printer could reasonably accomplish. The print turned out quite nicely. The detail was nicely done, with just a bit of stringing on one of the dragon’s teeth.
And just like that, I was off to the races, printing up a storm. Among the files I chose to test the printer were:
- HODOR DOOR STOP by 2ROBOTGUY
- HodorStop by fixers
Though I had told Scott when he wrote up his 10 3D Printable Hodor list in May that he was a bad, bad man for running that list, I admit that I printed two of them. This was my first run with including multiple files on one print bed, and the software and printer both handled it admirably.
- Aria the Dragon
- Adalina: The Singing Serpent
Both designed by Loubie, these dragon designs showcased detail work. I had in fact printed Aria earlier — the design was the first I had ever 3D printed myself, at Dayton’s Proto Build Bar, using a MakerBot Replicator. By printing a design I already had on my desk, I was able to do an apples to apples comparison of a print. I took the opportunity as well to print Aria in a few sizes and resolutions. At the standard size with the finest resolution available to me, Aria came out beautifully. The standard resolution came out nearly identical to the previous version I had, though it wouldn’t be hard to note that the version printed on the MakerBot had come out a bit better, as the new print had a few gaps in layers in the wings, as well as a couple of flubs higher on the wings that, in the next print at a lower resolution, repeated and failed in lumps of melted plastic before the top joints on the wings. At 75% scale, a smaller Aria stood successfully tall; at 50%, Aria failed pretty fully. The base printed, the legs had major stringing, and before the wings could start, the model became a lump.
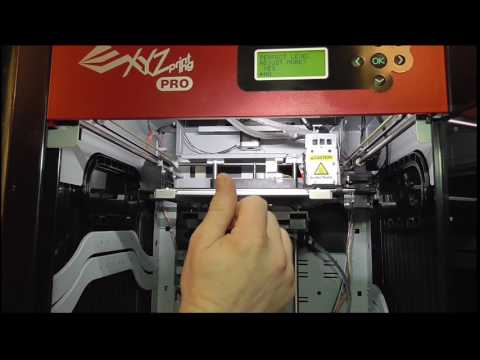 Still, I was impressed overall with the performance on the repeated Aria testing, and it’s important to know what the resolution limits are. I only tried Adalina once, and she came out overall well, though one wing gave out a bit right at the top tip.
- Side by side comparison with MakerBot (blue) print
- Ravenclaw Coat of Arms Wall/Desk Display – Harry Potter
- Slytherin Coat of Arms Wall/Desk Display – Harry Potter
Both coats of arms and stands were designed by andrewforster. The Ravenclaw design, in white, was the first print I tried with two components and where one had a moving part (the hinged stand). I was impressed with how this came out, and tried it again later, in black ABS, for Slytherin. For some reason, this one came out slightly less nicely, but it and the stand are both still display quality.
- Elsa from Disney’s Frozen by PPBle
- MineCraft Tool Keychains by Brandon Cessna
My niece’s fourth birthday came up around this time, so I made her a 3D printed Elsa (of course). The figure came out perfectly, and I also made my six-year-old nephew his own set of 3D printed Minecraft tools so he wouldn’t feel left out at the party. Both went over well with the kids (and my sister) and made appearances later at show-and-tell.
Among other designs I 3D printed, with no failures or major issues, were:
- Batowl! by sorenrd
- Doctor Who Quote. and Doctor Who – Bad Wolf by AwesomeA
- Disney Partners Sculpture at Disneyland Resort, California by Scan The World
- Casa Batlló, Barcelona by MiniWorld
- Dragon by Martin Conrad
- Dragon (smallest) shown alongside Loubie’s Adalina & Aria
The heated print bed was a nice touch, though I did have a few days of trial and error to find the optimal printing temperatures to get all my prints to adhere successfully. This part of the process was frustrating, but not insurmountable. I had a tendency to murder the tape on the print bed, as removing the prints sometimes caused me to dig a little deeply with the tool to remove them. When prints did adhere correctly and got to printing, I also learned that this is not the fastest 3D printer on the block. I appreciated the screen that kept me up to date on print progress, including percentage complete, time elapsed, and time remaining in each print, and noted that these estimations were pretty accurate.
While many users have been looking forward to XYZ opening up material options to allow for use of non-proprietary filament, I did enjoy the ease with which the chipped cartridges from the company were loaded and read, and appreciated the tracking of how much filament was left on the spool (which, as it was in the cartridge, I could not eyeball). Resolution was generally in a good range, though no one would mistake anything I printed for anything other than a layer-by-layer build off a 3D printer. It was easy to tweak settings to adjust resolution, speed, etc. , in the software.
One thing I noticed between prints was that I had to clean the print head off pretty frequently. The included copper brush was used pretty frequently, and after I took the extruder module off to swap out for the laser engraver module, I had some more cleaning to do. There were also a few instances of pretty total failure, where filament melted on/around the extruder; these were a pain and required some time to clean up (especially if I had left the room when it happened, and the melted plastic had had time to really gather), but they weren’t the norm of my experience. I definitely put all the tools XYZprinting had included in the box to use throughout my time with this unit.
3D Scanning
With an overall successful experience in 3D printing, I turned next to the machine’s other capabilities. The 3D scanner was incorporated right into the machine, so I downloaded the XYZscan software and set out to test the scanner. Unfortunately, I never had any success with a complete 3D scan.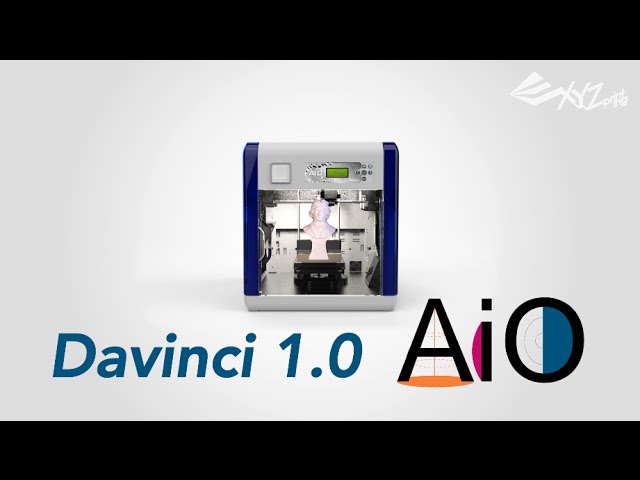 Part of this I will definitely chalk up to my computer’s less-than-stellar capabilities. While I am now using a newer laptop for working with 3D files for another review unit, I did not have the newer computer at the time of this review, so have only my lovely refurb desktop.
The first time I tried the scanner out, I couldn’t get a proper read on the included calibration piece. (And yes, though the photos included here are a bit well-lit, I did close the blinds as well for a dimmer room ambiance during scan testing.) I tried to move forward with a test scan without a completed calibration, but as I’m sure could be guessed, this didn’t go well. I turned back to 3D printing, as by this point a new package from XYZprinting had arrived with the laser engraver module and another cartridge of ABS filament (black, this time), so I could continue working with the machine. When I came back to 3D scanning again toward the end of that process, I was met with barely better results. I attempted to scan a simple figure I keep on my desk (it’s Doctor Hooves, in a simplistic shape that should have made for a somewhat accurate scan), and then attempted to scan the mounted dragon head I had printed earlier.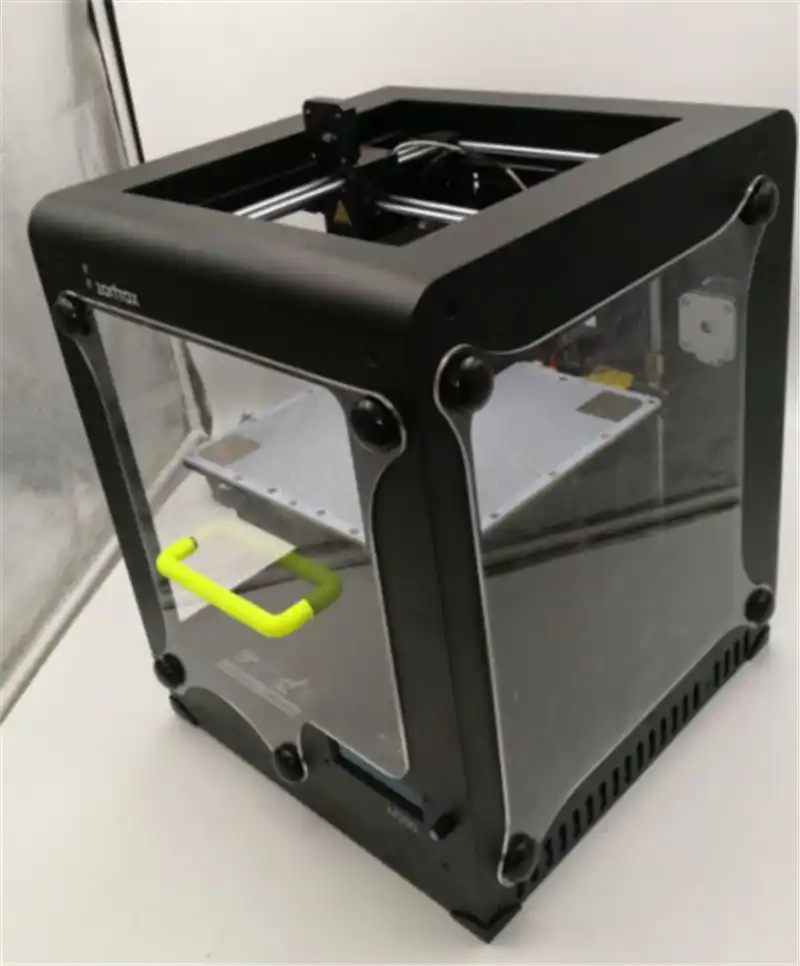
- I got used to this screen.
My intention here was to scan an object, turn that into an STL file, and print it to see how it compared to the original. I met no success in this endeavor, and did not come away with a single usable scan file. When I tried to fix one of three completed scans using the integrated fixing features in the software, the software crashed fairly spectacularly, freezing both my computer and the AiO. Next time I had a completed scan, I tried to just send it as-is to the printer to see how it would turn out in 3D print, errors and all. This also failed. The scanner is a good idea to include in the machine, and having a combined product seems sound. I am not willing to write off this particular machine’s 3D scanner as a wash, and I’m sure someone with a better computer and more patience will have had some success. It won’t be the best 3D scanner out there, but the resolution and capabilities promise to carry through for small desktop projects and recreations.
Laser Engraving
The third aspect of this 3-in-1 machine is its optional laser engraving module. The module is an add-on to the initial machine purchase, priced at $199, but it was the unexpected star of the show for me. I’ll be frank: I hadn’t expected to care much about the laser engraving capabilities. But when the box came with the module, I was cautiously optimistic. It was easy to follow XYZ’s instructions to swap out the extruder for the laser engraver module, and the whole switch of the two heads only took a few minutes, half of which was me flipping through instructions.
It’s noted to be able to engrave on materials including wood, leather, and cardboard; of these, I only had some spare cardboard around, so that was what I used. By the end of the included test engraving, I was scouring the house for more boxes to rip up to sacrifice to the engraver, and was very upset when one piece of spare, untreated wood we found was way too big to fit into the enclosed print bed area for safe engraving. The laser engraver was a champ.
- [Image: Sarah Goehrke]
The engraver offers the options for Vector or Raster designs, with Vector promising simpler/single-color designs, and Raster able to detect more gradation in shading. I mostly stuck with Vector. Both have options to play with to get the results you’re looking for. The engraving process itself did not take an especially long time; I was pleased with the speed particularly as I was working with cardboard, and had the printer set up in my office, where my desk was between the printer and the wide open windows.
My test engravings included our own logo, as well as a couple of (shockingly) dragon designs. These dragons I was particularly curious to see translated into laser engravings, as they are all tattoos I have that had been translated first from ink drawings (with the bottom one Tolkien’s original line drawing of Smaug from The Hobbit). All of these came out very nicely, overall. The creases in the cardboard prevented perfection in a few places, but the promise was there, as well as the accuracy in smaller areas of detail. I didn’t go for designs with a lot of shading, though the test design that was loaded with it showed off these capabilities nicely.
I did these designs one at a time; their not-great placement is my fault. The bottom design did not come out in its entirety.
Overall Impressions
The da Vinci 1.0 Pro 3-in-1 is a great desktop unit. It delivers on capabilities in 3D printing and especially in laser engraving, though the 3D scanning leaves some to be desired. All in all, I’d say I have faith in this machine as a good product. Priced at $899.95, with the option of adding the laser engraver module for $199, this is definitely a good value for the money. It’s not an industrial machine, so there is better quality (and speed) that can be found on the desktop; at this price point, though, this machine is very attainable for a number of users and fit for a number of applications.
On the whole, I had a good experience with this machine. The team at XYZprinting were easy to work with, and offered assistance with any issues that came up; their help line is even included under the print bed, ensuring that all users know that help is only a phone call or video tutorial away. Due to some communication/personnel issues, I kept the da Vinci Pro 1.0 3-in-1 for longer than I’d intended, but after all that, I have to say — I already miss it. Discuss in the da Vinci Pro 1.0 3-in-1 forum at 3DPB.com.
Stay up-to-date on all the latest news from the 3D printing industry and receive information and offers from third party vendors.
Tagged with: 3d printer review • 3d printer reviews • all-in-one • da Vinci Pro 1.0 • da Vinci Pro 1.0 3-in-1 • da Vinci Pro 3-in-1 • Da Vinci Professional • desktop laser engraver • laser engraver • laser engraving • xyzprinting
Please enable JavaScript to view the comments powered by Disqus.
All models of XYZprinting 3D printers in Ukraine
Product spawning (0)
Sort by: StandardName (A - Z)Name (Z - A)Price (Ascending)Price (Descending)Rating (Highest)Rating (Least)Model (A -Z)Model (Z -A)
Display: 15255075100
da Vinci miniMaker 3D printer
The da Vinci miniMaker 3D printer is a 3D printer for playing, creating and learning at home or in an educational institution. The MiniMaker da Vinci uses an intuitive auto-calibration system that adjusts the extruder and bed to ensure the best quality finished product..
₴8,519.00
da Vinci Junior 1.0 Pro 3D printer
The da Vinci Junior 1.0 Pro 3D printer is a compact professional 3D printer. Allows you to use plastics from different manufacturers and print models with a layer height of 20 microns. Convenient and easy calibration of a 3D printer ₴16,990.00
da Vinci 1.0 Pro 9 3D printer0007
da Vinci 1.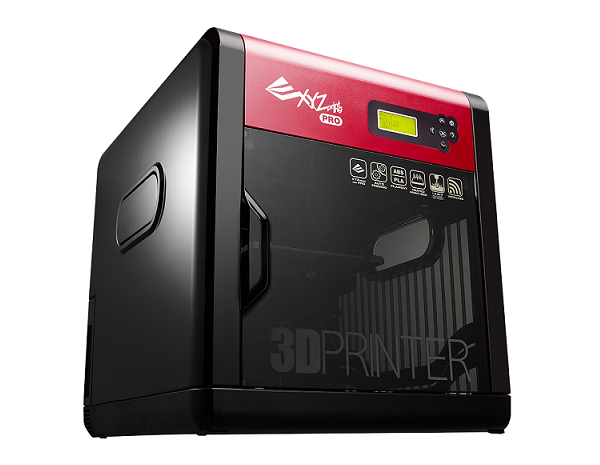 0 Pro 3D printer is a professional 3D printer. Allows you to use plastics from different manufacturers and print models with a layer height of 20 microns. ₴34,884.00
da Vinci 1.0 Pro 3 in 1 3D printer
The da Vinci 1.0 Pro 3 in 1 3D printer is a professional 3D printer. Allows you to use plastics from different manufacturers and print models with a layer height of 20 microns. Built-in 3D scanner and turntable for scanning small objects. Can be used as engraving..
₴42,639.00
da Vinci 1.1 Plus 3D printer
The da Vinci 1.1 Plus 3D printer is a simple and reliable 3D printer with a print area of 20 x 20 x 20 cm and a print layer height of 0.1 to 0.4 mm. The 3D printer has an automatic filament feeding system, which makes the process of replacing plastic as easy as possible. Connect, download, print Connect..
₴22,542.00
da Vinci 2.0 Duo 9 3D printer0007
da Vinci 2.0 Duo 3D printer - printing two-color models of any complexity, print area 15 x 20 x 20 cm, print layer height from 0.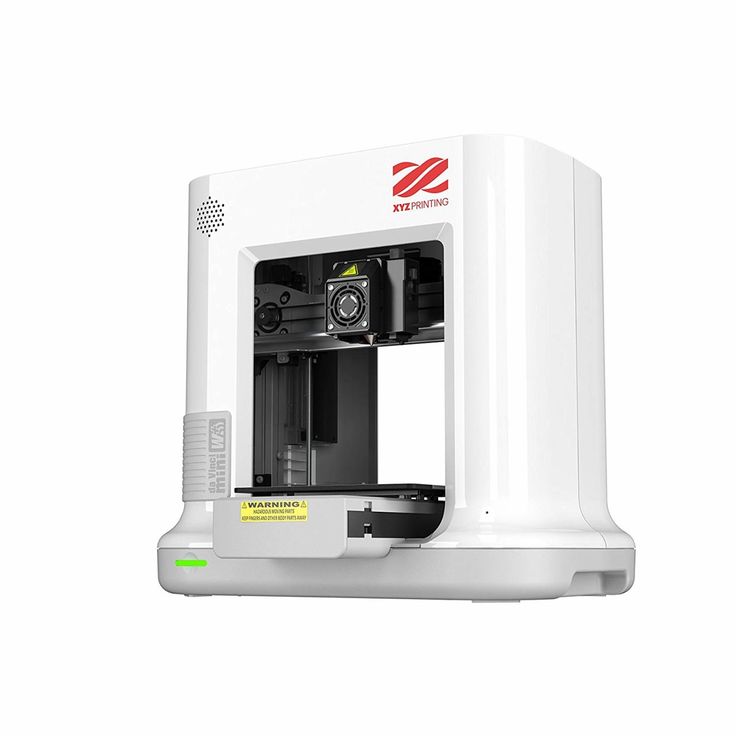 1 to 0.4 mm. The 3D printer has an automatic filament feeding system that simplifies the process of replacing plastic as much as possible.Easy replacement of cartridges of different colorsUs..
₴18,342.00
Nobel 1.0 3D printer
Nobel 1.0 3D printer - photopolymer printing using SLA technology with a layer height of 25 µm and resolution in the XY plane up to 300 µm for printing models with high detail and a smooth surface. Excellent quality for beginners and already experienced users. Completely safe to use..
₴47,759.00
Nobel 1.0a 3D printer
Nobel 1.0a 3D printer - photopolymer printing using SLA technology with a layer height of 25 µm and XY resolution up to 130 µm for printing models with high detail and a smooth surface. Excellent quality for beginners and experienced users. Completely safe to use.
₴67,490.00
da Vinci Super 9 3D printer0007
The da Vinci Super 3D printer is a professional 3D printer with a print area of 300 x 300 x 300 mm. Allows you to use plastics from different manufacturers and print models with a layer height of 20 microns. Professional Features at an Affordable PriceThe da Vinci Super 3D Printer is designed for ..
₴83,949.00
da Vinci Color 3D printer
The da Vinci Color 3D printer is the world's first color FDM 3D printer that prints from PLA filament and paints it in different colors layer by layer. Print area for color products 20 x 20 x 15 cm.0007
₴96,490.00
da Vinci Junior 1.0 3D printer
The da Vinci Junior 1.0 3D printer is a simple and reliable 3D printer with a print area of 15 x 15 x 15 cm and a print layer height of 0.1 to 0.4 mm. The 3D printer has an automatic filament feeding system, which simplifies the process of replacing plastic as much as possible. Convenient and easy calibration of the 3D printer.
₴9,749.00
da Vinci Junior 1.0w 9 3D printer0007
The da Vinci Junior 1.0w 3D printer is a simple and reliable 3D printer with the ability to connect remotely via a WI-FI network.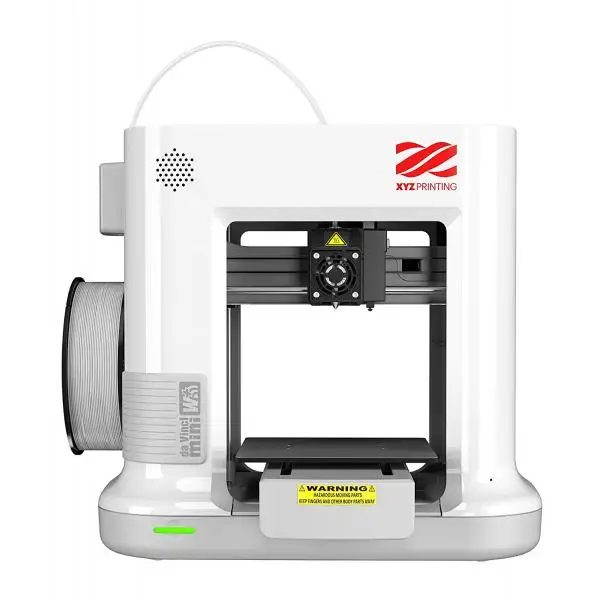 The print area is 15 x 15 x 15 cm and the height of the print layer is from 0.1 to 0.4 mm. The 3D printer has an automatic filament feed system that simplifies the process of filament replacement as much as possible..
₴15,036.00
da Vinci Junior 1.0 3in1 3D printer
da Vinci Junior 1.0 3in1 3D printer - 3D printer, 3D scanner and engraver in one desktop device that any novice maker can use! optional) You can engrave leather, cardboard, paper, plastic, etc.
₴16,990.00
da Vinci Junior 2.0 Mix 3D printer
da Vinci Junior 2.0 Mix 3D printer - mix two strands of PLA plastic at the right time and create two-color products in any quantity. The choice of printing color is up to youThe printer software allows you to choose the multi-color printing mode or mixed printing.Remote launch of 3D printing without wires..
₴18,239.00
Showing 1 - 14 of 14 (1 Pages)
XYZprinting opened offices in China, Japan, USA and Europe in 2013. In 2014, another office was opened in Korea.
The 2015 XYZ Da Vinci Junior 3D Printer was named a Best of CES 2015 3D Printer. XYZprinting received the "Digital Trends Top Tech" award.
3d printer XYZprinting Da Vinci Mini, 3d printer Da Vinci Jr. 1.0 Pro, Da Vinci miniMaker 3D printer, Da Vinci 1.0 Pro 3-in-1 3D printer and Da Vinci Jr. 1.0 are in the TOP 25 selling 3D printers on Amazon. (as of December 7, 2017)
XYZprinting has a 20% market share of sold 3D printing devices in the world. Every 5th printer sold is a company XYZ printer.
XYZprinting offers a range of 3D printers for beginners and experienced users.
The Da Vinci series of 3d printers are convenient and easy to use FDM machines with high print quality at a relatively low price.
Nobel series 3D printers use SLA (stereolithography) photopolymer printing technology, which allows for higher precision of finished products and better surface quality.
Founded in 1973, Kinpo Corporation, which includes several subsidiaries including Kinpo Electronics, Cal-Comp Electronics and XYZprinting, is a global electronic manufacturing service (EMS) and in-house design manufacturing (ODM) company that offers its customers more low costs, faster delivery time and product quality.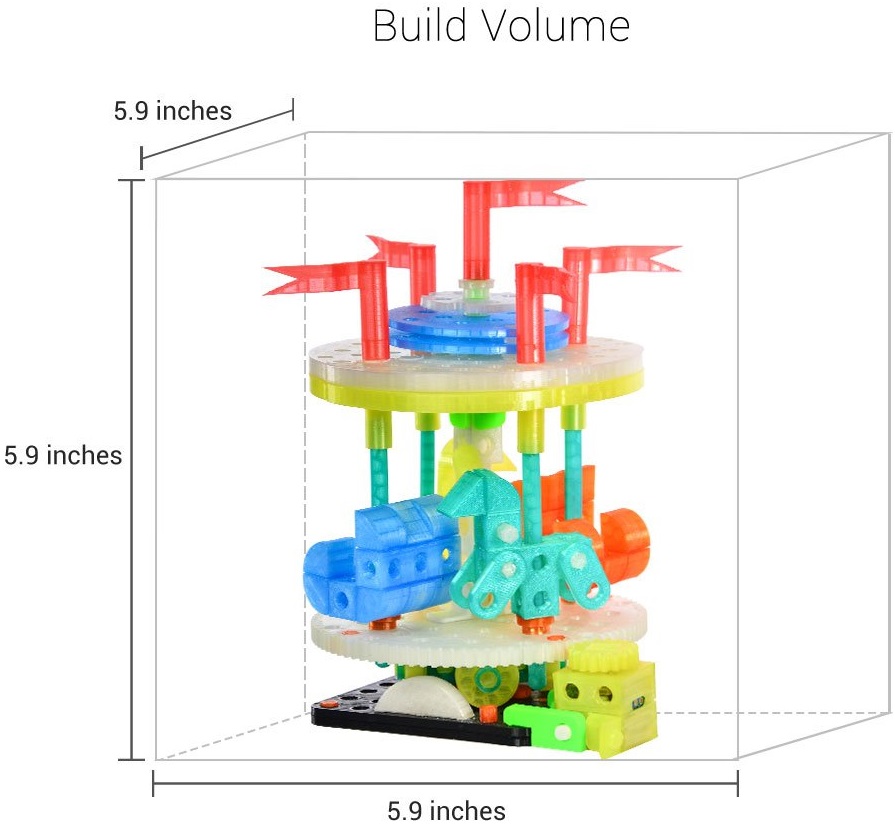 EMS's business includes many products including storage, printers, network attached storage (NAS), wireless and broadband networks, digital home, consumer electronics, 3D printing, robotics, power management and smart grid, industrial, automotive, security, medical / healthcare and new technologies. Kinpo Group, with its strategically located manufacturing sites, has the added benefit of allowing customers to manufacture products closer to end consumers, resulting in a significant reduction in shipping costs.
Buy 3d printer Da Vinci nano, Da Vinci miniMaker, Da Vinci Junior 1.0, Da Vinci Junior 1.0w, Da Vinci Jr. 1.0 3in1 Da Vinci Jr. 2.0 Mix Da Vinci Jr. 1.0 Pro, Da Vinci 1.1 Plus, Da Vinci 1.1 Plus, Da Vinci 2.0A Duo, Da Vinci 1.0 Pro, Da Vinci 1.0 Pro 3in1, Da Vinci Color and Da Vinci Super, Nobel 1.0, Nobel 1.0A, Nobel Superfine you can our store with delivery to anywhere in Ukraine (Kyiv, Kharkiv, Dnipro, Lviv, Odessa, Donetsk, Zaporozhye, Krivoy Rog, Nikolaev, Mariupol, Luhansk, Vinnitsa, Kherson, Poltava, Chernihiv, Cherkasy, Khmelnitsky, Zhytomyr, Chernivtsi, Sumy, Rivne, Ternopil, Lutsk, etc. ).
).
Snapmaker 2.0 A150 3 in 1 3D printer
Out of stock
Add to compare
Item added to compare Go
on request
Notify me of admission
Official distributor
We work directly with manufacturers.
Any form of payment
An opportunity to see the 3D printer in action in our demo room.
Own warranty service
Warranty and post-warranty service of equipment purchased from us.
Permanent 10% discount on consumables
When you buy a 3D printer from us,
you get a 10% discount on all consumables.
From 3D printing to laser engraving, CNC cutting and carving, the Snapmaker 2.0 A150 Modular 3D Printer unleashes all your creativity. Snapmaker 2.0 A150 is a next generation 3 in 1 3D printer that has everything you need:
- 3D printing
Snapmaker 2.0 Modular 3-in-1 3D Printers are ideal for 3D printing beginners, hobbyists, and engineers and designers printing large objects or precise parts with outstanding print quality.
- Laser engraving and cutting
Now with laser engraving and cutting, you can create a lot of artwork
- CNC carving
A150 can be used as a CNC router to create complex 2. 5 D and 3D objects.
Thanks to the modular design of the , switching between the functions of the is quick and easy.
The A150 comes with a smart with touch screen that simplifies the workflow of your daily projects by allowing you to manage your most frequently used tasks directly from the touch screen.
You can upload designs via the Wi-Fi or USB stick and print at the touch of a button. In addition, you can update Snapmaker Luban firmware directly via Wi-Fi.
Snapmaker Luban is specially designed for Snapmaker printers. The software comes with a user manual and instructional videos to get you up and running quickly. One powerful software for all tasks!
3D printer features:
- Automatic table calibration
- Filament End Sensor
- Improved part cooling system
- Flexible platform
Laser engraver features:
- Built-in camera
- Quick engraving
- Specially designed aluminum slatted table
Features of the CNC router:
- Universal collet ER11
- MDF platform and clamp set: The A150 comes with MDF platform and clamp sets.
 The platform is detachable and can protect other parts from damage, while clip sets provide a stable hold
- Mechanical dust resistance
Laser engraving and cutting
- Integrated camera
- Working area: 160 x 160 x 145 mm
- Laser power: 1600 mW
- Wavelength: 450 nm
- Safety class: Class 4
- Materials supported: wood, leather, plastic, fabric, paper, opaque acrylic
H PU milling
- Working area: 160 x 160 x 90 mm
- Shank diameter: 0.5 mm - 6.35 mm
- Spindle speed: 6000 - 12000 rpm
- Supported materials: Wood, acrylic, PCB, carbon fiber sheet, jade
Scale of delivery
Delivery to all regions of Russia and countries of the Customs Union.
Free shipping
When you buy a 3D printer (except assembly kits) you get free shipping.