Wifi sd card for 3d printer
Learn How to Make Your Ender 3 Wireless & Other 3D Printers – 3D Printerly
3D printing by itself is pretty cool, but you know what’s even cooler? 3D printing wirelessly.
I think we all love some extra convenience, so why not add some when it comes to 3D printing? Some 3D printers come with wireless support built in, but the Ender 3 isn’t one of them, along with several other machines.
If you want to learn how to make your Ender 3 wireless and operate through Wi-Fi, you’ve come to the right place.
A combination of a Raspberry Pi and OctoPrint is the usual method to make an Ender 3 wireless. You can also use AstroBox for a more flexible Wi-Fi connection option since you can access your 3D printer from anywhere. A Wi-Fi SD card can only give you the ability to transfer files wirelessly.
There are upsides and downsides to each method, so keep reading to find out the steps to take and which choice is most common.
This article will detail how people get their Ender 3’s working wirelessly which makes their 3D printing journey that much better.
There are a few ways that Ender 3 users upgrade their machines to be able to print wirelessly. Some are really simple to do, while others take a little more of a walkthrough to get it right.
You also have differences in equipment and products to purchase to connect your Ender 3
- Wi-Fi SD card
- Raspberry Pi + OctoPrint
- Raspberry Pi + AstroBox
- Creality Wi-Fi Cloud Box
Wi-Fi SD Card
The first, but less used option is implementing a Wi-Fi SD card. All you need to do here is get yourself an adapter which inserts into your MicroSD slot into your Ender 3, then present a SD slot for the WiFi-SD card since they only come in the larger size.
You can get a pretty cheap one from Amazon, the LANMU Micro SD to SD Card Extension Cable Adapter is a great choice.
Once you’ve inserted the adapter and Wi-Fi SD card, you will be able to transfer your files wirelessly to your 3D printer, but there are limitations on this wireless strategy. You will still have to start off your prints manually and actually choose the print on your Ender 3.
It’s a fairly simple solution, but some people enjoy being able to send files straight to their 3D printer. This is also a much cheaper option than the other methods.
If you want more capabilities with your wireless 3D printing experience, I would choose the method below.
If you’ve never heard of a Raspberry Pi, welcome to a really cool gadget that has many technological possibilities. In basic terms, a Raspberry Pi is a mini computer that packs enough power to operate as its own device.
For 3D printing specifically, we can use this mini computer to expand our capabilities to 3D printer wirelessly, plus many other cool features along with that.
Now OctoPrint is a software that complements the Raspberry Pi enabling you to activate that Wi-Fi connection to connect to your 3D printer from anywhere. You can implement some basic commands and do even more with plugins.
There is a list of plugins on OctoPrint which give you many extra features, one example being the ‘Exclude Region’ plugin. This allows you to exclude a portion of your print area mid-print inside the G-Code tab.
This is perfect if you are printing multiple objects and one has a failure such as detatching from the bed or the support material fails, so you can exclude that part rather than stopping the print altogether.
Many people also connect cameras to their 3D printers using OctoPrint.
In this article, we take a look at how to set up OctoPrint for the Ender 3, a great candidate printer for remote operation.
The basic steps to follow are:
- Purchase a Raspberry Pi (with Wi-Fi embedded or add Wi-Fi dongle), Power Supply & SD Card
- Put OctoPi on your Raspberry Pi through an SD card
- Configure the Wi-Fi by going through your SD card
- Connect the Pi & SD card to your 3D printer using Putty & the IP address of the Pi
- Setup OctoPrint on your computer browser and you should be done
Here you will find a complete guided setup to connect your Ender 3 to the computer using OctoPrint. Below are the things that you will need.
- Ender 3 3D Printer
- Raspberry Pi (CanaKit Raspberry Pi 3 B+ from Amazon) – includes power adapter,
- Power Adapter for Raspberry Pi
- Micro SD Card – 16GB should be enough
- Micro SD Card Reader (comes with Ender 3 already)
- Mini USB Cable for Ender 3 Printer
- Male Female USB Cable Adapter
The video below goes through the whole process which you can follow along with easily.
Connecting Pi to Wi-Fi
- Download the latest updated version of the OctoPi operating system (OctoPi image)
- Download & use Win32 Disk Imager to create the image on the SD card
- Plug in fresh SD card
- Once your OctoPi image is downloaded, ‘Extract All’ and ‘Write’ the image to the SD card
- Open the SD file Directory and look for the file titled “octopi-wpa-supplicant.
 txt”.
txt”.
In this file, there will be code as:
##WPA/WPA2 secured
#network={
#ssid=“type SSID here”
#psk=“type Password here”
#}
- At first, remove the ‘#’ symbol from the code lines to make them uncommented.
- It will become like this:
##WPA/WPA2 secured
network={
ssid=“type SSID here”
psk=“type Password here”
}
- Then put your SSID and set a password in the quotes.
- After adding the password, insert another code line as scan_ssid=1, just below the password code line (psk=“ ”).
- Set up your country name correctly.
- Save all changes.
Connecting the Computer to Pi
- Now connect it with your printer using the USB cable and power it on using a power adapter
- Insert the SD card into the Pi
- Open the command prompt and check the IP address of your Pi
- Insert it in the Putty application on your computer
- Login to the Pi using “pi” as the username and “raspberry” as the password
- Now open a web browser and type the Pi’s IP address in the search bar
- The Setup Wizard will be opened
- Set up your printer profile
- Set Origin at “Lower Left”
- Set Width (X) at 220
- Set Depth (Y) at 220
- Set Height (Z) at 250
- Click Next and Finish
Fix Pi Camera and Device on the Ender 3
- Fix the Pi camera on the 3D printer
- Insert one end of the ribbon cable in the camera and the other one in the Raspberry Pi ribbon cable slot
- Now fix the Raspberry Pi device on Ender 3
- Make sure that the ribbon cable is not tangled or stuck in anything
- Connect Pi with the Ender 3 power supply using a USB cable
- Installation is done
I’d go for the LABISTS Raspberry Pi Camera Module 1080P 5MP from Amazon. It’s a good quality, yet cheap option to get a nice visual on your 3D prints.
You can 3D print yourself OctoPrint camera mounts by checking out the Howchoo collection on Thingiverse.
A more premium, yet simple option to print wirelessly from your Ender 3 is by using AstroBox. With this device, you can control your machine from any location when they are both connected to the internet.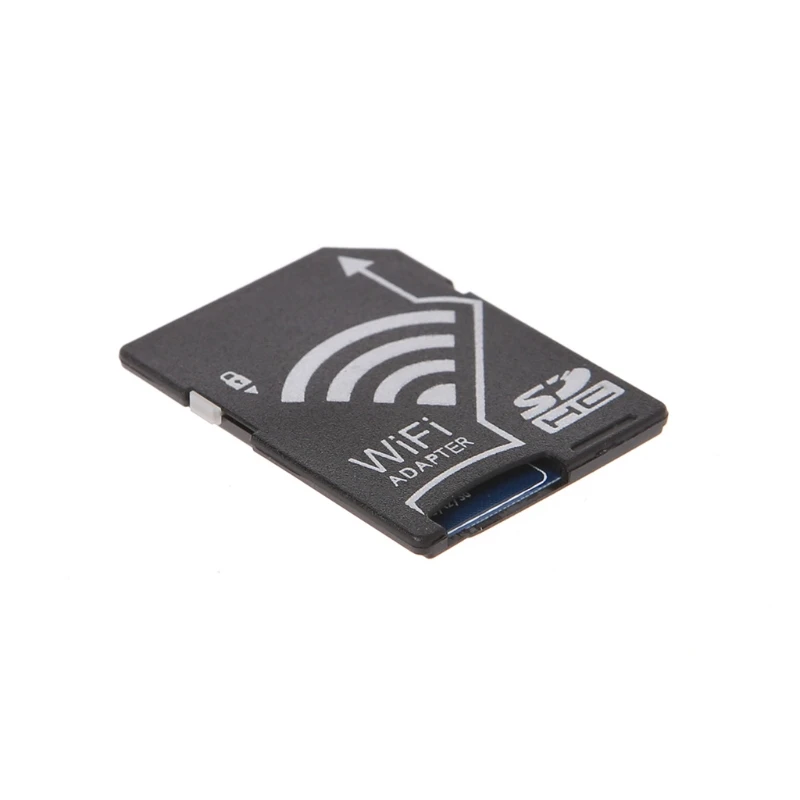
There is a Raspberry Pi 3 AstroBox Kit which you can get directly from the AstroBox website and it includes the following:
- Raspberry Pi 3B+
- Wi-Fi dongle
- Pre-flashed 16 GB microSD Card with AstroBox Software
- Power Supply for the Pi 3
- Case for the Pi 3
The AstroBox simply plugs into your 3D printer and enables Wi-Fi along with a connection with the cloud. You can easily manage your 3D printer with your phone, tablet or any other device which has connection to a local network.
Along with a standard USB camera, you can also monitor your prints, real-time from anywhere.
AstroBox Features:
- Remote monitoring of your prints
- Ability to slice designs on the cloud
- Wireless Management of your 3D Printer (No pesky cables!)
- No more SD cards to load STL files
- Simple, Clean, Intuitive Interface
- Mobile friendly and works on any web enabled device or using the AstroPrint Mobile App
- No need for a laptop/computer to be connected to your printer
- Automatic updates
AstroBox Touch
The AstroBox also has another product which extends the capabilities to be able to have a touchscreen interface.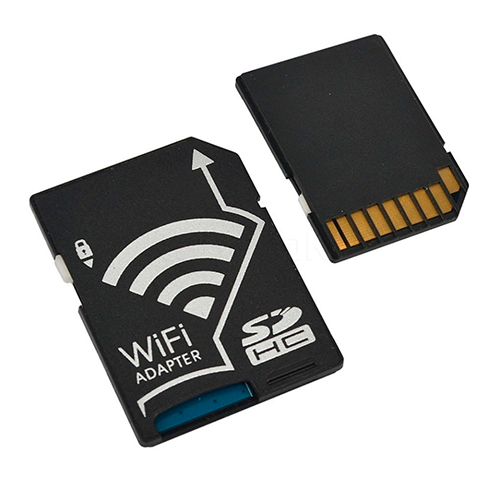 The video below showcases how it looks and how it works.
It does have some capabilities that you don’t get with OctoPrint. One user described how his kids could fully control and Ender 3 using just a Chromebook. The touch interface is really good and modern, compared to many touchscreen UI out there.
The last option that you might want to use to make your Ender 3 wireless is the Creality Wi-Fi Cloud Box, which helps to remove the SD card and cables, allowing you to control your 3D printer remotely from anywhere.
This product is fairly new at time of writing, and really has the chance to transform many 3D printer users’ experience with FDM printing. One of the early testers of the Creality Wi-Fi Box described their experience in this post.
You can also get the Aibecy Creality Wi-Fi Box which is the same thing but just sold by another seller on Amazon.
3D printing directly from your machine will soon be a task that is out-of-date as we develop the technology to easily 3D print wirelessly, with little setup.
The benefits of the Creality Wi-Fi Box are as follows:
- Simplicity of printing – connecting your 3D printer via the Creality Cloud app – online slicing and printing
- A cheap solution for wireless 3D printing
- You’re getting a powerful performance and very stable archive of software and hardware
- Professional-looking aesthetic in a black matte shell, with a signal light in the middle & eight symmetrical cooling holes at the front
- Very small device, yet large enough for great performance
In the package, it comes with:
- Creality Wi-Fi Box
- 1 Micro USB Cable
- 1 Product Manual
- 12-Month Warranty
- Great Customer Service
OctoPrint Raspberry Pi 4B & 4K Webcam Installation
For the highest quality 3D printing experience using a Raspberry Pi, you can use the Raspberry Pi 4B along with a 4K webcam. This will allow you to make some amazing videos of your 3D prints that you can share to your friends and family.
The video below by Michael at Teaching Tech goes through the process.
You can get yourself the Canakit Raspberry Pi 4B Kit from Amazon which gives you everything you need to get started without having to worry about the smaller parts. It also includes a premium clear Raspberry Pi case with an in-built fan mount.
A really good 4K webcam on Amazon is the Logitech BRIO Ultra HD Webcam. The video quality is definitely in the top-tier range for desktop cameras, an item that can really transform your visual displaying capabilities.
- It has a premium glass lens, 4K image sensor, high dynamic range (HDR), along with autofocus
- Looks great in many lights, and has a ring light to automatically adjust and contrast to compensate for the environment
- 4K streaming and recording with optical and infrared sensors
- HD 5X zoom
- Ready for your favorite video meeting apps such as Zoom and Facebook
You can really record some awesome 3D prints with the Logitech BRIO, so if you want to modernize your camera system, I’d definitely get it.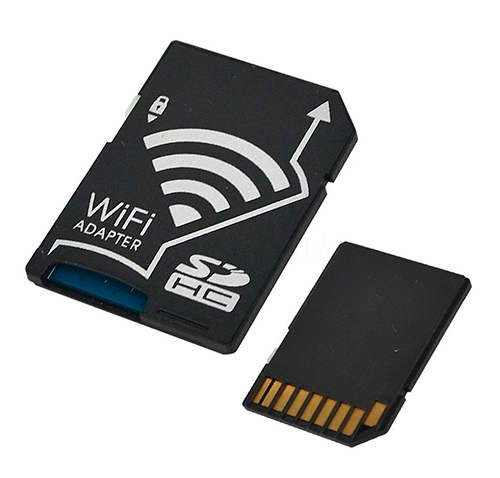
AstroPrint Vs OctoPrint for Wireless 3D Printing
AstroPrint is actually based on an earlier version of OctoPrint, being combined with new phone/tablet apps, along with a slicer that operates through a Cloud network. AstroPrint is a lot easier to setup compared to OctoPrint, but they do both run off a Raspberry Pi.
Practically speaking, AstroPrint is a software that carries fewer functions than OctoPrint, but has more emphasis on user-friendliness. You would want to go with AstroPrint if you just want basic wireless 3D printing capabilities without the extras.
If you think you’ll want to add more advanced features to your 3D printing, you probably should go for OctoPrint.
They have a larger community of contributors who are always developing new plugins and functions. It was built to thrive on customizations and unique features.
Duet 2 Wi-Fi
Duet 2 WiFi is an advanced and fully functional electronic controller specially used for 3D printers and CNC (Computer Numerical Control) devices.
It is the same as its old version Duet 2 Ethernet but the upgraded version is 32-bit and offers Wi-Fi connectivity to work wirelessly.
Pronterface
Pronterface is a host software that is used to control your 3D printer functionalities. It is built from the open-source software suite Printrun which is licensed under GNU.
It provides the user with a GUI (Graphical User Interface) access. Because of its GUI, the user can easily configure the printer and can print the STL files just connecting it with a USB cable.
Does the Ender 3 Pro Come With Wi-Fi?
Unfortunately, the Ender 3 Pro doesn’t come with Wi-Fi, but we can enable a wireless connection by either using a Wi-Fi SD card, a Raspberry Pi & OctoPrint software combination, a Raspberry Pi & AstroBox combination, or by using the Creality Wi-Fi Cloud Box.
In order to keep prices down and let people make their own choices for upgrades, the Ender 3 Pro has kept functionality and extra features to a minimum, mainly focusing on the what you need to get some of the best printing quality right out the box.
Best WiFi SD Cards & Adapters
The key to any data workflow, whether it’s photographers, researchers or graphic designers is the ability to securely and quickly transfer files from one place to the other. When WiFi SD cards burst onto the scene a few years ago, it opened up a new world of data transfer possibilities that had far-reaching implications.
What is a WiFi SD Card?
Although they look like a standard SD card on the surface, these units have the addition of what is essentially its own WiFi router.
Note: At no extra cost to you, we may earn a commission for purchases using our links. Learn more.
This allows any other device, such as a laptop or smartphone, to connect wirelessly to the SD card and access any data it might contain. It’s a brilliant solution for people who constantly pull an SD card in and out of a camera or other kind of device.
Depending on where your computer or device is located, it can be backbreaking work trying to reach for the SD slot repeatedly.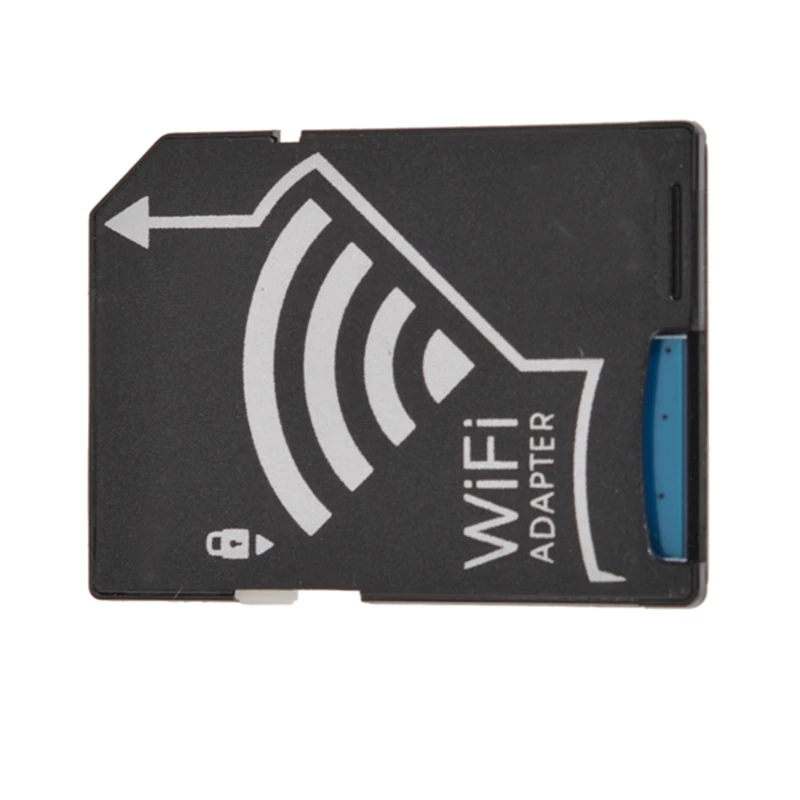
WiFi SD cards and adapters help eliminate this problem by helping perform all data transfer wirelessly. It’s compatible with any device that uses SD and/or WiFi technology.
While the data transfer landscape has changed with the rapid development of technologies such as Apple AirDrop, WiFi SD cards are still in high demand because of their ability to bridge files and data across multiple operating systems and platforms.
Although the basic concept is simple to grasp, different companies approach WiFi SD adapters in different ways. Some of them are more successful than others.
To help weed through the many options and eliminate confusion, we’ve rounded up three of the top WiFi SD cards and/or adapters on the market.
If you’re still not sure which SD card to select, stick around till the end for some things to keep in mind when making your decision.
How We Chose the Top Wi-Fi SD Cards
We based our choices on several criteria, including:
- Price and Value: Lots of price points out there.
 We make sure that each product has a high enough value to justify the price.
 - Reliability: For wireless data transfers, stability and reliability are essential. Data transfers can’t afford to be disrupted because of the risk of data corruption. The cards we’ve included passed this test better than the rest of the field.
- Storage: Files sizes are getting bigger and it’s important that your Wi-Fi SD card has the space to be of value.
- Transfer Speed: No one wants to sit around and wait for data to transfer. It’s important to make sure transfer speeds are best-in-class so we can be efficient with our time.
Best WiFi SD Card: Toshiba FlashAir
Key Features:
- SDHC Type.
- 16GB Capacity.
- Compatible with cameras, computers, 3D printers, and other WiFi, SD devices.
- Connects with up to 7 tablets and smartphones at a time.
- Easy to change SSID password to access photo sharing.

The Toshiba FlashAir 16GB WiFi SD card tops our list as the best overall because of its reliability and fast transfer speeds. It has a tremendous range and allows up to seven tablets and smartphones to connect to it at once when it is in photo sharing mode. It’s a brilliant solution if you are looking to share data with multiple people at once. This card is up for the task and could do so without dropping anyone’s transfers.
FlashAir has an Apple and Android app that lets users tweak the WiFi SD card’s settings and permissions. It makes keeping your card secure incredibly easy. While most people use it to transfer photos during a shoot or at an event, it has a wide range of other capabilities that make it a great solution for things such as 3D printing.
For speed, the Toshiba FlashAir is in a league of its own. The choice of many high end photographers and studios, this card is able to facilitate UHS speeds which makes it an ideal choice for most consumers. One thing to keep in mind is that this level of performance can get expensive.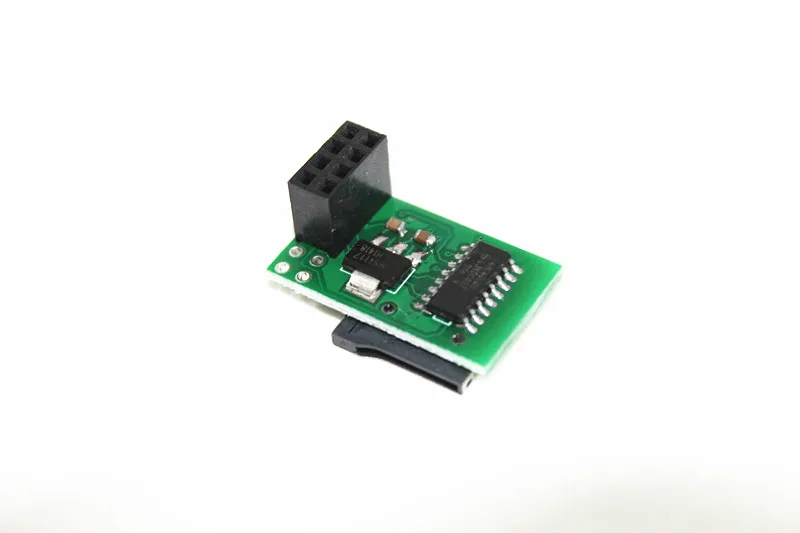
What We Like:
- UHS class transfer speeds.
- Connect up to seven devices during photo sharing.
- Has and Apple and Android app to control.
- Easily change SSID settings to keep the SD card secure.
What We Didn’t Like:
- 16GB capacity is limiting for bigger file sizes.
- Expensive.
Best Adapter: Zyyini TF to SD Card WiFi Adapter
Key Features:
- Supports image shooting and viewing JPG, PNG, BMP.
- Supports MP4, AVI, MOV video formats.
- Accommodates SDHC or TF cards.
- Inclusive WiFi compatibility.
This WiFi SD card adapter by Zyyini offers a tremendous amount of flexility. This model accommodates a TF or SD card. The onboard WiFi router on this adapter allows for WiFi password, AP mode, station mode switching and SSID.
The Zyyini can preview or transfer files from one device to another with little trouble. Although not as impressive as the Toshiba FlashAir, this adapter is still able to service three tablets or smartphone devices at a time. This card is compatible with both Apple and Android.
Another thing to keep in mind is that although it has solid data transfer performance, this WiFi adapter works best when it’s in close range with the devices that are connected to it.
User reviews have mentioned avoiding crowded or cluttered spaces. An advantage of an adapter is that you can expand its capacity to whatever you would like. It’s hard to beet the scalability of this product.
If you are choosing to use it for something like a DSLR camera, reach out to the seller to confirm that it is compatible with your devices. For example, this card is not compatible with the Canon t5i camera. Double checking before hitting purchase will save you heartache and delay. Overall, we believe this is the best adapter currently on the market.
What We Like:
- Adapter accepts whatever size SDHC or TF card we decide.
- Great price point.
- Durable construction.
- Apple and Android compatible.
- Simple operation.
- Supports sharing multiple photo and video formats.
What We Didn’t Like:
- Not compatible with certain DSLR cameras.
- Shipping can be slow.
Best Alternative: Canon WiFi SD Card Adapter W-E1
Key Features:
- Strictly for use with Canon EOS DSLR cameras.
- WiFi capability provides easy transfer of files to tablets and smartphones.
- Can provide computers with remote shooting functionality.
The official Canon WiFi Adapter W-E1 was specifically designed to help wireless bridge the photos on their Canon DSLR cameras with the rest of their laptops, tablets and smartphones.
This adapter was created to provide wifi connectivity for older Canon models that didn’t have it. It’s very simple to use and configure with transfer speeds that allows virtually simultaneous preview capabilities.
This WiFi adapter is one of the best (and only) ones on the market. With that said, this has only a few devices it is compatible with. Even within its own brand of products, this Canon WiFi adapter only works with a handful of cameras and printers. A good idea is to check with the seller to confirm that this card is compatible with equipment.
What We Like:
- Seamless and easy integration with certain Canon camera and printer models.
- Solid construction and weather proofed exterior.
- Can connect with a computer for remote shooting using the EOS Utility tool.
- Fit whatever size SD card you desire.
- Simple setting changes
- Great price.
What We Didn’t Like:
- Only compatible with certain products.
- Only works with a few Canon DSLR cameras.
How to Choose the Best WiFi SD Card or Adapter
There are a few things to keep in mind when trying to select the best WiFi SD card for your needs. Let’s look at some of them now.
- Price: WiFi SD cards are a great technology.
 However it’s important to make sure that you aren’t buying something that costs more than the benefit you would derive from it. However, it may be worth it to spend a little more money for a card or adapter that opens up a new world of speed and convenience.
 - Compatibility: You’ll want to make sure that the card you select is compatible with the primary devices you will be looping it into. This is going to be key if it’s going to provide maximum value. As an example, the Canon W-E1 is only compatible with select Canon cameras and printers. Whereas the Toshiba FlashAir can play nice with nearly everything.
- Your Specific Workflow: Take a moment to reflect on your workflow and how a WiFi SD card would fit. This will help you prioritize a card’s features and only choose one that enhances what you are doing.
Final Thoughts
Despite a wide range of new data transfer protocols coming onto the scene, Wi-Fi SD routers and adapters are still a powerful data transfer tool for professionals if used correctly.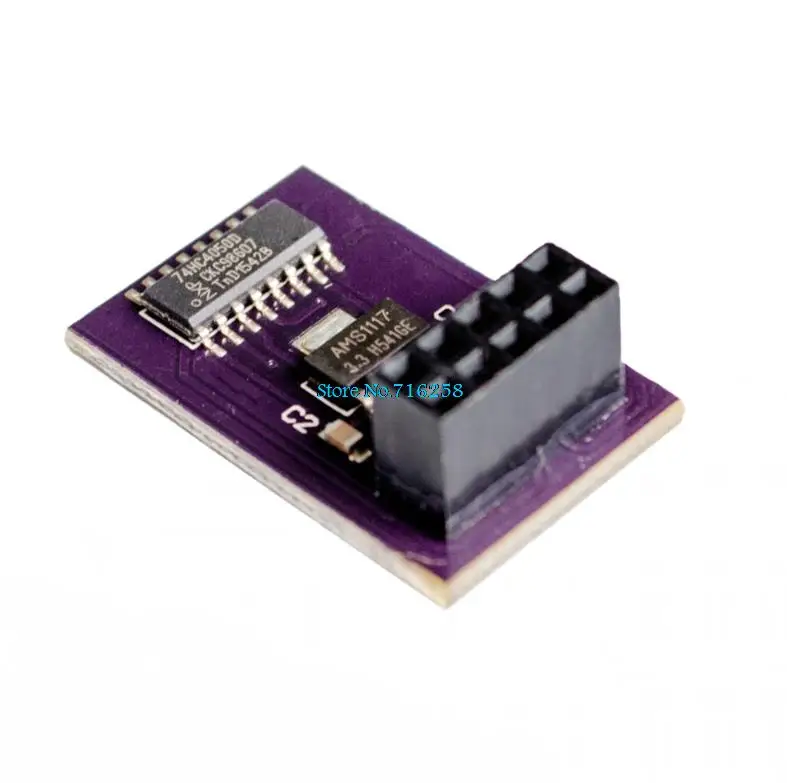
Of all the products we tested for this roundup, we feel that the Toshiba FlashAir provides the best functionality. The price is exorbitant but we feel it’s the best representation of the technology at this moment.
Please consider sharing:
Note: At no extra cost to you, we may earn a commission for purchases using our links. Learn more.
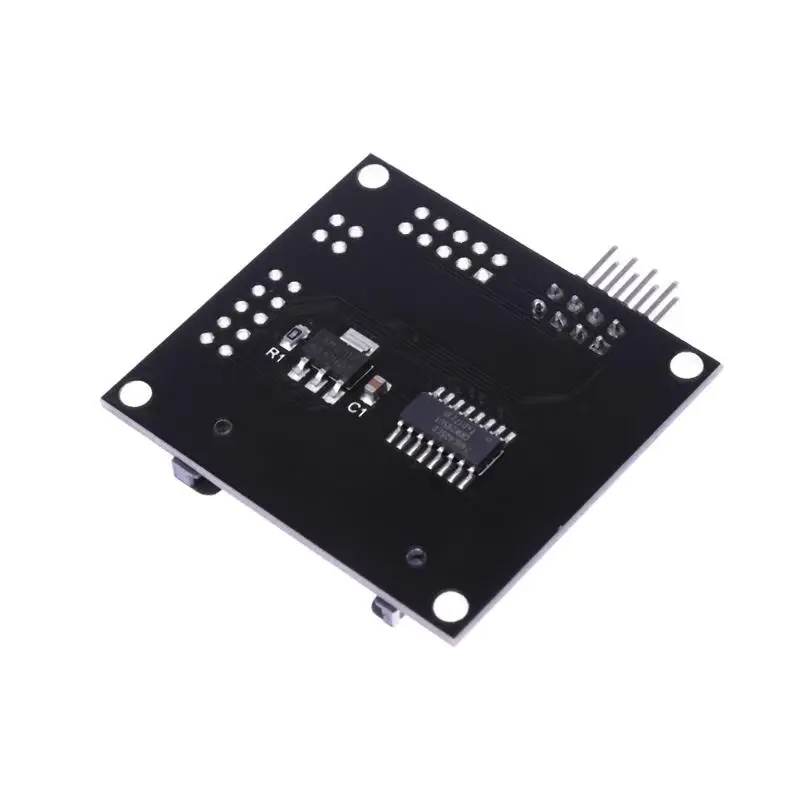
ESP8266 WiFi SD card for 3D printer (plug-and-play)
Tech
with a g-code on the PC, remove the SD card from the 3D printer, insert it into the PC, write down the g-code, and then put it back into the 3D printer. And, besides, for those who do not want to deal with arduino and all sorts of libraries. In fact, this is an analogue of FlashAir, but more cumbersome. All you need is to make a PCB, solder it, load the binary code into the ESP8266 using any programmer program, write your WiFi network settings to the SD card, insert the board into the SD slot of the 3D printer, and work over WiFi with files on the printer's SD card on your PC, as with network ones.
 Based on the development https://github.com/ardyesp/ESPWebDAVhttps://3dtoday.ru/blogs/jeka-tm/sd-card-with-wifi-with -your-own-hands/ and brought to its logical end. So: Schematic diagram: Board in Layout60003
 Capacitor-1206-1.0 - 1 pc. Capacitor-1.0 - 1 pc. Resistor-1206-470 - 1 pc. Resistor-1206-1k - 3 pcs. -12E - 1pc SD holder - 1pc * TTL-USB-Ch440G, 5v module - 1pc * 5v-3.3v level converter - 1pc
* - only for programming is not needed) The free program ESP8266Flasher.exe was used for uploading, but you can upload any other one, uploading is carried out at 0x00000Configuration. - Install jumper S1 on the assembled board - Write the setup.ini file to the root directory with three lines on the SD card: Wifi =Name of the wifi network to which we are connectingPassword=Network passwordThird line - empty - insert the SD card into the SD2 slot - Connect to the level converter RX,TX,Gnd, +3.3v with jmp1 (if you have a TTL-USB module at 3.3v , then the level converter is not needed, and + 3.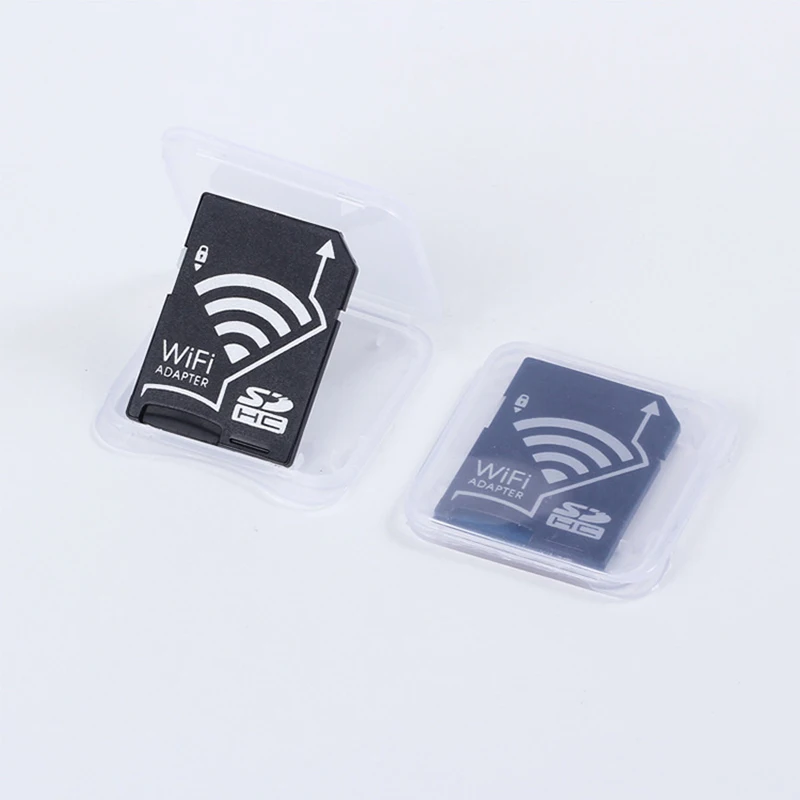 3v does not need to be connected anywhere) (Note: I still do not understand: RX-TX, TX -RX or RX-RX,TX-TX, if one does not work, try the other.) - Insert the TTL-USB module into the computer, install the drivers - Connect external power to the board - For programming, set switch S2 to the "closed" position, then briefly press the button S3- Run the programmer on the PC, set the port, speed, specify the binary download file, download address and start programming. The blue LED will flash. After programming is completed, switch S2 is set to the "open" position and press the S3 button. The device should now appear on your wireless home network in about 1 minute. To use it all the time, you can assign the SD drive to the PC's network drive. After we made sure that everything works, we take the device, remove the jumper S1, insert it into the SD connector on the display board and connect the power from the + 5v board: The attached archive contains a printed circuit board in the lay6 format, a binary firmware file, and, in addition, for those who want to tinker with Arduino and tweak something, the sketch source.
 https://cloud.mail.ru/public/3zqi/3ecDR82hg 42MB file is recorded ~ 2m 30s. The first part printed after installing this device, printing time is about 8 hours.
I hope I haven't missed anything, good luck everyone!
wifi ESP8266 SD-card
Subscribe to the author
Subscribe
Don't want
47
Even more interesting articles
19
Follow author
Follow
Don't want to
During one of the attacks of perfectionism, I decided to get rid of the problem of fi...
Read more
APToni
Loading
11/01/2022
1974
eleven
Subscribe to the author
Subscribe
Don't want
Installing Klipper on a Debian 11 machine.
Recommended hardware...
Read more
AKDZG
Loading
14.02.2015
842903
362
Subscribe author
Subscribe
Don't want
Many 3D printers run the popular Marlin firmware. The firmware is initially configured ...
Read more
Using and setting up WiFi Sdcard in a 3D printer.
Miscellaneous
Follow author
Follow
Don't want
80
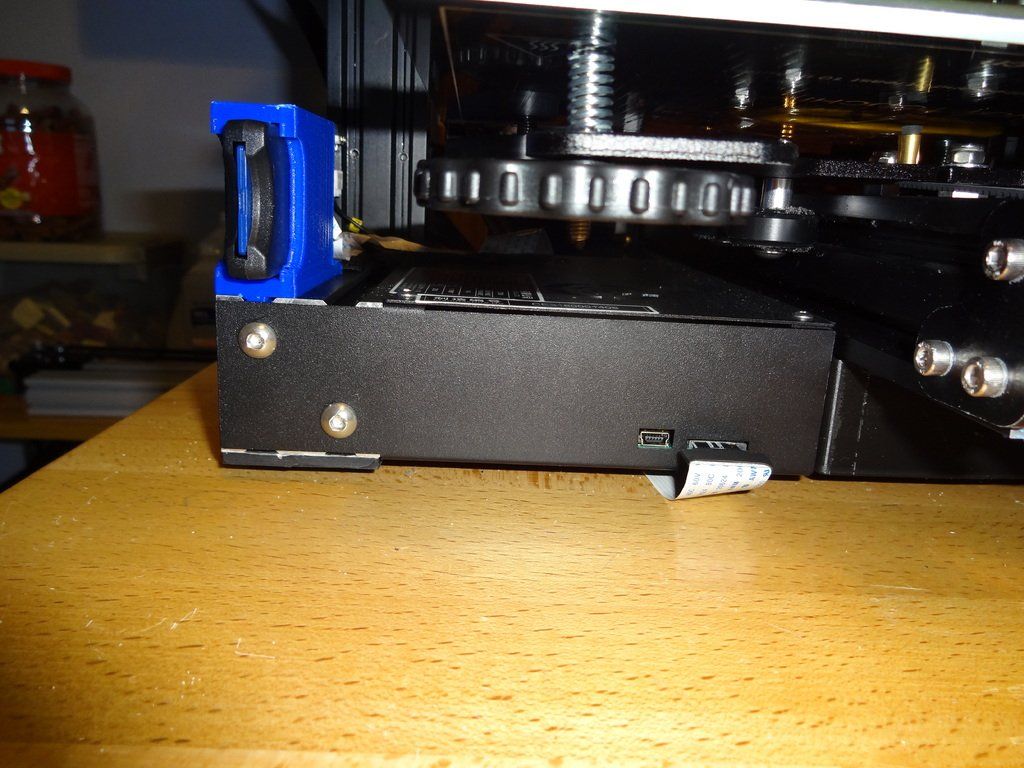
When I started looking for something simple to drop g-code files directly onto the printer card (without pulling it 'back and forth' from the printer to the card reader and back), I came across wireless memory cards.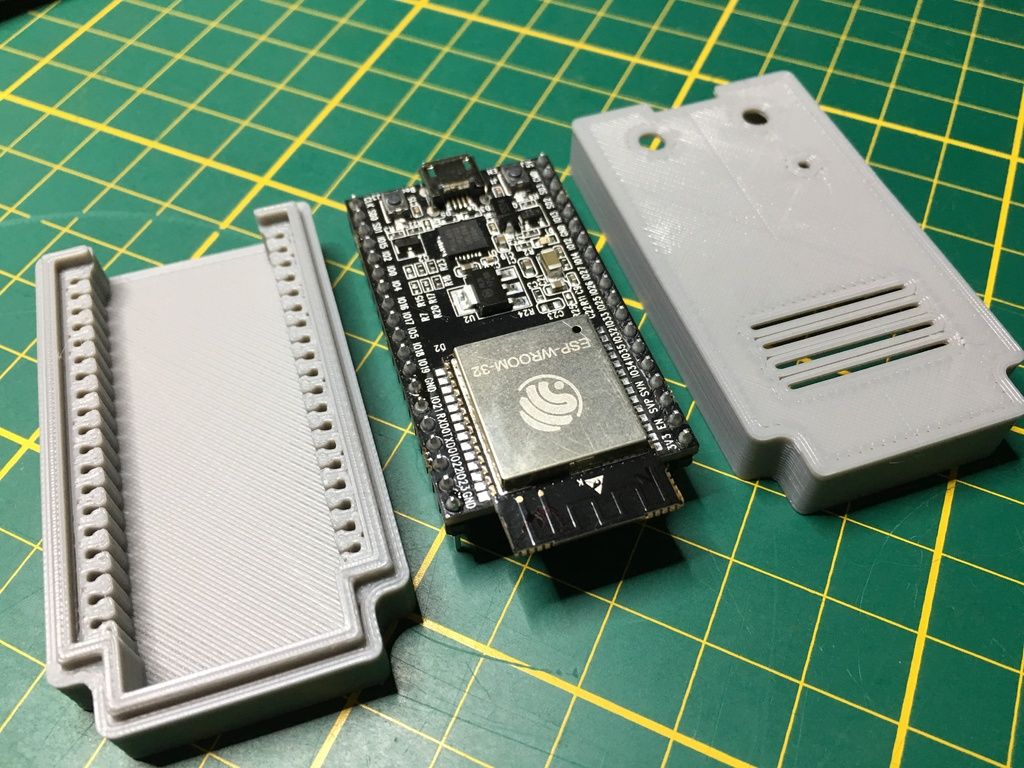
And, finally, I received an SD card ordered a week ago with a built-in WiFi module.
I learned the basic principles of setting up for using such a drive in relation to a 3-D printer from this video:
Using a Toshiba WiFi SD Card with your 3D Printer But as a result, I immediately ran into several problems and 'cons' ...
1. The card does not work in the 5GHz band (I had to enable the second 2.4GHz band in the router)
2 The 'dummy addressing' of the local network should be in the range 192.168.x.x (I had the range set to 169.254.x.x)
at least 65Mbps).
I spent a little time looking for additional config settings for this map, and went to the developers website, where everything is described in detail:
FlashAir Developers the printer is not needed, but interferes with the printer menu)
And this is how it can be seen on the map:
As a result, I created my configuration settings file (and the final part - connecting a remote disk, practically repeated what was in the video above).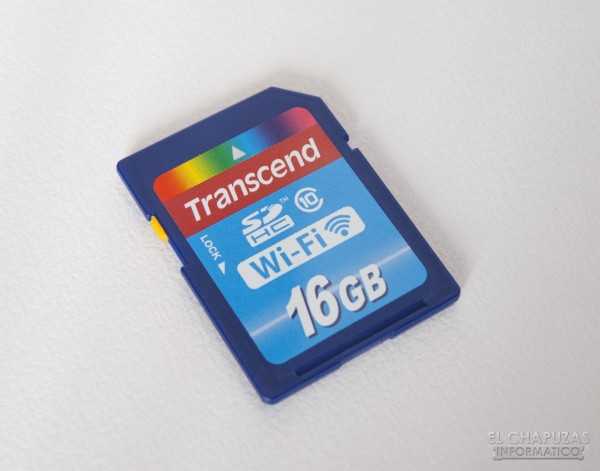
[Vendor]
Appmode = 6 (Automatic inclusion if there is a power in Internet Pass-Thru mode)
Upload = 1 = 9000 9000 APPANEM APPNETWORKKEY=*********
VERSION=FA9CAW3AW3.00.02
CID=02544d535731364740d4fdd679010c01
PRODUCT=FlashAir
VENDOR=TOSHIBA
APPSSID=HOME3D
TIMEZONE=12
LOCK = 1
STA_RETRY_CT = 3
DNSMODE = 1 (receipt of DNS from the router)
Brgssid = Sweet Home # 9000 9000 ** (router network password)
APPAUTOTIME=60000 (WiFi module turn on delay after power on)
DHCP_Enabled=YES (DHCP2 enabled) 0003
Noise_cancel = 2 ('Summary "(when there are many other devices)
Webdav = 2 (WEB-OPERATION OF THE BRUZER) 9000 9025
6
6 WLANAPMOODE = 0X826
6 fast mode WiFi 802. 11n/g)
P.S. Interestingly, now the card works in dual mode, being both an access point (a phone can connect to it) and a wireless network client, connecting to my router.
P.P.S. I'm not sure, but it's possible that APPNAME= and APPNETWORKKEY= are optional if you don't plan to access the card 'directly' from an external device.
Additional programs, I think, can also not be used (I only initially did a firmware update and tried Setup, and then everything was handled in the rules config).
Also important - after each change in the configuration file, the card must be pulled out and reinserted.
After everything described, I came across another thread on the Prusa 3D forum:
Flashair Toshiba Wifi SD Card?
Follow author
Follow
Don't want
80
More interesting articles
ski
Loading
10/14/2022
1050
5
Follow author
Follow
Don't want to
Video post about how taking the right idea and implementation, you can bring the whole concept to mind.