Bookmark 3d print
Bookmark best STL files for 3D printer・Cults
Cactus bookmark
Free
Cat marker
€0.76
Horse with horseshoe marker
€0.76
Bookmark Enjoy every moment
€0.76
Musical notes bookmark
€0.76
Bookmark Make it happen
€0.76
OM marker
€0.76
Halloween_Bookmark
€0.50
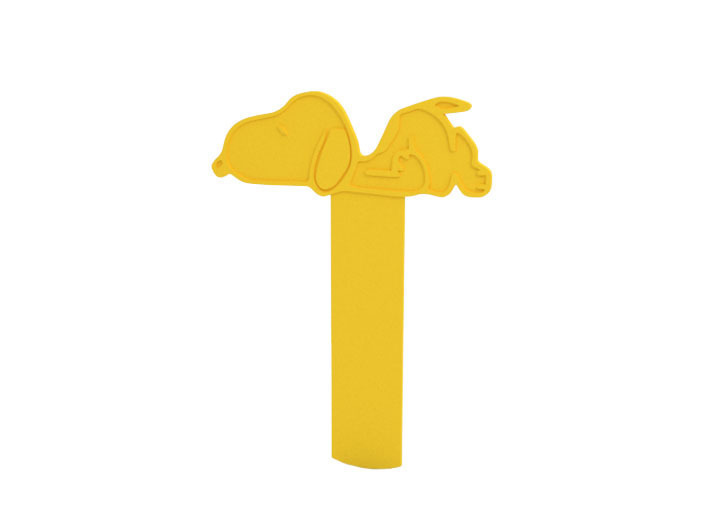
Bookmark
€0.70
Face art | Marker
€1.50
Xeno Jaw Bookmark
Free
Halloween evill pumpkins
€0. 50
Personalized Cars Bookmark
€1.20
Minios Bookmarks
€1.20
Rose Bookmark
€0.76
World Signaler Qatar
€0.76
book mark bookmark bookmark 3 units
€0.50
book mark bookmark bookmark 3 units
€0.50
book mark bookmark bookmark 3 units
€0.50
Bookmark for mom
€0.76
Various Bookmarks Bundle!
€1.14
Page marker
Free
Halloween kawaii pumpkins
€1
Sword
Free
Skeleton Hands Bookshelf / Door Halloween Decoration (NO SUPPORT)
€2. 50
50
Monster Claws Bookshelf/Cupboard decoration (no support)
€2.50
Monster Claws Bookmark (No Support)
€2.50
Bookmark wings
€0.52
World Signaler Qatar
€0.76
Brujita Bookmark
€0.76
Mexican skull bookmark
€0.76
Mummy Bookmark
€0.76
Mother's Day Bookmark 2
€0.76
Mother's Day Bookmark
€0.76
ROCKET BOOKMARK 🚀🚀🚀
€1.50
Batman Bookmark
€0.76
Sanderson Sisters Bookmark
€0. 50
50
Messi Bookmark
€0.76
Avengers Bookmark
€0.76
Bookmark Little Prince Fox Bookmark
€0.82
Lord of the Rings 2 bookmark
€0.76
Lord of the rings bookmark
€0.76
Eiffel Tower Bookmark
€0.76
Star Wars Rebel Bookmark
Free
Magic Bookmarks - FREE
Free
Magic Bookmarks
€2.77
PACMAN BOOKMARK
Free
Mate bookmark with thermos
€0.76
3d Printed Bookmark - Etsy.de
Etsy is no longer supporting older versions of your web browser in order to ensure that user data remains secure. Please update to the latest version.
Take full advantage of our site features by enabling JavaScript.
Find something memorable, join a community doing good.
(720 relevant results)
Construction 3D printing is waiting for a breakthrough The first construction projects using this technology appeared only in 2014.
 We are talking, first of all, about the so-called small architectural forms (benches, flower beds, fences). They never even dreamed about building houses. But already in 2015, the Russian startup Apis Cor made a splash - it printed a whole house in the Moscow region. Since then, news about new 3D printed houses has periodically appeared. However, despite the fact that the technology proved to be very promising in terms of the speed of construction of housing and the reduction in the cost of construction, no mass implementation followed.
 Construction is the world's number one market. And, if many technological innovations are being introduced in the field of high-rise construction, then little has changed in the field of low-rise construction over the past decades. The last 30 years have seen the availability of the Internet, mobile phones, mobile internet, robotics taken to a new level, etc., but when you get to a house construction site, you are unlikely to find many technological innovations. Automation is practically non-existent, and manual labor prevails. 2020 was a test of strength for the whole world, and also led to the highest level of inflation, which, first of all, hit the construction market, there was a dramatic change in prices for metals, cement, wood and much more.
This Internet meme shows what happened to the cost of building materials in just a year. And the process is still going on. At the same time, there is a serious rise in the cost of labor, and there is an acute shortage of it. All this leads to a sharp rise in the cost of building houses. No matter how strange it may sound, statistics show that the growth of automation does not occur when everything is fine, but precisely in crisis situations, during increased competition, reduced demand and the need to urgently look for new technologies to increase production efficiency. So it happened this time, and after some stagnation, construction 3D printing received a new impetus for development.
Preparing to write an article, I turned to the founder of Arkon - Boris Kozlov y. Arkon was established in 2020 and is engaged in the production of construction 3D printers, both a workshop type for creating prefabs (prefabricated houses) and a portal one capable of printing a two-story house. I asked Boris the key, in my opinion, question:
- Construction 3D printing appeared in 2014, but no mass introduction of this technology followed in 7-8 years. Why do you think this happened, and why is there a surge of new projects right now?
- It seems to me that the reason is the snowball effect. The technology had to mature, grow from a hypothesis to a pilot implementation, and finally to commercialization and scaling (what is happening now). In addition, it should be borne in mind that construction is one of the most conservative industries, where, unlike even aviation and the automotive industry, there is still an extremely low introduction of digital solutions and automation in the field of the production process itself - the construction itself.
The issue of regulation and certification also plays an important role - this process is long and creates an additional lag.
In 2014-2016 the first samples of building 3D printers and prototypes of printed buildings appeared. The concepts of various form factors of construction 3D printers and types of printing materials were tested.
In 2017-2018 in the world, the first notable investments were made in a number of construction 3D printing start-ups. Further, by 2020, these investments "rolled" in the form of reaching a certain level of technology maturity - the first commercial products (3D printers and houses) appeared.
Finally, in 2020-2022 it became clear that the hypotheses of the effectiveness of construction 3D printing were justified (cheaper, faster, more environmentally friendly), and large investments began in the industry. A striking example is the investment of GE (the French division of General Electric) in the Danish COBOD or the achievement of a capitalization of $ 2 billion by the American company ICON.
In 2022-2023 over 1,000 buildings will be printed worldwide already, scaling from single buildings/pilot projects to entire villages and major infrastructure/reinforced concrete implementations. In addition, in a number of countries, by now, a regulatory framework has been created or is being actively created for the introduction of additive technologies in the construction industry.
Thus, I believe that the specified time period is a fairly natural cycle of technology development, which is likely to experience exponential growth in the next decade.
According to ResearchAndMarket report, the global construction 3D printing market is valued at USD 354.3 million in 2022 and is projected to reach USD 11068.1 million by 2027, growing by 99.04%.
Various market processes affect the prices and behavior of participants in the global 3D construction printing market. They create price signals that are the result of changes in the demand and supply curves for a product or service.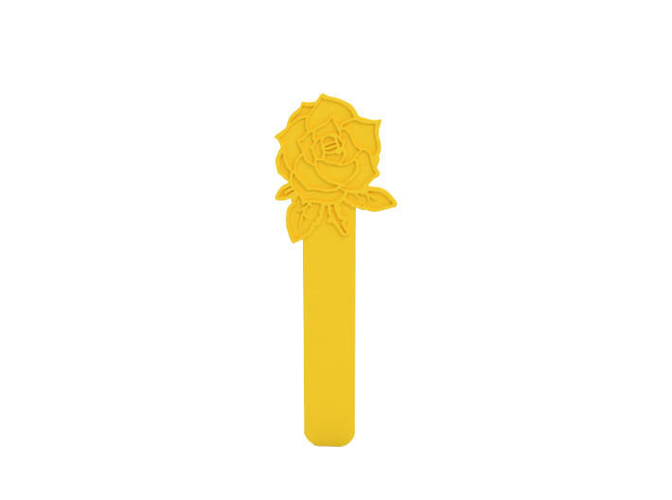 They can be associated with both macroeconomic and microeconomic factors. Even human emotions can also drive decisions, influence the market, and create price signals.
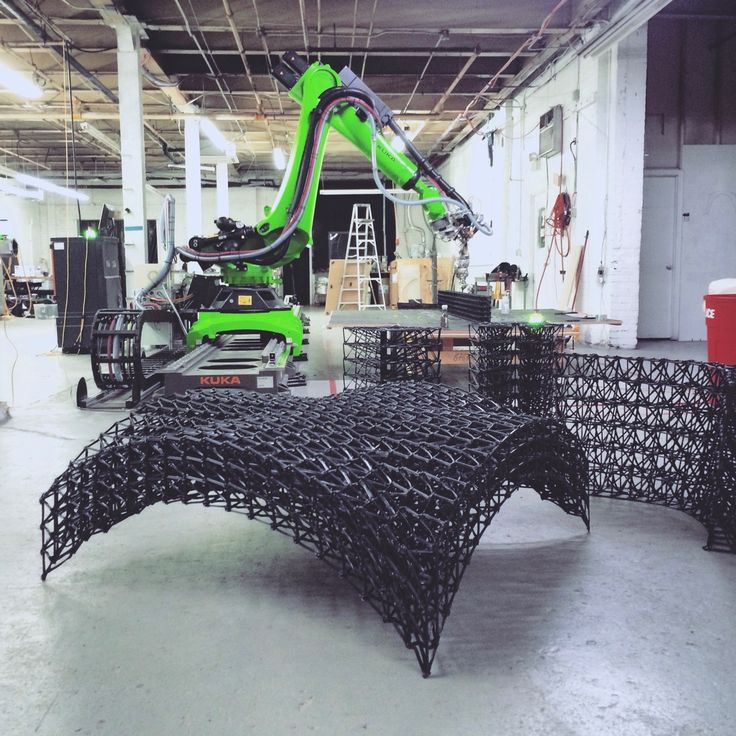
Now let's take a quick look at what the construction 3D printer is. Without delving too deeply into the technology, we can say that construction 3D printers are very similar to classic FDM/FFF printers that print with plastic, but instead of plastic, the material here is a cement mixture, which is fed directly into the nozzle and forms an object by layer-by-layer overlay. Printers are also portal, on the basis of a flying boom, with a robotic arm.
Pictured left is a construction printer based on a boom. The figure on the right is a gantry construction 3D printer
In the figure above, a construction 3D printer in the form of a robot arm installed on a mobile platform.
Everything changed completely when, in the summer of 2021, the American company ICON, which was trying to introduce 3D printing into the construction of various auxiliary facilities, signed a contract with one of the largest American developers, Lennar, to build a village of 100 houses in Texas and immediately became a unicorn , having received 200 million dollars of investments from several investment funds.
At the same time, the Danish company COBOD, created by the world's largest construction formwork company PERRI, began selling its gantry 3D construction printers and participating in construction projects around the world. In the photo below, a modern two-story house built in Germany and a school building in Malawi, built in record time with a minimal budget.
Few things unite developed, developing and poor countries, everywhere their problems and tasks, but Affordable housing shortage is a global agenda . If in poor countries there is an acute problem with the increase in the number of homeless people due to a lack of housing, as such, then in developing countries it is necessary to dramatically accelerate the number of new housing being built to meet the needs of a growing population. In developed countries, the problem is primarily in the cost of housing, which has risen in price to such an extent that it has become practically inaccessible to young people. And with the simultaneous increase in life expectancy in these countries, this problem is only getting worse.
At the same time, the trend towards "green agenda " is developing, reducing CO2 emissions, building with more environmentally friendly materials, etc. But, unfortunately, so far the construction industry is the absolute leader in CO2 emissions, as well as in the amount of garbage that each construction site leaves behind. This is not to say that construction 3D printing solves all these problems, but at least it is moving in the right direction. Let's look at this with a few illustrative examples.
3D printed walls. Today, when we talk about 3D printing houses, we are talking about printing walls. Everything else (foundation, windows, doors, ceilings and roof) is done in the traditional way. 3D printed walls are built as fixed formwork, which significantly saves the amount of cement used , and this, in turn, reduces the cost of construction and reduces the environmental impact of cement production. In addition, with this method of construction, no additional waste is produced, the strength of the structure does not suffer. It can be reinforced, as shown in the photo on the left, and engineering communications can be immediately laid, as shown in the photo on the right, which also affects the final speed of the construction of the object. At the same time, the total weight of the structure is reduced, the remaining cavities can be filled with lightweight foam concrete, insulation, straw or any other available material. Such a lightweight design can use a lighter foundation. The construction method itself is more economical in terms of material, and therefore environmentally friendly.
Eco-concrete with the addition of polymers is being actively developed, the production of which reduces CO2 emissions from 30% to 100%. The Apis Cor company mentioned at the beginning of the article, which built a house in the suburbs in 2015, is now based in hot Florida, plans to start using this material in its projects.
Another startup from Russia, Mighty Buildings, headquartered in California, initially relied on a polymer with the addition of mineral chips. And while the company doesn't build entire homes, it only makes wall panels, it has won numerous design awards, as well as a $400 million valuation in several investment rounds.
As a result, with a rough calculation, we can say that the total savings on the construction of walls can reach 30%, and the total cost of the house can be reduced by 10%. This is true for houses designed for conventional construction. And if you initially design with 3D printing, you can improve this ratio by optimizing the laying of communications, the ability to immediately print interior walls, bookmark niches for bathrooms, fireplaces, built-in wardrobes and kitchens, as was done in the house built by COBOD in Germany.
"There are spots on the sun." Despite all the advantages of construction 3D printing, has several significant disadvantages of . The main one is layering, which cannot be avoided at the current level of technology development.
The photo above shows the layering of the 3D printed walls.
This task can be worked in several directions:
-
Ribbed walls can be plastered, painted and played with as a design element. That's how ICON does it in the US, for example their latest project House Zero is done that way and has won a number of design awards.
-
Use special "shutters" on the print head that allow smooth layers, as COBOD and other manufacturers do. The photo below shows that this does not ensure the complete absence of layering.
-
Fully sand the surface to get the usual smooth wall for plastering, painting, wallpapering or other finishing. It is possible, but it will require huge labor costs, which can reduce the overall efficiency of using 3D printing.
Pictured above is a 3D printed wall sanded smooth.
The second problem is the required temperature. Ideally, printing should take place at temperatures between +5C° and +30C°. Humidity is also important. Using additives, you can push these boundaries, but not indefinitely. At strong sub-zero temperatures, printing will be possible in the field only if the construction site is covered with a dome and the required temperature is reached inside with the help of heat guns. In conditions of intense heat, it is preferable to print at night. Another solution could be to print the wall panels in the shop and assemble them on site. Of course, each of these decisions will have a negative impact on the economic efficiency of the project.
Building 3D printing can be useful not only for the construction of houses . With its help, you can solve many other problems, and there its disadvantages will not matter. For example, the American concern GE uses COBOD printers to build towers for wind turbines in the shop. Ribbed surface and temperature restrictions in this case do not play any role. Construction takes place in the shop, after which the object is transported to the installation site.
Construction 3D printing, or, as it is also called, additive construction, has just appeared, and I want to believe in its bright future. There are many prerequisites for this, but a lot still needs to be done for success. First of all, it is necessary to develop principles for designing houses for building 3D printing. Then it is necessary to attract top architects to create landmark projects, which can be followed by the mass introduction of a new and very promising technology. Construction 3D printing could help solve the global housing shortage and bring more automation to other areas of construction.
Alexander Kornveits
Expert in the field of additive technologies and 3D printing, head of Tsvetnoy Mir company
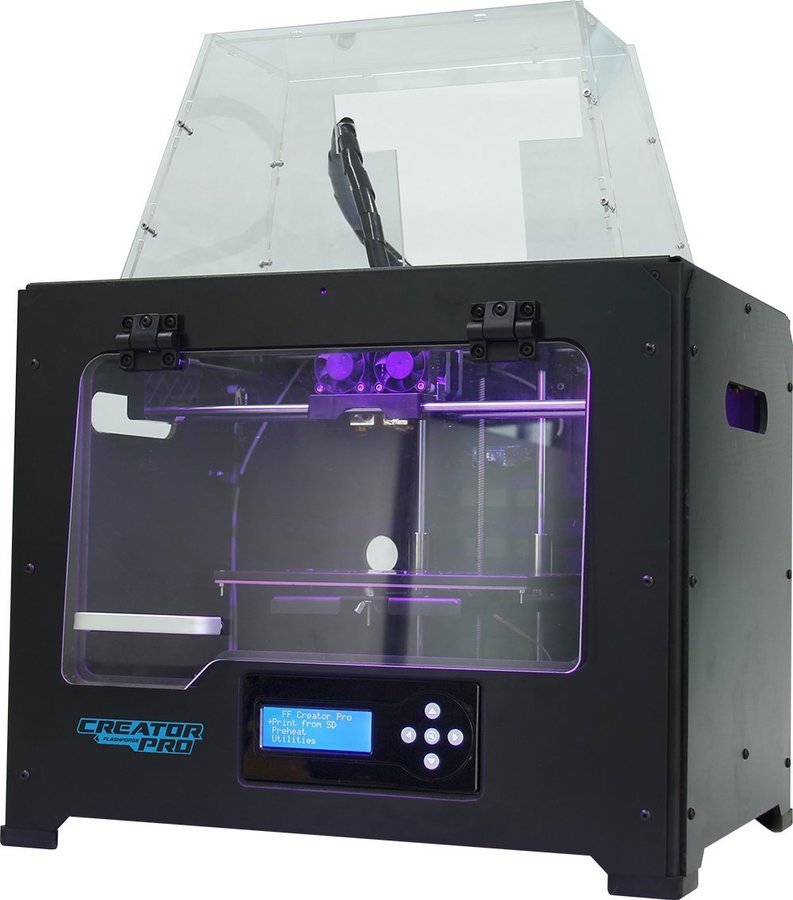
What is retract in 3D printing.
 Calibration and Adjustment
 Retract is the process of pulling the filament back into the nozzle of the 3D printer before moving the extruder between the printed surfaces. This reduces the pressure in the nozzle and prevents the extrusion of molten plastic at the moment of "idle" movement from one point to another.
You can enable retraction in the slicer. This parameter tells the extruder to draw the filament the specified length back into the nozzle at the specified speed. When the material is slowly drawn into the nozzle, the chance of seepage is greatly reduced. If you make ideal retract settings in a 3D printer, then you will never see any stripes, spots or smudges on the grown model. Favorit 3D service center engineers and specialists have accumulated vast experience in setting up and customizing various FDM 3D printers. If you have any questions or need help setting up print settings, please email [email protected] or call +7(473)295-93-49 and we will be happy to help you.
In the image you can see what the printed model looks like without retraction.
Why Retract is needed in 3D printing
This option in the 3D printer greatly helps with melted filament leakage and poor surface quality. To all of the above, we can add one more positive aspect of the retract. As the extruder moves from one surface to another, the retraction raises the nozzle slightly in the Z-axis (most often by 0.2 mm) and thereby reduces the risk of the nozzle tip hitting the already printed elements.
We have tried to make this manual as clear as possible and take as many photos as possible to make it clear how much the retract setting affects the 3D printing result.
The photo below shows the difference between printing without retraction (left photo) and printing with calibrated retraction (right).
How to turn on the retraction
In the last article, we dwelled on the Cura slicer in detail.
If you are using a different slicer, such as PrusaSlicer or Simplify3D, then the retraction setting will be slightly different, but the setting principle will remain the same.
We'll use Cura as an example. Open the slicer, go to the settings section and open the retraction options menu. If you have not yet enabled this mode, press the button "Enable retraction" .
Please note in advance that in this article we describe the instruction for retraction calibration for beginners, i.e. we will only check the correct temperature of the print and change the length of the filament retraction. Other parameters, such as speed, will not be considered here. We recommend starting with a speed of 50 mm / s no more. Any cheap extruders, as well as high-quality ones, can cope with this speed. This speed is the benchmark for filament retraction.
Be sure to check the print temperature, it must correspond to the temperature recommended by the manufacturer (as a rule, it can be found on the packaging with plastic).
Before calibrating, I recommend that you determine the optimum print temperature for your printer using the "Temperature Tower". The temperatures shown here are typical for most PLA manufacturers. If you use a different type of filament, then you need to change the operating temperature, for example, for PETG it will be 235°C, etc.
Before calibrating, you need to find out if you have a direct type extruder ("direct drive"), then it is recommended to start the retraction length from 0.2 mm .
If the printer is equipped with a Bowden extruder (filament fed through a PTFE tube), it is recommended to start with approximately 2 mm .
How to calibrate the retraction
1. Download and print the test model
Download the special calibration model from the link below. This is a fairly popular version, so keep it for yourself.
| |
| Download retract calibration model (Thingiverse. |
 com)
com)
When the download is complete, find the downloaded file (by default it is the "Downloads" folder)
Unpack (unzip) the file.
open the folder and find the file four_square_cons.stl . Run this file in your slicer (Cura in our case).
Now check your slicer to see if you have active retraction. Then click on "Cut" and slice the model.
Click "Save to file" and copy to SD card or flash drive. Then send the model to the 3D printer.
2. Evaluate the printed model
It is very important to first evaluate the current retraction settings on the printed model.
The photo below shows that the quality of the model turned out to be very deplorable.
The model is printed from PLA plastic, which usually has no problems with threading. The photo shows that in addition to the threads, thicker tails are observed, this indicates that the plastic outlet is not configured correctly.
A typical error is insufficient length of thread rollback or too low retraction speed. All these settings need to be adjusted.
Therefore, it is very important to print a test model and make a correct assessment for further adjustment of the retract settings.
3. Adjust the length with the current temperature.
The photos below compare several models printed with different retract lengths.
Only parameter "Bend length" was changed in the settings - from 2 to 6 mm. The rest of the parameters were not changed.
If the thread remains at any value of the withdrawal length, then it is necessary to adjust the printing temperature .
3.1 Branch length - 2 mm.
3.2 Lifting length - 3 mm
3.3. Dishasis length - 4 mm
3.
 4 Lifting length - 5 mm
 0206
3.6 Test evaluation of the model with initial temperature
As you can see in the images above, problem threads are still appearing. Changing only the retraction length did not help.
Therefore, other parameters must be changed, such as temperature or retract speed.
4. Test at lower temperature. Decrease by 10°C.
Because I print at a fairly high speed (160-200mm/s), the temperatures I use are much higher than standard printing at around 4-40mm/s.
In any case, if the test with retract adjustment at normal temperature is not successful, I recommend lowering the temperature by 5-10°C.
The photo below shows models printed with 2 and 3 mm retraction / at 205°C. As we can see the quality has improved a lot, but the threads are still visible.
4.
 1 Branch length - 2 mm.
4.2 Branch length - 3 mm.
4.3. Test print score
Compared to the first test, where the standard temperature is set, we see a significant improvement in print quality.
However, the thread is still present on the model, so we will reduce the temperature even more.
5. Test at a lower temperature. Lower it another 10°C.
If threading still persists, reduce temperature by 5 -10°C . Here I went from 205°C to 195°C.
We see that the resulting models have finally reached their level of quality (in terms of retraction).
Unfortunately on this 3D printer I can't avoid fine filaments due to the Volcano hot end, higher print speeds and long Bowden tube (Distance between nozzle and extruder about a meter).
5.1. Branch length - 2 mm.