Why use a skirt 3d printing
Rafts, Skirts, and Brims Tutorial
Raft
Skirt
Brim
This tutorial will help you understand the differences between rafts, skirts and brims. All three techniques provide a starting point for your 3D printed models, but they have different uses and advantages.
Rafts
A Raft is a horizontal latticework of filament that is located underneath your part. Your 3D printed part will be printed on top of this raft, instead of directly on the build platform surface. Rafts are primarily used with ABS to help with warping and bed adhesion, but they can also be used to help stabilize models with small footprints, or to create a strong foundation on which to build the upper layers of your part. The raft included in Simplify3D has been optimized over years of testing on hundreds of different machines to ensure easy separation and a high-quality surface finish on the bottom of your part. Once the print is complete, the raft effortlessly peels away from the print and can be discarded.
For our example today, we are going to add a raft to the popular “Dodecahedron” model. First, download and import the STL file from here. Then click “Edit Process Settings” in Simplify3D and place a checkmark beside the “Include Raft” option. The software also includes many settings that allow you to customize the raft for faster print times or improved adhesion. To adjust these setting, click on the “Show Advanced” option in the bottom left of this window and then go to the Additions tab. This tab contains the settings for the raft, as well as the skirt and brim which we will discuss shortly. An explanation of the important settings are given below:
- Raft Top Layers – The number of interface layers that are printed at the top of the raft. Your model will be printed on top of these layers, so you usually want at least 2-3 layers to ensure a smooth surface.
- Raft Base Layers – The number of extra-thick layers at the very bottom of the raft.
 These layers are printed slow and thick to ensure a strong bond to the build platform.
 - Raft Offset from Part – How wide the raft will extend beyond the edges of your part
- Separation Distance – This is an important setting that defines the height of the air gap between the raft and your part. Typically, having a gap of at least 0.1mm will help keep the part connected to the raft,
while still allowing for easy separation once the print is complete. - Above Raft Speed – Use this setting to customize the speed of the first layer of your part that is printed on top of the raft surface. Using a slow speed for this layer will also help the part stay attached to the raft during the print.
Adjust any of these settings and then click OK to save your changes. Click “Prepare to Print” to use the realistic pre-print simulation in Simplify3D to view an animated preview of the exact settings that you changed and how they will affect the print. Once you are happy with the changes, you can try running a test print on your 3D printer.
When the print is completed, remove the entire raft and model from the build platform. You can then grab the raft and begin to peel it away from the part, leaving a high-quality surface finish on the bottom of your print. Usually, this can be done by hand, but for extra delicate parts, you may want to use a thin spatula or tweezers to help with the removal. If you find you are having a difficult time removing the raft from the part, you can try increasing the raft separation distance or altering the other settings explained above.
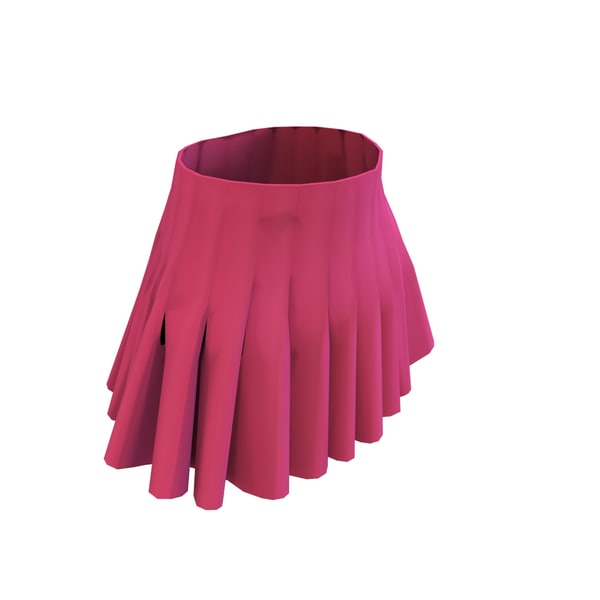
Skirts
A skirt is an outline that surrounds your part but does not touch the part. The skirt is extruded on the print bed before starting to print your model. Skirts serve a useful purpose because they help prime your extruder and establish a smooth flow of filament. Observing the skirt also allows you to detect and adjust any leveling or adhesion issues before the actual model begins printing.
You can customize your skirt by adjusting the settings on the Additions tab. This allows you to adjust the skirt position, the amount of plastic that is primed, and even the extruder that is used for the skirt.
- Skirt Extruder – Choose the extruder that will be used to print the skirt. This allows you to prime different extruders at the start of your print. If you want to prime all of your extruders, select the “All Extruders” option.
- Skirt Layers – How many layers you want to include a skirt. Typically, 1 layer is enough to prime the extruder, but adding a 2nd or 3rd layer may help create a more robust skirt that can be peeled away from the bed easier.
- Skirt Offset from Part – How far away the skirt should be from the edges of your part
- Skirt Outlines – How many loops you want to print around the outline of your model. Increase this value if you need to prime your extruder more by extruding extra filament.
Brims
A Brim is a special type of skirt that is actually attached to the edges of your model. Typically, the brim is printed with a increased number of outlines to create a large ring around your part, similar to the brim of a hat. Brims are often used to hold down the edges of your part, which can prevent warping and help with bed adhesion. The Brim may be a preferred option to the raft (which also helps with adhesion), as the brim can typically be printed much faster and uses far less filament. Once the print is complete, the thin brim can be separated from the solid model and discarded.
Because the Brim is a special type of skirt, it uses many of the same settings explained in the previous section. To setup a Brim in Simplify3D, set the skirt offset to 0mm so that the brim will be touching the edges of your model. Then increase the number of skirt outlines to 5 or more to create a wide ring around your part. You can raise the number of outlines even further if you need to increase the surface area of the brim for extra adhesion. Now when you start your print, the brim will serve as both priming and an adhesion assistant!
After the print is complete, the thin brim should easily peel away from the solid part. If you find that the brim is attached too firmly, you could increase the skirt offset slightly to 0.1 or 0.2mm to add a small gap between the brim and the part.
Now you know 3 new techniques to help improve the foundation of your 3D printed parts! Next time you are struggling with adhesion, priming, or small delicate parts, you will know the exact technique to use.
More Tips to Improve Your Prints
If you want even more tips on how to improve your 3D printed parts, be sure to check out our extensive Print Quality Guide. This guide covers dozens of common issues and provides tips and suggestions for each one, giving you the knowledge you need to succeed.
View the Complete Article Library
3D Printing Skirt: What is it? How & When to use it?
- Author
- Recent Posts
Martin
Martin has a M.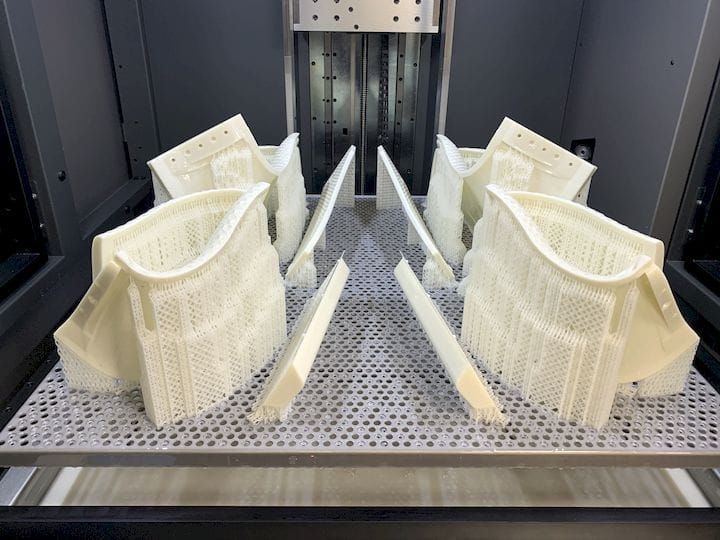 Sc. in physics and has gained many years of experience in industry as a lab manager and quality assurance manager. He has now tested dozens of 3D printers and is happy to share the collected experience with each new article.
Latest posts by Martin (see all)
- BQ-Hurakan vs. Ender-3 V2 Neo | Comparison, Pros & Cons - November 10, 2022
- Mouse Ears (Brim Ears) vs. Warping in 3D Printing – Guide - November 10, 2022
- Ender-5 S1 vs. Ender-5 Pro | Comparison, Specs, Pros & Cons - November 9, 2022
Disclosure: Links marked with * are Affiliate Links. I earn from qualifying purchases if you decide to make a purchase through these links – at no additional cost for you!
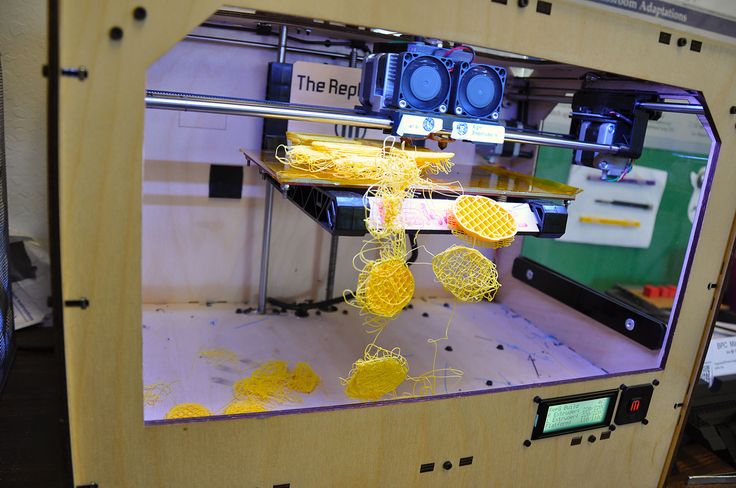
3D printing is still an adventure. The devices have become affordable, the software even intuitive to use, but 3D printing still poses many problems.
A lot can go wrong when printing. To avoid ruining the entire print piece because of an incorrectly set nozzle or poorly preheated filament, it is advisable to use a so-called Skirt.
The Skirt does not touch your actual printed part, but lies loosely around the outside and is printed before the part. If things go wrong with the Skirt, not much material is lost, you can adjust the settings and everything will be fine.
A 3D printing Skirt is a filament layer around the outside of your actual print object without touching it. With this auxiliary print, you can directly check certain print parameters (e.g. flow, filament quality, etc.) and intervene before you waste too much filament.
Table of Contents:
- 1 Skirt, Brim, Raft – Different Auxiliary Constructions
- 2 What Does a Skirt Look Like?
- 3 Skirt Slicer Settings
- 4 Skirts Detect Flow Problems
- 4.1 Problem 1: Simply no plastic comes out of the extruder
- 4.2 Problem 2: The nozzle hangs too close to the print bed
- 4.3 Problem 3: The extruder does not get filament
- 4.4 Problem 4: The extruder is blocked
- 4.5 A Skirt does not prevent these problems!
- 5 Skirt vs.
 Draft
Draft - 6 Related Questions
- 6.1 What can I do if the Skirt does not stick?
- 6.2 How do I Counteract Underextrusion?
- 7 Conclusion: Skirts are useful and quickly created
Skirt, Brim, Raft – Different Auxiliary Constructions
Skirt, Brim, Raft – these are the common auxiliary constructions in 3D printing. Unlike the brim and raft, however, the Skirt is not connected to the component and does not provide more adhesion to the printing plate.
Rather, the Skirt is intended to ensure that the filament actually flows on the build plate as you imagine it before the actual print. After all, the material doesn’t always come out of the extruder at the start of printing. The Skirt is therefore a kind of test print that uses little material.
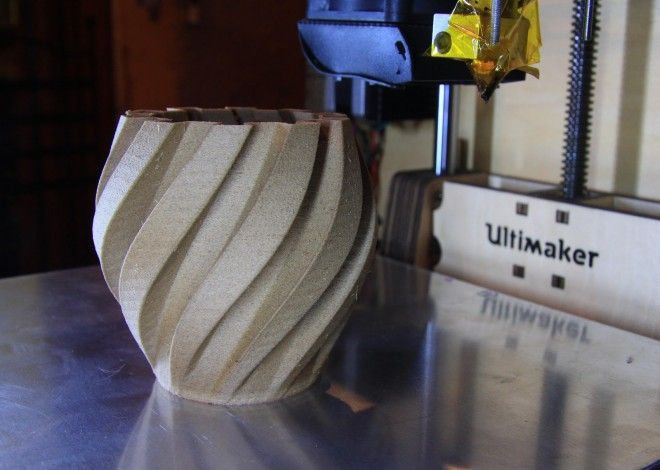
What Does a Skirt Look Like?
The Skirt is a thin layer of material that is placed in a wide circle around the actual print piece. There are no points of contact. If you are not quite sure whether your print piece really fits on the build plate, you can try it out by printing a Skirt. If the Skirt fits on the build plate, the internal component will also fit on it.
And the third point where the Skirt helps you is drafts. You are printing with a plastic that is only liquid at the right temperature. If the plastic cools down, it becomes hard. The individual print layers will no longer bond to each other if the plastic cools down too quickly. You may be able to preheat your print bed to prevent it from cooling down too quickly.
Skirt with several lines. (source: reddit)But not every 3D printer has an enclosed print bed that is protected from drafts. A gentle breeze blowing through the rooms may be enough to ruin a print piece. The Skirt lies around the outside of your print piece, it is printed first. This also keeps drafts away from the first layers and protects them somewhat from deformations such as warping.
Skirt Slicer Settings
Skirts and other auxiliary prints are available by default in the settings of many slicers.
The most important settings are the number of lines and the distance to the print object. In principle, you should make these settings depending on the size of your object. If your print object is very small, it is best to print several lines and for large models only one.
The idea behind this is that you use about the same amount of filament for the Skirt to detect certain problems before the actual printing. If you are only printing one line on a small object, this may not be enough.
Cura Skirt SettingsSkirts Detect Flow Problems
Of course, you always clean the nozzle thoroughly when you have finished your print. And you always adjust the nozzle properly. You heat up the extruder when it is idle and always follow the instructions. So why does it always happen that no filament lands on the build plate when you start printing?
Problem 1: Simply no plastic comes out of the extruder
The extruder normally heats up when idle, reaching high temperatures that cause the filament to melt. The filament, which is already in the nozzle, thus melts. It drips out, creating a cavity in the extruder. The technical term for this is oozing. The filament brought to high temperatures simply evaporates. You see this as a delayed extrusion. Only after a few seconds has the feeder transported new filament to the nozzle.
If you create a Skirt before the actual printing, delayed extrusion is not a problem. By the time your printer creates the actual part inside the Skirt, the air bubble has long since escaped from the extruder and the new filament has followed.
Problem 2: The nozzle hangs too close to the print bed
If you place the nozzle too close to the print bed, the filament cannot escape from the extruder. The filament is liquid, but it still needs some space. If the build plate blocks the hole from which the plastic is supposed to flow out, it simply won’t come out.
If the material does not really come out of the extruder until the third or fourth layer, this is exactly the problem. The first and second layers simply don’t have enough room to build up. Before you really know what’s going on, your printer has removed the bed down the z-axis and stopped printing.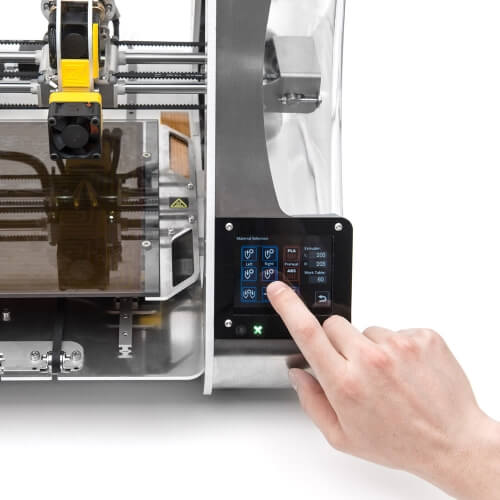
Before printing, check the distance between the nozzle and the print bed. If you print a Skirt before the actual part, you will notice the problem when creating the auxiliary print. Some 3D printers have automatic leveling via sensor technology on board to help you set the distance. Others come with a gauge card. However, you can also use a simple metal gauge if you want to control the distance.
Problem 3: The extruder does not get filament
The filament must somehow be transported into the extruder in the 3D printer. In most devices, this happens via a small gear wheel whose teeth grip the filament and move it along. However, the teeth of the gear also rub in the filament and generate abrasion.
Small chips are produced that get into the feed and possibly block it. Sometimes the abrasion is also so strong that too much plastic is removed from the filament and a milled-out groove is created on the filament. Then the gear no longer grips, and the filament can’t be moved to the nozzle.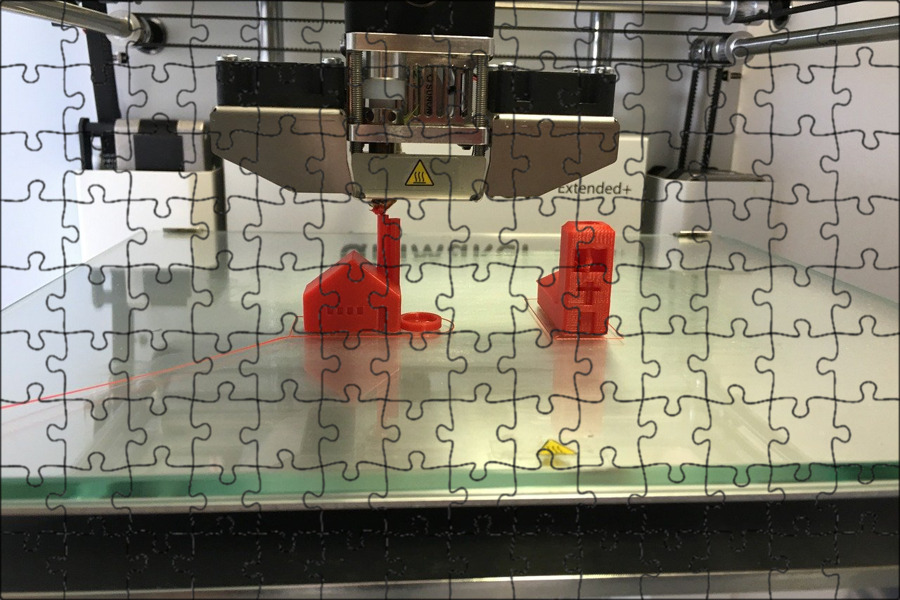 How do you deal with this problem?
Always check the diameter of new filament. Even if the manufacturers specify the diameter of the filaments, there can be deviations of about 0.1 millimeters to 1.5 millimeters in diameter due to production. And this is quite enough for the gear wheel in the extruder to just not grip anymore, but only produce an abrasion. The problem is particularly well known among inexpensive suppliers who produce in Asia.
Problem 4: The extruder is blocked
If you have checked the previous three points and found no problem, the extruder may also be clogged. If foreign objects get into the nozzle, this can happen. Sometimes hot plastic stays too long inside the extruder and gets stuck.
Or the material cools down in the extruder after printing and forms a plug. The only way to remove this clog is to disassemble the extruder. How exactly this works is slightly different for each 3D printer. Check with the printer manufacturer, look at the manuals that come with the printer.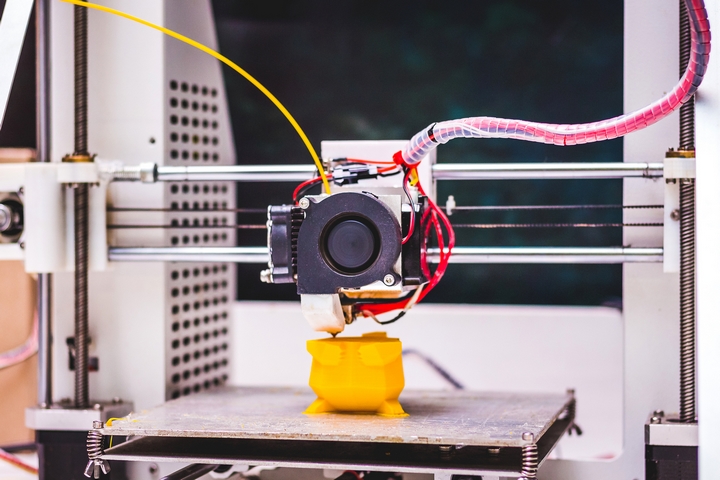 If you don’t find what you’re looking for, you can find information in the relevant forums on the Internet or watch information videos.
A Skirt does not prevent these problems!
Back to the topic at hand: Why would you create a Skirt as an auxiliary construction in 3D printing? A Skirt cannot solve the problems described above. However, it is very annoying when you start your print and find that the first layers do not print or print poorly.
You stand next to the printer, watch the nozzle work (or not), and only after a while notice that the print is not running as it should. Then you stop the printer and start troubleshooting. By then, the first six layers of your part may have already run through the printer and you have a lot of material sitting on the build plate that you’re just throwing in the trash can.
However, a Skirt can detect the problems described above!
If you put on a Skirt before printing, you prevent this. The thin layer of the Skirt does not need much material. If no material really lands on the plate because the nozzle is clogged, because of oozing or because the nozzle is too close to the print bed, not much is lost with the Skirt. The actual print will succeed, the Skirt may not – that’s fine. Think of the Skirt as the last test before the actual print, making sure the settings are right and the path is clear for the filament.
Skirt vs. Draft
Let’s move on to the second reason why a Skirt is sometimes useful. Your 3D printer works with plastics that are liquefied by heat. When the plastics cool down again, they are solid. Your part is created by the printer pushing a thin layer of liquid plastic out of the nozzle and depositing it on the build plate. Before this first layer cools down and becomes hard, the second layer must be placed on top.
Two liquid, warm layers combine. A cool, already hard layer never bonds with a liquid, hot layer. This is how your 3D printer builds the part layer by layer. Since the individual layers are very, very thin (even thinner depending on your settings), they cool down very, very quickly.
To prevent the print bed from cooling down too quickly, many 3D printers have it in an enclosed room protected from drafts (there are also enclosures or tents that you can buy to upgrade your 3D printer*).
And some printers offer the option of heating the print bed. This is also intended to prevent the individual layers of plastic from cooling down too quickly during printing. Incidentally, this is particularly dangerous for the success of your printed piece when it comes to the first layer: the first layer of plastic must adhere firmly to the building plate so that your component has exactly the shape you designed. If the plastic cools down, it contracts.
This quite normal shrinkage can amount to up to 2 percent of the volume. However, since the building board does not contract, the plastic may detach from the substrate and warp as it cools.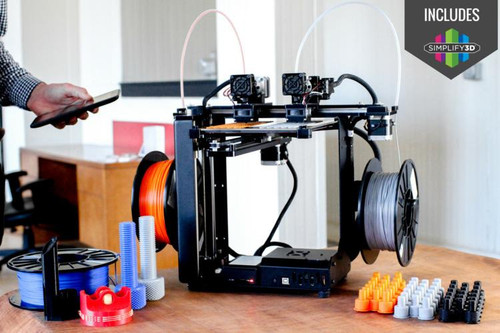
At which temperature the filament becomes hard again depends on the material. ABS* adheres very well at a temperature of around 100 degrees Celsius to 120 degrees Celsius, while 60 degrees Celsius to 70 degrees Celsius is sufficient for PLA*. If the first layers do not adhere to the printing plate, it may be useful to deactivate the cooling of your 3D printer.
However, this may not be enough. Check if there is a window open somewhere nearby, a fan blowing or the cooling from the laptop creating a draft. This is sometimes enough to let the plastic cool down too quickly.
If you construct a Skirt that lies around your component, no drafts will get to these sensitive lower layers. This is because the Skirt creates a wind shadow precisely for these first layers!
Related Questions
What can I do if the Skirt does not stick?
If the build plate is too cold or if there is a draft, you will logically also have problems constructing a clean Skirt on the build plate. The plastic will have no adhesion and will detach from the substrate and warp before you have built your auxiliary construction. Two tricks can help you:
- Try using an upright large book, a baking sheet, or a binder to keep the draft away from the print bed. This may be enough to make the plastic for the Skirt adhere.
- Scotch Blue Tape*, Kapton tape*, hairspray, special glue sticks* or similar can increase the adhesion of the material to the print bed so that you can construct your Skirt even in adverse conditions.
How do I Counteract Underextrusion?
Underextrusion is quite normal at the start of printing. This is because the filament flow must first get going before the plastic really flows evenly and as intended. Construct a Skirt around your print piece. In the Skirt, you don’t mind underextrusion and the associated suboptimal print image. The Skirt does not touch your print piece and therefore has no negative influence on the appearance of your print piece.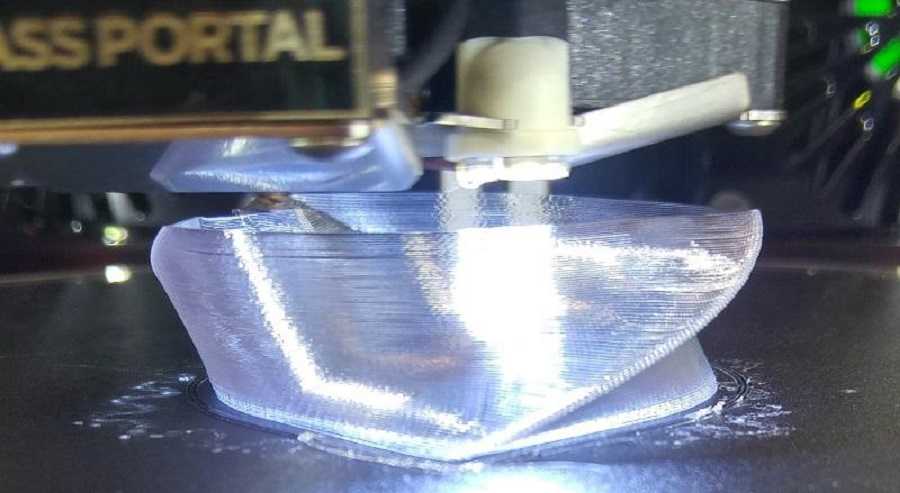 The few layers of filament are a negligible (because very small) loss of material. At the same time, you use the time during which your printer creates the Skirt to check or quickly correct a few points. For example:
- Leveling the print bed
- Nozzle distance to print bed
Conclusion: Skirts are useful and quickly created
As an auxiliary construction, a Skirt makes perfect sense. The fine frame, which does not touch your print piece, helps you to quickly detect and correct problems at the start of printing – and without material loss. Depending on the slicer you use, you may even be able to include Skirt creation in the default settings.
A Skirt consists of only a few layers of material, so the loss of material is really small. Because your printer creates the Skirt before the actual print piece, you can still correct faulty settings such as too little distance between the nozzle and the print bed.
Underextrusion is caught by the Skirt, your print piece is not affected. So consider the Skirt also as a cleaning measure – old filament is removed from the printhead and new filament can be added.
Disclosure: This website is the property of Martin Lütkemeyer and is operated by Martin Lütkemeyer. Martin Lütkemeyer is a member of the Amazon Services LLC and other Affiliate Programs. These are affiliate advertising programs designed to enable websites to earn advertising revenue through advertising and linking to Amazon.com and others. Links marked with * are affiliate links.
FAQ for beginners: Rafts, skirts and brims
Technical
Let's try to figure out between rafts, skirts and brim using Simplify3D as an example.
All three methods serve as a starting point for printing a model, but each has its own purpose and benefits.
Rafts
Raft (“raft”) - a horizontal filament mesh located under the model. Rafts are designed to increase the level of adhesion, and are used mainly with ABS and similar plastics that are prone to peeling and curling. In addition, rafts are used as a solid base for the first layers of the model and a raft is needed if the area of touch of the model to the table table is too small (regardless of plastic). Brim, as a rule, does not always help out in this case. If you're only concerned about lack of adhesion, you should move on to Brims, as Brims perform the same task but take much less time to print.
In this example, a raft has been added to the dodecahedron model. It's done like this:
- Import the STL file with the model
- Select "Add a Process"
- Double click on "Process" to open the FFF settings window Edit Process Settings" - "Edit Process Settings")
- Select "Show Advanced" ("Show Advanced")
- Select the "Additions" tab ")
The Raft Settings dialog box has four modifiable raft building options:
- Raft Layers allows you to change the height of the raft.
 In our example, three coats of were applied.
 - "Raft Offset" determines how far the raft will extend beyond the model print. In our case, the backing protrudes 3mm to each side.
- "Separation" defines the distance between the raft and the product. The distance will affect the ease of removal of the raft after printing, and can be adjusted according to the model and filament used. Usually this value is set within 0.14-0.2mm.
- "Raft Infill" controls its density. The percentage of infill should be high enough for the first layer of the model to come out flat, but not so high that it will then be impossible to tear it off. In our case, 80% filling was chosen.
Play around with these settings and save them with OK. Select "Prepare to Print!" ("Prepare to Print!") to go to the preview ("Preview"). If everything looks satisfactory, you can print using an SD card or USB cable.
When finished printing, simply remove the raft from the product. This can usually be done by hand, but in extreme cases a scraper or thin spatula may be needed. At the same time, evaluate the result of the separation settings and the need to change them in the next project.
Skirts The skirt is just an outline that does not touch the model. Skirts are printed in order to prepare the extruder and achieve smooth extrusion of the filament before printing the product itself. Observing the process of printing a skirt allows you to detect errors in the settings or calibration of the platform in advance. Usually the skirt is printed around the model with a margin of a few millimeters. The number of layers usually does not exceed one, and there may be one or two test circuits. Note: If you have selected the "Supports" option, then the skirt can be moved outside the footprint of the supports.
Skirts may have other uses. When printing ABS, a high skirt can be built - up to the height of the model itself, if desired - to protect the product from drafts that cause rapid shrinkage, buckling and delamination. The high skirt can also be used on printers with two extruders as a "nozzle catcher" to remove plastic residue when changing heads.
Brims
Unlike skirts, brims touch the product, that is, the Separation parameter is set to zero. Brims usually consist of several contours and may consist of 1-2 layers. Brims are often used to stabilize small models or "islands" (i.e. separated areas such as table legs), as the brim helps such parts with small prints stay on the platform.
- Import the STL file and add a process ("Process").
- Double click to open the FFF Settings window.
- Select "Show Advanced", then select the "Additions" tab and check the box next to "Include Skirt/Brim".
After printing, simply remove the brim with a scraper or tear it off with your fingers
criticisms and additions are welcome...
Follow author
Subscribe
Don't want
41
More interesting articles
Dmaw
Loading
25. 10.2022
2455
12
Subscribe to the author
Subscribe
Don't want
This problem has been known for a long time, but I didn't know about it. I'll tell you my story, how I helped a friend burn...
Read more
2
Subscribe to the author
Subscribe
Don't want
All inclusive (LA, Beziers, Dougie). Temperature limits have been raised to 290/130, and this is the main reason why...
Read more
xedos
Loading
04/25/2016
334560
207
Subscribe to the author
Subscribe
Don't want
Good afternoon Dear readers!
GCODE: Buns from PavlushkaAfter writing the previous. ..
..
Read more
What is support in 3D printing
Many users who are new to digital manufacturing or, more simply, 3D printing do not understand some of the terminology, which causes them many questions. One such question is: “What is support and why is it needed?” But supports, along with other service elements, are used in the manufacture of most parts on a 3D printer.
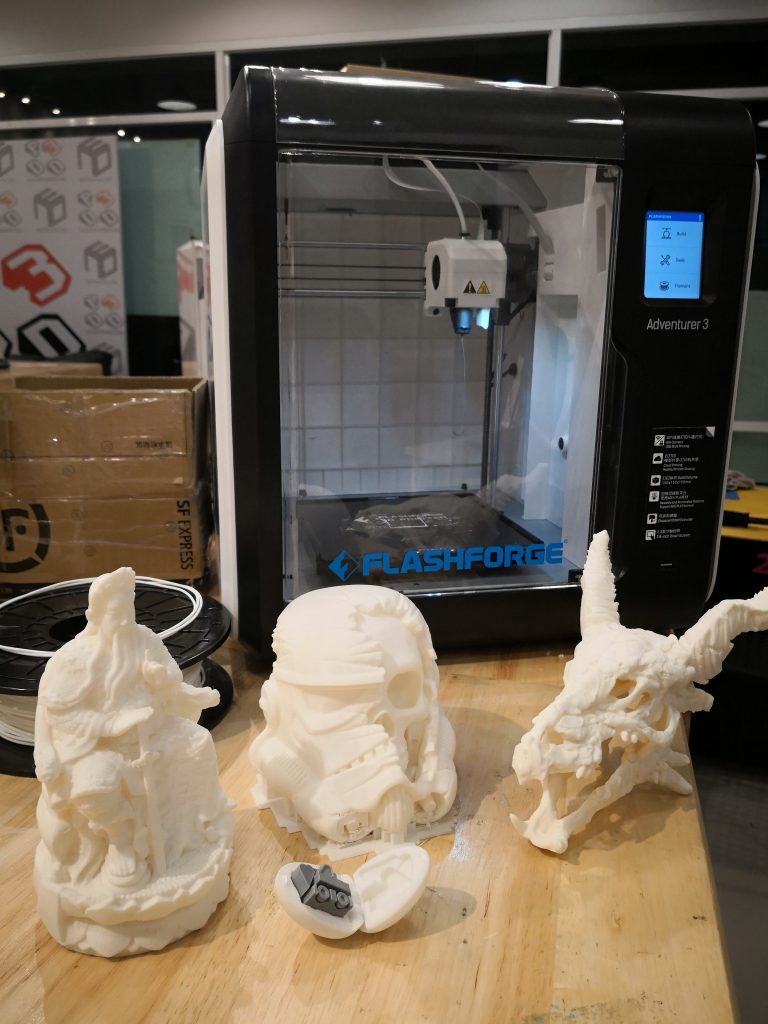
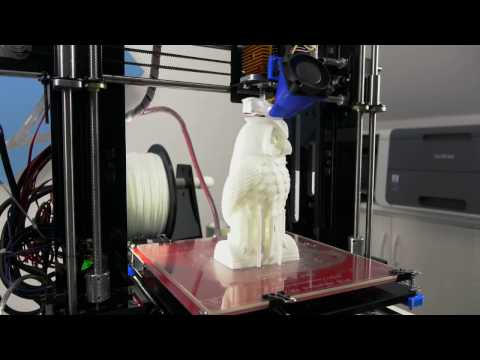
Using the most popular FDM 3D printing technology as an example, let's consider the main service elements. And so, when a 3D model is placed in the working chamber of the printer, several service elements are created around it: a border (can be replaced with a skirt, a substrate, or completely disabled), supports, and a casing. The photo below shows the model in the process of printing with service elements and the finished product, cleared of service elements.
The rim is a thin layer of plastic that is created around the product on the hot plate. The border increases the area of attachment of the model to the table and does not allow it to come off under the action of shrinkage forces of the material and movements of the print head (extruder). Border printed 90% items. It may not be used on products with low heights and simple geometries that are guaranteed to be held firmly on the heating bed. In other cases, without a border in any way.
Supports are frame elements that are built under the overhanging parts of the product and serve to support them. Supports can be made from the same plastic as the main product or from another material such as soluble HIPS or PVA. More often, supports are built from the material of the product, as this speeds up and reduces the cost of the printing process. Supports made of HIPS or PVA tend to cost more than the product they are designed for. Printing a product that should be supported without supports will result in poor surface quality or even tear the product off the desktop. After all, printers with FDM printing technology cannot print in air, the plastic simply flows down from the extruder nozzle and is smeared over the product. An exception to the rule may be the printing of the so-called "bridges", which are built in the air, but these are specific elements, the printing of which requires fine tuning of the equipment and is not used in all models.
Shroud is a protective plastic barrier that is built around the product on the 3D printer's heating bed. The casing protects the product from contact with cold air (less than +80 С°) in order to avoid abrupt cooling of the model and its warping due to a sharp shrinkage of the material. A casing is used on high models to improve the surface quality of the product, reduce the likelihood of the model breaking off the table and maintaining the geometric dimensions of parts subject to strong shrinkage.
After the end of the printing process, all service elements are mechanically removed from the product. This is done with a scalpel, drill (Dremel) or sandpaper. In most cases, the removal of the supports is included in the price of the product, but on some models, the removal of the supports is too long and painstaking, so an additional fee may be charged for the work.
There are other service elements created in the process of placing the model in the printer chamber, for example, towers for cleaning the extruder nozzle during two-color printing, and other elements.