Insight 3d printer software
Stratasys Slicer Updates for FDM: GrabCAD Print & Insight
In a recent Insight course, I had my students open, slice, and run toolpaths on an STL file that I hand-picked specifically because I knew the automated toolpaths would need to be manually optimized. As I worked along with them, I couldn't help but notice that their toolpaths, unlike mine, needed virtually no adjustments. As it turns out, I wasn't using the latest version of Insight. It threw my class for a loop, but the net impact is positive; it means less manual work!
Both Insight and Stratasys' GrabCAD Print 3D printing software recently benefited from an upgrade. Let's take a look at some highlights that made these last few updates so good.
Teaser alert: The moral of this blog is to update your software.
But If it Ain't Broke, Don't Fix It...Right?
I often run into customers who use legacy Stratasys 3D Printers and their original software Catalyst. While I understand the growing pains of changing a workflow you are comfortable with, I urge you to give GrabCAD Print a try. It is entirely free and you're not required to ditch Catalyst. You can download GrabCAD Print here.
Never Export STL's Again!
One of the key reasons to switch to GrabCAD Print is its ability to work with widely used native files, not just STL's. STL files have been a staple in additive manufacturing, but they can be error-ridden and often introduce a loss of design intent in the export process. If the mesh resolution is too coarse, you'll see faceting in your print, if too small, you'll have a large file that takes too long to process.
Using native files means these struggles go by the wayside and there is a reduction in file exports and less time spent organizing multiple file types for the same part. There's another benefit too. Because the files are not made up of thousands of tiny facets, you can select faces, bodies, and features to apply changes to. This gives you more control over build parameters without needing to apply them to an entire build/body.
Update Summary
Stratasys has had a stream of software updates including the addition of Adaptive Slice Height. This feature has been around for a little while and Stratasys has chosen to adopt it for both Insight and GrabCAD Print.
An honorable mention goes to GrabCAD Print for integrating its "Advanced FDM" features into its main user interface, no longer requiring you to enter a separate workspace. Now all standard and advanced features are available in one spot.
Adaptive Slicing
Have you ever needed to 3D print a part quickly, but a portion of that part required a fine resolution to minimize post-processing or to capture the full design intent? Enter Adaptive Slice. Below, is an example of a part that will benefit from Adaptive Slice.
My goal was to achieve a good surface finish and save some time. I processed it with “constant” and “adaptive” slicing in GrabCAD Print, but the same applies within Insight.
Figure 1
Figure 2
Figure 3
Figure 4
Rather than print the full part in a fine resolution, Adaptive Slicing creates a balance between print speed and aesthetic quality by using coarse slices everywhere fine resolution isn’t necessary. Figures 3 and 4 show a time savings of almost 2.5 hours on this part. The red and black arrows indicate where each slice height is employed.
This comes at no detriment to overall part strength, decreases time to print, and it’s available in both Insight and GrabCAD Print. Watch the video below for an explanation.
Stratasys Strategy
Stratasys has chosen an automated approach to Adaptive Slicing by minimizing the amount of time spent pre-processing parts. This negates having to manually assign each resolution to the desired zone. Simply select “Adaptive” from a drop-down menu, slice the part, and Insight or GrabCAD Print takes care of the rest by recognizing steep and shallow slopes within your part and assigning appropriate slice heights to those respective regions.
Does Your Machine Benefit From the Update?
According to GrabCAD Print, Adaptive slice is available for 0.0070in (0.1778mm) slice height and 0.0100in (0.2540mm) slice height. It works with all FDM materials and for the following printers:
- Stratasys F270
- Stratasys F370
- Fortus 450mc
- F770
- Stratasys F900
Here’s where things get interesting. If you look at the list of 3D printers above, you’ll see some unexpected systems on the list like the Fortus series and F900. Why should that pique your interest? Previously, the only way to change slice heights with a Stratasys production-style machine was to manually change the extrusion nozzle (aka the build tip).
Now, Stratasys production style machines are benefitting, with what I can only assume, are modified feed/speed recipes. One could assume these have been adopted from the successful F123 Series, which prints up to four slice heights with no hardware change. While the tips for the production machines are limited to just two slice height variations, two are still much better than one.
The Trickle-Down Effect In Insight The extensive work done behind the scenes to improve road height and width capability, per tip, has been repurposed to make other features better too. For folks who have used Insight in the past, you’re likely familiar with Variable Width Remnant Fill. It’s an on-or-off type feature within the toolpath setup in Insight that is off by default. Turning it on allows your road/bead width to have a variable width in tight spaces where a fixed-width would leave you with voids/dead spaces with no filling (see fig. 5).
Figure 5
These areas are notoriously difficult for roads with a fixed width to reach. While Variable Width Remnant Fill helps, users can get a mixed bag of results. Now, even in normal toolpathing, there seems to be limited use of variable width roads. While using unmodified toolpaths in the latest update, I have found myself pleasantly surprised. More of my toolpaths have looked “watertight” on the first try, needing no additional modification. (For clarity, FDM prints are inherently NOT watertight, but that’s the terminology we like to use when we get nice dense toolpaths) What this means less work for you because the automation is getting better.
Although there are now traces of Variable Width Remnant fill in standard toolpath generation, one may still see significant differences by toggling the feature on or off. I haven’t had enough experience to really understand how the strategies differ yet, but I do know I get varying results toggling between the two. So, continue to experiment with it when having difficulty getting toolpaths to reach tight/odd-shaped spaces.
If you have any questions about these new features or would like to learn more about how we can help you with additive manufacturing, please contact us.
Learn More about Stratasys 3D Printers
The Big Reveal! Stratasys Reveals 3 NEW 3D Printers
Stratasys Industrial 3D Printer Maintenance Tips: Fortus Edition
5 F123 Series Maintenance Tips for New Users
A Tip for Changing Tips: Fortus 3D Printer Edition
Fortus Tip and Build Sheet Combinations: 3D Printing Tutorials
3D Printing with the F123 Series: Hardware, Software, & Materials
Using Insight software stabilization features to produce large-scale parts
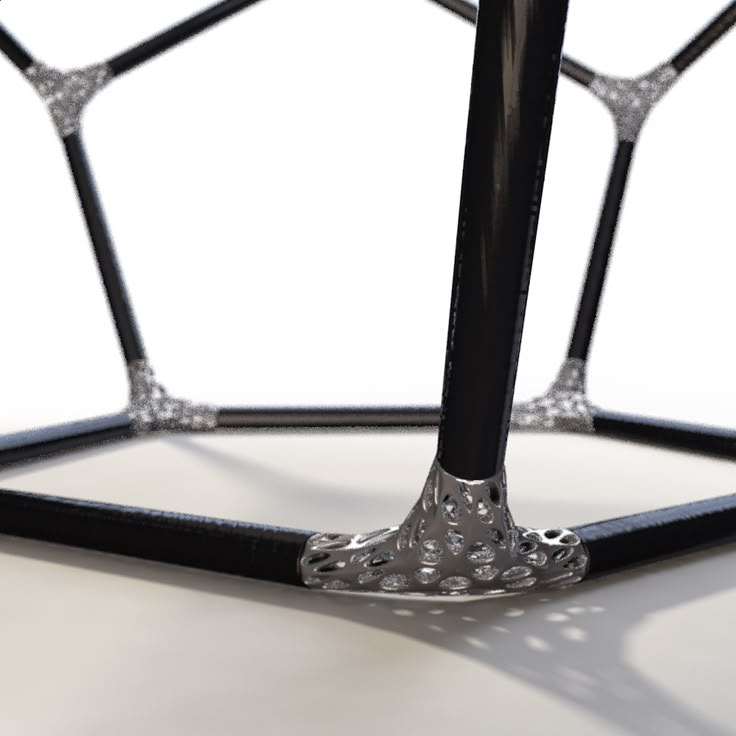
At Javelin we are constantly searching for areas where additive manufacturing can supplement or replace current manufacturing solutions for our clients. One of the leading areas in which additive offers an edge over traditional manufacturing is in low volume production of large-scaled parts, this can include Tier 1 automotive panels, large scale aerospace applications and heavy machinery replacement moldings.
Additive manufacturing is a perfect fit for these parts as the traditional manufacturing methods are usually costly and lengthy when large complex surfaces and features are involved. Utilizing additive manufacturing we are able to provide cost and time saving solutions for large parts in question. However, using additive manufacturing has its challenges, primarily due to the nature of plastics.
Warping and curling of plastics are issues that affect not only the additive manufacturing world, but plastic production on an industry wide scale. Warping plastics occur from a combination of two stimuli: thin/tall/unsupported geometry coupled with differential cooling/heating of the plastic part. As parts are being printed, heat can accumulate in areas with substantial mass vs areas that are thin walled and are able to cool more quickly, leading to differential cooling and warping. In the example part that we will be evaluating today, we can see that the majority of the part is thin walled except for the bulky geometry on the base corner pocket, which can allow for uneven heat accumulation and differential heating cooling.
Fig. 1 Differing Geometry
Stabilization walls are a feature of Insight software that can greatly assist with the production stability of large parts. This feature allows for a vertical supporting structure to be built alongside the printed part for added stability during the printing process. Let’s take a quick look at how we can set these features to print large parts successfully.
Insight software feature: Stabilizing Walls
Once we have identified our preferred printing orientation, we can apply this feature to any areas that may be too tall to print without warping. In our part, we can see a combination of this walls that may warp as well as a large asymmetrical mass that can cause uneven heating on one side of the part. Navigating to Support -> Stabilize wall, we can see the parameters of this stabilization wall that we can adjust.
Fig 2 Insight Stabilize Wall Settings
We can choose the width, height, thickness and the frequency at which the wall comes in contact with the part on a layer by layer basis. The general settings we use for successful stabilization walls can be seen in the screenshot above. Settings like Contact Interval (distance between adjacent supporting walls) and Penetration (depth of fusion between wall and printed part) can be adjusted as required based on the size of the section being stabilized. Once the parameters are selected, we can now select the intended start and end points of the stabilization wall, and generate a scaffolding supporting structure as such to support our part. As we can see below, we’ve generated stabilization walls on all of the thin walls of this part to offer extra stability.
Fig 3. Applied Stabilization Walls
Insight software feature: Anchor Columns
Flat planar parts are also at risk for warping while printing. Often, we see parts that are not properly stabilized start warping or curling as they are being printed. This is due to the thin nature of the part as well as the large opportunity for differential cooling along its surface area. Anchor columns are a great feature to stop part lift or part curling. Anchor columns ensure a secure connection between build platen and the printed part by using model material to create anchored material connections between the build tray and the printed parts. This allows for a more rigid connection when compared to the bed of support material that is used as default. These anchors can be clipped and sanded off from the bottom surface post print.
Navigating to Support-> Anchor columns, we can select the diameter of the intended column and start placing these anchors along the bottom layer of the part.
Once we are finished, we can reprocess the support and toolpaths and observe where the anchors are utilized. We utilize even spacing of anchor pins in order warping of the bottom surface does not occur. We can see that the anchor pins have created additional geometry that is printed in model material that is now projecting through the support base and providing a rigid connection directly from the part to the platen.
Fig 5. Anchor column placement
Fig 6 -Anchor column toolpath
Controlling Airflow & Vibration
Our final tip for successfully printing large parts comes from the understanding of what causes part warping: uneven heating and part vibration. Machine vibration is an inherent part of the rapid FDM printing formula. If parts with thin sections/walls are being printed, the infill pattern as shown in Fig 7 can cause short, rapid cyclic movement of the gantry leading the machine and the parts inside it to vibrate during printing. In some cases of thin walls, we can eliminate the need for back and forth printing movement by utilizing the “Variable width remnant fill” option on insight. This can be found under Toolpaths -> Setup menu in the advanced settings. This option allows for one uniform toolpath to fill thin sections as opposed to a uniform width utilizing back and forth motion to for infill, minimizing opportunity for vibration of the machine and printed parts.
Fig 7 – Toolpath rapid change
To keep vibration to a minimum, it is recommended that you check the rubber stopping legs at the base of the machine and ensure that it is extended to snugly meet the ground and dampen as much vibration as possible. This stops the machine from shaking and keeps the printed part as stable as possible during production.
To ensure even heating of the build chamber as much as possible we can be mindful of how we orient parts on the platen for printing, keeping in mind the direction of airflow from the heated fans.
With Stratasys FDM printers, airflow comes from both left and right walls and circulates downwards through the print chamber. If these air paths are obstructed by the printed part, the oven will not be heated evenly, therefore parts will not be heated evenly and will be at risk for warping. When printing large parts, ensure that they do not interfere with this airflow by orienting large features to align with airflow rather than obstruct the airflow. The above figure show that orienting so the walls are not perpendicular to airflow, will allow more uniform heat transfer during the printing process.
Additive Professional Services Team
We provide Designers and Manufacturers with a variety of custom-tailored 3D printing services, including high-performance prototypes, tooling and manufacturing aids, end-use parts, and low-volume production runs.
Feel free to reach out to our Print Services Engineering Team to find out how your parts can benefit from increased printing stability with these tips!
Learn More
Where else in the world can 3D printing come in handy? While the technology is still most actively used for prototypes, however, in the near future, 3D printing promises to radically change the situation in a variety of consumer markets.
 Analysts at CB Insights have identified 35 of them - we are talking about the most unexpected and interesting of them.
Print dinner
There is a growing demand for personalized diets around the world, which means CB Insights believes this is where the power of 3D printing could come in handy. Here we are sure that this technology will be able to provide people with personalized meals on demand.
Initially, 3D printing in the food industry was limited to the production of sweets, but now some commercial manufacturers are using the technology more widely, and some even debuted prototypes of home 3D food printers. For example, Beehex is developing a pizza printer solution and is already serving large food service businesses. Yissum uses natural, calorie-free fiber for printing. And Natural Machines' Foodini allows you to print a variety of products using natural ingredients, as long as they can be puréed. Foodini is currently available for commercial establishments and restaurants, but it promises to take a place in the kitchens of ordinary consumers in the future.
Photo: Beehex
Custom-made teeth-legs
Many doctors are optimistic about the possibilities of 3D printing for the production of prostheses and braces, first of all, they believe, thanks to it they will become noticeably cheaper. Now the cost of prosthetics is usually between $5,000 and $50,000, and the creation process can take several months (3D printing reduces production time to one day). Naturally, the technology will make prostheses more comfortable, and this task remains almost the main one in modern prosthetics. Also, 3D printing can help provide prosthetics for everyone in need, including in developing countries. Enabling the Future, for example, uses 3D printing to create a $50 e-NABLE mechanical arm.
Photo: e-NABLE
And the liver too
It won't be long before doctors will be able to create artificial vessels and even whole human organs using 3D printers. The demand for such solutions in a field such as transplantology will be extremely high. Also, biomaterials printed on the printer will allow changing the way of testing the safety of medicines, eliminating animal experiments. For example, L’Oreal is already experimenting with 3D-printed skin for testing cosmetic products.
Scientists are also working on the problem of compatibility of printed biotissues with the human body. If the problem is solved, the technology could save lives for patients with kidney failure, arthritis and infertility. At least researchers at Northwestern University (USA) managed to implant 3D-printed mouse ovaries, which were then able to produce offspring.
Photo: Philippe Gotteland | L’Oréal/EpiSkin
Disposable gun
3D printing promises to change the firearms market - with the help of 3D printers, almost anyone can acquire the latter. For example, the American startup Defense Distributed, which produces digital drawings for 3D printing of weapons, has already gained fame. Among other things, concern about the technology was caused by the possibility of printing plastic pistols, which may go unnoticed by metal detectors. However, CB Insights believes that it will not be possible to fully control the 3D printing of weapons, just like the problem of counterfeit money cannot be solved. And the situation will only get worse as the technology becomes more accessible.
Photo: Defense Distributed
Dress in size
On the fashion market, seasonality has finally changed the fast fashion format, often involving a change of collections almost every two weeks. This means that the potential of 3D printing will also be in demand in this niche. For example, the technology will speed up the process of manufacturing clothes, and will also enable customers to personally participate in the creation of a customized product.
So far, 3D printing is best suited for working with hard materials, so it's not surprising that the technology has found its way into the jewelry market. For example, Lockheed Martin applied for a patent in 2016 for a 3D printer to create synthetic diamonds. The technology has a future in footwear too: at least Adidas, Reebok and New Balance are already implementing similar projects. Many fashion houses are also turning their attention to 3D printing, increasingly using 3D scanning and 3D printing in their production cycles to create their own products.
However, according to CB Insights, there are a number of limitations for more active use of technology in the fashion market, especially when working with soft materials and non-geometric shapes.
Photo: New Balance
3 D-funerals
3D printing technology will also find applications in the funeral industry, according to CB Insights. First of all, they will make funeral paraphernalia more accessible. According to the company's experts, for many people the choice and purchase of a coffin or funeral urn for a deceased relative today is a difficult and expensive process. 3D printing could make it less expensive, more personalized, and potentially more sustainable.
However, there are other niches where 3D printing could be used – for example, for those who die in an accident, the technology can reduce the use of wax and makeup in preparation for a funeral, or allow the creation of special prostheses to replace limbs lost in an accident. This can make the procedure for saying goodbye to the dead more peaceful.
Battle for the harvest
CB Insights believes that 3D printing will open up new opportunities for participants in the agricultural market. First of all, it will be in demand in the creation of agricultural equipment, for example, for the quick and cheap creation of various parts. Thus, the technology will be in demand by farmers in remote areas, where the repair of equipment and the supply of new parts is often extremely difficult, especially when it comes to small farms. For example, already now, some farmers in Myanmar, an area with poor infrastructure and limited access to quality agricultural equipment, are using 3D printing to create new tools.
In addition, if farmers were able to create their own parts for machinery, they would no longer depend on large engineering companies, clarifies CB Insights. It will also provide an opportunity to experiment with different materials, including the use of recycled plastic, reducing the burden of the agricultural industry on the environment.
Author: Olga Blinova
Loading...
Media news2
About what you can 3D print / Sudo Null IT News
Sergiv
3D printers
Recovery mode
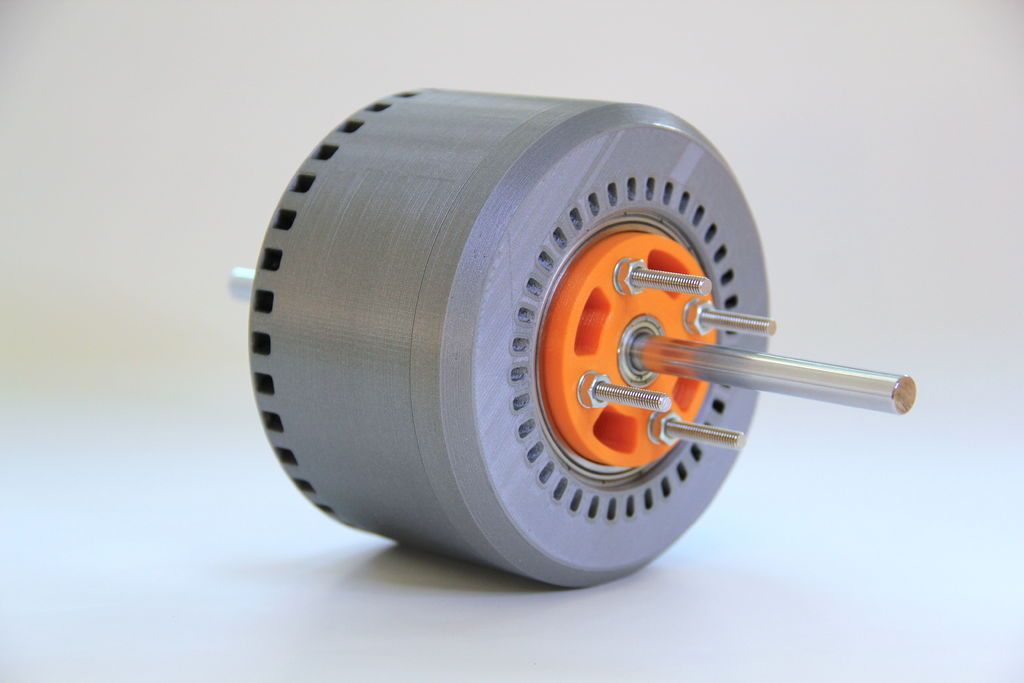
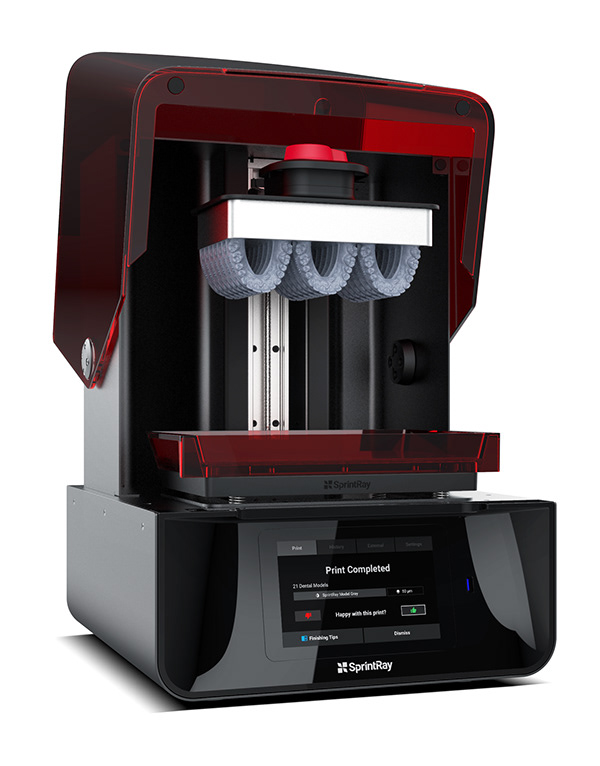
Hello everyone. My name is Sergey and I am engaged in the development of 3D printers. In this article, I want to show you how to use the RK-1 personal SLA 3D printer (with photos, of course).
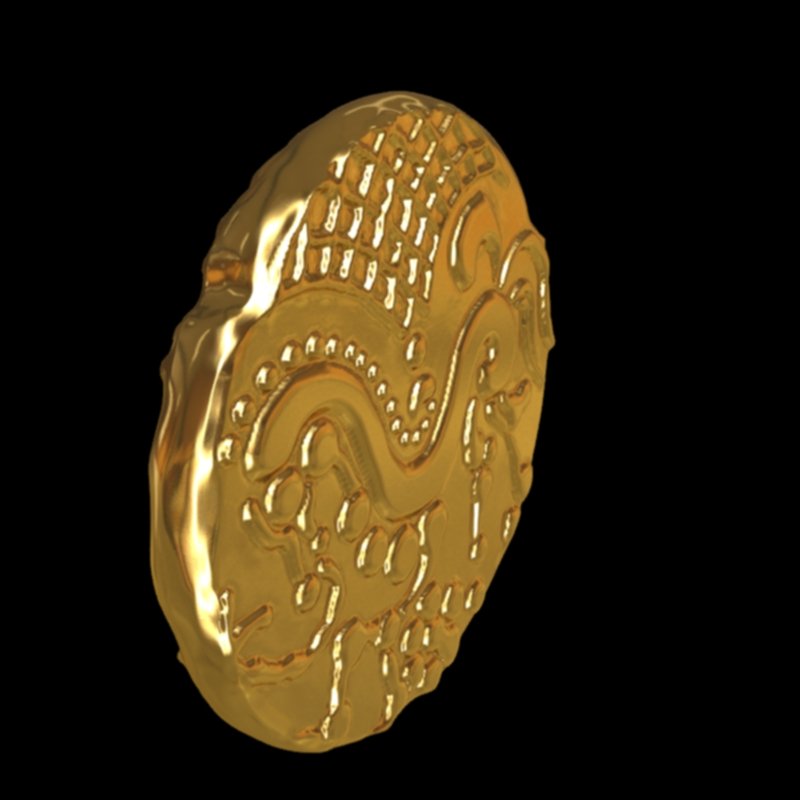
When someone is asked what a 3D printer can be used for, many people immediately remember jewelry production.![]() Let's start with her. The polymer is not cast (you can, of course, pour directly from it, but there are nuances). However, many jewelers do without casting polymer - they make molds and pour wax into them, getting waxes. I will describe this method in more detail in future articles.
Let's start with her. The polymer is not cast (you can, of course, pour directly from it, but there are nuances). However, many jewelers do without casting polymer - they make molds and pour wax into them, getting waxes. I will describe this method in more detail in future articles.
Prototyping will be the next application. It is also an important and widespread use of a 3D printer. We print the device under development, see how it is assembled (yes, you can do it in CADe, see how it lies in your hand, on a table, in your pocket, etc., install electronics. Or just print a reduced layout of the product under development for demonstration to a customer or another interested party
Let's not ignore the use of a 3D printer for medical purposes. In this case, for example, I cite the printing of surgical templates. Earlier in the article I described in more detail what it is and why.
There are such products - collectible celebrity figurines.