Weak 3d prints
6 Ways How to Fix Weak Infill in 3D Prints – 3D Printerly
Many people who have 3D print have experienced weak infill, where their models break easily. I’ve had this happen to myself before. Luckily, there are some pretty simple solutions to fix weak infill in 3D prints.
To fix weak infill in 3D prints I would alternate my infill pattern, lower my infill print speed, and increase infill line width. This ensures strength in your infill.
Keep reading on for a detailed answer on how to fix weak infill once and for all.
Why Do I Have Weak Infill in my 3D Prints?
Weak infill is a bad problem because infill is the backbone of the 3D print, and it plays a fundamental role in strengthening the whole structure. It gives support to the final robustness of the printed model and provides support to the layers.
Having weak infill is a problem that you definitely want to avoid, so before we get into the solutions, I want to quickly go through why it happens in the first place. There are several possible causes, some being more likely than others.
It usually comes down to your settings, so a few quick changes could solve this problem with ease.
So, the list is as follows:
- Using a weak infill pattern
- Infill printing speed is too high
- Using bad infill settings
- Incorrect filament diameter set
- Using low quality filament
- Bad print orientation
Now that we have a list of causes, lets get into fixing them, one by one.
How to Fix & Strengthen Weak Infills in 3D Prints?
1. Alternate Your Infill Pattern
Some types of infill only print one angle on one layer then a different angle on the next layer. This effective means that it is printed with 50% as much infill on one angle, so every second layer would be empty at the specific angle.
The ‘Lines’ pattern especially is one that prints those angles every other layer. I’d recommend changing to the ‘Grid’ pattern, which is similar to lines, but it prints out the whole pattern on each layer.
- Avoid using infill patterns which are designed for aesthetics (looks)
- Implement strong, reliable patterns like honeycomb, triangular or the grid pattern.
2. Adjust the Printing Speed
If the speed at which your infill is extruder is too fast, you may see that the extruder can’t keep up with the printing speed. You may start to face under extrusion at this point then.
This will cause weak and stringy infill, and the nozzle will be having trouble extruding plastic.
- You can slow down the printing speed, I would use 50% print speed and see the results
- Specifically lower the infill print speed, so it has time to be built up properly.
- If this works you can slowly work your way back up to find the optimal
Print speed goes hand in hand with a whole host of other 3D printer settings, so adjust this may require further adjustments to your settings, as well as what nozzle size you are using.
The important settings that complement print speed are the printing temperature, layer height, line width, as well as nozzle diameter.
The standard defaults that are recommended for most FDM 3D printers are a 0.4mm nozzle and a 0.2mm layer height. The higher your printer speed, the higher the temperature you want to use so the increased flow rate of material can still melt at the same rate.
It’s going to be harder to melt filament using the same temperature when there’s more of it coming through, which can lead to printing 3D prints with weak infill and under-extrusion.
One user who decreased their print speed to 60mm/s from 90mm/s said it helped out a lot with fixing this issue.
Another user who had an Ender 3 which experienced underextrusion at the infill said that doing an extruder calibration helped out also.
3. Adjust Infill Settings in Slicer
There are a number of settings which relate directly to how your infill will be printed, and this has a direct effect on having weak infill.
- Increase ‘Infill Density’ – 20% is a good infill density
- Increase ‘Infill Line Width’ – Try a 50% increase and run a test print
- Use the ‘Connect Infill Lines’ setting
If the extrusion infill width is small, this will ultimately bring a weak outline perimeter. You will be using a default width of 0.4mm, and to get better results, you should try to shift to a 0.8mm extruder infill width.
Basically, doubling your infill line width will strengthen your overall infill so that it prints with material in the right places.
Note: If you have increased the size of the extrusion infill width, you need to increase the infill percentage because now the infill lines will be spaced further apart. If the speed is high, it will get to the distance in time.
The basic aim of increasing the infill percentage is to increase the density of the print model’s connection, which will increase its strength overall.
Another thing to remember is that an increased infill density doesn’t translate linearly to infill strength. So, the increase from 10% to 30% won’t be the same increase from 30% to 50%, it generally gives back less strength as you get into those higher numbers.
4. Use the Correct Filament Diameter Settings
Sometimes you might find that your filament diameter settings are incorrect, so I would double-check that in your slicer software. Within Cura, you can check that by using the Ctrl + K shortcut and checking what diameter your profile is set at.
5. Using a Higher Quality or Stronger Filament
You can maximize the strength of the infill by:
- Using a high-quality filament such as going from PLA to PLA+ or using PETG, which is known to be stronger.
- This higher quality filament should provide a layer to layer adhesion and build more prints’ strength.
6. Adjust Print Orientation
This is a simple way but mostly overlooked because of its simplicity.
The term anisotropic comes in use, which means that an object has more strength in its XY axis than in the Z-axis. What you need to do is:
- Rotate your part 45 degrees on the printer bed, and it gives you the necessary strength; actually, it would double it.
Overall, I have covered a lot about the weak infill, and it will help you overcome this problem and fix it and strengthen your 3D print model.
Weak Infill
Weak Infill
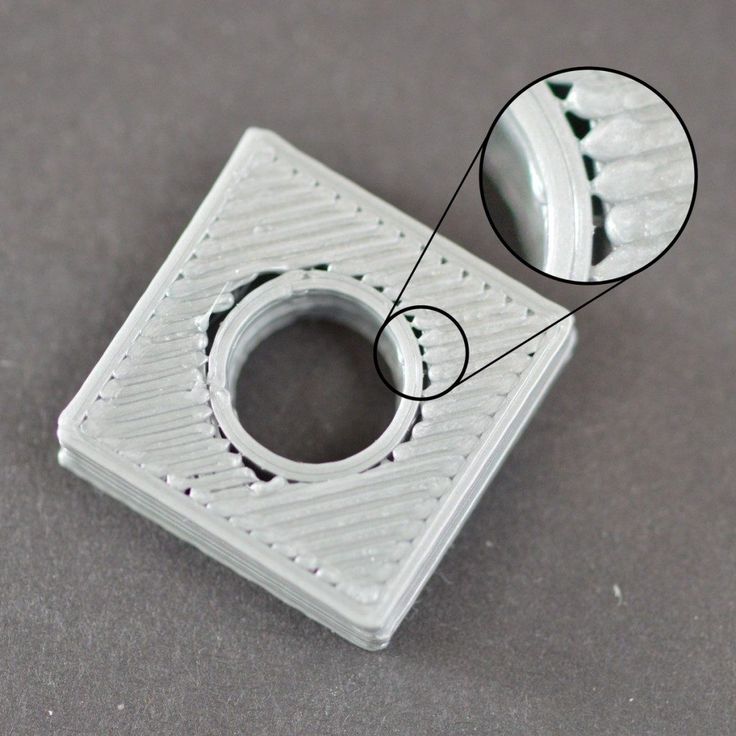
The infill inside your 3D printed part plays a very important role in the overall strength of your model. The infill is responsible for connecting the outer shells of your 3D print, and must also support the upper surfaces that will be printed on top of the infill. If your infill appears to be weak or stringy, you may want to adjust a few settings within the software to add additional strength to this section of your print.
Common Solutions
Try alternate infill patterns
One of the first settings you should investigate is the infill pattern that is used for your print. You can find this setting by clicking “Edit Process Settings” and going to the Infill tab. The “Internal Fill Pattern” determines what pattern is used for the interior of your part. Some patterns tend to be more solid than others. For example, Grid, Triangular, and Solid Honeycomb are all strong infill patterns. Other patterns like Rectilinear and Fast Honeycomb may sacrifice some strength for faster printing speeds.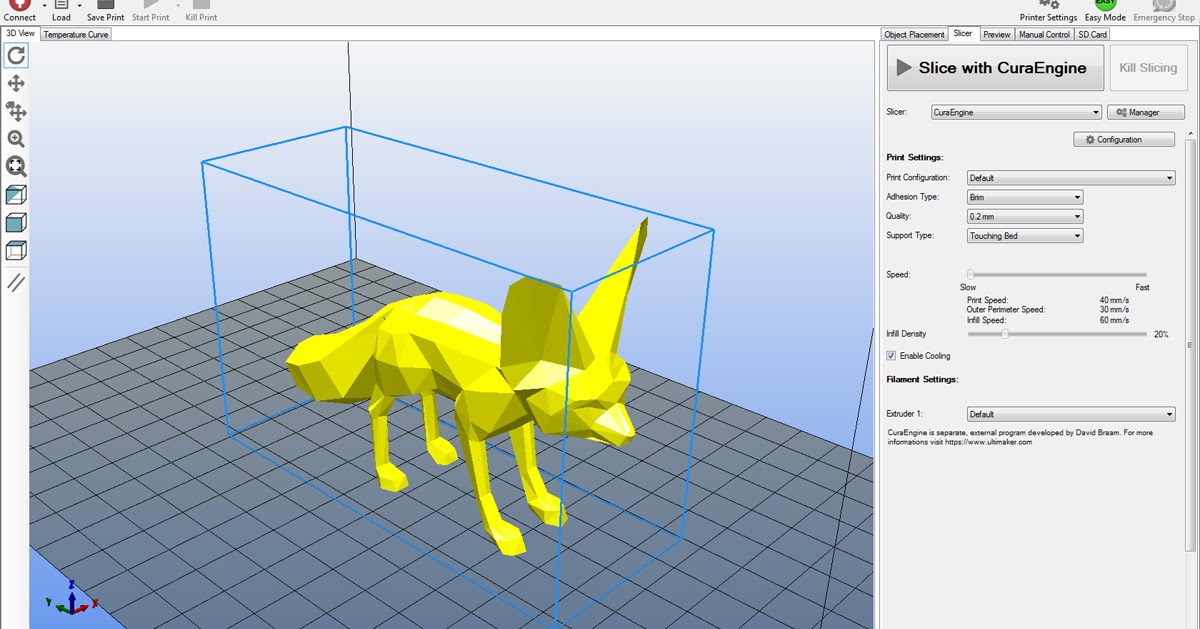 If you are having trouble producing strong reliable infill, try a different pattern to see if it makes a difference.
Lower the print speed
The infill is typically printed faster than any other portion of your 3D print. If you try to print the infill too fast, the extruder won’t be able to keep up and you will start to notice under-extrusion on the inside of your part. This under-extrusion will tend to create weak, stringy infill since the nozzle is not able to extrude as much plastic as the software would like. If you have tried several infill patterns, but continue to have problems with weak infill, try reducing the print speed. To do this, click “Edit Process Settings” and select the Speeds tab. Adjust the “Default Printing Speed”, which directly controls the speed that is used for the infill. For example, if you were previously printing at 3600 mm/min (60 mm/s), try decreasing that value by 50% to see if the infill starts to become stronger and more solid.
Increase the infill extrusion width
Another very powerful feature within Simplify3D is the ability to modify the extrusion width that is used for the infill of your part. For example, you could print the outline perimeters with a very fine 0.4mm extrusion width, but transition to a 0.8mm extrusion width for the infill. This will create thicker, stronger infill walls that greatly improve the strength of your 3D printed part. To adjust this setting, click “Edit Process Settings” and select the Infill tab. The “Infill Extrusion Width” is set as a percentage of the normal extrusion width. For example, if you enter a value of 200%, the infill extrusions will be twice as thick as the outline perimeters. One thing to keep in mind when adjusting this setting is that the software must also maintain the infill percentage that you specify. So if you set the infill extrusion width to 200%, the infill will use twice as much plastic for each line. To maintain the same infill percentage, the infill lines must be spaced further apart. For this reason, many users tend to increase their infill percentage after increasing the infill extrusion width.
Related Topics
6 Easy Tips for Choosing a 3D Printer for Your Projects
With the latest technological advances, 3D printing is rapidly becoming popular.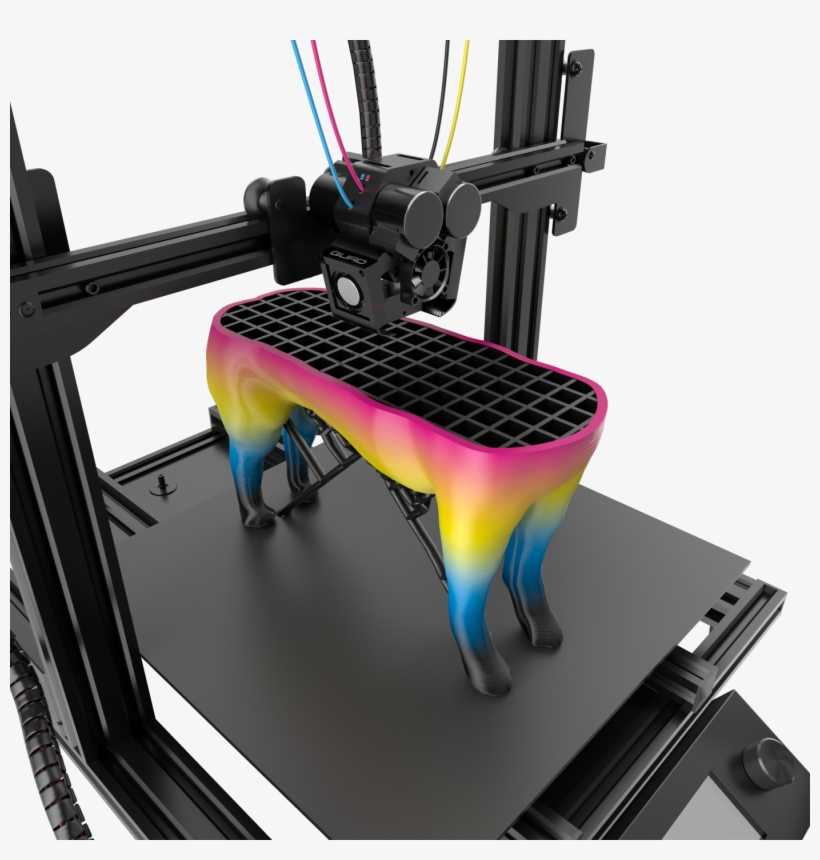 According to a recent report, the size of the 3D printing market will double every three years, with annual growth predicted by analysts typically between 18.2% and 27.2%. It also states that SMEs are power users of online 3D printing services, representing more than 75% of the global customer base.
In other words, 3D printing technology is no longer the domain of specialty shops or people with big budgets. As technology becomes more accessible, more people and small business owners are using it to their advantage. A 3D printer can become a common household appliance, like a microwave or refrigerator.
However, this is not a plug and play product. Thus, whether you are a beginner or an experienced do-it-yourselfer, purchasing the right 3D printer can seem like a daunting task. Here are six important factors you should consider when choosing a 3D printer.
From the initial CAD design to the 3D printed part. (3dhubs.com image)
Choose the right print technology
Not all 3D printers will use the same print technology. Here are some of the most popular resin printing technologies along with their strengths and weaknesses.
- Fused Deposition Modeling (FDM)
FDM is the simplest and most common printing technology. This is also known as Fused Filament Fabrication (FFF) or Plastic Jet Printing (PJP). In this process, the printer typically prints the object in successive layers by extruding a continuous length of printed material (eg, PETG, PLA, SBS, ABS filament) through a heated nozzle. So, printing starts from the bottom and goes up. - Stereolithography (SLA)
SLA uses a special liquid plastic printing material called photopolymer resin. Typically, a UV laser hardens layer by layer of printed material to create a part. SLA-based 3D models have incredibly high resolution. The process is also faster than FDM and SLS. It is a popular choice for designers and modellers. However, this is an expensive process requiring additional post-processing steps such as washing and curing in addition to standard support removal and other finishing work. Guide to Stereolithography SLA 3D Printing
 - Selective Laser Sintering (SLS)
SLS uses a laser to melt and melt powder raw materials such as silicates, polystyrene or even metal to print an object. Printing can be high precision. As a result, it is an excellent choice for industrial design and manufacturing. However, it is the most expensive of these printing technologies.
Internal geometry of FDM prints with different infill density (3dhubs.com image)
Find a compatible material
Plastic filament is a 3D printing material that looks like a long cord used for extrusion 3D printing processes, the most popular technology used in low cost desktop machines.
Photopolymer resin is a special liquid substance that hardens when exposed to light. Most often, ultraviolet radiation is used for illumination.
However, PETG and PLA are the two most common filaments. Because both materials are thermoplastics, they can be heated and cooled repeatedly to achieve the desired 3D shape.
- PETG Derived from fossil fuels, PETG is strong and resistant to high temperatures. Thus, it is a favorite among professionals such as mass production of 3D trim parts.
- PLA Made from renewable resources such as sugarcane or corn. You can also print objects with thin layers and sharp corners using PLA. It is available in various colors. As a result, many amateurs and professionals prefer.
- Others You can also choose from other options, including nylon, wood (a blend of recycled wood and resin binder), HIPS (high impact polystyrene), PVA (polyvinyl alcohol), ASA (acrylic styrene-acrylonitrile) and many more. Plastics, metals and other more specialized engineering grade materials will require more reliable machines (e.g. high temperature 3D printers, hardened nozzles).
Gloss spray paint on SLS printed parts (image 3dhubs.com)
Determine the size of the object you want to print
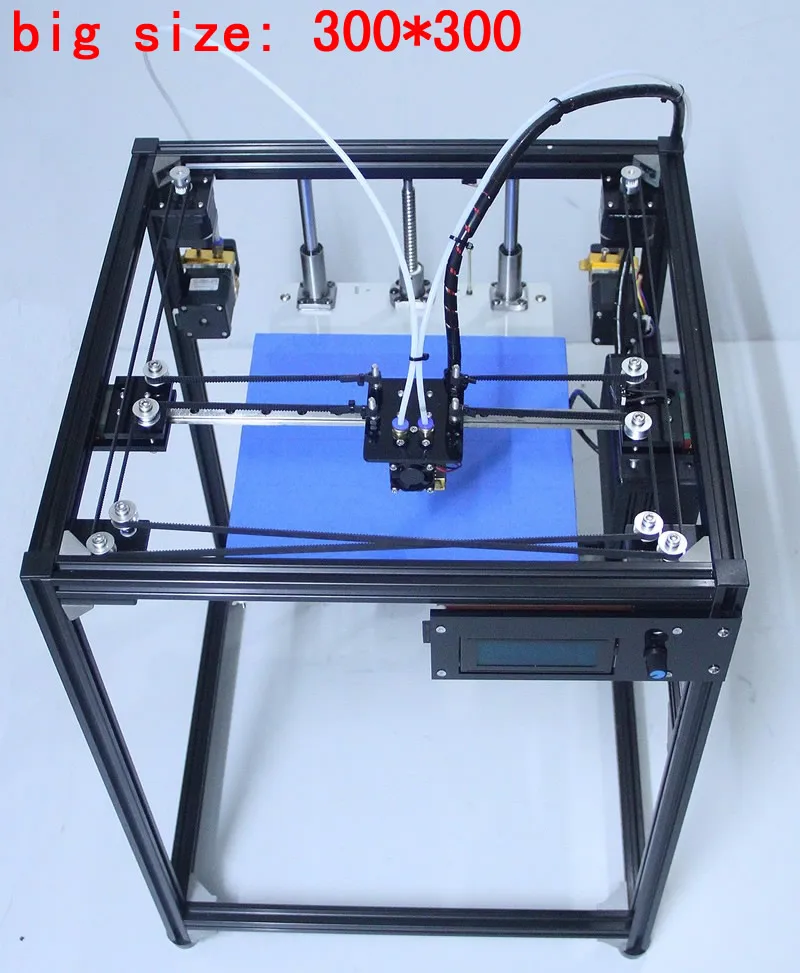
The size of the objects you want to print can help you determine the size of your 3D printer's chamber. The print volume is the maximum print size of the printer. Usually indicated in millimeters. Most desktop printers (primarily for hobbyists) have a limited print volume (maximum 380 x 380 x 380 mm).
Also remember that large models can be printed in parts that can be combined when finished.
Assembled 3D printed DIY speaker enclosure (3dhubs.com image)
Consider print speed
Print speed is also an important factor. As a rule, it is inversely proportional to the resolution. Higher resolution means more detail, which in turn requires slower print speeds. For example, printing shoes will take significantly longer than creating a tennis ball. How fast can 3D printers run?
Print head quality and configuration also affect print speed. For example, a small nozzle will produce ultra-fine prints but at a slow print speed. On the other hand, a large nozzle will work quickly, but it will reduce print detail.
In terms of print speed, FDM is generally slower than SLA technology. UNIZ, a well-known manufacturer of high-speed 3D printers, released the SLA UNIZ Slash Plus and UNIZ Slash Pro series, with which the company broke its own record by setting a new maximum print speed of 1200mm/hour.
FDM 3D printer print speed versus quality (image my3dmatter.com)
Think about your skill level
3D printing is a complex and evolving technology. It will take you some time to master even the most user-friendly 3D printer. You will need to learn about various settings in your slicing software, such as choosing the right print media and choosing the best print speed for your project. You also need to understand the strengths and weaknesses of your printer.
Many 3D printers are available, both fully assembled and as kits. The kits require assembly, which requires some technical know-how, but is often significantly cheaper
So, if you have not used a 3D printer before, you should try the most basic desktop models first and work on as your skills develop. It's in your best interest not to overestimate your technical skills. If you don't know how to use the printer, you will spend more time and money repairing it than using it. That's why it also helps to have a reasonably detailed 3D printing error guide to guide you through the process.
Find a suitable location for the printer
Finally, you should keep your 3D printer in a convenient but safe place. It's a good idea to store it indoors, preferably somewhere protected from dust and dirt. You should also keep it out of the reach of children and pets. You don't want any accidents that damage this expensive machine and cause injury.
You will need proper ventilation to ensure good airflow for health and to eliminate bad odours. Large printers should be installed outside your home or office, perhaps in a separate room. Be sure to read the user manual and specifications of the machine before setting it up.
Conclusion
3D printing is fast becoming a mainstream technology. It is also one of the fastest growing technologies around the world. So, before you jump into the realm of 3D printing, here are six tips to help you make the right choice. There are, of course, many factors, but hopefully they provide some starting points for thought.
Have you already bought a 3D printer? What things did you consider when buying? Tell us in the comments section below.
Comparison of 3D printing technologies: FDM, SLA and SLS
Additive manufacturing or 3D printing reduces costs, saves time and enhances product development capabilities. 3D printing technologies offer versatile solutions for applications ranging from rapid concept and functional prototypes in the field of prototyping to fixtures and clamps or even final parts in manufacturing.
Over the past few years, high resolution 3D printers have become more affordable, more reliable and easier to use. As a result, more companies have been able to use 3D printing technology, but choosing between different competing 3D printing solutions can be difficult.
Which technology is right for your needs? What materials are available for her? What equipment and training is needed to get started? What are the costs and payback?
In this article, we take a closer look at three of today's most well-known plastic 3D printing technologies: Fused Deposition Modeling (FDM), Stereolithography (SLA), and Selective Laser Sintering (SLS).
Choosing between FDM and SLA 3D printer? Check out our detailed comparison of FDM and SLA technologies.
Download this high resolution infographic here.
VIDEO MANUAL
Can't find the 3D printing technology that best suits your needs? In this video tutorial, we compare Fused Deposition Modeling (FDM), Stereolithography (SLA), and Selective Laser Sintering (SLS) technologies in terms of the top factors to consider when purchasing.
Watch Video
Fused Deposition Modeling (FDM), also known as Fused Filament Manufacturing (FFF), is the most widely used form of 3D printing at the consumer level, fueled by the rise of consumer 3D printers. On FDM printers, models are made by melting and extruding a thermoplastic filament, which the printer's nozzle applies layer by layer to the model being built.
The FDM method uses a range of standard plastics such as ABS, PLA and their various blends. It is well suited for making basic experimental models, as well as for quickly and inexpensively prototyping simple parts, such as parts that are usually machined.
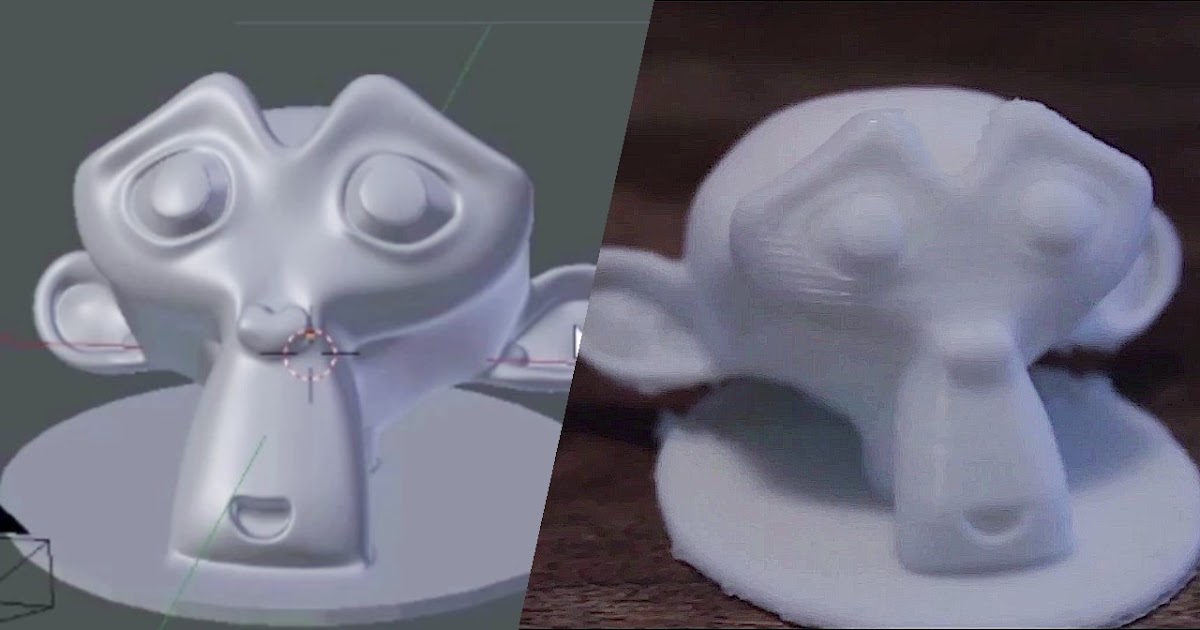
FDM models often show layer lines and may have inaccuracies around complex features. This sample was printed on a Stratasys uPrint FDM industrial 3D printer with soluble support structures (printer price starting at $15,900).
FDM printers have the lowest resolution and accuracy of SLA or SLS and are not the best option for printing complex designs or parts with complex features. Surface quality can be improved by chemical and mechanical polishing processes. To address these issues, industrial FDM 3D printers use soluble support structures and offer a wider range of engineering thermoplastics, but they are also expensive.
FDM printers do not handle complex designs or parts with complex features well (left) compared to SLA printers (right).
Invented in the 1980s, stereolithography is the world's first 3D printing technology and is still one of the most popular technologies among professionals today. SLA printers use a process called photopolymerization, which is the conversion of liquid polymers into hardened plastic using a laser.
See stereolithography in action.
Models printed on SLA printers have the highest resolution and accuracy, the sharpest detail and the smoothest surface of all plastic 3D printing technologies, but the main advantage of the SLA method is its versatility. Materials manufacturers have developed innovative formulas for SLA polymers with a wide range of optical, mechanical and thermal properties that match those of standard, engineering and industrial thermoplastics.
Models created with SLA technology have sharp edges, a smooth surface and almost invisible layer lines. This sample was printed on a Formlabs Form 3 Desktop Stereolithographic 3D Printer (price starting at $3499).
SLA is an excellent option for making highly detailed prototypes that require close tolerances and smooth surfaces such as molds, templates and functional parts. SLA technology is widely used in industries ranging from engineering and design to manufacturing, dentistry, jewelry, modeling, and education.
White Paper
Download our in-depth white paper to learn how SLA printing works, why thousands of professionals use it today, and how this 3D printing technology can help your work.
Download white paper
free sample
Experience Formlabs print quality first hand. We will send a free 3D printing sample directly to your office.
Request a free sample
Selective laser sintering is the most common additive manufacturing technology used in industry.
Selective Laser Sintering (SLS) 3D printers use a high power laser to sinter fine polymer powder particles. The unsprayed powder supports the model during printing and eliminates the need for special support structures. This makes SLS ideal for complex geometries, including internal features, grooves, thin walls, and negative taper. Models produced using SLS printing have excellent mechanical characteristics: their strength can be compared with the strength of injection molded parts.
Models created with SLS technology have a slightly rough surface, but almost no visible layer lines. This sample was printed on the Formlabs Fuse 1 SLS workshop 3D printer (price starting at $18,500).
The most common selective laser sintering material is nylon, a popular engineering thermoplastic with excellent mechanical properties. Nylon is light, strong and flexible, resistant to impact, heat, chemicals, UV radiation, water and dirt.
The combination of low part cost, high productivity, and widely used materials makes SLS a popular method for engineering functional prototyping and a cost-effective alternative to injection molding in cases where production runs are limited.
White Paper
Looking for a 3D printer to create durable, functional models? Download our white paper to learn how selective laser sintering (SLS) technology works and why it is popular in 3D printing for functional prototypes and end-use products. 9
Either way, you should choose the technology that best suits your business. Prices have dropped significantly in recent years, and today all three technologies are offered in compact and affordable systems.
3D printing costing doesn't end with initial equipment costs. Material and labor costs have a significant impact on the cost of each part, depending on the application and production needs.
INTERACTIVE MATERIAL
Try our interactive ROI tool to see how much time and money you can save by printing with Formlabs 3D printers.
Calculate savings
FDM, SLA and SLS printed prototype ski goggle frames (left to right).
We hope this article has helped you narrow down your search for the 3D printing technology best suited to your needs.