
Voxelab aquila 3d printer review
Voxelab Aquila X2 3D Printer Review: Inexpensive, But Unimpressive
Tom's Hardware Verdict
Featuring a hardware spec sheet nearly identical to dozens of other Creality Ender clones, the Voxelab Aquila X2 fell short of expectations and felt like a half-hearted attempt at an entry-level 3D printer.
Pros
- +
+ Silent stepper drivers make printer operation whisper quiet
- +
+ Large LCD interface is bright and easy to read
- +
+ VoxelMaker software is easy-to-use
Cons
- -
Cooling fan is hair-dryer loud
- -
User interface has multiple typos and errors
- -
Unassisted manual leveling
- -
No profile is provided for Cura
Why you can trust Tom's Hardware Our expert reviewers spend hours testing and comparing products and services so you can choose the best for you. Find out more about how we test.
Today's best Voxelab Aquila X2 deals
$169
View
$175
View
$179
View
Show More Deals
The Voxelab Aquila (Aquila is Latin for ‘eagle’) is an entry-level 3D printer that retails for around $239. Voxelab is a sub-brand of Flashforge, makers of the Adventurer 3 Lite and Adventurer 4, which specializes in making low-cost entry-level 3D printers for the consumer market. The Aquila X2 is the current flagship of the Aquila line, featuring several hardware improvements over the original Aquila.
Utilizing a build volume of 220x220x250mm and a heated build platform, the Aquila X2 is a direct clone of the Creality Ender 3 series of printers and has many of the same hardware features. The 32-bit controller board and silent stepper drivers are a nice addition to this machine, but the loud cooling fans and limited native software support keep this eagle from soaring, let alone competing with the best 3D printers.
Specifications of Voxelab Aquila X2
Swipe to scroll horizontally
| Machine Footprint | 18.6 x 18.9 x 18.6 inches (473mm x 480 x 473mm) |
| Build Volume | 8. 7 x 8.7 x 9.8 inches (220mm x 220mm x 250mm) 7 x 8.7 x 9.8 inches (220mm x 220mm x 250mm) |
| Material | 1.75mm PLA, PLA+, ABS |
| Nozzle | .4mm |
| Build Platform | Heated Removable Glass Platform |
| Connectivity | USB, microSD |
| Interface | 4.3" Color LCD |
Unpacking and Assembling the Voxelab Aquila X2
(Image credit: Tom's Hardware)The Voxelab Aquila X2 ships in a partially-built state, with the base of the printer and Y-axis already assembled. Assembling the Aquila X2 doesn’t require any drilling, soldering, or electrical work, and the included printed User Manual covers each step in detail. In addition to the parts for the printer, the Aquila X2 includes a scraper, a microSD card and reader, a set of Allen keys, a small flathead screwdriver, and a small spool of sample material.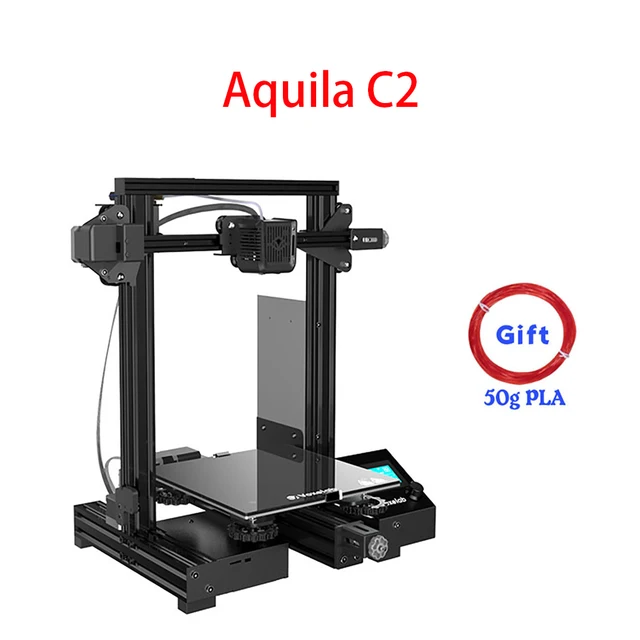
- Voxelab Aquila X2 (Black) at Walmart for $179
The aluminum extrusions were all wrapped in a protective plastic cover, and when I removed it, I was surprised to find out they were all covered in what appeared to be cutting fluid from the aluminum cutting process. This gave all of the extrusions a sticky and greasy feel, and I had to clean them off with a degreaser before they felt clean and dry to the touch. This doesn’t affect the performance of the machine, but it did make me wonder about the general quality control of the Aquila X2.
Like the similarly-featured Elegoo Neptune 2, the assembly of the Aquila X2 took about an hour from start to finish. The X gantry assembly involves running a belt across the aluminum extrusion and over an adjustable idler wheel, and the Z-axis threaded rod assembly was simple and straight-forward.
(Image credit: Tom's Hardware)Each terminated wire has a small yellow tag on it which corresponds with where it needs to be connected.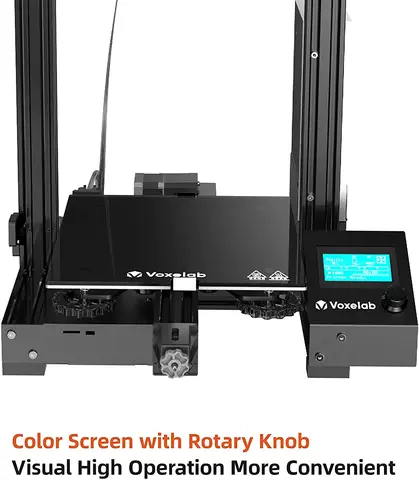 If you’re new to 3D printing and not sure what the difference is between “E” and “Z”, these labels are a great help and can save you from a frustrating troubleshooting exercise. The Z endstop is located on the left side of the printer, and is non-adjustable.
The Voxelab Aquila X2 shares a lot of design similarities with the Creality Ender 3 Pro and Creality Ender V2, two wildly-popular 3D printers that have spawned dozens of clones. Utilizing a 220 x 220 x 250mm build volume and a heated Carborundum glass bed, the Aquila X2 has a nearly identical set of features to the Creality Ender 3 V2 for around $60 less (as of this writing). Clones like this are fairly common, and their success typically can be measured by how well the company handles the entire user experience (assembly, software integration, etc..)
(Image credit: Tom's Hardware)The Aquila X2 uses a Bowden extruder which remotely feeds material through a PTFE tube to the hot end during printing. Voxelab has included a filament run-out sensor in-line with the extruder module, which can detect interruptions and pause the print. This sensor allows the user to print with confidence knowing the machine will pause before failing, giving the user time to swap in a new spool of material. The small PTFE tube that leads from the run-out sensor to the extruder module is a surprisingly helpful addition which keeps filament from curling and not feeding properly into the extruder, something that can frustrate a new user.
Image 1 of 2
(Image credit: Tom's Hardware)(Image credit: Tom's Hardware)The X and Y-axes both feature a tensioning knob located at the end of their respective extrusions. These knobs add or subtract tension from the X and Y belts, which is critical for making prints without ringing or muting detail on sharp corners.
This feature is present on the more expensive Ender 3 V2, but not the Ender 3 Pro. By including these tensioning knobs on this printer, it’s clear that Voxelab is positioning the Aquila X2 as a competitor to the more expensive Ender 3 V2 as opposed to the similarly priced Ender 3 Pro.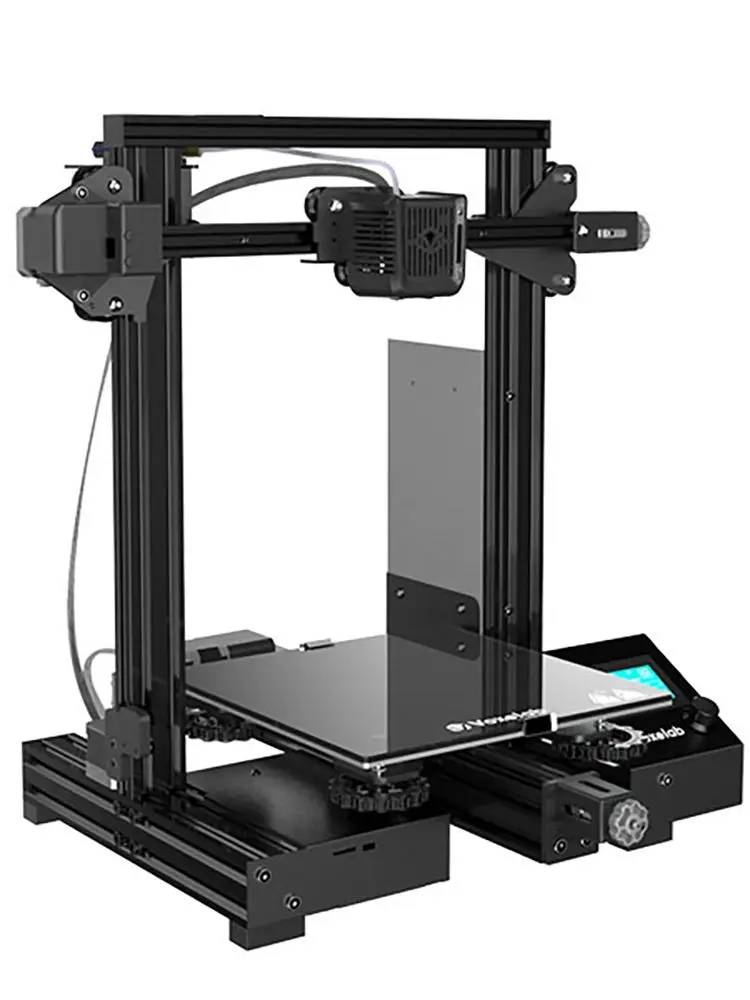
The hot end module contains two fans: a part cooling fan mounted on the right that blows cool air over the printed module and a heat break cooling fan that is mounted over the hot end. By far, this is my least favorite part of the Aquila X2 due to the distractingly-loud noise generated by these fans. The silent stepper drivers on this printer provide a nearly silent mechanical movement system, but the fans sound like a hair dryer when they are running.
For context, I measured an average of 26.6 dB in a room while the printer was turned off, as opposed to an average of 54.4 dB when the printer was on and being measured from six feet away. It feels like a particularly large oversight on the part of Voxelab to implement silent stepper drivers (a typically expensive addition) and neglect to include a less noisy fan. If you’re planning on running this printer in a home office, be aware the fans are so loud that they can make phone conversations difficult.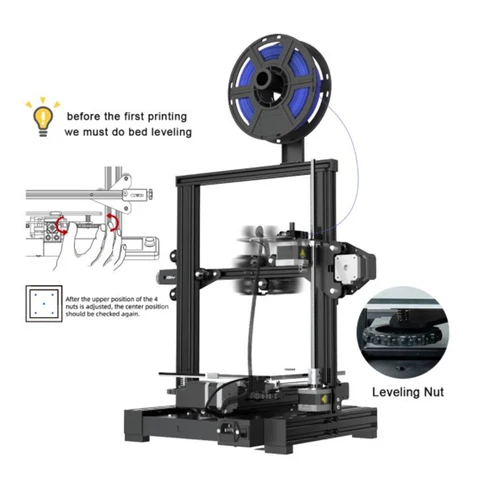
User Interface on Voxelab Aquila X2
(Image credit: Tom's Hardware)The Voxelab Aquila X2 has a 4.3-inch color LCD mounted to the front of the printer which is used as the primary interface for the machine. This screen is frustratingly not a touch-screen, instead using a push-knob to scroll and select options in the menu. I was underwhelmed by this interface, as the knob occasionally fails to register a click, and the various menu screens have misspellings, grammatical errors, and other issues.
(Image credit: Tom's Hardware)Considering that this machine is a nearly direct clone of the Ender 3 V2, it’s disappointing to see such a low amount of effort from Voxelab in the area where users will spend most of their time interfacing with the Aquila X2. The color LCD screen has a lot of potential, but the misspellings and general lack of attention to detail makes this feature feel like a bit of a stumble.
Calibrating and Leveling Voxelab Aquila X2
The Voxelab Aquila X2 features a manual leveling process that involves using four thumbscrews to set the height between the build platform and the nozzle.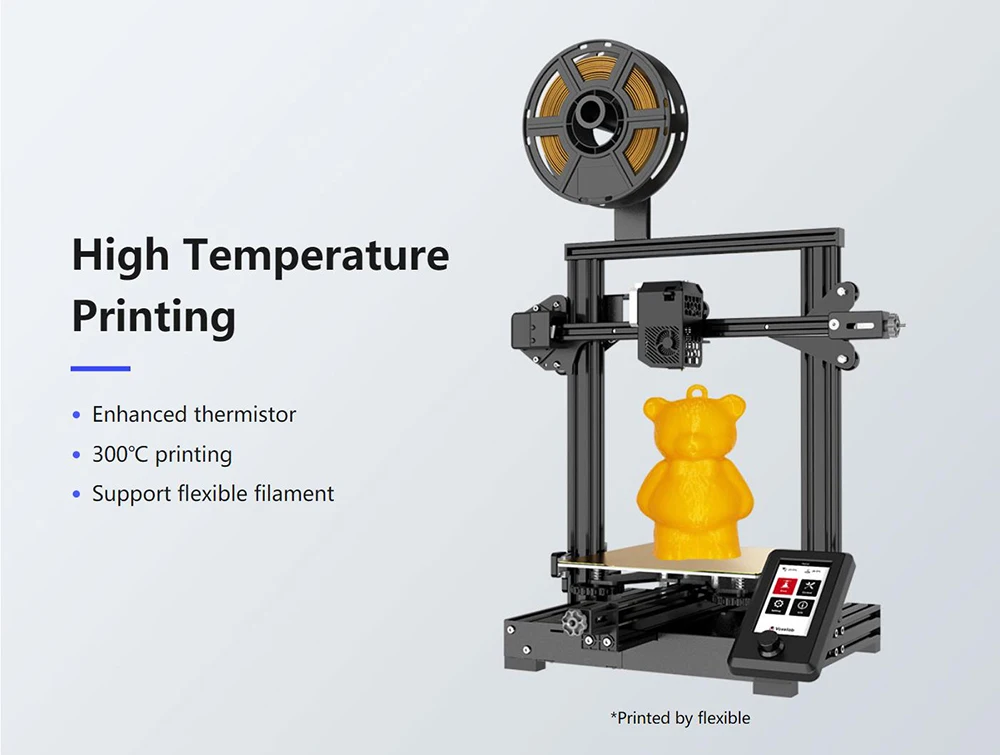 Each thumbscrew is located on a corner of the bed, and they all need to be adjusted manually while tramming the nozzle over the bed to correctly calibrate the printer. This manual process is common on less expensive 3D printers, and the Aquila X2 is no different.
Advancements in 3D printing technology have made semi-automated (or fully automated) leveling more common, so it feels like a missed opportunity for Voxelab to give the Aquila X2 a competitive edge by including an automated process. The Flashforge Adventurer 3 Lite uses a manual process that guides users, and the Anycubic Vyper is fully automated and requires no input from the user. These printers are only slightly more expensive, and integrating a similar technology would have made the Aquila X2 leap ahead instead of blending into the competition.
Build Platform on Voxelab Aquila X2
(Image credit: Tom's Hardware)The build platform on the Voxelab Aquila X2 is a sheet of Carborundum glass with a textured surface on one side and smooth glass on the other.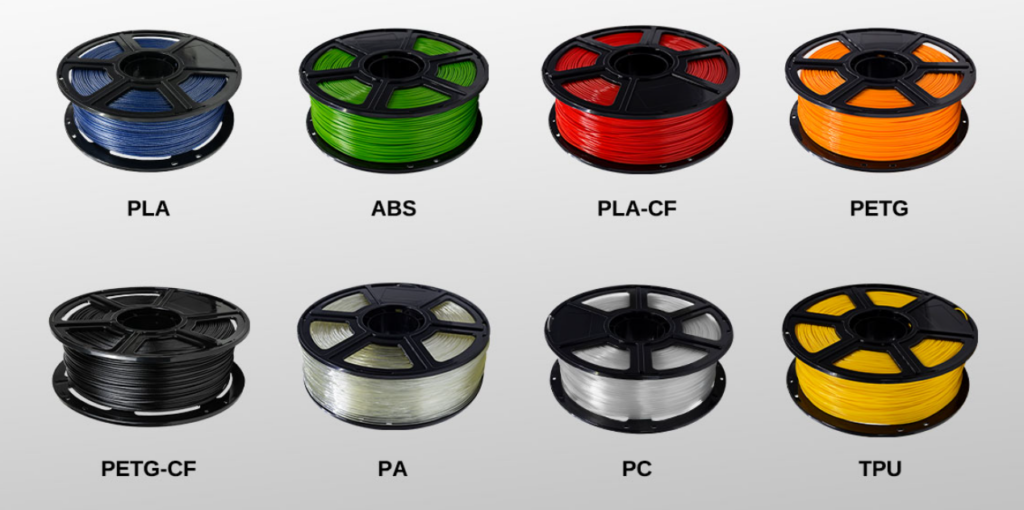 This build platform is mounted to the heated bed using two metal clips and felt sturdy and didn’t have any play. This is the same style of bed that is found on the Creality Ender 3 V2, and is generally viewed as an upgrade over the textured magnetic mat build platform that ships with the Creality Ender 3 Pro.
This style of build platform will keep a part locked to the bed during printing, but it will release after the bed cools and allow the part to pop off without any tools. Unfortunately, the textured surface is thin and delicate, and it tends to get scratched easily if the nozzle scrapes it at any point. I’m not a fan of this style of build platform because it has no flex to it, which means you have to wait until the bed has fully cooled before removing the part and the shiny surface attracts fingerprints, dust, and other small defects very quickly.
Controller Board on Voxelab Aquila X2
(Image credit: Voxelab)The Voxelab Aquila X2 uses a custom 32-bit controller board equipped with TMC2208 silent stepper drivers which allow for a near-silent printing experience from the motion system of the printer. These stepper drivers are a big upgrade from the standard A4988 or HR4988 ones used on the Creality Ender 3 Pro and other clones, which generate a noticeable amount of noise during printing.
The wiring inside the Aquila X2 is clean and organized, with the cables bundled neatly to provide airflow across the board from the built-in cooling fan. I was surprised to find an unused BLTouch connector on the board, which would allow the Aquila X2 to perform a fully automatic bed calibration by adding an inexpensive module. Adding this module would have added only a small amount to the cost of the printer and greatly improved the user experience, so it’s disappointing to see that it was not implemented.
Printing on the Voxelab Aquila X2
(Image credit: Tom's Hardware)The included microSD card comes pre-loaded with several pre-sliced .gcode files for testing out the Voxelab Aquila X2. The first model I printed was the file named ‘TestHook-pla.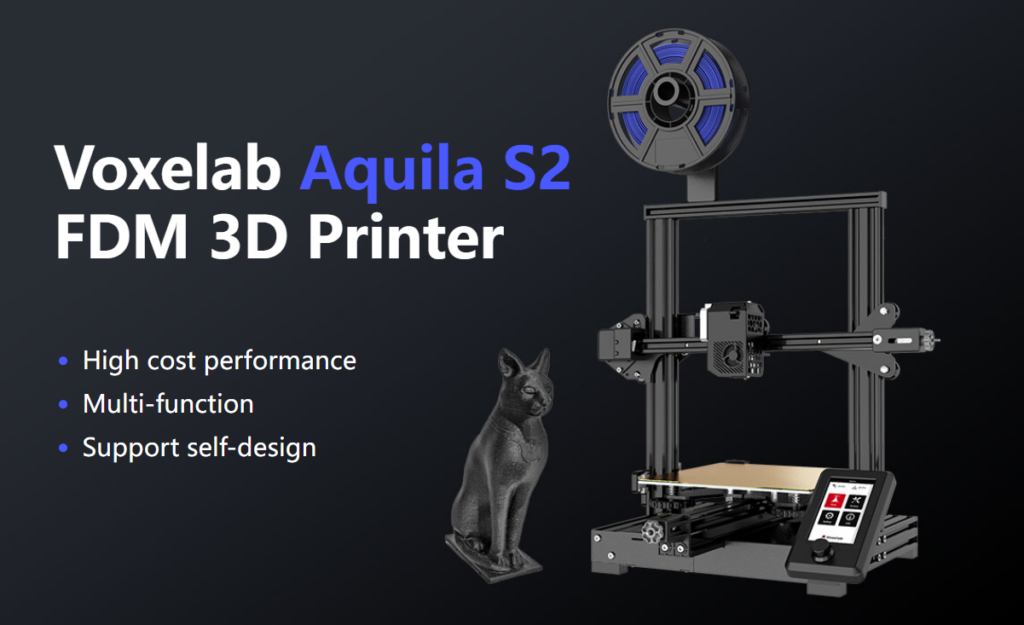 gcode’, and it printed in about 40 minutes using Prusa Silver PLA. Checking the .gcode file in a text editor, it appears the file was generated back in September, 2020 using ‘ffslicer 1.27.0’. This model was sliced with a .2mm layer height, 15% hexagonal infill density, and a base print speed of 50mm/sec.
Image 1 of 2
(Image credit: Tom's Hardware)(Image credit: Tom's Hardware)The quality of the test print was top-notch, and I was specifically impressed with the vertical sidewalls of the model. The hook was free of any banding, and the vertical walls felt smooth and even. Using a shiny material (like this Prusa Silver PLA) tends to highlight defects, so the even layers are even more pronounced on this hook. However, the top layer seemed slightly underextruded, and there were gaps between the toolpaths.
Image 1 of 2
(Image credit: Tom's Hardware)(Image credit: Tom's Hardware)The ‘Aquila Test model.gcode’ file contains several geometrical shapes that print out on a plate and can be used to highlight various aspects of calibration.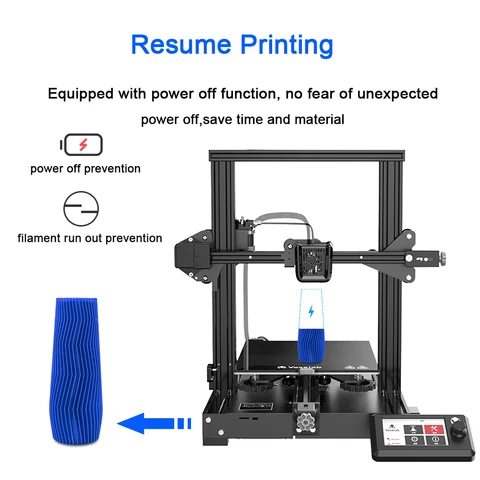 The pyramid shape confirms that the cooling fan is cooling the layers properly and not melting small features, the arc shows the ability to print a large overhang, the hollow cylinder confirms lamination on concentric contours, and the plate itself shows a smooth top layer.
Slicing Software for Voxelab Aquila X2
(Image credit: Voxelab)Voxelab includes their proprietary slicer app VoxelMaker with Aquila X2. Before diving into this app, it’s worth taking a minute to look at Voxelab as a company. Voxelab is a sub-brand of Flashforge that is focused on low-cost 3D printers for beginners (between $150 and $300), while Flashforge sells printers that are designed for the prosumer market (between $400 and $1000). Instead of creating an entirely new slicer app for Voxelab, Flashforge has created a skinned version of their FlashPrint app (used by printers like the Adventurer 3 Lite) and rebadged it as VoxelMaker.
(Image credit: Voxelab)The interface and controls for VoxelMaker are nearly identical to FlashPrint, which uses a ‘Basic’ and ‘Expert’ mode for selecting print settings.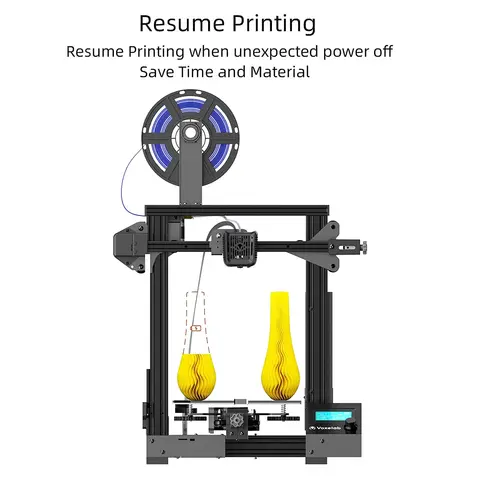 Unfortunately, just like the FlashForge Adventurer 4, Voxelab has only included a single ‘Standard’ profile with the Aquila X2. This means that if you want to print faster, print more detailed models, or make any changes to the slicer at all, you’re on your own. This is not a big deal for users who are used to changing settings and making adjustments, but it’s a frustrating experience for beginners who want to select a profile without having to make lots of adjustments and perform a lot of troubleshooting.
One of my primary issues with VoxelMaker (and FlashPrint, as well) is the inability to preview a file without saving it first. This means that every time you make an adjustment to the model, you have to re-export it, which is a time-consuming and tedious process. VoxelMaker gives you a full report after slicing including print settings, material type, and estimated time.
(Image credit: Ultimaker)Voxelab also advertises compatibility with the popular slicer app Cura, but doesn’t include a profile with the printer. Cura doesn’t have a built-in profile for the Aquila X2, so if you want to use Cura, you’re on your own to make a profile from scratch. Because it shares so many similarities with the Creality Ender 3 series of printers, I made a profile for the Aquila based on those printers which worked well.
It seems a little misleading for Voxelab to advertise compatibility with Cura without offering so much as a how-to guide for getting the printer running on this software, which places the burden of support somewhere between Voxelab and Ultimaker and ultimately on the user.
VoxelMaker Standard Settings for Voxelab Aquila X2
(Image credit: Voxelab)Swipe to scroll horizontally
| Layer Height | 0.2 mm |
| Infill Percentage | 15%, Hexagon |
| Print Speed | 50mm/second |
| Extruder Temperature | 200 degrees Celsius (392 degrees Fahrenheit) |
| Heated Bed Temp | 60 degrees Celsius (140 degrees Fahrenheit) |
| Print Time | 7 Hours, 31 Minutes |
The miniature models published by Loot Studios have a tremendous amount of detail when printed on resin printers like the Elegoo Saturn, but I wanted to see how the detail would resolve when printed at a large scale on an FDM 3D printer.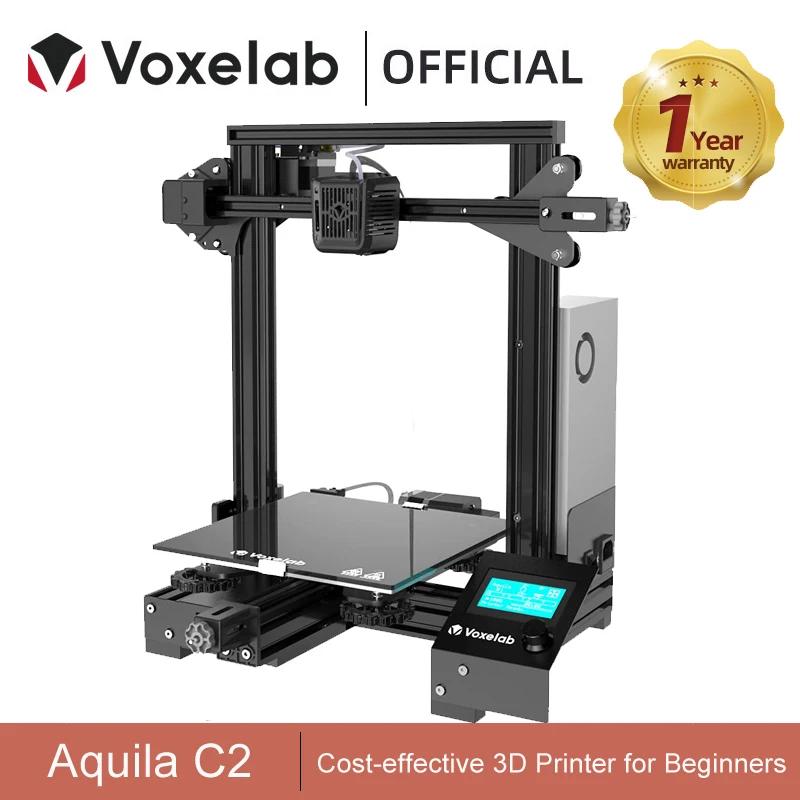 After increasing the size of this sci-fi door model to 200%, I sliced it using the standard settings on VoxelMaker and printed it using Prusa Silver PLA.
The model printed out without any major defects, and the Carborundum bed kept the model firmly adhered during printing. After the bed cooled, the door easily released from the bed and I was able to pop it off without using any tools. The detail on the door is well-defined, and I was impressed with the level of detail considering the fine features that typically wouldn’t resolve on an FDM 3D printer.
(Image credit: Tom's Hardware)VoxelMaker Standard Settings for Voxelab Aquila X2
(Image credit: Voxelab)Swipe to scroll horizontally
| Layer Height | 0.2mm |
| Infill Percentage | 15%, Hexagon |
| Print Speed | 50mm/second |
| Extruder Temperature | 200 degrees Celsius (392 degrees Fahrenheit) |
| Heated Bed Temp | 60 degrees Celsius (140 degrees Fahrenheit) |
| Print Time | 7 Hours, 59 Minutes |
I wanted to see how well the Voxelab Aquila X2 could handle complex curves and shapes, so the Mandalorian Support-Free Remix by iczfirz was the perfect model for demonstration.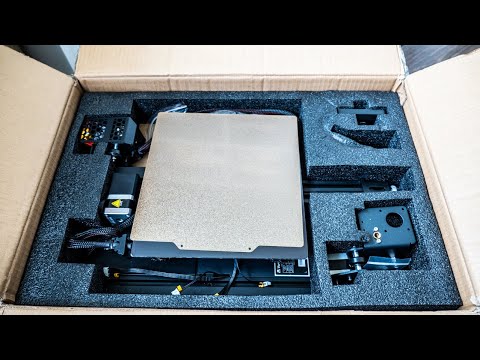 It contains multiple detailed components, prints without support material, and takes just under 8 hours to print. Unfortunately, it became apparent soon after the print started that the printer was having a difficult time creating the tall, thin, hollow portions of the print.
Image 1 of 2
(Image credit: Tom's Hardware)(Image credit: Tom's Hardware)The overall detail on the model looked satisfactory, and the flowing curves on the cape of the model looked smooth and even. Unfortunately, the tip of the rifle snapped off at the slightest touch, and showed that the inside of the print wasn’t fully laminated, and the material had extruded unevenly. This was one of the issues I had with the Flashforge Adventurer 4, which seems to make sense considering the slicer for the two printers is so similar and likely uses the same toolpath-generating algorithm.
(Image credit: Tom's Hardware)Regardless of the cause of the issue, it’s disappointing that there isn’t another built-in profile that a beginner could use for trouble-shooting if they had this issue, as it could be difficult to identify where the problem originated from.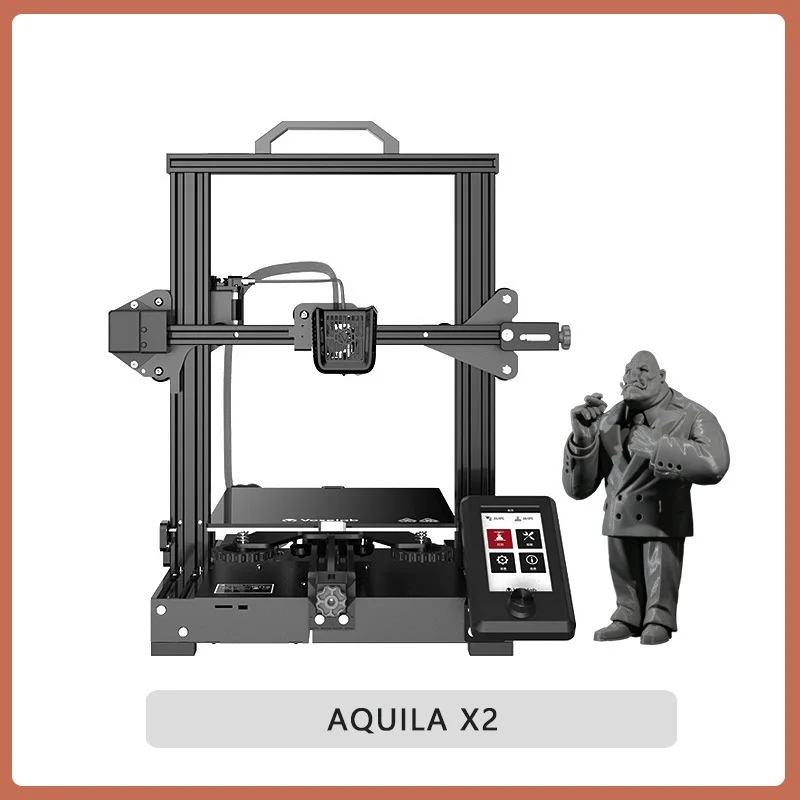 An experienced user may be able to identify and correct this under extrusion, but it’s not reasonable to expect that someone without 3D printing experience (one of the primary targets of this $230 printer) would be able to do.
Ultimaker Cura Standard Settings for Voxelab Aquila X2
(Image credit: Ultimaker)Swipe to scroll horizontally
| Layer Height | 0.2mm |
| Infill Percentage | 15%, Hexagon |
| Print Speed | 50mm/second |
| Extruder Temperature | 200 degrees Celsius (392 degrees Fahrenheit) |
| Heated Bed Temp | 60 degrees Celsius (140 degrees Fahrenheit) |
| Print Time | 2 Hours, 37 Minutes |
Voxelab advertises the Aquila X2 as being compatible with the Ultimaker slicer app Cura, so I created a profile based on the Creality Ender 3 to test it out.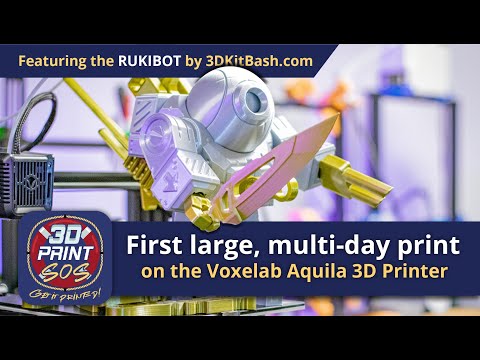 This isn’t a difficult process, but it’s not something I feel that a beginner should be expected to do after purchasing a printer.
Using the default ‘Standard’ slicer settings, I imported the Flexi Rex by DrLex and prepared it for printing. This model features multiple individual bodies that print-in-place to create an articulated model that can flex around without falling apart. This doubles as a tolerance test for the 3D printer, as a poorly calibrated machine will fuse the parts together instead of leaving a slight gap between them.
(Image credit: Tom's Hardware)Using Prusa Jet Black PLA, the model printed out in just over 2 and a half hours, and as anticipated, the model was able to freely articulate. Because the model is printed in multiple individual bodies, the Flexy Rex also doubles as a test of bed adhesion, as some of the smaller bodies are prone to popping off a poorly calibrated bed. I didn’t have any issues with bed adhesion, and was pleased with the overall level of articulation that the model achieved.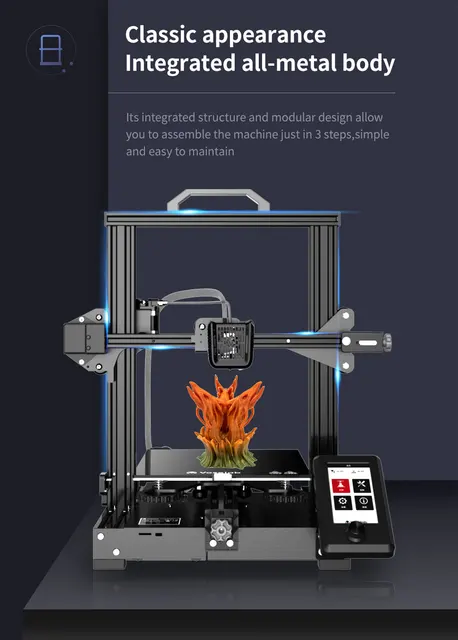
The Voxelab Aquila X2 feels like a printer that can’t quite decide where it should be positioned in the market. The silent stepper drivers and large color LCD screen would indicate a more premium machine, but the loud fans and sub-optimal software experience make this printer feel somewhat unfinished.
With a price of around between $215 and $230 depending on the retailer, the Aquila X2 is a perfectly usable machine for a beginner or anyone interested in using it as a platform for learning about how to build and modify 3D printers. However, it’s difficult to find a scenario where the Aquila X2 would edge out the competition, either by price or by features. The addition of a BLTouch input on the board indicates that this machine could be upgraded in the future, either by the user or by Voxelab.
It’s hard to find a compelling reason to recommend the Aquila X2, especially when considering that printers like the Elegoo Neptune 2 offer similar features at a lower cost. Given the abundance of Creality Ender 3 clones on the market, the Aquila X2 feels like a real missed opportunity to release a more user-friendly model with automated calibration and a profile for Cura.
Andrew Sink first used a 3D printer in 2012, and has been enthusiastically involved in the 3D printing industry ever since. Having printed everything from a scan of his own brain to a peanut butter and jelly sandwich, he continues to dive ever more deeply into the endless applications of additive technology. He is always working on new experiments, designs, and reviews and sharing his results on Tom's Hardware, YouTube, and more.
Voxelab Aquila 3D printer review
By Guanshan Fix / July 29, 2021 August 10, 2021 / Reviews / 3d printing / 2 Comments
We use affiliate links. If you buy something through the links on this page, we may earn a commission at no cost to you. Learn more.
REVIEW – Technology has come a long way in just the past five years.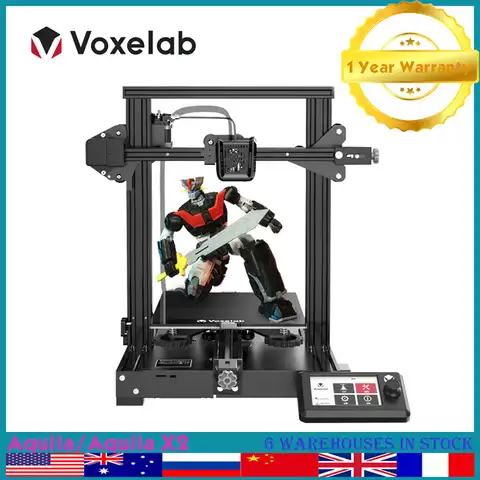 When they first came out, 3D printers were well beyond the price range of most labs not to mention an ordinary citizen. Now anyone with a few hundred dollars to spare can purchase one. The question is always which one to get. The Voxelab Aquila 3D printer is a great first 3D printer for anyone who is looking into getting into the hobby. Easy to assemble and comes with its own custom software to compile 3D files for printing means there isn’t anything needed to start printing beyond the machine itself.
What is it?
The Voxelab Aquila is a 3D printer perfect for entry level 3D printing hobbyists.
What’s in the box?
- Voxelab Aquila 3D printer
- M6 Pneumatic joint 2x
- Nozzle
- 50g filament
- Screw kit
- Wrenches & screwdrivers
- Spool rack
- Power cable
- Removal tool
- Storage card & reader
- Cable ties
- Nozzle needle
- User manual
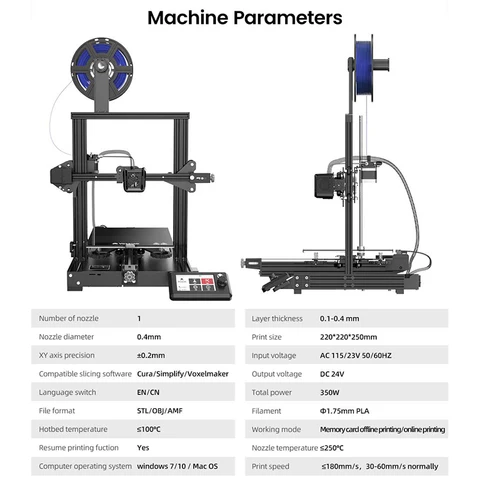
Hardware Specs
- Extruder Number: 1
- Extruder Diameter: 0.
 4 mm
4 mm - Maximum Set Temp. of Extruder: 250 ℃
- Maximum Set Temp. of Platform: 100 ℃
- Print Speed: ≤180mm/s, 30-60mm/s normally
- Filament Type: PLA, ABS & PETG
- Print Bed: 220*220*250mm
- Layer Resolution: 0.1-0.4 mm
- Print Resolution: ±0.2 mm
- Printer Size: 475*480*473(620)mm
- Screen: 4.3-inch Screen
- Net Weight: 8.2 kg
- Input: AC 115/230V 50/60Hz
- Output: DC 24V
- Power: 350 W
- Working mode: Memory card offline printing or online printing
- Software: Cura / Simplify 3D / VoxelMaker
- Output: gcode
- Input: 3mf / stl / obj / fpp / bmp / png / jpg / jpeg files
- Running Noise: 50dB
- Working Environment: 15-30 ℃
- Resume printing fuction: yes
- Filament sensor: no
- Language switch: English / Chinese
Design and Features
Since the bottom of the printer comes preassembled, the only part that needs to be put together is the z-axis.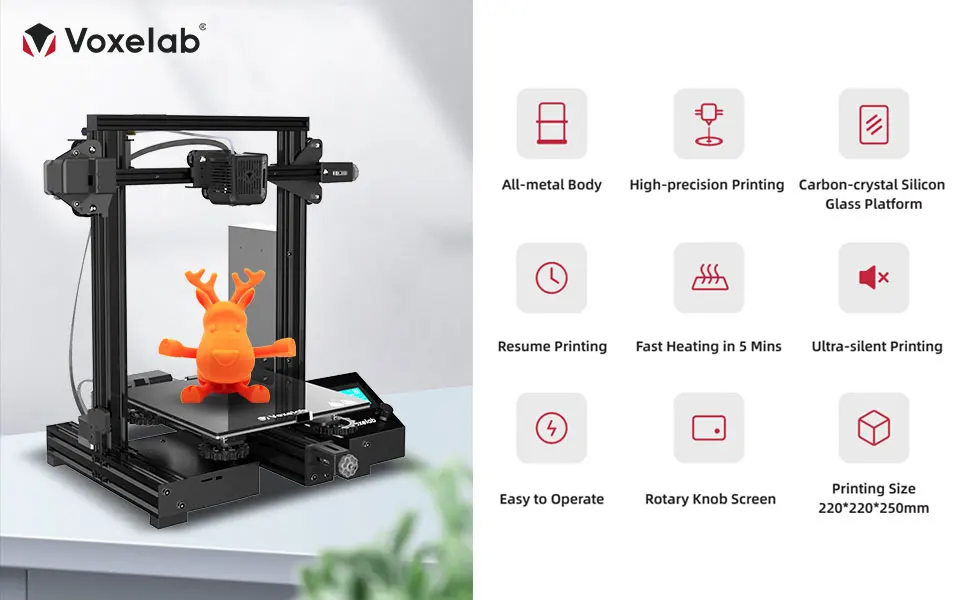 The instructions were easy to follow and the parts screwed together easily. Be careful when you’re installing the x or z axis bars, you can scratch the frame. I did unfortunately end up scratching my frame while I was trying to screw the bars on. A pro tip for installing the z-axis bars is lay the printer on its side and screw in the side that’s up in the air, not the side that’s laying flat on the table. Also make sure you have a towel or something soft to flip the base onto its side so you don’t damage the base and the table you are working on.
The x-axis rubber belt seems a bit old and turned white when I stretched it to install it. I was a bit worried about it but after my initial worry, it has held up wonderfully and hasn’t stretched or broken. The build was easy, it took me about an hour and a half to build it from start to finish. That’s with having built a 3D printer before but the instructions were super easy to follow so I feel anyone can put the printer together. The English translation is a bit rough but it is easy to follow as long as you have basic knowledge of how things are put together and can use the drawings to clarify the bad translations.
The way the screen attaches to the printer is a little weird. I wasn’t really able to figure out how to get the screen cord fed from the base to the screen. I squished it between the back of the screen and the mounting bracket and it seems to work. I know that there are many different prints available to address this issue, but this review is only going to focus on the out-of-box printer without any additional printable upgrades.
You do need to know how to level the print bed and the instructions don’t exactly explain how to do it very clearly so I advise looking it up online and watching a tutorial. However, once I leveled the bed, my first print from the machine went really well. It adhered wonderfully to the glass carbon fiber print bed and the quality of the extrusion was nice and clear.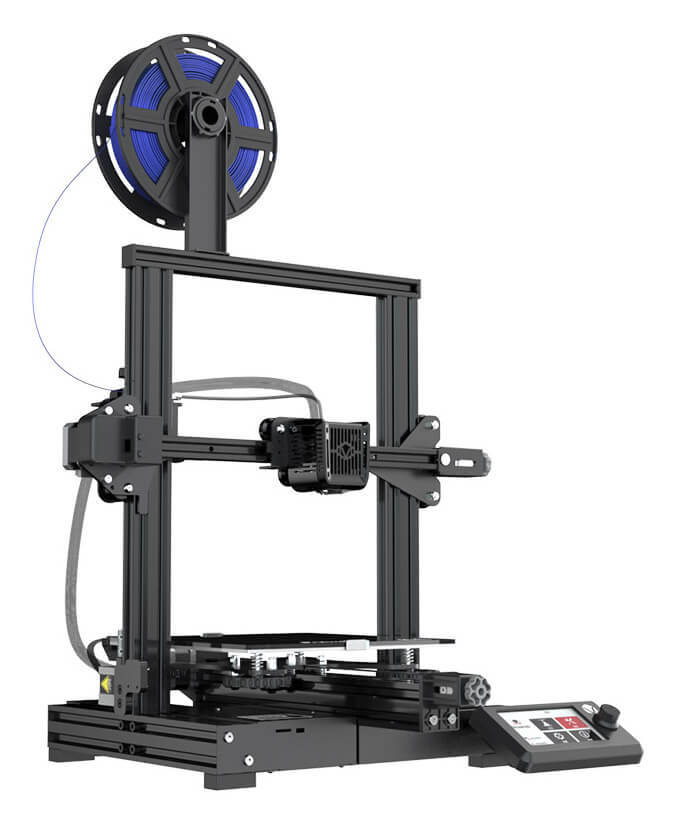 There are two ways to import the files for printing, a micro SD card slot and a micro USB port. I used the micro SD card provided to store the files for printing but you can directly connect the printer to your computer using the micro USB port if you wish.
The Voxelab Aquila 3D printer itself is a little loud, but it’s nothing compared to my other printer. The processor fan is the most noisy part, while the motors are almost silent. The extruder fan is the next loudest thing but really quite tolerable if it’s behind a closed door. I found it a bit too loud to sit next to so if you are planning on having it in the same room as you, I’d look into building an enclosure for it.
The screen uses a rotary dial to select things and then press to select. In the lower left corner it shows the printing temperature, bed temperature, print speed and x-axis offset. The currently printing file name is shown above the progress bar along with the printing time and the time remaining to complete the print.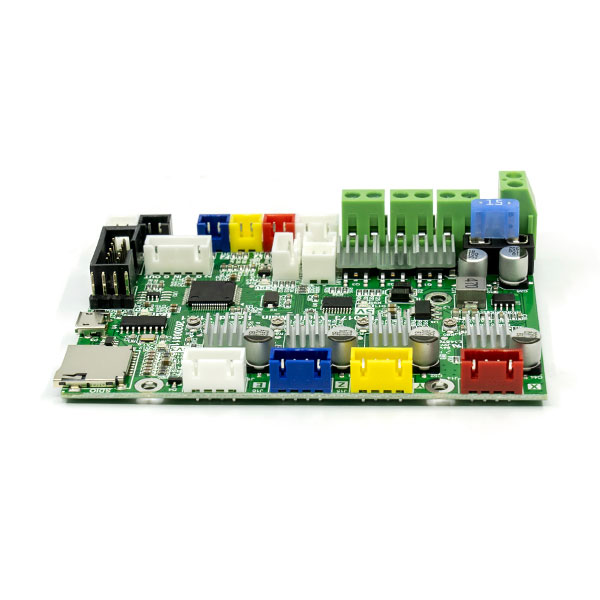 The time remaining seems to be pretty inaccurate. In the photo above it shows that it it will take 14 hours and 51 minutes to print but in reality it only took about a hour and 45 minutes.
The print popped off the bed nicely using the provided spatula. Just be careful to not scratch the bed. There was very slight stringing at the beginning and end of the print from the nozzle but nothing that is easily cleaned up during post print.
When I switched to my own filament, I did struggle with bed adhesion. I’m not sure if my filament was a lower quality than the sample filament but I really struggled to keep the print from shifting immediately. I ended up boosting the printing temperature by 20 degrees and the bed temperature by 10 and that seemed to help with the adhesion. I have used painters tape in the past for bed adhesion but I wanted to try to use the printer as straight out of the box as possible.
This little inch and a half robot is a great little test for the printer.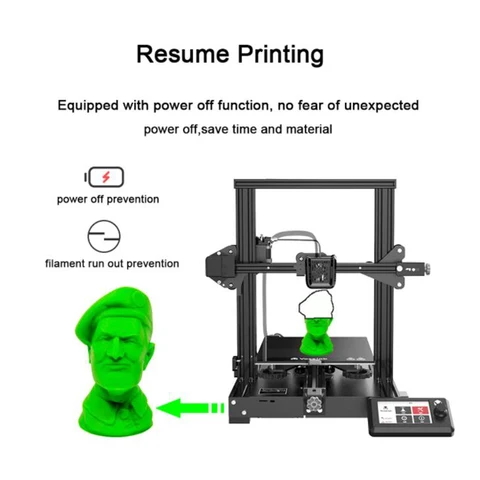 It has a large smooth head, print in place joints and small finger and toe details, all things that a quality printer should be able to handle. You can see the slight stringing on the left eye in the photo above.
As you can see in the picture above, it does have some print drooping on the overhangs especially around the hand joint. The finger detail came out nicely for how small they are.
The top of the head is nice and smooth, however you can see where each of the layers overlap each other on the right side behind the ear.
The base shows how the printer prints the first layer. It first prints the outline then fills it in. It also gives you a good view of the ball joints which were printed in place inside the body of the robot. The fact that the printer was able to do this means that it is very accurate printing with very little deviance. If it had a larger deviance, the joints would be printed into the sides of the body and wouldn’t be able to move.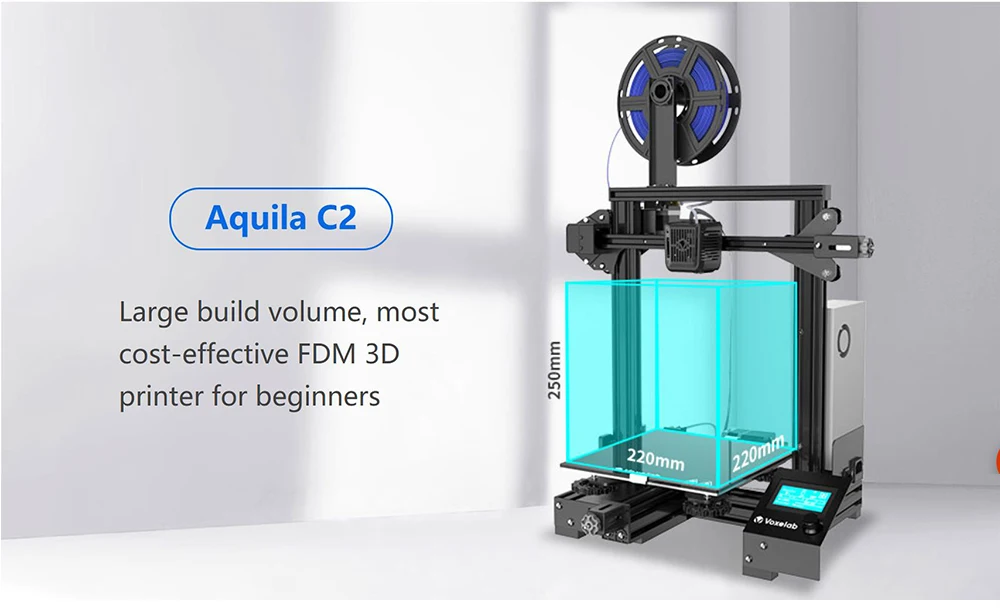
This is a failed print. I was attempting to print a dog head and it broke free from the print bed. It shows what the 3D infill looks like and how the shell of the print is supported without making the print completely solid.
Software
The provided compiling software is simple but gets the job done. Once you load a 3D file, it can be manipulated using the options on the left side.
For prints that have a large overhang, the software can help by adding supports. There are two options for the supports, tree or linear. Above is an example of the tree supports. The supports will snap off in post print and help prevent the print from sagging during printing.
There are two printing modes, simple and expert. The simple mode reduces the available options to prevent confusion and is great for beginners. The expert mode allows the user to adjust nearly any printer setting you wish. All you need to do is save the configuration onto the micro SD card or connect the printer to the computer and start printing.
What I like
- Super easy assembly
- Easy to start printing straight out of the box
- Wonderful first 3D printer
- Provides software to prepare 3D files
What I’d change
- Better bed adhesion
Final thoughts
The Voxelab Aquila is a great entry level 3D printer. Simple and easy to assemble and comes with software specifically designed for it makes it easy for anyone to use it no matter their level of knowledge. As easy as it is for a beginner to use, it has plenty of room for improvements to be made by a more experienced person. This means that this printer is a great option even for those who have more experience with 3D printing. I will definitely be recommending the Voxelab Aquila to anyone I know who is looking into purchasing a 3D printer in the future.
Price: $168
Where to buy: Voxelab and Flashforge
Source: The sample for this review was provided by Voxelab
Voxelab Aquila X2 3D printer review
Welcome to the Color World!
Creality successfully established itself in the market of budget 3d printers by releasing the Ender-3 printer and its subsequent modifications in 2018. The success of the company inspired competitors to use similar solutions in their designs, with an emphasis on reducing the cost of the product. Today we have a direct competitor of Creality Ender-3 V2 - Voxelab Aquila X2 on our review. Can such a budget solution meet today's print quality standards? Or is there no point in saving? We will answer these questions in our review!
At the end of the article you can watch a detailed VIDEO REVIEW of this printer
Package contents
Voxelab Aquila X2 is delivered in a relatively small number of parts. The printer comes with a set of fasteners in signed bags, a set of tools, a needle for cleaning the nozzle and an SD card with a card reader. Instead of the usual 250g plastic coil. The printer comes with just a few meters of red PLA, which is quite in line with the Aquila X2's price point. Also in the package, the attention to detail pleased: each aluminum stand is individually wrapped in cellophane film, the top crossbar is equipped with a handle for easy transportation of the assembled printer, as well as side plugs.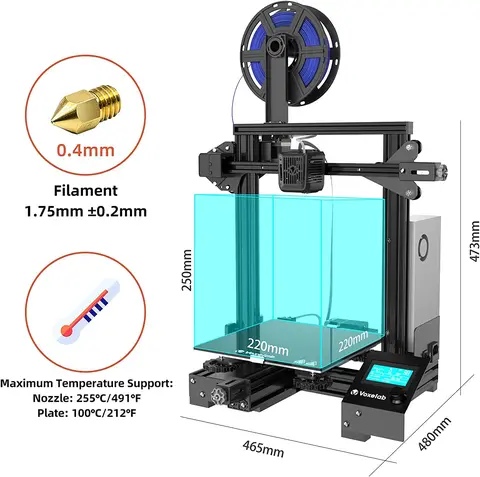 Spatula neatly packed in a zip bag. But most of all I was surprised that Voxelab in such a budget edition of the printer did not stint on spare parts: a second nozzle, a second fitting and a separate package with additional fasteners.
Features
When assembled, the Aquila X2 measures 473x480x473mm and weighs only 8.2kg.
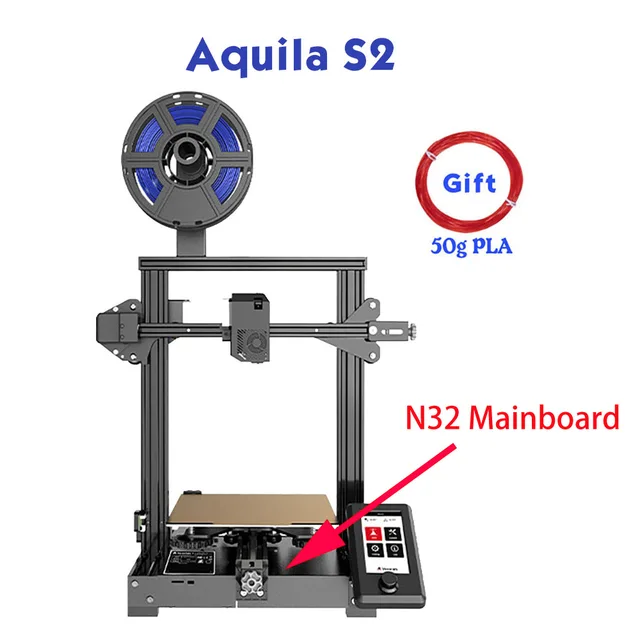
The printer's electronics are located at the base: 24V/350W power supply, 32-bit Aquila Main Board v1.0.1 control board with an analogue of the silent driver TMC2208.
4.3" color display with encoder mounted separately to the printer base.
The printer interface is simple both in design and functionality. The main screen contains the print, control, settings, and information menus. Several functions are available in the "Settings" menu: setting the temperature and preset temperature profiles for ABS and PLA, setting the movement: maximum speed and acceleration, as well as setting the angles on each axis and setting the steps. This menu displays the operation of the filament sensor, and you can change the language here, but only two languages \u200b\u200bare available in the basic firmware - English and Chinese. All the main functions are located in the "Control" menu: movement along the axes, turning off the motors, sending to the "home point", selecting preset profiles, loading and unloading the filament, cooling. In the "Print" menu, after selecting a file on the sd-card, information is displayed on the temperatures of the table and hotend, print speed and offset along the Z axis, which can be changed during printing.
The Aquila X2 uses the Prusa kinematics, where a sliding table is responsible for the Y-axis movement. Construction area 220x220x250 mm. The surface of the table is glass, made in the form of a separate plate, which is mounted on two aluminum brackets to the heating element of the table. The maximum table heating temperature is 110°C, which allows working with refractory PETG and ABS.
The hot end uses the standard CR10, same as the Ender-3, with a maximum heating temperature of 250°C. The plastic housing of the hot end is equipped with two coolers: for blowing the radiator and the model.
The MK8 feeder located on the X axis is also common in the Ender-3 series. Equipped with one brass feed gear and return roller. The developers have added additional details for Aquila X2 to the SD card of the model, among which there is a wheel for the feeder gear, but it makes no sense to print it, because the mechanism works fine and in its original form, there are no problems with the bar feed.
Preparing for the first print
There is no calibration menu in Aquila X2, so for calibration you need to set four points in the corners of the table using the "motion" tab, and set the gap with the adjusting wheel, at which the sheet of paper will pass with little effort between the nozzle and the table surface.
Voxelab has their own VoxelMaker slicer that comes with the Aquila X2 on an SD card. But also Aquila X2 is compatible with Cura. To work in Cura, you need to create an Aquila X2 profile according to the instructions, which are also on the sd card.
The paper clips included with the printer seemed unreliable to us - with a slight pressure on one of the sides, the glass plate shifts, which can lead to shifting of the layers during printing. We decided to strengthen the fastening with clerical clips.
Printing calibration patterns
Standard XYZ-cube calibration model selected for first print. Printed with Esun PLA+, settings: 215/60°C, print speed 60mm/s.
It was printed without problems: there is no misalignment of layers and smudges of the material, the geometry is even.
The next print was a test model that comes with the Aquila X2 on an SD card. This is a more difficult test with several geometric shapes.
It also printed well: the geometry is observed, there are no gaps, there are no sagging under the arch. The only difficulty arose at the point of confluence of the two ends of the arch - at high speed the nozzle ran into the material, due to which a barely noticeable shifted layer appeared, but this problem was solved by installing a retract along the Z axis in the slicer.
After the calibration models, we decided to print the cable channel for extruder switching with the same material, because during the printing process, the extruder cable touched the heated bed cable.
Due to the large number of supports on the links of the cable channel, there are noticeable traces, but it copes with its function.
Printing PETG
As a model for printing on PETG, an assembled gear mechanism was chosen. Material - dark gray Bestfilament. Temperature 235/80°C, print speed 80 mm/s.
The parts of the mechanism are printed evenly: there are no overextrusion drops on the walls, the layers are even. The mechanism works, all gears rotate without hesitation.![]() The only noticeable disadvantage of printing is a lot of threads and traces of seams on the models. This is a common problem with PETG printing, but especially with long retract extruders. Only the installation of a direct extruder can help here.
The only noticeable disadvantage of printing is a lot of threads and traces of seams on the models. This is a common problem with PETG printing, but especially with long retract extruders. Only the installation of a direct extruder can help here.
TPU print
Printing with a TPU extruder like this is difficult, but possible. To do this, you should choose a speed at which the soft material will not jam in the feeder. We tried to print membranes for the Pop it antistress toy. Esun eTPU-95A was chosen as the material. Print settings: 230/70°C, speed 30mm/s. The case was printed from Esun PLA+, which was also on the calibration models.
And here Aquila X2 surprised us again - it did a great job printing eTPU-95A the first time. The feed mechanism did not jam the bar, there were no breaks or shifts in the layers, and there were even relatively few threads by the standards of printing on TPU. As for the Pop it itself, the membranes made of eTPU-95A turned out to be rigid, but with a little effort Pop it can be used.
Stress test
And in the end we put a stress test for 22 hours. They printed a vase of a complicated shape - protruding ribs on the surface of the vase create a large amount of retract. Material - translucent Esun PLA, print settings: 215/60°C, speed 60 mm/s.
Aquila X2 coped with the vase, no problems arose, all geometry was observed. But during the printing process there were a lot of filaments, which is not typical for PLA, but as it turned out, translucent PLA includes components that affect the appearance of filaments, almost like PETG. So the noticeable traces of the "cobweb" on the vase upset me a little, but here the material was clearly chosen incorrectly, because. all models from orange PLA + Aquila X2 on the same settings printed without threads. In general, Aquila X2 proved to be worthy at long distances.
Totals
Aquila X2 is really very similar to Ender-3 V2. Components are made on the same level: belt adjusters, V-shaped roller profiles, heating table, display with encoder. The hot end and feed mechanism are the same. But there are also shortcomings: weak brackets on the heating table, not the most convenient location for switching the hot end, however, all these shortcomings can be easily fixed, and, perhaps, they can be forgiven for the price of Aquila X2.
You can also watch a VIDEO REVIEW of this printer:
Subscribe to our Youtube channel in order not to miss new reviews!
By the way, we recently created a second Youtube channel, where we publish various life hacks and other useful information related to 3D printing.
We remind you that when you buy any 3D printer in our store, you will receive a lifetime 10% discount on the purchase of plastic for 3D printing and photopolymer resin. As well as free delivery of the purchased 3D printer to any region of Russia (except for assembly kits)!
Thank you for your attention!
Our contacts: T: 8 (800) 550-02-09 | | www. cvetmir3d.ru
We are on Vkontakte: https://vk.com/cvetmir3d
We are on Facebook: https://www.facebook.com/groups/cvetmir3d/
We are on Instagram: https://www.instagram.com/cvetmir3d/
Our channel "3D printing life hacks": https://www.youtube.com/channel/UCUv3Lk-oDMh38rKX68kUBYg
Voxelab Aquila X2 3D printer (assembly kit) in Moscow
Out of stock
Add to compare
Item added to compare Go
23 500 ₽
Notify me of admission
Official distributor
We work directly with manufacturers.
Any form of payment
The opportunity to see the 3D printer in action in our demo room.
Own warranty service
Warranty and post-warranty service of equipment purchased from us.
Permanent 10% discount on consumables
When you buy a 3D printer from us,
you get a 10% discount on all consumables.
The Voxelab Aquila X2 3D printer is a new budget model released with the support of Flashforge, which made it to the top 10 3D printers on Amazon a few months after launch.
Voxelab Aquila X2 features:
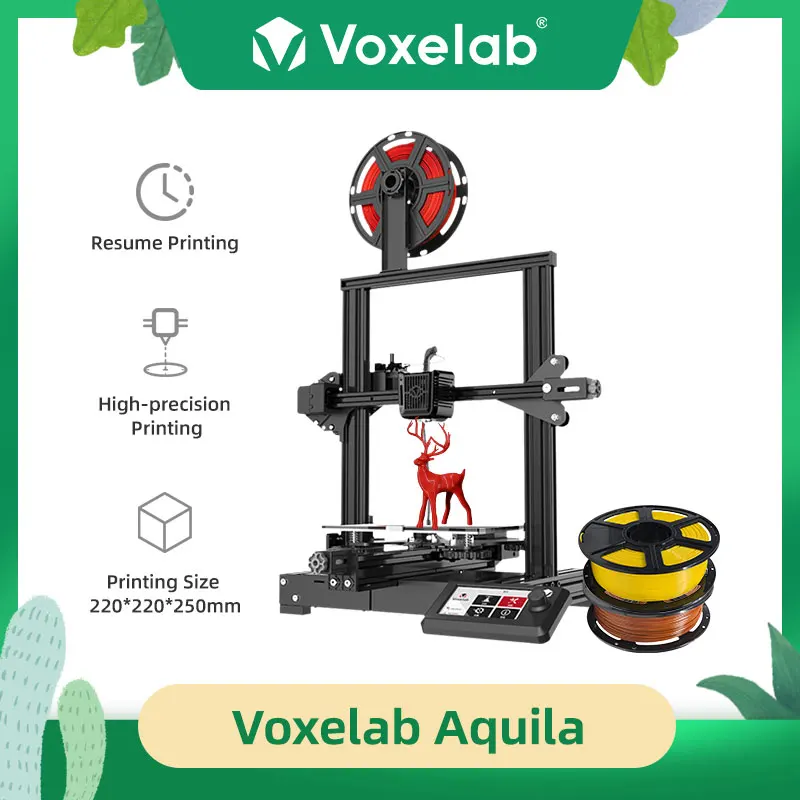
- Large print area The print volume of 220 * 220 * 250 mm allows you to print models of the same dimensions as on more expensive 3D printers.
- Resume printing after power off
- Fast platform heat up in 5 minutes
- High quality V-profile
- New regulator
- Aquila X2 is made in an aluminum housing that does not create wobbles during the printing process.
- Color display with encoder
- Plastic spool holder 1 pc.
- Power cable 1 pc.
- Cable ties 1 pc.
- Nozzle cleaning needle 1 pc.
- Pneumatic connector 2 pcs.
- Spatula 1 pc.
- SD card and card reader 1 pc.
- Wrenches and screwdriver 1 set
- Plastic roll 50 g
- Nozzle 1 pc.
- Screw set 1 pc.
- Instruction manual in Russian in el. form
Welcome to the Color World!
Creality successfully established itself in the market of budget 3d printers by releasing the Ender-3 printer and its subsequent modifications in 2018. The success of the company inspired competitors to use similar solutions in their designs, with an emphasis on reducing the cost of the product. Today we have a direct competitor of Creality Ender-3 V2 - Voxelab Aquila X2 on review. Can such a budget solution meet today's print quality standards? Or is there no point in saving? We will answer these questions in our review!
Read more