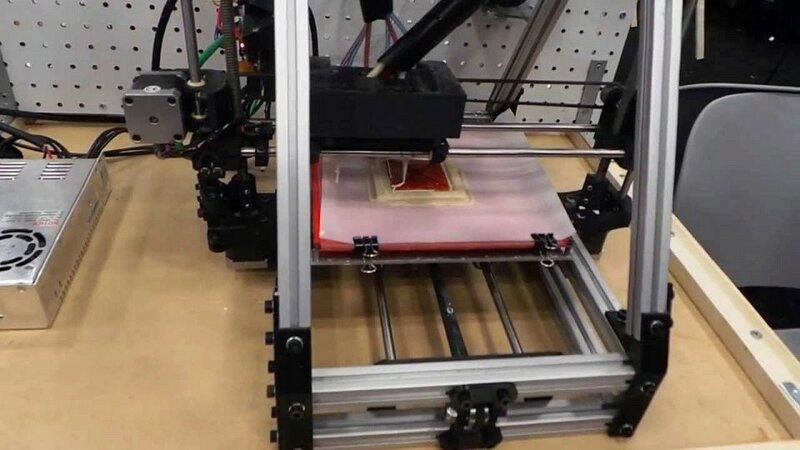
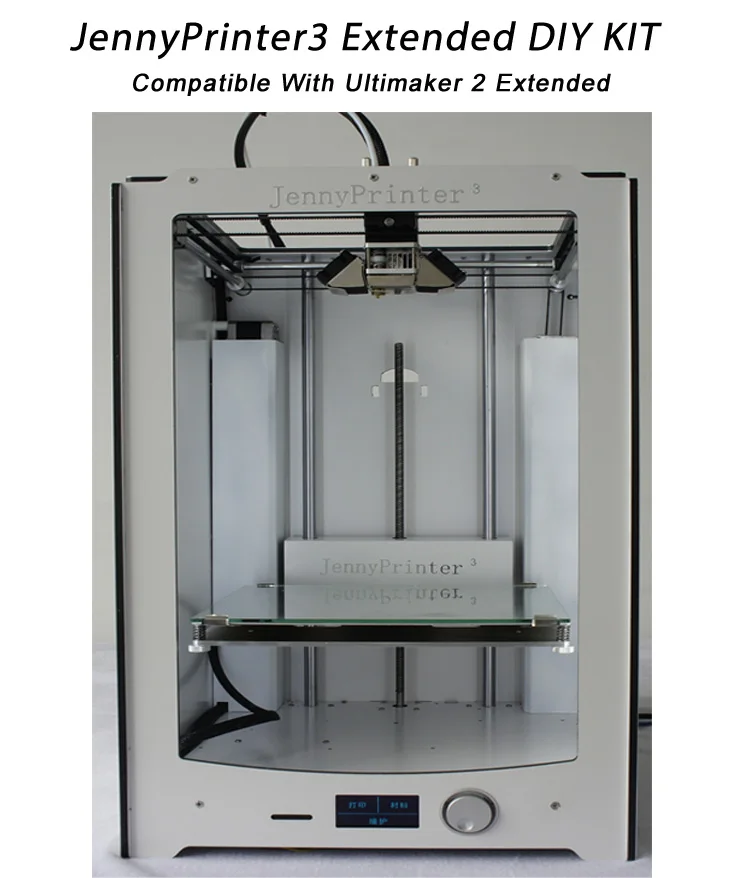
3D print repair
How to Repair STL Files for 3D Printing With the 5 Best (Free) STL Repair Tools
Designers and engineers often need software to adapt, repair, and finalize 3D models for 3D printing. Luckily, the era of manual mesh programming is long gone.
Today, there is a range of dedicated tools available offering both automatic and manual STL repair functions. Automatic wizards will suffice for most models and fix small errors such as holes and loose shells, but models with more critical errors will require a standalone solution.
In this guide, we describe the workflow for repairing STL files and walk through the process with five of the best STL repair software tools for fully repairing models towards 3D print-readiness.
Advanced print preparation tools like PreForm software from Formlabs include an automated repair function. PreForm is free, try it now.
Video Guide
Having trouble finding the best 3D printing technology for your needs? In this video guide, we compare FDM, SLA, and SLS technologies across popular buying considerations.
Watch the Videos
3D designers typically construct models using elaborate surfacing methods. This results in mathematically ‘perfect’ geometry defined by curves and splines. For 3D printing, surfaces are converted to a mesh format that describes geometry as a cloud of connected triangular faces and vertices.
Mesh conversion is like smashing a perfectly smooth mirror, then gluing back together all the bits and pieces to make it look like the original. Done badly, the result is a model with all kinds of edges, holes, and floating parts, as well as areas with many intersecting triangles that do not belong there. Done well, the 3D print is a manifold mesh without holes, indistinguishable from the original design.
A 3D model mesh with various flaws.
A typical STL file repair workflow contains the following steps:
-
Auto-repair. The STL repair software’s wizard will attempt to fix all major errors, including holes, separate shells, and intersections.

-
Separating shells. A mesh consists of collections of connected triangles. It can contain multiple continuous surfaces that ideally are joined together while obsolete ones need removal.
-
Closing holes, bridging gaps. Some comprehensive STL repair programs allow different ways of hole filling, such as planar, tangent, ruled, or freeform.
-
Resolving overlaps and intersections. This typically requires recalculating entire portions of the mesh.
-
Filtering out double faces, double vertices, inverted normals, and sharp, narrow triangles.
-
Stitching open edges and remaining holes.
-
Manual repair by deleting and creating triangles.
-
Remeshing to optimize triangle count.
-
Exporting to the chosen mesh format.
The most popular and storage-friendly format is STL (StereoLiThography), which we will use for this article. We recommend saving the .STL files in a Binary format since it further reduces file size. As described in our Meshmixer tutorial, there are several other useful formats such as AMF, Collada, OBJ, and PLY, with specialized qualities for storing material, color, rendering, 3D scanning, and 3D printing information.
Note: Several software packages contain mesh repair functionalities, such as FreeCAD, SketchUp, 3D Studio Max, and Rhinoceros, as well as online services such as Willit 3D Print, MakePrintable, 3DPrinterOS, SculptGL, and Shapeways. For Formlabs customers, PreForm print preparation software already has Autodesk Netfabb’s automated repair and part packing functions embedded to prepare 3D models upon import. This typically guarantees model integrity, so use additional tools only when requiring more advanced functions.
Sample part
See and feel Formlabs quality firsthand.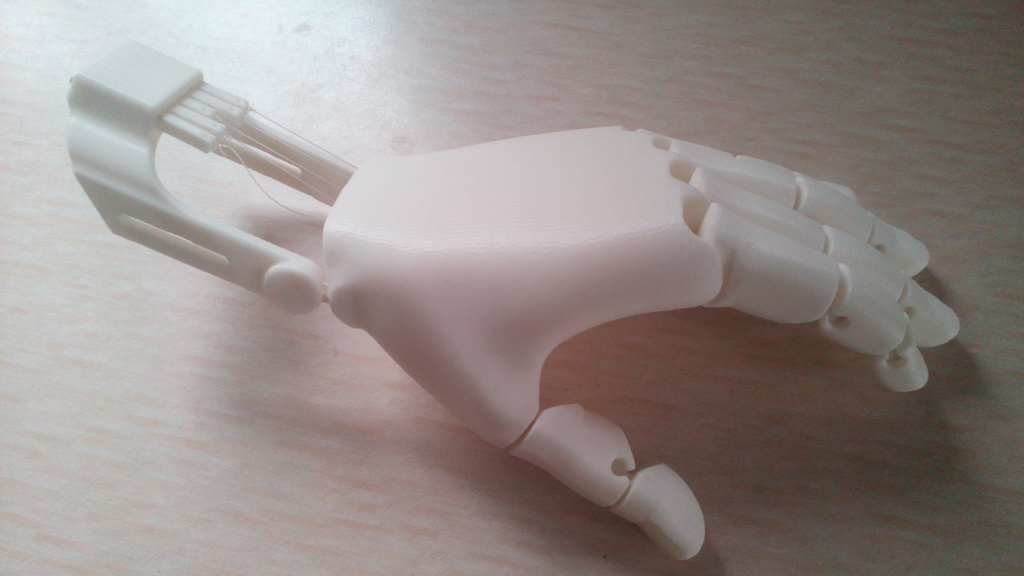 We’ll ship a free sample part to your office.
Request a Free Sample Part
| Effectiveness | Efficiency | UI | Versatility | Remeshing | Auto-Fixing | Top Features | Who is it for? | Cost | |
|---|---|---|---|---|---|---|---|---|---|
| Meshmixer | ★★★★ | ★★★ | ★★★★ | ★★★★ | ★★★★★ | ★★★★ | UI, Remesh, & Auto-Fix | 3D Artists | Free |
| Netfabb | ★★★ | ★★★ | ★★★ | ★★★★ | ★★★ | ★★★ | Infill & Supports | Engineers | Free (edu) |
| Magics | ★★★ | ★★★ | ★★★ | ★★★★★ | ★★★★ | ★★★ | Manual Repairs | Engineers | Paid |
| Blender | ★★★★ | ★★ | ★★ | ★★★ | ★★★★ | ★ | CG Artists | Free | |
| Meshlab | ★★ | ★ | ★ | ★★★★ | ★★★★★ | ★ | 3D Scanning | Free |
Based on our explorations, the best STL repair tool is Meshmixer. It combines a user-friendly interface with all the options needed to repair complex mesh errors. Its additional possibilities and free availability make it a clear number one. Meshmixer is also a useful tool to edit STL files, resculpt entire sections, as well as optimize and finalize 3D models. Read our Meshmixer tutorial with 15 pro tips for editing STL files for 3D printing.
Autodesk’s Netfabb distinguishes itself by being geared towards engineers with its advanced 3D printing preparation capabilities.
Magics is a professional STL editor solution and offers an enormous variety of STL file repair functions, yet, it often takes more manual repair work. Therefore Magics enters the list in third place.
While Blender is geared more towards 3D modeling and has a complex interface, it still offers most of the required functionalities for successful mesh repairs.
Lastly, Meshlab is a must-have lightweight mesh viewer and editor that makes up for what it lacks in file repair capabilities and user-friendliness with its advanced remeshing scripts.
The following section puts the five STL repair tools to the test using a complex 3D model of a coat hook that has several major errors including holes, gaps, intersections, and floating triangles. The hook needs to be combined with a mounting cylinder to result in a single watertight mesh.
Read on to walk through the step-by-step repair process with the five best STL repair programs.
- Meshmixer
- Meshlab
- Magics
- Blender
- Netfabb
White Paper
In this white paper, learn how 3D scanning paired with 3D printing can be effectively applied to multiple applications across industries, from reverse engineering, restoration, digital dentistry, replication, and more.
Download the White Paper
Meshmixer is a versatile and user-friendly mesh editing program. It is not only possible to optimize a triangle mesh, but also to resculpt entire sections, stylize the model, or add useful features to it.
When loading the coat hook into Meshmixer and initiating Analysis → Inspector we find that indeed, it shows all the mesh errors. Under Shaders, choose the X-ray mode for better visibility. Make sure to select the right Hole Fill Mode before either fixing individual errors by clicking on the dot indicators or running Auto Repair All that in most cases does the job sufficiently.
Use the X-ray shader in the Inspector to view all errors.
An alternative hole repair process is to select the area surrounding the hole and use the Edit → Erase and Fill (F) operation from the popup menu. Setting Type to Smooth MVC produces a good continuous fill. Edit → Make Solid or Edit → Replace and Fill are other alternatives that result in a closed mesh. An additional pass with the RobustSmooth sculpting brush will blend the improved area completely into the model.
In case the model consists of separate shells, go to Edit → Separate Shells and open the Object Browser (Ctrl + Shift + O). Now, progressively select two shells at a time and hit Boolean Union from the popup window. In the newly opened submenu, Precise or Max Quality mode will maintain the intersection curve between both objects, while Fast Approximate is much quicker and usually suffices.
If the Boolean operation fails it results in two red colored objects. In that case, turn the Search Depth parameter up and lower the Target Edge Scale to increase the chance of success. Checking Use Intersection Curves also improves quality. If all else fails, moving one of the shells by a few hundredths of a millimeter in the Edit → Transform section will do the trick.
Auto Repair All will remove floating sections and patch up all boundary loops. In this case, we want to manually connect the gap in one of the struts. This is where the Bridge tool comes in. It works best on straight sections and since this is a gap between circular loops it is best patched up in sections. Choose Edit → Select and highlight the triangles on both sides to be connected. Then hit Edit → Bridge (Ctrl + B) from the popup menu and set the Refine parameter high enough for a smooth connection. Repeat the Bridge command for a few areas around the perimeter of the gap, then use the Inspector to fill the remaining holes. A good error prevention practice is to use Edit → Remesh before repairs in order to increase and homogenize the triangulation in the area concerned.
Connecting a cylindrical gap requires several bridging, remeshing and hole filling operations in Meshmixer.
Meshlab is a software suite that specializes in mesh operations related to 3D scanning data and provides many retriangulation and advanced repair algorithms. A useful one is Filters → Remeshing, Simplification and Construction → Simplification (Quadratic Edge Collapse Decimation) because it recalculates a mesh towards a target number of faces. Checking Planar Simplification will preserve flat surfaces best. An alternative triangle reduction method is Filters → Cleaning and Repairing → Merge Close Vertices.
Floating elements can be detected by right-clicking on the part in the project window and selecting Split in Connected Components. Separate shells can then be individually deleted or combined back with CSG Operation using a Union operator.
Basic repair utilities in Meshlab: Close holes, Boolean, and brush selection.
It is possible to do basic mesh repairs as well with Meshlab. For example, Filters → Cleaning and repairing → Select Self Intersecting Faces → Apply will select all intersecting triangles which can then be removed by pressing Delete. Filters → Cleaning and repairing → Remove Duplicated Faces and Remove Duplicated Vertex are always useful actions to perform. The next step is healing up holes using Filters → Remeshing, Simplification and Construction → Close Holes. The Compute Geometric Measures operation under Filters → Quality Measure and Computations will indicate when a mesh is not watertight. If not, detect the involved areas with Render → Show Non Manif Edges and Show Non Manif Vertices.
For bridging gaps, groups of triangles can be deleted using the Select Faces in a Rectangular Region tool from the toolbar. Hold the Alt key to leave backfaces out of the selection, use Shift + Ctrl + D to deselect. For selecting individual triangles, click the Z-Painting tool on the toolbar and select the red brush icon. Left click to select triangles, right click to erase the selection and hit delete to remove triangles. Because Meshlab does not implement any triangle creation functions, we reside to the surface generation method under Filters → Remeshing, Simplification and Construction → Surface Reconstruction: VCG. With a low enough setting for Voxel Side and high enough value for Geodesic Weighting and Volume Laplacian Iterations, it will result in a smooth manifold mesh. This method is usually recommended over Filters → Remeshing, Simplification and Construction → Screened Poisson Surface Reconstruction. Another alternative method is to generate an Alpha Complex then generate an Alpha Shape which sometimes works with the right values. For remesh operations, Meshlab offers a voxeliser under Filters → Remeshing, Simplification and Construction → Uniform Mesh Resampling which results in a manifold mesh and offers an offset parameter useful for creating hollow parts.
Note: Save meshes after every important operation! Meshlab does not have an Undo function and will require reimporting the original mesh.
Advanced surface reconstruction functions in Meshlab, some more successful than others.
Materialise Magics is a professional 3D print data preparation tool that allows extensive manual control over meshes, including wall thickness analysis, hollowing, remeshing, smoothing, Boolean, and cutting operations, as well as fixing holes, bad edges, and the most complicated triangle errors.
Fixing errors is typically done using the Fix Wizard under the red cross icon. Click on Go to Advised Step opens a diagnostics table to check for different errors to be repaired. For large meshes, it is recommended to uncheck Overlapping triangles and Intersecting triangles and fix the major errors first. After selecting Update, again click Go to Advised Step and then on Automatic Fixing–this will fix most errors.
In case the fix wizard fails to repair bad edges and overlapping triangles, the Stitch function under Stitching in the Fix Wizard menu often proves useful with a high enough tolerance setting. For remaining overlapping triangles, either run the Fix Wizard again or choose Detect Overlapping from the Overlaps section in the Fix Wizard menu. This selects all overlaps that will then be removed by hitting Delete Marked. Similarly, this can be done for intersecting triangles under Triangles → Detect Intersecting. If stitching the remaining gaps does not complete the repair, the Create button now allows filling up the remaining gaps manually. Mesh sections can also manually be marked under the Marking tab on the main menu. Floating sections can be removed under the Noise Shells section. For large non-planar holes, manually filling these using the Freeform option under Holes in the Fix Wizard menu will result in the smoothest fill patch. The Ruled option allows specifying a direction for the hole to follow and is in this case used to bridge the cylindrical gap in one of the flower’s stamens after manually creating a few bridging triangles.
Sometimes the Fix Wizard will not merge different shells in the mesh. To fix that, right click on the part in the Part Pages → Part List menu on the main screen and choose Shells to Parts. This creates separate meshes that when checked can now be combined using the Tools → Boolean (Ctrl + B) function.
Advanced hole filling functions for organic and cylindrical shapes in Magics.
Blender is a free and open-source mesh creation environment, including 3D modeling, rigging, rendering, and animation. Several STL repair functions are available in Edit Mode on the Mesh menu on the lower toolbar. The CellBlender add-on provides a Mesh Analysis tool to check manifoldness and to look for manifold errors. Before commencing any repair scripts, make sure to have the relevant mesh or section selected.
Mesh → Normals → Recalculate Outside (Ctrl + N) flips any triangles with inverted normals. Check the info pane on top for results, in case quads are generated, these can be converted to triangles with Mesh → Faces → Triangulate Faces (Ctrl + T). Mesh → Degenerate → Dissolve removes edges and faces with no area. Remove duplicate vertices to weld edges together with Mesh → Vertices → Remove Doubles.
Bridging, hole filling, and Boolean functions are all represented in Blender.
The simplest way to fill a hole in Blender is to first select the boundary loop with Select → Select Boundary Loop or select all non-manifold edges with Select → Select All by Trait → Non Manifold (Shift + Ctrl + Alt + M) and then hit Mesh → Faces → Make Edge/Face (F) or Mesh → Faces → Fill (Alt + F) for an improved fill. Individual triangles can be created by right-clicking an edge or vertex, Shift + right-clicking the second one and pressing F. It is helpful during editing to switch between Vertex Select, Face Select, or Edge Select modes that are indicated by three icons at the bottom toolbar. Selecting a particular area can be done with Select → Circle Select (C) which works similar to brush selection. Change the brush size with the mouse wheel or the numerical plus/minus buttons, deselect holding the Shift key. Mesh → Faces → Beautify Faces (Shift + Alt + F) sometimes works to improve mesh quality in the selected area.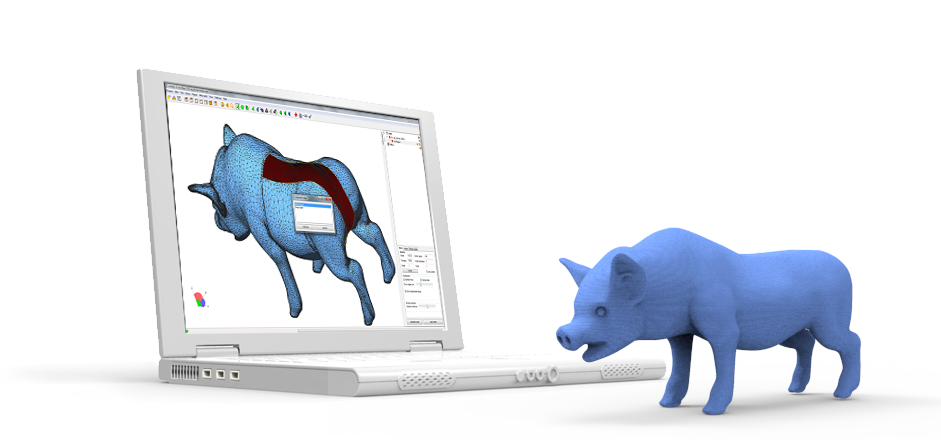 Individual boundary loops can be selected using Alt + Right click. With two open boundary loops selected, choose Mesh → Edges → Bridge Edge Loops and the two areas will be smoothly connected.
Choosing Mesh → Vertices → Separate → By loose parts will create one object per shell in the project browser. This makes it possible to delete unwanted mesh objects. Separate shells can be joined together with a Boolean Modifier. If all else fails, implement a Remesh Modifier and increase the octree depth to around 8 or until results are satisfactory. For increasing wall thickness in certain areas, go to Sculpt Mode and use the Inflate brush from the lower menu Brush → Sculpt Tool.
Autodesk Netfabb is an advanced 3D print file preparation tool and its automated repair function is embedded in software such as Formlabs PreForm. It is offered in a Standard, Premium and Ultimate version of which the first two are freely available for educational use.
Netfabb offers additional mesh editing procedures such as hollowing, custom support building, and the Lattice Assistant and Lattice Commander which are great aids in developing lightweight parts. The Ultimate version offers an Optimization Utility that structurally optimizes parts based on applied loads using FEA analysis.
With the File → Import CAD File as Mesh function it is possible not only to import mesh models in various formats, but also native files from Catia, Siemens NX, SolidWorks, SolidEdge, Rhinoceros, ProE, Sketchup plus support for STEP, IGES, SAT, and Parasolid XT files. To import a mesh click File → Add part and check Extended Repair in the dialog. This resolves most errors resulting in a 3D printable file.
Before starting the repair job it is useful to analyze parts. Under the Analysis icon in the taskbar or after right click on the part under Parts → Analyse → New Analysis → Add part it is possible to rapidly check wall thickness. Right-click the part then choose Analyse → New Measurement or pick the ruler icon from the taskbar which allows linear, radius, angular, and wall thickness measurements at specific points.
Advanced Netfabb functions: wall thickness analysis and lattice structures.
Open the Part Repair section by clicking the red Repair icon from the taskbar. If the automated repair script did its job well upon import, the Mesh is Closed and Mesh is Oriented items in the Status tab should be checked in green. In the Actions tab, it is possible to further optimize the file in case intersections pertain to exist. Under Self Intersections, choose Detect and then either opt for Trivial which does a default hole repair, Stitch Triangles, Remove Double Triangles, Remove Degenerate Faces, or Split Off and then Remove the intersections. Wrap Part Surface works similar to voxelisation procedures and leaves only a manifold outer skin. Also, make sure that no noise shells exist under the Shells tab.
Netfabb offers a advanced STL repair capabilities.
When attempting to bridge gaps, Netfabb will rather fill the open holes which require further manual repairs. Tap the Select Surfaces icon on the main toolbar and select the entire hole, then hit Delete. Alternatively, use the Brush Selection tool and use Ctrl + Scrollwheel and the Plus/Minus buttons to alter brush size and selection. With the triangles selected, choose the Remove Selected Triangles icon and manually add missing triangles as well as a few bridging triangles with the Add Triangles button. The Repair → Close all Holes operation will complete the mesh repair task. Finally, we can opt to refine the mesh using the Mesh Edit → Remesh command which recomputes the model based on a Target Edge Length parameter. Check the Maintain Edge option to optimize model integrity around sharp edges.
Looking for the right tool to turn your designs into reality? High-resolution stereolithography (SLA) and selective laser sintering (SLS) 3D printers are fast and cost-effective tools to produce high detail models with a smooth surface finish.
Learn more about 3D printers and see the quality firsthand by requesting a free sample part printed on a Formlabs 3D printer.
Learn More About SLA 3D PrintingLearn More About SLS 3D Printing
How to Fix Broken 3D Printed Parts – PLA, ABS, PETG, TPU – 3D Printerly
3D printing is great for creating parts, but with some models, we might end up with broken 3D printed parts. This can be due to weak points in the models, which sometimes can’t be avoided, but what we can do is learn to fix these broken parts.
You should glue broken 3D parts together with epoxy or superglue carefully, making sure the surfaces are cleaned up with sandpaper. You can also use a hot gun to melt materials like PLA then rejoin them, so the pieces bind together.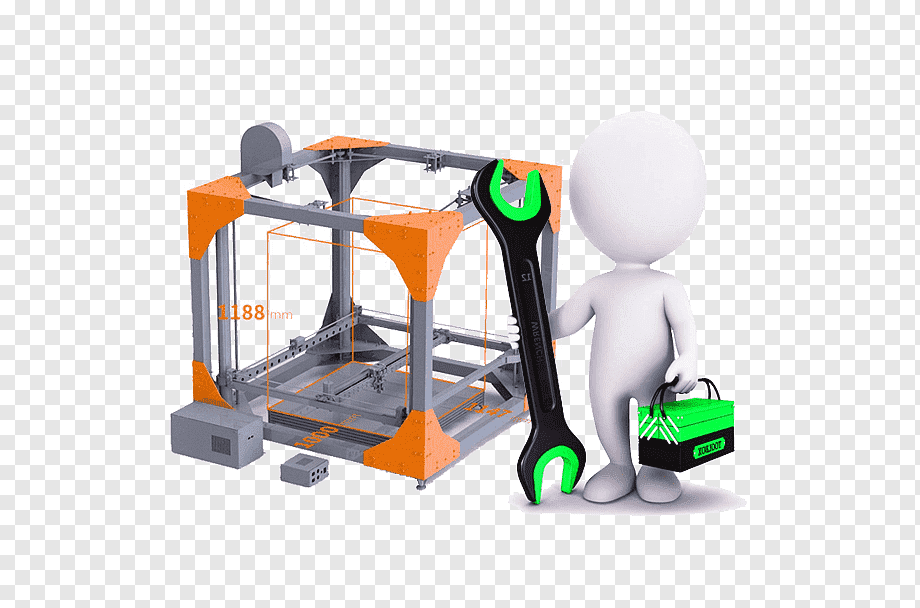
There are some key details that you’ll want to know when it comes to fix your broken 3D printed parts properly, so stick around and find out some extra tips.
How to Fix the Broken 3D Printed Parts
Fixing broken 3D printed parts isn’t too hard as long as you have the right information behind you. Sometimes it isn’t necessarily fixing broken parts either, where you just want to combine different parts of a larger 3D printed model.
Depending on what your situation is, you are going to want to use an adhesive substance to fix your broken 3D printed parts. There are other ways and materials that 3D printer users make use of when repairing parts, which will be described in this article.
The best ways to fix a broken 3D printed part is to:
- Prepare a flat, stable surface for you to work on
- Gather the broken 3D printed parts, along with an adhesive such as superglue or epoxy
- Sand down or remove rough pieces that may get in the way of bonding the main pieces together.
- Apply a small amount of your adhesive to the main part
- Connect the broken 3D printed part to the main part, then hold it together for around 20 seconds so it creates a bond.
- You should now be able to place the object down and let it cure over a short period of time.
Superglue
One of the most common, and better options for fixing broken 3D printed parts is using superglue. It’s very cheap, easy-to-use and cures relatively quickly. You can easily get amazing results and a strong bond between two parts in a matter of seconds.
Many people wonder whether superglue works on PLA, and it does work very well.
The first thing you’ll need to do is clear the rougher surfaces of the printed parts which are getting bonded together. It’s a good idea to use sandpaper to get the surfaces
What you need to do is to clear the rough surface of the printer parts which are getting bonded with sandpaper to get them flat.
Clean the surface with alcohol, and let it rest and get dry. Then apply the superglue to the affected area where you want to bond the pieces.
You have to be careful and prepared with it as it cures faster, and you won’t get much time to relax after applying it. You can leave it on the printer parts for a couple of minutes, and then you are good to go.
This method is useful for rigid materials such as PLA, ABS & PETG, etc.
Superglue isn’t very effective for flexible materials like TPU, TPE & Nylon.
Weld the Gap with a Piece of Filament
You’ll need:
- A piece of filament from same printed piece
- A soldering iron (chisel-tip)
- Some good steady hands!
The video below really illustrates this method, which is great if you have a large gap or crevice in your broken 3D printed part.
Some broken parts aren’t simply two pieces that need to be glued on, so in those cases, this method should really be helpful.
There is a little bit of a blemish on the finished part when you repair your broken model, but you can simply add extra melted filament to the part and sand it down in line with the rest of the model.
Acetone
This method is mainly used for ABS, but some people have used it for other materials like PLA & HIPS (depending on the type and manufacturer). Acetone does a good job dissolving ABS, which is why it’s used to smooth it with vapor.
You can also use this dissolving to your advantage when fixing a broken 3D print.
The method to fix broken 3D printed parts with acetone is:
- Clean the surface of both 3D printed parts with sandpaper to flatten the surface
- Apply a thin layer of acetone to both surfaces with a brush or a cloth
- Now connect the two pieces with a clamp or even some tape and let it sit
- After drying out, your pieces should be nicely bonded back together
Disclaimer: Be very careful with acetone because it is a highly flammable liquid, which shouldn’t be used next to any open flames.
For HIPS, I would use limonene as your solvent as it works pretty well.
Plumber’s Cement
You can use plumber’s cement to join the two or more parts of the broken 3D print, especially for PLA, ABS and HIPS. It works as a solvent, similar to acetone or dichloromethane for PLA.
You have to clean the surface from grease and dirt, and you can use sandpaper to flatten the surface before applying it. After cleaning, apply the material on both parts, and you will get a strong bond in minutes.
However, the bonding will be visible because the cement comes in either red or yellow color.
Keep in mind that plumber’s cement won’t work with Nylon, PETG and similar filament.
The product is flammable, and you have to keep it away from sparks and flames while using it.
Epoxy
Epoxy is great when it comes to bonding but not so great when it comes to flexible bonding parts, and it actually makes them rigid after drying.
The best thing about epoxy is that you can use it for both bonding the two parts, and filling up the gaps between the parts.
A great epoxy that you can get from Amazon is the BSI Quik-Cure Epoxy. It’s made in the USA and does a great job of handling parts, with just a 5-minute working time.
This epoxy comes in two containers which contain two different materials, with simple instructions to follow to fix your broken 3D printed parts.
You have to combine both the materials and create a mixture of them for your purpose. You have to be sure that you are following a certain ration while mixing the two materials to create a solution for bonding.
After you have mixed them thoroughly, you can apply the mixture to the surfaces which you want to bond together. It will take some time to get dry, depending on the ration of the added materials.
You can use it in all kinds of materials but always read the manual to know about the mixing ratio, which you are required to use for a particular surface.
Hot Glue
The AdTech 2-Temp Dual Temperature Hot Glue Gun provides strong bonding for virtually all materials, including your broken 3D prints.
This is an excellent alternative for gluing 3D printed parts together, and you can get a pretty good strong bond. However, the applied glue part will be visible to the naked eye.
It requires almost 2-3 mm in thickness for its adherence to the printed parts. Moreover, the hot glue after applying cools down in no time.
What you are required to do is clean the surface from the loose particles with sandpaper and then use the hot glue and apply it to the surface. Moreover, be careful with it, it is hot glue, so it’s going to be hot of course.
Best Glue/SuperGlue to Fix Broken Prints
The best superglue present in the market is Gorilla Glue XL Clear from Amazon. One of the best characteristics is how it has a no-run control gel formula, ideal for any vertical surfaces.
It also has an anti-clog cap, which helps in keeping the glue from drying out. It hardly takes 10-45 seconds to dry after applying, and your broken 3D printed parts can easily be bonded together.
I’ve used it plenty of times successfully, since thin parts of a 3D print can easily be broken when trying to remove those supports.
How to Fix Broken PLA 3D Printed Parts
So, as mentioned above, the easiest way to fix broken PLA 3D printed parts is to use a good quality superglue to bond the two pieces together. It isn’t a very complicated process and can be done very quickly.
Using the tips above, you should be able to follow along with the process and get your parts fixed nicely.
Here is another video that goes through gluing your 3D printed parts together which gets a little more detailed and precise.
Instead of just using superglue, the tutorial below uses:
- Superglue
- Epoxy
- Rubber Bands
- Spray activator
- Paper towels
- Putty knife/Xacto knife
- Filler
- Sandpaper
You can choose to use a filler and putty knife to smooth down the filler in line with your part. This is great if you are looking to paint your 3D printed parts.
How to Fix Broken ABS 3D Printer Parts
As described above, the best way to fix broken ABS parts is to apply acetone to both parts, and bind them together using a clamp, rubber bands or even tape.
This dissolves a small part of the ABS plastic and after curing, bonds the two pieces together.
How to Fix Broken TPU 3D Printer Parts
The video below shows a perfect illustration of using a heat gun to repair a broken TPU 3D printed part.
It shows a black TPU part which is going to absorb heat a little better than other colors, but 200°C was all that was needed.
You should make sure you use heat-resistant gloves and hold the two broken pieces together enough for it to cool down.
How to Fix Holes in 3D Prints
The gaps or holes which appear in the plain surface of the 3D print could be the cause of insufficient solid layer at the top, or your fill rate of the filament (under extrusion) was too low, or you might have provided insufficient material.
This phenomenon is called pillowing, which can usually be corrected by increasing number of ‘Top Layers’ or ‘Top Layer Thickness’ in your slicer settings.
Nozzle size during the printing and its height from the printing bed also cause under extrusion, which results in holes in the printer parts.
You can get your hands on a 3D pen to fill the gaps and holes you see after the printing process. Clean the surface from the loose particles, and before using the pen, make sure both the materials of 3D pen and printer parts are the same.
It covers all kinds of materials, and you can easily fill the holes and gaps present in the surface through it.
For people struggling with various 3D printing issues, you might want have wanted more guidance towards getting ideal 3D printing results. I created a full course that's available to purchase called Filament Printing 101: Beginner's Guide to Filament Printing that takes you through some of the best 3D printing practices early on, so you can avoid those beginner mistakes.
Repair of 3D printers SLM, SLS, FDM
Completed projects
All projectsComplex for spatial positioning of ship models for testing hydroacoustics in pools
The purpose of the complex is research in the field of hydroacoustics of ships and marine vessels.
Read more
Automated elevator warehouse with access system, video recording and communication with ERP
System for organizing accounting, storage and issuance of tools using an elevator warehouse.
More
Coordinate system for moving the interactive panel in the customer's showroom
System for moving suspended equipment (screen and illuminators) indoors at a distance of up to 40 meters.
Read more
Coordinate system for moving smart glasses in the customer's showroom. Movable barriers.
Glass and mirror movement systems are the most large-scale and significant constructions of a modern interactive complex. They move six smart glasses at a distance of 2 to 8 meters
Read more
MAGNET MOUNTING UNIT
The device is designed for safe installation of magnets with a pull-off force of 120 to 600 kg in magnetic cases to avoid chipping and deformation of the magnets themselves during installation.
Read more
Powder sieving station for 3D SLM printers in an inert gas environment
The sifting station is one of the peripheral devices of 3D printers using SLM technology. It is designed to clean the waste powder from foreign inclusions for its reuse.
More details
Interactive harness assembly table
Interactive harness assembly table is a working area in the form of a touch screen equipped with tempered impact-resistant glass
More details
SLM 3D printers SLM technology (laser sintering / fusion).
More details
High performance FDM extruder for large format 3D printers
High performance FDM extruder designed for use in large format 3D printers.
Read more
Large Format FDM 3D Printer FDM2000
This printer can print large size plastic parts using FDM technology.
Read more
Load cell signal input module with subsequent filtering and transmission via RS422 (Strain Module)
Load cell signal calculation and registration board with filtering and transmission of measurements via SSI.
More details
Auto-feeding and rewinding machine for roll material
The machine is designed for automatic dyeing of fabric-like base or mesh rolls.
Read more
Automated fire extinguishing complex, fire robot
Operational fire extinguishing in rooms with limited access for humans (cable tunnels, belt conveyor tunnels, radioactive rooms).
More
Plant for the production of sheet thermoplastic textolites
Laboratory complex for the production of profiled composite products based on a hydraulic press and unique molds with variable temperature 8 zones.
More
Extension table for TIRA TV 5220-120 shaker
For fixing workpieces on a shaker and subsequent testing for vibration strength and vibration resistance.
More
Plucking machine СШ-850 with modernized feeding unit
Textile processing
Read more
Moving bowl runners (Vertical roller mixing runners)
Its purpose is to impregnate fibrous materials with liquid substances.
More details
Machine for shooting firearms
Shooting and examination of small arms, sporting, hunting, rifled and smooth-bore weapons
Details
Design of a line for mechanical cutting of carbon blanks with a profile cut
The unit is designed for a step-by-step process of cutting a carbon blank to size with a profile cutter.
More
Princess 67 targa loop. Automatic folding.
The loop allows the targa to be rolled back, which reduces the height of the vessel by almost 1 meter and gives greater freedom of movement along the waterways of the city.
More details
Project of a complex for laser cleaning of pipe surfaces from corrosion
For laser cleaning of metal surfaces from plaque, rust and other organic contaminants.
More
Electronic pedal with pressure sensors (tension pedal for exercise bike)
Exercise bikes, bicycle ergometers, sports medicine.
Read more
Design of steel structures for maintenance of HPP turbine blades
Design of non-standard metal structures for maintenance of HPP turbine blades.
More
Modified case of the Pike2
reader camera specially for the legendary Zenit Arena stadium developed and manufactured for persons recognition systems in ticket readers
more
Automatic bulk dispenser
A device for dosed small -dispersed powder
2 Protective housings for cameras
For use in face recognition system
Learn more
Bundles
Production of pre-production or non-standard samples of bundles using specialized manual crimping tools.
Read more
milling machines with a movable desktop
Services for the creation of milling machines for individual tasks
more0005
Development of new hard -fuel boiler rooms
Read more
Uspur (PET)
Automation of the twisting process of plastic cans with various contents
more MW
More details
Collet
Machine upgrades CAT400C10Ф3
More details
Manufacture of metal structures and sheet metal products
Implementation of local tasks for the design and manufacture of metal structures for various purposes (corners, C-shaped profiles, frames, tanks, containers, and much more).
More
Control system for laser cutting equipment
Software for controlling the mechanics of the laser cutting machine.
More
Kvass barrel
The KB-78 team restored and modified for use in our time the tank trailer for transporting kvass ATsPT-0.9
More details
5-axis robot manipulator over objects" for the Customer representing the Ministry of Defense of the Russian Federation
Details
Encoder for virtual reality binocular
Interactive optical device that allows you to interact with 3D objects.
Read more
Automation of machine tool lubrication and reporting
Automatic lubrication software for milling machines
Read more
Modernization of the machining center and CNC module
Performing work on the modernization of the CNC module of turning machining centers Read more
5
5 Robotic complex for the analysis of electronic equipment components with remote access
Carrying out preliminary stages of analysis of the internal components of radio electronic equipment units.
Read more
Services provided for the repair of 3D printer mechanics:
- Repair of heating tables and heating elements in industrial 3D printers (SLS, SLM)
- Repair of elevator mechanics in industrial 3D printers (SLS, SLM)
- Repair or replacement of the extruder of industrial FDM printers
- Repair dispensers industrial SLM or SLS printers
- Repair of filtration and gas exchange systems in industrial 3D printers SLM
- Repair of nitrogen generators in industrial 3D printers SLM
- Repair of powder screening system for metal and plastic printers.
3D printer electronics and software repair services provided:
- Repair or replacement of motor drivers for industrial 3D printers
- Repair or replacement of stepper motors or servo motors in industrial 3D printers
- Repair or replacement of encoders in industrial 3D printers
- Repair or replacement of electronics control units with domestic ones in industrial 3D printers for metal and plastic
- Repair or replacement of the control system of industrial 3D printers. Unlock.
- Repair or replacement of the scanner control board in industrial 3D printers (SLS, SLA, SLM)
Services provided for the repair of optical elements of 3D printers:
- Repair or replacement of solid state and CO2 lasers in industrial 3D printers (SLS, SLA, SLM)
- Repair or replacement of a scanner in industrial 3D printers (SLS, SLA, SLM)
- Repair or replacement of mirrors in scanners in industrial 3D printers (SLS, SLA, SLM)
- Repair or replacement of optical connectors, collimators and telescopes in industrial 3D printers SLM
Repair of industrial 3D printers on order
Repair of industrial 3D printers is a complex task that can include many factors that cause equipment malfunctions.
Ordering a 3D printer repair from us is optimal if it is not possible to restore the equipment from an authorized dealer, if it is under sanctions, or if the manufacturer refused service. Often industrial 3D printers are discontinued and the manufacturer no longer has spare parts for mechanics and electronics. Due to sanctions, many customers do not have the opportunity to fully service and repair their industrial 3D printers. Also, due to the fact that industrial 3D printers were included in the sanctions lists for delivery to Russia, and some enterprises have already managed to purchase them, there is a problem of their use and the impossibility of withdrawing this equipment from service modes. In this regard, the KB78 team can replace components with Russian-made electronics.
Description of the main problems and possible causes of breakdowns in industrial 3D printers:
Problems in the kinematics of elevators, lifts, extruders of SLS, SLM, SLA, FDM, EBM printers can be caused by:
- Errors in end sensors
- Errors in optical encoders
- Breakdown of motors (steppers and servos)
- Failure of motor control drivers
- Mechanical failure of couplings
- Breakage or contamination of ball screw
- Burnout heaters
- Wedge design due to bends and distortions
Errors in the control computers of industrial 3D printers can be caused by:
- Failure of hard drives
- Burnout power supplies
- Motherboard failure
Incorrect operation of scanner systems in industrial 3D printers SLM, SLS, SLA can be caused by:
- By melting optical glasses, burning dirt
- Degradation of optical coatings
- Destruction F-Theta lens
- Destruction of the telescope or collimator
- Failure of the scanner control board
- Failure of the scanner itself
Incorrect operation of the heated table for metal and plastic printers SLM, FDM can be caused by:
- By burning off the supply contacts from the heating element
- Failure of the heater itself
- Thermocouple failure
Incorrect operation of solid-state and CO2 lasers in industrial 3D printers SLS, SLM, SLA can be caused by:
- Degradation of the laser with an operating time of
- Internal electronics problems
- Damage to optical paths or fiber optic cable
Repair of ski equipment using 3D printing
Application
my work.
Why 3D printing, because it:
1. Fast;
2. Quality;
3. Reliable;
4. Cheap.
The hardest part was 3D modeling the damaged plastic parts and fitting them to the equipment. Some 3D models were found on the Internet, some were developed from scratch using the Compass 3D program.
Printed on the proven Flying Bear Ghost 5.
This Chinese printer is quite reliable. Of the modifications, quiet drivers and LED illumination of the working area are installed on it. The speed of high-quality printing is certainly not high, but it copes with its tasks. I can say one thing about this printer, it does not need additional modifications. And if you want to redo it, then you need to redo everything and it turns out that it is easier to buy a new and ready-made printer.
The material for printing was mainly PETg plastic from the company FILAMENTARNO with a diameter of 1.75 mm.
Let me explain the choice of this particular plastic for use in 3D printing:
1. Printed at home, so non-toxic plastic is used for printing;
2. Easy to print with PETg plastic, it does not require special agents for adhesion to the printer table, adheres well to the printer's ultrabase, does not shrink when cooled, the part does not deform;
3. Plastic quality from FILAMENTARNO. I got it as a gift, I have not worked with it before, but in my opinion the details are very high quality.
Ski equipment needs to be repaired from time to time due to missing or damaged components. First, I’ll tell you what repairs were made, and then, using the example of one part, I’ll tell you about the process.
Ski poles have been manufactured with plastic handles and feet that have been damaged or lost during use. But here the work was not significant. Basically, ski boots needed serious repairs.
The plastic soles and heels of boots often wear out, especially in older models, and it is not possible to find a replacement. This is where 3D printing comes in.
Repair work can be divided into 3 stages:
1. 3D modeling of the part;
2. Printing a part on a 3D printer
3. Machining and fitting.
I will consider the whole process using the example of old ski boots made in Italy. To create a 3d model, I needed a damaged part and the boot itself, a compasses and a program for 3d modeling. I used Compass 3D as a program. Of course, I did not create an exact copy, but an analogue adapted for printing on a 3D printer and not inferior in functionality to the native part.
The next step is to prepare for printing.