Revolution 3d printer review
The 3-D Printing Revolution
Idea in Brief
The Breakthrough
Additive manufacturing, or 3-D printing, is poised to transform the industrial economy. Its extreme flexibility not only allows for easy customization of goods but also eliminates assembly and inventories and enables products to be redesigned for higher performance.
The Challenge
Management teams should be reconsidering their strategies along three dimensions: (1) How might our offerings be enhanced, either by us or by competitors? (2) How should we reconfigure our operations, given the myriad new options for fabricating products and parts? (3) How will our commercial ecosystem evolve?
The Big Play
Inevitably, powerful platforms will arise to establish standards and facilitate exchanges among the designers, makers, and movers of 3-D-printed goods. The most successful of these will prosper mightily.
Leer en español
Ler em português
Industrial 3-D printing is at a tipping point, about to go mainstream in a big way. Most executives and many engineers don’t realize it, but this technology has moved well beyond prototyping, rapid tooling, trinkets, and toys. “Additive manufacturing” is creating durable and safe products for sale to real customers in moderate to large quantities.
The beginnings of the revolution show up in a 2014 PwC survey of more than 100 manufacturing companies. At the time of the survey, 11% had already switched to volume production of 3-D-printed parts or products. According to Gartner analysts, a technology is “mainstream” when it reaches an adoption level of 20%.
Among the numerous companies using 3-D printing to ramp up production are GE (jet engines, medical devices, and home appliance parts), Lockheed Martin and Boeing (aerospace and defense), Aurora Flight Sciences (unmanned aerial vehicles), Invisalign (dental devices), Google (consumer electronics), and the Dutch company LUXeXcel (lenses for light-emitting diodes, or LEDs). Watching these developments, McKinsey recently reported that 3-D printing is “ready to emerge from its niche status and become a viable alternative to conventional manufacturing processes in an increasing number of applications. ” In 2014 sales of industrial-grade 3-D printers in the United States were already one-third the volume of industrial automation and robotic sales. Some projections have that figure rising to 42% by 2020.
Further Reading
More companies will follow as the range of printable materials continues to expand. In addition to basic plastics and photosensitive resins, these already include ceramics, cement, glass, numerous metals and metal alloys, and new thermoplastic composites infused with carbon nanotubes and fibers. Superior economics will eventually convince the laggards. Although the direct costs of producing goods with these new methods and materials are often higher, the greater flexibility afforded by additive manufacturing means that total costs can be substantially lower.
With this revolutionary shift already under way, managers should now be engaging with strategic questions on three levels:
First, sellers of tangible products should ask how their offerings could be improved, whether by themselves or by competitors. Fabricating an object layer by layer, according to a digital “blueprint” downloaded to a printer, allows not only for limitless customization but also for designs of greater intricacy.
Second, industrial enterprises must revisit their operations. As additive manufacturing creates myriad new options for how, when, and where products and parts are fabricated, what network of supply chain assets and what mix of old and new processes will be optimal?
Third, leaders must consider the strategic implications as whole commercial ecosystems begin to form around the new realities of 3-D printing. Much has been made of the potential for large swaths of the manufacturing sector to atomize into an untold number of small “makers.” But that vision tends to obscure a surer and more important development: To permit the integration of activities across designers, makers, and movers of goods, digital platforms will have to be established. At first these platforms will enable design-to-print activities and design sharing and fast downloading. Soon they will orchestrate printer operations, quality control, real-time optimization of printer networks, and capacity exchanges, among other needed functions. The most successful platform providers will prosper mightily by establishing standards and providing the settings in which a complex ecosystem can coordinate responses to market demands. But every company will be affected by the rise of these platforms. There will be much jockeying among incumbents and upstarts to capture shares of the enormous value this new technology will create.
These questions add up to a substantial amount of strategic thinking, and still another remains: How fast will all this happen? For a given business, here’s how fast it can happen: The U.S. hearing aid industry converted to 100% additive manufacturing in less than 500 days, according to one industry CEO, and not one company that stuck to traditional manufacturing methods survived. Managers will need to determine whether it’s wise to wait for this fast-evolving technology to mature before making certain investments or whether the risk of waiting is too great. Their answers will differ, but for all of them it seems safe to say that the time for strategic thinking is now.
Additive’s Advantages
It may be hard to imagine that this technology will displace today’s standard ways of making things in large quantities. Traditional injection-molding presses, for example, can spit out thousands of widgets an hour. By contrast, people who have watched 3-D printers in action in the hobbyist market often find the layer-by-layer accretion of objects comically slow. But recent advances in the technology are changing that dramatically in industrial settings.
Some may forget why standard manufacturing occurs with such impressive speed. Those widgets pour out quickly because heavy investments have been made up front to establish the complex array of machine tools and equipment required to produce them. The first unit is extremely expensive to make, but as identical units follow, their marginal cost plummets.
Additive manufacturing doesn’t offer anything like that economy of scale. However, it avoids the downside of standard manufacturing—a lack of flexibility. Because each unit is built independently, it can easily be modified to suit unique needs or, more broadly, to accommodate improvements or changing fashion. And setting up the production system in the first place is much simpler, because it involves far fewer stages. That’s why 3-D printing has been so valuable for producing one-offs such as prototypes and rare replacement parts. But additive manufacturing increasingly makes sense even at higher scale. Buyers can choose from endless combinations of shapes, sizes, and colors, and this customization adds little to a manufacturer’s cost even as orders reach mass-production levels.
A big part of the additive advantage is that pieces that used to be molded separately and then assembled can now be produced as one piece in a single run. A simple example is sunglasses: The 3-D process allows the porosity and mixture of plastics to vary in different areas of the frame.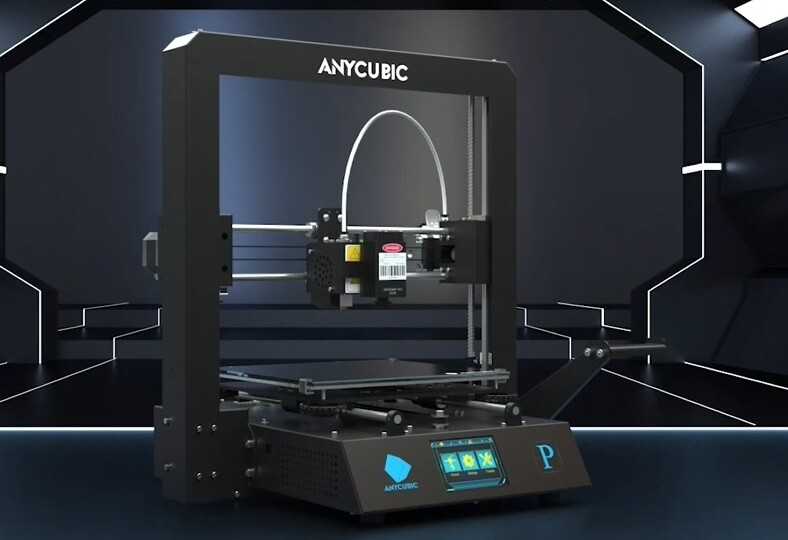 The earpieces come out soft and flexible, while the rims holding the lenses are hard. No assembly required.
Printing parts and products also allows them to be designed with more-complex architectures, such as honeycombing within steel panels or geometries previously too fine to mill. Complex mechanical parts—an encased set of gears, for example—can be made without assembly. Additive methods can be used to combine parts and generate far more interior detailing. That’s why GE Aviation has switched to printing the fuel nozzles of certain jet engines. It expects to churn out more than 45,000 of the same design a year, so one might assume that conventional manufacturing methods would be more suitable. But printing technology allows a nozzle that used to be assembled from 20 separately cast parts to be fabricated in one piece. GE says this will cut the cost of manufacturing by 75%.
U.S. hearing aid companies converted to 100% 3-D printing in less than 500 days.
Additive manufacturing can also use multiple printer jets to lay down different materials simultaneously. Thus Optomec and other companies are developing conductive materials and methods of printing microbatteries and electronic circuits directly into or onto the surfaces of consumer electronic devices. Additional applications include medical equipment, transportation assets, aerospace components, measurement devices, telecom infrastructure, and many other “smart” things.
The enormous appeal of limiting assembly work is pushing additive manufacturing equipment to grow ever larger. At the current extreme, the U.S. Department of Defense, Lockheed Martin, Cincinnati Tool Steel, and Oak Ridge National Laboratory are partnering to develop a capability for printing most of the endo- and exoskeletons of jet fighters, including the body, wings, internal structural panels, embedded wiring and antennas, and soon the central load-bearing structure. So-called big area additive manufacturing makes such large-object fabrication possible by using a huge gantry with computerized controls to move the printers into position. When this process has been certified for use, the only assembly required will be the installation of plug-and-play electronics modules for navigation, communications, weaponry, and electronic countermeasure systems in bays created during the printing process. In Iraq and Afghanistan the U.S. military has been using drones from Aurora Flight Sciences, which prints the entire body of these unmanned aerial vehicles—some with wingspans of 132 feet—in one build.
Three-Dimensional Strategy
This brief discussion of additive manufacturing’s advantages suggests how readily companies will embrace the technology—and additional savings in inventory, shipping, and facility costs will make the case even stronger. The clear implication is that managers in companies of all kinds should be working to anticipate how their businesses will adapt on the three strategic levels mentioned above.
Offerings, redesigned.
Product strategy is the answer to that most basic question in business, What will we sell? Companies will need to imagine how their customers could be better served in an era of additive manufacturing. What designs and features will now be possible that were not before? What aspects can be improved because restrictions or delivery delays have been eliminated?
For example, in the aerospace and automotive industries, 3-D printing will most often be used in the pursuit of performance gains. Previously, the fuel efficiency of jet fighters and vehicles could be enhanced by reducing their weight, but this frequently made them less structurally sound. The new technology allows manufacturers to hollow out a part to make it lighter and more fuel-efficient and incorporate internal structures that provide greater tensile strength, durability, and resistance to impact. And new materials that have greater heat and chemical resistance can be used in various spots in a product, as needed.
Want to know how fast the 3-D future is coming? Don’t look only at adoption rates among manufacturers. Look at the innovation rates of inventors. In 2005 only 80 patents relating to additive manufacturing materials, software, and equipment were granted worldwide, not counting duplicates filed in multiple countries. By 2013 that number had gone into orbit, with approximately 600 new nonduplicative patents issued around the globe.
What are some of the companies behind these patents? Not surprisingly, the two leaders are Stratasys and 3D Systems, rivals that have staked out positions in additive manufacturing. They hold 57 and 49 nonduplicative patents respectively. As befits its printing heritage, Xerox, too, has invested heavily in additive technologies for making electronics and has developed a strong alliance with 3D Systems. Panasonic, Hewlett-Packard, 3M, and Siemens likewise hold numerous patents.
But surprisingly, the largest users of 3-D printing have also been active innovators. Fourth on the list, with 35 patents, is Therics, a manufacturer of medical devices. These commercial companies understand additive manufacturing’s potential to give them important advantages over competitors.
Also noteworthy among patent holders are companies that straddle both worlds. GE and IBM are important manufacturers but are increasingly invested in platforms that optimize value chains run by other companies. GE (11 patents) is developing the industrial internet, and IBM (19) has worked out what it is calling the “software-defined supply chain” and optimization software for smart manufacturing systems. Both are well positioned to take on similar roles with regard to additive manufacturing—and both bear watching as models for how incumbents can capture disproportionate value from a highly disruptive technology.
In other industries, the use of additive manufacturing for more-tailored and fast-evolving products will have ramifications for how offerings are marketed. What happens to the concept of product generations—let alone the hoopla around a launch—when things can be upgraded continually during successive printings rather than in the quantum leaps required by the higher tooling costs and setup times of conventional manufacturing? Imagine a near future in which cloud-based artificial intelligence augments additive manufacturing’s ability to change or add products instantly without retooling.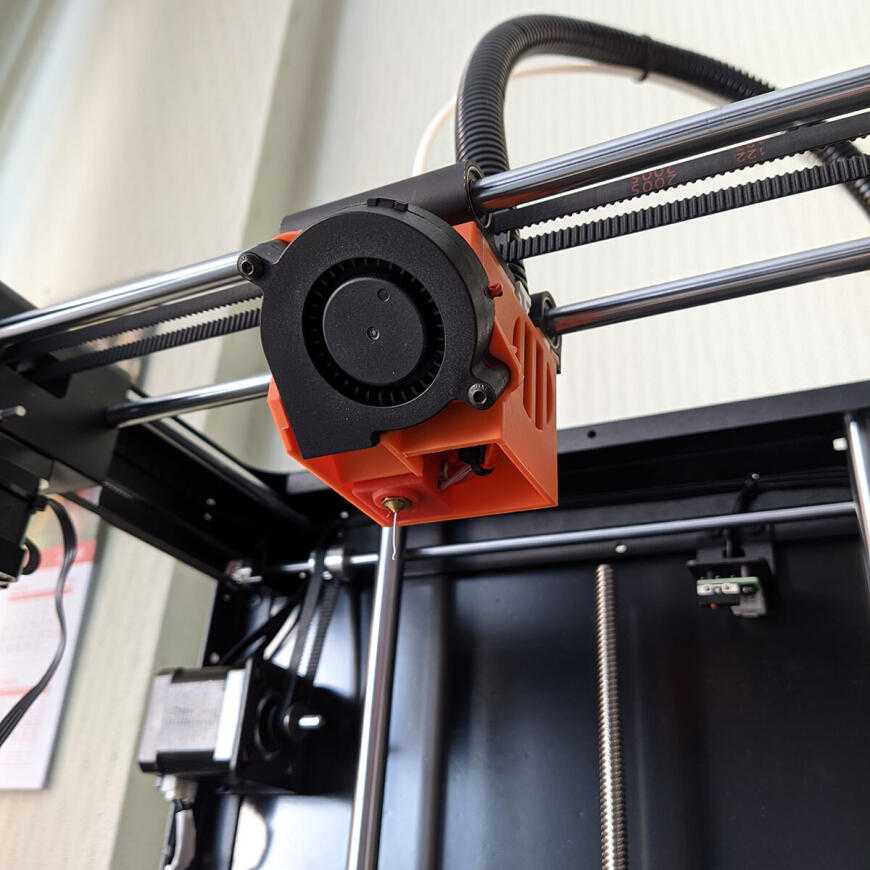 Real-time changes in product strategy, such as product mix and design decisions, would become possible. With such rapid adaptation, what new advantages should be core to brand promises? And how could marketing departments prevent brand drift without losing sales?
Operations, reoptimized.
Operations strategy encompasses all the questions of how a company will buy, make, move, and sell goods. The answers will be very different with additive manufacturing. Greater operational efficiency is always a goal, but it can be achieved in many ways. Today most companies contemplating the use of the technology do piecemeal financial analysis of targeted opportunities to swap in 3-D equipment and designs where those can reduce direct costs. Much bigger gains will come when they broaden their analyses to consider the total cost of manufacturing and overhead.
How much could be saved by cutting out assembly steps? Or by slashing inventories through production only in response to actual demand? Or by selling in different ways—for example, direct to consumers via interfaces that allow them to specify any configuration? In a hybrid world of old and new manufacturing methods, producers will have many more options; they will have to decide which components or products to transition over to additive manufacturing, and in what order.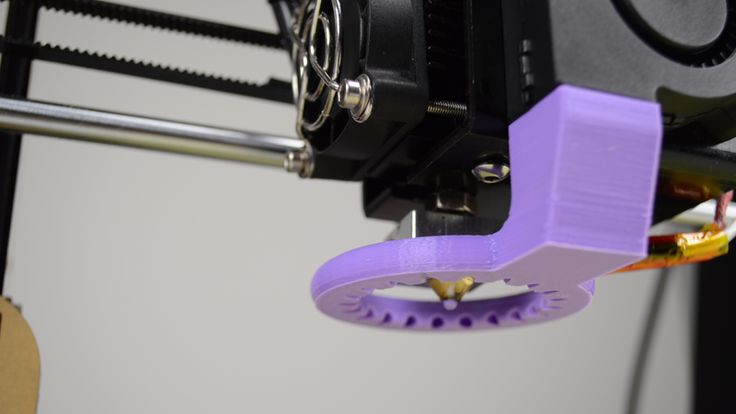
Additional questions will arise around facilities locations. How proximate should they be to which customers? How can highly customized orders be delivered as efficiently as they are produced? Should printing be centralized in plants or dispersed in a network of printers at distributors, at retailers, on trucks, or even in customers’ facilities? Perhaps all of the above. The answers will change in real time, adjusting to shifts in foreign exchange, labor costs, printer efficiency and capabilities, material costs, energy costs, and shipping costs.
This article also appears in:
A shorter traveling distance for products or parts not only saves money; it saves time. If you’ve ever been forced to leave your vehicle at a repair shop while the mechanic waits for a part, you’ll appreciate that. BMW and Honda, among other automakers, are moving toward the additive manufacturing of many industrial tools and end-use car parts in their factories and dealerships—especially as new metal, composite plastic, and carbon-fiber materials become available for use in 3-D printers.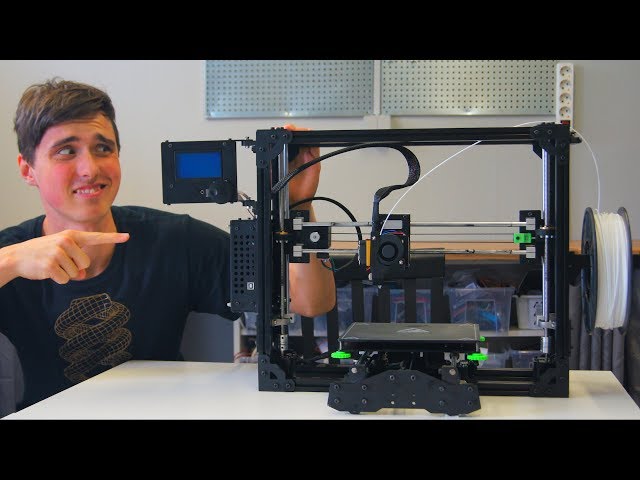 Distributors in many industries are taking note, eager to help their business customers capitalize on the new efficiencies. UPS, for example, is building on its existing third-party logistics business to turn its airport hub warehouses into mini-factories. The idea is to produce and deliver customized parts to customers as needed, instead of devoting acres of shelving to vast inventories. If we already live in a world of just-in-time inventory management, we now see how JIT things can get. Welcome to instantaneous inventory management.
Indeed, given all the potential efficiencies of highly integrated additive manufacturing, business process management may become the most important capability around. Some companies that excel in this area will build out proprietary coordination systems to secure competitive advantage. Others will adopt and help to shape standard packages created by big software companies.
Ecosystems, reconfigured.
Finally comes the question of where and how the enterprise fits into its broader business environment. Here managers address the puzzles of Who are we? and What do we need to own to be who we are? As additive manufacturing allows companies to acquire printers that can make many products, and as idle capacity is traded with others in the business of offering different products, the answers to those questions will become far less clear. Suppose you have rows of printers in your facility that build auto parts one day, military equipment the next day, and toys the next. What industry are you part of? Traditional boundaries will blur. Yet managers need a strong sense of the company’s role in the world to make decisions about which assets they will invest in—or divest themselves of.
Aurora Flight Sciences can print the entire body of a drone in one build.
They may find their organizations evolving into something very different from what they have been. As companies are freed from many of the logistical requirements of standard manufacturing, they will have to look anew at the value of their capabilities and other assets and how those complement or compete with the capabilities of others.
The Platform Opportunity
One position in the ecosystem will prove to be the most central and powerful—and this fact is not lost on the management teams of the biggest players already in the business of additive manufacturing, such as eBay, IBM, Autodesk, PTC, Materialise, Stratasys, and 3D Systems. Many are vying to develop the platforms on which other companies will build and connect. They know that the role of platform provider is the biggest strategic objective they could pursue and that it’s still very much up for grabs.
Platforms are a prominent feature in highly digitized 21st-century markets, and additive manufacturing will be no exception. Here platform owners will be powerful because production itself is likely to matter less over time. Already some companies are setting up contract “printer farms” that will effectively commoditize the making of products on demand. Even the valuable designs for printable products, being purely digital and easily shared, will be hard to hold tight. (For that matter, 3-D scanning devices will make it possible to reverse-engineer products by capturing their geometric design information.)
Everyone in the system will have a stake in sustaining the platforms on which production is dynamically orchestrated, blueprints are stored and continually enhanced, raw materials supplies are monitored and purchased, and customer orders are received. Those that control the digital ecosystem will sit in the middle of a tremendous volume of industrial transactions, collecting and selling valuable information. They will engage in arbitrage and divide the work up among trusted parties or assign it in-house when appropriate. They will trade printer capacity and designs all around the world, influencing prices by controlling or redirecting the “deal flow” for both. Like commodities arbitrageurs, they will finance trades or buy low and sell high with the asymmetric information they gain from overseeing millions of transactions.
Any manufacturer whose strategy for the future includes additive techniques has to lay out a road map for getting there. Companies already on the journey are taking things step-by-step, but in three different ways.
Trickle Down
Some start with their high-end products, knowing that their most sophisticated (and price-insensitive) customers will appreciate the innovation and flexibility. The luxury will trickle down in the time-honored way as the technology matures and becomes more affordable. Automotive manufacturers, for example, tend to engineer one-off parts specially for Formula One racing cars and then find ways to introduce versions of those innovations to high-end sports and luxury cars. As engineers’ familiarity with the technology grows, they spot opportunities to bring it to parts for mass-market car segments.
Swap Out
Other pioneers proceed in a less splashy way, focusing first on the components of a given product that are easiest to migrate to additive manufacturing. The objective is to develop the organization’s know-how by advancing to more-challenging components of the same product. This is common in aerospace, where companies have selected a specific product, such as an F-35 fighter jet, and started with mundane brackets and braces before moving to, say, internal panels and partitions. As the manufacturers learn more, they begin printing the fighter’s exterior skin. Experiments with printing its load-bearing structures are now under way.
Cut Across
A third approach is to find components that show up in multiple products and use them to establish a 3-D foothold. For example, a design improvement for a fighter jet could be transferred to drones, missiles, or satellites. Such cross-product improvement builds knowledge and awareness throughout the company of how additive manufacturing can enhance performance on key dimensions such as weight, energy use, and flexibility.
The common theme here is small, incremental steps. In all three approaches, engineers are being given fascinating new puzzles to solve without having their world upended by still-evolving methods and materials, thus minimizing risk and resistance to change. It is up to more-senior managers to maintain the appropriate level of pressure for taking each successive step. As they push for further adoption, they should allow naysayers to explain why 3-D printing isn’t right for a given part or process, but then challenge them to overcome that roadblock. Traditionalists will always be quick to tell you what 3-D printing can’t do. Don’t let them blind you to what it can.
Responsibility for aligning dispersed capacity with growing market demand will fall to a small number of companies—and if the whole system is to work efficiently, some will have to step up to it. Look for analogs to Google, eBay, Match.com, and Amazon to emerge as search engines, exchange platforms, branded marketplaces, and matchmakers among additive manufacturing printers, designers, and design repositories. Perhaps even automated trading will come into existence, along with markets for trading derivatives or futures on printer capacity and designs.
In essence, then, the owners of printer-based manufacturing assets will compete with the owners of information for the profits generated by the ecosystem. And in fairly short order, power will migrate from producers to large systems integrators, which will set up branded platforms with common standards to coordinate and support the system. They’ll foster innovation through open sourcing and acquiring or partnering with smaller companies that meet high standards of quality. Small companies may indeed continue to try out interesting new approaches on the margins—but we’ll need big organizations to oversee the experiments and then push them to be practical and scalable.
Digital History Replicated
Thinking about the unfolding revolution in additive manufacturing, it’s hard not to reflect on that great transformative technology, the internet. In terms of the latter’s history, it might be fair to say that additive manufacturing is only in 1995. Hype levels were high that year, yet no one imagined how commerce and life would change in the coming decade, with the arrival of Wi-Fi, smartphones, and cloud computing. Few foresaw the day that internet-based artificial intelligence and software systems could run factories—and even city infrastructures—better than people could.
The future of additive manufacturing will bring similar surprises that might look strictly logical in hindsight but are hard to picture today. Imagine how new, highly capable printers might replace highly skilled workers, shifting entire companies and even manufacturing-based countries into people-less production. In “machine organizations,” humans might work only to service the printers.
And that future will arrive quickly. Once companies put a toe in the water and experience the advantages of greater manufacturing flexibility, they tend to dive in deep. As materials science creates more printable substances, more manufacturers and products will follow. Local Motors recently demonstrated that it can print a good-looking roadster, including wheels, chassis, body, roof, interior seats, and dashboard but not yet drivetrain, from bottom to top in 48 hours. When it goes into production, the roadster, including drivetrain, will be priced at approximately $20,000. As the cost of 3-D equipment and materials falls, traditional methods’ remaining advantages in economies of scale are becoming a minor factor.
Local Motors can print a good-looking roadster from bottom to top in 48 hours.
Here’s what we can confidently expect: Within the next five years we will have fully automated, high-speed, large-quantity additive manufacturing systems that are economical even for standardized parts. Owing to the flexibility of those systems, customization or fragmentation in many product categories will then take off, further reducing conventional mass production’s market share.
Smart business leaders aren’t waiting for all the details and eventualities to reveal themselves. They can see clearly enough that additive manufacturing developments will change the way products are designed, made, bought, and delivered. They are taking the first steps in the redesign of manufacturing systems. They are envisioning the claims they will stake in the emerging ecosystem. They are making the many layers of decisions that will add up to advantage in a new world of 3-D printing.
A version of this article appeared in the May 2015 issue (pp. 40–48) of Harvard Business Review.
Anycubic Photon D2 review: A miniature printing revolution
Space Verdict
The Anycubic Photon D2 is an incredible 3D printer that offers exceptional print quality for hobbyists. Whether you're printing figures for wargaming, or intricate jewelry and decorations, the D2 is capable of creating almost unbeatable detail, all while being affordable and easy to use.
Pros
- +
Excellent build quality
- +
Incredible print quality and detail
- +
Easy to use
- +
Low energy consumption
Why you can trust Space Our expert reviewers spend hours testing and comparing products and services so you can choose the best for you. Find out more about how we test.
Anycubic is back with another new addition to the Photon family of 3d printers, with the Anycubic Photon D2, the follow up to its debut DLP printer, the Photon Ultra.
Anycubic has been on a roll, firing out a constant stream of new printers over the last couple of years. Earlier this year we were introduced to the Photon M3 printer series, along the Kobra line of FDM printers. Now Anycubic is back again with the Photon D2 DLP printer. The Photon D2 represents a major improvement over the Photon Ultra.
Much like the differences between FDM vs resin printers, there are some unique properties of DLP printers that make them worth considering. The projectors in DLP printers typically have a much longer lifespan than LCD screens, so you won't need replacement parts as often, and the technology in them basically eliminates light convergence (light from the bright areas of the LCD screen bleeding over into unilluminated areas). This means you get sharper details than equivalent resolution LCD printers.
So, does the Anycubic Photon D2 make it onto our list of the best 3D printers? Let's have a look at the new Photon family member and see how the enhanced DLP projector performs.
Today's best Anycubic Photon D2 deals
$829. 99
99
View
Show More Deals
Anycubic Photon D2: Design & set up
The Photon D2, like the other printers in the Photon line, is easy to set up and use. After you've unpacked everything, secure the U-shaped bracket to the print bed with the four screws on the print bed. Tighten the screws only halfway; you'll need them loose to level the build surface. The print bed is then installed, and the printer will be turned on. The first step is to level the build surface by selecting the tools menu and move Z. Then you'll press the home button.
Image 1 of 6
(Image credit: Future)(Image credit: Future)(Image credit: Future)(Image credit: Future)(Image credit: Future)(Image credit: Future)Make sure the bed is loose and there is a piece of paper on the glass to avoid damaging it and to level the bed. Apply gentle pressure to the bed after it has settled before tightening the four screws that hold it in place. When you're done, go back to the main tools menu and press z=0 to save the level. When finished, press enter again to raise the bed. Install the resin vat, load the resin and start printing.
The photon line has always been relatively easy to set up. The most important factors to consider will be your exposure times and lift speeds. The user manual for Anycubic's DLP craftsman resin includes time and speed recommendations.
Design wise, there isn't much to say about the Anycubic Photon D2 if you're familiar with resin 3d printers - it's a relatively compact printer measuring in at 17.2 x 9.3 x 8.9 inches. There is a 2.8 inch touchscreen on the front of the device and the connection ports are on the side.
In terms of appearance, the Photon D2 is similar to the previous Photon Ultra, with a blue-tinted UV cover - not the typical yellow covers for which Anycubic is known. The 2.8" touch screen is also clear and easy to navigate, making menu navigation and model selection simple.
Anycubic Photon D2: Specs & features
DLP 3D printers use a digital projector screen to flash an image of a layer across the entire platform, curing all points simultaneously. The light is reflected on a Digital Micromirror Device (DMD), a dynamic mask consisting of microscopic-size mirrors laid out in a matrix on a semiconductor chip. It is a 3D printing technology used to rapidly produce photopolymer parts.
It’s very similar to SLA with one significant difference -- where SLA machines use a laser that traces a layer, a DLP machine uses a projected light source to cure the entire layer at once. The part is formed layer by layer. It could directly to the bottom of the resin vat and could provide evener light and realizing the high precision printing results.
Image 1 of 3
(Image credit: Future)(Image credit: Future)(Image credit: Future)Anycubic Photon D2 Specs
Operation: 2.8 inch color touch screen
Software: ANYCUBIC Photon workshop
Connectivity: USB
Printing technology: DLP (Digital Light Processing)
Light source: DLP optical projector
Resolution: 2560x1440
XY resolution: 51um (0. 051mm)
Z axis resolution: 0.01mm
Layer res.: 0.01 ~ 0.15mm
Build platform: Laser etched build surface
Rated power: 15W
Build volume: 130.6mm (L) * 73.4mm (W) * 165mm (H)
Net weight: ~ 5kg
In terms of consumer LCD 3D printing, Anycubic has always been a pioneer. In 2021, Anycubic applied Texas Instruments's DLP technology to 3D printing and developed the first consumer-level DLP 3D printer photon ultra. The apparatus achieved the success of pledging over 2M dollars. To further improve users' experience with the DLP 3D printer, Anycubic released the second generation DLP 3D printer Photon D2. Based on the features of Photon ultra,
Anycubic added the latest light uniform algorithm and enhanced anti-aliasing effect to the Photon D2. As a result, the new 3D printer Photon D2 shows marked improvements, such as a bigger build size, higher projector resolution, and more detailed print details. It provides a new premium 3D printing experience for users.
The Photon D2 is intended for professional users such as jewelers and dentists. Having said that, it's also a great choice for miniature tabletop gaming or figure printing and collecting. The 1440p resolution of the second generation DLP projector is a significant improvement over the 720p resolution of the preceding Photon Ultra model.
Image 1 of 2
(Image credit: Future)(Image credit: Future)The Photon D2 also uses a new light algorithm to aid with steady and even exposure while reducing energy use. This may result in somewhat slower print rates than the Photon Ultra, but the difference in times was not big enough to be a concern in our tests.
Anycubic Photon D2: Print quality & speed
In terms of quality, The Photon D2's new 2K DLP projector does not disappoint. In comparison to other resin printers I've used in the past, all of the models We printed during our testing came out very clean and sharp. Anycubic DLP Craftsman resin is recommended. We created some of the cleanest, sharpest models we've ever printed. The layer lines were barely visible to the naked eye when using the standard 0.050mm layer height.
We used the included Photon Workshop slicer with the same slicer settings for all of the models we printed. Other slicers, such as the popular Chutubox and Lychee slicers, do not currently support the Photon D2, but support will be added in the near future.
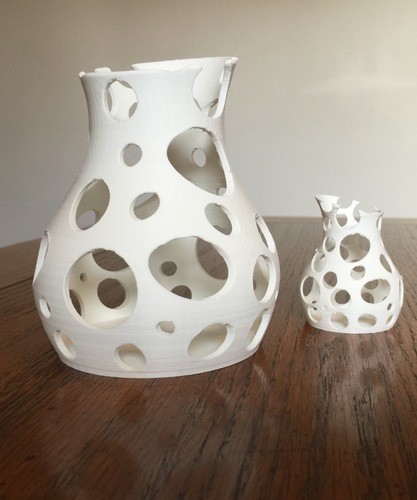
The test print included is the first print we made with the Photon D2. This is a small vase-style print covered in various textures and patterns that show how much detail is possible with the new 2K DLP. The level of detail achieved is astounding. These are some of the most detailed prints we've ever produced.
Image 1 of 3
(Image credit: Future)(Image credit: Future)(Image credit: Future)Wicked3D's The New Konshu Statue was the next print we chose. The attention to detail on the bandages, head, hands, and hieroglyphs on the staff handle is astounding. The fibers in the fabric used to make his suit and cape could almost be seen. This print came in several pieces, which we put together after printing and curing. The components all fit together neat and snug. Again the level of detail is amazing and sharper then any of the LCD printers we've tested.
Image 1 of 7
(Image credit: Future)(Image credit: Future)(Image credit: Future)(Image credit: Future)(Image credit: Future)(Image credit: Future)(Image credit: Future)We printed the Mr. Knight statue from Wicked3D to keep with the Moon Knight theme. His suit and clothing were impeccably tailored, right down to the knot on his tie. Like the Konshu statue before it, this model was cut into several pieces and then assembled. The components all fit together perfectly.
Image 1 of 5
(Image credit: Future)(Image credit: Future)(Image credit: Future)(Image credit: Future)(Image credit: Future)The next print we wanted to try was a one-piece model from Wicked3D . The Ultron Statue is depicted here. We scaled the model down to 15% of its original size. We were concerned that it wouldn't print because of the size of some of the parts. The Photon D2 did not disappoint. The print quality was comparable to the other models we tested. The images are self-explanatory.
Image 1 of 4
(Image credit: Future)(Image credit: Future)(Image credit: Future)(Image credit: Future)Finally, we created a trio of Hex3d skulls. We reduced the size of these models by 20%. The three skulls are covered in ornate details and were an excellent choice for demonstrating the capabilities of the new second generation DLP. All three skulls are printed flawlessly, and the level of detail is exceptional, as with the other models.
Image 1 of 7
(Image credit: Future)(Image credit: Future)(Image credit: Future)(Image credit: Future)(Image credit: Future)(Image credit: Future)(Image credit: Future)Anycubic Photon D2: Price & warranty
The Anycubic Photon D2 has an MSRP of $679.99 and can be purchased either directly from Anycubic , or via Amazon . That's reasonably expensive for a printer of this size, but you're paying a premium for the DLP technology which, when you look at the results above, is a fair compromise.
As with all Anycubic 3D printers, you get a one-year warranty. This typically covers all parts other than the LCD screen which would get a three-month warranty - since the D2 doesn't have an LCD screen though, we're not sure what the warranty period for the DLP projector is. We've reached out to Anycubic for clarification and will update this review when we receive a response.
Should you buy the Anycubic Photon D2?
During our time with the new Photon D2, we had no problems with any of the printing processes. We used the Photon Workshop slicer's recommended exposure times and lift speeds. The print quality is incredible, and whether you're a professional maker creating small ornate jewelry pieces or miniatures for tabletop gaming, the Photon D2 is an excellent choice. The Photon D2 is an excellent choice for any printing needs that require sharp, clean, crisp details, even for hobbyists.
Anycubic Photon D2: $679 at Anycubic
Get the latest DLP printer from Anycubic direct from their website. At time of writing, you can use code PAYPAL to get an extra $20 off sitewide on orders over $100+ when you pay via PayPal Pay
Today's best Anycubic Photon D2 deals
$679
View
$829.99
View
Join our Space Forums to keep talking space on the latest missions, night sky and more! And if you have a news tip, correction or comment, let us know at: [email protected].
Will is a freelance writer from Canada and 3D printing guru. If you need to know anything about 3D printing, slicing software, or 3d modelling, he's your guy. As a result, you'll find him reviewing the latest 3d printers for Space.com, as well as offering handy tips and buying advice for newcomers to the field.
Wanhao GR2 3D Printer - Features Overview, Setup and Calibration
Table of Contents
-
- Specifications Overview
- Display and New Features Overview
- Getting started with the printer.
- Testing the printer in different modes.
- Engineering plastics.
- Summing up
We welcome everyone! Today, the older brother and ideological successor of the Duplicator 6, a novelty of this year, a desktop printer from Wanhao - Gadoso Revolution 2, came to our table. FDM printer.
The main innovation in this model was a full-featured, color touch screen, which made working with the printer much more convenient.
The printer comes with quite a wide range of accessories. In addition to the necessary things, such as a power cable and a USB cable for connection, the kit includes a PLA plastic spool weighing 1 kilogram and a box with tools and spare parts. Let's analyze it in more detail. Inside is a 4 GB flash drive, which contains the Wanhao Cura slicer, a spatula for prying models, sharpened, and not least, sharp tweezers, hexagons of all necessary sizes for repairing and setting up the printer. Of the additional parts, there is a mount for a Teflon tube on the body and a holder for the coil on the back wall. By the way, it is designed for coils up to 750 grams, which is strange. The sales version will be equipped with a replaceable heating block assembly with a nozzle and a metal thermal barrier designed for printing ABS and other high temperature plastics. We didn't put it on. And in the extended version of the delivery, we will also get an acrylic casing for the printer, consisting of walls, a roof and a door with a convenient handle.
Technical overview
As in the younger model, the kinematics was based on a scheme similar to the “Ultimaker” printers, where the extruder carriage moves along crossed polished shafts, sliding on brass bushings. The Z-axis has been changed and now instead of an expensive and often average quality ball screw, a conventional T8 4-start screw with an “Anti-bubble” nut is installed. The table itself is a plate, 6 mm thick, from the bottom of which a heater is attached, and an adhesive coating is glued on top. The table, as before, is bolted to the frame with 3 bolts with springs and iron nuts "lamb".
The whole structure is assembled in a steel case with a wall thickness of 2 mm. Due to this, rigidity increases and vibrations are hidden at high print speeds.
The printer has a rather modest size and can easily fit even on a small bedside table. Its dimensions are 460 x 440 x 550 mm. Its print area has not changed from the previous model and is 200x200x175 mm.
The print head of the printer has also changed from its predecessor. In particular, the new model has an MK11 extruder with two feed gears instead of one as in the old M K10.
The radiator and heating block remained the same as before, which allows us to say that these units are interchangeable.
The cooling fan of the model has become a little more powerful and now allows you to print more gentle overhangs.
The extruder head is connected, as before, using a connector with a fixation in the upper part.
Since this printer was designed with an application for professionalism, it, like the more expensive models, has a carbon air filter that eliminates unpleasant odors when printing with odorous plastics. The filter is easily removed and behind it is a fan that circulates air when the hood is closed.
Let's look inside the case, where all the electronic stuffing is located. The heart of the printer is a proprietary board, updated, but similar to its predecessor. It is based on the STM32 processor, modern quiet TMC2209 drivers are responsible for the movement, unfortunately soldered on the board. We will talk about them separately. There is a quiet but powerful fan for cooling the board. A 24 volt power supply with a capacity of 350 watts is installed. It is more than enough to power the printer. All wires are crimped into terminals and neatly laid, which undoubtedly pleases and gives a plus to safety.
Display overview and new features
Now let's talk about the most interesting, namely the new features of the printer electronics. First of all, it is striking, of course, a bright touch screen with a diagonal of three and a half inches.
To the left of the display is a niche for a complete stylus.
Despite its presence, the display also responds well to finger taps.
On the main screen, you can see information on printing, hotend and table temperatures. Above them are the buttons to enter the settings menu and the camera.
Yes, yes, in addition to the new features, a built-in webcam appeared here with the ability to record time-lapses or control the printing process remotely if the printer is connected via Wi-FI.
Under the display there is an SD card port and a two-zero USB connector, and the connection to the computer is made from the back of the printer.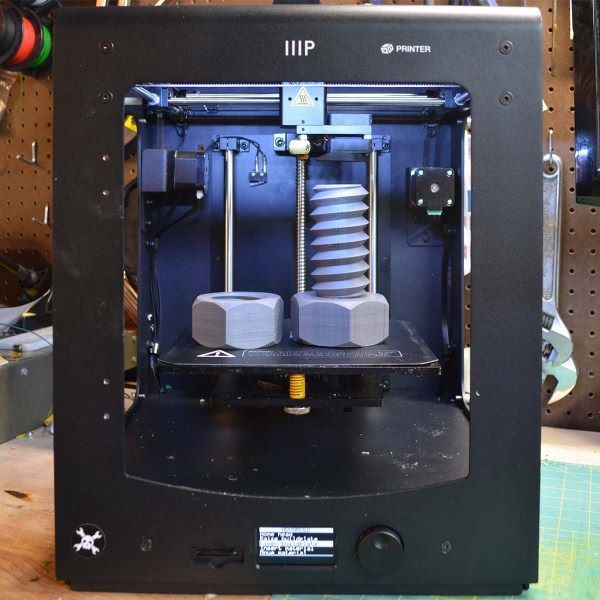
Let's get back to the interface: Under the temperature indicator there is a control window where you can set the preheating of the hot end using the side buttons. The preheating for the table is also set.
By clicking on the Axis icon in the lower left corner, the printer switches to manual axis control. The axis is selected by pressing the central button, the side buttons can be used to move.
Now let's take a closer look at the Settings menu. The first step is to set up a Wi-fi connection. When opened, we will be shown a list of available networks with signal strength, and after selecting your network, we will be prompted to enter a password to connect to it.
In the lower lines are the language selection menus. There is no Russian language here, but this does not interfere with printer management at all. After it comes a section on pairing the printer with a mobile application. There is not much information about it, but the manufacturer claims that it is possible not only to start printing from the phone, but also to edit models, place them in the printed area and cut them into layers.
At the end of the menu is the firmware update section, and even lower is the reset button to factory settings.
Getting started with the printer.
As we all know, before printing, the printer must be calibrated. Here, Wanhao has tried, and the GR2 provides functions that greatly facilitate the process, clearly demonstrating on the display what needs to be done and in what sequence. This is the first printer in this price range to offer such a handy feature. They are responsible for this, just two menu items that we missed. Now let's look at them in more detail.
To set the table to the horizon, we need a piece of paper. You can tear off a piece of A4 sheet. Next, select Bed Leveling in the settings menu and, following the instructions on the screen, adjust the height of the table so that at each of the three attachment points the paper barely noticeably rubs against the nozzle.
The next step is to adjust the Z-offset. The quality of printing of the most important first layers of the model directly depends on the calibration accuracy at this point.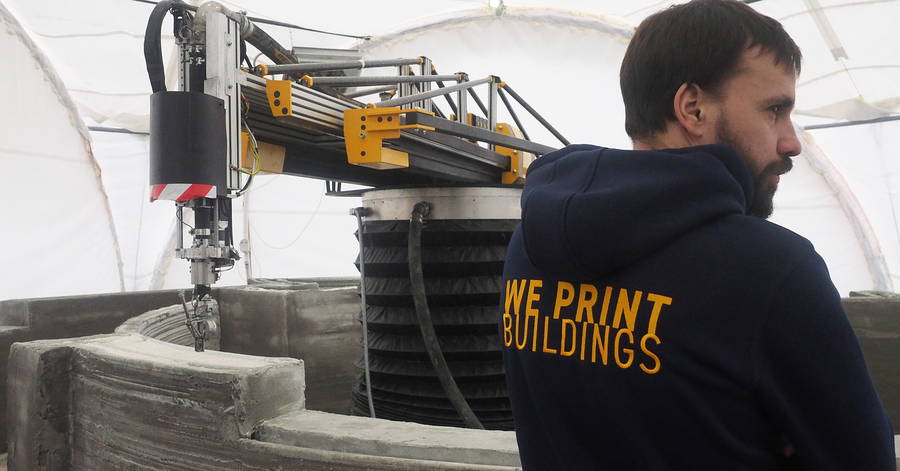 Select the Print Bed Calibration item and adjust the gap using the buttons on the display and the same piece of paper. When you are satisfied with the degree of paper pressure, we confirm the calibration and exit to the main screen.
The last step before starting printing is loading the filament. We set the required preheating temperature on the display, then go to the Filament menu and click Load. We push the bar into the hole from above, until it stops, and the printer itself will start feeding plastic when the temperature you specified is reached.
Testing the printer in different modes.
Well, now it's time for the first print. For her, a low-poly, or, to put it simply, an angular, bear model was chosen. We will print from red PLA from Poymaker with a layer of 0.2 mm.
First impressions at the beginning of printing were very pleased. Firstly, thanks to the new drivers, the printer is much quieter compared to the Duplicator 6. The mechanics of the printer move almost silently, and the only thing that stands out is the noise of small fans.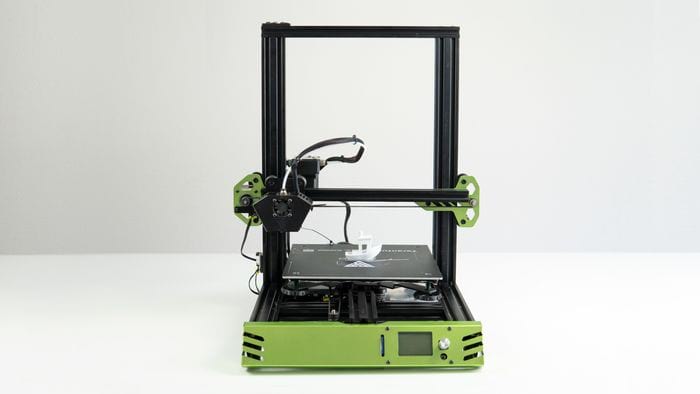 But the fans are still better to hear than the loud buzz of stepper motors. Secondly, the first layer lay down perfectly without any tricks, and the table cover became much more tenacious.
We see the excellent quality of the printed model. The most difficult elements - overhanging under the foot and on the chin - were perfectly printed, although they were not supported by anything. The only difficulties arose with a very sharp overhang in the ear area, and even then only because the model was not deployed to the fan. The edges of the model are even, layer to layer, no visible external defects are observed. Decent result.
Let's move on to the next tests. A cup model for pens with holders for flash drives and SD cards was chosen. The material will be PETG from Tiger3D. We also print with layer 0.2.
Now let's examine the resulting model of such an interesting color. Despite the high fluidity of PETG, the whole model was printed very high quality.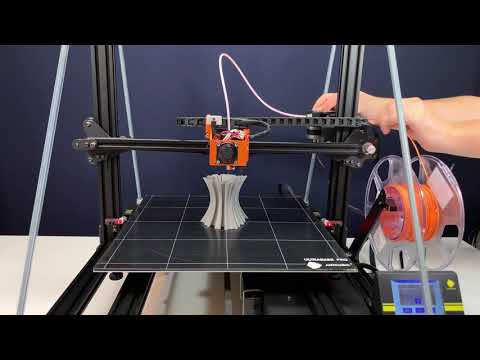 The overhangs are smaller here than on the PLA bear and printed better. Holes for flash drives and cards did not sag anywhere. Rounding at the bottom too. There are problems with a little underextrusion on the upper layers, but I would attribute this to the lack of wall density in the model. It does not appear on the side faces.
For the following prints, we need to install the walls, roof and door on the printer. The assembly is quite easy and everything goes together without any problems. But at this stage, disappointment awaited us, because instead of a door with a cutout for a new screen, we received a door from the previous model. Alas, it will have to be used as is.
When everything is finally assembled, you can start printing ABS. It will be a box for storing various small things. It doesn't look complicated, but it's actually very thin-walled. A filament from eSUN was chosen for it.
The peculiarity of this model is that such drawers can be assembled into a small storage system, so we printed a few more, hoping to also catch problems with peeling off the table. But no, in none of the seals there were any problems with tearing off the model. As promised by the manufacturer, the new table cover keeps even the most complex plastics from tearing off.
As we can see with the chamber closed, the Wanhao GR2 prints beautifully with complex plastics. The wall thickness of this model is only 1.2 mm. But she was not led, and not torn between layers, which often happens on open printers. Looking at the plane of contact, you can once again make sure that it is firmly stuck to the table and does not come off. Of the jambs, a visible seam can be noted at one of the corners of the model, but it can be easily removed using any tool. This result inspired us to try printing with this printer with something more difficult than ABS.
Engineering plastics.
Having changed the plastic to Polycarbonate from Polymaker, we launched a fairly well-known model of a wrench for printing, the feature of which is that it is fully functional immediately after printing. The model already provides support and does not need to be included when printing.
The model printed without any problems, and after removing the supports, it immediately spun. During this print, there were a lot of difficult areas that were printed on the supports, but the cooling handled them perfectly, allowing the supports to be separated by hand. And the accuracy of the printer is clearly demonstrated by the convex inscription on the handle of this key.
Unfortunately, no matter how much we tried to print with nylon, we did not succeed. The model started to print, stuck perfectly to the table, but in the middle the plastic suddenly chewed into a gear and stopped squeezing out. With carbon-filled nylon, the situation is better, it is stiffer and can be printed, but periodically, due to the small diameter of the nozzle, it also clogs it. If you need to print durable models from carbon-filled plastic, then our recommendation is to install a nozzle with a diameter of at least 0.6 mm.
Summing up
It's time to take stock. Wanhao's Gadoso Revolution 2 3D Printer can rightly be called the successor to the Duplicator 6. Wanhao has taken the best of the previous model and improved upon it with a new, much more advanced, yet inexpensive model. Thanks to the convenient touch display, it has become much more convenient to manage the printer, and the feedback is more informative. All actions are literally performed in one tap.
The new design of the extruder, with two feed gears, increases the stability of the bar feed into the extruder, which has a positive effect on print quality. A built-in camera allows you to record and view the printing process. As we could see, this 3D printer is capable of working with all the most interesting types of plastics used in 3D printing. Moreover, thanks to separate packaging, you can not overpay if you plan to print only PetG and PLA.
During testing, no significant disadvantages of this printer were revealed, with the possible exception of the difficulty of printing with too flexible materials.
In our opinion the Wanhao GR2 is a great option for beginner printers due to its ease of handling and visual calibration aid.
More advanced users will appreciate the ability to print with complex plastics, as well as connect the printer via Wi-Fi and control it remotely. Perhaps there will be a place for it in small, small-scale production, thanks to its accuracy and reliability.
You can buy this 3D printer in our store at the link. Sergey was with you, the Tsvetnoy Mir 3D equipment shop. See you soon!
Best 3D Printer Candidate 2022 / 3D Printers, Machine Tools & Accessories / iXBT Live
If you want quality printing out of the box as well as a solid build, then Kywoo3D Tycoon Max is the one for you. This printer attracted me with interesting features at a low price. And most importantly, what attracted me is a very reliable design. After all, it is she who affects the quality of the print.
I found the first mention of this manufacturer and printer on Kickstarter, and then on local sites. Then the model was simply discussed, but there were no real owners. But then the first reviews appeared, and to be honest, the printer was not praised in them. Despite the thoughtful design, the printer had problems with airflow and buggy firmware. Therefore, when I needed a 3D printer, I took myself Anet ET4 Pro. But then there was a need for another printer, so I, again returning to the question of choice, decided to take myself a Tycoon Max. And now, having used the printer for several weeks, I realized that I made the right choice. The printer for its price really gives excellent print quality, and if necessary, also a very fast print speed comparable to deltas.
Characteristics of Kywoo3D Tycoon Max:
Well, in words, I’ll add something that is not in the table:
- Print area: 300 * 300 * 230mm
- Print type: FDM
- Number of extruders: 1
- print l.
 90 -0.4mm
 - Nozzle: 0.4mm
- Control: USB, MicroSD card, Wi-Fi
- Power: 350W
- Maximum table temperature: 100C
- Maximum extruder temperature: 260C
- Maximum print speed: 0mm/10mm s (personally tested up to 140mm/s and it prints fine)
- Additional information about the structure:
- Rigid aluminum profile frame.
- X-axis rails, Y-axis shafts.
- Z-axis motor belt synchronization
- 16-point auto-leveling
- 3.5-inch touch screen for printer and printing control
- Convenient 9018 filament threading with ring 9008
Now let's talk about the printer itself. It was ordered from a warehouse in the Russian Federation, and the delivery time took 5 days. A huge box weighing 16kg was received in the mail:
Inside the box is a printer disassembled into two parts. Everything lies in layers, which are laid with foam material. So it is unlikely that anything could be damaged along the way.
 Opening the box, the first layer I saw was the lower frame of the Y-axis with a heating table and ultra-base:
 Below the next layer is the main frame of the Z-axis, a coil of PLA test plastic, a box with accessories:
I’ll tell you right away about the complete plastic. It has a weight of 500g, wound on a plastic reel, sealed in a vacuum bag. I printed part of the coil during the tests, and I liked the plastic.
As for complete accessories, everything is relatively standard. Inside the box are a spatula, a set of hexagons in a convenient case, several spare ties, wire cutters, clamps for the ultrabase, four screws for assembling the printer, a Phillips screwdriver, a piece of heat pipe, a spare 0.4mm nozzle, a needle for cleaning the nozzle, a wrench for unscrewing the nozzle, spare limit switch, USB cable, reel mounting stand. Also included is a card reader and a MicroSD 8Gb flash drive manufactured by Netac ( a good manufacturer, I have several flash drives of this company, and they work well )
The printer is powered through a detachable cord with a European-type plug.
 If necessary, it can be replaced without any problems:
 Also included with the printer is an assembly and configuration manual. It is made on high-quality printing, but, in fact, there is no great benefit from it:
Now let's consider ultrabase glass. It has dimensions of 305*320mm and a thickness of 4mm. On the edge there is an inscription with the logo of the manufacturer:
Having already printed enough parts, I can say that the quality of the Ultrabase is excellent. It is strong, there are no problems with plastic sticking, it heats up evenly. And at the end of printing and cooling, the parts come off without problems.
The ultrabase is attached to the heating table with 4 stationery clips (they are included). The heating table itself is made of metal, and is attached to the frame on shafts through plain bearings. By the way, in order to reduce weight and inertia during movement, the manufacturer made the table itself with holes that do not affect rigidity.
By the way, the table is connected to the control board via the XT60 connector. This is the first time I see such a solution, but logically, this is a fairly reliable connection.
Another thing I would like to note on the table frame and X-axis is the presence of good legs that can be adjusted in height. This is useful if the printer is not standing on a completely flat surface, and correct adjustment will avoid unnecessary movement of the frame when printing.
Now let's move on to inspecting the frame along the YZ axes. It also contains the control board and power supply. It also has an extruder. This is what it looks like:
The first thing I want to pay attention to is the overall rigidity of the frame. It uses a double frame made of aluminum profile, on which there is a metal box on top. This box serves two purposes: hiding the interior of the printer and adding rigidity to the frame. And it has a very good effect on the quality of the print.
The Z-axis of the printer is fixed on the frame through two shafts rigidly fixed to the frame itself and a closed plain bearing, and for moving there are two studs with stepper motors on both sides.
 Additionally, the manufacturer has added a belt that synchronizes the operation of these stepper motors:
 Rails are installed on the printer to move the extruder. They are quite high quality, and during the work I personally did not have any problems with them. For better sliding, the rails are immediately lubricated from the factory, and the rails themselves also have holes through which this lubricant enters the rails. Also, through these holes, the rails were fastened along the entire length of the frame.
As for the extruder, the manufacturer did not reinvent the wheel, and equipped the printer with a proven solution. This is MK10, but with some modifications. First, it adds an iron frame that looks good while protecting the user from contact with hot extruder elements. I would like to think that this frame also serves as an additional radiator, but if you look at how it is fixed, it immediately becomes clear that there is not much heat coming to it. And the second addition is a special lamb for scrolling plastic when refueling.
 And this is a really handy feature. When refueling, you do not need to press anything, as in other printers. We simply pull the plastic through the plastic sensor, point it into the hole of the extruder and turn the lamb. Plastic itself immediately clings and is pressed through. A simple and elegant solution that is sorely lacking in other printer models.
 Also immediately above the extruder is a low filament sensor. This is also a pretty good solution, since the distance between the sensor and the extruder is minimized here. And this means that you don’t have to throw out 20-30cm filament bars that simply cannot be pushed into the printer. The amount of waste here is minimal.
As for blowing, a fan with an impeller is used here, which is mounted near the nozzle. Fan model pb04010ms4. The airflow itself is realized through a wide slot. I personally did not notice any problems with blowing during printing, there is enough blowing, and it blows directly on the model. The blowing speed can naturally be adjusted both during the cutting of the model, and already directly during printing, the fan has speed control.

I also once had to disassemble the extruder to replace the nozzle during printing. What was in the kit, I managed to score on my own stupidity, alternating types of plastics without changing the temperature. Therefore, I will show the extruder in disassembled form:
I also want to draw attention to the fact that the printer has a table auto-calibration function. For this, a BL Touch sensor is installed here. More precisely, there is not the original 3D Touch with a plastic plug.
But by the way, I have no complaints about his work. The table calibrates perfectly, and even if there is a misalignment of fractions of millimeters, everything is taken into account and there are no problems with printing. The table itself is calibrated using 36 points (6*6) and looks like this:
Also, in addition, I can also note the presence of a silicone lining on the hotend, so that the temperature is more stable:
Well, after we have examined both halves of the frame, we can proceed to assembling the printer.
 She's very simple. The existing 4 screws are screwed through the grooves, and we stretch harder.
 Additionally, you need to connect the connector to the table and connect the motor along the X axis. By the way, in the printer, all the wires are laid right away, and where they can be fixed with ties. Therefore, nothing dangles here, does not hang down and is as neat as possible:
That's it, the assembly is finished. This is what the assembled printer looks like, well, with the exception of the ultrabase and the bracket for installing the filament spool.
The bracket itself, by the way, is standard, like most printers in this price range. Metal profile and plastic tube. The bracket is installed at any point of the aluminum profile, through two spacer nuts:
Well, once the printer is assembled, you can consider the rest of the design elements. If you look at the back of the printer, you can see the power button and the port for connecting the power cord:
On the other hand, there is a sticker on the frame with information about the printer:
Separately, I would like to note one more convenient feature of this particular printer, which I have not seen anywhere else.
 These are convenient carrying handles:
 They are metal and rigidly fixed to the frame, you can safely lift the entire structure with them and not worry that something will break. For me, this is very important, since my printer can be transferred to different points around the room, and even between rooms. Depending on how long the print is placed.
If you look at the printer from the right end, then you can see a slot for a MicroSD card through which a model for printing is thrown onto the printer. There is also a MicroUSB port for connecting to a computer (does anyone use this method of printing?) and another slot for SD cards, the purpose of this slot remains a mystery to me:
Well, now the most interesting. It is, of course, a touch screen. When you turn on the printer, we first see a splash screen with the manufacturer's logo, and then the main desktop, from which you can get to different settings:0003
All items on the desktop are interactive. Management is implemented by clicking on the desired element.
 For example, by clicking on the ruler of XYZ axes, we get to the axis calibration menu:
 And if you click on the flash drive icon, the files for printing located on the flash drive are opened:
The printer sees folders and subfolders without problems, but there are Russian file names Problems. In the current firmware, the Cyrillic alphabet looks like unreadable krakozyabry.
If you click on the gear icon, then naturally we get into the settings menu. Here you can select the temperature of the preheating of the table and extruder, change the filament during printing or in idle time. Find out information about the firmware, set up Wi-fi and select the interface language ( there is no Russian language in the photo, but it has already been added in the latest firmware )
By the way, the printer has a built-in Wi-fi module, and it can be run in access point mode or connected to a home wi-fi network.
In the first case, you can connect to the printer and use an additional plug-in in Cura to send files for printing over the air, as well as monitor the status of the printer:
True, the wi-fi module has one minus.
 It stands inside a metal case, and it dampens the signal very noticeably. If the printer is in the next room, then I can no longer connect to it because the signal level is too weak. In fact, the range of the access point is about 5-6 meters maximum.
 But back to the screen. Despite the modern 32-bit processor, another disadvantage that I want to point out is the lack of model previews. This option is already firmly in use, and I would like to hope that it will also appear in future firmware. But so far the interface looks pretty simple. By the way, this is also visible at print time, when progress is displayed simply as a blue bar with a percentage of completion.
But in general, the management here is really convenient. You can change the Z-axis gap on the fly, change the speed of the blower fan and the temperatures of the table and extruder.
Well, I also want to show the inside of the printer without disassembling it. How could I get the camera. The printer is powered by the built-in Mean Well LRS-350-24 power supply.
 Already by the name it is clear that this power supply produces 24v / 350w.
 In the future, I plan to crawl up to this PSU and add a backlight tape to the printer frame so that you can see the printing process.
The brains of the printer are located in the upper part of the case, it is already much more difficult to crawl there with the camera:
But since the board is sold separately, I'll just add a photo from the manufacturer here:
True, in this photo it is not clear which processor is used in the board. But let's hope it's good enough.
In general, if we talk about the assembly, then it did not raise any questions for me. The frame here is well thought out and very rigid. All axles run smoothly and there is no backlash. The printer is large, solid and heavy. And gravity, as we know from the words of Boris Razor, is good and reliable.
Now it's time to talk about the printing process and the models I have printed
The first thing I decided to do was check the speed characteristics of the printer.
 The specifications indicate that its maximum speed reaches 150mm / s. Therefore, I printed a test cube at this speed:
 I shot with a macro lens so that the flaws in the layers were immediately visible. And they are here, since my plastic is not the best, besides, it’s also old, taken from the remnants.
Then I printed the same cube, but at a speed of 180mm/s, and put it next to the first cube:
Try to guess from the photo which of these two cubes was printed at what speed.
I'll give you a hint. On faster printing, at 180 mm/s, the plastic from the nozzle no longer has time to come out and lay down evenly, so the layers appear thinner, and there are gaps between the layers.
And yes, on the left it's a cube printed at 180mm/s and on the right it was 150mm/s.
And by the way, this speed is quite suitable for printing rough parts, when you need to determine the degree of fit and size, without regard to quality. This saves a lot of printing time.

Well, at a speed of 150mm / s, you can already print full-fledged models. Here, for example, I printed a model at this speed:
And this is not a draft part, but a full-fledged one, for a commercial order. Here is what I printed, the size of this medal is 22 centimeters:
If you look at macro photography, you can evaluate both the detail and the level of stacking layers at this print speed:
By the way, as you can see, the medal was printed in two colors of PLA plastic. This type of printing is not difficult, just at a certain moment of printing, you can pause the printer and replace the filament. But I want to add that Cura has a handy plugin that allows you to precisely set the pause on the desired layer. To do this, go to the plugins, and select the “Filament Change” function in the post-processing plugins, in which we simply set the layer on which the pause will occur. The printer will stop printing at the right moment, move its head to the extreme left side in front and squeak loudly, calling for a replacement of the filament:
Through this plug-in, you can set the replacement of the filament at least on each of the layers, which is very convenient and allows you to achieve interesting effects when printing art objects.
 I hope my advice will be useful to those who are fond of 3D printing.
 I also printed an axolotl toy for children, which consists of closed links:
Printing was done at a speed of 120mm / s, and could have been more successful if I had not forgotten to remove the automatic supports in Cura. But since there were supports, I had to spend time post-processing and separating the supports, as well as cleaning up excess plastic in the links. This is what this axolotl looks like on a macro shot:
Layer height 0.25mm, travel speed 120mm/s, table temperature 60 degrees, extruder temperature 220 degrees.
The next model was among the models on the flash drive provided with the printer, this is a ghost keychain.
By the way, I want to add a macro photo of the substrate that remained after printing, so that you can evaluate the uniformity of laying layers and tracks:
a piece of ordinary sponge to clean the plastic from dust, which is very visible on white parts.
 Some print different boxes and cases, but I just took a piece of dish sponge and pierced it with a filament, which I then moved on. After that, the parts became noticeably cleaner.
 Another custom-printed detail. Steering shaft bushings for Nissan Qashkai. Designed to eliminate the runout between the shaft and the tube in the steering reach adjustment mechanism:
Another model. Decepticon logo overlay for standard Mazda car logo:
Spinner gear. A toy that I printed to test the possibility of printing gears:
Stand legs for Sony PlayStation 4 Slim:
Well, there were many other models that were printed to order, but I did not have time to take high-quality photos. I mainly use PLA and Petg plastics when printing. Well, a little ABS, which I really dislike because of its capriciousness to ambient temperature and drafts. And as you can see from the photo, there are no problems with printing. The only problem I've encountered is changing different types of plastic during printing and clogging the nozzle as a result.
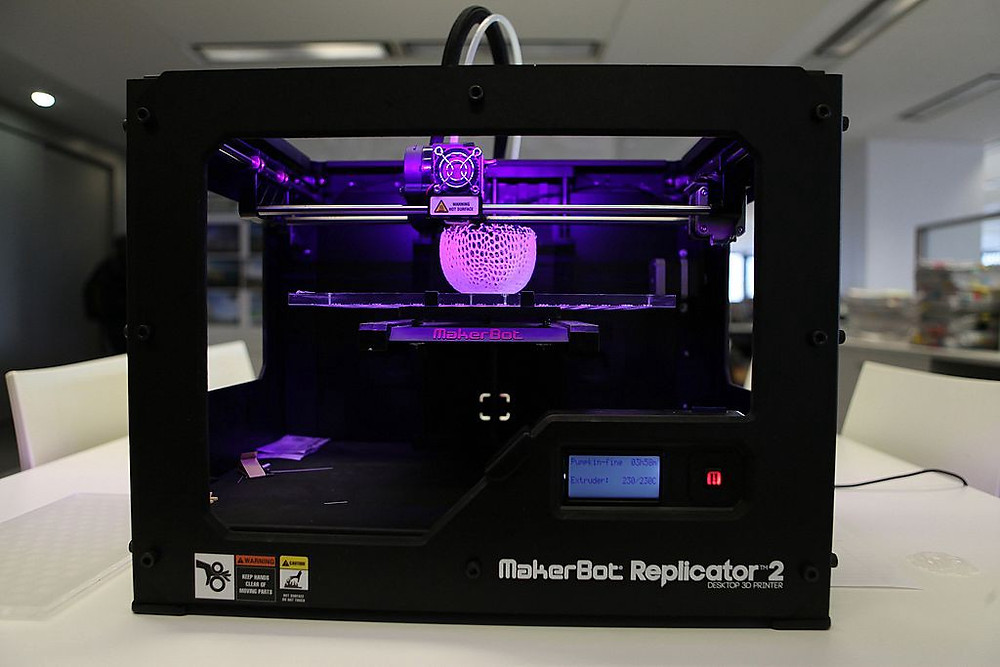 But it's my own fault, I shouldn't have experimented.
 Conclusion:
As you can see from the review, I really liked the Kywoo3D Tycoon Max 3D printer. It is definitely worth the money, here it is clear that the manufacturer did not save on everything and everyone, as is the case with other manufacturers. I will try to indicate the advantages that the buyer receives:
Reliable design and rigid frame . A double profile and a metal frame are assembled into a single design that is reliable and does not give any backlash. This has a positive effect on detail and print quality, as well as on the maximum print speeds. Also, all cables and wires are correctly laid in the printer immediately from the factory. And the heating table is attached through the XT60 connector, which has long proven its reliability.
Shafts along the axes Z and X. The presence of shafts and plain bearings also has a positive effect on the accuracy of printing and the reliability of the design as a whole.
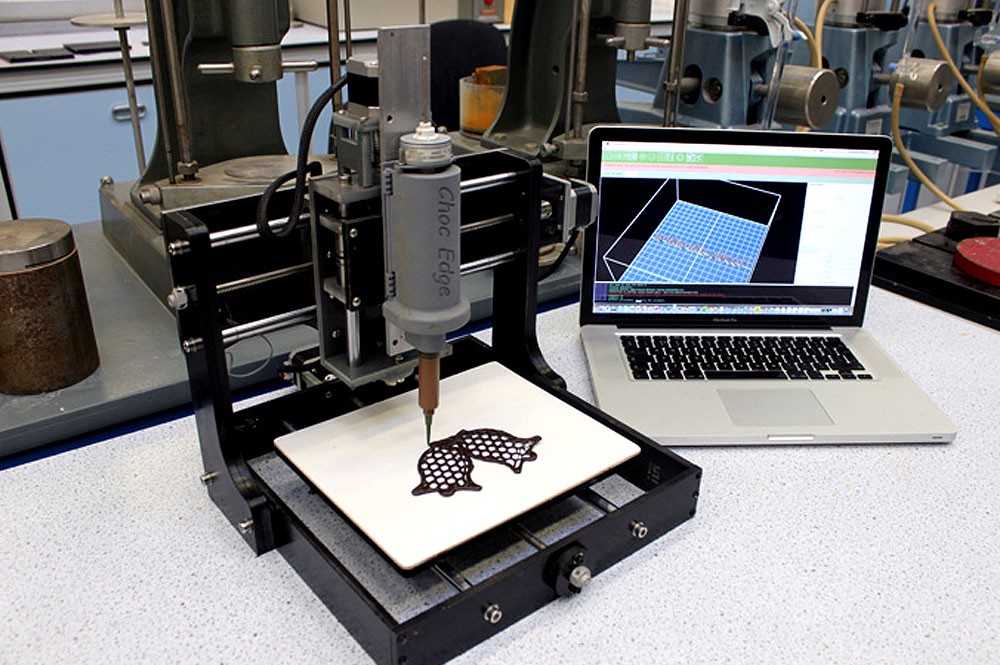 Since they are less subject to wear and play, unlike wheels that drive along a profile.
 Axis rail Y . The advantage of rails over conventional wheels, I think, is not even worth discussing. This is a more accurate movement of the extruder, and the absence of backlash, and durability. Of course, it would be better to have rails on all axes, but this will significantly increase the price of the printer, and it will no longer be so interesting.
Convenient filament threading with scroll knob . Here I will attribute this not only to pluses, but directly to huge pluses. Such a trifle like, but very much affects the work with the printer, especially if you print a lot and often change the filament.
Short feed extruder MK10 . Allows you to safely print any type of filament, including flex. In addition, unlike Bowden, plastic is saved here. The retract works more adequately. In general, I personally prefer Direct extruders, although I have a printer with a bowden system.
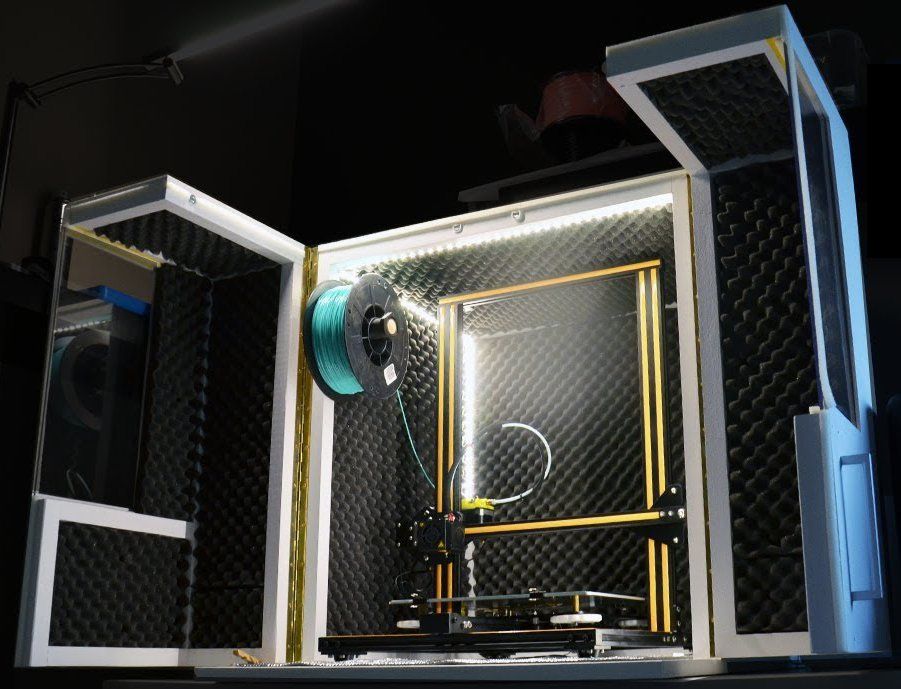
Availability of Wi- fi module. Let it be weak, and not everyone needs it. But for some it will be very useful and necessary.
Axis motor synchronization Z . Another little thing that many manufacturers neglect. Meanwhile, this little thing affects the accuracy of printing. And many people customize their printers by adding a belt to the Z axis.
Auto level. The printer builds a table map using 36 points and then takes into account any irregularities during printing. Which is very good for the adhesion of the base layer. Well, of course, there are no dances around the printer with a leaflet for an exact fit. To be honest, this process is what I dislike the most during printing.
Print area 300*300*230mm. With this size of the printed area, you can print a much larger number of details than with the usual 220 * 220mm in most models.
 True, as a minus, the dimensions of the printer themselves are already acting here. Under it, you need to prepare a surface with dimensions of 62 * 62 centimeters, and not every table is suitable here.
 But to be honest, I did not find any minuses for the printer. Well, except perhaps the dimensions and the weak signal of the Wi-fi module. But I already wrote about this above. Well, perhaps the relatively simple firmware can be attributed to the minuses, although it does not affect the print quality, it's just an interface.
Kywoo3D Tycoon Max is currently my main 3D printer, on which I print most models. For yourself and to order. Print field 300 * 300 * 230mm allows you to print large enough parts or batches of parts, which suits me completely. I also liked the robust, well-thought-out and monolithic design of the printer, as well as the speed of its operation. As for working on wi-fi, this did not take root for me. At first I dabbled in sending and monitoring, and then, out of habit, I returned to the flash drive and card reader again.
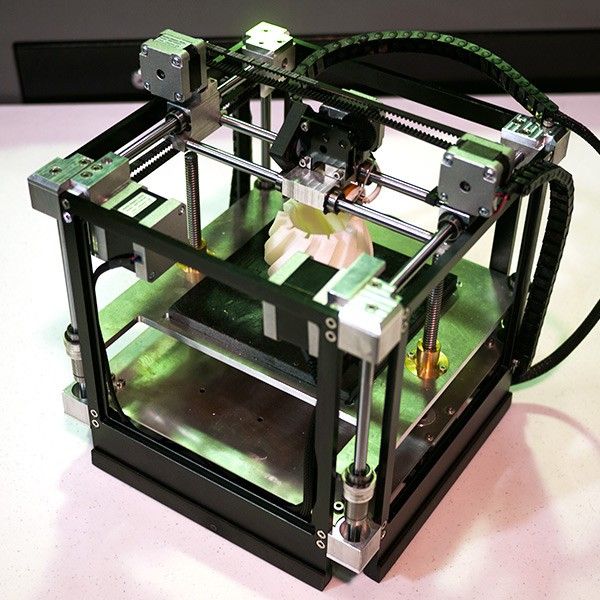
Learn more