Feeler gauge 3d printer
Feeler Gauge vs Paper – 3D Solved
Leveling a 3D printer is probably the hardest thing you have to learn when you first get your hands on one, and it takes more than a couple days to get the process right, at least it did for me.
However, this is when you level it using a piece of paper to feel how much friction there is between the nozzle and the bed to determine if the distance is set right or not, but you could also opt to use a feeler gauge to do this, and, at least in my opinion, it’s the better way of doing things.
In this article, I will go over how these two methods differ from each other, how to actually do it using both methods, their pros and cons, and lastly, which one I think is best.
So, without further ado, let’s get started!
Leveling the Printer using Paper
Leveling an Ender 3 bed using the paper method.This is by far the most common method simply because it’s free and because it also works really well. However, it takes time to learn since you need to feel how much friction there is between the nozzle and the bed when moving the paper.
The issue with using a piece of paper is that it’s not as consistent since you have to rely on your touch to gauge the amount of friction, and more often than not, you’ll encounter that the nozzle is either too close or too far from the bed, especially when you are just getting started with 3D printing, which means that you’ll have to deal with some failed prints.
Essentially, since it’s not as consistent, you’ll probably have to go through the leveling process more than once to get it right and fine-tune it while the printer is printing the skirt/brim to get a great first layer.
Why is getting a good first layer so important?
In 3D printing, the first layer is everything; Get it right and your model won’t detach from the build plate, or warp, which means that it will come out beautiful and without having to deal with any hiccups along the way.
On the other hand, not getting the first layer right could result in poor bed adhesion, causing the print to suddenly detach mid print forcing you to start all over.
Pros
- It’s free.
- Once you know how to do it, it’s easy.
Cons
- Not as consistent.
- Takes a lot of time to get right.
Since it’s so important to level the bed correctly, here’s a quick guide on how to do it. However, if you want a complete step-by-step guide on how to level the bed of a 3D printer, make sure to check the article I wrote on that subject.
How to Level the bed using a sheet of paper
- Preheat the printer to the temperature that the filament requires (bed and nozzle)
- Lower the bed by twisting the leveling knobs to the left.
- Home the printer.
- Disable the Stepper Motors.
- Move the nozzle on top of one of the leveling screws (any of the four corners).
- Place a piece of paper between the nozzle and the bed and tighten the screws while moving the paper back and forth until you can feel some friction (if you push the paper and it bends, you need to loosen the screws a bit).
- Do this on all four corners and also in the middle of the bed until you can feel the same friction on all spots.
Leveling the Printer using a Feeler Gauge
Many claim that leveling, or tramming, the bed on your 3D printer bed using a feeler gauge is the optimal way of doing things, and while I may agree in some ways, it’s not a night-and-day difference to the paper method.
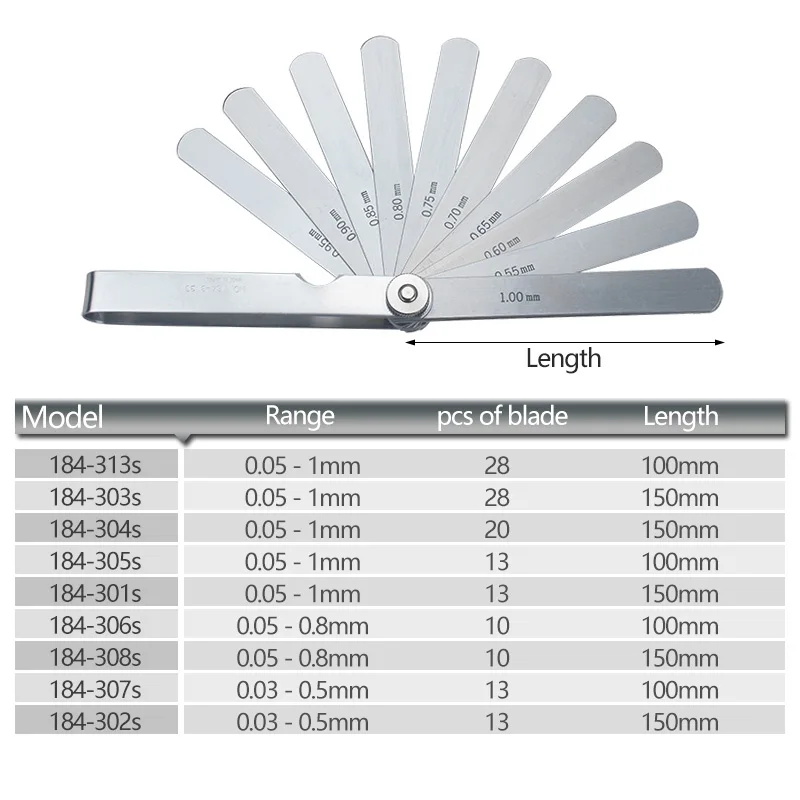
It consists in using a feeler gauge that has a specific width (height) to adjust the distance between the nozzle and the bed, and this way you can always set it to 0.2mm, for example, with no room for error.
It’s also a much quicker way of doing it since you don’t need to be testing how much friction there is, if there’s enough or too much of it, etc., and the results will be far more consistent.
The only con to using this method is that you need to purchase a set of feeler gauges which sell for about $10, but that’s about it.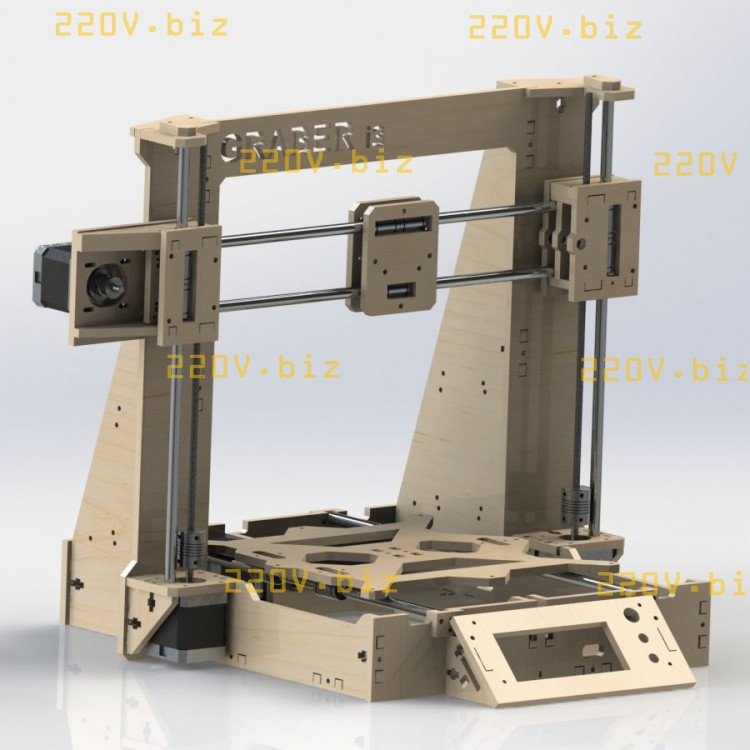
Pros
- More consistent bed level.
- Faster.
Cons
- Not free (about $10).
How to level the bed using a Feeler Gauge
The process of leveling the bed using a feeler gauge is almost identical to the paper method, with one slight difference:
- Preheat the printer to the temperature that the filament requires (bed and nozzle)
- Lower the bed by twisting the leveling knobs to the left.
- Home the printer.
- Disable the Stepper Motors.
- Move the nozzle on top of one of the leveling screws (any of the four corners).
- Place the feeler gauge between the nozzle and the bed, move it back and forth while increasing the height of the bed until you feel that there’s no wiggle room between the feeler gauge and the nozzle (it should fit nice and snug between the nozzle and the bed).
- Do this on all four corners and also in the middle of the bed.
What gauge to use?
If I’m printing my first layer at 0.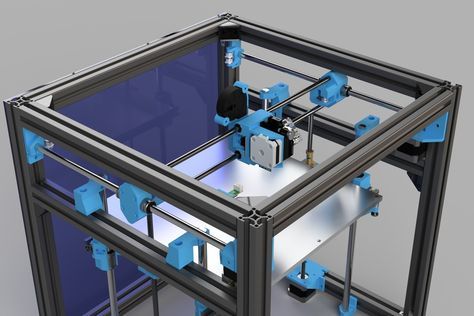 2mm, then I use the 0.2mm gauge, and the same goes for all the other first layer heights. If I want to print using a 0.32mm layer height and the first layer is also printed at that height, then I use the 0.32mm gauge to level the bed.
Which one is better?
I tested both methods when printing PETG since that’s a type of filament that has a much harder time sticking to the bed than PLA, which meant that I had to nail the leveling process to avoid problems.
Since I have a lot of practice using the paper method, because it’s what I used for close to a year, I had no trouble getting the print to stick, but I realized that the first layer was a bit too close to the bed and was getting squished.
On the other hand, when using the 0.2mm feeler gauge, the first layer came out literally perfect on the first try, and if you want to set your first layer to 0.24mm, 0.16mm, or even 0.8mm, you simply use a different gauge and that’s it, it’s ready to go.
Essentially, using a feeler gauge could be considered to be the superior method since it’s more precise.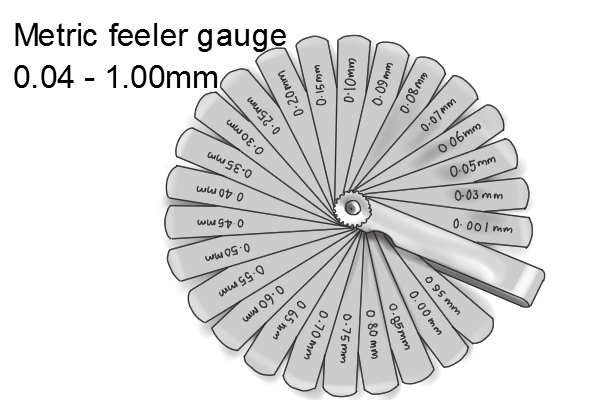 However, I don’t think that everyone should run out to purchase a set of feeler gauges, even if they are really affordable, since it only takes some practice to get the first layer right using the paper method.
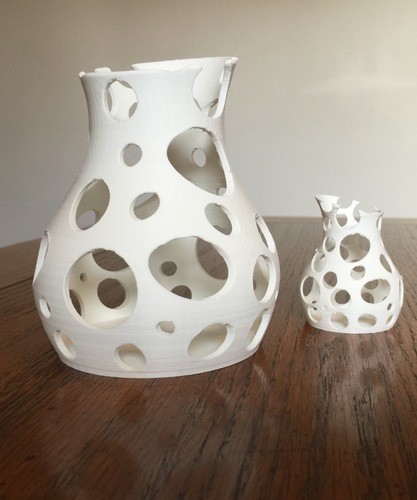
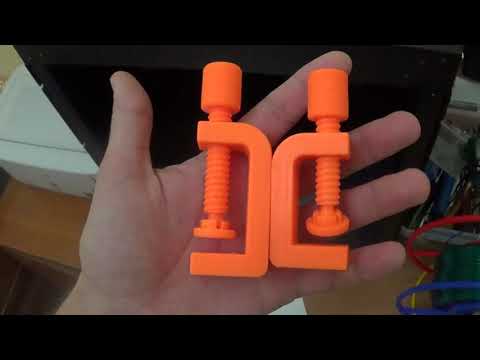
If you’re printing a model that requires absolute precision on the first layer, like this collapsing sword that needs to keep the first layers from fusing together in order to work, then using a feeler gauge to get that first layer perfect is something that I’d recommend.
Otherwise, practice leveling the bed using the paper method. Sure, it will take and you will get frustrated at first, but after twenty or so times that you do it, it becomes second nature.
A better alternative
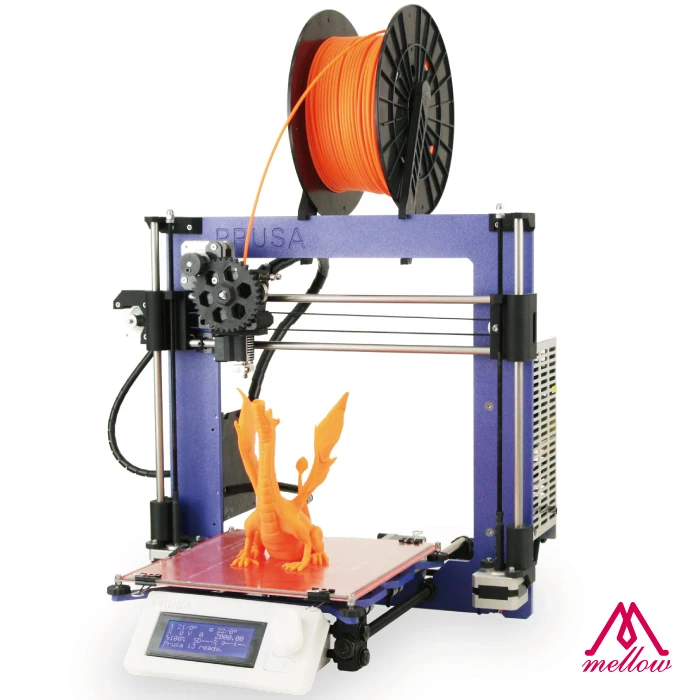
To be honest, there’s no need anymore to go for a manually leveled printer since there are so many affordable ones out there that come with automatic bed leveling already built-in, and if you already have a printer like the Ender 3, which doesn’t come with a bed leveling sensor already built-in, then you could certainly install one yourself for about $35.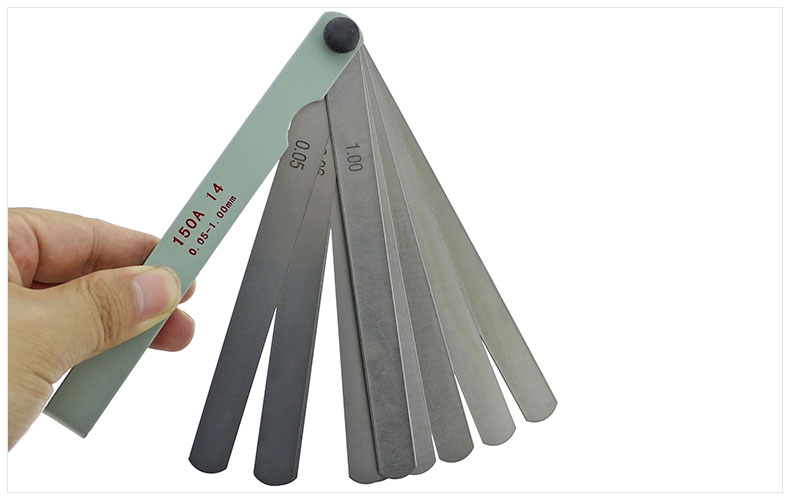
Getting a printer with automatic bed leveling can make your life a whole of a lot easier and you won’t have to deal with prints detaching (in general), and other related issues.
I hope this information was useful!
Have a great day!
We created a recommended products section that will allow you to remove the guesswork and reduce the time spent researching what printer, filament, or upgrades to get, since we know that this can be a very daunting task and which generally leads to a lot of confusion.
We have selected just a handful of 3D printers that we consider to be good for beginners as well as intermediates, and even experts, making the decision easier, and the filaments, as well as the upgrades listed, were all tested by us and carefully selected, so you know that whichever one you choose will work as intended.
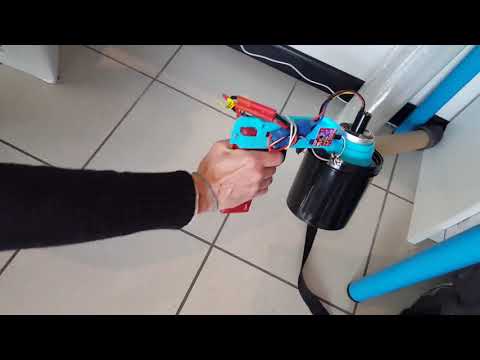
The feeler gauge is a tool to adjust the 3D printer.
View larger
30 other products in the same category:
-
Precise tweezers
8,27 €
-
Palette knife for application of Kapton Tape
4,17 €
-
Tip cutter
26,12 €
-
Tool for self-tapping inserts ensat
35,64 €
-
Modifi3D Tips Kit
20,77 €
-
Adjustable spanner
20,77 €
-
Pliers
10,06 €
-
PTFE tube cutter
14,70 €
-
PrintaKit
98,41 €
-
3DB anti-vibration pads
17,79 €
-
Filament drying capsule
17,84 €
-
Fiber Three Safe - drying case
199,86 €
-
Vacuum sealed filament container
154,64 €
-
PrintDry Smart Vacuum Filament
216,32 €
-
SuperLube lubricating oil for 3D printers
10,32 €
-
Lubricant for 3D printer SuperLube
8,81 €
-
P 298 Cleaner
6,49 €
-
3D Printer cleaner
10,65 €
-
IPA Alcohol
19,64 €
-
TPM Wash Solvent
105,91 €
-
Plastic repellent paint
17,84 €
-
Novus 1
26,18 €
-
Novus 2
26,18 €
-
Novus 2
26,18 €
-
Ethanol 99.
 9%
9% 10,71 €
-
Thermal boron nitride paste
11,89 €
-
Digital humidity and temperature monitor
21,63 €
-
PrintaClean
4,90 €
-
Nitrile gloves
17,73 €
-
Cleaning brushes
7,85 €
What if the filament (plastic) does not stick to the table? It may not be the adhesion.
 Dealing with setting up a 3D printer and leveling the table surface
 Practical every novice user of 3D printers is faced with a problem, the essence of which is that the plastic (filament) does not stick to the table. Almost all the answers that I met on the Internet are weak adhesion. In general, this correct answer, but not only the adhesion index affects the adhesion quality plastic.
More one very important and decisive factor is the correct setting of the table and setting gaps between the nozzle and the table surface. In most cases manufacturers recommend carrying out this procedure with a piece of paper, silent for additional manipulations.
Before I just want to note that when the setting is done using a piece of paper, for some reason, everyone believes that the thickness of the sheet is 0.00 mm, but this is at the root an erroneous opinion, because the thickness of a sheet of paper can be from 0.1 to 0.2 mm, or even more.
If the gap is set incorrectly, the plastic will cling poorly to the table surface and roll off.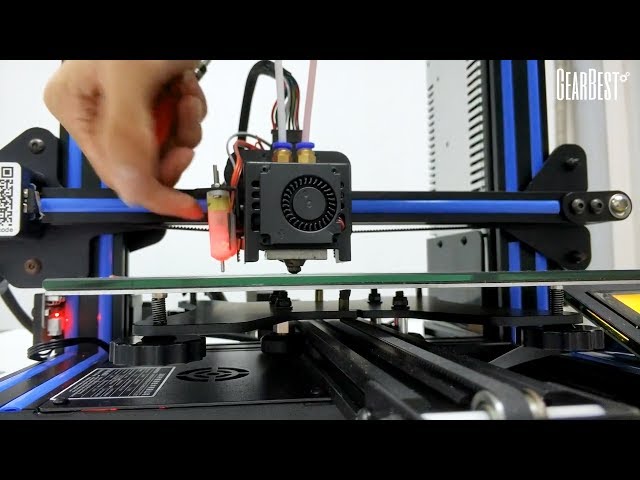
To to make the correct calibration, you will need a set of probes to measure the gaps. Personally, I use a 0.2 mm thick probe, but you can use any, just 0.2 is the most convenient (for me personally).
- AT In general, to properly calibrate the table, I do the following:
- I plan on the table from 4 to 5 points for which calibration will be carried out;
- Output table position in Z in position corresponding to the thickness of the probe;
- AT each of the marked points align the position of the table in such a way that the nozzle barely touched the surface of the probe lying on the table;
- We repeat previous step 2-3 times.
All the table is now calibrated correctly. We got a clean 0. In the slicer settings or set the required Z-Offset gap in the printer settings.
B in principle, we can also use the standard printer alignment settings table surface by doing the following:
- AT printer settings, start the table calibration mode;
- We use calibration probe for setting gaps at each of the points;
- We repeat calibration procedure 2-3 times;
- AT Z-Offset settings take into account the thickness of the probe.
On that's all. The printer is ready to print and the plastic should stick well to the surface table.
PS: It is very important that the table and the extruder are at operating temperature during the above steps.
News
Publications
Winter has already arrived, and with it the first frosts. Many smartphone users have experienced the problem of fast discharging the battery of the gadget in very cold weather. Today in the article we...
Introduction I am writing this publication based on my almost 15 years of experience in using multitools. I got my first multitool around 2007, and luckily it became...
Grace free period for credit You won’t surprise anyone with cards for a long time. As well as its duration of several months, too, has long become habitual. But a year... A year sounds proud....
In ancient times, sailors fought not only with various diseases and beriberi, but also with hunger. However, why didn't they solve the food problem by fishing in the ocean? Sailors wrote about the problem of starvation. ..
..
In the mid-nineties, I worked at a plant in the APCS department. Work schedule - two shifts for 12 hours (day, night, sleep, day off). They hadn't been paid for several months then. And at home the wife and ...
New gadgets for the Oculus Quest 2 headset - advanced Geekvr helmet mount and rechargeable battery that allows you to not only play offline, but also connect an external power cable,... slicer setting
Despite the abundance of videos and articles, the information in them is scattered and it can be difficult for a novice 3D maker to understand such an abundance of facts. In fact, everything is not so difficult, at the first stages it is enough to deal with just a few important nuances.
First use
Before using the printer for the first time, it is best to read the instructions. Each printer may have its own usage and settings. Some 3D printers are able to calibrate automatically, without user intervention, and some need to be configured manually.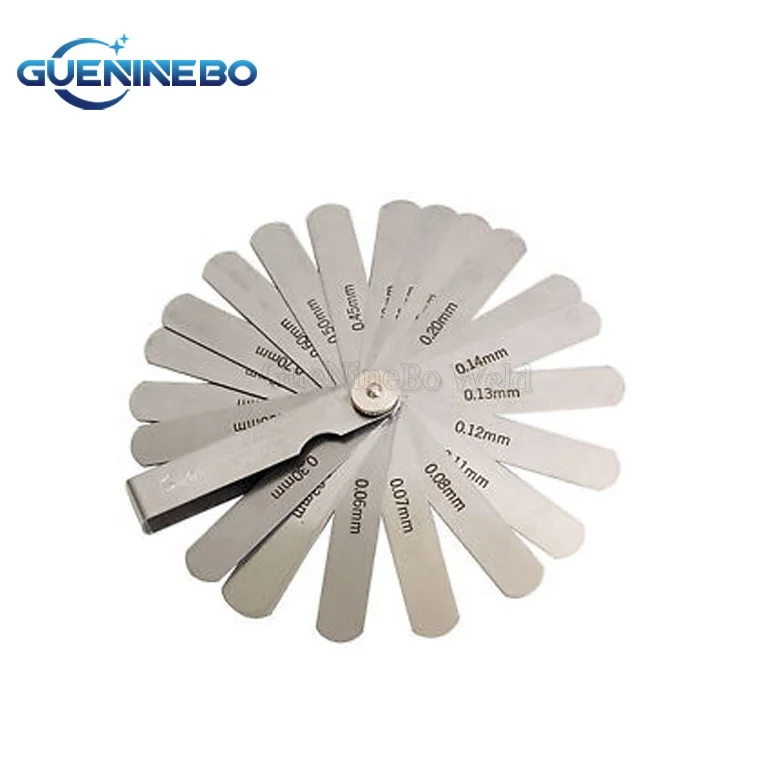
If there was no paper instruction in the box, you can download it from the manufacturer's website. Some manufacturers stick a sticker on the box with a link to the current version of the instructions.
Before the first run, make sure all shipping locks are removed from the 3D printer. You can gently try to move the extruder along the axes with your hands to make sure that nothing interferes with its free movement.
Table calibration
The result of the entire operation of the printer depends on the calibration of the table. It is very disappointing to see that the model, after many hours of printing, came off the surface of the table and deformed or “moved out”. In order to prevent this from happening, it is necessary to correctly set the working plane and the gap between the table and the nozzle.
In many printers, manufacturers began to add an automatic print surface calibration sensor. A special sensor measures the distance from the table to the nozzle and makes a “map” of irregularities that are taken into account when printing.
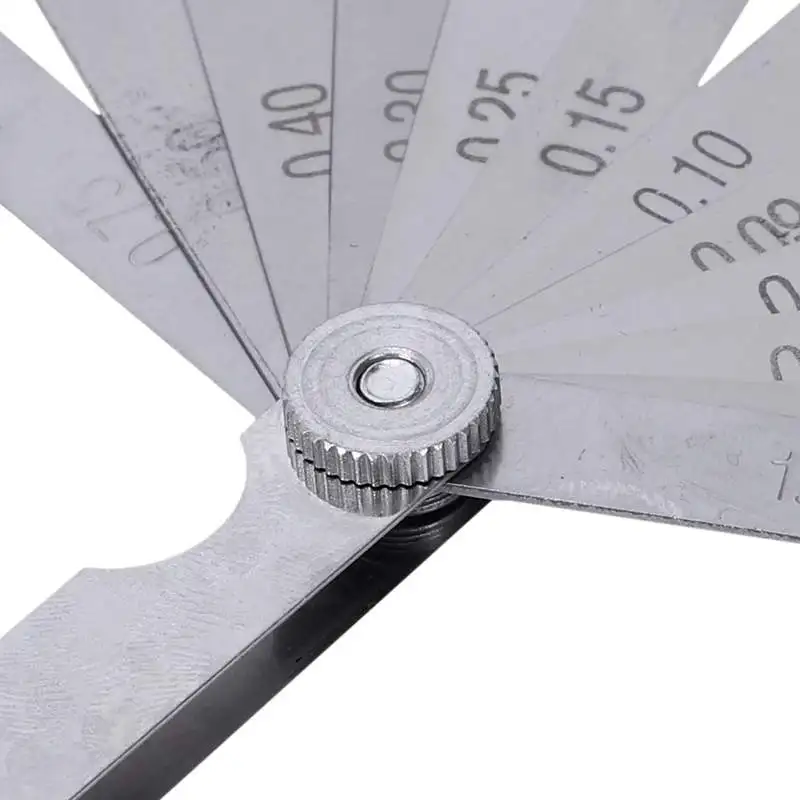
Table auto-calibration sensor
There is a semi-automatic calibration. In this case, the printer, using a sensor, determines the distance to the table and tells you in which direction to turn the adjusting screw.
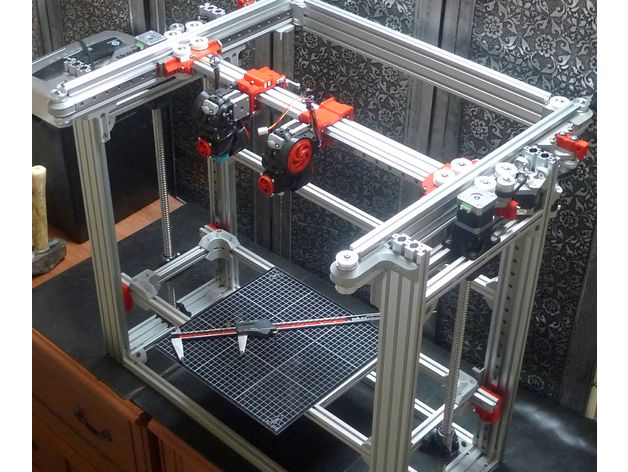
Here we will look at the manual calibration of the working surface of the most popular mechanics of FDM printers - Prusa, H-BOT, CoreXY, etc.
Table leveling
First you need to level the plane of the table. To do this, using the adjusting bolts, it is necessary to set the same distance between the table and the nozzle. Anything can be used as a probe, but it is better to take the probe recommended by the manufacturer (usually 0.1mm).
Table calibration
-
Heat up the table. The 3D printer table is made of a metal plate, when heated, the metal expands, so it is better to heat the table before calibrating.

-
Tighten the calibration screws as far as possible at the bottom of the print surface. This will help prevent the work surface from colliding with the nozzle in the next step.
-
Send table and extruder to zero position. Raise the table as high as possible or lower the extruder as far as possible with Prusa kinematics. This can be done from the menu with the HOME command. Make sure that the nozzle does not “crash” into the work surface.
-
Using the menu, move the nozzle so that it is above the calibration screw.
-
Place the probe between the work surface and the nozzle, use the screw to raise or lower the work surface so that the probe is firmly clamped. Repeat this for all table gauge bolts. There may be 3 or 4 of them.
-
Move the extruder to the center of the table and use a feeler gauge to check the gap between the table and the nozzle. If the gap is the same as above the calibration bolts, then the plane is aligned correctly, if the gap is different, then it is worth repeating the calibration or checking the evenness of the printed surface.

The square test can be used to check the uniformity of the table plane calibration.
Work surface flatness test
Depending on the size of the work surface, you can place test squares in different places.
Test squares on the printed surface 30x30 cm
For this test, you need to print several thin squares (1 layer thick) on the printed surface. Depending on how they are printed, you can see if the table plane is evenly calibrated.
Table for determining the correct calibration of the table and nozzle.
Sometimes the printed surface is a bit uneven on its own and there are some small depressions or bumps in some places. If it is not possible to change the working surface or there is no time to re-calibrate, you can try to print the model on the “raft”.
The raft is a thick substrate that is printed under the model. A thicker layer of plastic adheres better to the printed surface and “smoothes out” its bumps.
3D model printed on raft
Table to nozzle gap calibration
If a feeler gauge was used to align the work plane, which matches the required gap between the table and the nozzle, then the extruder does not need to be calibrated separately. If the printer has 2 extruders, then only the second extruder needs to be calibrated.
Some 3D printers, like the Raise 3D, come from the factory with a leveled bed, but it's a good idea to check the gap between the bed and the nozzle before printing. Settings may change during shipping.
-
Using the menu, you need to send the table and extruder to the zero position (HOME).
-
Using a feeler gauge, set the distance between the working surface and the nozzle recommended by the manufacturer (usually 0.1 mm). Some manufacturers recommend calibrating the nozzle “to the table” without clearance.
 The distance between the nozzle and the working surface can be adjusted by the calibration screw, which is located at the z-axis limit switch, programmatically or by the extruder.
 -
If the printer has 2 extruders, then the calibration must be repeated with the second extruder.
-
It is necessary to heat the extruder to the melting temperature of the plastic filament. The temperature range is usually marked on the box or spool of plastic.
-
After heating the extruder to a predetermined temperature, depress the lever that presses the filament in the feeder and push the plastic into the extruder until it starts to flow from the nozzle.
-
If necessary, fix the pressure lever so that it firmly presses the filament against the feed gear. (If the lever is not spring-loaded and does not return to its original position).
After changing the nozzle, thermal barrier, table surface or moving the printer - it is necessary to check the gap calibration between the work surface and the nozzle, and sometimes the plane of the table.
Filament loading
After setting up the print platform, you can load the filament (plastic).
In some 3D printers, the plastic loading process is automated and starts from the menu.
After loading the filament, you need to push the plastic bar a little until the remnants of the old plastic come out of the nozzle.
Setting print options
In order to get a neat and accurate model of the insufficiently good mechanics of a 3D printer, it is important to properly prepare the model using a special slicer program.
Table and nozzle temperature
Perhaps the two most important parameters are the temperature of the nozzle and the working surface. These settings may affect other slicer settings.
Slicer CURA
Table temperature settings
A heated work surface is necessary for better adhesion of plastics with a high percentage of shrinkage, otherwise the part will simply come off the printed surface during printing. But due to too high a temperature, the lower layers can soften and deform under the weight of the growing model.
Depending on the surface of the table, the recommended temperature may vary. For example, if ABS is printed on a special substrate, the recommended table temperature is 100 degrees, and if glass with stationery glue is used as the work surface, the temperature should not be raised above 80 degrees.
Some manufacturers indicate the recommended table temperature on the box or on their website. But there are general temperature ranges that you can focus on.
-
PLA - 0 - 50 degrees. During printing, the plastic must be blown.
-
ABS - 80 - 90 degrees. Drafts should be avoided during printing.
-
Nylon - 80 - 90 degrees. Drafts should be avoided during printing.
-
Flex - 80 - 90 degrees. Drafts should be avoided during printing.
Nozzle temperature settings
The required temperature range is indicated by the manufacturer on the filament spool, but it is better to print a couple of small tests to determine the ideal temperature for a given filament.
After changing the nozzle to a nozzle with a different diameter or a significant increase in printing speed, it is necessary to slightly increase the temperature of the extruder. Due to the small “melt chamber”, the plastic may not have time to warm up to the desired temperature.
There are extruders with a large volume of "melting chamber" of plastic, but they are not suitable for every 3D printer and are designed to work with large diameter nozzles.
Conventional heating block and Vulcano block with enlarged “melting chamber”
Printed tests
To configure some slicer parameters, it is convenient to use special tests, rather than setting the settings at random. Some of the tests can be printed every time you change the spool of filament. For example, plastic from the same manufacturer, but with a different dye, may have slightly different temperature settings.
XYZ Cube
Printed Cube
This is one of the most popular tests that can be used to evaluate the quality of the surface and the accuracy of the kinematics of a 3D printer (belt tension, number of steps per mm, etc.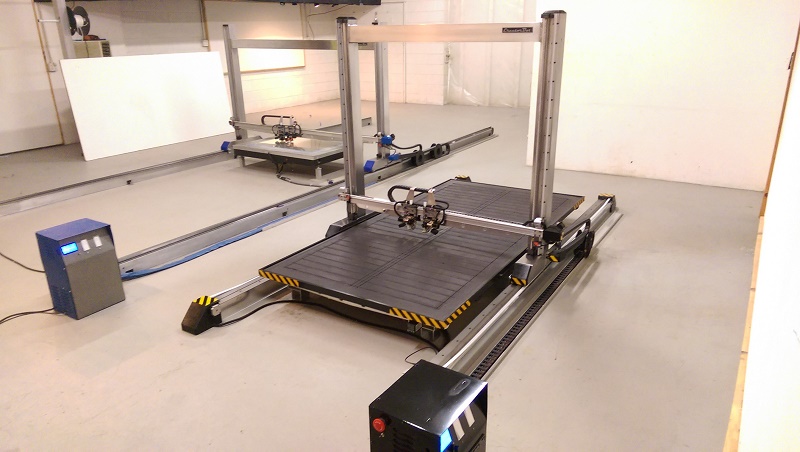 ). You can download it here
Boat 3D Benchy
A small test boat that allows you to evaluate many 3D printer parameters and slicer settings. 3DBenchy has become so popular that enthusiasts have come up with various fun and practical accessories for it.
Parameters to pay attention to in the finished model
For two extruder printers, there is a boat that needs to be printed in two colors. You can download the model or find models of accessories for the finished boat here.
Boat for two-color printing
Simple temperature tower
Setting the correct print temperature is one of the most important factors in obtaining a strong model with a quality surface. Many factors can affect the fusibility of a plastic - the quality of the raw material, the addition of dyes, the speed of printing, the thickness of the layer, etc.
In order to understand how plastic behaves at different temperatures, enthusiasts came up with a simple test turret that prints at different temperatures at different heights. There are several types of these tests. Some have overhanging elements and “bridges”. You can download the test here.
Temperature tower with bridges and overhangs
Turrets
Retract Turrets
These small turrets allow you to fine-tune the retract in your slicer settings. Due to their small size, they print very quickly. You can download the model here.
Bridge Print Test
Test bridge
Some overhanging elements can be printed without supports, the slicer even has special settings for printing such “bridges”. To find the optimal parameters, you can use this small test model.
Surface overhang
Test model
A small test that allows you to understand how the plastic will behave when printing overhanging elements. With this test, you can configure support settings in the slicer.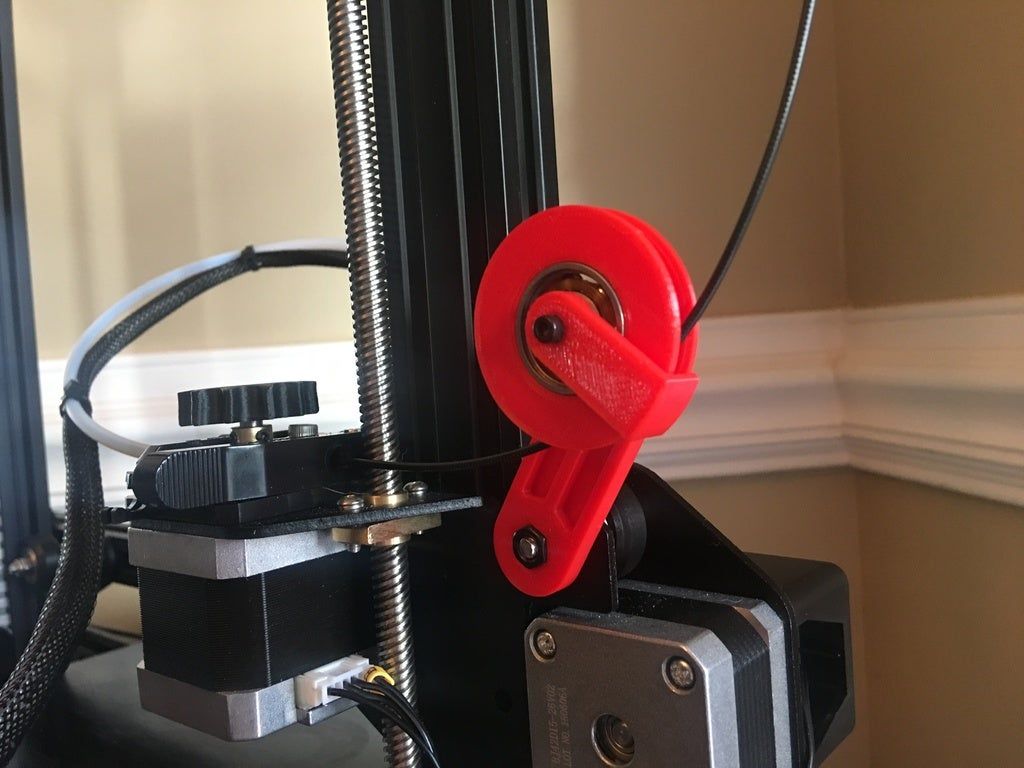 You can download the model here.
Test All-in-one
There are printed tests - all in one, but it can be difficult for a beginner to figure out which settings need to be adjusted. Therefore, to begin with, it is better to print simple tests, and with experience, you can use universal ones.
Printed test all in one
Model can be downloaded here
Common errors
Poor adhesion of the first layer
This is usually due to incorrect print surface calibration or poor adhesion of the first layer.
First you need to check the correct gap between the table and the nozzle. If necessary, calibrate the plane of the printed surface and the gap between the working surface and the nozzle.
To increase adhesion, you can use special adhesives that are applied to the printed surface. Check the correct temperature of the extruder, table and thickness of the first layer in the slicer settings. The higher the temperature of the extruder, the better the adhesion. The first layer is usually thicker than subsequent ones, because the thicker layer of plastic adheres better to the work surface.
Printer does not extrude plastic
If the printer stops extruding plastic and the feed mechanism starts to click, then most likely the problem is a clogged nozzle. The nozzle can be burned or cleaned, but in 3D printing nozzles are consumables and it is better to replace it immediately.
Plastic bubbles when printed
If the plastic bubbles when exiting the nozzle, then it must be dried. Some engineering plastics, such as nylon, need to be dried before each print.
Model is printed with errors
The slicer cannot always process the model correctly if it has errors. For example, inverted normals, internal walls, or the model is not closed. Such models need to be “cured” before printing.
Model printed with error
Some slicers are able to fix simple errors on their own, but if the slicer is powerless, you can use special programs designed to work with STL files.