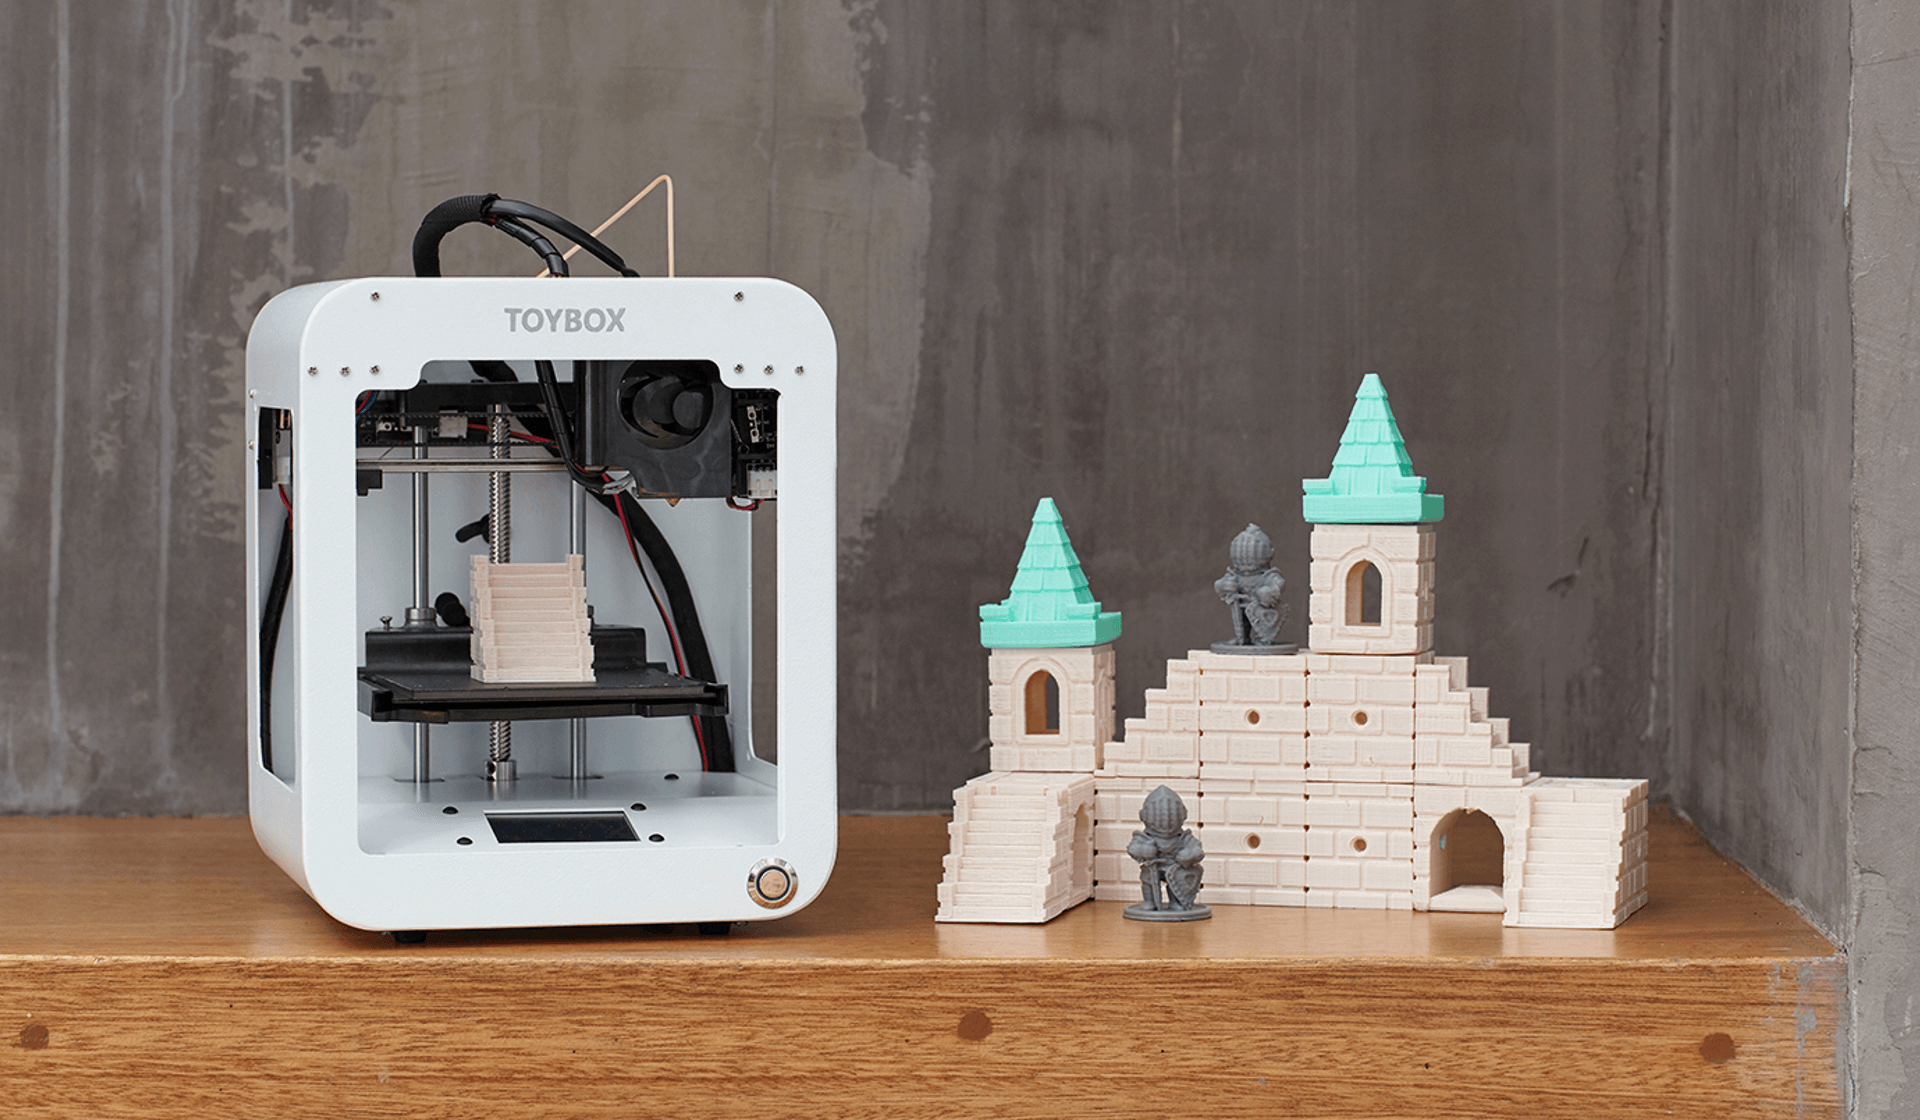
Toybox 3d printer setup
How To Use A Toybox 3D Printer (Kid's Guide!)
The printing process has recently evolved, providing even three-dimensional printed items. These exceptional 3D printers produce realistic images through additive processing and successive layering.
A great exemplar is the Toybox 3D printer.
Toybox is a user-friendly 3D printer and the best companion for kids as it develops their creativity by printing outstanding 3D toys with ease.
In this article, we are going to highlight the main specifications of the Toybox 3D printer and detail how it works.
Are you curious?
Stay with us and..let’s dive in!
The functioning of the Toybox 3D printer is straightforward since it has been specifically designed for children. The printer works through an app you can easily download on your phone. Here is the tutorial you were looking for:
- First of all, download the application on your mobile phone (it’s available for both Android and iOS).
The printer requires a Wi-Fi connection, so make sure you have a fast internet connection.
- Once downloaded, the Toybox app categorizes all the items suitable for 3D printing (the group is sectioned into ‘Quick Prints’ and ‘Critters’). You can also directly draw in the app. Then, browse and select the print option and hit ‘Print Me.’
- Attach the filament roll of your desired color to the back of the printer. Lead the wire through the top of the machine to start the printer.
- With the “Print Me” option, the app will immediately command the Toybox 3D printer. A small LCD is located at the bottom front of the printer and lights up when the machine runs.
- The machine will start printing your 3D image through successive layering and additive processing. You can see all the progress in front of you.
- The app also notifies you once 3D printing is over. An alert will appear on your mobile phone.
- Finally, your desired toy has now come to life in three-dimensional form! The process usually takes minutes according to the design you have chosen initially.
- The Toybox also allows users to import custom design files for 3D printing. These must be in OBJ, G-code, and STL format, as they are the only ones supported by the printer.
It’s exciting to see how the Toybox 3D printer works. It is used to create custom 3D toys but seems like a toy itself! That’s why children can use it with ease under their parents’ supervision. It bypasses any complex or hazardous functions. Kids can learn a new printing technique and develop their creativity and imagination simultaneously.
As it works through wireless connectivity, the Toybox 3D printer is able to print 60mm per second.
It features a print bed for layering the three-dimensional object, which you can easily peel off as it's non-sticky. It is also portable as it only weighs 3kg.
The Toybox 3D printer supports a mobile app representing the device’s core specification. It is easy to use and integrates as many designs as you want. Apart from selecting, kids can also draw and create their own toys through the app. The output is a biodegradable plastic object of 7x8x9 printing volume.
The Toybox 3D printer prints through a single nozzle and utilizes PLA filament material strictly for environmental concerns. You can import your models using the app’s ‘Creator Space’ or, alternatively, through the browser website.
The Toybox 3D printer has been known since 2018 to be affordable and at a reasonable price. The ongoing cost on the official website is $249.00. At this rate, the buyer avails the 3D printer, the peel bed, creator space access for free, printer food, and a 2.000+ digital toy index.
The Toybox also offers a Deluxe Bundle for their customers that integrates eight printer colors, a peal bed, creator space access, and a 20. 000+ toy catalog along with the 2D printer. The bundle is available for the price of $299.
All in all, the cost of the device is relatively feasible, considering it’s a toy that can produce more toys. It offers an excellent opportunity for the kids to be productive and creative at the same time.
The Toybox 3D printer works with colored PLA material filaments. It is relatively simple to change them mid-print.
- Carefully cut the filament strip from the top of the Toybox printer. Take the filament roll out from the back of the machine and replace it with the filament roll of a different color.
- Let the excess wire of the previous color disappear and insert the filament wire of the new color from the top of the Toybox printer.
- Hold the filament in place for a few seconds, and the Toybox will start printing with this new color. That allows you to 3D print an object in multicolor.
The color filaments for the Toybox 3D printer are available with the purchase of the printer or can be separately ordered as well. They are strictly made of biodegradable PLA material and are not pure plastic. Changing colors with the filament wires are non-dangerous and safe for kids.
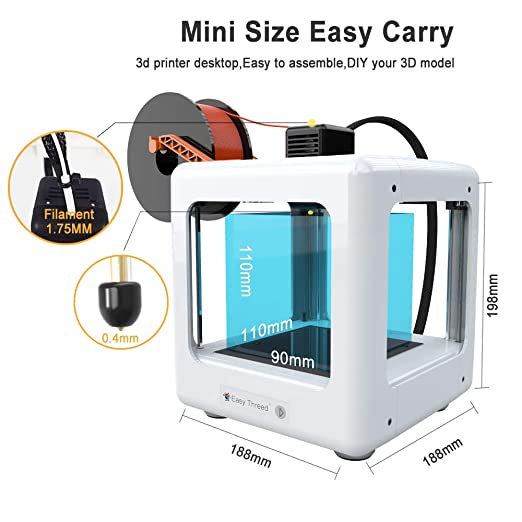
Toybox filaments are made of PLA material to make the output toys environment-friendly. However, you can also use other filaments, not Toybox manufactured. Only make sure that these are printing safe and non-dangerous (Toybox 3D printer supports filaments of 1.75mm).
If you’re interested in purchasing a printer filament, kindly refer to the following properties as a suggestion:
- The filament should be flexible and high in strength. It should also have high durability. These properties ensure that it will be safe for printing and produce a stable output.
- The filament should also have an appropriate melting temperature. The average temperature used for printing is 210–250 degrees.
- The filaments also have shrinkage properties that are preferred from considerable to minimal. That depends on the toys you are 3D printing.

- Please also check if it is food safe.
Toybox is specifically made for children and easy usage. However, the recommended age for using the Toybox 3D printer is five years and above. The company suggests parents supervise their kids while working on it.
Even though it’s entirely safe, it is still a machine that heats up. The printer has wireless connectivity, which prevents any electrical dangers. Apart from this, the app is also easy for kids. Kids aged five and older can easily command the printer with just one click.
The Toybox 3D printer weighs 3kg only. This feasible weight makes the device easy to carry around and store. It is not heavy and gigantic, making it perfect for kids. The 3kg weight also makes the Toybox 3D printer easy to store, as it does not occupy a lot of space and can be stored effectively.
The 3D printer is an exciting way of bringing imagination to life. This modern innovation has made it possible to develop children’s creativity in minutes.
Toybox is a smart machine that can easily be your kid’s preferred toy. It allows them to customize and produce toys through easy operation and functioning. It’s definitely a great device to boost your child’s productivity and creativity.
So what are you waiting for?
Get your Toybox 3D printer right now!
We hope you appreciated the content. If so, please share it with your friends and colleagues who might be interested. Also, don’t forget to subscribe to our Youtube Channel for ultimate news about the wonderful World of Print On Demand!
Is it Really Easy to Use?
Yes, the Toybox 3D printer is so easy to use that you can begin printing in as little as 10 minutes after opening the box. I speak from experience, vouch for the claims made about this printer. This post is all about my first-hand experience with the Toybox 3D printer. I confess, it maybe took me 20 minutes but I could see someone doing it in 10 minutes.
To show you how easy it is, check out the steps I took from opening the box to admiring my first printed object. You quickly see there is nothing technical required to operate this 3D printer.
- Open the box
- Remove the protective packaging from the printer
- Connect the plug to the printer and plug it into the wall
- Down load the Toybox app (on your phone or tablet)
- Open the app, follow setup instructions
- Connect the direct Wi-Fi to the 3D printer (access code listed on printer display)
- Load filament
- Test printer calibration (push print and review the test)
- Choose a toy to print
- Push Print
- Wait for the object to print
- Once finished printing, wait 30 seconds for the nozzle to cool
- Pull out the flexible magnet bed
- Remove the object
You’ll notice there are no real technical things to do. There is a step by step guide through the app that walks you through the entire setup.
Nothing is ever perfect and I imagine each person could have a slightly different experience depending on how the Toybox printer arrives. I took 20 minutes to set it up because I was going slow, and had just a couple of spots I got lost on mainly related to navigating the app. I had zero experience with the app prior to opening the box.
Why did I buy the Toybox 3d printer?I purchased the 3D Toybox printer because I was new to 3D printing, wasn’t very technical, and certainly didn’t have patience for assembling lots of parts.’
What I did have was tons of enthusiasm for 3D printing and wanted to have my own experience printing. After researching various beginner 3D printers, I felt it couldn’t get any easier than the Toybox 3D printer so I bought it after thinking about it for several months.
I figured it was a good place to start, mainly because was little to no setup, the materials came with the printer, and there was an app interface that did all the work and provided so many free objects ready to be printed. I might add, I’m a grandpa of 5 grandchildren and thought it would be the perfect thing to let my grandkids choose toys to print. So far it hasn’t disappointed, and beyond my grandchildren, my grown children enjoy it just as much.
No, it is not a perfect printer and it does not print perfectly every time; but I imagine every 3D printer has its issues. What is nice about the Toybox 3D printer is there is really only one adjustment necessary – the height of the print bed.
The purpose of the calibration is to test the distance from the extruder nozzle to the print bed (the height of the print bed). If it gets out of whack either no material will come out or the material becomes stringy and doesn’t allow the material to stick to the bed.
If you notice any of these things happening all you need is a small allen wrench and a quick turn of a screw to adjust the bed height. It might take a couple of test prints to test the quality of the print after each adjustment but that is very easy to do.
Ideally, the printer comes from the factory properly calibrated. Mine did come properly calibrated and out of the first 5 prints I only had one that didn’t print completely correct. After about 5 prints I noticed the material was not sticking to the bed in one spot. I stopped the print, made the quick adjustment and then it seemed to work well.
I didn’t mind the glitch as it taught me more about the machine and gave confidence there was a solution for most issues you might encounter. I’m learning more about 3D printing and am seeing the things I have been reading about over the past several months.
- I have seen the skirt print and not print.
- I have seen warping.
- I have seen remains of filament from a previous print come out before the new color comes out when I change filament color.
- I’ve seen good prints and not so good prints
- I’ve seen stringy prints and smooth prints.
- I have seen how people get excited about watching this new technology.
There were minimal problems, but I will share my issues regardless of how small as I know that is what you would like to understand.
Issue #1
The paper instructions that come with the Toybox are very very basic and simple. By design, they want you to get into the app and let the guided instruction walk you through the setup. The issue with this is if you have a question about a step, there really isn’t instructions to get you back on course. The calibration caused me just a simple delay, but I did a good search on YouTube and found the answer I needed. This is probably your best source if you get off track. By design this machine is designed for kids so minimal written instructions is understandable.
Issue #2
I did not understand that the Toybox app only works on a mobile phone or a tablet. I initially tried to setup up the app on my laptop, and couldn’t figure out why it wouldn’t setup. After trying for 5 minutes I decided to try doing it on my iPhone and had no problems. Later, I researched this issue and discovered the app does not work on a laptop or desktop machine. No biggy, but it is good to understand.
Issue #3
Setting up the Wi-Fi was just a little confusing. The first step is making sure you are connected to Wi-Fi in your house. Second, is connecting to the direct Wi-Fi on your printer. This connection requires a 6-digit code. I was expecting the code to come on my phone, but after 2-3 minutes I realized it was displayed on the mini screen of the 3D printer. I have been accused of not reading instructions so maybe I overlooked that little tidbit. The code is actually a fixed code specifically for your printer. It never changes. It is what allows the phone to communicate with the box. Once I found the code, it was no problem.
Issue #4
Calibration was the next minor issue. As I walked through the setup instructions, it talked about making sure to calibrate the 3D printer to ensure things printed ok. I watched the video that was included in the online steps, but once it was done, I didn’t know how to actually start the calibration. I assumed it would just start immediately as a step. But it didn’t so I had to search on the app for the calibration tool. Once I found it, no problems. You can find it under the “my Toybox” menu option. Click on the icon, scroll to the bottom and there it is. You will need this more often than they allude too as I think the calibration at least on my printer is a little more sensitive depending on the item being printed.
Issue #5
The other thing that took a minute to figure out was feeding the filament. There is a button on the mini printer that says feed me (click the gear icon if you don’t see this). Once you push the feed me button you will see to icons. The one on the left indicates load, the one on the right indicates unload.
The challenge was both buttons were Initially greyed out and not active. Finally, I realized the button is inoperable until the printer is heated sufficiently. Once it heats up the buttons become active and is push able. I’ve learned that nothing really happens until the machine is heated to proper temperature. So, get used to always waiting for it to heat up.
I’ve only had the printer for a short time but have tried different style objects and will rate each one below.
Heart RingHeart ring
this was my very first print, and I did it to surprise my wife. It worked. It was really her first experience with a 3D printer and she was in awe. She wore the ring the rest of the night. The ring printed just fine.Whistle
Whistle
this was my second print. The print turned out great, looks just like a normal referee whistle. The only negative, it doesn’t actually work all that well. Occasionally you can get a good shrill whistle but most of the time not so much. But it looks beautiful so from that standpoint, I like it.Spider
Spider
the third print was a spider with 8 legs each in the shape of an upside down “V” coming out of the body. This was the first real failed print. I could tell from the get go it didn’t quite look right and sure enough by the end I had 4 good legs and 4 partial legs.Gecko Puzzle
Gecko Puzzle
the fourth attempt was an individual gecko printed multiple times that then connected together to make a puzzle. Each gecko printed beautifully. It introduced using different colors for different prints and then assembling them to create color in the overall object.
Elephant (no image, my grandson took it)
this was the fifth print, and the first one selected by one of my grandsons. It was just the shape of an elephant with a hole for the eye. Very simple, very solid, no delicate appendages and he loved it. Uses it in the bathtub today. He’s only two so not too picky.
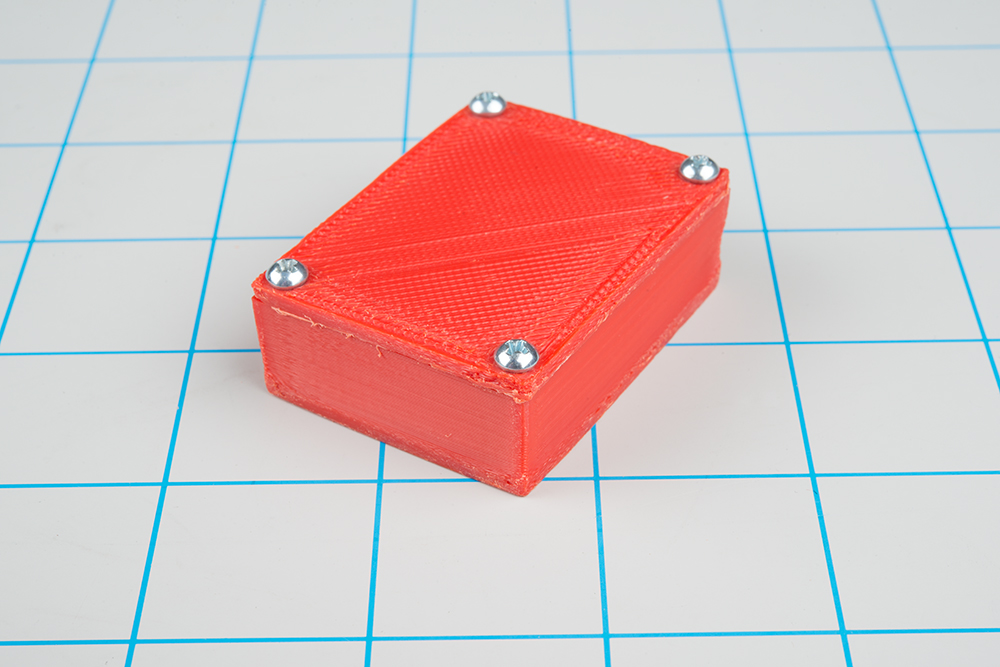
The letter F box
this was the sixth print and the first attempt at printing a two-piece object that would fit together. It was box in the shape of a block “F”. It had a base and a lid. Overall, the box printed reasonable, but with this print I began to see adhesion issues.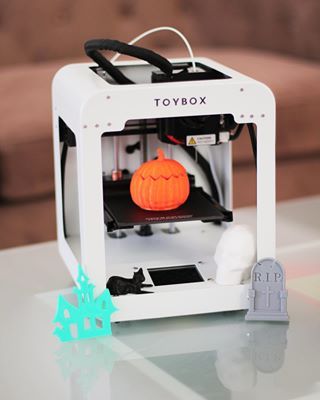 The tail end of the “F” was not adhering to the printer bed and so the bottom of the F curves up rather than laying flat on a table. The lid appears to have some adhesion issues as well which caused a few minor defects mostly in the look. But the the two pieces do fit together just not perfectly flush. I learned later this is an issue that indicates the print bed is not calibrated correctly.
Scissors
this was the seventh print and the first attempt at creating my own object to print. You can only print so much before you start to wonder and your creativity kicks in. The Toybox app gives you a lot of flexibility. You can print existing designs or you can create your own designs by combining shapes, drawing freehand or converting a picture of an object.
The scissors was an attempt at print a picture. I took a picture of regular scissors, it converted it to 3D or tried too. The picture itself wasn’t bad but It left a background behind the scissors so I tried to erase background.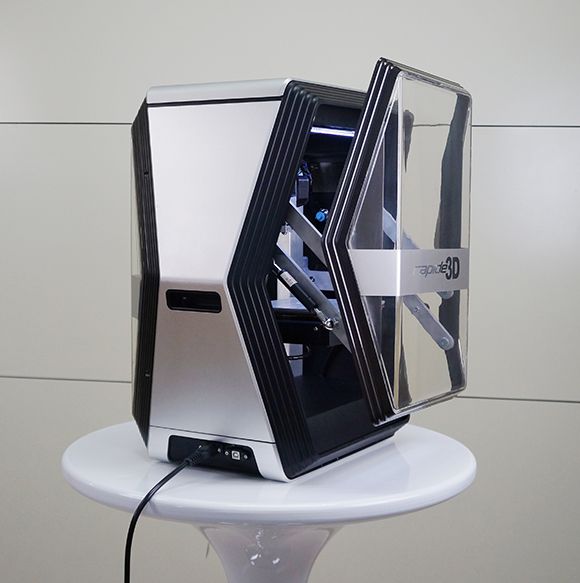 Then I printed. You could certainly tell they were scissors but the file obviously needed editing. My assumption is that while pictures can be taken and converted, the conversion is sketchy at best and would always require some editing.
Flexible Octopus
This was the eight print and by far the coolest print yet. It was an 8-leg octopus, but each leg swiveled. It printed perfectly and really is a great example of 3D printing even printing moving parts.
What is the purpose of the Toybox 3D printer?Everyone will have a different purpose for a 3D printer. The Toybox 3D printer is more for play than for practicality. It introduces people to the 3D printing concept and lets them play and learn. The printer is very small, limiting objects to 3 x 3 inches max. However, for me it does have some other application. I own a small lapel pin company, Pinprosplus. We produce small lapel pins. The Toybox 3D printer is perfect for printing lapel pins.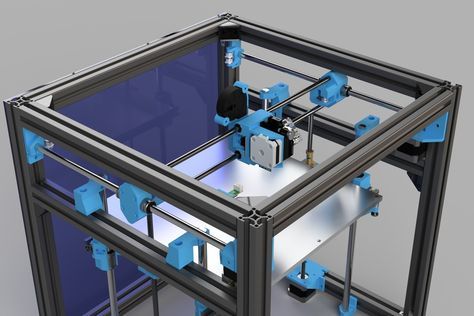 Now it does produce mass quantity, but can easily create a one-off custom pin.
The Toybox 3D printer plus 9 spools of different color filament cost $377. I purchased the Toybox and deluxe bundle direct from Toybox Labs. I had no problems with the order, it delivered a little over a week after I ordered it. The amount of filament I received will last a long time and print many many prints.
RecommendationI have enjoyed using and sharing this printer with others. It has far exceeded my expectation and I would strongly recommend it to anyone wanting to have a 3D experience without the worry of being technical. If you plan to expand quickly into bigger objects, its probably better to choose a 3D printer that has a little more capacity.
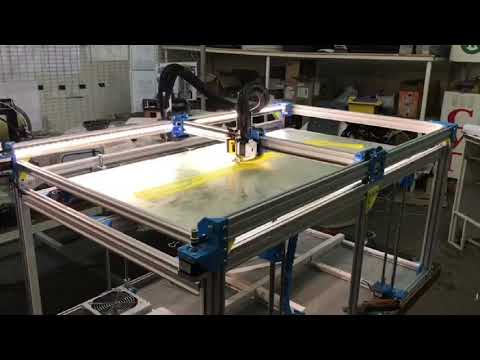
printing of mechanical children's toys 3d models for children
In the modern world, additive technologies that allow the use of 3D printing are developing at an accelerated pace. The technological process involves the layer-by-layer application of the material in accordance with a pre-compiled digital model so that in the end the user can obtain a product with the specified parameters. 3D printers are no longer a rarity today and are increasingly found in home use. They allow you to create at home not only things necessary for everyday life, but also toys for children. nine0003
Why use 3D printed toys?
3D printed toys can be an endless source of joy for children. If the owner of a 3D printer has at least basic modeling skills, then he can easily bring to life any toy that will be of interest to the child at the moment. In addition, you can print those toys that are difficult to find in stores, or their cost is too high.
Lost or missing parts can also be 3D printed. This feature is especially useful for those who are not indifferent to designers and modeling. nine0003
Another factor that speaks in favor of home 3D printing of toys is their relatively low cost. For example, printing a few lost parts from a Lego set is much cheaper than ordering originals from a manufacturer.
It is also worth noting that due to the low requirements for the accuracy and quality of printing 3D toys, the process can be used to gain experience in applying a new material, final debugging of the device, etc.
Which toys can be printed on a 3D printer? nine0005
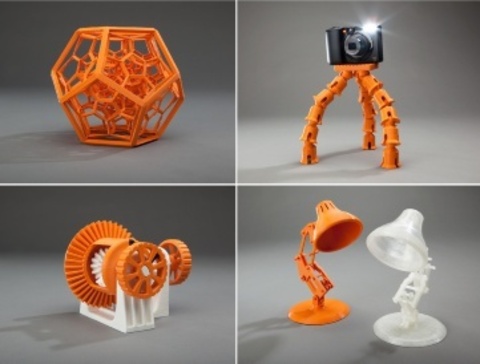
3D printing technology allows you to reproduce almost any toys at home, but most often it is used to create mechanical products, print figures and make lego parts.
The practice of home-made parts of this construction set quickly gained popularity among users. This happened due to a significant reduction in the cost of materials for 3D printing and the availability of the printers themselves.
Lego is made from ABS plastic. This material is readily available, making home-printed items difficult to distinguish from original parts. However, if desired, PLA can also be used for this, the plastic is non-toxic and made from natural materials.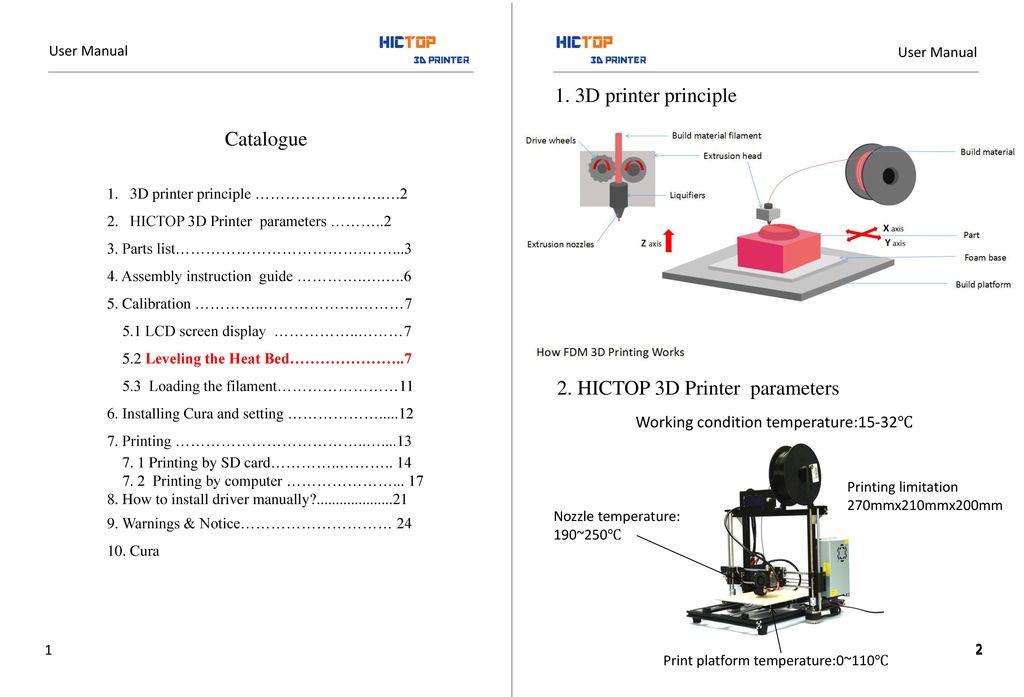 nine0003
Printing parts for a house constructor has several advantages at once:
- A home 3D printer allows you to create fundamentally new parts that did not exist before.
- Lost or broken parts can be replaced with new parts that are still as good as the original.
- Collectors are using 3D printing to recreate vintage Lego sets that have long since been discontinued.
- Home-printed adapters allow you to combine the set with other fantasy worlds, including Meccano. nine0028
- Printing a designer part on a home printer will cost its owner much less than ordering a similar one directly from the manufacturer.
Another indisputable advantage is the speed of production. Designer spare parts are easy to order on the manufacturer's website or other online resources, but delivery will take several weeks. With home printing, there are no such problems - printing lego on your 3D printer can take only a few hours.
Reproduction of iconic items from films has also become a popular trend for home 3D printing. So, for example, in a few hours you can print an exact copy of a lightsaber or a figurine from the Minecraft universe.
Mechanical toys such as articulated octopuses, spinning tops or dinosaurs are also popular.
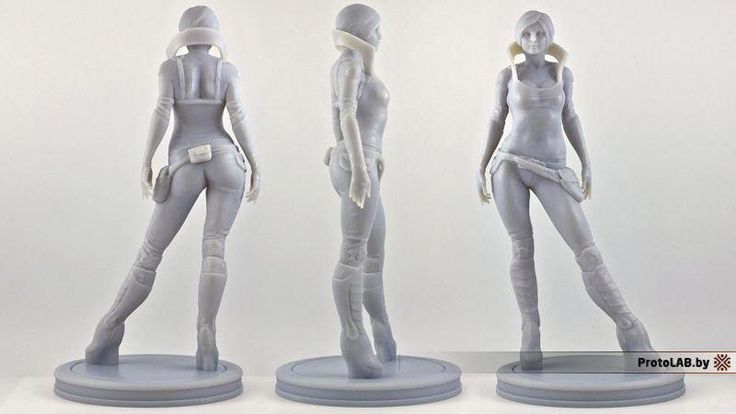
Printing toys on a home 3D printer is interesting not only for children, but also for adults. Especially often the technology is in demand among professional cosplayers. 3D printing allows you to faithfully recreate the original details of the equipment of your favorite characters. nine0003
Printing toys on a 3D printer
Technologies and materials for printing toys
The following technologies are most often used for printing toys at home:
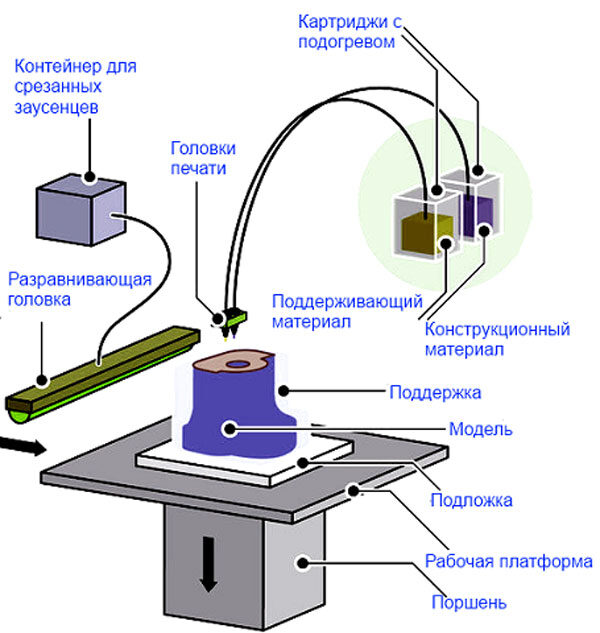
- FDM/FFF. It implies that the filament, passing through the nozzle of the extruder head, is melted, after which the device deposits the material on the printing table, forming the product layer by layer. There, the product solidifies, forming a solid object.
- SLA and DLP.
 The technology is based on the principle of digital processing of material with light. The principle of operation of printers using these technologies involves the selective polymerization of a photopolymer resin in a vat. nine0028
The most popular materials for making toys are the following types of plastics:
- ABS is a material that is highly durable, lightweight and flexible. It is used in the production of designer parts and other products requiring high wear resistance. The disadvantage of the material is the relatively high melting point (from 210 to 250 degrees) and the inability to use without a special heated panel. Also, the use of this plastic involves installing the printer in a well-ventilated room, which is far from always possible at home. nine0028
- PLA is a biodegradable plastic that is relatively less toxic than ABS. This polymer is less sensitive to temperature changes, so it does not require a heated table for its use. The melting point of the material is from 180 to 230 degrees.
- PET - The strength and quality of this polymer far exceeds those of ABS and PLA. In addition, unpleasant odors do not occur during printing, and waste can be recycled. Most often, this material is used for products that require increased flexibility, toughness or impact resistance. The only disadvantage is the increased requirements for setting the nozzle temperature. nine0028
- PVA - this material is used for printing supporting structures in the manufacture of objects with complex shapes. It is suitable for printing with two filaments and dissolves easily in water.
- Laywood - belongs to the category of wood filaments. Toys made using this material have a tactile feel that resembles the surface of a tree. The material does not require a heated table, but at the same time it has relatively low flexibility.
3D models
3D printing is not possible without first creating a 3D model for the printer. A well-prepared model allows you to avoid unforeseen difficulties during the creation of the product.
Most modern printers support the STL format. It was originally developed by 3D Systems and was used to create products using the stereolithography method.
STL files describe only the geometric parameters of the model, without specifying its color, texture, or other characteristics. nine0003
3D printer slicers support common file formats OBJ, 3DS, as well as proprietary formats - FORM and PLG.
You can create a model for a 3D printer yourself using a CAD program or one of the 3D scanners (RangeVision, Einscan, etc.).
If the owner of the printer does not have 3D modeling skills, he can download one of the ready-made models created by other users and made available to the public.
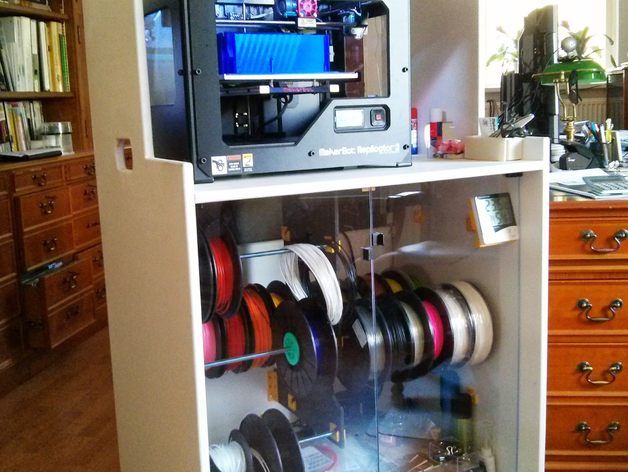
Printers
The most popular home 3D printers are the following models:
The main advantages of self-printing toys at home are:
- Manufacturing speed. The whole process, including the creation of a model, takes no more than a day.
- The cost of products printed at home is lower than ordering similar products from manufacturers or resellers.
- Copy accuracy and quality.
- The ability to recreate exactly the product that is needed at the moment. nine0028
- Availability of materials.
The disadvantages include:
- Less accuracy in compliance with the specified parameters (compared to serial stamping).
- Limited overall dimensions of manufactured items.
- Limited in materials used. Not all types of plastic are suitable for home printing.
3D printing toys allows you to create unusual and creative works that can not be purchased in stores, or quickly and cheaply replace broken or lost parts. The main thing is to prepare a high-quality 3D model before starting printing, on the basis of which the product will be printed. nine0003
- March 14, 2021
- 6506
Get expert advice
As a beginner I bought a 3D printer.
 Choosing, setting up, problems and solving practical problems / Sudo Null IT News
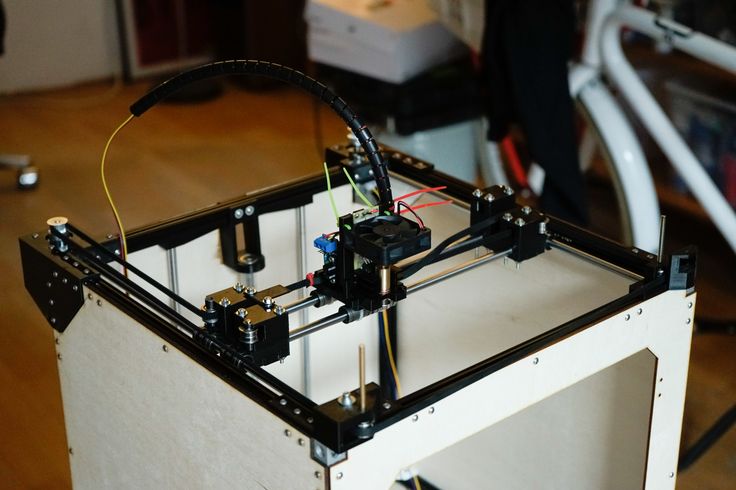
 A few months ago, I was thinking about purchasing such a device because I wanted to print a broken part of my robot vacuum cleaner. About a month ago I bought a device I liked on eBay. That's what was important to me when choosing a 3D printer. nine0144
Which printer was needed?
Considering that I knew almost nothing about 3D printers (except for a few articles read here on Habré), the important points were:
- Printer performance out of the box. I have seen several articles describing how long it takes to set up a "simple Chinese printer". It needs to be assembled from a large number of parts, and it is not a fact that there will not be defective ones among them. Once assembled, you can mess around with the device for a couple of days, and then it turns out that for some reason it does not work. In short, I needed a printer that didn't need to be assembled and that could work right out of the box.
 nine0028
 - It shouldn't be too expensive. Seriously, I'm new, I was not sure that after a couple of days I would not abandon the device. And a printer for 500-600 euros would be too expensive a toy. So I was willing to spend a couple of hundred, no more.
- It should not be too big. Before buying, I allocated a little space for installing the printer, somewhere around 50 * 50 cm. Therefore, the printer had to stand on the allocated area without any problems.
- It shouldn't be too difficult to maintain. This point is closely related to the first. I didn’t want to spend a lot of time on operation and maintenance work - there is sorely not enough time, so constantly eliminating emerging glitches is not an option. nine0028
- I wanted to get a printer with WiFi, it was not critical, but important.
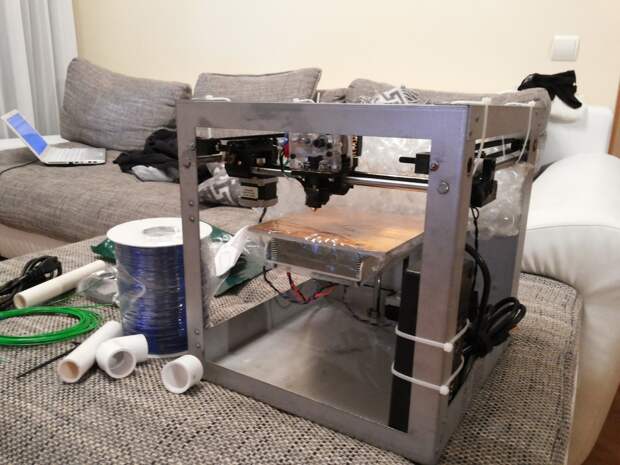
What did I end up buying?
Model Geeetech E180. It was shown by Google after the query “3D printer for beginners”. There were other models in the search results, but this one was liked by the design and the presence of WiFi.
The developers of this printer raised money for it with the help of Kickstarter and a couple of years ago it appeared on the free market. Its price is from 200 to 350 euros, depending on the company that sells it and the store. nine0003
Bought on eBay, starting price was 200 euros, but the seller agreed to drop 50 euros, so the total price is 150.
Printer specifications:
- Print technology: FDM
- Working space dimensions: 130 x 130 x 130 mm
- Printing accuracy: 0.05 mm
- Positioning accuracy: X / Y 0.11 mm, Z 0.0025 mm
- Print speed: 80-110 mm/s
- Thread diameter: 1.75 mm
- Nozzle diameter: 0.4 mm
- Supported material: PLA declared by the manufacturer, but can work with other materials
- Operating system: Windows
- Management software: EasyPrint 3D
- File format: .
 STL, G-code
 - Maximum extruder temperature: 230 °C
- Power supply: DC 12V 6A
- Connectivity: WiFi, USB, TF card (offline printing support)
- Display: 3.2" full color touch screen
- Chassis: metal plate + injection molding (portable console 3D printer)
- Work table: aluminum alloy plate
- XYZ Rods: wear-resistant, stainless steel screw and lead (Z axis)
- Stepper motors: 1.8 degree stepped angle with 1/16 micro stepping
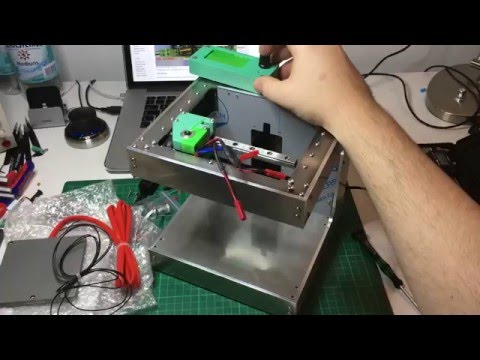
Unpacking and setup
Before setting up, I looked at several reviews and tests of the printer. If not for them, I would not have done it myself, the explanation in the instructions is slurred. The setup is simple, but not for a beginner. nine0003
The printer "wound up" as soon as I connected it to power and a laptop. I calibrated the position of the table - it turned out to be simple - inserted a microSD card into the slot, found the contents through the menu on the printer screen, inserted the fiber into the channel and started printing.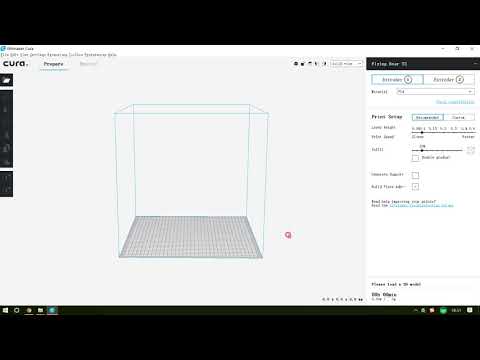 The printer made a noise and started printing. Or rather, I thought that he started typing, in fact it was not so.
Problems
The printhead moved, the temperature reached 205 degrees Celsius, but there was almost no plastic - in the first few seconds, a few plastic “hairs” came out and that was it. The printer continued to work, but the plastic was not squeezed out of the head. nine0003
I wasted several Saturday hours trying to figure out why. I tried to look for an explanation on the net, but solutions to similar problems did not suit me.
The joy of buying disappeared in the first couple of hours of fuss. I wanted a printer that “just works”, but it didn’t work out. As a result, I realized that the fiber was not being fed - the feed mechanism hidden under the plastic cover simply did not work. It did not work because the constituent elements did not rotate. There was no movement at all.
I have decided that the printer has a defective electric motor that is responsible for feeding, and I cannot repair it. The next step is to click the Return to Seller button on eBay. After clicking the button and describing the problem, I decided to pack the printer for shipping. Before sealing it in a foam box, just in case, I decided to carefully examine those “insides” that are visible through the holes in the case. nine0003
And the reason was immediately found - the assembler at the factory simply forgot to connect the power supply to the engine. Seriously, the cable just dangled inside the case. I connected it to the right connector with tweezers without disassembling the printer. Then I turned on the device again and this time everything was fine, the plastic feed worked as it should.
Then a few more minor problems arose:
- Misaligned table. This caused the table to skew and the printhead was pressed against the surface in one place. As a result, the plastic could not be squeezed out of the head, which led to solid print defects; nine0028
- Unable to directly print models downloaded from the Internet.
 Being a beginner, I thought that everything works like with a regular printer - I downloaded a document, sent it to print. It turns out that slicing is also needed. I will not repeat what it is and why it needs to be perfectly described in this article on Habré;
 - Slicers are not compatible with the printer model. Slicer needs to set printer desktop size. Some slicers for some reason did not want to work with the dimensions of my printer (13*13*13 cm). Some even crashed (including the printer's native application), some did not "understand" the dimensions. As a result, I settled on ideaMaker; nine0028
- No WiFi. As it turned out, there are two varieties of E180 - one with an integrated WiFi module, the second - without a module, you need to buy it in addition. At the seller, the inscription "need a separate module" was applied to one of the photos of the printer, small and in French (everything else was in English). Not a scam, but close to it. The module decided not to buy more, it is not really needed;
- Long printing time.
 I thought it would take several tens of minutes to print. I was not ready for the fact that large models can be printed for 6-8 hours. This is my own fault - I did not carefully look at the reviews. nine0028
Practical use
I didn’t buy a printer for a game, I wanted to get a device that would allow me to create things I need in everyday life, and not run to the store. Before buying, I outlined what I wanted to create:
The lever for separating the water tank in the iRobot Scooba robot vacuum cleaner, the repair review of which I published on Habré. His native pen broke, he did not want to spend money on buying a new one (they are relatively rare, since Scooba is no longer produced and expensive). nine0003
Finally found a suitable model on Thingiverse and printed it. To my surprise, everything fell into place the first time, the pen still works quite normally (it's been about a month since this part was printed).
Chinese electron microscope stand. I needed it for soldering small parts. I do not want to buy a professional microscope for 400 euros, since I myself do not do repairs very often. A Chinese microscope connected to a laptop is quite an option. But his native tripod is just terrible. Therefore, I wanted to make a new, normal one with my own hands. nine0003
Soldering iron stand. I just need a comfortable stand, from which the soldering iron will not fall, like from a Chinese stand that I once bought.
Paste tube squeezer. Yes, the thing is not the most necessary, but practical.
iPhone stand. Convenient, there is a hole for the cable, sound amplification.
Toys for children. Why buy another small doll or dollhouse piece when some things can just be printed out? nine0003
Stylus for Nintendo DS Lite. I had a game console bought at a flea market for a long time.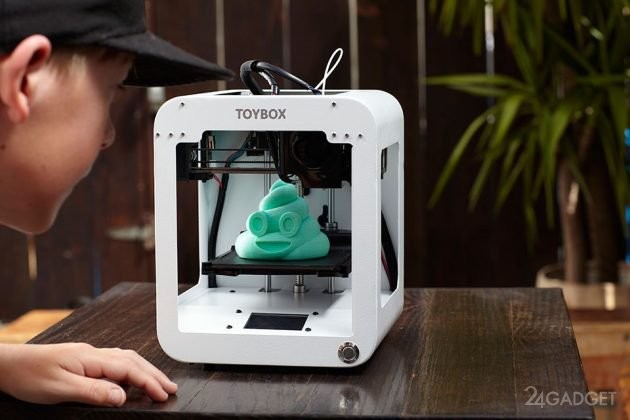 The stylus was lost and I (and my daughter) played using the PDA stylus. Recently I found a stylus model for the console, printed it out - it turned out perfectly. It fits into the connector like a factory one.
Extractor for printed parts stuck to the table. Nearly all parts stick to the printer's desktop backing. You can’t do without a special device - an ordinary knife will scratch and cut a special sticker. I found a model that is compatible with the blades of a standard utility knife - works great. nine0003
The printer lived up to my expectations. It was possible to print almost everything that is indicated above. All these things fulfill their purpose, and most importantly, I am not afraid that any of them may fail. You can always print a new one.
There are a lot of ready-made models on the net. If you need some detail or thing, in 90% of cases you can find everything you need.
Troublesome little things
Printed parts are far from perfect. In some cases, deformation of some elements occurs and it is necessary to “finish” manually, with a knife and, in fact, a file. It doesn't happen that often, but I wish the printed part didn't need to be reworked (yes, I know you can get it by buying a professional 3D printer). nine0003
Sometimes details are printed out, but for some reason the actual and declared size do not match. So, I tried several times to print different dispensers for AA and AAA batteries, but for some reason the ready-made dispensers did not fit. The diameter of the holes into which the batteries are inserted was always somewhat smaller than the diameter of the batteries themselves. I still do not understand whether the problem is on my part, or the model is problematic. As a solution, you can simply increase the scale of the part in the slicer, by 10 percent. But it’s a pity for the spent plastic - after all, you can find out whether a quality part will turn out or not only after a solid part of it is ready.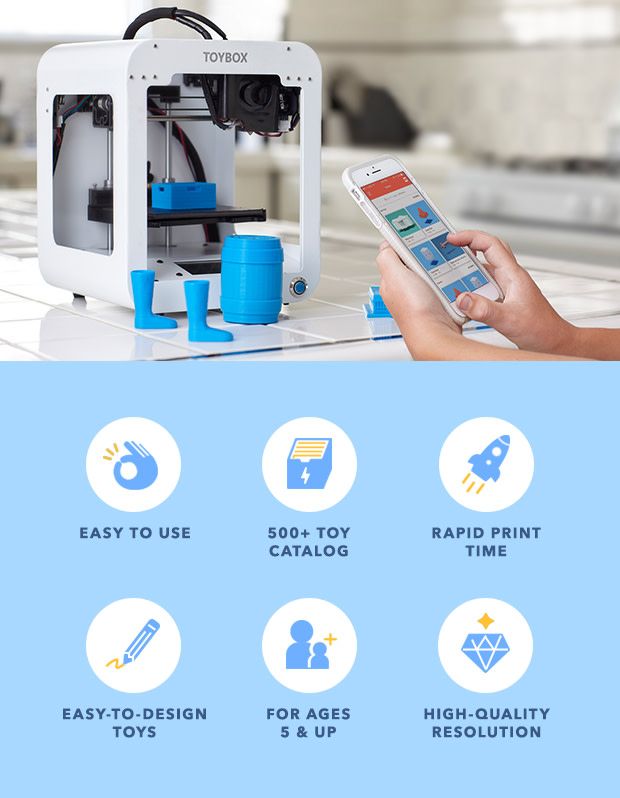 nine0003
It takes a long time to print a part. Some printouts take hours to complete, so making a simple car stand can take half a day.
In order to develop something of your own, you need knowledge of CAD , at least at an elementary level. Otherwise, you will have to look for ready-made objects on sites that host models created by someone. In the end, I never found a battery cover for one of the remotes. I am not able to develop it myself - there is almost no time to master CAD. nine0003
My printer desktop is small . Not all objects that I would like to print can be implemented. In particular, I wanted to get a different microscope stand model. But it did not work out, because it is larger than the printer table. The same problem with the handle of a robot vacuum cleaner (not the one in the photo, another one).
Fin
Am I satisfied, as a beginner, with the printer? Yes very. It met my expectations almost completely.