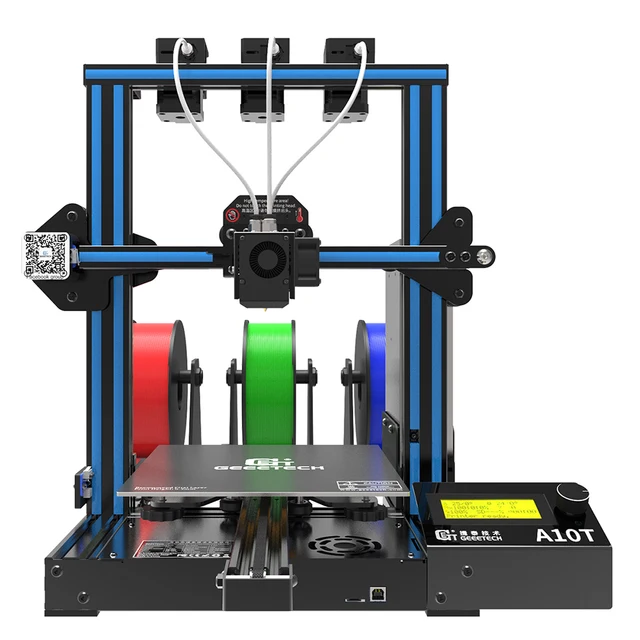
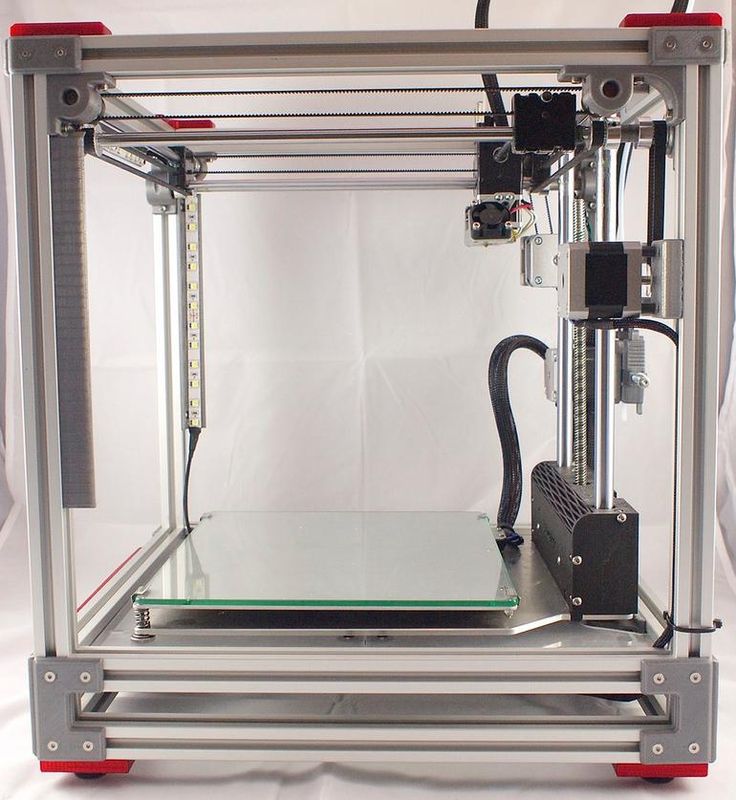
Tmc 3d printer
3D Printing - Trinamic
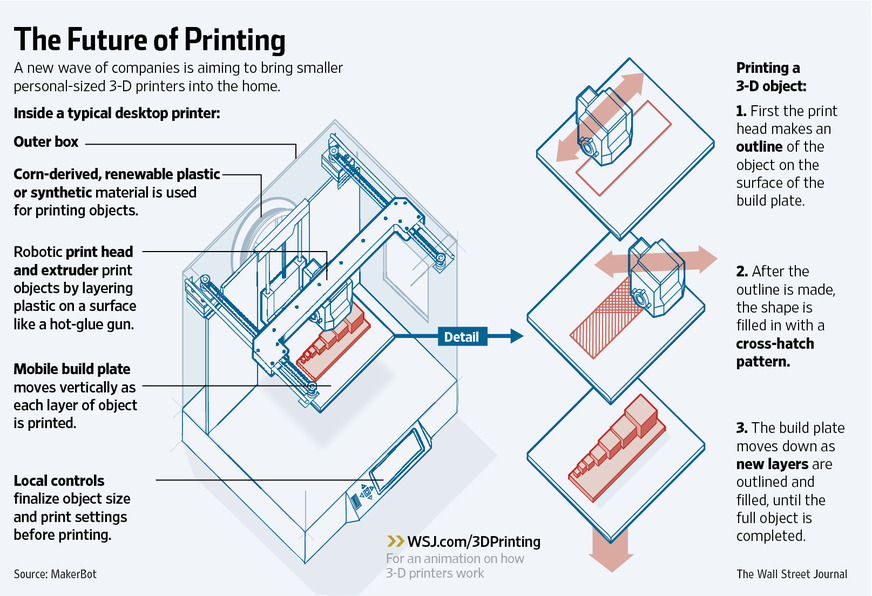
In the life cycle of a technology, there‘s always a gap to bridge between the initial enthusiasm of hobbyist and the mass market. 3D printing has reached this crucial point, maturing into a technology that is accessible to consumers.
SLA-1
1987
DIY Printer
2004
Witbox Go!
2017
While early adopters are willing to accept some technological flaws, end-consumers want a perfect product that’s easy to use. The result is an increasing demand for small, dynamic, and energy-efficient 3D printers that have silent motors and can operate for hours on a desk unnoticed. Trinamic has developed a family of products which not only meets these demands but also ensures easier development for future generations.
These are just a few of the complaints on the RepRap forum, one of many used by the 3D printing community to discuss 3d printing and to find the best solutions for silent motor control:
3D printers are loud to the point it make them hard to be in the same room with while doing anything productive.Trexation – RepRap Forum
I already managed to reduce the noice by finetuning stepper currents though according to my neighbour it's still to loud. BackEMF – RepRap Forum
I hadn't anticipated that they would be so noisy, is this normal? plankton – RepRap Forum
Every decent sized stepper I've seen always makes noise. cdru – RepRap Forum
When printing at low speeds the whole thing vibrates and makes noise. the_digital_dentist – RepRap Forum
Most drivers controlling motors of 3D printers have a distorted current sine wave, generating an audible “humming” noise. Trinamic’s solutions minimize current fluctuation, resulting in a cleaner and smoother sine wave. Silent 3D printing motors don’t only lead to fewer complaints, they also lead to better 3D printers.
Better Printing Results and Happy Customers
Trinamic's compact drivers and leading-edge technology enable 3D printers to be silent and small, while at the same time reducing cost of ownership.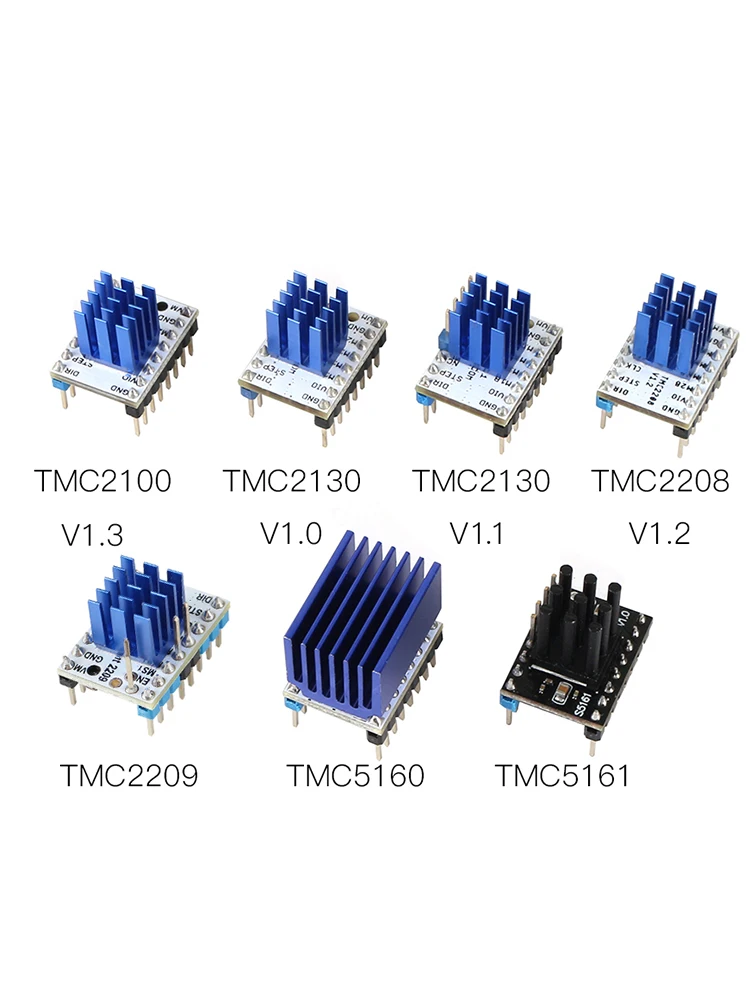 These, together with the application specific reference design TMCM-TRAMS with open-source software derived from the popular Marlin project, enable a simple and fast start to your 3D printing project.
"Using Trinamic motor drivers in our Witbox Go! 3D printer was a key technical upgrade that helped us reach important project goals. The result is a cleaner and less intrusive product that will change the way 3D printers are perceived in the future." Jon Goitia, 3D Product Technical Director at BQ
More technologies
Overall processing tasks have become heavier and more complex than ever before. The increasingly smaller and more powerful stepper motors of 3D printers require extremely accurate motion control. Trinamic’s building blocks combine several features into a single package. Enriched with peripherals and embedded complex software, they offer the complete plug-in solution.
"I love seeing the TMC2100 used on 3D printers.It runs smoother, quieter, cooler and more reliable than the alternatives from both Allegro and Texas Instruments." Thomas Sanladerer, 3D printing expert & YouTuber
Trinamic’s TMC2100 is renowned in the 3D printing community for its ability to turn 3D printers into silent machines with smooth motor control. Following its success, Trinamic improved the concept by developing the TMC2130, TMC2208, TMC5130 and the TMC5160. The latest addition to the family is the TMC2209, enabling both sensorless homing and silent operation at the same time while offering Step/Dir and UART interfaces.
These stepper driver ICs also come as SilentStepSticks, small breakout boards that can be plugged in directly to most 3D printer motherboards.
"Engineer time is a precious resource at Markforged. Trinamic’s integrated drivers allow us to implement high-performance motion systems with a minimum amount of overhead." David Lawrence, Markforged
"The Trinamic TMC2660 is at the core of the advanced features within our 3D printing electronics, we have found it to be in a class of its own in both performance and ease of configuration." Tony Lock, Duet3D
"The TMC5130 allowed us to eliminate the failure-prone mechanical endstops and the noise generated by stepper motors. The result is a cleaner and less intrusive product that will change the way 3D printers are perceived in the future.“ Jon Goitia, BQ
“Using Trinamic’s TMC2208 driver has significantly improved the performance thanks to stealthChop2, and the noise generated by the device has dropped by more than 15dB.” Tomasz Kuc, VSHAPER
Trinamic is the go-to partner for everything that needs to be positioned precisely, enabling new use cases that were previously infeasable. Whenever there's a small motor involved, Trinamic makes it turn.
Discover the best drivers for 3D printing and technologies.
One of the most important components of your 3D printer, and of any application that uses stepper motors, are the so-called drivers.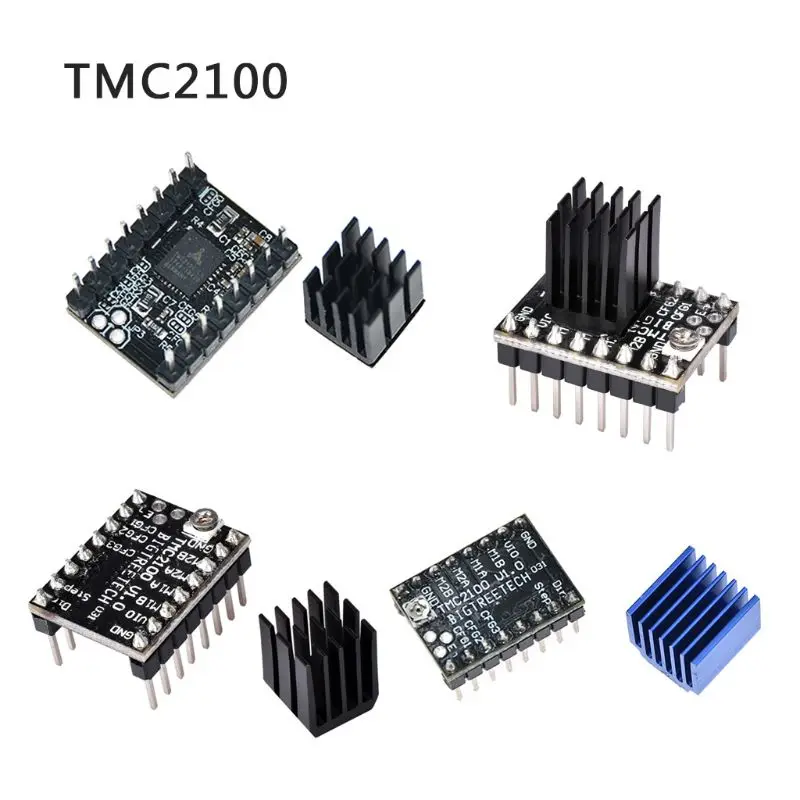 These tiny boards are in charge of the important task of managing how the engines have to act in each and every one of their movements.
And we are not talking about a small thing, for this they require a series of quite complex calculations to be able to carry out everything that is required of them and when they are required.
Choosing good drivers is important and can influence the quality of the parts, as well as possible improvements of our printer (smoother movements, greater heat dissipation, reduce the noise of the motors, avoid installing limit switches on the axes, etc.)
Brief introduction
In today’s article I would like to take a brief look at TMC drivers and the different and innovative technologies that they offer us and that have made them one of the most used in 3D printing. And, of course, the drivers that we recommend in 3DWork.io without a doubt for any of your 3D printers.
For some time I had in mind to write a series of articles on TMC drivers and possible configurations, and this will be the first in the series.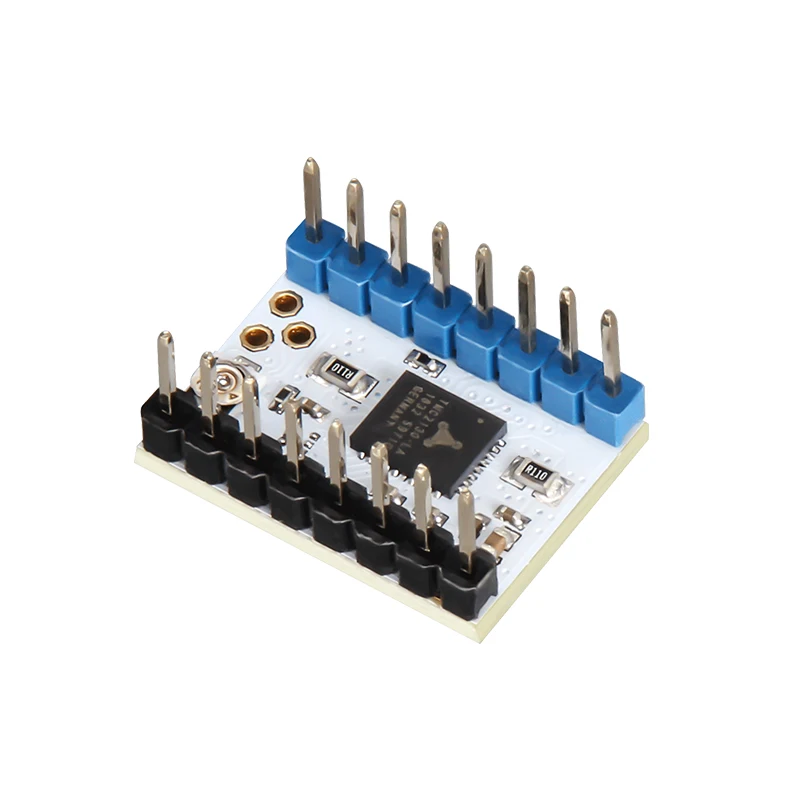 Later I will address how to configure this type of drivers so fashionable using SKR electronics, but it will be in later articles that they will see the light shortly.
Update: In the following link you have a very interesting article on how to configure SKR electronics with TMC2209 and Sensorless drivers Complete guide SKR v1.4 / v1.4 Turbo with TMC2209 Sensorless drivers and Display TFT35 V3.0
As I always do, I would like to remind you that we have a great community in our Telegram channel where we share our doubts and experiences. And of course, open to everyone, so have no qualms about joining if you wish.
Stepper motors
Before talking a little bit about TMC drivers I wanted to give a brief introduction to stepper motors. However, I do not wish to extend too much at this point as there is a lot of information on the net.
A stepper motor is basically an electromagnetic device that converts electrical pulses into angular displacements, or rather, into turns of the motor.
This makes them an ideal element when designing and developing applications where we may need extremely precise movements.
If you open a stepper motor, you can see that it mainly consists of a rotor where a certain number of magnets and exciter coils have been coupled. And in all of them, there are three common characteristics:
- Voltage: It is the voltage with which the motor operates. This information is usually indicated on the engine itself, or, at a minimum, in the manufacturer’s specifications.
- Degrees per step: This characteristic defines how many degrees the shaft of our motor rotates for each step it takes. As you can imagine, it is one of the most important factors when deciding to use one engine or another.
- Electrical resistance: Defines the current that our motor will consume, its maximum operating speed, and of course, its torque (force of the motor in rotation)
That said, to move our motors (or better said to rotate) we will need hardware that manages each and every one of these movements correctly, precisely and efficiently.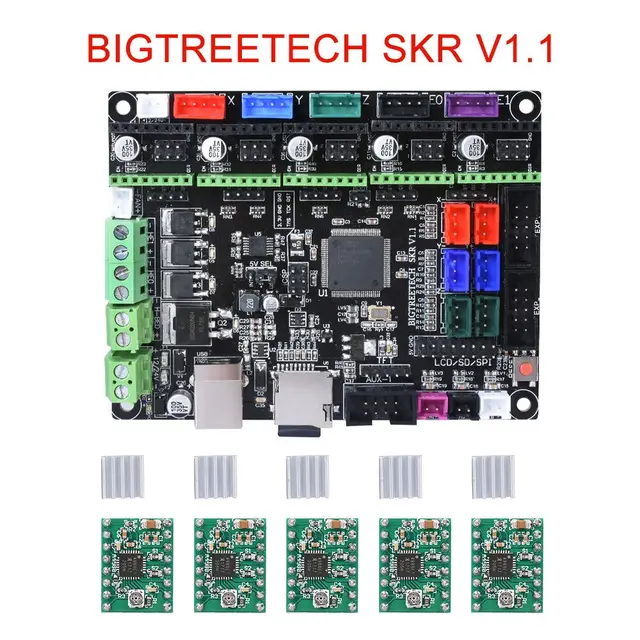 And this is where the drivers come into play, since they will transfer these movements that we request in measurements in an “understandable” way for the engine.
Modifying the power
The power that we are going to supply to our motors will be configured in our drivers, and the optimal one will depend on the type of driver we use (A4998, DRV8825, TCM2xxx, etc.). They usually have a rotary potentiometer (resistor) on the same board.
This potentiometer must be turned to select the correct value, with a simple Philips screwdriver. It is recommended that it be with a ceramic tip, so as not to accidentally make a “short” on the plate if the screwdriver slips, something that is not difficult at all.
To know the values that your drivers currently use you can use a multimeter. As you can see in the image above, you simply have to locate GND and the Vref and carefully put the measurement probes (or tips) there.
If you configure the drivers to communicate in “intelligent” mode as we will explain later (SPI or UART), you will be able to modify these values without having to touch the potentiometer (using GCODE commands). Marlin will select some default values, and if you want to change them, you can access its own menu on your printer’s display and modify them at will.
However, always keep in mind that even if you want to control the motor current digitally (through SPI or UART), the maximum current will always be limited by the potentiometer. So make sure it’s not set to a minimum value before using digital control.
If you set excessively high power values, your motors will have more torque, but the drivers will heat up more and could lose steps in some movement. In the engine you will also notice a large increase in temperature, reaching even to not be able to touch even with your hands, something that should not happen.
The ideal power to which you should regulate your drivers is to the minimum point where your engine does not lose steps. This is always relative, since motors and drivers can be different in most cases, as well as the resistance offered by your mechanics.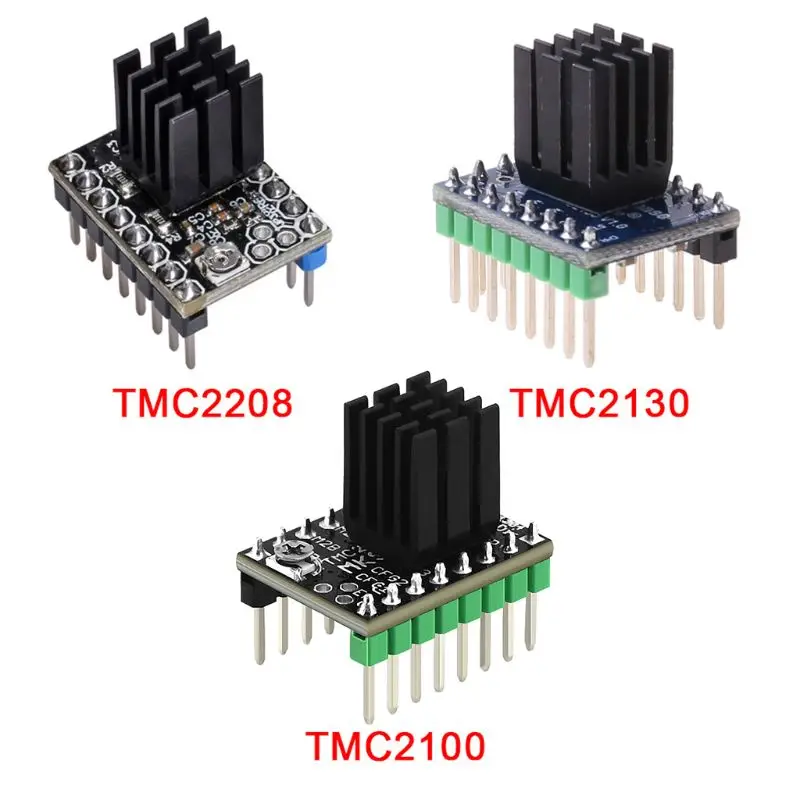 But it is worth spending a few minutes trying to find the correct settings for your printer.
Reasons to use TMC drivers (and not A4988/DRV8825)
Until recently, the most typical thing in a 3D printer was to use A4988 drivers to simplify the operation of stepper motors. It reached tremendous levels of popularity, and not only for 3D printing, but also for all kinds of projects such as CNCs, Robots, Plotters and even 3D Scanners.
Later a new version of the same called DRV8825 appeared on the market, which improved the old A4988 in several aspects. These new DRV8825 already allowed to operate with voltages higher than the A4988. They also added a new Microstepping mode (1/32 compared to 1/16 of the A4988) and its maximum intensity was increased from 2A to 2.5A.
In general, the A4988 and DRV8825 drivers are robust devices, we are not going to deny it at any time, and they have protections against possible short circuits, overvoltage and excess temperature. But they also have some drawbacks that we will cite below and that do not bring with them any of the new models of TMC drivers.
One of the biggest drawbacks of the A4988 and DRV8825 drivers is that they are incredibly loud. You may not give it much importance, but if you compare them with TMC drivers there is a huge difference, believe me. And if you have the machine in your office a few meters away, you will notice the difference.
Furthermore, the A4988 and DRV8825 drivers can cause the famous salmon skin problem on your printed parts. This drawback appears as an uneven surface and can visually ruin the quality of a printed piece, as you can see in the attached photo (click on image to enlarge).
This can be “alleviated” by adding some electronic boards called Smoothers, but it implies adding more components and wiring to all the tangle of cables of your 3D printer on a problem of easier solution, replacing them with TMC drivers.
Another reason could be the resolution that our A4988/DRV8825 drivers can reach, much lower than that of TMC drivers. The A4988 drivers achieve a resolution of 1/16 steps and the DRV8825 drivers a resolution of 1/32 steps. If we look at the technical specifications of the latest TMC drivers, we will see how all of these can reach resolutions of up to 1/256 steps.
It is not a piece of information that you should be obsessed with in 3D printing, far from it, since the quality difference in your pieces is not going to be substantial. However, it is always good to take it into account to know what each of these components offers. And certainly going from 1/32 to 1/256 is quite a significant precision difference for some types of applications.
Leaving behind the inconveniences of the A4988 / DRV8825 drivers, using TMC drivers we will find ourselves face to face with a series of new technologies patented by the Trinamic company, which open up a wide range of possibilities.
Functions such as StealthChop™ will reduce the sound of our drivers to practically zero while we are printing and CoolStep™ will reduce consumption and cool the motor considerably, among other things. I’m not going to gut all the new tech at this point, so you’ll have to read to the end 🙂
I sincerely believe that drivers are quite forgotten components, and that many people who access 3D printing do not give them the importance they deserve. It is very important to bear in mind that certain aspects such as the choice of drivers, the filament or the type of extruder you use can better define the quality of your parts before other components where there is a pointless obsession.
For all the inconveniences mentioned in the A4988 and DRV8825 drivers, I already only assemble TMC drivers in my 3D printers. And not only for this, but for the improvements that they bring from the hand. Equipping your mechanics with TMC drivers is a good decision, and something I highly recommend even though the price is slightly higher.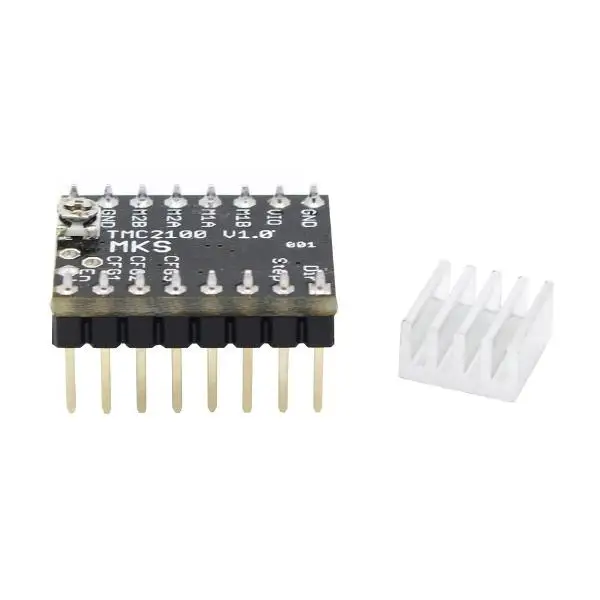
Buying TMC drivers for my 3D printer
You can buy TMC drivers in any online store. The links below are from some Marketplace where you can find them.
They are affiliate links to Amazon, Aliexpress and Banggood, but they do not increase their price and they helps to support the 3DWork.io project.
| Drivers TMC2208 (1 pcs) | |||
| Drivers TMC2208 (Kit) | |||
| Drivers TMC2209 (1 pcs) | |||
| Drivers TMC2209 (Kit) | |||
| Drivers TMC2225 (Kit) | |||
| Drivers TMC2226 (Kit) | |||
| Drivers TMC2130 (1 pcs) | |||
| Drivers TMC2130 (Kit) | |||
| Drivers TMC5160 (1 pcs) | |||
| Drivers TMC5160 (Kit) |
Or if you wish, you can use our component search engine Markets. sx, where you can compare prices in different Marketplaces (Amazon, Aliexpress, Banggood, etc.) with a single search and very easily.
Drivers TMC: The brain behind the motor
As you well know, in 3D printing precision and quality is the great goal that a good maker pursues without any rest. However, regardless of the precision of a motor, the quality it can offer us will be defined in part by the driver that manages it, since it will be the “brain” that will control all its operations.
Moving our print head from one side of the bed to the other is not as simple as setting two coordinates and launching the G-Code command, or at least if we want to obtain decent results. And this is where TMC drivers come in.
There are numerous TMC drivers available, but in the article I will only make a brief introduction of the most current and modern with some exceptions.
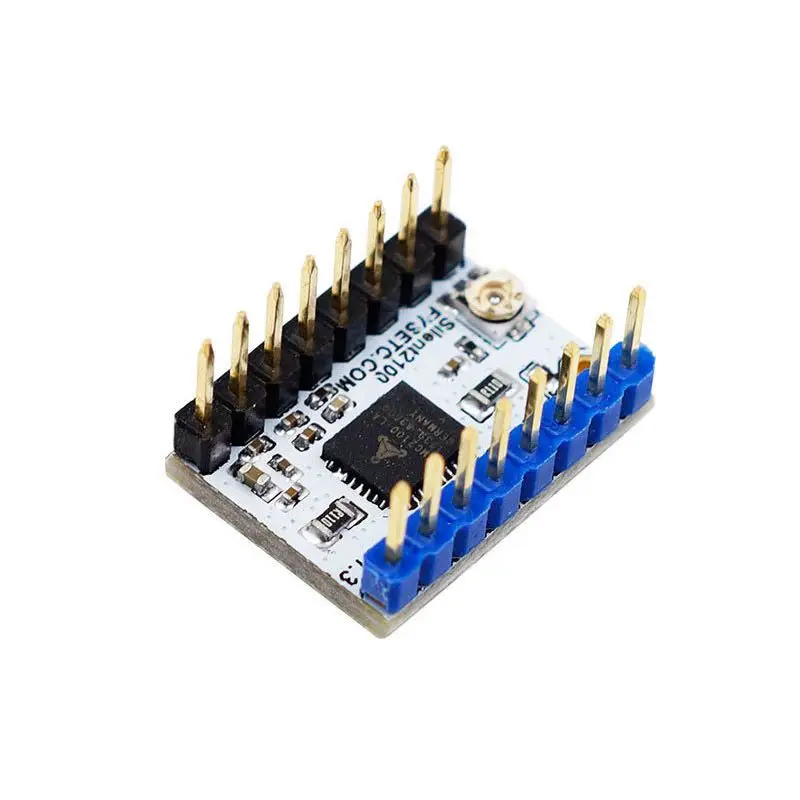
TMC2130 Driver
Although they are not recent, they are TMC drivers that are worth reviewing.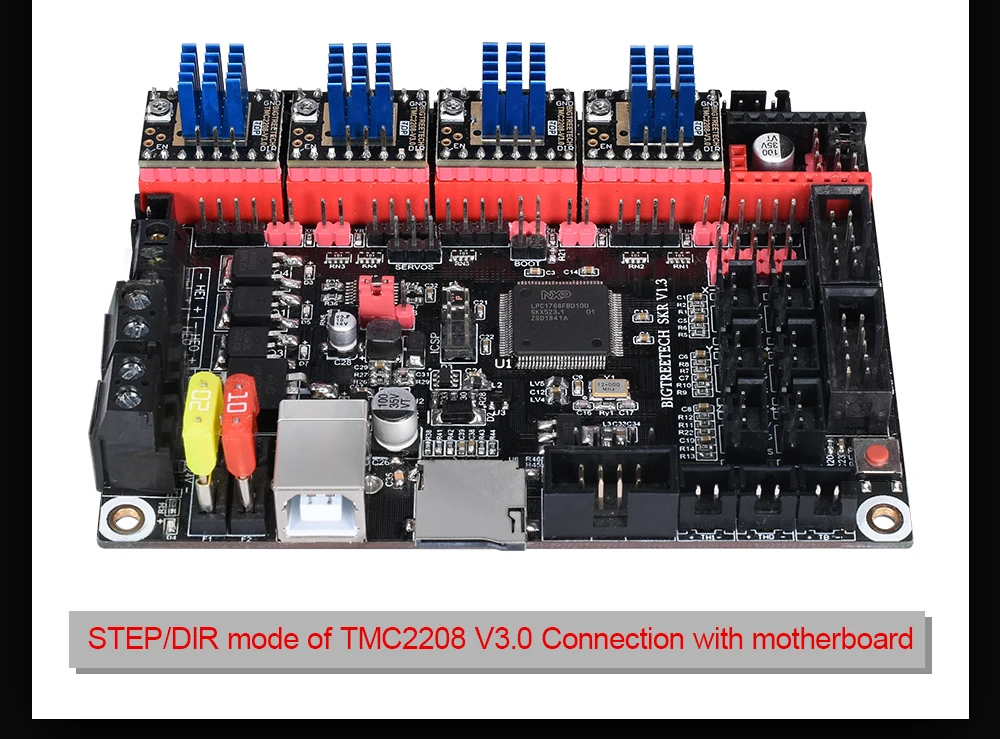 They are based on the microprocessor with the same name (Trinamic TMC2130) and the latest versions come preconfigured to connect directly in SPI mode (intelligent mode).
They have most of the current technologies that Trinamic offers for its drivers such as StealthChop, SpreadCycle and CoolStep, which we will explain in detail later.
They are not as modern as the recent TMC2209, but in their favor we will highlight that they dissipate heat a little better.
TMC2209 Driver
Ultra-quiet driver, specifically designed for two-phase stepper motors. The TMC2209 drivers come to be an update or improvement of the old TMC2208 driver, with which it shares characteristics and its pinout.
However, the TMC2209 drivers offer greater power (2.0A) and support for HOMING without any type of limit switch (StallGuard), a technology that we will talk about later.
Today, the TMC2209 drivers are highly recommended for any 3D printer, as they include most of the new technologies patented by Trinamic, and in a reasonable price range.
Differences between TMC2208 and TMC2209
- The TMC2208 drivers can power motors with a continuous current of up to 1.5A (with peaks of 2.0A), while the TMC2209 drivers work up to 2.0A (with peaks of 2.8A)
- The TMC2209 drivers have lower resistance conducting output drivers (RDSon). This provides them with less power dissipation and higher current.
- The new TMC2209 drivers feature CoolStep and StallGuard4, fully optimized for StealthChop2. In this way they can be used to avoid adding limit switches in our printers and all the corresponding wiring, with an accuracy of about 0.2mm.
- On TMC2209 drivers you can switch between StealthChop2 and the SpreadCycle via a configuration pin (called SPREAD).
- The Vref and DIAG0 onboard pins are interchanged between the TMC2208 and TMC2209.
TMC2225 and TMC2226 Drivers
The TMC2225 drivers come to be an update of the already known TMC2208 (the predecessor model of the TMC2209), and share each and every one of its characteristics in full.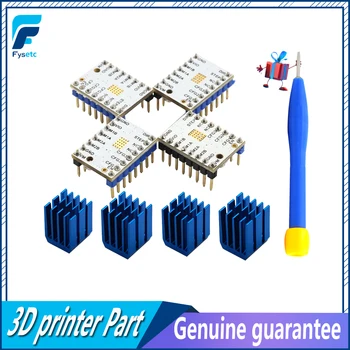 The only substantial difference is that instead of carrying QFN encapsulation (or surface mount).
This encapsulation is perfect when making extremely compact plates, since it does not have terminals (or legs) where to solder the component and saves a lot of space in the PCB design. But on the contrary, that size reduction makes it less effective when it comes to dissipating heat.
The TMC2225 drivers have a different package called HTSSOP, which offers us greater thermal resistance compared to its predecessor the TMC2208 (and greater cooling power, as it has more surface area).
Although like the TMC2208, they do not have StallGuard technology, so if your intention is to be able to use Sensorless in your printer they are not an option to consider.
The TMC2226 drivers are an update of the TMC2209, with identical technical specifications but with the HTSSOP package (like the TMC2225). These already have StallGuard technology and offer us the possibility of mounting our printer without limit switches in X and Y (Sensorless).
The TMC2226 are an excellent option like the TMC2209, and even recommended with respect to the TMC2209 if you are going to mount them in an electronics with little cooling. These will offer one more point of thermal resistance and cooling.
TMC5130 and TMC5160 Drivers
The TMC51XX series of drivers could be said to be the “big brothers” of the well-known TMC2208 and TMC2209. They are technically superior, have a higher power and are recommended for much more demanding applications.
In principle for 3D printers I recommend assembling TMC2209 drivers, since they are the most modern and are more suited to the mechanics of your 3D printer and motors. However, if your idea is to mount a CNC, I have no doubt that they are a very good option.
The TMC5160 and TMC5161 drivers integrate 45mΩ (1A 25°C 24V) mosfets that will practically avoid the need for heat sinks in them, since they get less hot than the TMC2209.
Technologies and patents for TMC drivers
There are various technologies developed by Trinamic that have promoted their products to make them a benchmark within their sector, not without great regret from competitors such as Pololu (A4988/DRV8825).
These patented technologies offer us some very interesting characteristics for our applications, and that we can obviously apply to our 3D printers. So we are going to cite some of them to be able to know them first hand.
StallGuard Technology
The StallGuard technology, patented by Trinamic, is one of the most interesting that we have available when using TMC drivers. This technology allows us to make load measurements on our stepper motors without any type of sensor.
Thanks to these measurements, StallGuard can accurately detect motor stops and eliminate any type of limit switch (endstops).
And this is something very interesting certainly. In this video below you can see how by offering a sudden resistance, the drivers detect the variation and the LEDs are activated, warning us of the new status.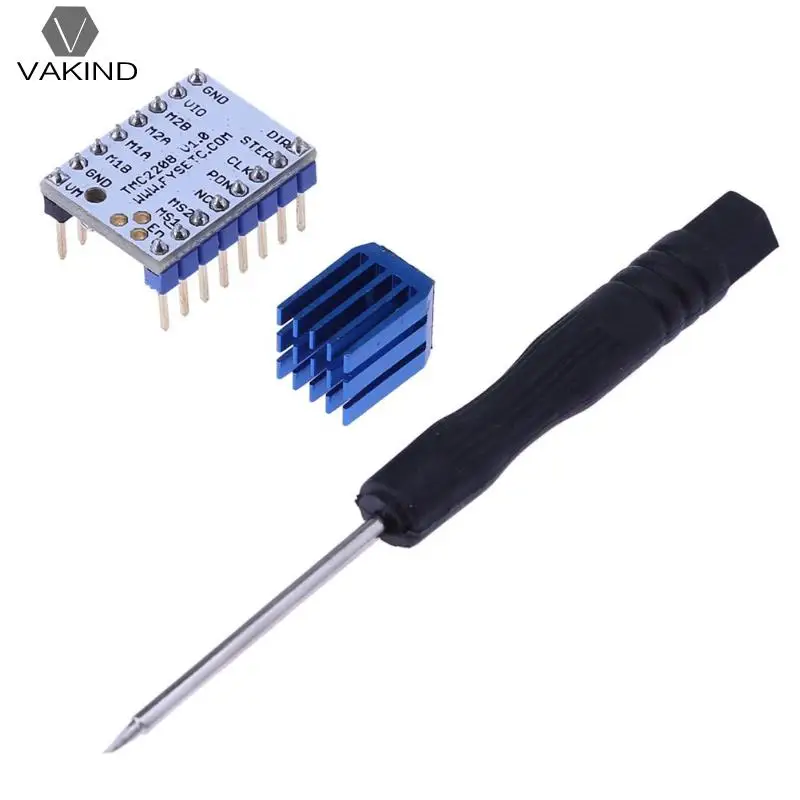
Think about how our printer would look without all that tangle of cables that comes with having 3-axis limit switches. And, of course, in the advantages that this brings (which are not merely aesthetic). Fewer devices to add and configure means fewer components that are prone to breakdown over time.
The discovery process occurs because StallGuard constantly monitors motor load, measuring the electrical energy flowing in and out, and the amount returning to the power supply.
This type of technology is found in numerous Trinamic drivers. Among them the drivers TMC260, TMC261, TMC262, TMC5031, TMC5041, TMC5062, TMC2130, TMC51XX, TMC22XX and TMC389.
If you want to find out a little more about StallGuard technology and how it works, do not hesitate to consult the technical documentation available in the following manufacturer link.
CoolStep Technology
The technology CoolStep tries to correct, or rather, optimize the electrical consumption of the stepper motors available in any of our applications.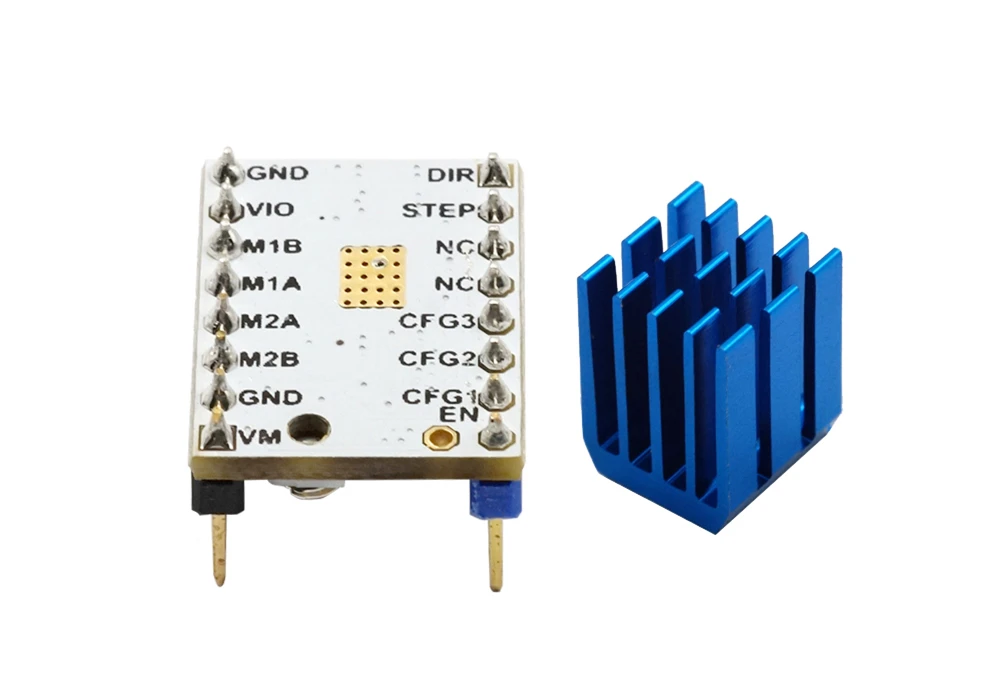 CoolStep reduces the supply voltage of the same when there is no load in an intelligent way, and offers it again when the motor requires it.
All this results in a drastic reduction in engine temperature of up to 80%, according to the manufacturer itself. The truth is that it is a figure that is hard to believe, but although it was somewhat lower in real applications, it is still an impressive temperature reduction.
A few lines below (video), you can see how CoolStep manages the voltage supplied to the motor when there is a load and when it is completely at rest (minute 03:28). The video is very graphic and shows us how the voltage increases rapidly according to the needs (or demands) of the motor.
As you can imagine, CoolStep requires StallGuard technology to rely on load detections and act. So the StallGuard must be properly parameterized for its correct operation. For this you can check the StallGuard technical documentation.
StealthChop technology
I think I’m not wrong when I say that this is possibly the best known feature and one of the most interesting for 3D printing makers. Having our machines in operation for long hours can be somewhat annoying due to the noise produced by the motors.
I have a room dedicated to printers (I’m lucky), but if you have to share your room or office with it it can be a hassle.
In this regard, Trinamic with its TMC drivers has moved parts and has developed an incredible technology that reduces sounds in a spectacular way for stepper motors.
Motors that operate at reduced speeds often exhibit a phenomenon called magnetostriction. Thanks to this, noise or hum in high tones are produced due to the frequencies in the fluctuations of the magnetic fields.
By regulating the voltage modulation it is possible to minimize this current fluctuation, thus minimizing hum considerably. According to Trinamic, in applications using StealthChop sound levels can be reduced by over 10 dB, or even more.
And not only that, but the StealthChop achieves this noise reduction without any loss of torque and even producing smoother motor movements. All this allows us to enjoy our printers in a more silent way, as you can imagine.
But why explain it in words if you can hear it yourself. From minute 2:00 you will see how it affects a stepper motor to activate the incredible technology StealthChop, something worth seeing. And think about it, our 3D printers have at least 4 motors.
SpreadCycle technology
SpreadCycle is another of the advanced technologies offered by TMC drivers. Basically SpreadCycle manages the driver so that it offers us a smoother operation, especially when we reduce the accelerations to zero, and we rev our engine again.
In addition, SpreadCycle provides superior microstepping performance, measuring current and automatically adjusting to the optimal length of fast decay phases.
Drivers such as TMC260, TMC261, TMC262, TMC2660, TMC50XX, TMC21XX and TMC51XX and TMC389 incorporate this technology as standard.
If you want to know more about SpreadCycle or how to parameterize this function, you can consult the technical information of Trinamic in the next document.
DcStep technology
The DcStep technology of the TMC drivers allows to increase the torque and the maximum speed of the stepper motors at certain times, and in this way avoid possible loss of steps in our applications.
Stepper motors typically operate below their maximum touch, with around a 40-50% margin of safety. Activating DcStep modifies their operating limits and thus they can move as fast as possible, without losing steps along the way.
The DcStep technology has 4 operating modes (Limited speed, Limited load, Min. Allowed speed> 0 and Min. Speed). You can find exhaustive information about it, as well as instructions on how to parameterize it, in the next document.
This type of technology is available for the TMC5062, TMC210 and TMC5130 driver models.
MicroPlyer technology
This Trinamic technology interpolates the steps that the motor will perform with the frequency and speed of the previous step.
This results in a smoother microstepping when using the STEP / DIR interface, as you can see in the following graphic on the black line (click on the image to enlarge).
When during an acceleration the next step is shorter than the previous one, the interpolated step cannot be completed.
In order not to miss any step, the controller performs a larger step, which is defined by the maximum size of microsteps that we are using.
In the early versions of StealthChop, this could present a drawback when used with 3D printers, as this type of technology was specifically designed for applications with stable step frequencies (something that does not happen during 3D printing), and can lead to loss of steps in some extreme cases.
However, this stopped being a problem some time ago, since Trinamic improved the technology in its new version of StealthChop2 by adding a pre-regulation that allows a greater torque during the acceleration phases, and which was added to the whole family of TMC22XX drivers.
SensOstep technology
SensOstep is another type of technology patented by Trinamic for its TMC drivers and the last one that we are going to discuss in this article. It actually requires additional hardware, as it is a combination of the motor and added electronics, so it requires a printed circuit board to use this technology.
Its function is to monitor possible step losses that may affect a motor and send the information to the corresponding microprocessor.
For this, SensOstep uses a magnet located at the rear end (or rear part) of the motor shaft and some sensors installed on the electronic board, which can be used with a minimum resolution (1/16).
This considerably reduces installation costs as well as adjustments required during assembly.
Operating modes (Step/Direction, SPI and UART)
There are 3 operating modes for our TMC drivers . However, this does not mean that all drivers have them. As an example, the TMC2209 drivers only have Step / Dir mode and UART mode. These are the operating modes available for TMC drivers:
Step/Direction mode
Step/Direction is the “classic” operating mode for drivers in general. It simply proceeds to send the steps and direction and the motor executes the relevant commands.
However, when using this mode the TMC drivers cannot return any information to the controller, such as possible errors, or simply information. This is essential to be able to take advantage of each and every one of the TMC drivers technologies (such as StallGuard).
In this way we do not have information about the real position or the current applied to the motor, something that other intelligent operating modes such as SPI or UART provide.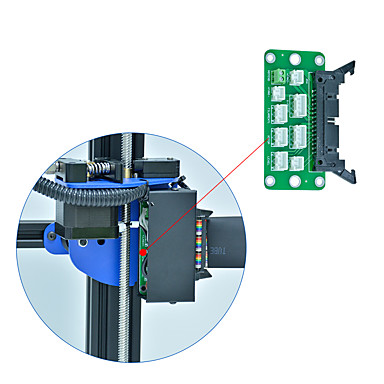 If you don’t want to complicate yourself excessively when configuring your drivers, you can perfectly use this operating mode.
But in my opinion, if you have TMC drivers, the ideal is to use any of the other more advanced operating modes (SPI/UART). In case of not activating a “smart” operating mode, our drivers will use the StealthChop (Speed and low noise) and SpreadCycle (Torque) technologies default.
SPI mode
The SPI (Serial peripheral interface) mode is one of the 2 advanced or intelligent modes of operation of these drivers. In order to use this mode we must use a completely different pin configuration. In some cases you will need to make modifications to the driver or use a cable to connect some extra pins to our electronics.
In this way, and just like using the UART mode, we can have all the advantages of these types of intelligent operation (automatic switching between modes, avoiding the use of sensors, etc.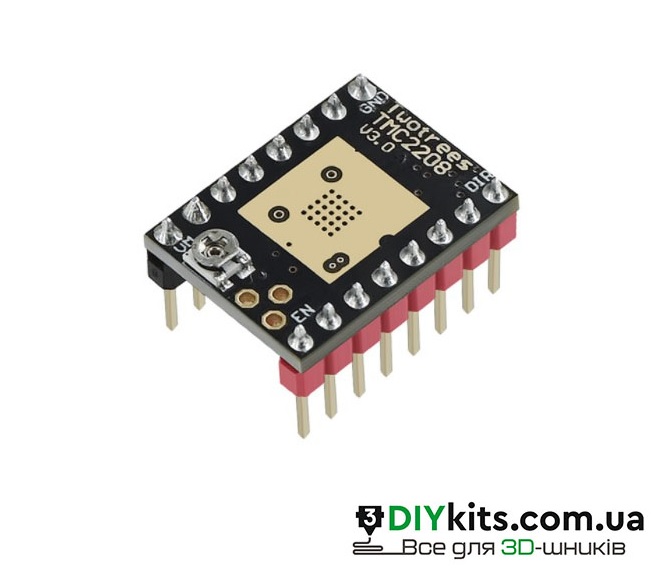 )
)
UART mode
The UART is a hardware component that is used to establish serial communications in which we can modify the speeds of our data and its format.
Some TMC drivers, such as the TMC2208 and TMC2209, allow you to operate in this “smart” mode. In this way, and as in SPI mode, we can manage them directly from our Marlin firmware (menu on the display).
This has a number of advantages that other modes of operation do not have. Combine the real and interpolated microsteps (to generate maximum torque), change the use in real time of different technologies (for example from StealthChop to Spread Cycle), reduce current consumption when it detects that it is stopped and even select the desired current for each one of our drivers are some of the advantages that we will have available.
In some cases and depending on the driver you purchase, you may have to make a brief subsequent modification to activate the UART mode. However, these processes are very simple and can be done easily by anyone.
Technical specifications
| TMC2130
| TMC2208 | TMC2209 | TMC5130 | TMC5160 TMC5161 | ||||
| Motor Supply | 4.75/6V | 4.75/36V | 4.75/29V | 4.75/46V | 8/60V | |||
| Microsteps | 1/256 | 1/256 | 1/256 | 1/256 | 1/256 | |||
| Logic Voltage (VIO) | 3-5V | 3-5V | 3-5V | 3-5V | 3-5V | |||
| Phase current | 1.2A RMS 2.5A Peak | 1.4A RMS 2.0A Peak | 2.0A RMS 2.8A Peak | 2.5A | 3.0A | |||
| a/b/n incremental | ||||||||
| SPI | ||||||||
| Step/Dir | ||||||||
| UART | ||||||||
| SixPoint™ | ||||||||
| trapezoidal | ||||||||
| MicroPlyer™ | ||||||||
| CoolStep™ | ||||||||
| Passive braking | ||||||||
| Short detection | ||||||||
| SpreadCycle™ | ||||||||
| Stall detection | ||||||||
| StallGuard2™ | ||||||||
| StallGuard4™ | ||||||||
| StealthChop2™ | ||||||||
I hope and wish that this brief introduction to TMC drivers and their different technologies have been of interest to you, or at least an enjoyable read.
You can find other interesting articles in 3DWork.io in the following links:
- DyzeXtruder Pro: Analysis of a high-performance extruder for professional environments
- MKS TFT35 Display: Latest updates v106 and v107 available
- The Spaghetti Detective: Monitoring Octoprint from the Internet safely
- Powering the Raspberry Pi from the power supply of your 3D printer
- Booting our Raspberry Pi from USB with an SSD hard drive (or pendrive)
- Maker Ultimate 2: Review of the latest Monoprice printer
- Analyzing the new resin printer Phrozen Sonic Mini (Review)
- MKS Robin Nano v1.2: Analyzing the new MakerBase 32bit boards
- Hollow 3D objects with ChiTuBox to save resin
- 10 reasons to use ChiTuBox with your resin printer (SLA/DLP)
3D printer modifications - higher print quality, quieter operation
Based on our extensive experience with different 3D printers, we have prepared several modifications that will improve print quality, make your 3D printer quieter and more functional.
1. Motor dampers (Buy here)
A damper is a simple passive device that consists of two strips of metal filled with rubber. It turns out the correct vibration decoupling without hard contact. The main task of dampers is to dampen small vibrations from the operation of motors, thereby significantly reducing noise and damping small print irregularities that arise from it. Hard rubber is used, so this installation of dampers will not affect the tension of the belts and the rigidity of the printer itself in any way. In fact, installing a damper even on one motor makes the printer noticeably quieter in operation. There is a thread on the metal plate itself, so there will be no transmission of vibration and noise through the fixing screw. The only thing I advise you, before ordering dampers, be sure to check whether there is enough space for its installation on your printer model. The height of this insert is 7 millimeters, and it happens that you can stick it to all points of installation of motors. nine0003
2. TMC Drivers 2208 (Buy here)
This is another upgrade that greatly reduces the noise from the printer motors. Most often, 3D printers have an old, and therefore cheap, replacement A4988 driver installed, and when it works, an unpleasant howling, whistling humming noise occurs from the motors. This sound comes from the motors themselves, but it is the drivers that control them that create it. The fact is that manufacturers strive to reduce the cost of the printer, not caring about the noise during its operation, which is why they install the A4988. But, of course, there are many modern drivers on the market today. One of them is TMC 2208. Its feature is that it is almost completely compatible with the A4988 driver. It is enough to take out the A4988 and install the TMC 2208 instead. Of course, it is important to observe the pinout of the contacts, otherwise you can stupidly burn not only the driver itself, but also the control board. The pins are signed, so just be careful. Next, you need to adjust the motor current for your printer. This is done by a variable resistor on the driver itself. There are no exact setting values, since printers and their mechanics are different. The point here is that you need to set the minimum required current so that there are no skipped steps when moving. For example, for an Anycubic Kossale delta on lubricated and easy-rolling rails, I got a value of 1.1 volts. According to the formula, this is approximately 0.75 amperes per motor. In general, this value is suitable for most printers, but I repeat, you must calculate the settings yourself using the formula indicated on the product page on Aliexpress. And the last thing that is required of you is to invert the operation of the motor. The output pins on the drivers are located differently, so you will either have to invert the firmware outputs, replacing false with true, or physically rearrange the wires in the motor connector. They are signed on the driver itself 1A, 1B, 2A, 2B.
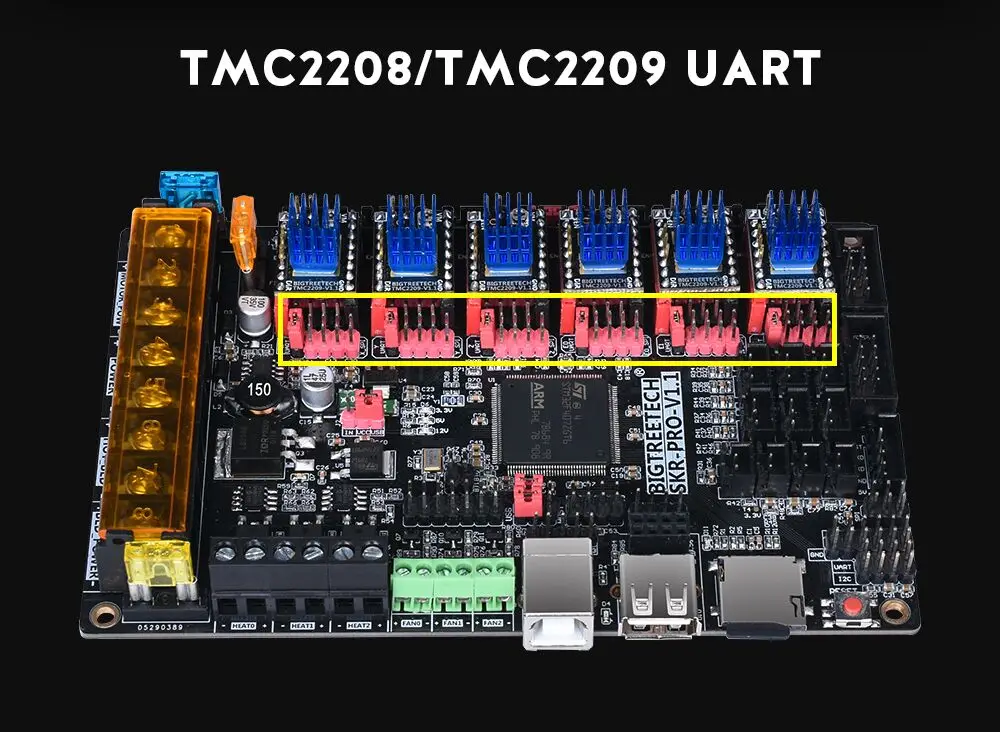 And here we also just observe their new pinout. But of course, the easiest way to do this is in the firmware. nine0003
So let's do it again: First, install the new driver, following the pinout. Second, we adjust the current with a variable resistor. And third, we invert the operation of the motors either in the firmware or in the physical connector. After that, the output is an absolutely quiet printer.
When ordering, please note that for deltas you need to install three drivers - on the X, Y and Z axes. And for the cartes only 2 drivers will be enough - on the X and Y axes.
It would seem, well, what's wrong with that, nozzles in most cases are sold under 10 pieces for one dollar, but there are those that cost 5 bucks for one nozzle. But for a printer, this little detail is almost the most important, because the quality of the nozzle will determine how the extruded thread of hot plastic is formed, and how it will fit on the model. In appearance, all nozzles are similar and no significant difference can be seen between them. Still neglected by many in printing, but the main cause of nozzle gaps is dust and dirt that builds up over time on the spools of filament or is already present on them during production. Therefore, I recommend covering them with bags and additionally printing a dust filter, stuffing foam rubber in it and putting plastic on them. Installing such a simple filter significantly reduces the likelihood of nozzle clogging and saves you from one of the most common problems with 3D printers. 4. Foil insulation (Buy here) Manufacturers of Chinese 3D printers save on everything, especially budget models. Therefore, printers often come without a table insulation at all. But its absence, of course, causes heat loss and uneven heating of the table, which leads to large models coming off during long-term printing. If you have a table without insulation, then I definitely recommend ordering foil insulation. It costs only 2-3 dollars. It is simply molded on the self-adhesive from below, immediately insulating the entire table, and thereby stabilizing its temperature. Of course, instead of it, you can use a sheet cork or any other heat insulator, because the tables usually do not heat up above 100 degrees. nine0003 5. Tensioners (Buy here) Probably the most useful little thing. They are needed for GT2 belts. On many models, it is very difficult to tighten the belts by hand and often does not work well. But in order for the print to be of high quality, the belts must ring like a string. If your printer has steel guides and steel linear bearings roll along them, over time, dust settled on the guides will get into the bearing balls, blocking them. Bounce, jamming and uneven movement of the carriage and table along the axes appear. In this case, you need to remove and wash the bearings from dirt. An alternative to them is a plastic sleeve. It is not affected by dust and even completely dirty does not produce a rumbling noise when moving. nine0003 7. Ultrabase - Ultrabase (Buy here) This perforated tabletop is the best choice for long term printer installation. If you have a film on your table, then over time we recommend replacing it with Ultrabase. 8. Scroll fans (Buy here) Most of the budget 3D printer models come from China with a weak plastic blowing-cooling system. This causes a number of problems when printing fast model layers, when the plastic does not have time to cool down, flows down or, on the contrary, lifts up. Therefore, the cooling system of such printers has to be modified and made more powerful. As a replacement for standard fans, it is best to use radial snail fans. They create several times more powerful cooling air flow and allow you to completely eliminate plastic laying defects by quickly cooling it at the outlet of the nozzle. You can take the simplest cheap fan models, or you can take more expensive branded models. 9. Octo print (Buy here) Many of you are familiar with the Raspberry PI single board computer, which can be used as a print server to run a 3D printer. There will be no improvements in the quality and accuracy of printing, the control code and the mechanics of the printer remain the same, but the server will allow you to remotely control and start print jobs. Installing and configuring Octoprint is simple, you just need to deploy the finished image from disk to USB flash drive. Next, directly on the computer, open the configuration file from this flash drive and configure the Wi-fi network connection. If you connect the network with an Ethernet wire, then no configuration is required at all. Optionally, you can connect a webcam for visual remote control of printing. A list of compatible cameras is on the Octoprint website, for example Logitech c270. There are 15 products. Sort by: Showing 1-15 of 15 quick view Add to Compare nine0003 quick view Add to Compare quick view Add to Compare quick view Add to Compare Price 249.00 € quick view Add to Compare quick view Add to Compare quick view Add to Compare quick view Add to Compare quick view Add to Compare quick view Add to Compare Regular price €169. quick view Add to Compare quick view 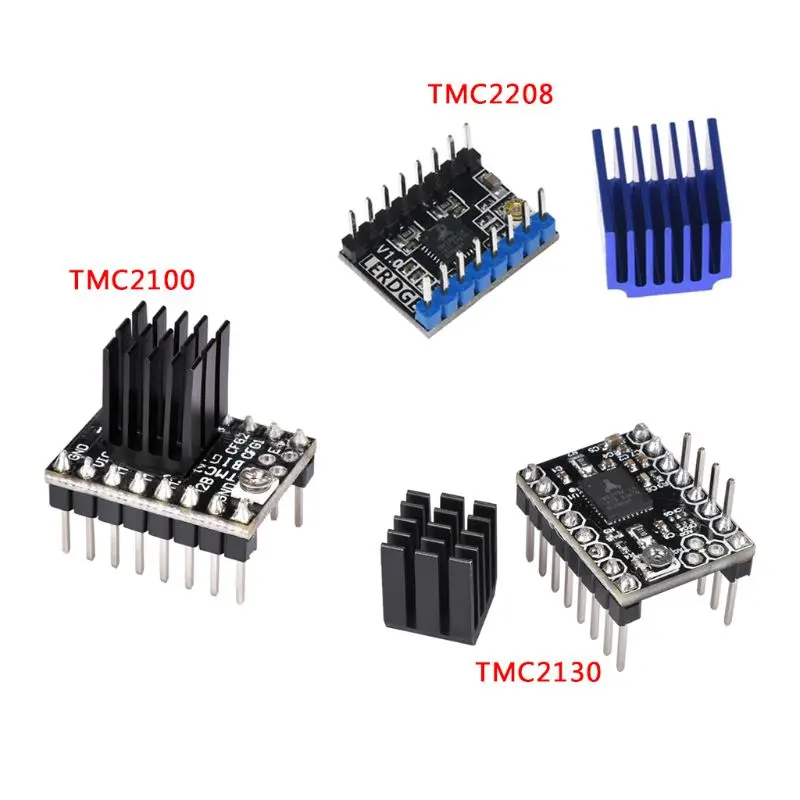 But it is worth looking at them under a microscope and this difference will immediately become noticeable. Some nozzles have scuffs on the edges, others are generally bent, but there are also almost perfectly even ones. After studying all the nozzles, we can say that there is not a single visual good among cheap nozzles and it turns out that you will have to arm yourself with a microscope and check cheap nozzles for their curvature before installing them on the printer, or immediately buy expensive and high-quality ones. nine0003
 For this, you need to use such small spring tensioners. They need to be installed in places where they do not interfere with the movement of the carriage. This is usually a point near the attachment of the belt to the extruder.
6. Linear bushings (Buy here)  These glasses are even, heat-resistant and have good plastic adhesion. Thus, such a coating provides a high-quality bottom layer of the model. Perforation is needed so that when the table cools down, the model itself comes off and can be easily removed without any effort. Ultrabase base can be used without any additional adhesives. nine0003
  For example, a Sunon fan with the same size and power consumption blows one and a half times more powerful and runs quieter. nine0003
  You can use the stock Raspberry pi camera, but the picture quality will be worse. Logitech connects to the raspberry USB port and does not require any settings other than a reboot. The camera will allow you to see the printing process itself remotely online and it will be possible to automatically record beautiful print time-lapses. In the event of a failure, it will be possible to see the cause of the defect if the print suddenly becomes. Octoprint works with all printers that have Marlin firmware installed. As a result, you will fully control the printer remotely, start and stop printing on it, adjust the temperatures, and, of course, see how the printing is going at the current moment. nine0003
 3d printer
3d printer
MAKERPI P2 3D Printer,Thermodynamic Nozzle up to 260°C, 200H Printing, Picture Relief, FDM.
 ..
..
MAKERPI M1 48W 3D Printer for Kids, One Key Print, Auto Leveling, Magnetic Spring Bed, TF Card Slot
 00 Price 159.00 €
- New
quick view
Add to WishlistAdd to Compare
- New
quick view
Add to WishlistAdd to Compare nine0003
- New
quick view
Add to WishlistAdd to Compare
back to top
-
Log in
-
Register
nine0091
Login to an existing account Login to your account
Remember me
Forgot password
No account? Create
hereReset password
Registering a new account
I agree with the conditions.