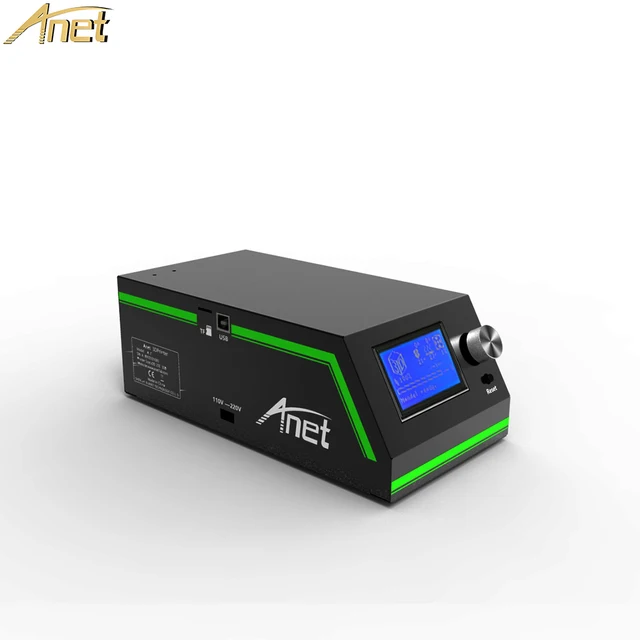
3D printer control box
Buy a controller board for your 3D printer in the USA | 3D printing experts
About 3D printer controller boards
A controller board or a motherboard is the heart of a machine. This special unit manages and links the machine’s components to one another. The motherboard oversees the processes, ensuring that your 3D printer or laser engraver is operating to its full capacity. Check that the motherboard is compatible with your 3D printer or CNC machine as some items are manufactured for certain brands. Easily find a high-quality motherboard for your machine in our collection.
Select a controller board for your 3D printer
So, how do you go about selecting a controller board?
Choosing a mainboard depends on the kind of device you are working with and also what the tasks that you intend on having the device perform. The most important feature to consider is the firmware that supports the mainboard. There are many different types available like Marlin, MK4duo, and RepRapFirmware. Do take into account that certain mainboards will come with the manufacturer’s firmware installed, for example, Creality and Klipper.
Another consideration is the amount of axis that you would like to be supported by the mainboard and the number of extruders you will be able to hook up to your 3D printer. The speed of the main processor is also determined by your choice. The higher the MHz the faster your machine can run. Furthermore, ensure that the peripherals you would like to incorporate into your machine are supported by the controller board. This concerns the fan outputs, external stepper drivers, thermistors, thermocouples, SD cards, and LCD/touch screens. It can also be that you want to set up another circuit for the heated bed, allowing you to provide more power to your machine. Decide which voltage is required to run your machine as higher voltages will give more power for the heaters and stepper motors. The most commonly supported voltages are 12-24V. The expandability of the motherboard will also be different. Some will accept certain add-ons, like Duet 3D known for electronic devices with various innovative expandability options.
3D printer motherboard firmware
Firmware is an essential part of the motherboard and acts as the connection between all components. A firmware will function based on the scripts and programs designed by developers. This can vary depending on a device and its intended function. Without firmware, devices would not know what to do and in fact, would not function at all. Firmware can be found in all devices like TVs, washing machines, and security cameras. Firmware processes the inputs and controls the outputs in 3D printers and CNC machines. An example of an input is the file provided by the slicer software with G-code instructions which is then executed by the firmware.
Updating a 3D printer’s firmware
Updating firmware is possible however there are many factors to take into consideration. Compatibility is very important since not all motherboards support the same types of firmware. There are many reasons to update your firmware, however, it is advised to do this if really required. For example, if you need to fix some bugs and your machine keeps crashing. If you feel like you are missing out on the necessary features that your project or activity requires, this is also a good reason to look into updating your firmware. In case you would like to fully replace your motherboard, it is very possible that you will also have to change the firmware as well, especially if the previous firmware does not match.
Do you have questions about controller boards? Please let us know through our customer service team, we are happy to help!
Frequently asked questions
How can I upgrade the firmware of my 3D printer?
Connect your 3D printer to your computer with a USB cable or download the compatible firmware onto your USB and plug it into your 3D printer. Always check the manual as this can depend on the 3D printer. There is a series of firmware to select from like Marlin, MK4duo, or RepRapFirmware.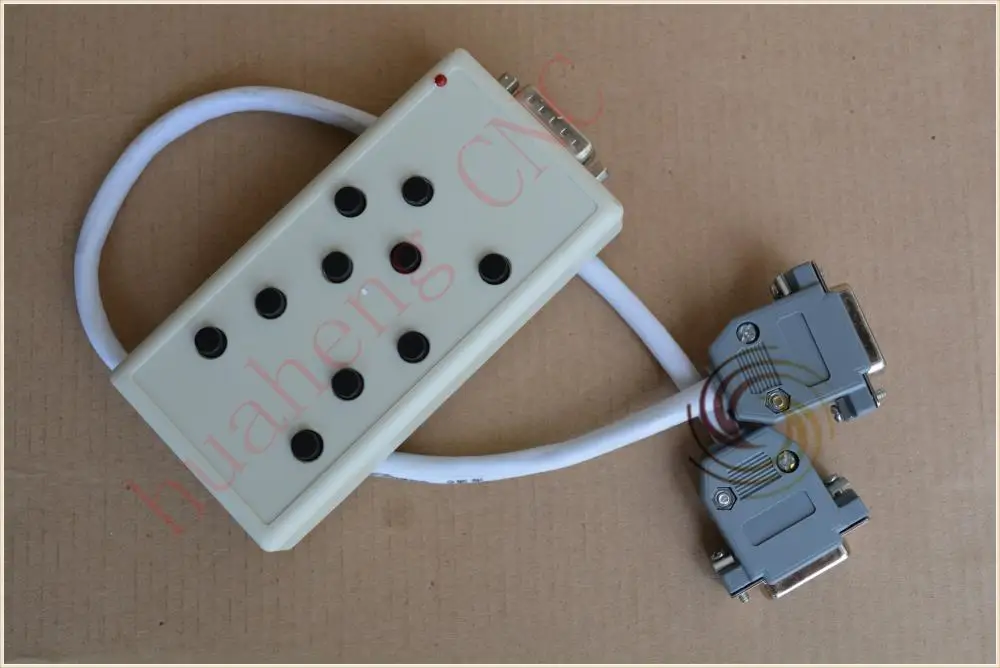 Make sure that your firmware is compatible with your 3D printer’s mainboard.
What is the best 3D printer controller board?
The best controller board for your 3D printer depends on the kind of machine and the firmware that is supported. Decide what kind of peripherals will make your machine complete and determine the features and operations you need to perform, this will majorly outline which mainboard to select. Find your 3D printer and see the available upgrades for your machine on the product pages.
What is a 3D printer controller board?
A 3D printer’s controller board or motherboard is often referred to as the heart of the machine. It is a special unit that oversees and manages all operations of a 3D printer or CNC machine. The firmware is located in a mainboard that connects all components to the same place for inputs and output commands.
What controllers do 3D printers use?
A 3D printer is controlled by the firmware.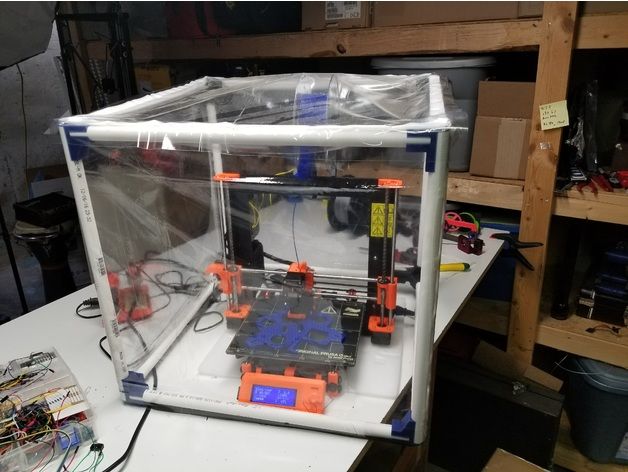 The firmware receives input from the slicer software with G-code commands for the 3D printer. The 3D printer is then instructed on where to place the extruder and when, or how much filament to extrude at a certain temperature appropriate for the material or model being printed.
How do I choose a 3D printer mainboard?
A controller board should be selected based on the intended functions for your 3D printer. Choose a 3D printer mainboard that supports the peripherals best for optimal operation. There are many aspects to take into account like the overall setup, voltages, and expandability options. We list upgrades for specific 3D printers on the details page in our 3D printer section.
Modular control panel for 3D printer
Modular control panel allow to compose your panel control
regarding your needs.
It is compatible with :
Mk3s /mk2s panel control for Prusa3D
PanelDue 5i from Duet3D
Raspberry PI 3 1B+ / 2B / 3B+ / 4B
Kuman 3.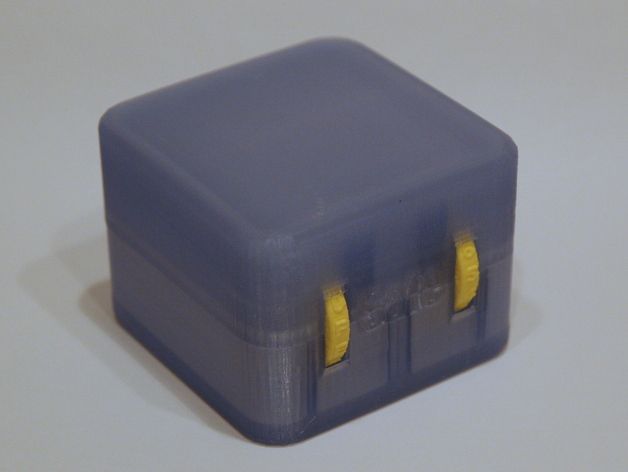 5″ (GPIO) / Hyperpixel 4″ (GPIO) / Waveshare 5″ (DSI)
W1219 enclosure temperature control
And more…
Prusa mk2/3s with PrusaboxPrusa mk2/3s without Prusabox
It is a work in progress mod. Parts could be updated at any moments. Always check new version before print.
1. Components :
We recommend screen with DSI cables:
- No driver
- Only one DSI cable to plug
- GPIO fully free
/!\ screens with HDMI bridge
are NOT suitable:
2. Print:
Files are in download section:
Download
3. Assembly:
1. General overview:
- Orange: “Front parts” module
- Green: “Plate parts” module
- Blue: “Extremity left parts” module
- Yellow: “Extremity right parts” module
- Red: “Coupler parts” module
- Purple: “Back parts” module
2.
 Parts list:
Front parts:
- Mk3s /mk2s panel control for Prusa3D
- PanelDue 5i from Duet3D
- Kuman 3.5″ (GPIO)
- Hyperpixel 4″ (GPIO)
- Waveshare 5″ (DSI)
- W1219
Back parts:
- Basic left with cable slot
- Basic right with PI3/4 power cable slot
- Standalone left with cable slot
- Standalone right with PI3/4 cable slot
- Standalone bracket
Plate parts:
- Basic with 40x40mm fan slot
- Raspberry PI 3 1B+ / 2B / 3B+ / 4B with 40x40mm fan slot
Extremity left:
- Basic
- Mk3s/mk2s SD card opened
Extremity right:
- Basic with 30x30x10mm fan slot
- With w1219 control temperature slot and PWM setter slot
Coupler parts:
- Basic
- With #1 rocker switch (14×9.
 5mm) slot
 - With #2 rocker switch (14×9.5mm) slot
- With #3 rocker switch (14×9.5mm) slot
Miscellaneous:
- Printer feet spacer for standalone use.
3. General assembling instructions:
Assembling is done with:
- m3 square nuts Din 562
- screws M3x6
- screws M3x12
Screws and nuts are available on amazon or include in Prusabox kit.
Kuman 3.5″ and Hyperpixel 4″ are assembled in the same way. Crossbar is hold with 2 screws on each side.
Prusa mk2/3 control panel is hold with m3 screws on each corner.
Raspberry PI 3 or 4 can be installed. It’s hold using the original Raspberry PI screws (2x M2.5).
SD card can be inserted/removed without removing the PI from the plate.
Left extremity for Prusa panel allow to easily insert the SD card.
GPIO display need “Raspberry GPIO ribbon female to male” available on amazon.
Plate assembling.
30x30x10mm fan is hold in place wih a M3 screw.
/!\ Do not tighten the screw otherwize fan will be blocked.
Waveshare DSI 5″ is hold with 2 clamps on each side.
W1219 control temperature extremity left module.
Inside installation of enclosure temperature control W1219 and PWM fan speed setter
4. Stand alone version for mk3 series:
Standalone parts allows you to mount instead of the original Prusa panel.
Due to control panel height, it is a mandatory to add printer feet spacer (file available in download section).
5. Perfect fit for Prusabox:
Modular control panel is fully compatible with Prusabox enclosure.
Congratulations!
The modular control panel is installed!
Back to summary >>
32-bit 3D printer boards
top sellers
-
Bearing 604UU U604ZZ
U-bearing U604ZZ 604UU 4*13*4
35.
 00 UAH
 - nine0002 Thermal mat for 3D printing 200 x 200 mm
3D printing thermal pad
150.00 UAH
-
Buy epo3d+ 3D printer nine0003
Epo3d+ Ukrainian FDM 3D printer on HIWIN rails. Thanks to reliable...
UAH 35,000.00
-
ABS granules
ABS granules for extrusion
400.00 UAH nine0009
-
PLA
PLA environmental plastic from Plexiwire.
 100% advance payment....
 UAH 375.00
-
Buy ABS plastic (ABS) nine0003
ABS plastic from Plexiwire. 100% prepayment. Free shipping...
UAH 220.00
-
Mini motor reducer 12v 100 rpm
high torque mini electric motor. Its size...
150.00 UAH
-
Nozzle for 3D printer 1.75 mm, for E3D and MK8 hotends
3D printer nozzle 1.75 mm 0.2/0.3/0.4/0.5
35.00 UAH
nine0012 -
PETG plastic for 3D printer
PETG plastic from Plexiwire.
 100% prepayment. Free...
 UAH 360.00
-
SHF-20 shaft support nine0003
SHF-20 shaft support is used for CNC
60.00 UAH
-
A4988 stepper motor driver
35.00 UAH
nine0005
Buy epo3d 3D printer
Ukrainian epo3d 3D printer built on the basis of modern kinematics...
UAH 18,000.00
All best sellers
categories
Information
32-bit 3D printer boards
The controller board is the heart of any 3D printer and controls components such as the extruder, heated bed, motors and sensors. The rapidly evolving 3D printer controller boards are expanding to offer incredible possibilities.
Duet Wifi
These 3D printer boards are usually powered by RepRapFirmware. The entire Duet family can be controlled through the Duet Web Control , but they also support the PanelDue touch screen. All of them have a slot for an expansion board. drives 5 independent stepper motors with built-in Trinamic TMC2660 drivers and I/O circuit - DueX4 for Duet 0.6 and 0.8.5, and DueX2 and DueX5 for Duet WiFi and Duet Ethernet. nine0112 The firmware for the Duet board family is open source, but most users do not need to modify the firmware itself, only working with settings stored on the internal SD card. However, it's a good idea to update your Duet to the latest stable firmware.
Replicape BeagleBone Black
Replicape is a fast 3D printer board. It works with a BeagleBone Black, with a 1GHz processor and two 200MHz PRUs.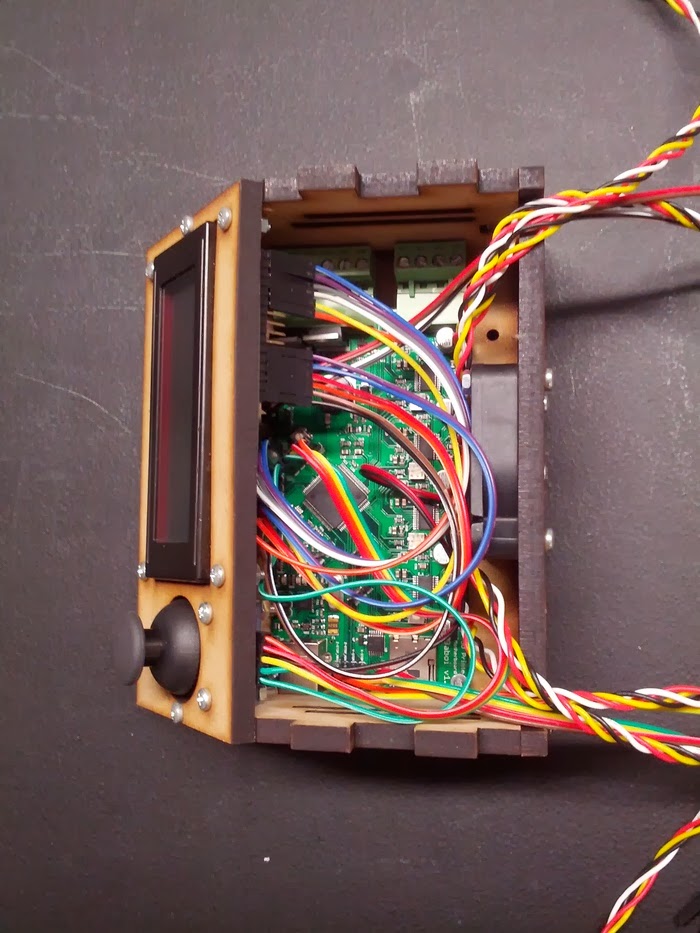
It is extremely versatile. The control can support two to five 2A stepper motors, two servos and four fans. Uses the best TMC 2100 stepper motor drivers, which have an incredibly low noise level. And also interacts with the printer through the browser, while printing. nine0009
Re-ARM for RAMPS, simple 32-bit upgrade
The Re-Arm microcontroller board is more powerful and equipped with a faster 100MHz processor, which provides a high feed rate for the 3D printer. The board has an SD card slot for firmware and configuration files, but a second SD card is also supported, connected via the LCD screen for file uploads. Having a separate configuration file outside of the firmware makes setting changes much easier than other boards that require new firmware for any setting changes. The configuration is a text file that allows you to easily and quickly make changes from your computer. nine0009
Arduino DUE with RADDS 1.5
V The RepRap Arduino-Due Driver Shield is a daughterboard for the 32-bit Arduino Due. Although it looks like an 8-bit RAMPS board, it provides much more processing power and allows your 3D printer to print faster and with greater accuracy.
The 12-bit ADC (analogue-to-digital converter) has been upgraded from 10 to 12 bits. The temperature calculation is now performed over 4096 measurement points instead of 1024. This gives 4 times better temperature resolution and improves the accuracy of temperature readings. nine0112 In addition to better temperature resolution, the new firmware includes an algorithm that uses 660 measurement points to extrapolate results. This takes RADDS to the next level of temperature control for RepRap 3D printing.
Smoothieboards 4x
Smoothieboards is a controller board for digital machines. It is designed for use in 3D printers ( Reprap ), laser engravers and CNC machines, developed by a community of volunteers to run the open source Smoothieware firmware They come in many varieties, with different sets of features and benefits. nine0112 All Smoothieboards are designed to run on the most powerful machines in their price range. They are designed to be easily extended, developed and used by general users.
Smoothieboard v1 was the first Smoothieboard released and received several updates. It has gone from a pilot project to a widely used and recognized system. The board comes in 3 versions, 3X, 4X and 5X, with different sets of peripherals.
Archim 1.0
This is Archim v1.0a. The Archim Rambo 1.0 board is a versatile 3D printer motherboard. This is an original RAMBo style design with an Atmel SAM3X8E processor (same as the Arduino Due) and DRV8825 stepper drivers on one integrated PCB. Archim is named after the mathematician Archimedes.
Key Features - 5 built-in 1/32 micro stepping motor drivers, 6 full PWM Mosfet outputs, 4 thermistor inputs, PWM motor current control (no tiny knobs to adjust), SMPS supports hostless printing at supply voltages from 10-24VDC , 3 independent power rails with ATC fuse protection, built-in full speed USB protected by ADUM isolator, high quality connectors.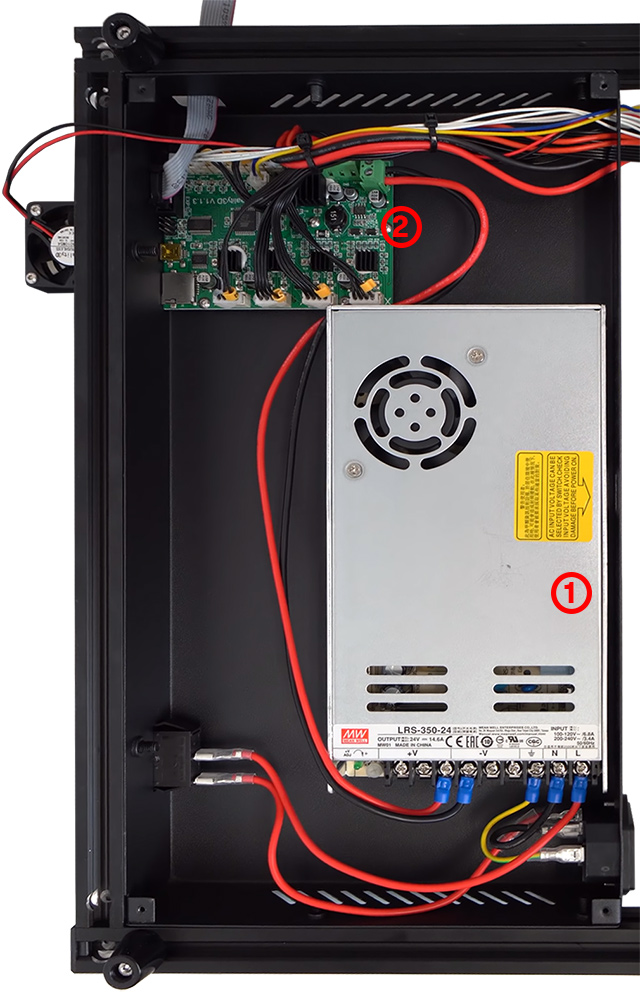 It is supported by the Arduino IDE using a third party URL board feature to simplify firmware development. nine0112
MKS SBASE 1.3
MKS SBASE is a multifunctional electronic solution for Reprap and other CNC machines. It features an embedded ARM-Cortex M3 LPC1768. Its five motor outputs are powered by DRV8825 stepper drivers. The board can use the same firmware as Ramps1.4. MKS SBASE is designed with flexibility in user's power supply selection, allowing any power supply from 12V to 24V to be used.
MKS SBASE is suitable for mass production 3D printer manufacturers and used as the main control board. Relative to Ramps1.4, this adds the heat output of E1. MKS SBASE is suitable for dual extruder machine. nine0009
Arduino DUE with RAMPS-FD
The only secure version of Ramps-FD is V2.A released February 2014. Previous versions carry a high security risk. Unfortunately, the only Ramps-FD available on the market (February 2016) is version 1. 2, while its manufacturer has repeatedly warned that the only safe version is 2.A. Beware of confusing wording and lack of clear mention of fee revisions from sellers. Thus, until version 2.A is released, the Ramps-FD board should be avoided. nine0112 The Arduino Due is a new Arduino board using the ARM Cortex M3 processor. The Atmel SAM3X8E chip used in the Due operates at 3.3V and is not compatible with 5V. Therefore, the RAMPS shield will not work with the Due, and worse, applying 5V to the Due's inputs may damage the chip. Therefore, there are several options: create a new version of RAMPS that is compatible with the Due.
Lerdge-X
Among Lerdge 3D printer boards, Lerdge-X is a highly integrated control board designed for small 3D printers, educational 3D printers and entry-level 3D printers. The motherboard uses 32-bit CoreTX-M4 Core control unit, high and stable performance, feature-rich, price concessions. With a 3.5 inch full color IPS LCD touch screen, it provides simple and smooth operation.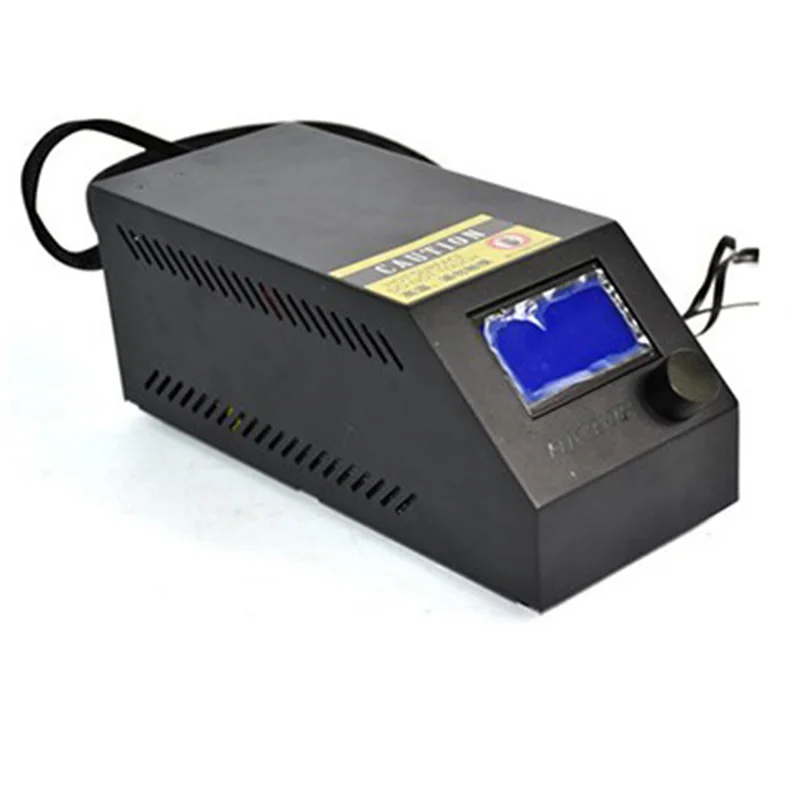 The motherboard uses an open interface and can match a variety of motor drive modules (A4988, DRV88225, LV8729, TMC2100 and external driver, etc.) The motherboard optimizes the connection of limit switches and adopts a comprehensive line protection design.
Panucatt Azteeg X5
X5 mini WIFI is an ARM-based 32-bit motion controller for 3D printers, CNC machines and laser cutters. X5 mini runs on Smoothieware firmware and is based on the Smoothieboard. X5 mini WIFI uses powerful 32bit 120MHz ARM NXP LPC1769 chipcapable of faster calculations for quick and fluid movements.
Configuration is made easier with a text-based configuration file loaded onto the SD card, no need to download the firmware every time you make a change. Just edit the config file from your PC, then reboot the board with the new config and you're done.
The Wi-Fi module has its own web page for remote control of the printer. You can transfer files directly to the main SD card and edit the configuration file on any PC, phone or tablet using Wi-Fi. Web Control can also display video when using an IP camera. nine0009
BIGTREETECH SKR V1.1
BIGTREETECH SKR V1.1 - from Shenzhen Bigtree Technology Co., Ltd. introduced a simplified open source 3D printer control board. It is especially suitable for small and medium printers.
Greatly improved the performance of LPC1768 series ARC-class Cortex-M3 master chip with 32-bit 100M main frequency, equipped with high-modulus smoothieware open source firmware, convenient for DIY and secondary development users, don't worry about not being able to master the main worries code. nine0112 SKR V1.1 support Disdplay: 2.8 inch, 3.5 inch color touch screen, LCD12864 screen support;
The factory motherboard is equipped with testing firmware, which can be used to control the 3D printer and print, or you can flash another one yourself.
Power Management Module
Technician
Follow author
Follow
Don't want
9
After updating the firmware on my Sapphire Pro, it became possible to control the printer's power off via G code.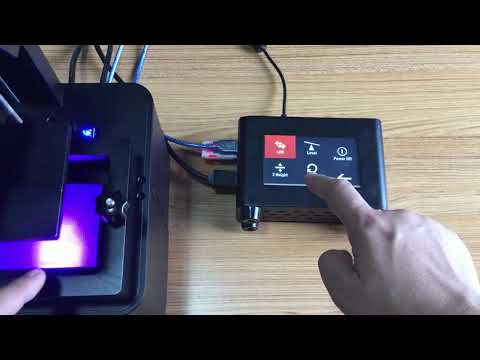 This allows, for example, to automatically turn off the printer at the end of printing, and not leave it to buzz with fans all night. nine0009
The input requirements I have formed for myself are the following:
- Non-latching on/off button
- Press execution delay (on/off) - 0.5 sec
- Galvanic isolation of the power section from the control
The question is whether to choose a timer 555 with strapping or a minimal microcontroller from the field of religion. So I'll just tell you what and how it works. nine0009
Power unit consists of 2 keys. One is made on a triac, the second is parallel to a relay. First, the triac turns on, then after 0.2 seconds the relay. Thus, the relay contacts do not burn, and the triac is only loaded when turned on. Shutdown occurs in reverse order.
The triac is controlled through an optical pair, the activation of which is synchronized with the transition through 0 of the mains voltage, therefore there are no critical currents when the discharged load capacitor is switched by the triac in the phase of maximum voltage. nine0009
Tiny13 is used as a control microcontroller. Port PB3 controls the activation of the triac, and PB4 controls the relay. The reset button B1 is not required for installation and was used only at the stage of debugging the firmware.
The rising OFF_REQ signal causes an interrupt and the microcontroller performs a load off procedure. Thus, if OFF_REQ_IN hangs in the air, the optocoupler transistor is closed, and OFF_REQ has a logical 1 and does not affect the operation of the microcontroller algorithm in any way. But if a printer is connected, OFF_REQ_IN will receive potential, and the optocoupler transistor will open, OFF_REQ will be logic 0. The front will now occur if potential is lost on OFF_REQ_IN or OFF_REQ_IN is pressed to the ground under the control of the printer motherboard. nine0009
The power on/off button is connected between the MISO signal (PB1) and ground and is processed by software: if 0 is held for more than 0.5 seconds, the procedure for turning the load on or off is called (described earlier).