3D printed jigs and fixtures
Replacing Machined Jigs and Fixtures With 3D Printed Parts
Jigs and fixtures are used to make manufacturing and assembly processes simpler and more reliable, reducing cycle times and improving worker safety.
Typically, manufacturers machine tooling in metal, either in-house or through outsourced vendors. Depending on the forces experienced by the part, however, it may not always be necessary to produce these tools in metal.
Stereolithography (SLA) 3D printing materials have advanced significantly, and there are a number of functional resins well suited to 3D printing jigs and fixtures, including Formlabs Standard Resins and Formlabs Engineering Resins. Manufacturers around the world have used these materials to replace metal fixtures in automated machining operations, electronics assembly lines, foundries, and other production facilities.
Custom 3D printed jigs in-use for motorcycle gear manufacturing at Pankl Racing Systems.
Read on for seven specific examples of jigs and fixtures that can be 3D printed for some ideas to start implementing 3D printing on your production line.
This blog post is an excerpt from our white paper, Designing 3D Printed Jigs and Fixtures. Download the full white paper for a comprehensive look at jig and fixture design basics, best practices for designing 3D printed jigs and fixtures, and tips for validating printed fixtures.
Download the White Paper: Designing 3D Printed Jigs and Fixtures
Soft jaw inserts are customized to closely match the unique geometry of a particular part, allowing for workholding of more complex parts and preventing marring of softer metal or plastic parts. 3D printing in a material like Formlabs Tough Resin works well for producing soft jaw inserts and jigs because of the quick build speed and low fabrication cost for dealing with complex shapes.
A part being clamped between soft jaw inserts, printed in Formlabs Tough Resin.
Drill guides help prevent a drill bit from deflecting or wandering, maintaining angular and cylindrical tolerance requirements.
A press fit bushing in a drill jig, printed in Formlabs Tough Resin.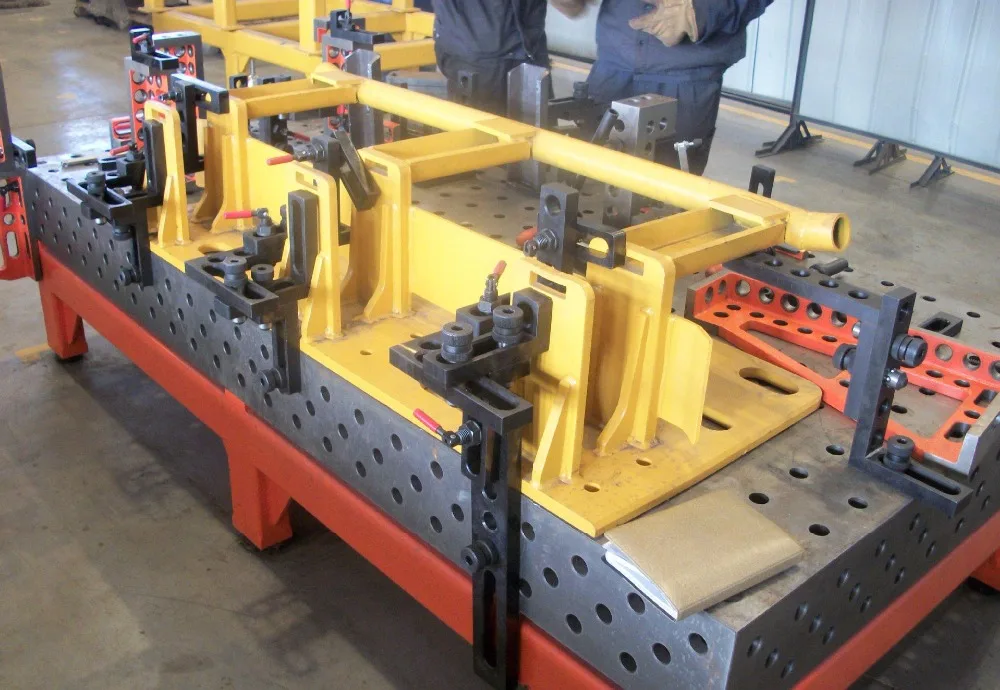
Drill guide bushings come in press fit or screw-in varieties, and can be purchased from industrial suppliers like McMaster-Carr. Bushings that have been designed specifically for use in plastics work best for SLA-printed jigs.
Use the tolerancing guidelines from our Engineering Fit White Paper to determine correct hole sizing for press fitting.
A simple tolerance check using a template or gauge can quickly help a quality control inspector determine whether a part will work for its end use. 3D printed go/no go gauges are useful when the part’s successful function is determined by small differences in form and dimension, and those dimensions can’t easily or quickly be assessed using calipers, micrometers, or other standard metrology tools, as in the case of complex rubber parts.
A go/no go gauge for inspecting a rubber gasket, printed in Formlabs Clear Resin.
Go/no go gauges are a fast, low-cost way to implement additional quality control checks for an assembly or manufacturing line.
Tip: In certain applications, gauges can wear over time, leading to QC failures. Because of their low cost and ease of manufacture, 3D printed gauges can be easily reprinted and replaced on a predetermined schedule or as needed, to prevent quality drift from worn out gauges. This is most pronounced where the parts that are contacting the go/no go gauge are hard metals.
For many products, connecting parts and adding fasteners to create subassemblies or full assemblies is the most labor intensive part of the manufacturing process. 3D printing part-specific assembly jigs reduces cycle times, improves ergonomic workflow for assembly technicians, and improves consistency across production units.
An assembly jig used for manufacturing the Formlabs Form 2 3D printer.
Disassembly is required to examine a product that has failed inspection, correct an error, or access a device for refurbishment and repair. Using a disassembly jig makes this process faster and reduces the risk of breakage.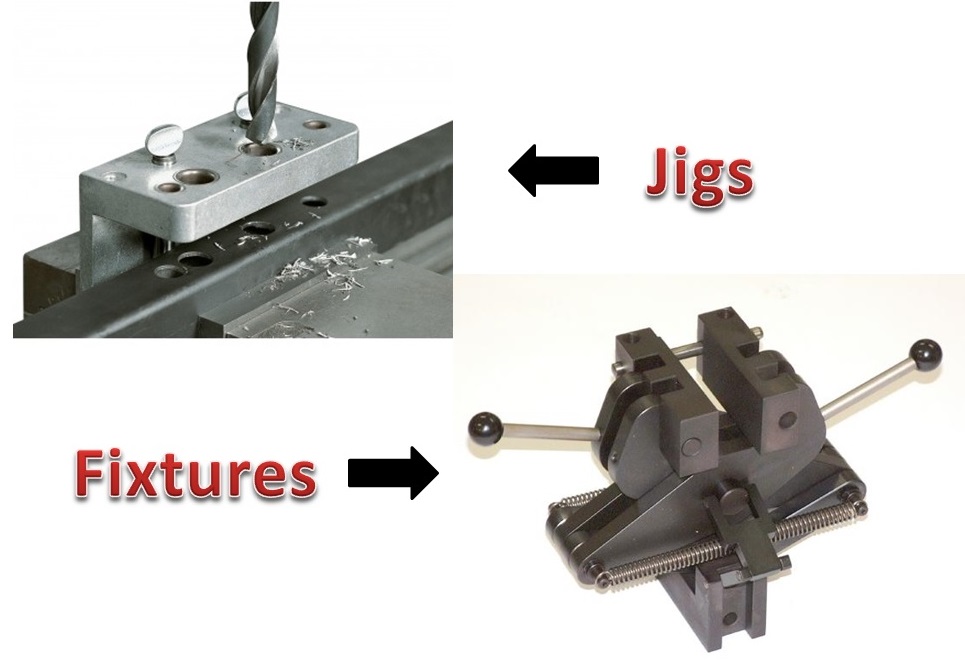 For instance, separating an enclosure with snap fits requires each of the snaps to open simultaneously to prevent damage to the parts.
Disassembly jig for separating a snap-fit enclosure in Formlabs White Resin.
The low cost of 3D printed bonding jigs makes regular replacement of these parts more acceptable compared to jigs machined from plastic or metal. In theory, bonding jigs and fixtures are designed well and maintained so they don't have to be resurfaced or thrown out. In practice, it depends a lot on the labor and work culture of a shop.
Adhesive being applied to a part in a bonding jig printed in Formlabs Durable Resin.
Tip: Coating a bonding jig with a release agent will make it easier to clean up any solidified adhesive that may spill onto the jig.
3D printed jigs are useful for low-force applications; for example, making sure a label is placed in the exact same location across multiple units or masking on an area for marking.
Using Formlabs Flexible Resin, a conformal masking template can be designed to perfectly match the part surface. For applications where a stiffer template is required, Durable Resin works well.
Hinged jig for applying volumetric markings, printed with Formlabs Tough Resin and Durable Resin.
While not a fixture or jig per se, surrogate parts are commonly used to test fixtures or jigs in advance of final production parts, so that manufacturing and assembly lines can come online faster and iron out process kinks before the pressures of production are in place.
Surrogate parts allow manufacturing process validation with low-cost 3D prints instead of risking delicate high value components like electronics assemblies.
SLA prints work well for surrogate parts because of their high dimensional accuracy and ability to replicate fine features relevant for solving manufacturing or usability aspects that fused deposition modeling (FDM) or other print processes may miss. Additionally, since SLA printed parts are highly isotropic, they will behave more similarly to their injection molded counterparts than anisotropic FDM parts.
Learn how Google ATAP used surrogate parts printed in Formlabs High Temp Resin and reduced turnaround time for a crucial component by 85% while saving over $100,000.
Download the full 20-page white paper to learn the principles behind creating effective jigs and fixtures, with an emphasis on how to leverage 3D printing to reduce costs, shorten development time, and create more efficient production workflows from design engineer to manufacturing floor technician.
White Paper Download: Designing 3D Printed Jigs and Fixtures
3D Printed Jigs & Fixtures: Production Floor Solution | Stratasys Direct
- December 27, 2017
On the production floor, jigs and fixtures play a pivotal role in the manufacturing line. Jigs, custom-made tools used to guide and control the motion of another work piece during an operation, and fixtures, devices used to hold a piece in a fixed location during an industrial process, are used to produce products reliably and repeatedly.
With fast and near labor-free production, 3D printing (aka additive manufacturing) offers a powerful solution for producing jigs and fixtures. 3D printing manufacturing aids can reduce lead times, provide cost savings, improve performance and add efficiencies to the production floor.
Faster Production
The beauty of 3D printing is shorter lead times; some parts can be produced in a matter of hours. Prototyping a jig or fixture to test its performance is sometimes critical and can be accomplished with 3D printing faster than ever before. 3D printed jigs and fixtures are built from a digital file rather than hard tooling, allowing you to produce aids on-demand and as needed. The CAD file can be updated and redesigned at any time, then reprinted and delivered in days.
Reduction of Costs
With advantages such as quick turnarounds, part consolidation and near labor-less production, 3D printing jigs and fixtures delivers an overall cheaper venture. The process also reduces material waste and helps you avoid costly expenses associated with inventory and storage.
Enhanced Performance
The ease of customization and ergonomic enhancements with 3D printed jigs and fixtures delivers an overall improved performance on the production floor. CAD files can be easily modified before each build, allowing for the painless customization of tools and aids. With additive manufacturing’s design freedoms, these customizations can include contours that improve tool handling and ease of use to help increase worker comfort. With no added cost, the jigs and fixtures can increase efficacy and safety for employees.
Design Freedom
A complicated jig or fixture that may have been designed for manufacturability and requires extensive machining or other conventional production methods can find new value with 3D printing technology. The design freedom of additive manufacturing removes traditional manufacturing constraints and opens new opportunities for tool configuration. Because of the technology’s ability to handle design complexity, tools previously envisioned with multiple components can be redesigned as one contiguous component.
This component consolidation also contributes to creating a lighter weight tool, increasing in worker comfort. Strong plastics used in 3D printing processes are an excellent alternative to conventional metals. Light-weight, 3D printed jigs and fixtures produce the same, or better, functionality while improving ease of use.
The Powerful Solution
The improvements offered by 3D printed jigs and fixtures can add up to major advantages for your company. Stratasys Direct Manufacturing produces aids for nearly every stage in manufacturing, and our Professional Services team can help you identify opportunities to implement 3D printed jigs and fixtures to streamline your operations.:quality(80)/images.vogel.de/vogelonline/bdb/1186000/1186052/original.jpg)
Download our white paper to learn more about the benefits of 3D printed jigs and fixtures, and how you can use this ground-breaking technology for better production-floor proficiency.
3D Printing Designing Mounting and Mounting Fixtures
Brief Information
This white paper describes how to create efficient mounting and mounting fixtures, with a focus on how to use 3D printing to reduce costs, reduce development time, and create more efficient manufacturing processes for applications ranging from design engineers to production technicians
Introduction
For manufacturers, maximum production speed while maintaining high quality parts is critical to success. Mounting and installation fixtures are used to simplify and increase the reliability of manufacturing and assembly processes, reduce cycle times and improve worker safety. In this paper, we will explain the basic design principles and concepts of fixtures and fittings, look at how to adapt the characteristics of machined fasteners to achieve successful 3D printing, and discuss how to use the unique advantages of stereolithography (SLA) materials to reduce manufacturing costs. manufacturing and reducing lead time. nine0005
As a rule, manufacturers create metal tools as needed, either machining them in-house or outsourcing. Depending on the loads experienced by the part, it may not always be necessary to manufacture these tools from metal. SLA 3D printing materials have improved significantly and there are a number of functional resins well suited for 3D printing of mounting fixtures, such as primarily Formlabs Standard resins and Formlabs engineering resins, especially Tough, Durable and High Temp. Manufacturers around the world use these materials to replace metal fasteners in automated machines, electronics assembly lines, foundries and other manufacturing facilities
3D printed fasteners on an automated production line at Pankl Racing Systems.
Mounting and setting fixture design fundamentals
UNDERSTANDING DEGREES OF FREEDOM AND LIMITATIONS
In their most basic form, mounting and setting fixtures hold a part in position while simultaneously withstanding forces from a secondary operation without subjecting the part being held to an unacceptable force deviation, movement or rotation. To understand how this is achieved, one must first understand how degrees of freedom work. nine0005
A rigid body in space has six degrees of freedom: up/down movement, left/right movement, forward/backward movement, and the ability to rotate along one or more axes called pitch, rotation, and deflection.
Part with all six degrees of freedom.
The principles of good fastener design require that these degrees of freedom be limited as much as possible in order to achieve precise location and safe secondary operations. It is equally important not to overdo this detail. Excessive constraints introduce unnecessary effort and precision issues, requiring higher precision on mounting and setting fixtures. nine0005
To explain this principle, consider a stool. A three-legged stool has just the right number of restrictions: when loaded with a weight on its top surface, the chair cannot move vertically. Friction prevents the chair from sliding in any direction, and each leg is limited by the others to prevent individual legs or the entire stool from rotating.
- An exact constraint is when each degree of freedom requires one constraint to work properly. nine0040
- An unacceptable deflection occurs when a part is free to rotate, move, or slide in one or more directions or along one or more axes. When secured, underconstraining the part prevents proper operation and can be a significant hazard to machine operators and equipment. However, depending on the application, some tasks may need to be under-constrained: for example, a wooden board that can move freely through a planer. nine0040
- Insufficiently supported parts have sufficient restraint to prevent movement and rotation of the object, but not enough support to prevent significant deflection of the part during secondary operations such as milling and drilling
- Overlimiting occurs when a structure has excessive limiting factors. One example is that when multiple forces are working to do the same work, those forces will come into conflict and one of these forces will always "win" and end up doing the intended work.
 Back-up forces at best do nothing or at worst degrade the intended function of the structure, resulting in degraded parts and increased risk to the operator. nine0040
In practice, it is sometimes necessary to use too many "limits"
The four-legged chair is an example of overdesign. The fourth leg is redundant and introduces a new rocking problem if it rests on a surface that is even slightly uneven.
The trade-off is greater overall stability at the expense of the need for flatter floors. To put this into a manufacturing context, a more forgiving (less constrained) fixture design is useful for machining parts that have more variation (castings, for example), while a tighter fixture will work better for parts with more precise surfaces (machined). or injection molding parts). nine0005
Three-dimensional fastener attached to the mounting plate.
3D Printed Mounting and Mounting Jigs
Improved design tools have allowed engineers to create products optimized for end use, but the same design freedom and increased complexity of parts make it difficult to assemble mounting and mounting fixtures for secondary operations. Traditional fastening systems such as vices and clamps cannot provide and support amorphous shapes or components with very fine detail. 3D printing allows engineers to create objects without the limitations such as tool access and wear and tear that come with machining. nine0005
Making fixtures and fittings in an additive process saves significant time and costs by eliminating the skilled labor steps involved in machining solid workpieces or tools for pipe and sheet metal fabrication. Even if fixtures require metal components for end applications, affordable, low-cost 3D printing allows fabrication engineers to test these concepts before building stronger fixtures. nine0005
In particular, for parts with curved or complex surfaces, the cost of in-house 3D printing is significantly less than for outsourced milling, even for low-cost plastics such as HDPE. High resolution Formlabs 3D printers with excellent surface finish are well suited for creating mounts and fixtures with curved surfaces and thin objects.
| COST OF SIMPLE FASTENING | Aluminum milling | HDPE milling | Tough Resin Printing |
| Price | $475 | $360 | $46 |
| Run time | 3 – 5 days | 3 – 5 days | print less than 1 day |
Applications for 3D printed mounting and mounting fixtures
SOFT VISE JAWS
Soft jaws are designed to precisely fit the unique geometry of the specific part, allowing you to handle more complex parts and prevent crushing of softer metal or plastic parts. 3D printing works well for making soft jaws and jigs due to its high assembly speed and low manufacturing cost for processing complex shapes.
The part is clamped between soft jaws printed with Formlabs Tough Resin. nine0016
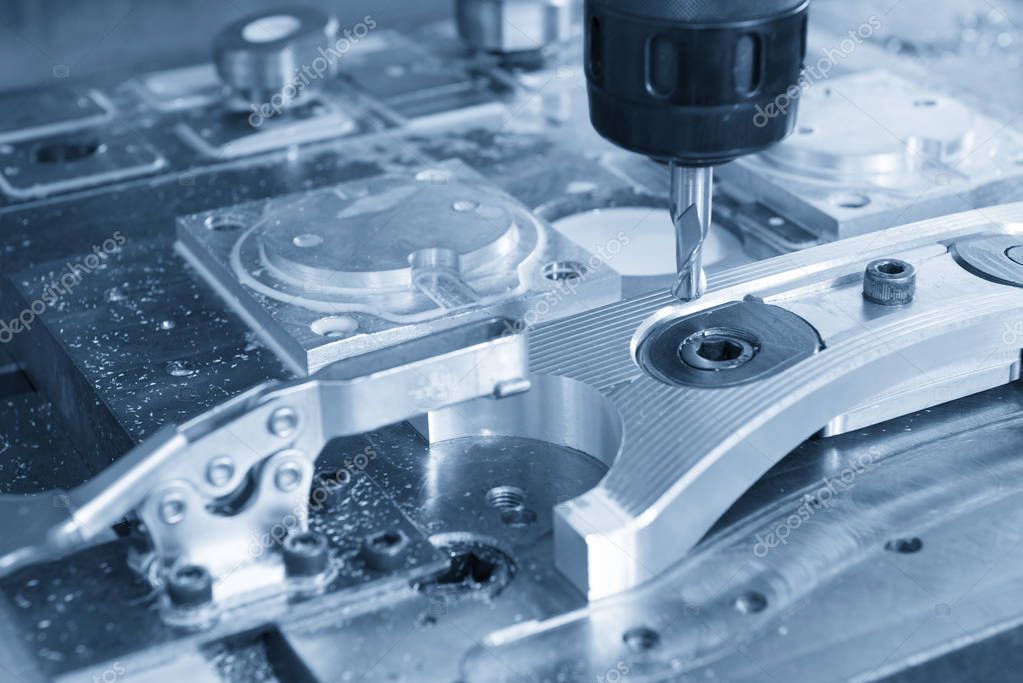
PILOT DRILLS
Pilot drills help prevent drill deflection or backlash while maintaining angular and spur tolerance requirements
Permanent bushing in Formsins Tough Relabins drill template.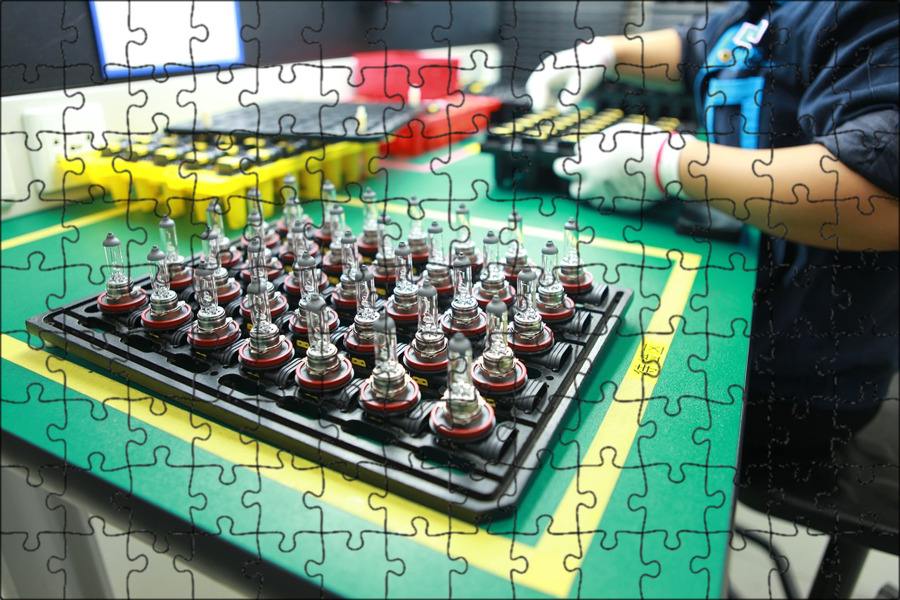
Drill guide bushings are available in press-fit or screw-in options and can be purchased from industrial suppliers such as McMaster-Carr Bushings and have been designed specifically for use in plastics, best suited for SLA printed templates
Use the tolerance recommendations in our Design Fit Information Booklet to determine the correct hole size for a press fit.
LIMIT GAUGE
A simple tolerance check using a template or gauge can quickly help a quality control inspector determine if a part will work for its end use. Limit gauge 3D printing is useful when the successful function of parts is determined by small differences in shape and dimension, and these measurements cannot be easily or quickly assessed with calipers, micrometers, or other standard metrology tools, as is the case with complex polymer parts. nine0005
Limit gauge for testing rubber gasket printed with Formlabs Clear Resin.
TIP
In some applications, calibers can wear out over time, causing QC to fail.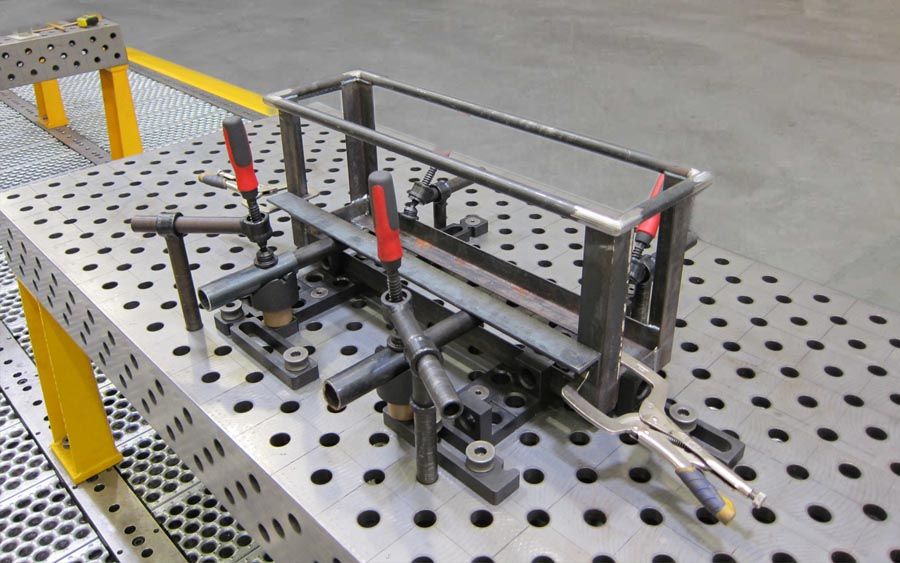
Due to their low cost and ease of manufacture, 3D printed gauges can be easily reprinted and replaced according to a predetermined schedule or as needed to prevent quality degradation due to worn gauges. This is most noticeable when the parts that are in contact with the limit gauges are hard metals. nine0005
ASSEMBLY DRIVER
For many products, the most time-consuming part of the process is joining parts and adding fasteners to create sub-assemblies or complete assemblies. 3D printing of part-specific assembly mandrels reduces cycle times, improves workflow ergonomics for assembly technicians, and improves consistency between manufacturing units errors or gaining access to the device for repairs and modifications. Using a disassembly tool speeds up this process and reduces the risk of breakage. For example, separating a latched housing requires each of the latches to open at the same time to prevent damage to parts. nine0005
Formlabs White Resin Clip-on Enclosure Disassembly Tool.
GLUER TOOL
The use of 3D printed glue tools and fasteners is an attractive solution because their low cost makes the regular replacement associated with their use more acceptable.
The adhesive is applied to the part in an adhesive fixture printed with Formlabs Durable Resin. nine0016
TIP
Coating the bonding tool with release agent will make it easier to clean up any hardened adhesive that may spill onto the tool.
MARKING AND MASKING TEMPLATES
3D printed fixtures are useful for low force applications; for example, to make sure the label is in the same place on multiple devices, or to mask an area to label.
Using Formlabs Flexible Resin, a consistent masking pattern can be designed to perfectly match the surface of the part. For applications where a stiffer template is required, Durable Resin also works quite well. nine0005
Hinged attachment for applying volumetric marks printed with Formlabs Tough Resin and Durable Resin.
REPLACEMENT PARTS
Replacement parts are typically used to test fixtures or workpieces until fasteners and fixtures are in place in front of final production parts so that production and assembly lines can get up and running faster and correct process disturbances before effects occur. production. nine0005
Replacement parts enable process validation with low cost 3D printed products instead of risking high value sensitive components such as electronics assemblies.
SLA works well for replacement parts due to its high dimensional accuracy and ability to replicate thin objects related to manufacturing or usability issues that FDM or other printing processes can skip. Also, since SLA printed parts are highly isotropic, they will behave similarly to their injection molded counterparts, unlike FDM anisotropic parts. nine0005
Recommendations for designing and using 3D printed fasteners
COMPLEXITY (NEARLY) FREE
Because 3D printing allows "free" complexity (increased complexity does not increase the cost of the part), it will take some time to consider what additional features can be built into a fastener or fixture at the design stage to take advantage of this principle. Small objects that are difficult to machine, as well as geometries that are considered impossible due to tool clearance during milling or turning, are included in the scope of additive processes. Serial numbers, manufacturing dates and other relevant data can be embedded into this part for digital asset management and easy tracking without the need for secondary engraving steps. nine0005
What are usually two components in mechanical equipment can be built into one piece, helping to prevent dust or chips from accumulating by eliminating the gap.
For example, instead of using inserted straight dowels or cylinders to accommodate the part, spherical or diamond structures are built into a single gapless part. The use of diamond or spherical fixtures reduces or eliminates binding of parts during loading and unloading by minimizing the contact area. nine0005
Minimum contact mounting fixture printed in Formlabs Tough Resin.
INTRODUCING POINTS INTO MOUNTING AND INSTALLATION TOOLS
Part of the process of introducing mounting and installation fixtures in the context of assembly or manufacturing checks the dimensional accuracy of the fixtures. Amorphous part structures, which 3D printed fixtures are often designed to solve, can be fixtures, and the fixtures themselves tend towards more complex shapes. These designs can be difficult to verify with standard metrology tools such as calipers and micrometers. Creating basic functions in printing devices and fixtures makes inspection easier and more accurate. nine0005
A reference point is a theoretically geometric perfect reference—a perfectly flat plane, the axis of a cylindrical hole, etc. The fiducial point object is the reality of this concept in the context of a part that is used as the main reference point for other measurements. Fiducial objects should relate to the requirements of secondary operations and to the functional requirements of the part in the end use.
Where possible, include planar faces or corner geometry in the fixture to aid inspection and determine overall accuracy. With any fixture, accuracy is assessed when parts are inspected after machining, as operating conditions such as part or tool deflection can create errors that require redesign of the mounting and setting fixture. nine0005
In applications where accuracy is paramount, use digital metrology tools such as 3D scanners or touch probes to test more organic geometries.
RIGIDIZING
A typical way to stiffen a mechanical fixture is to leave extra material in places that tend to bend under load. In additive processes, minimizing material consumption reduces spare parts costs. The use of reinforcing ribs and infills provides additional structure without significantly increasing cost or assembly time of the part
Typical milled geometry to minimize material removal and machining time. Typical print geometry to maximize rigidity and minimize material usage
INCREASED MECHANICAL STRENGTH
Using threaded holes in 3D printed plastic parts is an inefficient method of joining fixture parts; these parts are more prone to breakage or wear when reused than metals. Instead, use more resilient assembly methods such as threaded inserts or a pocket to tighten the nut while tightening the bolt. Alternatively, the 3D printed mount can have clearance holes for running bolts up to the T-nuts or mount plate below. To prevent elastic deformation of the part when screwing onto the work surface, through holes must use clearance tolerances. nine0005
PRINTED PARTS EXTENSION
In many cases, 3D printed parts for fixtures and fasteners are augmented using spare parts from industrial plants. This approach works well when some components need the specificity and flexibility of a 3D printed design, but the overall work envelope or other requirements such as stiffness or conductivity cannot be met with an additive process.
Common replacement parts to add extra functionality to fixtures and fasteners include metal shafts for long distance fixing while maintaining rigidity, or washers to distribute screw clamp loads over a large area. Spare parts combined with additive processes quickly add mechanical features such as linear or rotary indexing at a much lower cost than machining. nine0005
Drill template slides smoothly over steel rails using Formlabs Durable Resin bushings molded into Tough Resin rail.
BE AWARE OF FLOW
Some SLA resins experience flow (permanent elastic deformation) if they are constantly loaded, as is the case with printed fixtures fixed to a desktop for extended periods of time. To avoid deformation of parts due to continued loading, it is best to loosen any bolts and remove clamping forces after completing secondary operations. nine0005
REPLACEMENT ON REQUEST FOR Worn COMPONENTS
Even under normal conditions of use, fixtures, mounting tools and fasteners usually break or wear to the point where they are no longer effective.
By creating fixtures and fittings in additive manufacturing, a facility takes control of its own production and is able to change tools on site as needed rather than relying on external suppliers with minimum order quantities. Replacing worn attachments with internal equipment shortens the supply chain and reduces the risk of downtime. nine0005
TIP
Some coolants, solvents, and cutting fluids can degrade SLA printing. Run a short test to check the overall processing requirements before introducing printed parts into a new application.
Checking a 3D printed part with a dimensional accuracy template.
Print Fixture Check
Once the fixture has finished printing the fixture, clean and allow it to cure per Formlabs material specification. The Form Wash and Form Cure post-processing systems are the best way to ensure that part quality is not compromised by too much solvent or uneven curing. nine0005
If Formlabs PreForm software is being used to create support structures for the model, remove the supports and carefully sand any remaining depressions to a smooth, flat surface.
HINT
Place a sheet of sandpaper on a known, flat surface and slide the part over the sandpaper, applying enough even pressure to achieve an even finish.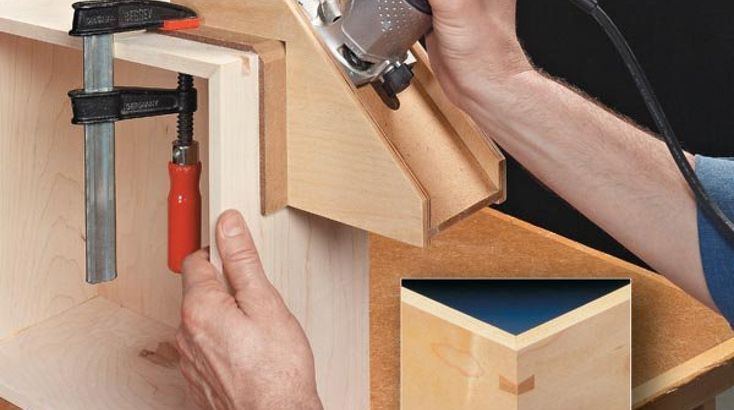
After that, examine the printed part against the original CAD model. Use a gauge or micrometer to check the print dimensions against the dimensions on the drawing or annotated CAD model. Record any discrepancies that could adversely affect the effectiveness of the mounting or setting tool. nine0005
If all dimensions are correct, the next step is to test the functional effectiveness of the fixture.
When loading a part onto the jig, pay particular attention to how well it is positioned in relation to the mounting surface and supports. A properly designed and built fixture will support the part, eliminating any movement after clamping force is applied.
The clamping force must push the workpiece evenly into the fixture without tilting, shifting or bending the workpiece. nine0005
Properly seated pocket printed with Formlabs Durable Resin.
A component printed with Formlabs Tough Resin that aligns and secures the bonded assembly during cure.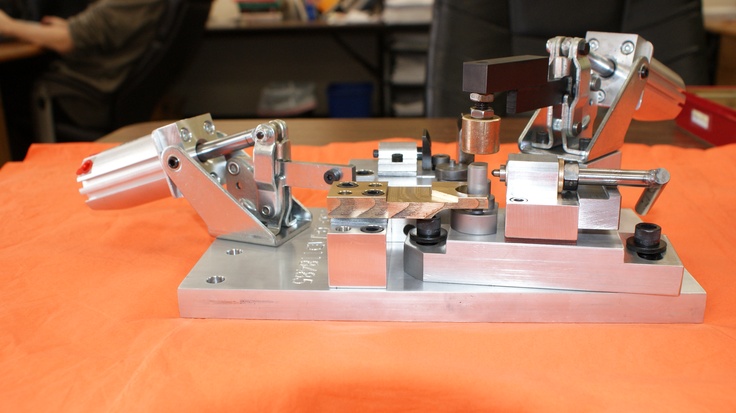
For processes with higher operating forces such as milling or drilling, calculate clamping requirements based on feed and speed, machine power and selected material, and safety considerations. On first use, inspect to ensure intended functionality. nine0005
After performing any subsequent operations on the part, an additional check will check the tolerances and also establish an acceptable cycle time. When a new fastener or clamping device is first deployed, more frequent quality checks will reveal any unpredictable operator errors or wear that could lead to a quality error. These errors can be detected at an early stage and corrected either through training or by changing the design of the fixture.
Workflow questions
PART EXTRACTION
If the fixture truly functions as a time-saving tool, figuring out how to quickly remove parts from the setup is critical, as is loading and securing
To help eject parts, use bevelled springs guides or levers to lift the part up from the surface of the fixture
By placing the springs in the fixture, when the clamping force is released, the part will be pulled away from the surface of the fastener, making it easier for the operator to remove the part. The same can be done with a movable slider or lever, albeit with an additional step required from the operator. Determining the correct approach depends on the application, tool setup, and cycle time requirements. nine0005
TOOL USE QUESTIONS
Any type of machining operation generates garbage. Good fixture design provides tolerances for controlling the impact of such debris. When drilling a hole, for example, small chips are generated. The clearance left in the fixture provides room for chips without affecting the part or tool performance.
Similarly, during milling operations, small pieces of material chips can accumulate on the fixture or fastener. If possible, minimize or eliminate small gaps and pockets where chips can accumulate. Creating deep grooves improves fixture function by allowing chips to fall out of the way of the part when loading and unloading. nine0005
Smoothing corners and grooves creates rising surfaces, making it easier to brush, blow or flush debris from the work area. Surface chamfering saves time but is expensive, requiring either the removal of expensive material or part assembly that introduces new seams.
Standard milled and assembled 3-piece angle positioner for great chip removal capability.
Standard geometry 3D-printed corner device for positioning with rounded edges, smooth pockets for discharge and without seams, without increasing the cost of part
Improvement of the user's experience in relation to installation and installation devices 9000
Mounting and installations fixtures are tools to reduce the required skill level or concentration of the operator, as well as tools to speed up the production of parts. nine0005
Properly designed fixtures improve worker safety and improve workstation ergonomics for the person who is tasked with the ongoing task of performing a given operation. Successful manufacturing takes into account not only how parts are machined using fixtures, but also how workers mentally and physically perceive the tools they use.
While each application has different requirements, a few general concepts make work easier and improve efficiency:
- Whenever possible, design fixtures for one-handed operation, freeing up the other hand for part positioning, stabilization and rest during replacement.
- Design fixture to securely hold the part during subsequent unattended operations
- Use geometries that amplify placement errors to make misalignment obvious.
- Consider not only the part in the context of the fixture, but also the overall progress of the job, from loading the part and performing subsequent operations to removing the part and sending it to the next station. nine0040
- Always aim for the fewest steps required to use the fixture to minimize cycle time and facilitate worker movement. Simulate these design steps to ensure that all necessary motions and spatial tolerances are included.
Find out how other companies are incorporating 3D printed fixtures and fittings into highly automated lines from the Pankl Racing Systems case study By moving fixture production in-house with 3D printing, Pankl Racing Systems has reduced time and costs without the need to connect the expensive facilities of a CNC production center,
Conclusion
A modern factory must continually fine-tune and implement new technologies to maintain competitive advantage, achieve production and profitability goals, create a safe environment for staff, and reduce worker workload.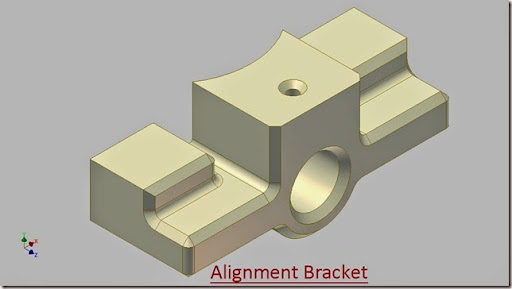 Additive manufacturing helps achieve these goals by moving the design and production of fixtures and fittings as close to the production site as possible. Engineers who are familiar with the precise context of fixtures and fittings in manufacturing do a much better job of building the right tools in the right way. High-quality, high-precision 3D printers like the Formlabs Form 2 enable even small organizations to bridge the gap between concept and reality to increase productivity and stay competitive. nine0005
5 Ways 3D Printing Is Changing the Automotive Industry / Sudo Null IT News
You can't buy a fully 3D printed car at a car dealership yet, but additive technologies have been used in car design for many years. Every year, especially in recent years, 3D printing is taking an increasingly important place at all stages of production. This is evidenced by the rapid growth of 3D printing market share in automotive manufacturing, which is projected to reach $2.5 billion by 2023. nine0005
For example, luxury car companies including Bentley, Porsche, BMW and Ferrari use 3D printing to create custom car interior parts. GM, Volvo, Ford are using 3D printing to produce tooling to save money, improve designs and reduce delivery times.
Source 3dprinting.com
3D printing is constantly emerging with new opportunities, it is becoming more and more accessible. If the first 3D printers cost about $20,000, now you can find 3D equipment for $100. Now companies can, with the help of additive technologies, produce the necessary components directly at their own enterprises and not depend on suppliers. nine0005
With new materials, 3D printers can print high-precision, functional end parts. Additive technologies facilitate the production of custom products and increase productivity.
But this is only the beginning of the journey. Here are five key ways 3D printing is driving innovation in the automotive industry, from car design to production. Plus one bonus.
1. Changing the prototyping process
It was with the manufacture of prototypes that the use of 3D printers in the automotive industry began. 3D printed prototypes took much less time than traditional methods required.
Using Raise3D 3D printers and ideaMaker, Crazy Grandpa Garage was able to automate the process of creating custom car parts. Production costs have been reduced by 50%, design reliability has improved significantly, and lead time has been reduced by 83%. The parts now come out very well fitted to the car. nine0005
Source: facebook.com
Using 3D printing, car designers can quickly prototype individual parts or assemblies, from interior detail to dashboard, or even full-size car models. Thanks to 3D prototyping, the initial idea quickly turns into a physical embodiment of the concept - a conceptual model. The concept can then be developed into full-featured, high-fidelity prototypes, and after several validation steps, mass production begins. For the automotive industry, getting through these steps quickly is vital, and the entire downtime of an automobile production line in just an hour is very costly for the company. nine0005
For example, the assembly plant of the American car manufacturer General Motors claims that the purchase of a 3D printer in 2016 saved more than $300,000.
Ringbrothers designers and engineers are not dependent on third parties to implement laser stereolithography (SLA) in their facility. The cost is reduced, the development time is reduced. Source: formlabs.com
Hose for Eventuri BMW M4, Source: ultimaker.com
Traditional prototyping was time consuming and costly, in part because the product went through more iterations. With 3D printing, you can create high-quality prototypes in one day and at a much lower cost. More examples.
The Ford Fiesta ST with 3D printed parts, ext. SEMA 2016, ultimaker.com
For example, General Motors has partnered with Autodesk to produce low cost, lightweight automotive parts using 3D printers. Tools, fixtures and fittings can now be produced at a fraction of the cost, according to Autodesk. For example, a 3D printed tool used to align engine and transmission ID numbers costs less than $3 at General Motors. A traditionally produced instrument will cost $3,000. In addition, downtime due to faulty tools can be significantly reduced as new tools are produced in-house. nine0005
2. Creating custom and complex parts
Daihatsu, Japan's oldest car manufacturer, launched a project in 2016 to customize its Copen model.
Source: 3dprint.com
In partnership with Stratasys, Daihatsu customers can design and order custom 3D printed panels for their front and rear bumpers with a choice of over 15 basic patterns in 10 different colors. nine0005
Source: 3dprint.com
In Europe, the BMW MINI brand also uses 3D printing to create personalized car parts. Since the beginning of 2018, MINI customers have been able to personalize various trim elements such as the instrument panel, LED treadplates and illuminated bumpers, as well as choose from different colors and textures. These parts are then 3D printed using a range of technologies from DLS Carbon to SLS.
Source: formlabs.com
Volkswagen Motorsport's I.D. R Pikes Peak is designed with over 2000 3D printed test parts.
Source amfg.ai
The use of 3D printers makes it possible to experiment in the development of non-standard designs, reduces the cost of their production. Long production processes for custom-made products are becoming much shorter.
Ringbrothers uses 3D printing to create custom end pieces such as ventilation grilles. Source: formlabs.com
Large companies are merging 3D printing technologies with traditional manufacturing methods. Volkswagen has recreated its iconic 1962 Microbus by replacing the petrol engine with a 120 hp electric one. The Type 20 concept electric minivan has received many improvements using 3D printed parts. These improvements include cast aluminum wheels. Even the wheel hubcaps, while looking like stamped steel, are actually printed on a Formlabs SLA 3D printer, then electroplated and polished.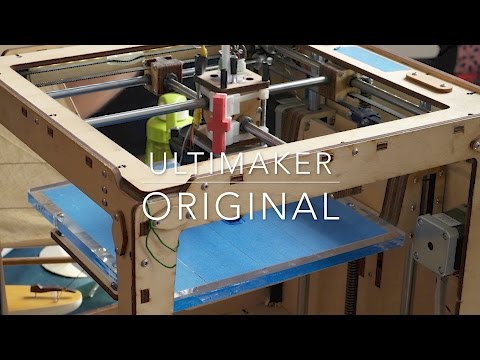 nineanother example Bentley has used cutting-edge metal 3D printer technology to produce a grille, side vents, door handles and exhaust pipes much more complex than those used on current production models.
Bentley used metal 3D printing to create intricate parts with micron precision. Source: formlabs.com
Source: youtube.com
3D printing has also made it possible to create parts that could not be made in any other way.
Bugatti's monobloc brake caliper is a prime example. For some components, Bugatti would have preferred titanium due to its high performance, but processing this metal with traditional methods is expensive and difficult. 3D printing has allowed Bugatti to produce a titanium alloy brake caliper. Due to the thin walls, the caliper turned out to be very light - almost two times lighter than forged aluminum. At the same time, the strength of the 3D-printed monoblock is superior to that of aluminum.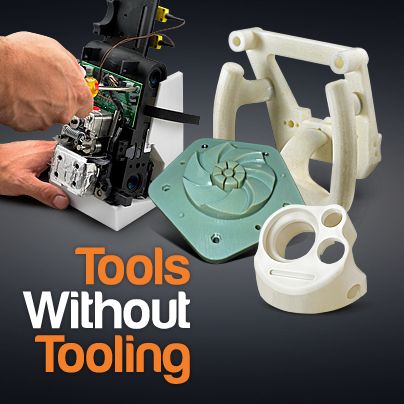 The 3D printed titanium monoblock has a tensile strength of 1250 N/mm2. This means that a force of just over 125 kg will be applied per square millimeter of this titanium alloy without tearing the material. The new titanium caliper is 41 cm long, 21 cm wide and 13.6 cm high and weighs only 2.9kg compared to currently used aluminum, which weighs 4.9 kg.
Source: youtube.com
Bugatti's brake monoblock is the industry's largest functional 3D printed titanium component for a car. Source: formlabs.com
3. Tool making
Various devices help to facilitate and speed up the production and assembly processes, improve the safety of workers. Automotive factories and component suppliers use a large number of non-standard tooling that is specifically designed and optimized for end use. As a result, a lot of non-standard equipment and tools are made, which increases production costs.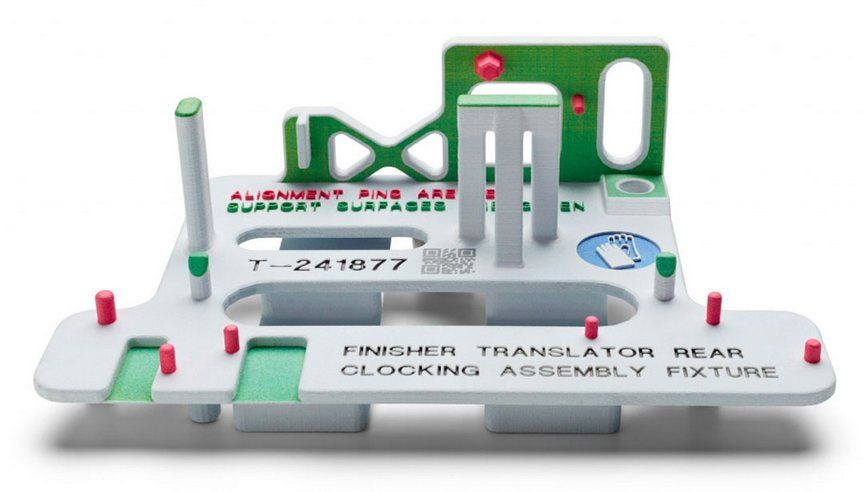 nine0005
This 3D protective wheel disc was purchased for 800 euros but can now be printed for just 21 euros. Tool development time has been reduced from 56 to 10 days.
Source: ultimaker.com
Outsourcing custom tooling and fixtures to service providers who machine parts from solid metal or plastic stock can delay production by weeks.
For example, a commutator motor can take up to four months to develop and prototype using conventional manufacturing methods and cost about half a million dollars. Thanks to 3D printing, Ford was able to develop several variants in just 4 days and 99.4% cheaper - only $3,000.
Source: youtube.com
Additive technologies allow you to complete the task in a few hours and significantly reduce costs compared to ordering from a third-party enterprise. Since increasing the complexity of a 3D printed model does not incur additional costs, products can be better optimized for their application.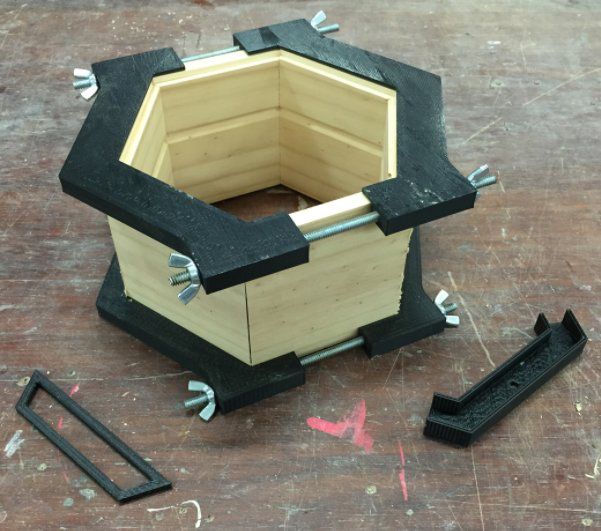 New elastic materials for 3D printing in many cases allow you to print plastic parts instead of metal or create prototypes on a 3D printer to test the tool before using it in production
Gradually, the production of 3D printed accessories and tools is becoming one of the largest applications of additive technologies.
Pankl Racing Systems uses 3D printed fixtures to attach workpieces to a conveyor belt. Source: formlabs.com
For example, Pankl Racing Systems uses multiple Formlabs SLA 3D printers to make critical manufacturing tools. The multi-stage production of parts for transmissions on automatic lathes requires a series of fixtures and tools designed for each specific part. nine0005
With the help of 3D printing, Pankl's engineers have reduced the production time for the aids by 90%, from 2-3 weeks to around 20 hours. Costs were also reduced by 80-90%, saving $150,000.
The transition to 3D printing has enabled Volkswagen Autoeuropa to cut tooling development costs by 91% and tooling times by 95%.
4. Troubleshooting Parts
Spare parts have always been a problem for the automotive industry. The demand for them is either there or not, so the production of spare parts is not economically viable, and the storage of pre-fabricated replacement components is also costly. But if there are no repair parts available, difficulties arise and the main product becomes less valuable. nine0005
3D printing could solve the problem of spare parts in the automotive industry in many ways. The main factors are printed materials, which can match the characteristics of traditional materials used in parts and be cost-effective. There are prerequisites for this.
Using computer-aided design, drawings of all parts can be stored digitally, so there is no need to store the parts themselves. The parts needed by the client can be printed on a 3D printer right in the workshop. nine0005
Even obsolete parts whose drawings have not survived can in principle be recreated by making a 3D scan of existing parts of this type and applying reverse engineering (reverse engineering).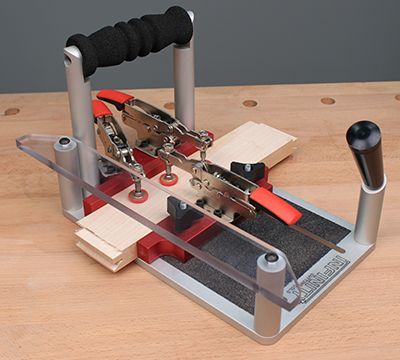 You can read more about this on our blog. Old projects can take on new life. There are many lovers of vintage cars, with the help of 3D printing it would be possible to create parts for them.
Ringbrother 3D printed the Cadillac emblem for a custom built old car. Source: formlabs.com
5. Production of standard parts
As 3D printers and materials for 3D printing become more affordable, a gradual transition to the production of mass-produced automotive parts using additive technologies is possible.
3D printing makes it possible to combine components into a single whole. Let's say there is a mechanism assembled from six or seven car parts that can be combined into one printed part. It will save time and assembly costs. With 3D printing, it is also possible to reduce the weight of the combined assembly, as a result, the car will use fuel more efficiently. nine0005
3D Systems has developed an advanced exhaust pipe for a sport bike. In the image below, you will see 20 sheet metal and hydroformed parts needed to assemble the original exhaust pipe. On the right is a monolithic exhaust pipe that does not require assembly, made using metal 3D printing.
Source designnews.com
The 3D printed tube was produced using Grade23 titanium in just 23 hours, compared to three weeks for traditional production. Design development time reduced from 6 weeks to 6 days. Additive manufacturing also eliminates the need for tooling, fixtures, multiple welding and multiple inspections. nine0005
Geometry optimization has reduced the amount of material required for maximum productivity. All elements of the original exhaust pipe are incorporated into the new design and, when printed with a typical wall thickness of 0.5mm, the 3D printed exhaust pipe is about 25% lighter than the original one.
A wide range of 3D printing materials is beginning to meet the requirements of various vehicle components. Since additive methods reduce costs compared to traditional methods (such as molding and injection molding), it makes a lot of sense from a production and financial point of view to further introduce 3D printing into the production of basic parts. nine0005
Volkswagen, one of the world's largest and most innovative car manufacturers, is using an HP Metal Jet 3D printer to produce high-performance functional parts with special design requirements, such as shift knobs and mirror mounts. Volkswagen's long-term plans to work with HP include accelerating the production of mass-customized parts such as key rings and exterior nameplates.
Source: youtube.com
+1. 3D printed cars
While 3D-printed cars have yet to hit the market, there are some interesting designs and concepts that can suggest a possible direction for the automotive industry.
Light Cocoon . German engineering firm EDAG was clearly inspired by nature to create the 3D printed supporting structure of the Light Cocoon concept car. The frame resembles the veins of a tree leaf or its branch. Despite the fact that the design of the EDAG took less material than a conventional frame, all the strength requirements for structurally significant components are met. Outside, the case is covered with a lightweight and durable waterproof fabric. nine0005
The cover protects the EDAG Light Cocoon from the weather and gives the car a unique personality. Source: formlabs.com
Blade . Blade ("Blade") announced as "the world's first 3D-printed supercar." It meets supercar standards but is made from inexpensive materials: carbon fiber tubes and aluminum rods, combined with 3D printed metal parts. Blade turned out to be very light and does not take long to assemble. nine0005
The world's first 3D printed Blade supercar. Source: formlabs.com
Strati . The American company Local Motors 3D printed and assembled the Strati electric car right at the exhibition stand, in just 44 hours. Most of the components were printed - the body, seats, interior parts. A car is made up of less than 50 assemblies, far fewer than the thousands of parts that go into a traditional car. The company intends to reduce the print time to 10 hours. nine0005
The Strati from Local Motors consists of less than 50 individual parts*. Source: formlabs.com
LSEV. Developed by the Italian company XEV, the LSEV could be the first in the 3D printed electric vehicle market when it goes on sale. The 3D printed chassis, seats, windshield and all visible parts of the LSEV. Thanks to the active use of 3D printing, the number of components was reduced from 2000 to just 57, resulting in a very lightweight design. The electric car weighs only 450 kg. nine0005
The LSEV is the first 3D printed electric vehicle to hit the market in 2020. Source: formlabs.com
While most of these and many other 3D printed car projects remain at the concept stage, the extent to which 3D printing has penetrated various areas of the automotive industry is astonishing.