Tevo tarantula pro 3d printer
TEVO Tarantula Review 2022 - Is This 3D Printer Worth The Money?
3.4
See Price
Choosing a budget 3D printer is tough. If you’re new to the hobby, you might not know which specifications are important, and which are only mentioned to draw your attention away from other things. The good news is that you don’t have to spend hours on research: we’ve done it for you.
Today, we’re looking at a popular entry-level printer, the TEVO Tarantula. We’ll be highlighting this model’s strengths and weaknesses in the hopes of giving you all the information you’ll need to decide if the Tarantula is right for you. Without further ado, let’s begin.
| Filament Diameter | 1.75mm |
| Extruders | 1 |
| Supported Materials | PLA, ABS, PETG, PVA, Exotics |
| Connectivity | USB, SD Card |
| Printing Speed | 150mm/s |
| Build Volume | 7. |
Table of ContentsShow
Design
First of all, you should know that this printer has to be assembled from parts. Still, the construction is fairly straightforward, if a little time-consuming. When it’s complete, you’ll notice that the build area is pretty big for a printer in this price range. Simply, that’s never a bad thing.
On the other hand, there are a few structural complaints. The frame is a little flimsy and prone to wobbling during prints, the print bed is absurdly sticky, and the bed-leveling mechanism isn’t as stable as we’d like. Still, these issues can be solved with a bit of preparation, so they’re not total deal-breakers.
Because the entire unit is so open and accessible, there’s a lot of scope for modifications. Some of these (like additional support brackets) can actually help offset some of the issues we discussed earlier, although really, you shouldn’t have to. You can even add WiFi support to complement the USB and SD card interfaces if you’d like.
Printing
Due to the lack of a cooling fan, it’s hard to print with anything other than PLA at first. The temperature is just too inconsistent. However, once you add a fan, it’s possible to create decent models at reasonable speeds. Make no mistake: this is not a pro-level printer, but it’ll do fine for around the home or office.
The Tarantula does have layer integration going for it though. You can print as finely as 50 microns, at which point the layers are barely perceptible, assuming you’ve set the printer up properly. However, it can be difficult to achieve a perfect print since the Tarantula is prone to spool tangles, heating issues, and sticking.
Initially, we were impressed by the range of materials that this printer could handle. That said, there are just too many variables to look after, at least initially. We’d recommend sticking with the basic filaments until you get a feel for this model’s quirks.
Features
As far as functionality goes, this is a pretty bare-bones printer.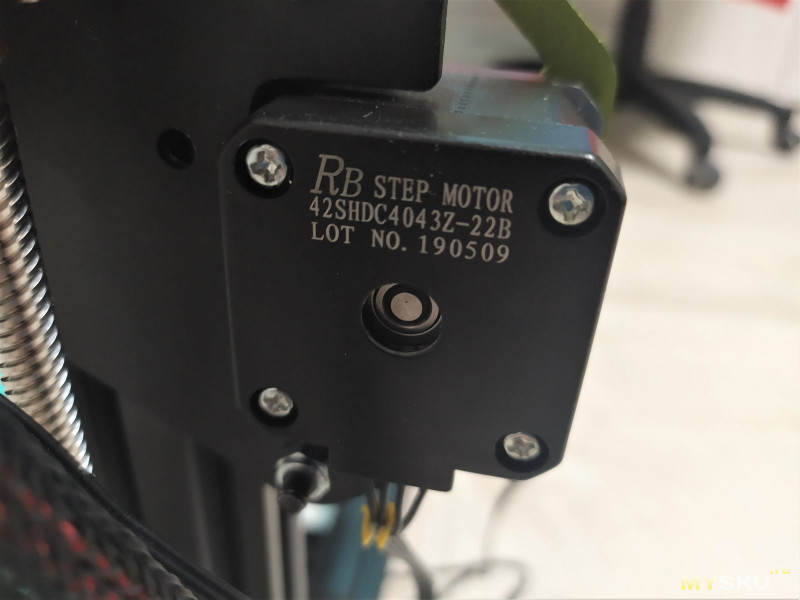 There’s a small screen so you can control prints when not connected to a PC, but that’s about it. Indeed, the features that get people excited online seem to be the ones they’ve added personally.
At the very least, there is a heated print bed. In theory, this should help keep your prints in place, but in practice, it can be extremely difficult to remove them once completed. If you like to tinker, this may be a good long-term project, but if you just want something that works consistently, the Tarantula probably won’t cut it.
There is one saving grace: the build volume is larger than you’d usually find on an entry-level printer. That said, whether you’ll get any advantage from this is unclear, given how often the Tarantula encounters problems.
Cost
It’s true that the TEVO Tarantula is one of the least expensive 3D printers on the market. You can pick one up for around $200, and its running costs are fairly low too, thanks to its ability to use third-party materials. However, what you save in cash, you pay for with your time.
Remember that you’ll have to build this printer from a kit, a process that can take days if you’re inexperienced. Additionally, some users have reported their kits to arrive without essential components, or with parts that don’t fit. As such, be prepared to spend a couple more days waiting for replacements to arrive.
It’s also worth noting that this isn’t a simple product to make. Its design is deceptively simple, but take a look at the image above. That’s a blown-up diagram of how the extruder fits onto the arm and we count no less than 15 components, all of which have to be quality checked and attached.
Support
The Tarantula support page can be described as basic, at best. It consists entirely of a ridiculously complex construction guide for the printer. There are firmware updates (hosted on Dropbox, of all places) on a separate page, but no troubleshooting guides, tutorials, or anything approaching a professional-level support system.
If you’re completely stuck, you can contact TEVO via email, a support form, or (sigh) Facebook Messenger. The site is primarily written in broken English, so you’ll probably have to resort to forums or YouTube videos to better understand how to fix a given problem.
This is quite simply one of the least professional websites we’ve ever seen. It’s a real shame since $200 is still a lot of money, and customers deserve to be given some kind of after-purchase support. TEVO’s iterative design practices mean that much of the helpful information out there becomes more outdated each time they release an upgrade, too, so you might well end up having to fix problems on your own.
Tevo Tarantula PRO Review 3D Printer - Homers Odyssues
The TEVO Tarantula is the 1ST DIY kit 3D printer from the Chinese manufacturer TEVO. It has a construction volume of 200x 200x 200 mm and can be used with a variety of different filaments ranging from PLA, TPU, PETG, ABS and many more.
To make the Tarantula print good there had to be a lot of upgrades, but of course, it is a DIY Machine. Once you got the machine dialled in, after many hours of print time and upgraded the 3D printer printed great quality prints. There are a lot of printable modifications for STL, OBJ repositories. These can be found on Thingiverse, Cults, Cgtrader and other downloadable 3D model websites.
After three years of Tevo designing and selling their 3D printers and a lot of user comments and reviews. They must have thought we need to go back to the Tarantula and make the machine better and they did! Calling it the Tarantula Pro.
In this article of the Tevo tarantula Pro review we will be going over features looks how we compare it to the original Tevo tarantula, and much more.
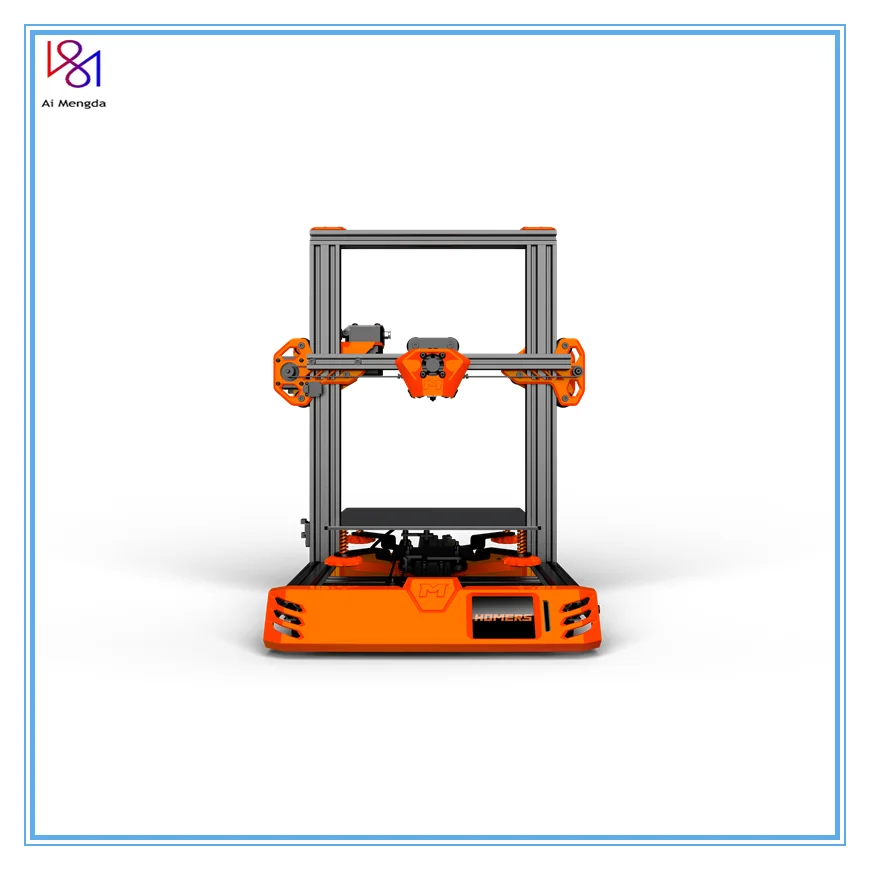
Tevo Tarantula Tevo Tarantula Pro Tevo Tarantula RS Homers Odyssues RSHomers Odyssues And Homers Odyssues RS
The new Homers Odyssues Pro and Odyssues RS look identical there are differences between them. Tevo has now re-branded to Homers. I can’t understand the reason behind this move because the company in my eyes were doing a good job, and now this will more than likely be a set back for them, lets get on to the Tevo tarantula Pro review.
About The ProTo find out more information about these two 3D printers have a look at the articles bellow
The Tarantula Pro is an FDM (Fused Deposition Modelling) 3D Printing technology. This is the standard format for most home desktop and consumer-grade 3D Printers. FDM printers like the Tarantula Pro have become the norm for most hobbyists and small businesses looking to take advantage of prototyping and even end-use products. FDM 3D Printers produce physical objects by interpreting the information from a CAD file and a slicing application like Cura or Simplify3D then laying down plastic layer by layer until your virtual concept becomes a physical object in the real world.
SoftwareThe Tarantula Pro, like many similar i3 based FDM printers, is an open-source 3D printer and can, therefore, take advantage of the current slicers available. Slic3r, CURA, Simplify3D, CraftWare, MatterControl – to name a few.
In our opion we prefair the PRO better for the following reasons, but we aren’t going to go into every little detail just the sections we found that had been improved alot more, please read on.
Athstetics And Frame
The Tevo Tarantula came with aluminium extrusions for the frame, plastic pulleys running in the extrusions’ grooves and XY axes are belt-driven. Z is driven with a leadscrew. With the structure being so weak and unstable, it needed to be modified quite a bit by printing new brackets.
Acrylic parts ranging from the LCD screen, motherboard and base of the print bed, the acrylic parts break easily if under stress. I have experienced this before, and it is very time consuming having to re-print parts to replace the broken brackets. The layout, you say? I don’t see a design just a mess of randomly placed pieces. It was not a very appealing 3D printer to look at.
For the Tarantula PRO, the frame comes with the standard black colour scheme. There are two Z extrusions that are 40mm x 20mm x 424mm, the X extrusion is 20mm x 20mm x 345mm and last of all the Y extrusion is 40mm x 20mm x 394mm. The only acrylic part is for the z limit switch which is not a structural part, so it won’t matter if this is made out of plastic but if it does break it won’t take long to design and re-print. The rest of the brackets are aluminium with a beautiful sparkly anodised green. The part that struck my eyes is the front screen face cover.
That has slots for the LCD screen and memory card. It also helps hide the cables, MKS Genl V1.0 Control Board, MKS MINI12864 LCD screen and of course the power supply keeping everything all neat and clean. I’m loving the fact that Tevo is now re-designing their 3D printers to have a nice design with a touch of colour. I like having a colour theme for my 3D printers instead of dull old black. The machines that have colour seem to attract people more.
Tarantula Pro Review – Technical
- Cable management
The Tarantula had virtually no cable management at all to make the cables look a bit better and neater you had to think out of the box. The wires are all over the place you needed to use zip ties and cable sleaves. There was no quick and easy way to take the cables out of the control box you had to unscrew the top cover on the mks board to get to the wires.
For the Tarantula PRO, on the other hand, comes with the cables in a braided sleeve and with a quick way to disconnect the cables from the mainboard the wires are more hidden and looks more appealing to the eye.
- Power Supply
On to the messy power supply for the Tarantula, this was a nightmare sitting on the table right next to the printer is this box with a lot of cables coming out of it maybe about six roughly that all went to the control board that was a hazard.
The Pros power supply is under the frame; this makes it all hidden; there is not much more to say about it.
Features
- Extruder – Hotend
It was a long time ago since I had the Tarantula I can’t remember precisely what the hotend was I did try and do some research but couldn’t find much information regarding the extruder. I’m not 100% sure but I think it was the Tevo clone E3D Chimera.
Now on to the pro, this has an E3D Volcano Hotend clone. The advantages of this are faster printing speeds. I do have a genuine E3D Volcano on one of my other printers; this is an all-metal hotend, the clone, on the other hand, I’m not sure, also we cant leave out the extrude which is the titan.
- Layer Cooling
Tarantula comes with no layer cooling what so ever so you do need to print one.
I’m glad Tevo took out the Tarantula PRO with dual fan layer cooling. Besides helping with overhangs, you can print a lot faster due to the layers bellow cooling quicker.
- Print Bed
The Tarantula has good adhesion but could be better. Comes with no insulation under the heatbed this can make the bed temperature fluctuate more. The aluminium beds have been known to be warped.
Excellent adhesion on the Tarantula Pro print surface but please do not squish the filament too much or you won’t get your 3D print off.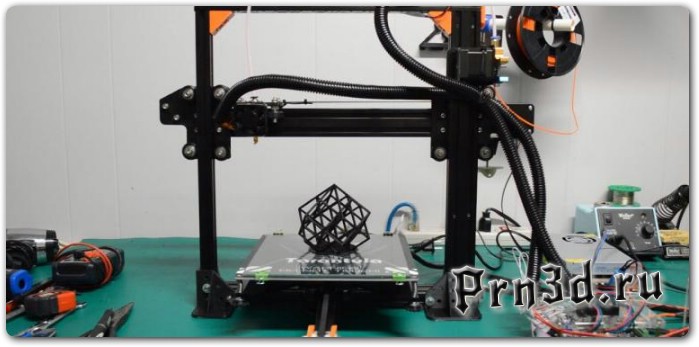 You do not need any products to keep your print stuck to the bed lets rule out what you don’t need, the popular one’s glue stick, hairspray, 3dlac, filaprint. This 3D printer comes with insulation under the heat bed a cosey evenly heated print surface with no warpage.
3D printer installation manual for installing the Tevo Taratula
Read the first
Read this manual before assembling and turning on the printer!
Hazards and warnings
The TEVO Tarantula 3D printer has motorized and heated parts. Always be aware of possible hazards when using the printer.
Electrical Hazard
Never open the printer electronics compartment while the printer is on. Always turn off the printer and unplug the AC power cord before removing the access door.
Burn Hazard
Never touch the extruder nozzle, heating block, or heated bed without first turning off the hot end (or heated bed) and allowing it to cool completely.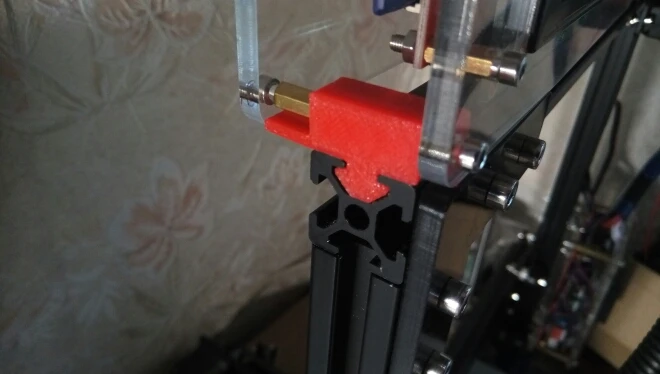 It can take up to twenty minutes for a hot end (or heated bed) to cool down completely. Also, never touch newly extruded fibers. The thread may stick to the skin and cause burns.
Fire Hazard
Never place flammable materials or liquids on or near the printer while it is turned on or in operation. Liquid acetone and its vapors are highly flammable.
Pinch Hazard
When the printer is in operation, be careful not to touch any moving parts, including belts, pulleys, gears, wheels, or lead screws, with your fingers.
Static charge
Be sure to ground yourself before touching the printer, especially electronics. Electrostatic discharges can damage electronic components. To ground yourself, touch a grounded source.
Age Warning
Adult supervision is recommended for users under 18 years of age. Beware of choking around children.
Letter from TEVO
Dear Customer,
Thank you for purchasing a TEVO Tarantula 3D printer.
This manual will guide you through the assembly and first start of the printer. If you are having trouble building, please visit our Facebook group:
https://www.facebook.com/groups/TEVO.3dprinter.owners/
If you can't solve your problem there, feel free to contact us via the
website http://support.tevoprinter.com/
Make sure the frame is completely square and tight at all corners using a geometric triangle or other more sophisticated square tools (not included with the printer).
Regards,
TEVO team
assembly
- Remove the parts from the box and remove all tape and gasket from them. Inspect the parts to make sure they were not damaged in transit.
- Install the portal frame (A) on the support frame (B).
• Make sure the nozzle assembly on the portal frame is forward. On the base frame, make sure the stepper is at the back.
• Use M5x25 screws (4 pcs) and lock washers (4 pcs). Raise the base frame above the table.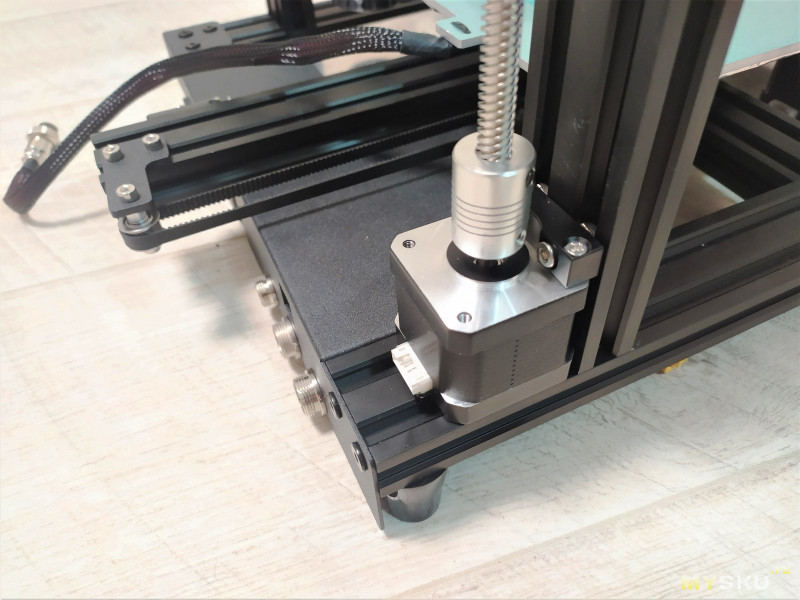 Insert the screws through the base frame into the threaded holes in the portal frame (as shown in the figure below). Tighten with an M5 hex wrench (hexagon).
3. Install the two T-shaped frame reinforcement plates. The plate with the limit switch comes from the side of the stepper motor Z.
• Loosen the T-nuts by hand and turn them until they fit into the grooves on the frames. Keep the nuts loose so that when you tighten the bolts, the nuts turn 90 degrees and grip the inside of the groove.
• Tighten all eight bolts with an M5 hex wrench (hexagon wrench).
4. Connect all electrical cables.
• Place the control box on the side of the printer with the lead screw side facing forward.
• Connect the heater cables to the control box.
Assembly support cable has four pins. The nozzle heater cable has eight pins. Rotate the connector until the pins slide into the socket easily. DO NOT JOIN them.
Once the pins are fully inserted, hand tighten the knot. url the nuts so they don't come off.
• Connect the stepper motor and limit switch cables.
Y-cables go to the stepper motor and limit switch on the back of the base frame.
Z cables go to the stepper motor and limit switch on the lead screw side of the base frame. Cables X and E (extruder) go to the portal frame. The X cables go to the stepper motor and limit switch that drives the ribbon, and the E cables go to the stepper motor that drives the extruder.
• Plug the power cord into the back of the control box and into a standard 220/110 V electrical outlet.
• Turn on the power using the switch on the back of the control box.
5. Make sure the PTFE tubing is fully inserted into the hot end, it may come loose during shipping. Push it into the hot end until it stops. Gaps between the PTFE tube and the nozzle will cause clogging.
Fine tuning
1. Adjust the worktable Y-axis tension on the base frame.
• Check the tension of the work table wheels.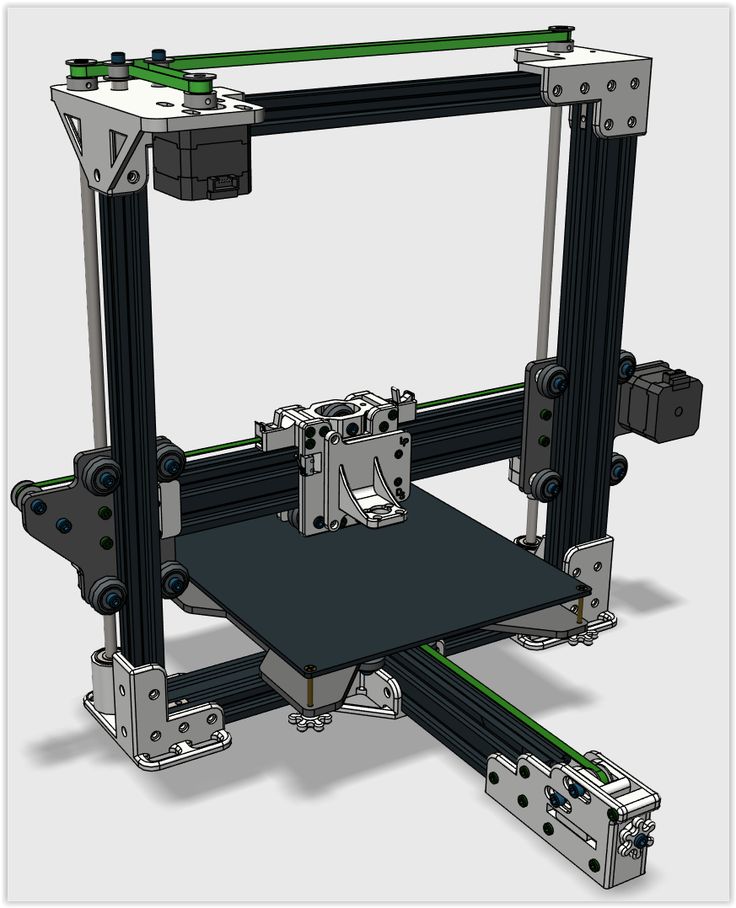 Try to turn the wheels under the work table without putting any effort on it. If the wheel turns freely or without much effort, then it is too loose.
• To tighten the wheels, turn the eccentric nut that connects to the wheel. Use an open end wrench to slightly turn the nuts until the wheels are snug against the Y-axis frame.
• The build plate assembly and belt should move back and forth without much effort, and there should be no side to side wiggle or play. .
2. Adjust the tension on the gantry wheels on the right gantry frame leg.
• Check portal platform wheel tension. Try to turn the wheels behind the plate without putting any effort on it. If the wheel turns freely or without much effort, it is too loose.
• To tighten the wheels, turn the eccentric nut that connects to the wheel. Using an open end wrench, turn the nut slightly until the wheel is snug against the Z axis.
3. Adjust the tension of the carriage wheels X in the X axis on the gantry frame.
• Check the X-carriage wheel tension. Try to turn the wheels under the work table without putting any effort on it. If the wheel turns freely or without much effort, then it is too loose.
• To tighten the wheels, turn the eccentric nut that connects to the wheel. Use an open end wrench to slightly turn the nuts until the wheels are snug against the X-axle frame.
• The hot end assembly and belt should move left and right without much effort, and there should be no wobble or play in front and back.
4. Check the tension on the belt that drives the Y-axis (under the work table). The belt must be tight, without sagging or warping.
• If the belt is loose:
• Loosen the four bolts at the front of the base frame holding the belt pulley.
• Pull the pulley to tension the belt. While holding the belt taut, tighten the four bolts.
5. Check the tension on the belt that drives the X-carriage. The belt must be tight, without sagging or warping.
- If the belt is loose:
- Loosen the two bolts on the right side of the gantry holding the belt pulley.
- Pull the pulley to tension the belt. While holding the belt taut, tighten the two bolts.
6. Adjust the tension of the Titan extruder with the screw shown in the figure below if the filament does not come out smoothly during printing.
Aligning the build plate
To build good parts, the build plate must be level and the nozzle should be approximately 0.1 mm from the build plate at all points. This is approximately the thickness of one sheet of A4 paper. You want to adjust the height of the build plate so that you can barely push the paper between the nozzle and the build plate with little resistance.
- Select Prepare -> Preheat PLA . This will heat up the bed and nozzle to actual printing conditions, making the alignment more accurate.
- Select Prepare -> Car Home .
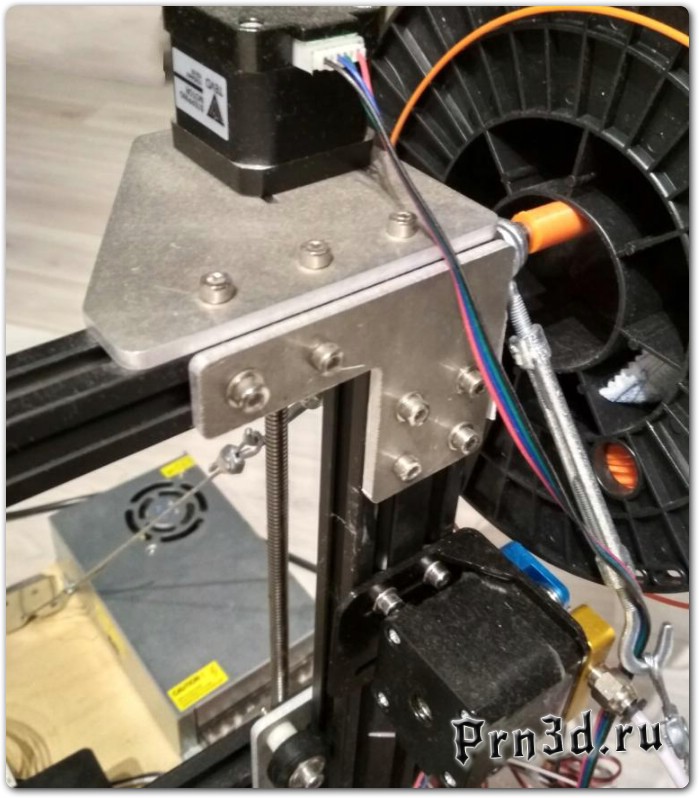 This will move the nozzle to its home position at the front left corner of the build plate.
 - Select Prepare -> Disable Steppers . This will allow you to manually move the X-caret and desktop.
- Tips: The Z-axis stepper motor is also disabled and you don't want it to move at all. Therefore, handle the printer carefully during alignment. Keep it level and carefully move the X-carriage.
- Wait until the temperature of the print platform and nozzle reaches the set temperature. On the information screen, this information is displayed below the head and bed icons.
- Insert a sheet of paper between the nozzle and the worktable.
- Screw each of the four thumbscrews under the bed until the sheet of paper slides, with little effort, in all places on the build plate.
- You may need to fine tune the bed level when you start printing. The first print layer will show if the distance between the nozzle and the build plate is correct.
 You want it to be slightly pressed into the surface of the build to maximize surface area contact while still maintaining good extrusion flow.
• You can try to carefully adjust the thumb screws during the first layer of printing when the plate is moving until the distance between the nozzle and the build plate forms smooth embossed lines.
• After fine-tuning the platform level during the first layer, you can stop printing, clean the build plate, and restart printing.
Preparing the slicing software
This printer works with most of the slicing/printing software like Simplify3D, Cura, Repetier-Host, etc. But we will focus on the Repetier-Host software and tell you how to set it up so you can make your first print. To get started, we recommend downloading the program from the official website. website: https://www.repetier.com
Once the installation is complete and the software is running, you should see the following screen:
Now we need to set up our printer in the settings so that the Repetier-Host can connect to it and know what build area size our printer is using. Open the printer settings window (click "Configuration" -> "Printer Settings").
First set port to whatever port your motherboard uses (when you connected your printer to the PC, it should appear here). Installed Baud rate to 250000 and DO NOT touch the other settings on this tab (see illustration on next page).
Click on the Printer Form tab and change the following values:
X Max - 320
Y Max - 320
Print Area Width - 300
Print Area Depth - 300
Print Area Height - 400
Go to Printer tab, change the value according to the image on the left.
Go to Slicer tab, select slic3r as slicer and click config.
In the Slic3r window, go to File -> Load Configuration. (The downloaded settings are for general printing using PLA filament.)
Select and load Tornado.ini from SD card.
Rename print settings, filament, printer to Tornado and save.
How to cut a 3D object for SD printing
Click Download, navigate to the location of file, then select Open.
Once file is open in 3D view, click the Slicer tab to go to the slicer page.
Select the correct print settings, printer settings, and extruder type, then click Slice with Slic3r.
After slicing, click "Save for SD Print" to save the G-code. file to the SD card with file a name of your choice. You can then insert the card into the printer and select Print from SD to start printing.
How to flash the firmware
To install the firmware on your printer, you need to download the following:
- Arduino IDE (http://www.arduino.cc) e.g. on our Facebook page). File in our customer service section or directly from Marlin and Repetier.)
In this chapter, we are going to use Marlin for the demonstration.
Configuration
The firmwares downloaded from our Facebook page or our customer service are preconfigured and you can use them without any modifications.
For configuration you need to edit two files: configuration.h and configuration_adv.h . You can visit their website for an explanation of the configuration file format and a summary of most of the options in these files.
Verify / Compile
Follow these steps to start the process:
- Double click Marlin.ino file to open it in Arduino IDE.
- Select Arduino / Genuino Mega or Mega 2560 from Tools -> Boards menu.
- Select the serial (USB) port your card is connected to. Tools -> Serial menu .
- Click the Verify / Compile button at the top of the window to ensure there are no configuration errors. (Or you can click on Download next to the Check/Compile button if you use Marlin on our Facebook page or our support team).
- Once all errors are fixed, continue downloading by clicking Download button.
 During this process, the blue or green LED on the board will flash rapidly.
Flash your board
To flash your board, follow these steps:
- Make sure Marlin.ino is open in the Arduino IDE.
- Select Arduino / Genuino Mega or Mega 2560 from Tools -> Boards menu.
- Select the serial (USB) port your card is connected to. Tools -> Serial port menu.
- Click the Download button to start flashing the controller board. During this process, the blue or green LED on the board will flash rapidly.
That's it! Now you have installed the firmware on your board, enjoy printing!
TEVO After Sales Service
Dear Customer,
Thank you for purchasing a TEVO 3D printer. We strive to produce low cost, high quality 3D printers and hope you enjoy them as much as we do!
If you have any problems / questions regarding the contents of the kit, please fill out a Service Ticket on our support page. http://support.tevoprinter.com
Creating a service ticket will be your official TEVO support request. Our support team will contact you within 48 hours .
SERVICE INFORMATION:
1. SPARE PARTS
1.1. TEVO products are covered by a parts replacement program for a period of 12 months from the date of purchase.
1.2. Missing / damaged / defective parts
1.2.1. Within 7 days from the date of delivery, TEVO will replace any parts, including shipping costs, free of charge.
1.2.2. After 7 days from the delivery date, TEVO will replace any parts free of charge, BUT the customer is responsible for shipping charges.
1.3. Parts damaged by the customer
1.3.1. The customer pays for parts cost and shipping cost.
2. LOSS OF MEDIA, DAMAGE, DAMAGE AND FAULTY PARTS
2.1. Claims for lost or damaged shipments must be reported to the carrier within the carrier's claim period and the customer must report to TEVO within 7 days of the delivery date.
2.1.1. If any parts are lost or damaged during shipping, the customer must take photographs or videos and provide them when completing the service request. If the claim number was issued by the carrier, please provide the claim number when creating the service ticket. (Report a problem / Lost carrier parts.)
2.1.2. After resolving the dispute with the carrier, provide TEVO with all communications from the carrier. The customer is responsible for keeping TEVO up to date on ALL communications with the carrier.
2.1.3. TEVO will work with the customer to replace the parts in the claim.
2.2. For missing parts see Section 1.2, the customer must fill out a service card ( Report a Problem / Missing Parts .)
2.3. See section 1.2 for damaged parts of the equipment. The customer must take photographs or videos and provide them when filling out the service request ( Report a problem / damaged parts of the equipment .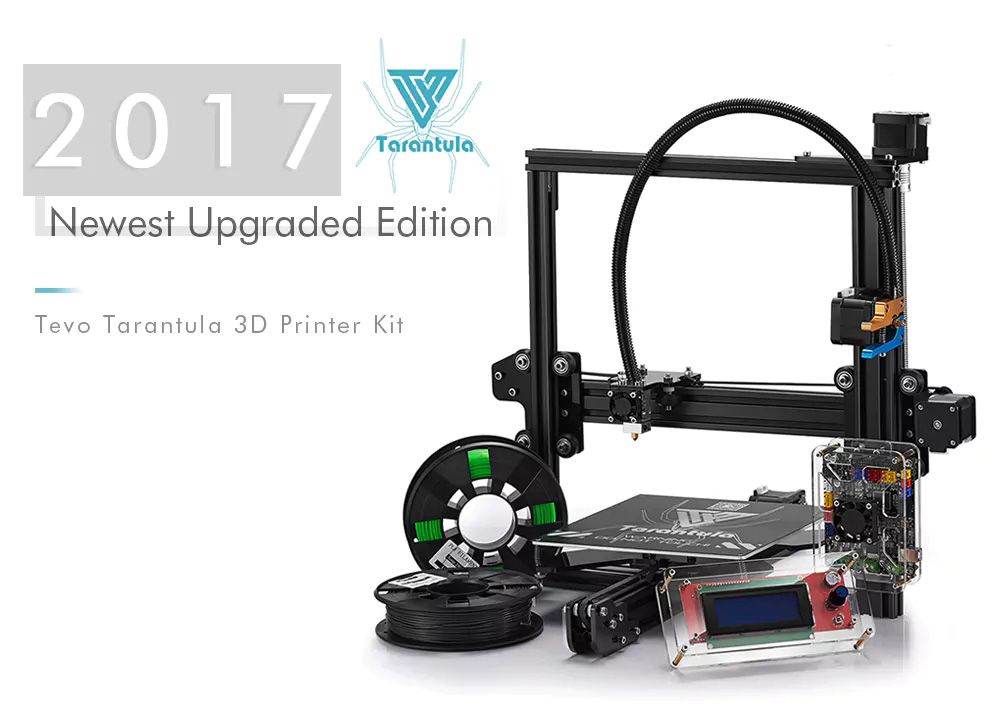 )
)
2.4. For faulty electronic components, see section 1.2. The customer must take photographs or videos and provide them when filling out the service request ( Report a problem / defective electronic components .)
2.4.1. If the part is an LCD panel, power supply or motherboard, the customer must send the part back to TEVO and TEVO will send a new part.
2.5. For customer damaged parts, see Section 1.3, send a service ticket ( Report a problem / Customer damaged parts .)
3. GENERAL SUPPORT
For information and support on building and operating your 3D printer TEVO Tornado visit the TEVO Tornado Owners Group. https://www.facebook.com/groups/TEVO.Tornado.Owners/
report this ad
Documents / Resources
Recommendations
- - Software Repetier
- Owners of TEVO Tarantula PRO and Regular Prusa i3
- Arduino - Main
- support.
 tevoprinter.com/
 - Owner group TEVO Tornado
- support.tevoprinter.com
tevo tarantula 3D printer • Web cheat sheet for internet entrepreneurs!
Follow the author
Follow the author if you like his publications. Then you will be notified of his new posts.
You can always unsubscribe from notifications in the author's profile.
I’ll note right away that with this review I don’t want to push anyone to buy this 3D printer, on the contrary, its disadvantages will be discussed here more than its advantages. Today, instead of it, there are more worthy options.
Today 3D printing is quite a fast-growing modern direction. And I wanted to say so, to try, feel, evaluate what a miracle of technology is - a 3D printer.
I didn’t have the task of printing to order, but, without a doubt, it was clear that for an electronics engineer, home-made and techie, a 3D printer is like an indispensable tool in the implementation of any of their ideas, an assistant in the household, and just a device for interesting hobby. Therefore, I considered budget options in aliexpress, from pryushka-like ones, such as anets, but chose another one, relying on customer reviews.
And was ordered to, such a beast, Tevo Tarantula.
At the time of selection, there was just a sale on Ali. And taking into account the use of fat coupons and the seller’s discount, it cost me only 9700 rubles, somewhere around $ 150 (at that time), it’s not bad at all, given the cost without a discount of more than 13 thousand.
The printer was sold with delivery from Russia, and it was lucky that it was just in stock in the Russian warehouse, usually they are usually not available, so the seller offers to ship from China, but of course more expensive. Sent from somewhere in the Russian warehouses in the east, delivery took 3 weeks.
To be honest, when choosing, I didn’t understand either the kinematics of 3D printers or the reliability of the implemented mechanics in a particular model, in general, I was a layman in this matter)) but now, a year later, I have something to say about it.
Printing area 200x200x200, although it will decrease to 180 along the Z axis when the wiring harness is fixed on the X carriage.
Drain nozzle diameter 0.4. The maximum print speed is 100mm s, the recommended 60. But with proper assembly and slicing settings, its cruising speed is 80mm.s.
The printer comes well packaged. All elements were tightly folded, as it were, in layers using dense spongy material; nothing dangles or breaks inside.
I won't go into assembly details. In the reviews, they complain about the instructions, although I assembled everything according to it without any problems, spending two evenings on it, it took 6 hours in total. I think that techies with hands from where they need to should have no problems at all, but an ordinary user can have big problems , it's still that puzzle.
The frame of the printer consists of sections of an anodized structural profile in-slot, with a section of 20 × 20 and 20 × 40, which are fastened with internal steel, applied aluminum and applied acrylic corners, as if forming a perimeter for the X and Z axes. And for the Y axis, between two cuts of the 2040 profile, forming the lower cross-beam, the profile for the Y-axis is attached longitudinally. And it is at this attachment point that I want to highlight the first problem of this printer.
Firstly, during assembly, a slight distortion of the lower two halves relative to the X-axis plane is formed, this is either due to a slightly curved profile cutting, or due to the peculiarity of fastening with internal corners.
This problem can be solved by first printing out a set of brackets and fixing the printer to a furniture panel of suitable dimensions.
I initially saved on the filament and fixed it on the galvanized furniture corners, slightly trimming them. Later I redid it, already on printed brackets. If the frame is not fixed at all, well, let's say if it were even, because of its ease, the printer when printing the filling, the walls can generally crawl away from vibrations)) so there is no way without a 'board'.
Still, there are problems with the frame even after fastening to a rigid base due to such an economical implementation of the drygost. Namely, the Z axis bends at an angle relative to the Y axis, this is hardly noticeable if you apply force to the upper crossbar of the frame, you can see a displacement of only 2-3 mm. Jambs because of this appear when printing tall objects.
I plan to remake the lower part of the frame as in Tevo Tornado. There will be a 2040 profile frame in the lower part, to which the upper part will be attached with connecting plates and corners. Maybe the electrician can be hidden under the table.
Kinematics and mechanics
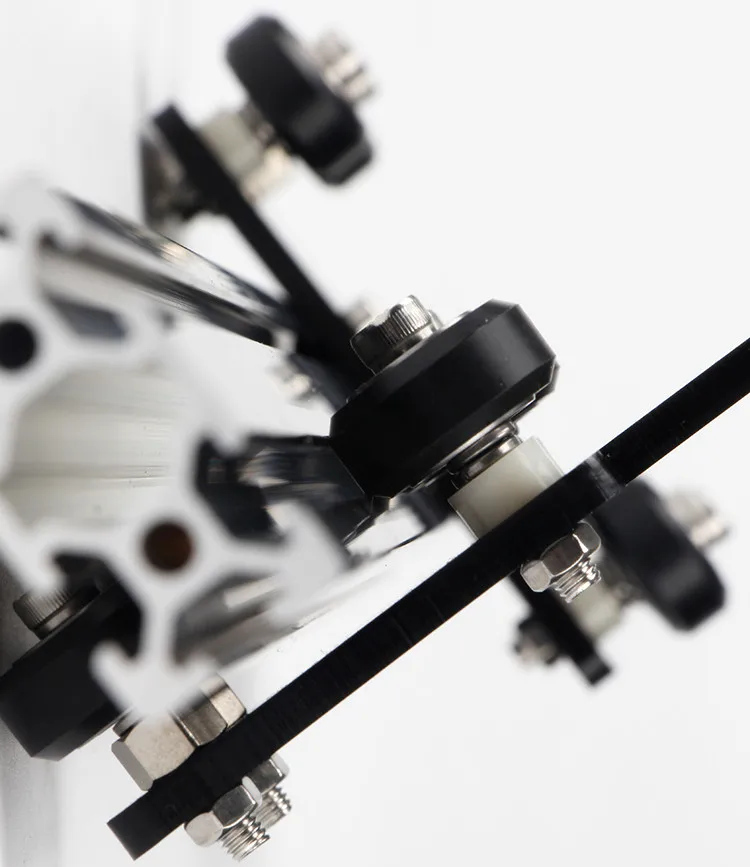
The kinematics from pryusha is applied in the tarantula, the classic drygost is used, the Bowden extruder is used. The movements of all axes are realized on rollers, consisting of bearings and holders dressed on them made of wear-resistant POM plastic. There are 4 rollers on each carriage, two of which have eccentric nuts for adjusting the gripping force on both sides of the profile.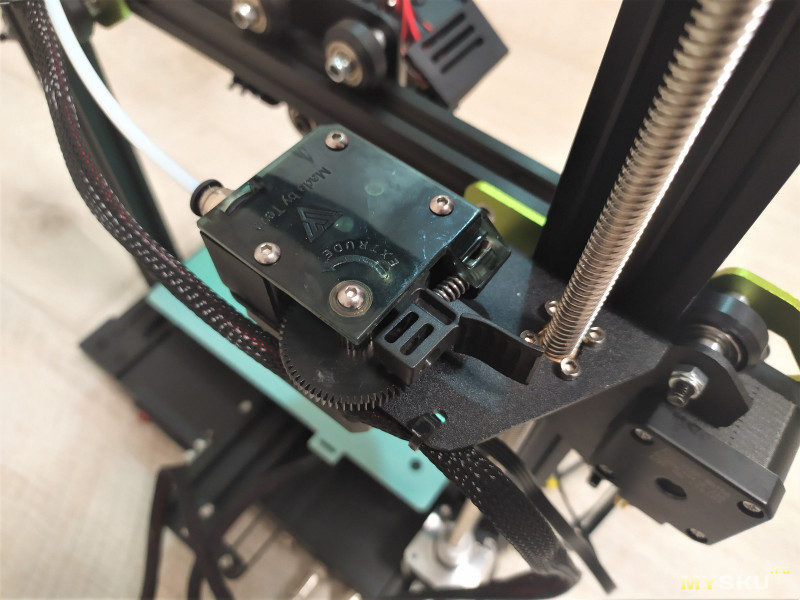 This is the most practical and simple mechanics of cheap solutions, certainly better than studs. I will not ascribe rails in comparison, since they are already used in a different price segment of 3D printers, although it can be noted that they are noisy. The rollers are very cheap and easy to change, they are quiet and can be adjusted. But they also have downsides. Such mechanics take up more space. At the expense of the difference in weight - I did not compare, I assume that it is heavier than the studs, but the rail is lighter. They can not be overtightened, they will wear out quickly. However, any mechanic wears out.
In the tarantula all carriages are made of acrylic and this is his second problem.
First. The fact is that, because of acrylic, you can get there already during assembly, since this material is too caustic, it cannot be overtightened, it can crack, fortunately I was lucky with this.
Second. Acrylic plays already with little effort, if in more detail, it is expressed as follows:
Well, if I didn’t notice a special jamb on the X axis, although there is not a big skew with the force on the X carriage, this is played by the acrylic plates of the carriages on the Z axis and X (carriage X - bends especially noticeably if you apply force to the hot end) and this is nothing at all compared to two other problems, namely:
The Z-axis motor is mounted on an acrylic bracket to the upper transverse profile and it does not walk vertically so weakly, there is no rigid fixation to the frame!
Thirdly, it's a joint of tarantula joints, this is the Y carriage. The implementation of the acrylic table attachment is nothing at all. Due to the large area of the carriage, the table, sorry for the expression, dangles like something in an ice hole. I also read in the reviews that, due to the heating of the carriage, the table takes away .. At least they would have made a stamped steel carriage here, maybe ... of this, shoals appear as a print.
But here it begs, dude, what did you want for this money?
To solve all the problems associated with acrylic parts, I ordered a set of carriages made of aluminum, in the future we'll see how their replacement will affect the quality and speed of printing.
Okay, let's move on..
The X and Y axes are driven by a 6mm wide GT2 belt. It should be noted that here the Chinese saved on pulleys, they are plastic, but with bearings, they don’t seem to hit, okay. Thanks, at least on the engines, the drive pulleys are aluminum. There are no belt tensioners.
The Z axis is driven by a T8 screw with a 2mm stroke, i.e. one revolution of the Z screw moves 2mm. For this, Tevo is definitely a plus, there are printers with 8mm screws, and this affects the print quality, not much - but it does. The declared accuracy of movement along the axes, XY-12 microns Z-40 microns. I plan to hang the Z axis on two shafts and try to switch from a Bowden extruder to direct.
All electrics are powered by a power supply unit with active cooling at 12V, 300W, well, yes, why, a 12-volt PSU is more budgetary)) It has automatic cooler speed control, it is very noisy during operation, but I didn’t observe any special problems with its operation, well, except that I printed it out and installed such a noise reduction:
and filled the cooler with grease, but this must be done on all Chinese fans.
Everything is controlled by the MKS Gen L V0.1 board with A4988 plug-in drivers. On the Internet, I found complaints about this board, there were cases of burning the mosfet on the table, and for some it sins with an unstable reading of the temperature from the hotend thermocouple. I checked the temperature - it is read stably, probably lucky:
and the table was powered through a module on a powerful mosfet with a radiator and the MKS stopped heating up!
I flashed MKS-ku on Merlin almost immediately after assembly, maybe there were temperature problems on native firmware, but I didn’t notice it. The transition to Merlin is due to the lack of the necessary functionality on the native firmware, but this is a separate issue ... someone they wedge.
Hot end MK8 with square heatsink installed. Works without problems. Once cleaned from the cork, when the tube was not fully stuck during assembly. The kit does not provide a fan for cooling the extrusion, so the first thing I printed out was this:
There are a lot of options on thingiverse, but anything with 40x40 coolers is ineffective, and airflow should be from at least two points. The board has a connector for automatic control of the cooling fan.
Heated table here 130W, Teflon coated. Rather, it’s probably some kind of not Teflon, but plastic, which can withstand 150 degrees. At the first touch of the nozzle, pits appear, so I tore off this coating and cleaned it of glue, and then the glass ... clothespins ... classic))
These are even two different housings, for MKS and display, and they can be fixed together. I transferred the boards to it and somehow it still became more fun. I really liked the implementation of cooling in it, these are two 40x40 coolers that cool the MKS with a through flow from both sides.
For laying the bundles, I used a special mounting spiral tape with a diameter of 10 mm. Well, I love order, there's nothing to be done.
You can find the tape in electrical stores or order it in aliexpress.
The corrugation from the kit also came in handy, although it is already very rigid, the main thing is to fix it well on the X carriage, the tourniquet bends more in this place. It is also better to remove the X-axis motor wire into a spiral and also secure it well with ties, otherwise it will bend and break at the motor connector.
With the alteration of the lower part of the frame, it is planned to remove all the electrics under the table, let's see what happens.
What can we say about the printer in general. The low cost of any equipment is always due to certain problems. In the case of Tevo Tarantula, I see three problems, these are: the use of cheap material, acrylic, in the production of parts, saving on profiles - and this, the frame has been simplified so much that it is problematic to use it without fixing the printer to a hard surface. Well, the third problem is the assembly of the printer, which few people may find pleasant.
But along with this, it is clear that the Tevo company adds nice changes to the package.
Over time, the tarantula began to be equipped with an anodized profile. To strengthen the frame, added internal overhead corners. The control board is usually the latest version at the time of sale. The power supply was previously 250W, now it is equipped with a 300-watt one.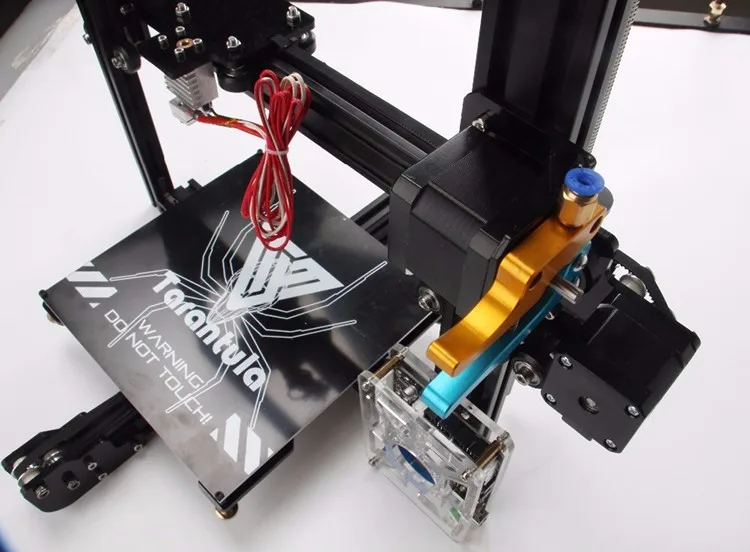 The heated table became not with a soldered cable, but with a connector.
Who knows, maybe over time there will be changes in the design, or at least the Y carriage will be changed. In general, like any budget 3D printer, the tarantula needs some work, which will have to be done.
I hope this review will help you, both in choosing an inexpensive budget printer, and in solving any problems with it, if you own it. I think that for my not a lot of money, the Tevo Tarantula is not a bad printer and is in stock, at low speed it is quite capable of printing details with a four-star quality.
- Technology: FDM
- Type: Material Extrusion
- Year: 2019
- Assembly: DIY kit
- Mechanical arrangement: Cartesian-XZ head
- Manufacturer: Tevo 3D
- Assembly volume: 235 x 235 x 250 mm (9.
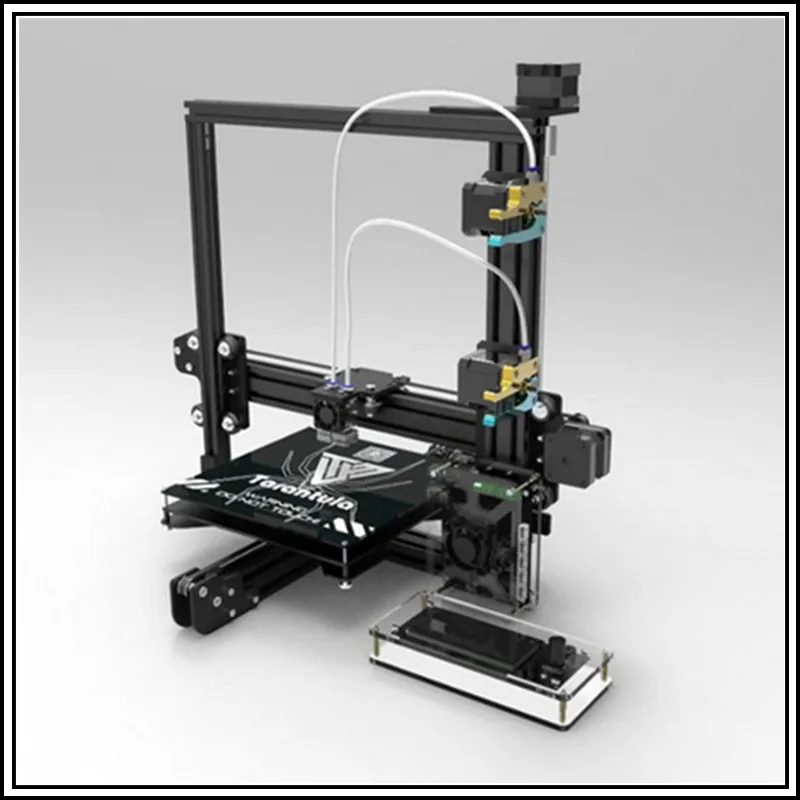 25 x 9.25 x 9.84 inches)
 - Layer height: 50-350 microns
- Feeding system: Bowden drive
- Extruder type: single
- Nozzle size: 0.4 mm
- Max. extruder temperature: 240 ° C
- Max. heated bed temperature: 70 ° C
- Frame: Aluminum
- Print chamber: Open, not closed
- Platform Leveling: Manual
- Display: LCD screen
- Connection: SD, USB cable
- Built-in monitoring camera: No
- Filament diameter: 1.75 mm.
- Third party threads: yes
- Materials: PLA, ABS, flexible PLA, wood, PVA, HIPS
- External dimensions: 434 x 333 x 504 mm (17.09 x 13.11 x 19.84 inches)
- Weight: 6.3 kg (13.9 lb)
Tevo Tarantula Pro from Tevo is an updated version of the previous model, which adopted all the best from its predecessor, eliminating the shortcomings. Tevo has a whole line of printers from desktop to high volume professional. This Chinese manufacturer has been on the printer market for many years, having managed to interest many consumers.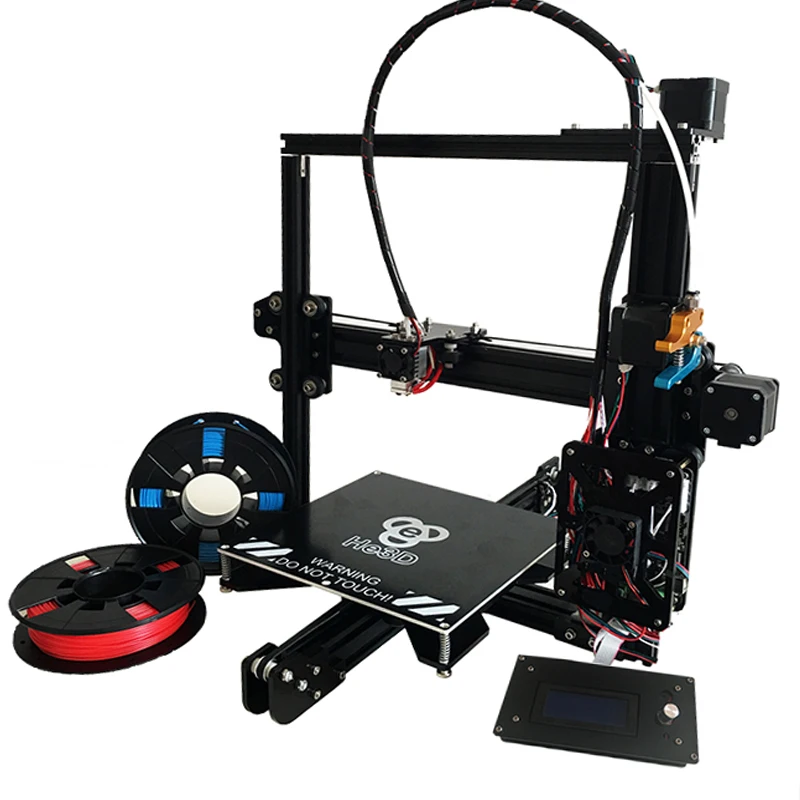 Specifically, the Tarantula Pro model has phenomenal characteristics and a price of only $199, which is very low for this level of device.
The platform is really good: it has an impressive size of 235 x 235 x 250 mm and can heat up to a temperature of 70 degrees Celsius in just 4 minutes. Thus, it is possible to print almost any object.
24V machine, main control electronics taken from the Tarantula Flash, a proven and stable 3D printer. Due to the low cost, the machine does not have automatic leveling of the platform for the manufactured product. However, if you align the plane once and fix it well, this ceases to be a problem.
The printer can work with various software, the main thing is to comply with the requirements of the operating system: Windows, Mac OSX, Linux.
Main specifications:
- Weight - 6.3 kg.
- Dimensions - 434 x 333 x 503 mm.
- Knows how to use threads from different manufacturers.
- Can be used with a variety of materials.

- Has the ability to work with SD or USB drives.
- Equipped with a built-in :R screen.
- Frame material - aluminum.
- Nozzle size - 0.4 mm.
- Feeding system - Bowden drive.
- Layer height 50-350 microns.
It's no secret that stable 3D printing requires a lovingly configured rigid frame 3D printer. Tevo Tarantula has "children's" sores, which are very desirable to eliminate during assembly. Namely, to increase the rigidity of its aluminum frame.
Initially Tevo Tarantula comes with a frame made of plastic (acrylic) connectors, which are replaced with metal parts when finalized: laser-cut corners, brackets, holders and carriages.
The list of improvements is not very large, but it is desirable to complete it completely.
This is the replacement of the acrylic table holder (sore spot), the replacement of motor and roller brackets, the replacement of carriages, and the installation of a second motor on the Z axis.
Standard and retrofit kits available.
This kit is made from durable aluminum to replace the original acrylic bottom brackets and connectors. Aluminum parts ensure the rigidity of the frame connection and the strength of the structure as a whole. As a result, the printer will not require frequent calibration and will delight owners with stable and accurate printing for a long time. The modernized kit differs from the standard one by the presence of X and Y belt tensioners, as well as the ability to install all axles both on rollers and on rails.
Good luck - if the kit is purchased before you start assembling the printer.
If the printer is already assembled, then to replace the plastic carriages, you will need to sort out the corresponding components according to the instructions. It won't take much time, but the result will be simply stunning.
This carriage replaced the plastic table holder, which was broken several times in my version. Acrylic is not the best choice for a 3D printer, I recommend replacing all such “weak” points with aluminum parts.
All parts are made of aluminum alloy AMG3 with corrosion protection (thickness - 4 mm) by laser cutting.
Kit before assembly.
The photo shows the roller holder with tensioner from the upgraded kit. Provides accurate adjustment of the GT2-6 belt tension, which was sorely lacking in the original version.
In addition, all acrylic corners on the frame are replaced with aluminum ones from the kit.
Aluminum motor holders
An aluminum T8 nut holder is installed along the Z axis (similarly, a weak point in the printer).
The choice of a kit with one or two extruders is worth paying attention to. This is a good opportunity to add a second extruder to your printer.
Photo shows carriage X with one extruder.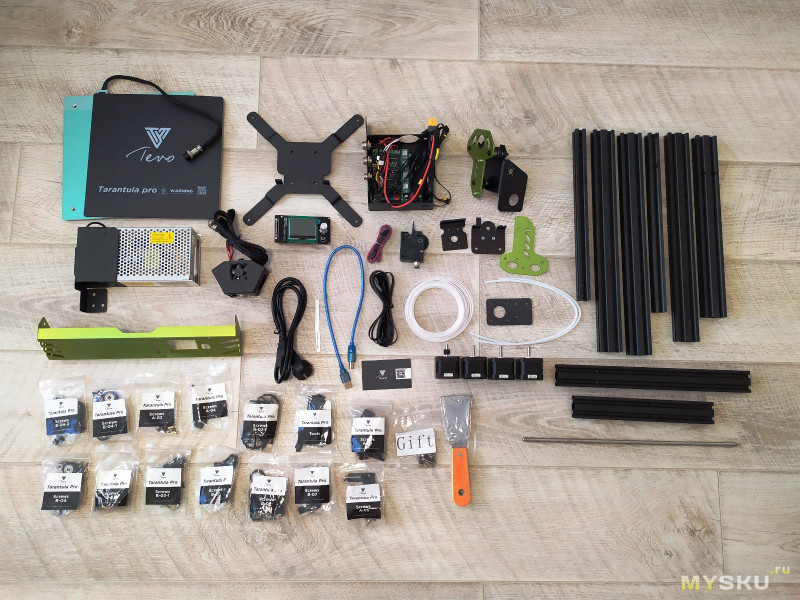


.jpg)
