Monoprice 3d printer settings
Getting the most out of Monoprice Cadet 3D Printer
I entered the world of 3D Printing recently with the small but surprisingly capable and affordable Monoprice Cadet 3D Printer. It has won recognition as the best budget 3D printer of 2020. In this post, I share tricks I learned over the past few weeks to make the most out of this printer.
Though the printer is fairly small with a print bed of only 10 cubic centimeters, I was able to design and print quite a few useful things around the house using TinkerCAD
Organizing Remote Controls
Sheet Music Holder
Monoprice Cadet has child-friendly features that make it a good choice for home use like auto-bed leveling, a removable magnetic bed to make it easy to remove printed parts and a finger guard to reduce the risk of curious little fingers touching the hot nozzle. It also has (slightly buggy) WiFi and USB connecitivty. While there are a number of un-boxing blogs and videos, in this post, I will focus on sharing a few less obvious tips.
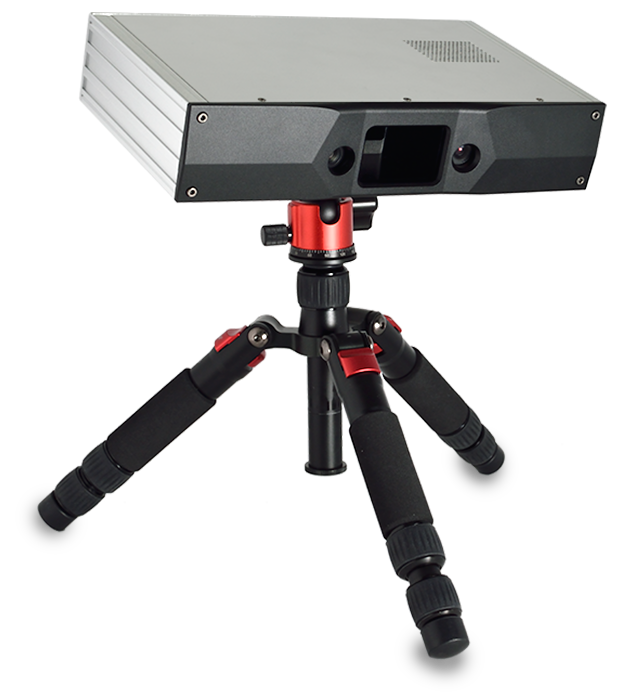
Buy a filament spool holder
The filament holder attached to the printer is woefully inadequete and small - probably to save package size & shipping cost. The amount of filament that comes out of the box with the printer is also barely adequete. Buy a filament spool holder like the one in the pic at the top to get a much better experience - it costs only 10-20 dollars (2020 prices).
Filament doesn’t feed into the tube
I got a scare the first time I tried to print as the filament simply did not feed into the printer & got stuck in the filament feeder. I found out that the tolerences in my printer’s feeder were such that the filament would get stuck inside the feeder’s components and not even enter the tube when I insert filament. A periodic clicking noise from the feeder is a sure sign the feeder is jammed in some way. Here’s how you can fix this issue.
- Press the black latch above the filament feeder to release it
- Remove the white filament tube while keeping the latch pressed
- Unscrew the stainless-steel feeder nut (you might need a spanner)
- Pressing the filament latch at the bottom, push filament through
- Re-insert the feeder nut threading filament through
- Re-screw the feeder nut to the feeder
- Re-insert the tube threading the filament into it
- Press the black latch & insert the tube back into the nut
WiFi connection issues
The recommended way to connect the printer to a WiFi network is to use the PoloPrint app from your smartphone. However, I had a number of issues getting this to work.
I eventually found out by researching the WiFi networks in the house and port scanning that if the Cadet printer is unable to connect to WiFi, it stands up an open WiFi network of its own with something like ESP32 or Espressif in its name . This refers to the famous ESP32 MCU that seems to be the brains of the printer. Here’s how I was able to set the WiFi credentials using this. Unfortunately, I didn’t take screenshots.
- Connect to the WiFi network put out by the printer
- Find out the printer’s IP address. On Linux you can do
arp. On windows, you probably need to run a port scanner like nmap to discover whats on your net - Connect to port 88 from your browser. Eg. if your printer is 192.168.0.1, then type
http://192.168.0.1:88in your browser - You will see a small web-app that will show you detected WiFi networks & allow you to connect to your preferred network setting credentials.

Upgrading to latest OEM Firmware & Software
WARNING: THIS MAY VOID YOUR WARRANTY AND MAY BRICK YOUR PRINTER. TRY THIS AT YOUR OWN RISK ONLY IF YOU UNDERSTAND WHAT YOU ARE DOING AND ARE WILLING TO RISK THE CONSEQUENCES. I DISCLAIM RESPONSIBILITY FOR ANY ISSUES AND I WILL NOT HELP DEBUG.
If you look at the generated GCode file produced by WiiBuilder software provided by Monoprice, you’ll find that the Monoprice Cadet printer seems to be essentially a re-branded version of a 3D printer called TINA 2 by a Chinese 3D printer manufacturer called WEEDO.
It turns out that the manufacturer has released newer versions of firmware, drivers and software on its website that are less buggy & have more functionality built-in than the versions offered by Monoprice.
Weedo also has a very comprehensive wiki with has detailed instructions including for maintainance and firmware update.
I followed the method 2 documented in the firmware update page to upgrade my printer’s firmware version to 2.. Everything went well and the new firmware seems to have much more stable WiFi support and additional support for OctoPrint. The logos changed from Monoprice to Weedo OEM branding. 11
11
I also found that the latest version of WiiBuilder software (2.0.8.0) from the OEM far less buggy than the one provided by Monoprice when loading GCode files & uploading to the printer through WiFi. Since upgrading firmware & software, I have had no issues printing using a WiFi connection.
Using the latest version of Cura
WARNING: THIS IS UNSUPPORTED AND MAY DAMAGE YOUR PRINTER NOZZLE IF IT DOESN’T WORK PROPERLY. TRY THIS AT YOUR OWN RISK ONLY IF YOU UNDERSTAND WHAT YOU ARE DOING AND ARE WILLING TO RISK THE CONSEQUENCES. I DISCLAIM RESPONSIBILITY FOR ANY ISSUES AND I WILL NOT HELP DEBUG.
Cura is a much more powerful, flexile and widely used open source slicing software than WiiBuilder and supports multiple operating systems. It has a multitude of options to customize and fine tune your prints. For instance I routinely print with thicker walls and more in-fill than default as I find it better to spend a little extra time and material than have a toy I’ve printed for my daughter break.
Both Monoprice and WEEDO provide versions of Cura that supports Monoprice Cadet but the supported Cura version is quite old. Incidentally, if you look through the GCode file listing above, you’ll note that even WiiBuilder seems to use the Cura engine underneath to generate the GCode.
To use the latest version of Cura, you’ll have to setup the printer manually in the software. After looking through the generated GCode files from both the officially provided WiiBuilder and Cura software and understanding the generated the Marlin GCODE, I came up with the following configuration that seems to work with the latest version of Cura (4.7).
Here’s how you go about adding Cadet as a custom printer. Type in the settings from the screenshots below into the machine settings dialog screens in Cura making sure you fill in both the Printer and Extruder settings correctly.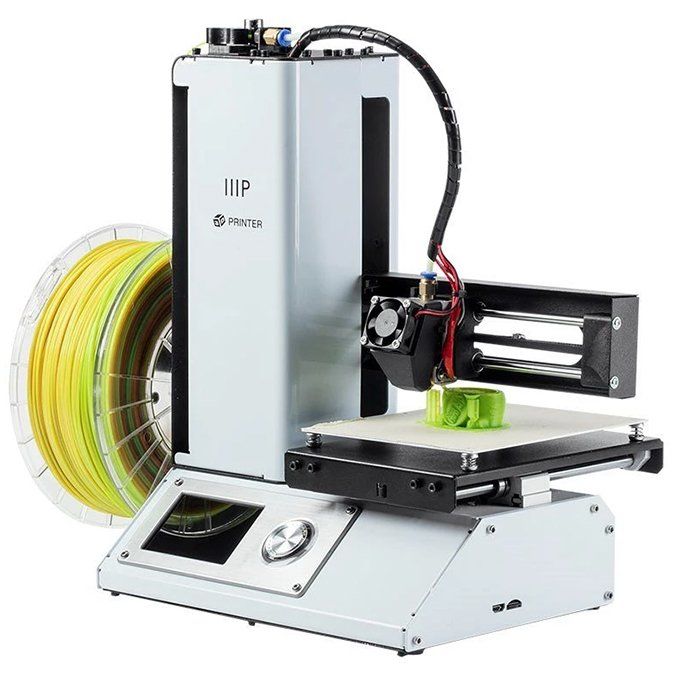 I have provided listings for the Start GCode and End GCode that I am using below.
Add Printer screen
Add a Custom Printer
Printer Settings
Extruder Settings
Start GCode listing
;(**** start.gcode for Cadet****) G28 Z G28 X Y; Home extruder G1 X55 Y55 F1000 G1 Z10 F200 G29 G1 Z15 F100 M107 ; Turn off fan G90 ; Absolute positioning M82 ; Extruder in absolute mode G92 E0 ; Reset extruder position G1 X90 Y6 Z0.27 F2000 G1 X20 Y6 Z0.27 E15 F1000 G92 E0 ; Reset extruder position M203 Z5
End Gcode listing
;(**** end.gcode for Cadet****) M104 S0 M107 G92 E0 ;(Reset after prime) G0 E-1 F300 G1 Z105 F300 G28 X0 Y0 G1 Y90 F1000 M203 Z30 M82 ;absolute extrusion mode M104 S0 ;End of Gcode
Happy 3D printing!
Srinath E-mail Curiosity driven innovator in data science & evidence based marketing.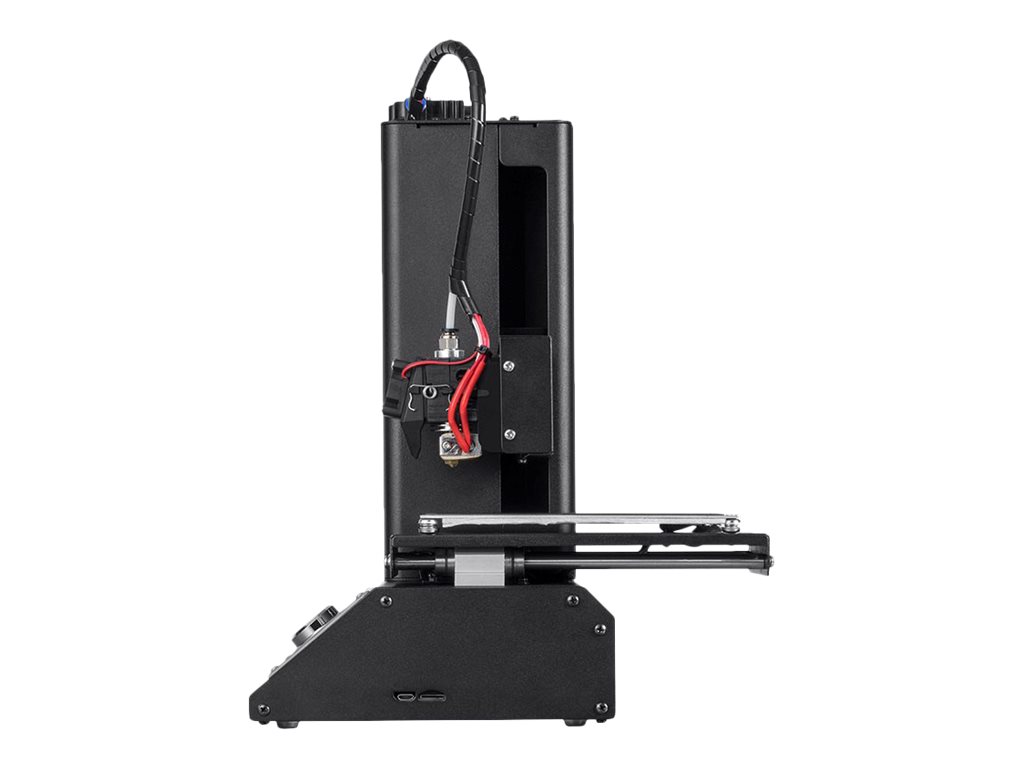 Programmer for over 25 years. Multi-instrumentalist.
Monoprice Maker Select & Select Plus - Designing Prints & Slicing With Cura
Now that you've got your printer up and running, it's time to actually print stuff! No doubt you've already gotten tired of printing the four basic files included with the printer, so let's learn more about designing your own objects and getting them ready for printing. This guide should be generally applicable to any printer, but when I talk about specific settings I'll be calling out my printer in particular. While my printer is a Monoprice Maker Select Plus, all of these settings also apply to the Wanhao Duplicator i3 Plus, and most will apply to the Monoprice Maker Select (Wanhao Duplicator i3).
There are two phases to printing your own stuff - one is designing a 3D object and making a STL file, and the other is translating that STL file into gcode with a slicer.
Thanks for your support! Links to third party websites in this article may contain affiliate IDs. If you purchase something from these links, the blog might get a small percentage as revenue. We use that money to offset the cost of creating and hosting our content. If you'd prefer not to participate in this program, don't click these links.
I don't want to go into a lot of detail around the first aspect - the 3D modeling - since that's it's own topic with a wealth of information. I do want to introduce some important bits of software and explain the high level process of how you can go from idea to a design, though.
Pro Tip In many cases, the object you're trying to make has already been modeled by someone else - there are a wealth of STL files for various models available on the internet. Before you go through the trouble of making your own model, try searching a site like Thingaverse to see if you can skip the modeling step. If you luck out, you can move straight to the "Slicing With Cura" section below.
Often what you'll want to do is start with a 2D sketch of the object you want to create, and then extrude that to a 3D model. Sometimes your 2D item is simple enough that you can use the "sketch" features of your 3D modeling program to create the whole thing from start to finish, but sometimes you're going to want to make a more complex 2D design first. When I need to start with a 2D design, I will tend to use Inkscape. It's free and open source, and pretty easy to use. Inkscape can export to a SVG file format that most 3D modeling programs are able to understand.
Once that's done, I'll load my 3D modeling software. There are a number of popular utilities out there for doing 3D modeling, including:
- Blender - an extremely powerful program, but it's very focused on 3D animation more than doing 3D modeling.
- FreeCAD - this program is better suited to sketching and then modeling parts, but it can be somewhat complex to get started.
- OpenSCAD - a good choice if you're already familiar with programming, since you build parts programmatically in a simplified design language. It may be hard to translate a complex idea into a set of simple commands, though.

- AutoDesk Fusion 360 - not open source, but it is free for hobbyists. I like this one pretty well, and I use it the most often, but there are some things that are tough to do in it. For instance, placing two objects relative to one another is needlessly painful. It also seems to bug out on me from time to time.
The end result of any modeling operation is to produce a STL format file. You'll want to make sure you also save a copy of the design in some format the modeling software understands, because if you have to make changes to your design, going from a STL file back to the model can be quite painful.
Slicing With Cura
The STL format file just represents your object as one or more solid hunks of material. Your 3D printer, though, only understands a few basic operations like "move the nozzle to this position" and "squirt out some plastic." The language the printer speaks is called "gcode." Bridging the gap between your design (in STL) and the printer's capabilities (in gcode) is a piece of software called the "slicer. "
"
The slicer's job is to look at your object and figure out how to move the printer head around and where/when to squirt plastic in order to create it. There are a few slicers available, but by far the most popular one is Cura. The Monoprice/Wanhao Maker Select printers ship with a custom version of Cura that has a bunch of settings already set, but this version of Cura is out of date and missing a lot of features. I would suggest that you use the latest version of Cura, and just customize it for your printer. Most of the settings are intuitive and well labeled, although the sheer volume of settings means that you're going to have to practice and research in order to get everything dialed in just right.
The first step to configuring Cura for your printer is to add a new printer configuration. In Cura 3.2, this can be found under Settings->Printers->Add Printer. The settings here will depend on your exact model of printer. You can get these settings from the manufacturer, or if they offer a customized version of Cura, you can steal the settings from there.
Cura Printer Settings (Monoprice Maker Select Plus)
For my Monoprice Maker Select Plus (or Wanhao Duplicator i3 Plus), the relevant Cura "Printer" settings are:
- X (Width) - 200 mm - this is the left-to-right size of the build plate.
- Y (Depth) - 200 mm - this is the back-to-front size of the build plate.
- Z (Height) - 180 mm - this is the distance between the build plate and the highest point that the Z-axis can reach. Wanhao/Monoprice advertise this as 180 mm, but I would suggest being careful if you're trying to print a very tall object. You might want to tell the printer to raise up as far as it can, and then measure the nozzle to plate distance as a double check.
- Build Plate Shape - Rectangular. Hopefully that's obvious.
- Origin at Center - No - the origin of the printer is where it will go to when you zero/home all three axes. On the Monoprice Maker Select Plus, homing the axes takes you to the front left corner of the plate.
- Heated bed - Yes - The MP Maker Select Plus has a heated bed.

- Gcode flavor - Marlin - Wanhao bases their i3/i3 Plus firmware on Marlin
- Printhead Settings - This is only really relevant if you want to print multiple objects in the same print, but you want to print all of object 1 before moving on to object 2 and so forth. When I print, I prefer to print the same layer of all objects at the same time, so this doesn't matter.
- Number of Extruders - 1. You'd know if you have more.
Monoprice Maker Select/Plus Start/End GCode
The "Start Gcode" and "End Gcode" are basically just chunks of gcode that will be copied to the top and bottom of every gcode file that Cura produces. Usually these do some maintenance operations like heating everything up, or priming the extruder (thereby making sure there is hot plastic ready for when it starts printing). I stole the gcode from the Wanhao version of Cura, although I've been playing with it since and may release some "better" gcode at some point. My gripe with the default "start gcode" is that it primes the extruder and then leaves a tangled ball of filament stuck to the extruder before it starts printing.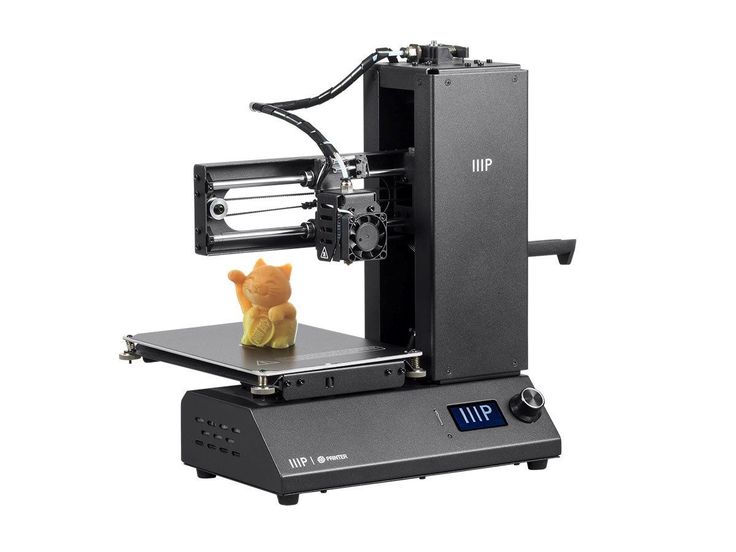 That often collides with my print at some point, or it burns or jams something up.
You can find the "default" gcode and my "custom" gcode over on GitHub.
Cura Extruder Settings (Monoprice Maker Select Plus)
Next up is the "Extruder" settings tab. For my Monoprice Maker Select Plus (Wanhao Duplicator i3 Plus), the Cura extruder settings are:
- Nozzle size - 0.4 mm - taken from my printer's documentation. If you've replaced your nozzle, you might need to change this from the Wanhao/Monoprice defaults
- Compatible material diameter - 1.75 mm
- Nozzle offset X/Y - ignored, because there's just one nozzle.
Extruder Start Gcode and End Gcode can be left blank, since there's just one extruder and we can put any start/end gcode in the "Printer" section just as well.
Cura Material/Filament Settings
Cura has a bunch of material settings built-in, but what settings you will want to use depends on your filament and the manufacturer's recommendation.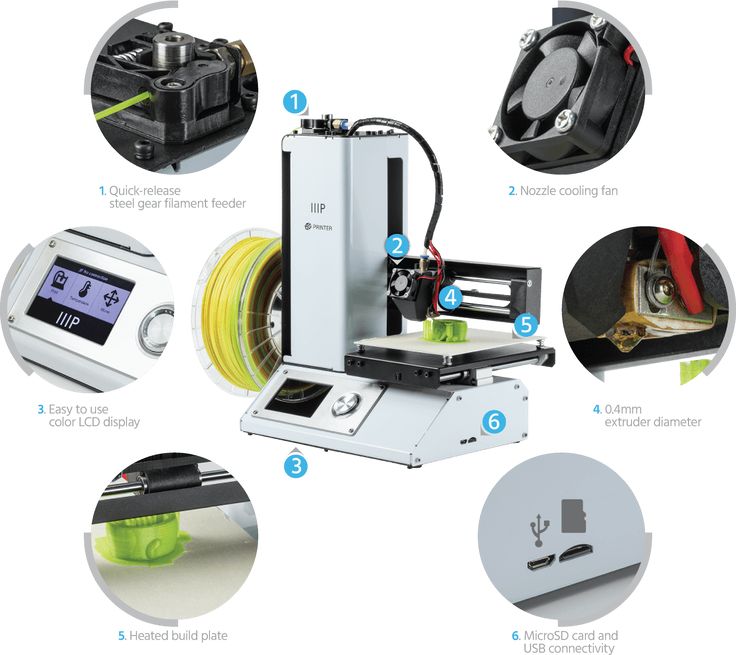 Many of the settings on the "Information" screen are optional - they're only used to determine the cost of a print. The important ones are the diameter, the printing temperature, and the build plate temperature. I print with eSun PLA+, and eSun recommends an extruder temperature of around 210 degrees C, and a bed temperature of around 60 degrees C.
Pro Tip Cura will attempt to only show materials that fit the current active printer. If you try to create a new material and it seems to immediately disappear after setting up the "Diameter" field, double check that you have the correct settings for your printer to match the filament you're trying to create.
Cura Print Setup Settings
From here on out, many of the settings are either personal preferences, or settings you might want to tweak because of an issue you're having with your prints. You can start with the "Fine" profile and tweak it to suit your needs.
Pro Tip Note that by default, Cura shows very few options.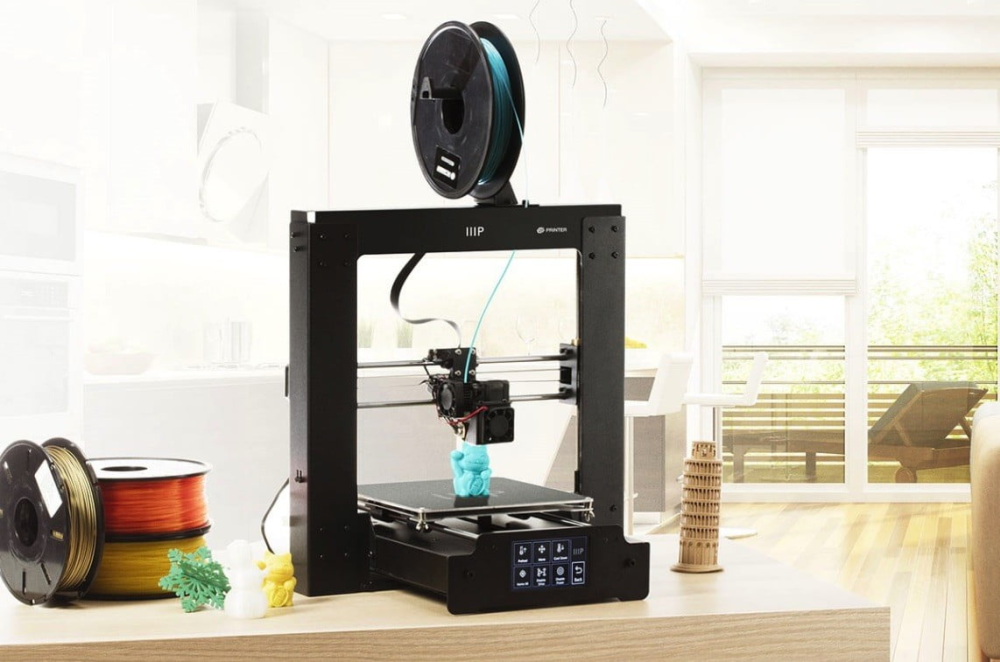 If you start typing in the "Search..." box, you can find even more settings
Some important settings you'll want to learn about early:
- Build Plate Adhesion (Raft) - If you're having trouble getting your prints to stick, you could try adding a Raft. A Raft will put a wide, thin, chunk of plastic on the build plate and then build your model on top of that. I would probably suggest not using this unless you actually are having issues with stuff not sticking, though, as it leads to the bottom of your model ending up rough and damaged looking.
- Build Plate Adhesion (Skirt) - It's hard to call a skirt "build plate adhesion," really. Skirts don't actually touch your model. They can be useful for priming the extruder, which means that your extruder will be (hopefully) flowing plastic consistently when your model starts to print.
- Generate Support - If you are printing a model that has parts which "hang" in the air, you're probably going to want to print supports. Supports give the plastic something to stick to instead of just being printed into dead air.

- Retraction - Depending on your material, you might find tweaking the retraction settings useful. I found that I often got "stringing" (little plastic bits floating off my model) until I tweaked my retraction settings.
Conclusion
Once you've practiced these techniques, you should feel comfortable creating or finding a 3D model for the item you want to print, and with the process of taking that model and generating gcode from it. Hopefully you've printed a few things by now and gotten some practice under your belt. In my next article, I'll talk about what to do to improve your print quality, including useful modifications you can make to your printer.
Next Up - Improving Print Quality
Please enable JavaScript to view the comments powered by Disqus.
90,000 manner of the 2D printer Monoprice Makere Ultimate 3
2D printer MAKER ULTIMATE 3 P / N 36045 POSTENT LEGERTE 9000
Introduction
We thank you for the purchase of 2D-printer ! This printer uses the FFF (Fused Filament Fabrication) printing method. It has a metal frame, a fully enclosed structure and a heated build platform. It can print 1.75mm ABS, PLA, metal filler, wood filler and other types of fibers with a melting point below 250°C. It has a print area of 200 x 150 x 150mm and can print at up to 150mm/sec. It can print from a computer via a USB connection or from a sliced code. files are stored on the microSD™ card. It supports auto leveling, has a removable heated glass work plate.
CUSTOMER SERVICE
Monoprice's customer service team makes sure your shopping and order delivery experience is second to none. If you have a problem with your order, please give us the opportunity to fix it. You can contact a Monoprice support representative through the Live Chat link on our website. website www.monoprice.com or email at [email protected], Check the website for support times and links.
PACKAGE CONTENT
Inventory the contents of the package to make sure you have all the items listed below. If something is missing or damaged, contact Monoprice Customer Service for a replacement.
| 1x 3D printer | 1x Keys set | ||||
| 1x 500 g PLA 1x Holder | 1x yellow tape | ||||
| 1x 8 GB MicroSD ™ GA Card Card Card Card Card Card key | |||||
| 1x cartridder Microsd ™ | 1x sticky sticky glue | ||||
| 1x Metal scraper | 1x power cord for USA | ||||
| 1x cable 9003 | 9003 | 1x EU Power Cord | |||
| 1x Motor Cable | 5x English User Manuals | ||||
| 1x 3D Printer |
MENU OPERATION
- Control unit to the right of LCD display Monitor is used for menu control.
- If you are in a menu or submenu, turn Control Knob counterclockwise to move the menu highlight up or to the left.

- If you are in a menu or submenu, turn Control Knob clockwise to move the menu highlight down or to the right.
- If you are in a menu or submenu, press the Control button Knob to enter the highlighted submenu or to select the highlighted entry for editing.
- If you are editing a value, turn Adjustment with control unit counterclockwise to decrease the value.
- If you are editing a value, turn Adjustment with control unit clockwise to increase the value.
- When editing a value, press button Setting by control unit to save the displayed value and return to the previous menu or submenu.
GETTING STARTED
- Open the box and remove the foam from the printer. Place it on a flat, stable surface and remove the plastic film.
- Use scissors or side cutters to remove the zippers and silicone rubber sheets on the Z axis.

- Use the supplied 2mm hex wrench and supplied wrench to remove the fixed support on the Z axis.
- Remove the microSD™ card from the accessory box and insert it into the card slot to the left of the display. Then, unplug the supplied AC power cord, plug one end into the AC outlet on the left side of the printer, and then plug the other end into a nearby AC outlet.
- Remove the filament holder from the accessory box and install it inside the printer.
Remove the filament spool and hang it on the filament holder, then insert the end of the filament into the sensor until it comes out of the tube.
- Press the extruder handle, then insert the filament into the hole to a depth of about 4 cm.
- Open the Control menu, then select the Filament In options. Wait until the thread ends.
- Return to the main menu, then select the Print from SD option. Find and select one of the files codes on the microSD™ card to start your first print.

Documents / Resources
Recommendations
- HDMI Cable, Home Theater Accessories, HDMI Products, Cables, Adapters, Video/Audio Switch, Network, USB, Firewire, Printer Toner and more! - Monoprice.com
Monoprice Select Mini
budget 3D printer review 3DPrintStory Reviews Overview of the budget 3D printer Monoprice Select Mini
Prices for desktop 3D printers continue to fall. There were times when a $600 3D printer was a delight and a desire to order it as soon as possible, but technology does not stand still, and developers and manufacturers are looking for new options to lower the price even lower.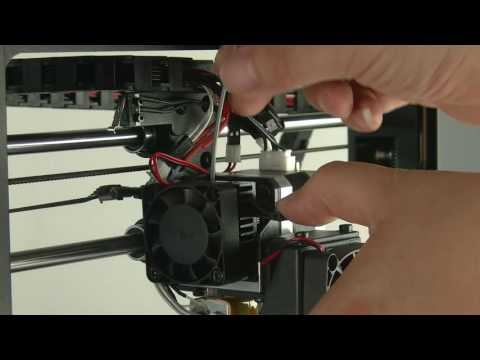 This review is dedicated to one of the budget 3D printers costing about $200 - Monoprice Select Mini.
It is worth noting that this inexpensive model breaks established traditions and did not start with Kickstarter, unlike others like M3D Micro, Tiko, OLO / ONO and Trinus, which attracted the attention of consumers and investors precisely thanks to crowdfunding platforms (by the way, this is really an effective development strategy for small startups, but there is often a mismatch between expectations and the final product).
Monoprice is different. This is an American company that did not bother with the development and production of its own 3D printer, but simply imported the Malyan M200 from China, hung its logo on it and put an attractive price of $199. What if you get a defective 3D printer? No problem, send it back and they will replace it for you.
A reasonable question arises: can such a cheap 3D printer compete with Ultimakers or Printrbots? And is it even worth comparing? We will try to answer these and other questions in the review below.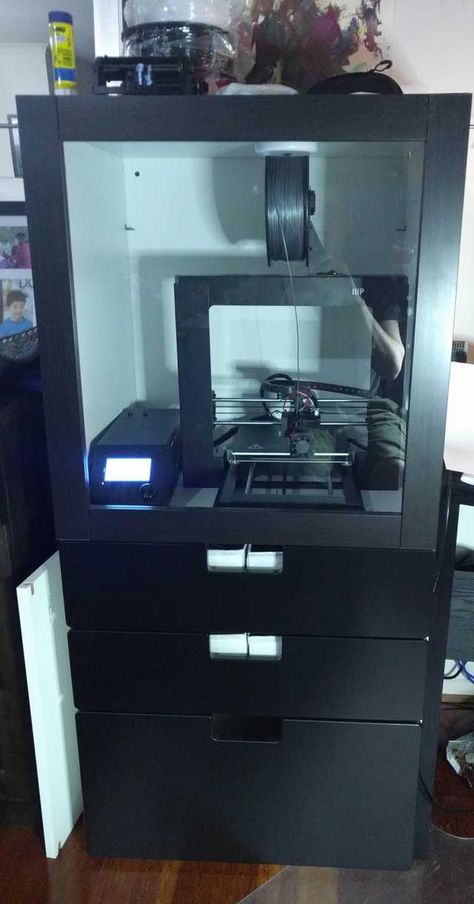
Features Monoprice Select Mini
- Available;
- Robust design;
- Easy to use;
- Predictable 3D printing at low speed;
- Works with any slicing software and standard 3D printing materials;
- Amenable to improvements and upgrades;
- I think we already mentioned the price?
Disadvantages Monoprice Select Mini
- Difficult to calibrate;
- Prints poorly at high speeds;
- Print table not protected;
- Faulty power supply;
- WiFi module not active;
- Unstable nozzle temperature;
- Weird quirks...
Short Verdict
The Monoprice Select Mini is a great 3D printer for the price. There is a heated table, easy to operate if you do not use high speeds, stable 3D printing quality.
Naturally, there are disadvantages. During operation, the temperature of the nozzle may change, and at high speeds, 3D printing errors occur. The calibration process takes a lot of time and the first time you have to tinker. Well, the most interesting thing is that the power supply burned out after 12 hours. But the latter, incorrect, can be attributed to an accidental marriage.
Despite all the shortcomings, the Monoprice Select Mini is a wonderful little 3D printer with many great features. In general, it performs in accordance with the information in the technical specifications, and the quality of the 3D printing even exceeded our expectations.
If you are not afraid to take it apart / put it back together, then you can do a few upgrades. The first thing to do is to replace the hotend and update the firmware to activate the WiFi module ( be careful! These upgrades have not been tested as part of this review and may damage your 3D printer! ). You can install the glass on the print table. Even with these upgrades, the price will still remain acceptable.
Would you recommend the Monoprice Select Mini as your first 3D printer? Yes, definitely.
Specifications and features Monoprice Select Mini
Monoprice Select Mini workspace 120 x 120 x 120 mm. The maximum resolution of 3D printing is 100 microns. Heated table. The 3D printing speed is 55 mm/s.
You can upload your 3D model via micro SD card or USB. The manual states that compatible slicing programs are Cura, Repetier-Host, ReplicatorG, and Simplify3D. This means that the Monoprice Select Mini recognizes the standard G-code, and this 3D printer is not tied to any particular software. Cura was used during testing for this review.
Monoprice Select Mini doesn't limit you in the media you use. You can print with any standard 1.75 filament using PLA or ABS thermoplastics. In our case, PLA plastic from ColorFabb was used.
These two points - the freedom to choose software and filament - are very important in this price range, because manufacturers such as M3D Micro and XYZprinting, which are Monoprice's main competitors in this niche, tend to use proprietary software and their own materials for 3D printing .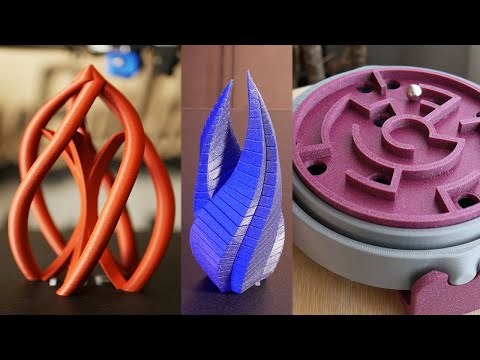
Unpacking and installation of Monoprice Select Mini
Installation of Monoprice Select Mini is quite simple. You can start typing within 20 minutes.
Inside the box you will find a 3D printer, a power supply, an imbus wrench for calibrating the table, a plastic spatula for scraping off the rest of the material from the table after printing, a 256 mb micro SD card and a micro USB cable.
One piece of paper contains a basic instruction and a link to a website where you can download the full version.
You will also find a rectangular steel sheet, the purpose of which is not at all clear at first. It turns out that this is a coil holder that is attached to the side of the main unit.
It is important to note that the Monoprice Select Mini kit does not include media test samples. So stock up on filament with a diameter of 1.75 mm.
You can use the wheel to adjust. The menu is well structured and easy to understand. You can start the calibration process, preheat the extruder and feed the filament.
Calibration can be somewhat difficult. In theory, it should be carried out even before shipment, in production, and you should have a piece of paper between the nozzle and the printing table. If it doesn’t work, then hex keys will come in handy here. It will be necessary to try and tighten the screws at the corners of the table so that the sheet still passes.
At this stage, the first important shortcoming of this model becomes clear. The printing table is made of aluminum and does not have a special protective film or coating on it. So stock up on blue 3D printing tape or install glass right away. Otherwise, the table will wear out very quickly and you will have to change it.
Well, one more bug that got out in our particular case. The power supply burned out after 12 hours of use. Foaming it was not difficult, but it was very unpleasant. You can probably throw it off for marriage, but in any case, be prepared for a similar turn of events.
Design and build quality of the Monoprice Select Mini
Very pleased with the build quality of the Monoprice Select Mini.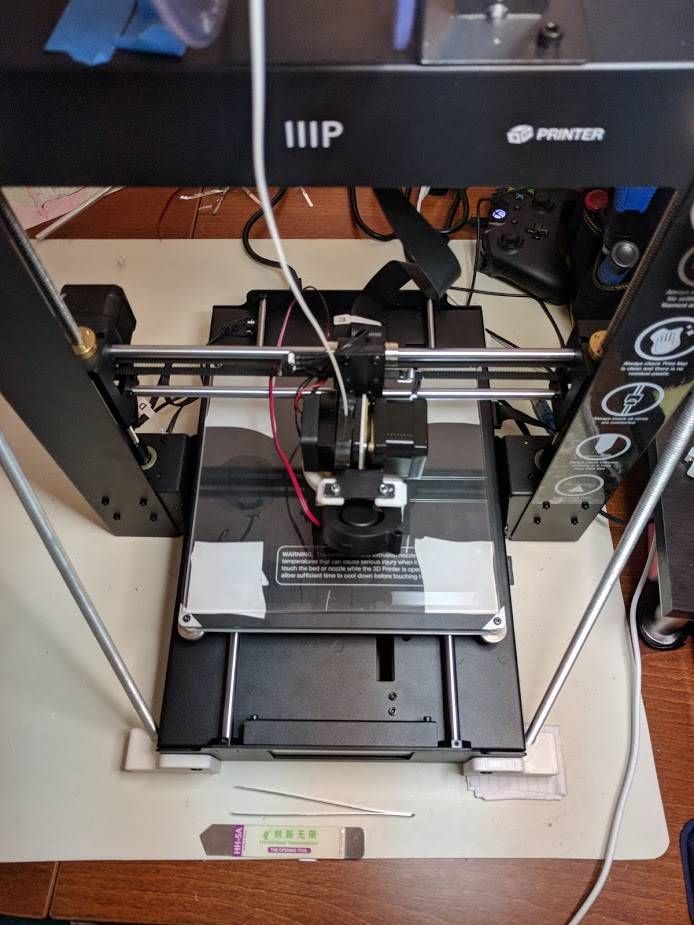 The construction is strong, reliable, with a steel sheet metal case that hides all the electronics. So don't worry about shipping damage.
This 3D printer uses deposition modeling technology. The classical Cartesian coordinate system is used. The design is similar to Printrbot Simple. One cooler is used to cool the nozzle. It is likely that problems may arise during 3D printing with unusual materials.
The extruder has a diameter of 0.4 mm and can be heated up to 230°C. We have not been able to test how easy it is to change, but in the long run this is an important factor as the nozzle will still need to be changed over time.
Monoprice Select Mini Print Quality
Models will already be preloaded on the micro SD card. They are supposed to be optimized for 3D printing on the Monoprice Select Mini. So before uploading our own models, we printed test ones.
The cat was printed first. The resolution was 200 microns. Everything went well until the last layers.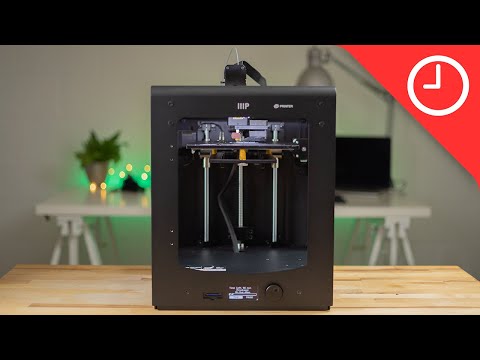 The upper part of the paw and ears could not be printed even once. There were 3 attempts in total.
G-code analysis in Simlify3D shows that the table accelerates up to 55 mm/s during the printing of the last layers. That is why the error was repeated. Quite a strange decision of the company - to provide a test model, which a priori will be printed with errors...
The second model that we printed is a test elephant. The resolution was also 200 microns and 10% infill. There were no problems! The result is excellent and you can see it in the photo below.
Next we moved on to our own models. We used Cura for slicing. This article reveals the excellent Cura settings for 3D printing on the Monoprice Select Mini and we used them.
We printed a classic 3DBenchy and Graphica model: a MEGA Ghost with 200 micron resolution and 10% infill, a V29 whistle with 200 micron resolution and 100% infill, and another 3DBenchy model with 100 micron resolution and 10% infill.
The simple 200 micron models worked well. There are no special problems with small protrusions and holes, although there are sagging. The layers are laid evenly along the X and Y coordinate axes.
The V29 whistle sounds as loud as intended, which means that the partitions were printed correctly. The Graphica Mega Ghost with its long tongue also printed correctly. The hinge glided smoothly. The
3DBenchy at 100 microns worked well too. When you look at the photo, don't forget that this is a $19 3D printer.9.
We have noticed that most errors in 3D printing occur when the spool of filament clings or there is not enough adhesive coating on the printing table. This cannot be attributed to the shortcomings of the Monoprice Select Mini itself, since this is a global problem for all FFF printers.
During operation, the print table may block access to the control wheel. This point is implemented in the design is not very ergonomic.
Another disadvantage is that the nozzle temperature has an error in the region of 5°C. For example, when the 3D printing temperature is set to 215°C, it jumps between 213°C and 217°C on the control panel.
This does not particularly affect printing with PLA plastics, but may have a negative effect during 3D printing with materials that are more sensitive to temperature changes.
Finally, we printed a Low Poly Moai bust. We scaled the model by 50% and printed with 100 micron settings and 30% infill. It turned out well on the whole, the only small marriage is the influx of material on the chin. By the way, we observed the same effect when printing 3DBenchy with resolution settings of 100 microns.
Life hacks and upgrades Monoprice Select Mini
A few words about upgrading the Monoprice Select Mini 3D printer. There are no official upgrades! But here are a few options that you can try to implement on your own.
In our opinion, it is necessary to deal with the temperature of the extruder, make it more stable. For example, you can implement a PID temperature controller.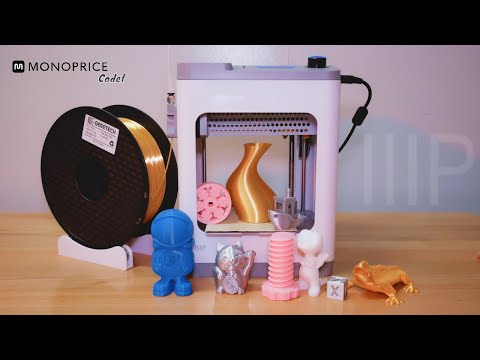

.jpg)