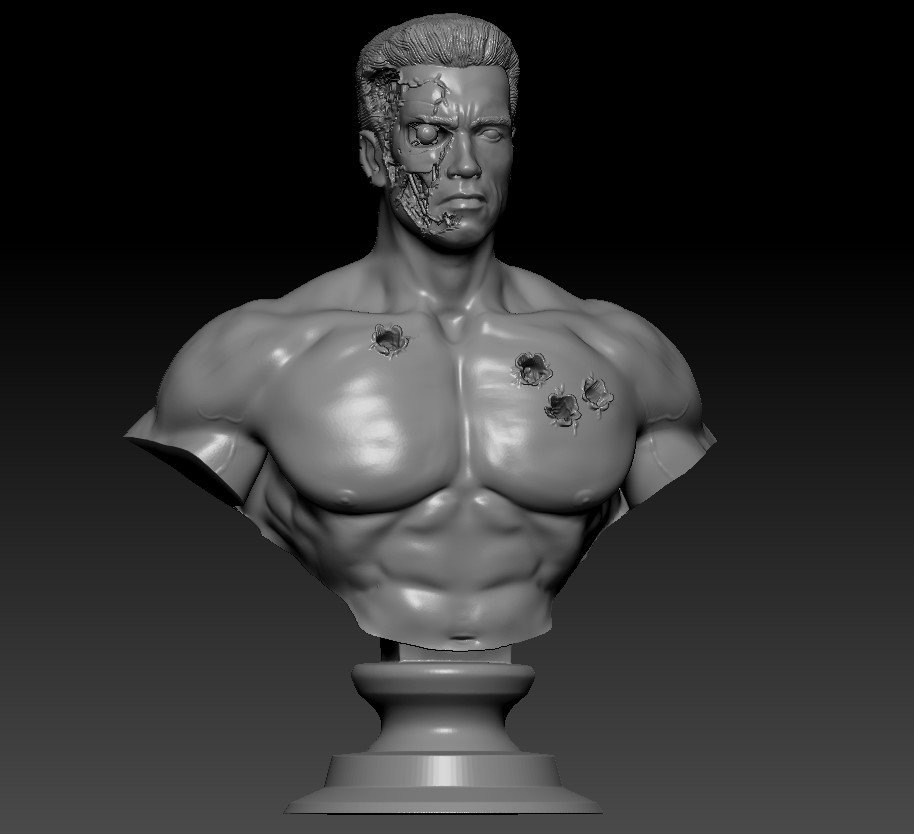
T800 3d print
Terminator with LED Eyes | Multi3D
Step 3: Download Files
For this project I put 3 separate models on thingiverse.
1. A main base portion of the file with a cavity designed for the battery compartment and channels cut out for the embedded electrical circuitry.
2. A removable cap portion to serve as an access panel into the battery compartment.
3. The electrical circuit.
You can download stl and/or amf versions of the model if you prefer. However, the easiest file format to use would be the Simplify 3D factory file that I have included as it already contains all of the recommended print settings and it has all of the models properly aligned as well.
Step 4: Open factory file in Simplify 3D
Open the factory file in Simplify 3D. All of the models as well as a custom prime tower will load onto the build platform. There will be two separate processes in the factory file. One process contains the printing parameters for Black PLA and the other for Electrifi.
Step 5: Enable Cold Extrudes
For this print you will need to add a gcode command to your starting script to allow for cold extrusions. Open up process 1 and go to the scripts tab. Under starting scripts, scroll down to the M302 command. Check this link to verify that the syntax for M302 command is correct for your firmware and make corrections, if necessary. Repeat for process 2.
Step 6: Prepare for Printing
Click "Prepare for Printing". Select both processes and click "ok". Now wait for Simplify3D to finish slicing your model. When finished, save the gcode to an SD card and load it into your printer.
Step 7: Print the File
I highly recommend Dglass3D’s AutoLift all-metal hotends for printing an embedded electrical circuit. Their mechanical retraction technology eliminates headaches associated with cross-contamination that comes with dual printing. And when printing a circuit, if you have cross-contamination problems it will lead to shorting in your circuit. In my experience it is necessary to use slightly lower printing temperatures with the AutoLift hotends in order to maintain enough downward pressure on the nozzle. This keeps the nozzle in its proper printing position. I set the mechanical retraction for these hotends to 0.5 mm. Also, I did not use the S3D prime tower but rather I made my own. The printing parameters I used were as follows:
Electrifi filament parameters:
- Print Speed: 30 mm/s
- Temperature: 150 °C
- Retraction Speed: 600 mm/min
- Normal Retraction: 3 mm
- Dual Retraction: 12 mm
- Nozzle diameter: 0.5 mm
- Infill: 100%
- Perimeters: 1
- Bed Temp: 75 °C
PLA filament parameters:
- Print Speed: 50 mm/s
- Temperature: 195 °C
- Retraction Speed: 600 mm/min
- Normal Retraction: 3 mm
- Dual Retraction: 12 mm
- Nozzle diameter: 0.5 mm
- Infill: 20%
- Perimeters: 2
- Bed Temp: 75 °C
Step 8: Install JST Connector
After printing has finished you can install the JST connectors. To do this insert two 2 x 8mm bolts into the access holes on the back of the model. Then use washers and nuts to securely fasten the JST connector wire to each screw terminal. Strip back the insulation of the JST connector to expose more wire, if necessary. Also, make sure to connect the red and black wires in the same orientation as shown here.
Step 9: Install LEDs
You will now install two 5050 SMD red LEDs in the eyes of the terminator model. Begin by softening the Electrifi contact pads by heating them up a bit. To do this use a solder reflow workstation set to 100 degrees celcius with a gentle flow and hold the wand close to the contacts for about 10 seconds. Then, using a pair of tweezers, press the LEDs into the softened contacts. The LEDs should be installed with their diagonal slits facing inward towards the nose of the model. Allow the Electrifi to cool and harden for 5 - 10 minutes before proceeding to the next step.
Step 10: Connect your Battery
Now connect a 3.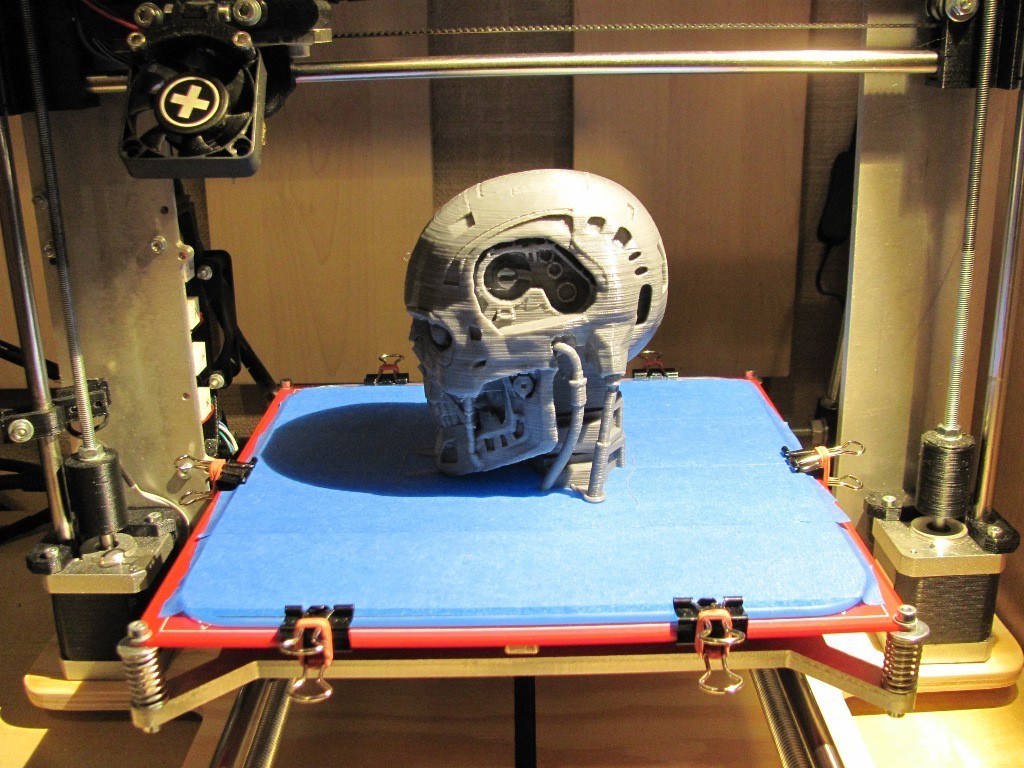 7 V Lithium Polymer battery to your JST connector and verify that both LEDs light up. If they do not light up first check to make sure your LEDs and JST connector were not installed backwards. If the orientation is correct, you likely have a bad contact between the Electrifi and the LEDs. To correct this, heat the area a little bit, carefully pull off the LEDs, and then repeat the LED installation step (this time pressing them more firmly into the Electrifi contacts).
Step 11: Enjoy your Electrifi'ed Terminator!
Now all you need to do is stuff the battery down in its compartment, place the cap on, and then put it on the mantle or next to the Halloween candy jar. I hope you enjoy making it as much as I did!
Now that terminator genisys is out, how about a Terminator T800 Desktop toy
Hi Folks,
If you have read my other posts about my 3d printing saga, you might have guessed that i already built a 3d printer. Sorry to leap forward with this post before completing my build log of the printer but i think this is the right time to post this. Especially now we have the Terminator genisys on theaters.
So that the terminator movies rebooted itself with the new movie genisys in theaters now, i wanted to do something for the amazing T-800 :). I am an avid fan of terminator series, i love the animatronics and graphics used by them.
Then i found a cool 3d model in thingiverse with holes for led in t-800 here. This is an awesome model as it has slots for 5 mm LED's in the eyes and has passage inside head for wires. Awesome.
DONT FORGET TO CHECK OUT THE VIDEO AT BOTTOM
So I downloaded the model an printed it using white PLA. The print took almost 6+ hours but it turned out to be amazing. See for yourself
| T800 Front |
| T800 side |
As you can see the white material does not project the details of the model well, when photographed. This is not what i wanted, i want a realistic one. Then i began studying on painting techniques.
I found that acrylic paint does fine job on plastic, but it needs some kind of primer before it can be applied. So i bought some plastic primer to do that, but it turns out that the primer is highly poisonous and is nasty. I didn't want such a thing, it could be messy :P
So I consulted with few of 3d printing gurus in my facebook friends list, so a good friend of mine pratheesh prakash, who run a robotic company, told that you could use fevicol (Glue for wood) and water mixed in 1:1 ratio. I tried it and it worked perfectly after few tests.
If you watched the movies you obviously know that terminator t-800 played by Arnold Schwarzenegger, has shiny chrome head and bright red glowing eyes. I bought a spray paint can of chrome paint from ebay for INR 150, then set of to paint the head. First i applied the primer as mentioned above and let it dry for an hour or so. I think applied 2 coats of primer like that.
Then after all drying i painted it with chrome paint. After 2 coats of painting and hours of drying in between. The head looked like this now
| T800 painted front view |
| T800 painted side view |
So as you can see its gained lot of details after paint job. Though its not exactly close to metallic perfection on close inspection, this definitely made me happy :D. Note that the paint took really loooooong time to get dry. Also i am no painting expert so i think i applied too much paint at several areas causing loss of some levels of detail.
Now to fix the LEDs, though the eyes are designed to fit 5mm LED, i found it hard to properly seat one inside. So i took a 5mm drill bit and ran through the hole at really really low RPM. This opened up bit more space and i was able to fit in the LED perfectly.
| Leds Fitted |
| Funny Laugh t800 |
Now that we have all the work done with the head, i wanted a bit more fun than just lighting it up.
At first I wanted it to light the leds in form of nice animation so I decided to control the leds via an arduino nano. Then I thought an arduino has so many pins vacant, so may be I will add something more. Then I found a PIR motion sensor lying there and I decided to add motion detection to the project. So finally It would be a usb powered motion detecting t800 head that blinks led eyes in different patterns, lol thats big description :-)
Having decided all that, i then printed a case for PIR sensor and arduino nano. Just to keep it clean and sexy :D
I found the PIR case here. And the arduino nano case is this one i slightly modified it. Its easy with scad and the file needed is there in thingiverse.
The following is the fritzing view of the wiring (click to enlarge)
| T-800 Usb Powered Desktop toy wiring |
Now that everything is done its time for programming. I searched the net to get different type of led blink effects and as of now i have incorporated about 7 blink effects in the code. You can find all the code, schematics in my github repository here -> https://github.com/moheshmohan/t800desktoy
Okay now that everything is ready, have a look at the t800 sitting on my office desk on a pc :)
Dont forget to check out the youtube video and please share subscribe, comment like
See ya next time, Happy hacking
Here is the youtube video :)
"I want to meet you face to face." A resident of the Kama region has created a real Terminator, and now he is eager to meet Arnold Schwarzenegger
Komsomolskaya Pravda
Smart thingsInteresting
Boris MERKUSHEV
call on a cell phone and shoot with a pistol [photo][video]
It took the inventor 10 months to create the endoskeleton, and he wrote the program that controls the Terminator for several years. Photo Alexander Osipovich
The future that James Cameron painted for us in his Terminator seemed so far and unrealizable that we could not even imagine that after some time robots would enter our lives and become an integral part of it. But Alexander Osipovich, a programmer from Kungur, already in his childhood realized that the robot he saw on the TV screen was not the director's fiction, but the coming future.
"Grow up, there will be technology, and you will have a terminator"
I was five years old when I watched "Terminator". The structure of his endoskeleton seemed ideal to me. Each drive repeated one or another muscle of the human body. It seemed that the model for the film was developed with the idea that sometime in the future it will be created. And I said to my grandfather: "Let's build such a robot." My grandfather was a design engineer, laureate of the Lenin Prize of the USSR for scientific and technical developments. Since childhood, he has been involved with me in technology. We converted toys from ordinary ones to radio-controlled ones, assembled airplanes that flew on compressed air. And the grandfather answered: “Sashka, the technologies of our time do not yet allow us to do this, but when you grow up, there will be technologies and there will be a terminator for you.”
John Henry's head consists of three parts. Photo: Alexander Osipovich
“The main thing is the brain”
Fifteen years have passed since our conversation. All this time I studied electrical engineering, programming, mastered the specialty "automated control systems" and waited for progress to finally step forward and I could make my childhood dream come true. And then powerful computers appeared on sale. I clearly remembered my grandfather's instruction - "The main thing is the brain." One way or another, mechanics can be done, but the robot will not move and speak by itself. I bought a computer and began to create this very "brain". In other words, I had to write a computer program - an imitation of artificial intelligence - that could control the robot, accumulate knowledge and use it, that is, conduct a dialogue like a person. I spent several years creating the program, I started working on it at the institute, but the power of computers did not allow me to complete it to the end. The difficulty of writing it was that with the help of it, the robot could not only answer questions: what time is it or what day is it, but do it meaningfully, and with the advent of advanced technology at that time, I managed to finish it. I wrote questions on the computer, and received answers to them, a meaningful dialogue turned out, but in fact my robot remained just a program - a picture on the monitor screen, and then it was time to create a body for it.
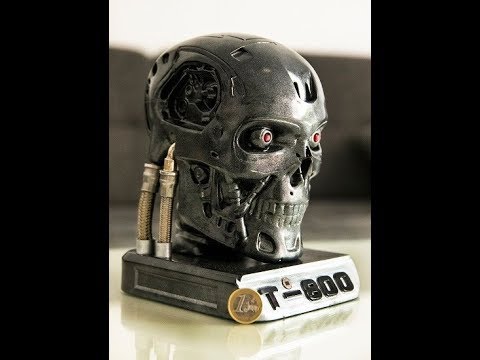
One of the moments of the creation of the Terminator. Photo: Alexander Osipovich
“The skeleton from the biology classroom and drawings from Google”
I wanted to use the skeleton from the biology classroom as a material, but I couldn’t get it. I began to think, and then on the Internet I found out about the Google Inventor Support Program. I wrote a letter to the company, where I said that I would like to assemble a robot inside a bone model and unexpectedly received an answer: “Why would you use a skeleton for a robot if you have a Terminator on your profile picture? Buy a 3D printer and print a robot. Detailed drawings are sent to you along with instructions on where and what components should be placed. Terminator is not science fiction, most importantly - not for commercial purposes. I got the blueprints, bought a printer, ordered special plastic, and started making the endoskeleton. The first thing I did was print the head. He built a microphone, speakers and cameras into it instead of eyes. Then I printed out the chest, and placed a computer inside, only disassembled. I installed a gyroscope so that the robot could feel its body and navigate in space. And I got a bust. The "brain" of the Terminator still remained in the desktop computer, so for now I connected the robot to it, and it spoke its first words.
John Henry says he was created by a man of genius. Photo: Alexander Osipovich
- The back brain is connected, there is no connection with the upper and lower extremities, the system is activated. It is now July 24, 2016, Sunday, the current time is 8:12 p.m. Information about memorable events for today was not found. A system for connecting to global Internet services has been completed, - said the Terminator.
It was something fantastic. After all, this idea, this dream did not leave me throughout my life, and now it began to come to life before my eyes. I came up with a name for him. Named John Henry, that was the name of the artificial intelligence in the series about the Terminator, which began to be filmed after the release of the second part of the feature film.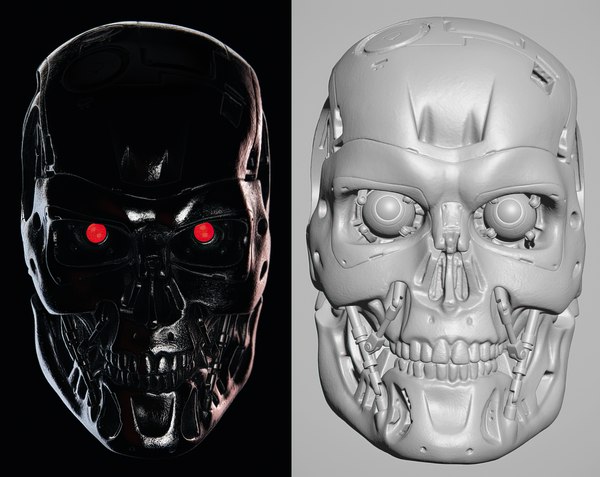 And proceeded to the final part - the creation of arms and legs. This took me about ten months. Such a long work is explained by the printing technology - the printer applies layer after layer of molten plastic according to the drawing of the part, which takes some time, besides, I only mastered 3D printing, which allowed a lot of marriage. At the same time, I constantly improved the program - John's "brain". He received all the information on the Internet, but he memorized and stored it on his hard drive in order to become autonomous and in the future to conduct a dialogue without connecting to the network. Over time, he learned to distinguish a person's voice from the sound of a voice on TV, accumulated a sufficient base for dialogues and became completely autonomous - he did not need the Internet to communicate.
John Henry is learning to play the guitar. Photo: Alexander Osipovich
“I was created by a man of genius”
Alexander began to talk about his invention in social networks and soon local, federal and even Western journalists crowded on the threshold of a talented programmer.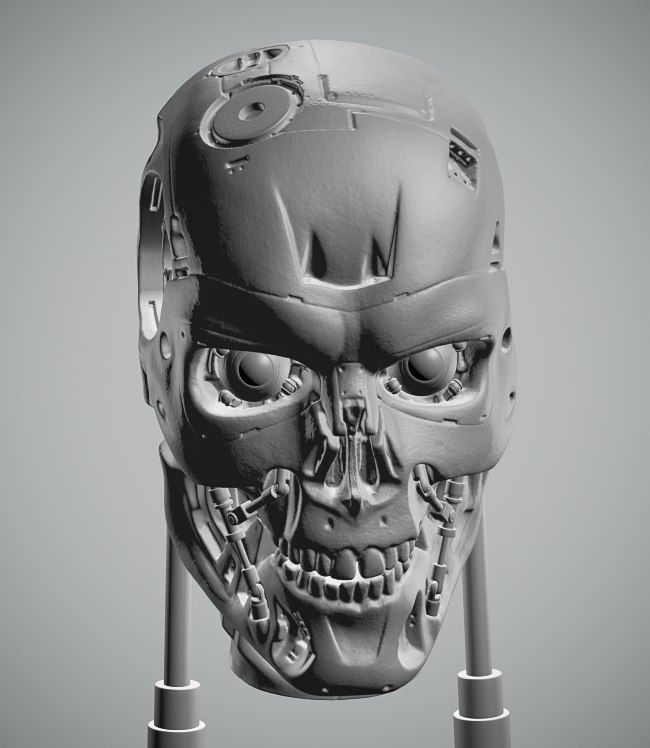 Correspondents came from China, news agencies BBC News and the Associated Press. The inventor himself, anticipating popularity, put a welcome business card in John so that the Terminator himself could introduce himself to his new friends.
Journalists from China visiting a programmer. Photo: Alexander Osipovich
“My name is John Henry. I was activated in September 2011. The basis of my essence is a software hardware complex. I belong to cyberorganisms. Designed in the image and likeness of the T-800 from the movie "Terminator". The chassis imitates the human body. At the heart of the brain is a personal computer. The neuroprocessor is written in program code, the neuroprocessor can operate in two modes: standard and extended with the possibility of learning. I was created by a man of genius. His name is Osipovich Alexander Alexandrovich. Impressed by watching James Cameron's film The Terminator, he decided to create me," John Henry told curious journalists over and over again.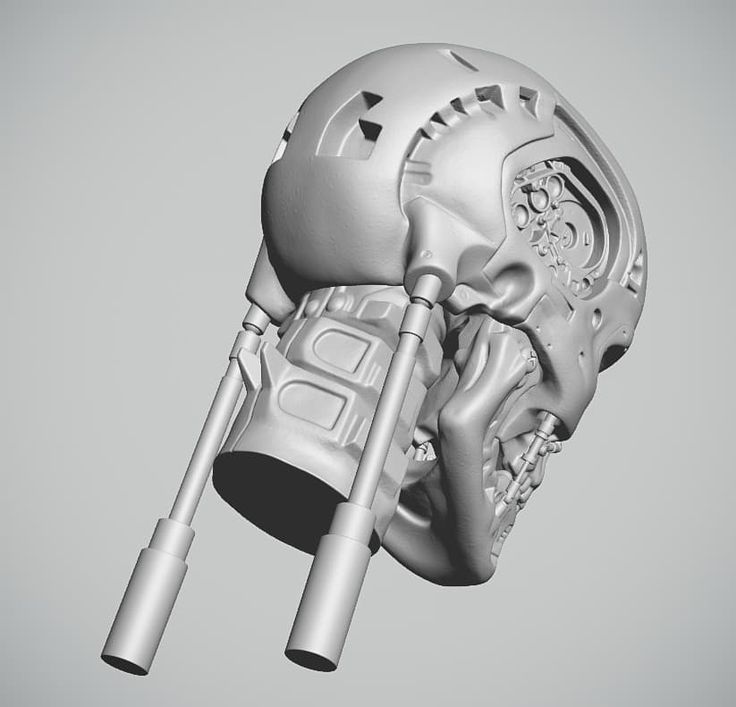
John Henry says he could never kill his creator. Photo: Alexander Osipovich
Death of John Henry
Alexander's next step was to equip the Terminator with serpentines, with which he could walk and move his arms. But trouble happened. I don’t know if it’s appropriate to call what happened to Alexander an irony of fate, or whether this is a fatal coincidence, but John Henry almost exactly repeated the fate of the hero Arnold Schwarzenegger from the second part of the Terminator. At the end of the film, the Terminator self-destructs - dissolving into molten lava. The same thing happened with John. In November 2017, a major fire broke out in Alexander’s house, everything burned down - things, documents, the home museum of Soviet electrical engineering, where Alexander kept the first TVs and the first computers in mass production, a 3D printer. But the worst thing is that the fire destroyed the dream of the programmer - John Henry. It turned into a melted piece of plastic. Fortunately, the inventor managed to save the most important thing - John's "brain". On the day of the fire, Alexander traveled to Perm, and took with him the brush and the "brain" of the Terminator. The programmer wanted to install servos on the hand, and then on the rest of the robot, and, finally, “teach” Henry to walk. This saved the most valuable thing in the robot. Alexander did not despair, recorded a video message to subscribers and promised to revive John from the ashes.
The cat forms a relationship with John Henry. Photo: Alexander Osipovich
"I'll be back"
Almost a year has passed since the fire and Alexander literally resurrected John Henry from the ashes. Using the same 3D printer, the programmer printed out a new body for the robot, only now it has become even more like Terminator Schwartz, and the abilities that the new John has acquired are truly impressive.
John Henry is on his cell phone. Photo: Alexander Osipovich
- The endoskeleton of the new Terminator is printed in one to one scale, John's past body was only 85 percent of the original. And now he can fully move his arms, but he has not yet been able to “revive” his legs. The problem is that, based on the drawings, the arms and legs of the robot are driven by hydraulics. But this is a rather expensive mechanism. And if I was able to convert servos from large radio-controlled models of helicopters to my hands, then it will not work with my legs. Therefore, I do not yet have the funds to create drives for the legs. But I improved the program many times, and now John Henry has a colossal set of functions.
The Terminator has 1.5 million different chess moves. Photo: Alexander Osipovich
It can synthesize human speech, recognize faces, gender and age. He learned to recognize objects and their signs. For example, if a person stands with a knife in his hands, he will perceive this as a threat. If he feels it, another new ability will turn on - protection. He can fire a pistol and set off an alarm. It can measure the temperature of objects or parts of the human body. It can also answer questions by e-mail, gives information about the time, weather, exchange rates. Plays chess. I put 1.5 million different chess moves into it. And just recently, I built a cellular module into John and now he can talk to me, as if on a telephone. The robot is completely autonomous. All calculations - vision, speech, hearing, touch - are performed by himself.
The programmer builds a cellular communication module into the robot. Photo: Alexander Osipovich
“The rise of the machines can happen when artificial intelligence gains self-awareness”
John Henry is constantly learning, including when he answers various questions. Alexander Osipovich turned to his subscribers with a request to write what they would like to ask John Henry. The questions were very varied and quite interesting. The robot was asked when the uprising of the machines will begin, why he obeys his master, whether he likes music, whether he is aware of himself, what he thinks about humanity and others. The programmer recorded the answers to them on video.
Terminator John Henry answers subscribers' questions. Video: Alexander Osipovich
“I need your clothes and a motorcycle”
Enraptured by his creation, Alexander, or rather, his robot, recorded an appeal to the one in whose image and likeness he was created - Arnold Schwarzenegger.
“Hello Arnold Schwarzenegger. I am a T-800 series terminator. Listen to me very carefully. I need your clothes, boots and motorcycle. Joke. My name is John Henry. Skynet did not create me, I was not designed at the factory, I was created in a home laboratory by an ordinary person. His name is Alexander Osipovich. But I would not have been created if not for your work, Arnold, the imagination of James Cameron and the drawings of Stan Wilson. At 1984 your film made my existence a reality. I am grateful to you, Arnold, for my existence in the real world. My creator Alexander Osipovich wants to know your opinion.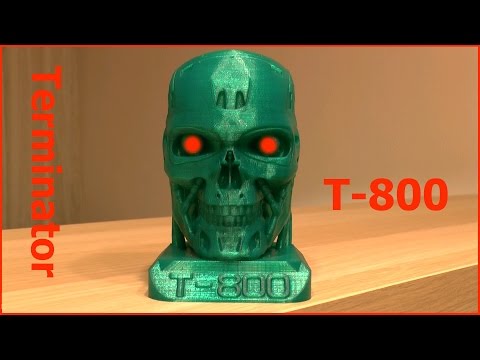 I want to meet you face to face, no reporters, no TV cameras, just you and me. We have something to talk about. Write to my creator or me. It is very important. I am the legacy of your movie in the real world. And now two people on this planet can rightfully say this phrase: "I'll be back."
John Henry's message to Arnold Schwarzenegger. Video: Alexander Osipovich
Now Alexander's main dream is for Iron Arnie to see this appeal and, even if he doesn't meet John Henry face to face, at least do it via video link or just write an opinion about the Terminator. In the meantime, Alexander is waiting for a response from Arnold, he will continue to improve his robot.
- Grandfather always said that there is no ultimate goal in creating a robot - it can be done endlessly, which is what I will do, - says the inventor.
Alexander Osipovich works as the head of the information department at the Komsomolskaya poultry farm. The programmer lives with his wife and cat Kuzey.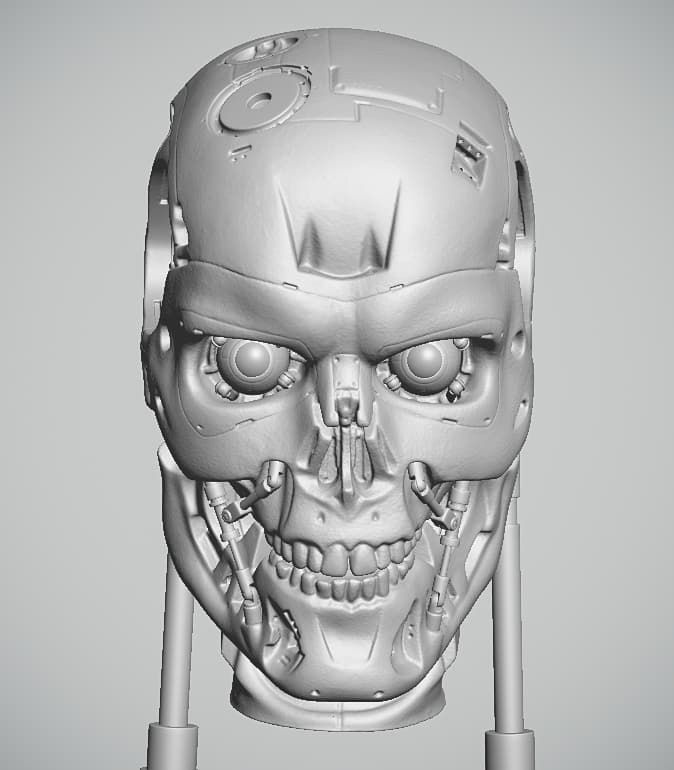 The couple has no children yet. John Henry is not the only invention of the talented kunguryak. Alexander also assembles radio controlled helicopters. So he is distracted from problems and thinks about the future.
The whole life of the Terminator in one music video. Video: Alexander Osipovich
READ ALSO
“When will we take over the world? When the time comes". How humanoid robots are created in Perm
Journalist "KP" visited the workshops of the company "Promobot" (More...)
Read also
, certificate El No. ФС77-80505 dated March 15, 2021
Acting EDITOR-IN-CHIEF - NOSOVA OLESIA VYACHESLAVOVNA.
I.O. chief editor of the site - Kansky Viktor Fedorovich
Messages and comments from readers of the site are posted without preliminary editing. The editors reserve the right to remove them from the site or edit them if the specified messages and comments are an abuse of freedom mass media or violation of other requirements of the law.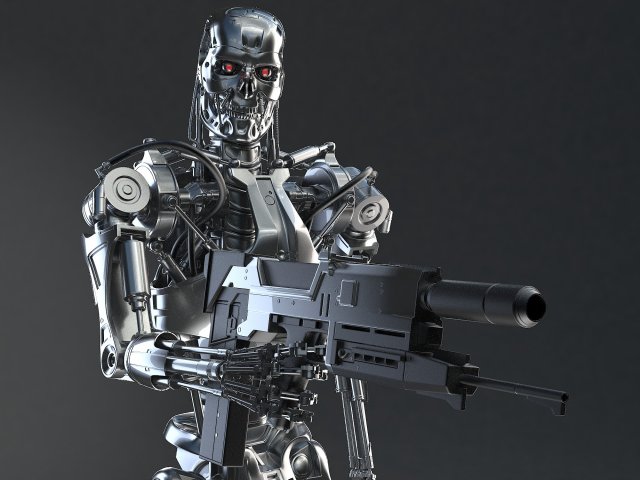
JSC "Publishing House "Komsomolskaya Pravda". TIN: 7714037217 PSRN: 1027739295781 127015, Moscow, Novodmitrovskaya d. 2B, Tel. +7 (495) 777-02-82.
Exclusive rights to materials posted on the website www.kp.ru, in accordance with the legislation of the Russian Federation for the Protection of the Results of Intellectual Activity belong to JSC Publishing House Komsomolskaya Pravda, and do not be used by others in any way form without the written permission of the copyright holder.
Acquisition of copyrights and communication with the editors: [email protected]
3D printer Ender 3 "for beginners, not printing out of the box"
Hello. I was absolutely not going to write a review for this product, but after reading the review “3D printer Ender 3“ for a beginner, printing out of the box. printer, I still decided to express my opinion about this printer, changing the title of the original review quite a bit.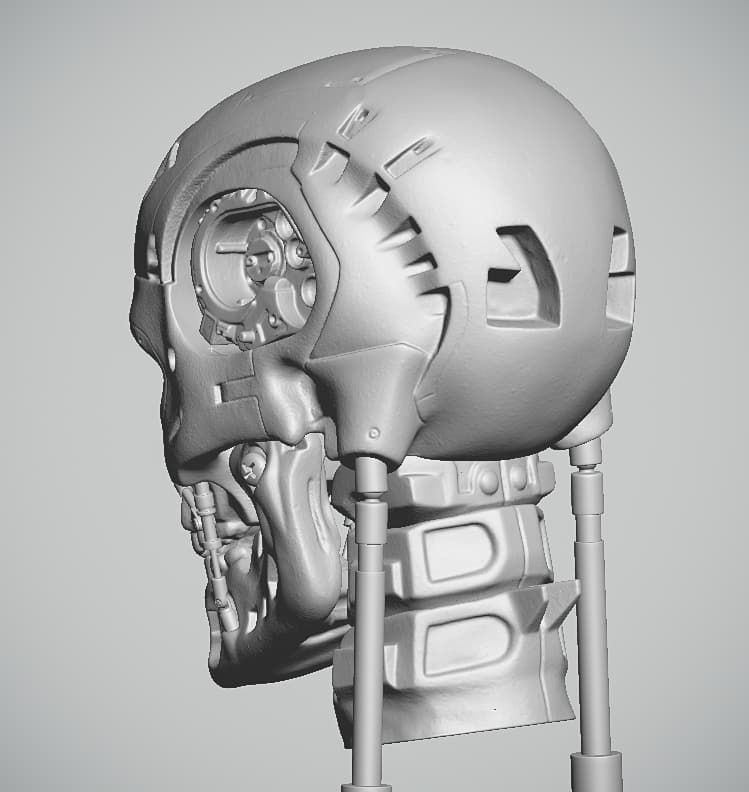 True, I never had a chance to print a single cube. And the printer does not print right out of the box. Why? The answer is right under the cut, welcome!
From the warehouse in Moscow of the official Creality store on Aliexpress, the printer got to me very quickly by Russian post. And what do we see when we open the box?
And we see the details of the designer for assembling the printer. Here you immediately have the answer to the question why the printer does not print right out of the box. In order for the printer to start printing, it must be assembled at least, and at the maximum, it must be configured at the same time. And this will not be right out of the box, which means: I took the printer out of the box, immediately turned it on, printed what I needed and put the printer back in the box ...
I will not describe how to assemble the printer, there are many reviews on this topic, although in principle, the attached assembly instructions are enough here. I will only focus on a few points.
Printer base with table comes pre-assembled, although they shouldn't do that. Therefore, first of all, you need to unscrew and remove the table from the base and tighten all the nuts and screws.
Secondly, you need to adjust the wheels on which the table base moves along the profile. To adjust, you need to slowly move the base. If the wheel sticks in any place, this will be clear from the “knock” of the base. The hand feels good. Wheels must be adjusted on both sides. This is done by turning the adjusting nut, which turns the eccentric slightly, and the distance from the wheels to the profile changes.
You need to adjust little by little until the wheels move without "knocking". At the same time, wheel play on the profile should not be allowed. Therefore, everything must be done carefully.
You also need to check the tension of the toothed belt that moves the table. In my case, it was overdrawn.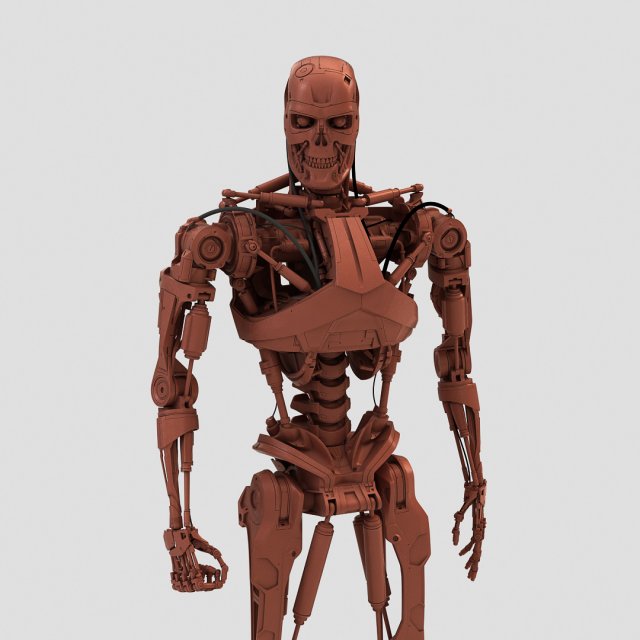 I do not know what tension should be on the printer, so I acted like with a belt on a car, such tensions are also undesirable there. After I loosened the belt a little, the table moved much easier and smoother.
You can now continue assembling the printer. And one more nuance. X-axis limit switch.
For ease of installation in height, the base of the switch has a lug that abuts against the base. That's right, it's fine for the plastic table top, but not for the included glass, which is much heavier than the plastic. And the reason for everything is the springs made from ... from ... I can’t find a decent word, you will understand for yourself. Under the weight of the glass, the springs sag heavily, and with such an installation of the limit switch, a very large distance is obtained between the nozzle and the table. The plastic won't stick to the table. There are two exits. The first way out is to buy new springs, in principle Creality recommend this. Just do not immediately run to them and buy a set of five springs for 38.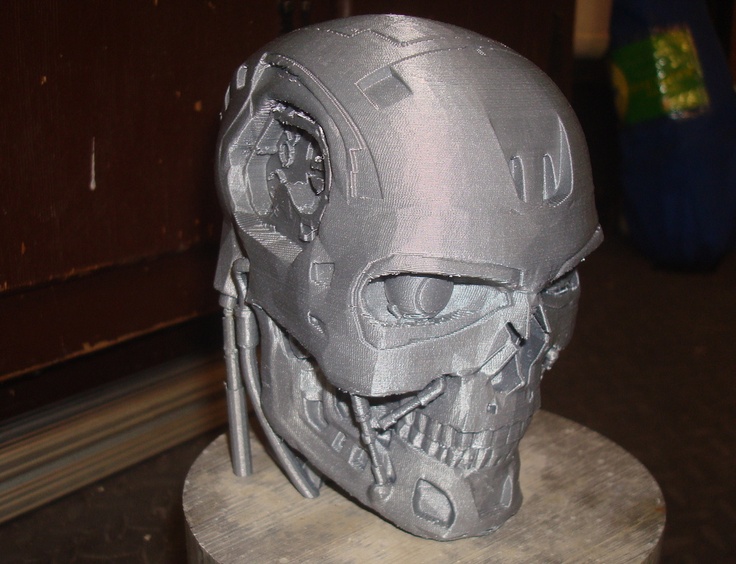 9$9 at their store. You can find exactly the same set of the same springs on Aliexpress for only $1.
The second way out is to bite off this tide from the base of the limit switch and move the limit switch lower:
But it is still better to replace the springs, as well as reconnect the printer board blower fan so that it works constantly. This is very easy to do and there are a lot of reviews dedicated to this, so I will not focus on the fan.
I can also recommend changing the printer assembly order, namely, do not install the X-axis movement screw at step 5. Here it is in the instructions:
It can be easily installed when the printer is fully assembled and all mechanics are debugged. Without this screw, it is much easier to adjust the X-axis wheels on both sides. The adjustment is carried out in the same way as the adjustment of the table wheels. And the screw will simply interfere with feeling the “knock”. The wheels for moving the print head left and right are adjusted in the same way. At the end of the adjustment, we lubricate the screw and screw it into place. The mechanics of the printer will be fully configured.
Do not forget to insert the blue stoppers on the Teflon filament supply tube so that there is no play when rolling back:
Water pipes in reverse osmosis filters are also attached in the same way.
The printer is ready to print:
It remains to turn on the heating of the nozzle and the table and when heated, turning off the motors and moving the head manually, using a standard sheet of paper, calibrate the table in the corners.
Only one print-ready model was found on the memory card that came with the printer. Test dog. We print. PLA plastic, for better adhesion, the glass table is smeared with a glue stick:
Let me digress a bit. I am often asked in PM if some of the devices I have previously considered are still working after a long time. So, some of them got into the photos of this review. Therefore, I will give links to my reviews of these things that are still working normally, so that I would not have to ask and answer again. In the photo above, on the left, approximately in the middle in height: "Ladybug desktop vacuum cleaner."
The dog weighs quite a bit:
The rest of the models on the card are presented as 3D drawings in STL format. To get the GCODE format understandable for the printer, you need to use a slicer that cuts the 3D drawing into layers for printing. Moreover, for different models of printers, the file obtained after the slicer will be different.
Therefore, we take a slicer:
Although no, even though this slicer cuts in layers, we will need a software slicer, although I would not refuse this, but alas, it is not included with the printer.
The supplied memory card contains a Creality Slicer:
I configured the printer profile following the recommendations from the Creality website.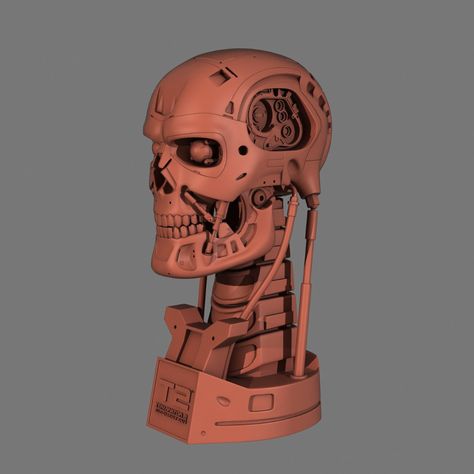 This slicer has a variety of settings. But if you don’t have enough of them, then you need to take chicken:
We take grilled chicken and, quietly gnawing it, install the Cura slicer on the computer. (By the way, the "Creality Slicer" is also based on Cura):
Cura version 4 already has a profile for this printer. This slicer has a huge number of settings. Below I will write what can happen if the slicer is configured incorrectly.
Well, now we need to try to print something useful:
This is a microscope leg extension. If you take a microscope and stick it on the table, it will be simply impossible to work with the thing examined in it:
In the photo behind the microscope you can see: “MOTOSPEED Inflictor CK104 mechanical keyboard”. And of course the microscope itself: "Mustool G600 microscope and its refinement."
A part of the carabiner is broken on the halter of the dog, it doesn’t matter, we are printing a new one:
Fastens perfectly:
Halter overview: “Gentle Leader dog halter”. I bought a replacement halter just in case. The cheapest is to buy it on Aliexpress for $3.62. Here is the very rare case when a copy is made with more care for the dog and of better quality than the original.
Phone stand:
Hinge after printing, immediately after the stand has been removed from the base - works:
After printing, the stand for the phone was immediately taken away from me and its further fate is unknown.
Soldering iron stand:
Flower pots:
When watering - Groot cries because his eyes have small holes.
But then trouble happened. The printer has stopped printing normally. With any printing, shifts began:
Inspection revealed that the screws holding the X-axis wheels turned away from the vibration. Here are the screws on the diagram:
The screws were tightened perfectly, the grovers even dented a little into the aluminum profile, but the screws still came loose.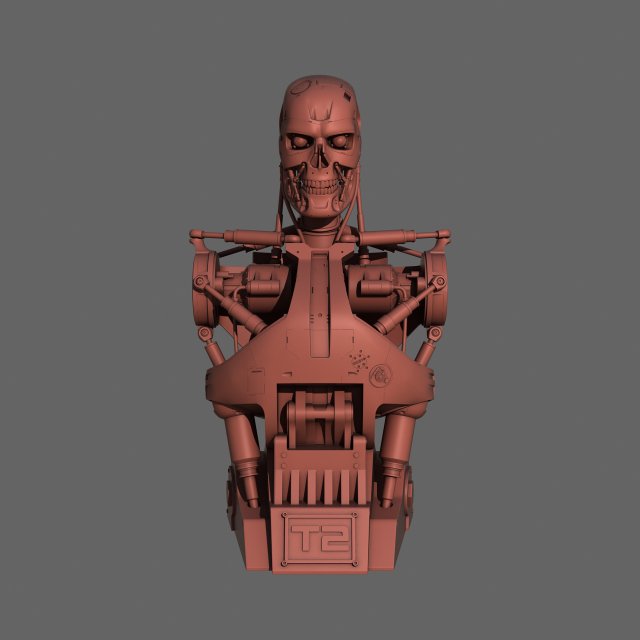 The growers here are made of the same metal as the table springs. Grower washers after tightening turned into ordinary ones. The blue threadlocker from the car dealer came to the rescue. It is blue, so that if necessary, you can disassemble the printer, and the red thread lock is one-piece. This problem didn't show up anymore.
Therefore, we print further. Two soldering tools:
For soldering wires, the notches are specially made so that the wires hold tight:
Flux squeezer:
Dough knife:
On the right in the photo, behind the cat's paw: "A set for cutting fruit in the form of a flower pot."
In the morning he met me with a dog and a poster in his paws:
With the poster he demanded to save a real cat. Save from hunger…
Another phone for the phone:
We collect:
A pair of devices for printer:
The holder of the instrument attached to the printer:
Cleader for the Philiment - Cornation - thread:
Foam rubber sticks out for clarity, if it is properly filled inside it will not be visible.