Startup 3d printing
20 Emerging 3D Printing Startups (2023)
You may also like:
- 6 Product Development Trends
- 20 Thriving Robotics Startups
- 40 Growing AI Companies & Startups
For 2022, the global market for 3D printing is projected to be worth $17.4 billion.
And is forecasted to grow more than 26% over the next 2 years.
On top of that, the 3D printing market is expected to grow at a CAGR of over 18% into 2025.
All things considered, it’s safe to say that the growth of this industry isn’t slowing down anytime soon, especially with new ventures launching every year. We’ve gathered the best 3D printing startups you should follow in 2023.
1. Relativity Space
5-year search growth: 1650%
Search growth status: Exploding
Year founded: 2015
Location: Long Beach, CA
Funding: $1.3B (Secondary Market)
What they do: Relativity Space is an aerospace startup that designs and manufactures 3D printed autonomous rockets. The company claims that their rockets can be designed and launched in a matter of days, as opposed to years. In 2019, Relativity Space made it to Fast Company’s list of most innovative companies (space sector).
2. Mighty Buildings
5-year search growth: 4100%
Search growth status: Peaked
Year founded: 2017
Location: Oakland, CA
Funding: $101.8M (Series B)
What they do: Mighty Buildings is a modular construction technology company that builds 3D printed homes. They do this by leveraging 3D printed panels and prefab technology. The company has completed about a dozen projects so far.
3. nTopology
5-year search growth: 840%
Search growth status: Exploding
Year founded: 2015
Location: New York, NY
Funding: $135.2M (Series D)
What they do: A software company, nTopology creates tools for design, engineering, and simulation.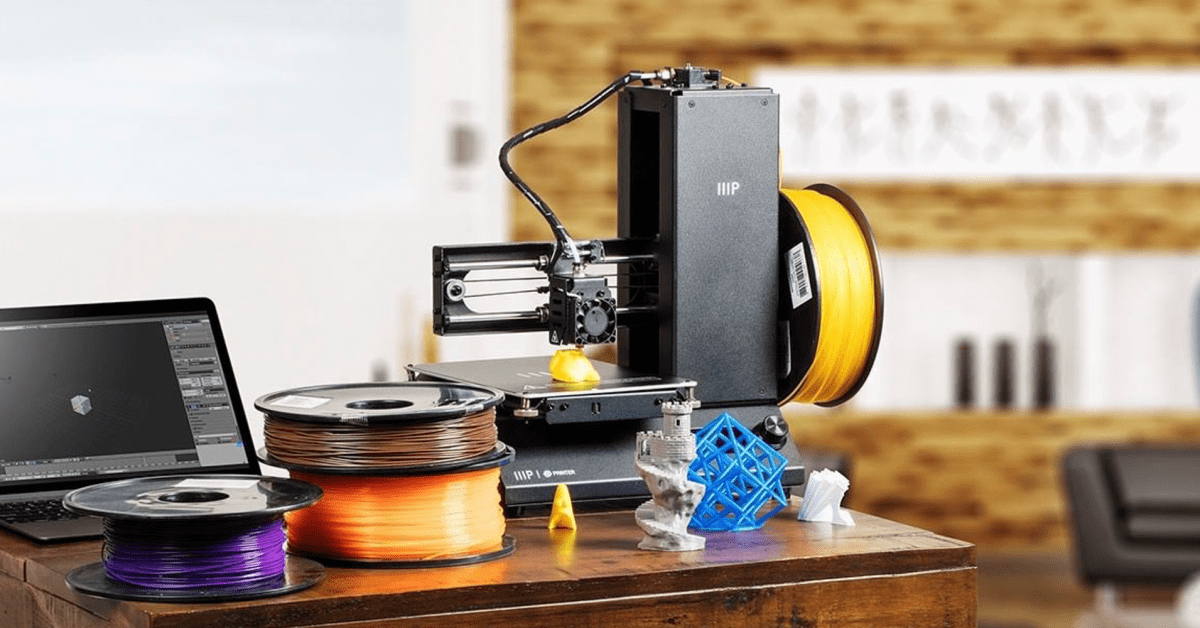 Their software solutions are designed to support and make the fabrication/3D printing processes smoother. nTopology’s solutions have been used to create +2,200 parts so far.
4. Multiply Labs
5-year search growth: 0%
Search growth status: Regular
Year founded: 2016
Location: San Francisco, CA
Funding: $22.7M (Series A)
What they do: Combining pharma with robotics, Multiply Labs creates 3D printed personalized capsules. Each capsule contains multiple products that are released at different times in the human body. It is estimated that the company currently earns $5M in annual revenue.
5. Additive Industries
5-year search growth: 50%
Search growth status: Peaked
Year founded: 2012
Location: Eindhoven, Netherlands
Funding: $25. 6M (Series Unknown)
What they do: Additive Industries specializes in offering metal additive manufacturing solutions to industrial markets. Specifically, they offer 3D metal printers and supporting services to aerospace, automotive, energy, and high-tech companies. In 2019, Additive Industries was shortlisted for the 3D Printing Industry Awards in the “Enterprise 3D Printer (Metals)” category.
6. VELO3D
5-year search growth: 728%
Search growth status: Regular
Year founded: 2014
Location: Campbell, CA
Funding: $205.1M (Post-IPO Equity)
What they do: A digital manufacturing company, VELO3D offers 3D metal printers and custom-printed components. Their platform is designed to provide end-to-end AM solutions for manufacturing problems. VELO3D made it to the Fast Company’s list of the most innovative manufacturing companies in 2021.
7. Fast Radius
5-year search growth: 341%
Search growth status: Exploding
Year founded: 2017
Location: Chicago, IL
Funding: $167.8M (Post-IPO Equity)
What they do: Fast Radius is a 3D printing startup that provides production and logistics assistance to manufacturing companies. They do this by offering on-demand manufacturing services, additive technology, and a cloud-based virtual warehouse. Fast Radius has served around 1.8K customers so far.
8. Mixed Dimensions
5-year search growth: 160%
Search growth status: Exploding
Year founded: 2009
Location: San Mateo, CA
Funding: $7.5M (Seed)
What they do: Mixed Dimensions is a 3D printing startup that transforms digital products into physical objects. They sculpt 3D collectibles of virtual characters and objects from video games. According to their website, Mixed Dimensions has partnered with some of the leading gaming and technology companies, including CCP Games, Cryptic, and Daz 3D.
9. Formlabs
5-year search growth: -19%
Search growth status: Peaked
Year founded: 2011
Location: Somerville, MA
Funding: $253.7M (Series E)
What they do: A hardware manufacturer, Formlabs builds and sells accessible 3D printers. They also offer material used for 3D printing, along with supporting software. Formlabs says that their users have printed over 40 million parts so far.
10. Fictiv
5-year search growth: -100%
Search growth status: Peaked
Year founded: 2013
Location: San Francisco, CA
Funding: $192. 6M (Series E)
What they do: A fabrication service, Fictiv offers custom on-demand manufacturing. They provide an online platform where their customers can upload 2D/3D files, receive a quote, and track the progress of the manufacturing process. Fictiv claims that they currently have over 250 manufacturing partners worldwide.
11. Markforged
5-year search growth: 27%
Search growth status: Regular
Year founded: 2013
Location: Watertown, MA
Funding: $346.8M (Post-IPO Equity)
What they do: Markforged is a hardware company that offers industrial-grade additive manufacturing solutions. Specifically, they offer 3D printers, materials, and software. Markforged claims that their 3D printers are used by the world’s top 9 manufacturing companies.
12. Xometry
5-year search growth: 566%
Search growth status: Exploding
Year founded: 2013
Location: Gaithersburg, MD
Funding: $197. 2M (Series E)
What they do: Xometry is an online marketplace where customers can find suppliers for custom 3D components and prototypes. In addition to 3D printing, users can also find suppliers for CNC machining, injection molding, and more. Xometry says that they currently have 4,000+ manufacturing partners in their network.
13. Glowforge
5-year search growth: 363%
Search growth status: Peaked
Year founded: 2014
Location: Seattle, WA
Funding: $113.2M (Series E)
What they do: Glowforge manufactures consumer-grade 3D laser printers. Their printers use subtractive manufacturing to print objects with different materials. Last year, Glowforge earned $28 million in pre-order sales.
14. 9T Labs
5-year search growth: 0%
Search growth status: Peaked
Year founded: 2018
Location: Zurich, Switzerland
Funding: $22. 5M (Series A)
What they do: 9T Labs offers 3D printing solutions focused on carbon composites. Their solutions, which consist of both hardware and software, are designed to help their customers produce carbon composites in high volumes. According to their website, they are trusted by the leading manufacturing organizations, including ESA BIC Switzerland, Ansys, and ETH Zurich.
15. 3YOURMIND
5-year search growth: -100%
Search growth status: Peaked
Year founded: 2014
Location: Berlin, Germany
Funding: $32.9M (Series A)
What they do: A software company, 3YOURMIND offers a suite of additive manufacturing solutions. Their software suite is designed to automate the additive manufacturing workflows of companies. According to their website, 3YOURMIND is used by the leading companies in the AM industry.
16. NEXA3D
5-year search growth: 100%
Search growth status: Exploding
Year founded: 2014
Location: Ventura, CA
Funding: $95M (Series Unknown)
What they do: NEXA3D is a manufacturing company that builds polymer 3D printers and supportive software. The company has aimed to make its products accessible to businesses of all sizes. NEXA3D claims that their solutions can deliver a 20X productivity gain.
17. Equispheres
5-year search growth: 0%
Search growth status: Peaked
Year founded: 2015
Location: Ottawa, Canada
Funding: $26.6M (Grant)
What they do: A materials science company, Equispheres offers additive manufacturing products. Specifically, they manufacture metal powders that the company claims have superior mechanical properties. In 2019, Equispheres received $8M in cleantech funding from BDC.
18. Arevo
5-year search growth: 300%
Search growth status: Exploding
Year founded: 2013
Location: Milpitas, CA
Funding: $69.5M (Series Unknown)
What they do: Arevo is a manufacturing company that develops 3D printed components for end-use. They do this by offering software solutions, carbon fiber material, and hardware designed for mass production. In 2019, Arevo won the startup prize at JEC World.
19. Dyndrite
5-year search growth: 0%
Search growth status: Peaked
Year founded: 2016
Location: Seattle, WA
Funding: $13M (Series A)
What they do: Dyndrite offers digital manufacturing software solutions. Their core platform, called “Dyndrite Accelerated Computation Engine,” supports the creation of software and hardware used in additive manufacturing. The startup was selected as one of the “Best Small Companies to Work For” by Built In Seattle in 2020.
20. 3DEO
5-year search growth: 0%
Search growth status: Peaked
Year founded: 2016
Location: Gardena, CA
Funding: $33. 8M (Series Unknown)
What they do: A 3D printing technology company, 3DEO builds and supplies metal components. They also offer a cloud-based manufacturing platform designed to manage the entire development process. Last year, 3DEO announced that they shipped 150,000 production parts for end-use applications.
conclusion
And that wraps up our list of 3D printing startups.
As additive manufacturing and prefab technologies become necessities, the industry for 3D printing products and services is set to see continued growth in the years to come.
Discover 5 Top 3D Printing Startups
Staying ahead of the technology curve means strengthening your competitive advantage. That is why we give you data-driven innovation insights. This time, you get to discover 5 hand-picked 3D printing startups.
Out of 1 704, the Global Startup Heat Map highlights 5 Top 3D Printing Startups
The insights of this data-driven analysis are derived from the Big Data & Artificial Intelligence (AI)-powered StartUs Insights Discovery Platform, covering 2 093 000+ startups & scaleups globally. The platform gives you an exhaustive overview of emerging technologies & relevant startups within a specific field in just a few clicks.
The Global Startup Heat Map below reveals the distribution of the 1 704 exemplary startups & scaleups we analyzed for this research. Further, it highlights 5 3D printing startups that we hand-picked based on criteria such as founding year, location, funding raised, and more. You get to explore the solutions of these 5 startups & scaleups in this report. For insights on the other 1 699 3D printing startups, get in touch.
Click to download
Interested in exploring all 1 700+ 3D printing solutions?
Schedule Demo
A.D.A.M enables Bone Implant Printing
Founding Year: 2018
Location: Farmington, US
Funding: USD 469 000
Industry: Healthcare
Partner for 3D Bioprinting
US-based startup A. D.A.M provides on-demand 3D-bioprinting for orthopedic and plastic surgery use cases. The startup uses biopolymers and bioceramic to print human tissues, primarily bone tissue, as well as offers other related services like the development of surgical aid software and equipment. Clinicians develop 3D models of the implants by directly uploading patient-specific medical data like magnetic resonance imaging (MRI) and computer tomography (CT) scans on the startup’s platform. The resulting 3D model is printed using 3D printers either in the startup’s lab or on the customer’s site. The startup’s regenerative bone stimulates osteogenesis to replace every bone element with bone tissue over time.
Founding Year: 2018
Location: Gandhinagar, India
Industry: Construction
Collaborate for Prefabricated Homes
Indian startup MiCoB develops 3D concrete printing technology. The startup develops large-scale 3D printers to allow construction companies to print modular rooms and houses. The startup also prints inflammable 3D concrete furniture which is resistant to external conditions like rain, termites, and wind. Concrete furniture has the ability to retain heat and hence increases the energy efficiency of the building. Further, the startup uses high-strength fiber-reinforced concrete to print customized facade and wall panels. The 3D printing software allows construction companies to upload architectural and other infrastructure design files to obtain material volume instantly. This enables them to reduce waste and optimize production by pre-designing and printing.
Founding Year: 2017
Location: Tallinn, Estonia
Industry: Fashion
Partner for Metal 3D Printing
Estonian startup Cloud Factory uses 3D printing to produce fine jewelry items. The startup spreads silver powder on the build platform and guides the laser beam onto the powder to melt the silver particles. according to the computer-aided designs (CAD). The process repeats until products are grown layer by layer onto the building platform. Once the metal adds up to make a jewelry piece, the startup uses the semi-automated polishing technique to finish the product. The technology enables jewelry manufacturers to mass-produce fine designs with higher quality and speed compared to traditional subtractive manufacturing. Furthermore, the startup allows circular jewelry manufacturing with minimum waste.
Founding Year: 2016
Location: Illinois, US
Funding: USD 2,5 M
Industries: Manufacturing, Industry 4.0
Reach out for Digital Manufacturing
USA-based startup Azul 3D enables mass manufacturing with 3D printing. The startup uses high area rapid printing (HARP) technology to streamline prototyping and production. The startup’s Azul 3D LAKE Printer allows lean manufacturers to massively produce highly customized products. The printer provides high manufacturing speed with variable part sizes. It uses advanced materials including rubber, resins, and high-temperature ceramics to print solid and production-ready parts. The startup’s solution enables manufacturers to scale up the production capacity and increase production speed.
Founding Year: 2016
Location: San Pedro, Spain
Funding: undisclosed
Industry: Food
Partner with Moodbytes for Personalized Food
Spanish startup Moodbytes advances 3D printed food technology. It combines 3D printing and computer vision with gastronomy to provide personalized food options as per an individual’s health. It allows chefs and nutritionists to design the food online and further use food ink to print it.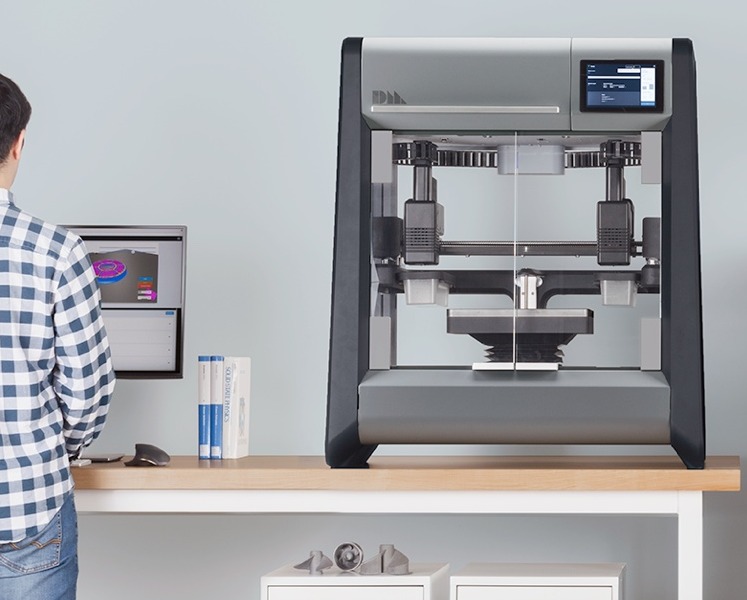 The 3D printing food technology enables personalized gastronomy while making the food industry more sustainable. The startup reduces food waste, creates better nutritional value for consumers, and reduces emissions associated with food from cultivation to consumption. Additionally, the startup uses virtual reality (VR) to simulate real-life environments like space, snow, and others for the consumer and enhance the food experience.
Discover more 3D Printing Startups
Startups such as the examples highlighted in this report focus on stereolithography, polymer 3D printing, and mass customization. While all of these technologies play a major role in advancing additive manufacturing, they only represent the tip of the iceberg. To explore more 3D printing technologies, simply get in touch to let us look into your areas of interest. For a more general overview, you can download one of our free Industry Innovation Reports to save your time and improve strategic decision-making.
Get in touch
First & Last Name*
Business Email*
Company*
How can we support you?
true
Get our free newsletter for insights into in technology, startups, and our services. (Learn more)
This site is protected by reCAPTCHA and the Google Privacy Policy and Terms of Service apply.
✕
Get in touch
First & Last Name*
Business Email*
Company*
How can we support you?
true
Get our free newsletter for insights into in technology, startups, and our services. (Learn more)
This site is protected by reCAPTCHA and the Google Privacy Policy and Terms of Service apply.
✕
Beginner's Tips on Getting Started with a 3D Printer, Table Calibration and Slicer Setup
Despite the abundance of videos and articles, the information in them is scattered and it can be difficult for a novice 3D maker to understand such an abundance of facts. In fact, everything is not so difficult, at the first stages it is enough to deal with just a few important nuances.
First use
Before using the printer for the first time, it is best to read the instructions.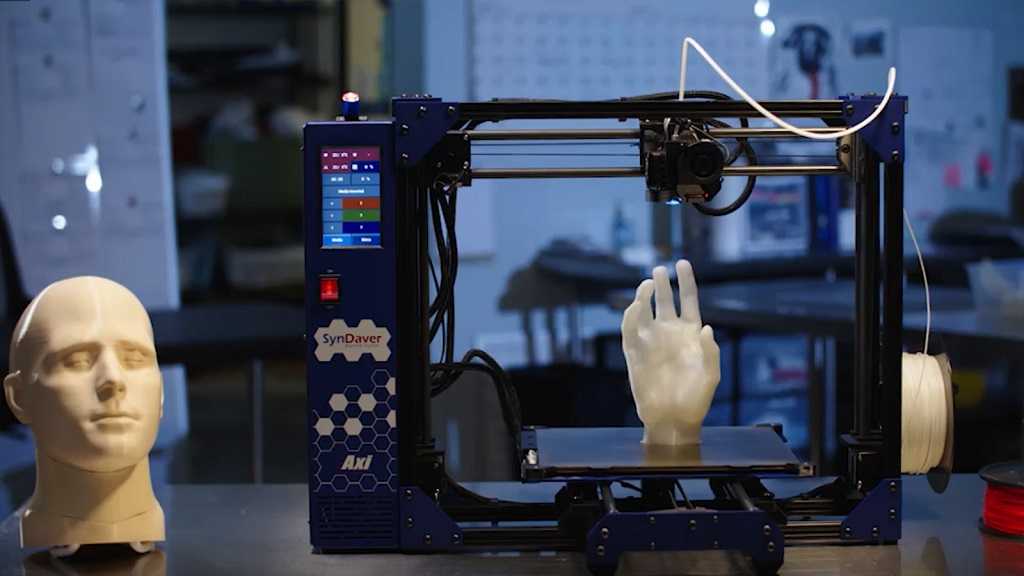 Each printer may have its own usage and settings. Some 3D printers are able to calibrate automatically, without user intervention, and some need to be configured manually. nine0003
If there was no paper instruction in the box, you can download it from the manufacturer's website. Some manufacturers stick a sticker on the box with a link to the current version of the instructions.
Before the first run, make sure all shipping locks are removed from the 3D printer. You can gently try to move the extruder along the axes with your hands to make sure that nothing interferes with its free movement.
Table calibration
The result of the entire operation of the printer depends on the calibration of the table. It is very disappointing to see that the model, after many hours of printing, came off the surface of the table and deformed or “moved out”. In order to prevent this from happening, it is necessary to correctly set the working plane and the gap between the table and the nozzle.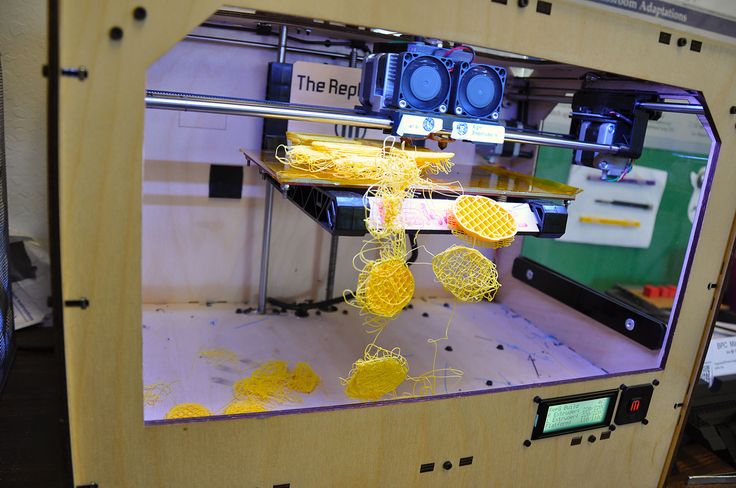
In many printers, manufacturers began to add an automatic print surface calibration sensor. A special sensor measures the distance from the table to the nozzle and makes a “map” of irregularities that are taken into account when printing. nine0003
Table auto-calibration sensor
There is a semi-automatic calibration. In this case, the printer, using a sensor, determines the distance to the table and tells you in which direction to turn the adjusting screw.
Here we will look at the manual calibration of the working surface of the most popular mechanics of FDM printers - Prusa, H-BOT, CoreXY, etc. nine0003
Table leveling
First you need to level the plane of the table. To do this, using the adjusting bolts, it is necessary to set the same distance between the table and the nozzle. Anything can be used as a probe, but it is better to take the probe recommended by the manufacturer (usually 0. 1mm).
1mm).
Table calibration
-
Heat up the table. The 3D printer table is made of a metal plate, when heated, the metal expands, so it is better to heat the table before calibrating. nine0003
-
Tighten the calibration screws as far as possible at the bottom of the print surface. This will help prevent the work surface from colliding with the nozzle in the next step.
-
Send table and extruder to zero position. Raise the table as high as possible or lower the extruder as far as possible with Prusa kinematics. This can be done from the menu with the HOME command. Make sure that the nozzle does not “crash” into the work surface. nine0003
-
Using the menu, move the nozzle so that it is above the calibration screw.
-
Place the probe between the work surface and the nozzle, use the screw to raise or lower the work surface so that the probe is firmly clamped.
 Repeat this for all table gauge bolts. There may be 3 or 4 of them.
 -
Move the extruder to the center of the table and use a feeler gauge to check the gap between the table and the nozzle. If the gap is the same as above the calibration bolts, then the plane is aligned correctly, if the gap is different, then it is worth repeating the calibration or checking the evenness of the printed surface. nine0003
The square test can be used to check the uniformity of the table plane calibration.
Work surface flatness test
Depending on the size of the work surface, you can place test squares in different places.
Test squares on the printed surface 30x30 cm
For this test, you need to print several thin squares (1 layer thick) on the printed surface. Depending on how they are printed, you can see if the table plane is evenly calibrated.
Table for determining the correct calibration of the table and nozzle.
Sometimes the printed surface is a bit uneven on its own and there are some small depressions or bumps in some places. If it is not possible to change the working surface or there is no time to re-calibrate, you can try to print the model on the “raft”. nine0003
The raft is a thick substrate that is printed under the model. A thicker layer of plastic adheres better to the printed surface and “smoothes out” its bumps.
3D model printed on raft
Table to nozzle gap calibration
If a feeler gauge was used to align the work plane, which matches the required gap between the table and the nozzle, then the extruder does not need to be calibrated separately. If the printer has 2 extruders, then only the second extruder needs to be calibrated. nine0003
Some 3D printers, like the Raise 3D, come from the factory with a leveled bed, but it's a good idea to check the gap between the bed and the nozzle before printing.Settings may change during shipping.
-
Using the menu, you need to send the table and extruder to the zero position (HOME).
-
Using a feeler gauge, set the distance between the working surface and the nozzle recommended by the manufacturer (usually 0.1 mm). Some manufacturers recommend calibrating the nozzle “to the table” without clearance. The distance between the nozzle and the working surface can be adjusted by the calibration screw, which is located at the z-axis limit switch, programmatically or by the extruder. nine0003
-
If the printer has 2 extruders, then the calibration must be repeated with the second extruder.
-
It is necessary to heat the extruder to the melting temperature of the plastic filament. The temperature range is usually marked on the box or spool of plastic.
-
After heating the extruder to a predetermined temperature, depress the lever that presses the filament in the feeder and push the plastic into the extruder until it starts to flow from the nozzle. nine0003
-
If necessary, fix the pressure lever so that it firmly presses the filament against the feed gear. (If the lever is not spring-loaded and does not return to its original position).
After changing the nozzle, thermal barrier, table surface or moving the printer - it is necessary to check the gap calibration between the work surface and the nozzle, and sometimes the plane of the table.
Loading filament
After setting up the print platform, you can load the filament (plastic). nine0003
In some 3D printers, the plastic loading process is automated and starts from the menu.
After loading the filament, you need to push the plastic bar a little until the remnants of the old plastic come out of the nozzle.
Setting print options
In order to get a neat and accurate model of the insufficiently good mechanics of a 3D printer, it is important to properly prepare the model using a special slicer program.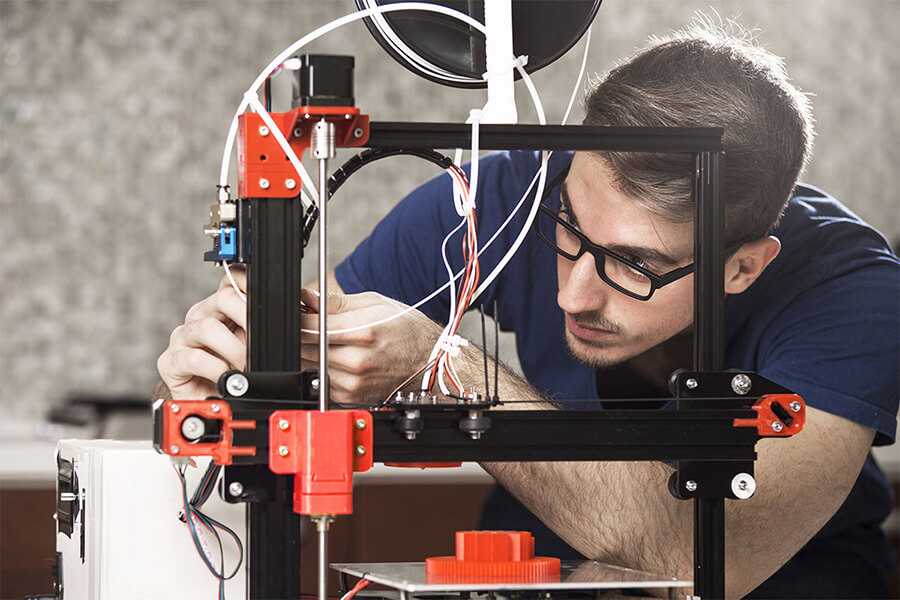 nine0003
Table and nozzle temperature
Perhaps the two most important parameters are the temperature of the nozzle and the working surface. These settings may affect other slicer settings.
Slicer CURA
Table temperature settings
A heated work surface is necessary for better adhesion of plastics with a high percentage of shrinkage, otherwise the part will simply come off the printed surface during printing. But due to too high a temperature, the lower layers can soften and deform under the weight of the growing model. nine0003
Depending on the surface of the table, the recommended temperature may vary. For example, if ABS is printed on a special substrate, the recommended table temperature is 100 degrees, and if glass with stationery glue is used as the work surface, the temperature should not be raised above 80 degrees.
Some manufacturers indicate the recommended table temperature on the box or on their website. But there are general temperature ranges that you can focus on. nine0003
-
PLA - 0 - 50 degrees. During printing, the plastic must be blown.
-
ABS - 80 - 90 degrees. Drafts should be avoided during printing.
-
Nylon - 80 - 90 degrees. Drafts should be avoided during printing.
-
Flex - 80 - 90 degrees. Drafts should be avoided during printing. nine0003
Nozzle temperature settings
The required temperature range is indicated by the manufacturer on the filament spool, but it is better to print a couple of small tests to determine the ideal temperature for a given filament.
After changing the nozzle to a nozzle with a different diameter or a significant increase in printing speed, it is necessary to slightly increase the temperature of the extruder. Due to the small “melt chamber”, the plastic may not have time to warm up to the desired temperature. nine0003
There are extruders with a large volume of "melting chamber" of plastic, but they are not suitable for every 3D printer and are designed to work with large diameter nozzles.
Conventional heating block and Vulcano block with enlarged “melting chamber”
Printed tests
To configure some slicer parameters, it is convenient to use special tests, rather than setting the settings at random. Some of the tests can be printed every time you change the spool of filament. For example, plastic from the same manufacturer, but with a different dye, may have slightly different temperature settings. nine0003
XYZ Cube
Printed cube
This is one of the most popular tests that can be used to evaluate the quality of the surface and the accuracy of the kinematics of a 3D printer (belt tension, number of steps per mm, etc.). You can download it here
Boat 3D Benchy
A small test boat that allows you to evaluate many 3D printer parameters and slicer settings. 3DBenchy has become so popular that enthusiasts have come up with various fun and practical accessories for it. nine0003
Parameters to pay attention to in the finished model
For two extruder printers, there is a boat that needs to be printed in two colors. You can download the model or find models of accessories for the finished boat here.
Boat for two-color printing
Simple temperature tower
Setting the correct print temperature is one of the most important factors in obtaining a strong model with a quality surface. Many factors can affect the fusibility of a plastic - the quality of the raw material, the addition of dyes, the speed of printing, the thickness of the layer, etc.
In order to understand how plastic behaves at different temperatures, enthusiasts came up with a simple test turret that prints at different temperatures at different heights.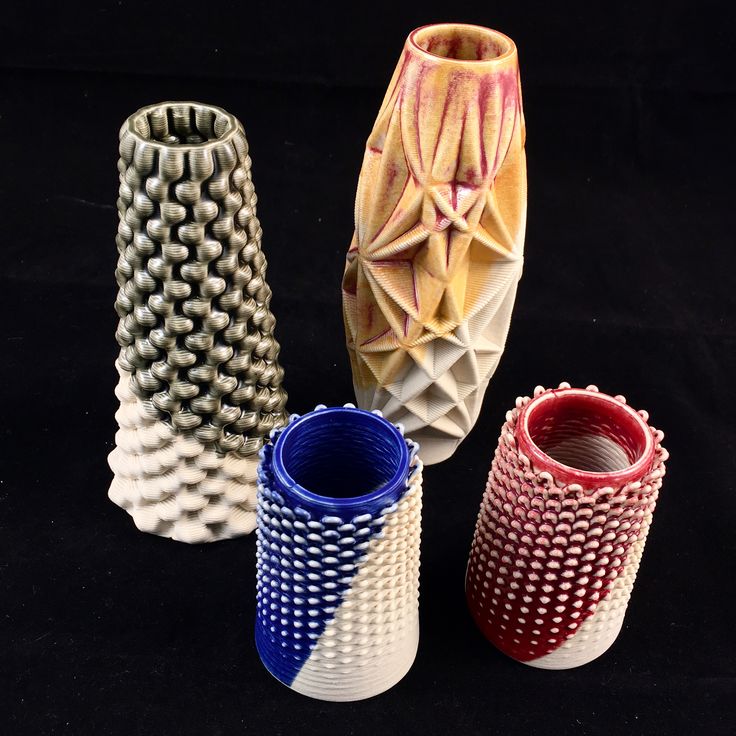 There are several types of these tests. Some have overhanging elements and “bridges”. You can download the test here. nine0003
Temperature tower with bridges and overhangs
Turrets
Retract Turrets
These small turrets allow you to fine-tune the retract in your slicer settings. Due to their small size, they print very quickly. You can download the model here.
Bridge printing test
Test Bridge
Some overhanging elements can be printed without supports, the slicer even has special settings for printing such “bridges”. To find the optimal parameters, you can use this small test model.
Surface overhang
nine0026 Test model
A small test that allows you to understand how the plastic will behave when printing overhanging elements. With this test, you can configure support settings in the slicer. You can download the model here.
Test All-in-one
There are printed tests - all in one, but it can be difficult for a beginner to figure out which settings need to be adjusted. Therefore, to begin with, it is better to print simple tests, and with experience, you can use universal ones. nine0003
Printed test all in one
Model can be downloaded here
Common errors
Poor first coat adhesion
This is usually due to incorrect print surface calibration or poor adhesion of the first layer.
First you need to check the correct gap between the table and the nozzle. If necessary, calibrate the plane of the printed surface and the gap between the working surface and the nozzle. nine0003
To increase adhesion, you can use special adhesives that are applied to the printed surface. Check the correct temperature of the extruder, table and thickness of the first layer in the slicer settings.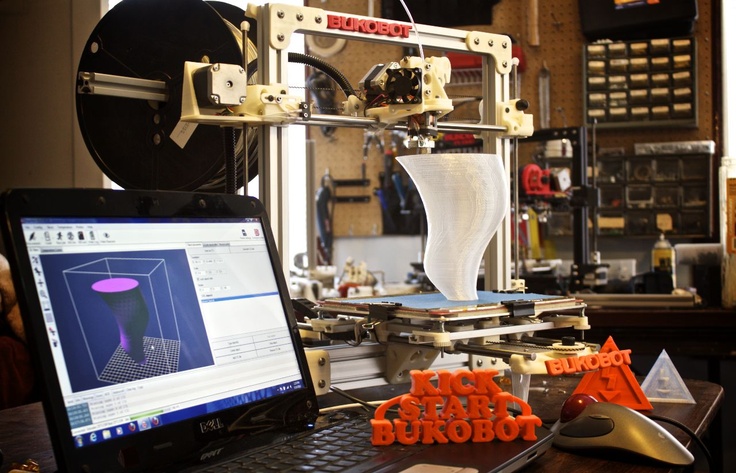 The higher the temperature of the extruder, the better the adhesion. The first layer is usually thicker than subsequent ones, because the thicker layer of plastic adheres better to the work surface.
Printer does not extrude plastic
If the printer stops extruding plastic and the feed mechanism starts to click, then most likely the problem is a clogged nozzle. The nozzle can be burned or cleaned, but in 3D printing nozzles are consumables and it is better to replace it immediately. nine0003
Plastic bubbles when printed
If the plastic bubbles when exiting the nozzle, then it must be dried. Some engineering plastics, such as nylon, need to be dried before each print.
Model is printed with errors
The slicer cannot always process the model correctly if it has errors. For example, inverted normals, internal walls, or the model is not closed. Such models need to be “cured” before printing. nine0003
Model printed with error
Some slicers are able to fix simple errors on their own, but if the slicer is powerless, you can use special programs designed to work with STL files. For example, Autodesk Netfabb allows you to fix model flaws with the click of a couple of buttons.
Repairing a Model with Autodesk Netfabb
Totals
Despite the fact that a 3D printer is essentially a CNC machine, manufacturers are trying to make it as easy as possible to work with it. There are many additional options that allow the novice user not to delve into the nuances of setting up and calibrating the printer, but to start printing right out of the box.
Most slicers are also simplified as much as possible for a more comfortable acquaintance with 3D printing. Universal profiles appear, in which the user only needs to specify the type of plastic and send the file for printing. And later, you can use the advanced settings menu for finer control of print settings. nine0003
Instructions for starting a 3D printer -Manufacturers -News
Instructions for starting a 3D printer -Manufacturers -News Moscow, Dubninskaya st. , 24, building 3
+7 (499) 391-38-03
Mon-Fri from 10:00 to 19:00
- Everybody
-
Applications
-
Manufacturers
nine0202
News
The possibilities of 3D printing are incredible. We would like to share the most inspiring user stories with you.
Felix Tec4 3D Printer Startup Instructions
Quick start3D printer FelixTec 4 | |
1. Safety | |
nine0004 Security Do not allow children to use the printer without adult supervision. The printers are intended for professional use.Operation warningDo not lean on the printer. Be careful with long hair and loose clothing. Do not move the printer during operation.Check that there are no foreign objects or residues of previous printing in the print area. Do not remove objects from the plate while printing or while it is still warm. Be careful of any moving parts that move in the X, Y and Z directions. There is a pinch hazard at the end of each moving part. nine0005Network SecurityUse only power supplies and cables supplied by FELIX - printers. Always turn off and unplug the printer before performing maintenance or upgrading.The power supply complies with all CE regulations and has protection against short circuit, overload, over voltage and over temperature.Printer locationPlace the FELIXprinter on a stable support or table. It should be placed so that small children do not have access to it. nine0005 | VentilationGood ventilation during printing is recommended, although printing with PLA is considered safe. When printing ABS, small concentrations of Styrene fumes may be released. This can (in some cases) cause headaches, fatigue, dizziness, confusion, drowsiness, malaise, difficulty concentrating, and feeling drunk. When printing ABS, small concentrations of Styrene fumes may be released. This can (in some cases) cause headaches, fatigue, dizziness, confusion, drowsiness, malaise, difficulty concentrating, and feeling drunk. We recommend using the filament types shown on the felixprinters.com website. Examples of PLA, PETG, ABS, PVA etc. Other types may be toxic. Please follow the instructions from the filament supplier. nine0005Care with heating elementsThere is a potential risk of injury as the print head can reach up to 275°C and the heated bed up to 100°C. Do not place objects that cannot be printed on the heated bed, even if the printer is turned off. Do not touch the heating elements while the printer is in operation and until they have cooled down.It is not recommended to leave the printer unattended for a long time. nine0005 |
Data sheet | |
| | |
Schematic of 3D printer | |
| Accessory installation | |
Place the back of the flex plate on the edge of the table. Lower the front of the flex plate and make sure all edges are inside the table platform. Fit the thread guides and material spool holders into the aluminum profile as shown. First you need to mark the part of the fastener in the T-slot, then turn it a little until the fastener wraps around the aluminum profile. nine0003 | |
3D printing table leveling | |
| Go to the main menu by pressing the button and select the "Control" section. | |
| Select "Level Build Platform" by turning the button, confirm the selection by pressing the button | |
| Next, the 3D printer will start measuring the angle of the platform (table), this may take a few seconds, wait until the end of the measurement, and you will see the measurement results on the printer display | |
Shows the values for the necessary adjustment of the table with the adjustment screws. These values will be used to level the platform (table) with the two large screws. These values will be used to level the platform (table) with the two large screws. | |
| Turn the front screw 90° to the left (counterclockwise) and the rear screw 45° to the right (clockwise). Now select "Measure Again" | |
| If the screws are adjusted correctly, the process will end automatically and you will see "OK" on the screen. Otherwise, the measurements must be repeated. nine0426 | |
3d printer surface sensor calibration | |
| 1. Go to the main menu by pressing the button and select the "Control" section. 2. Next, rotate to find the item "Calibrate Z-Probe" and press the button 3.Place the calibration card between the nozzle and stage flex plate. Click the button to continue. | 4. If you turn the button to the left (counterclockwise), the distance between the table and the extruder will decrease, to the right (clockwise) it will increase. 5. "OK" means everything went well, this setting affects the distance between the nozzle and the table at the first printing layer, and is the most important! |
Replacing and threading the 3D printer Felix Tec4 | |
| 1. Take the Teflon guide tubes and insert them into the holes on the printer's printhead and guide. The Teflon tube is used as a filament guide. With a Felix 3D printer, you can use any 3D printable plastic, but you will achieve the best quality with plastic from Felixprinters. nine0426 | |
| 2. Place the media spools on the holders at the end of the printer | |
3. Take the free end of the filament on the reel, check that it does not break (bend the material 2-3 cm from its end, if the material breaks it means that it has absorbed moisture and may get stuck when fed into the extruder). Cut off a little (2-5cm) of excess thread with scissors. The tucked thread should be without fractures and with a neat butt. Cut off a little (2-5cm) of excess thread with scissors. The tucked thread should be without fractures and with a neat butt. | |
| 4. Repeat steps 1-3 for the second spool. | |
| 5. Push the thread through the guides and the Teflon tube until the thread comes out of the tube by 5-7 cm. | |
| 6. Go to the main menu by pressing the button and select the "Control" section | |
| 7. Select "Change Filament" from the open menu | |
| 8. Select the desired extruder to load the filament. If you have a printer with one extruder, you just need to select "Extruder 1" | |
| 9. Select the type of plastic you want to replace or insert. | |
10. By turning the button you can both pull out the material from the extruder and refill it. With a smooth rotation of the button, it is necessary to draw the thread through the entire extruder until the thread starts to come out of the nozzle, as in the figure, the thread that has come out of the nozzle must be removed with tweezers (CAUTION: the nozzle heats up to high temperatures, do not touch it during the plastic replacement procedure with your hands). If necessary, you can slightly push the thread from above. nine0426 If necessary, you can slightly push the thread from above. nine0426 | |
Please note that for high-quality printing, there must be no filament residues on the nozzle, and the table must be clean, so it should be cleaned before printing. | |
Printing with an SD Memory Card | |
| 1. Save the gcode print program and insert the memory card into the slot near the printer's power connector | |
| 2. Enter the main menu and press "Print" | |
| 3. Select a file to print and click the button. After that, printing on the 3D printer will start, the extruders and the table will warm up according to the settings, the platform and the distance to it will be measured at several points, after which the printer will print a preliminary strip from the front side of the platform and start printing the object itself. | |
4. Do not leave the printer unattended until at least two or three layers have been printed, be careful about the first layer, it must be in contact with the table surface, otherwise the print will be damaged. nine0426 Do not leave the printer unattended until at least two or three layers have been printed, be careful about the first layer, it must be in contact with the table surface, otherwise the print will be damaged. nine0426 | |
| 5. If you need to stop printing or pause, press the button and in the menu that appears, you can stop printing "Cancel print", pause printing "Pause", change the material and adjust the Z-axis printing. | |
How to properly remove the printed object from the table | |
| 1. Remove the metal plate from the table, as shown in the picture, this plate is magnetic to the table and can be easily removed from it. (Be careful not to damage the printed object and your hands on the heating element). nine0426 | |
| 2. Bend the sheet-plate slightly on both sides, the printed object can be easily separated from the platform. | |
Our company supplies unique equipment for 3d printing from Felixprinters.


 The calibration card should be lightly pressed between the nozzle and the table, then press the button to continue. nine0003