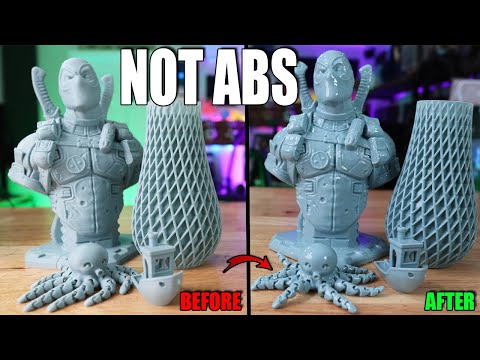
Smoothing out 3d prints
How to Get Perfectly Smooth PLA 3D Prints – Clever Creations
Are you interested in smooth PLA 3D prints but aren’t sure where to start? You’re not alone! PLA smoothing is one of the most common concerns among 3D printing enthusiasts who want glossy prints without the hassle of working with ABS.
While you won’t find a direct equivalent of ABS acetone smoothing for PLA, there are several other methods you can use to achieve a smooth outer surface on your prints. Whether you just don’t like the 3D printed look, want to sell your 3D prints, or need a smooth piece for certain applications, PLA smoothing is fast and easy.
In this article, you’ll find the most common products and techniques used in PLA smoothing, how to use them, the benefits and disadvantages of each method, and when one method should be used over another.
What is PLA Smoothing?
PLA smoothing is the process of removing the visible layer lines that are generated on 3D printed parts during the printing process. A smoothed 3D print becomes just that: smooth. The outside of the print loses the 3D printed look and appears more like injection-molded plastic.
PLA is one of the most common 3D printing materials available because it is easy to use, cheap, and readily available. PLA prints at a low temperature and does not have a strong tendency to warp (unlike ABS filament), making it a good choice for beginners.
Recommended:
PLA vs ABS: Which Filament is Better?
There are many methods to achieve a smooth look on PLA prints, and they usually require either by removing the excess plastic that causes the visible layers or filling in the tiny gaps between the layers with some sort of brush-on coating. Each method has its pros and cons and some are better for certain projects than others.
Why Smooth PLA 3D Prints?
There are several reasons for smoothing PLA 3D prints, but the most common one is aesthetic. Many enthusiasts don’t like the lined look of 3D prints and would prefer to remove them. This is especially true if they are making money with their 3D printer by selling 3D prints, since their customers may not appreciate the rough texture.
You also may need to fill in or remove your layer lines for certain applications. For example, if you are using the print as a master for making a silicone mold, you may want to smooth it so the texture isn’t transferred and so that casting materials like resin end up being glossy instead of matte.
Some of the methods used for smoothing PLA prints, like epoxy coatings, also make your prints more resilient. The coatings seal the layers and protect them from moisture and dirt. This is especially helpful if you plan to use your prints outside. Even sanding and spray painting your prints gives them more water and heat resistance.
An additional benefit of epoxy coatings is that they can help make your PLA food safe.
Methods to Smooth PLA Filament Prints
XTC-3D
XTC-3D is a high-performance two-part epoxy resin coating formulated to smooth 3D prints. Epoxy resin generates heat as it cures, so typical epoxies can warp 3D prints made from low-temperature materials like PLA. XTC-3D is formulated to cure at a lower temperature, so it won’t damage your prints.
Like most resins, XTC works by mixing the dormant resin with a proportionate amount of hardener. Once the hardening agent is added, the resin will go from liquid to solid within a certain amount of time. While it’s still in its liquid phase, you can paint a thin layer of it on your print and let it cure.
Resin coats like XTC are a great option for smoothing 3D prints because they are relatively simple to use and produce great results. The resin coating fills in the layers and adds a glossy shine. You can even sand and paint the resin coating as needed to easily achieve the look you want.
Epoxy resins should be handled with care and proper personal protection equipment. Always use XTC-3D in an area with good ventilation (while ideally wearing a respirator) and wear protection like latex or nitrile gloves and goggles to protect your skin and eyes. Be sure to check the product’s MSDS for more information on safe handling.
XTC-3D - High Performance 3D Print Coating - 6.4 Ounce Unit
1,337 Reviews
Check PricePros:
- Paints on easily
- Clear glossy finish
- Protects your prints
Cons:
- Expensive
- Fumes while uncured
3D Gloop
One of the most versatile 3D printing products you can buy, 3D Gloop is an adhesive meant for coating the print bed and gluing 3D printed parts together. However, it also works well as a brush-on coating to smooth PLA, ABS, or PETG 3D prints.
Unlike resin formulas like XTC-3D, you don’t need to mix or otherwise prepare 3D Gloop—you can brush it on in thin layers directly from the bottle and let it dry. They have formulas specifically made for different types of filament, so make sure you are using the PLA product for smoothing PLA parts.
3D Gloop does produce a lot of fumes while in use, so always use it in a well-ventilated area or with a respirator. You should also wear gloves and goggles and try to avoid direct contact with your skin (and be sure to wash it off quickly if skin contact does happen). If you also resin 3D printing, you might already have this equipment at hand.
Recommended:
Resin vs Filament 3D Printers: What’s the Difference?
Pros:
- Easy to use
- Versatile
- Made for 3D prints
Cons:
- Hazardous fumes
Sanding and Painting
Image: AxeCatAwesome via Reddit
Sanding PLA can give great resultsThe easiest and most common way to smooth PLA 3D prints is to sand and paint them. This process is the most time-consuming, but it yields excellent results when done thoroughly. With sanding, you are physically removing the layer lines, whereas with other methods, you are filling them in.
Sanding and painting will give you the most control over your finished piece. If you want to 3D print a helmet or create 3D printed cosplay armor, this is the method to go for.
To sand a PLA print, start with a rough quality sandpaper like 100 grit and sand down all the layer lines and areas you want smooth. Use the next size like 200 grit to sand it again, and keep repeating the process while you work your way up to finer sandpaper sheets.
Image: 3D Printed Props via Youtube
Make sure you don’t skip grits when sanding PLAYou can keep sanding until you reach 2000 grit paper for a very smooth 3D print surface, but this may be more than you need for your print. If you plan to prime and paint your piece, you likely won’t have to go that high. Assess your print after each grit and stop when you reach the texture you want.
You can use a wood filler or other filler primer before sanding to fill in some of the layers. This will cut down on a lot of the sanding needed and give your print a nice surface texture for holding paint.
From there you can paint your print as needed using whatever type of paint you prefer. Spray paint works well for large prints, while gloss paint adds shine to your new smooth surface.
Keep in mind that wet sanding (using wet sandpaper or keeping your print submerged in water while sanding) is best for PLA prints since it keeps the friction from melting the plastic and keeps you from inhaling the dust particles from the PLA. It can take a while to finish using this method, but it holds paint very well and looks great.
3M 88619NA 99419 Sand Paper, 9" x 11"
174 Reviews
Check PricePros:
- Gives you the most control
- Most affordable option
Cons:
- Time-consuming
- Takes a lot of effort
Heat Gun
Image: Tinkerine via Youtube
Be careful not to overheat your PLA prints when smoothing with a heat gunIf you want a non-chemical method that doesn’t require quite as much elbow grease as sanding, you can try using a heat gun. This method can be very effective at smoothing 3D prints when used correctly. However, it is rather difficult to do without accidentally melting your prints (especially ones made from PLA), so be sure to practice on failed or broken prints first.
Smoothing a PLA 3D print with a heat gun melts the outside layers of plastic just enough to remove the layer lines and give the print a shiny gloss. You carefully move the heat gun around the print, never staying on one area too long in order to heat the whole print evenly. When the surface of the print looks wet, you can turn off the heat gun and let the print cool.
Recommended:
How to Melt and Dissolve PLA Filament
This is a helpful technique to quickly get a smooth, shiny look with a tool you might already have on hand. Since it’s so difficult to get consistent results, this method is probably best kept as a last resort or when the results don’t matter as much.
Wagner Spraytech 0503008 HT1000 Heat Gun, 2 Temp Settings 750ᵒF &...
21,554 Reviews
Check PricePros:
- Quick
- Uses a common tool
- Gives a shiny surface
Cons:
- Hard to do well
- Results are inconsistent
PolyMaker PolySmooth PVB Filament
Image: Polymaker
Printing under similar settings and conditions as PLA, PolySmooth is a special low-temperature filament that can be smoothed with isopropyl alcohol. For fans of the ABS acetone smoothing, this is one of the closest equivalents you can get to that process with PLA or PLA+ filaments.
PolySmooth is easy to use. It prints at a low temp like PLA and doesn’t require a heated bed or 3D printer enclosure. You can spray alcohol onto your finished model and have a smooth print within minutes. The alcohol breaks down the outermost layer of plastic, leaving behind a shiny and smooth surface similar to that of a vapor-smoothed ABS.
Image: Polymaker
You can also use the PolyMaker Polysher to smooth 3D prints. Similar to a wash station for resin prints, the Polysher machine evenly coats the prints with vaporized alcohol. You can set the start and end times for the Polysher, ensuring smooth 3D prints every time.
While you don’t need to purchase the Polysher to use PolySmooth, it is a good way to automate the smoothing process if you have a lot of prints to do. It gives more consistent results across many prints.
Polymaker PolySmooth PVB Filament 1. 75mm 3D Printer Filament Green...
283 Reviews
Check PricePolymaker Polysher - Post Processing Device to Smooth Print Surface...
283 Reviews
Check PricePros:
- Prints like PLA
- Safer than vapor smoothing
- Uses isopropyl alcohol
Cons:
- Costly
Chemical Smoothing
If you are wondering if there are chemicals available that smooth PLA similar to how acetone smooths ABS, the short answer is yes. There are some chemicals like ethyl acetate that can vapor smooth PLA, but they are not ideal for many reasons.
We also don’t recommend using them since they are highly toxic (especially when vaporized), expensive, and difficult to source. Ethyl acetate in particular poses a significant health hazard if inhaled and is highly flammable.
With products like PolySmooth on the market, you can already smooth 3D print layer lines without needing to use hazardous chemicals.
Abrasive Smoothing Methods
Abrasive smoothing methods like tumbling and sandblasting are another possibility to smooth 3D prints. These methods are fairly versatile because different tumbling media and blasting mixtures will give you different results.
However, the processes tend to work best with metal-filled PLAs. Regular PLA prints have mixed results. Sticking to the best PLA filament brands does help get better results.
Recommended:
The 10 Best PLA Filaments for 3D Printing
Tumbling 3D prints has been met with limited success. Vibratory bowls tend to work better than rotary tumblers. Using an actual tumbling media instead of the cheaper options like steel nails/shot or walnut shells also gives more consistent results.
Tumbling regular PLA prints usually softens the layer lines but doesn’t completely remove them. Metal and wood-filled PLA filaments, on the other hand, tend to have better results in a tumbler and look nicely polished and smoothed from the process.
Sandblasting is another option for smoothing PLA prints that offers varied success. Like tumbling, how efficient sandblasting is depends on the media used. Using fresh sand produces the best results. Like with tumbling you usually won’t completely remove your lines, but it will make them less noticeable.
Frequently Asked Questions
What is the best way to smooth PLA prints?
The “best way” really depends on what you’re trying to accomplish with your finished print. If you just want it to look nice and smooth with minimal effort, XTC-3D resin coating is probably your best option. However, this adds another layer of materials on top of your print, so if you plan to paint it afterward, you will lose your small details.
If you want more control over the detailing of your smoothed prints, sanding is the best method to use. Since you are doing the process by hand, you have the most control over where the sandpaper goes. This method is best when used on prints that are going to be painted after.
Finally, for a quick smoothing effect that still leaves most details and doesn’t require much time, using PolySmooth filament instead of your usual PLA is a fast and easy way to get smooth results, so this will be the best option for everyday prints or when you need to smooth many prints quickly.
How do you smooth PLA without sanding?
To smooth 3D prints without sanding, you can use a liquid coating or filler primer to fill in and seal the layers. XTC-3D and 3D Gloop are the best choices for this, but there are other products available as well.
You can use the heat gun method detailed in this article, but that one takes quite a bit of practice to use well and doesn’t always produce consistent results.
Can you acetone smooth PLA?
No, acetone does not react with PLA plastic in the same way it does ABS, so it will have little to no effect on your 3D print. ABS is acetone soluble, meaning it will break down in acetone. PLA has few chemical reactions (and even less so that work like acetone and ABS), so finding a chemical smoother is not feasible.
If you want the experience of printing with PLA and the easy smoothing of acetone, you’ll need to buy PolySmooth or some other filament made for easy post-processing.
Can you smooth PLA with heat?
Yes, you can use heat to smooth your PLA parts, but your results will vary since it is very easy to damage your prints this way. The best way to heat smooth 3D prints is to only heat the outermost layers of plastic. Being too aggressive will also melt or warp the inside layers, causing the print to deform.
Heating the print in an oven or similar appliance often results in uneven heating. Your prints can overheat or burn in some areas while other areas haven’t even started to smooth. This is because the heat is coming from a static source, so it doesn’t distribute evenly within the oven.
Image: Tinkerine via Youtube
Your results with smoothing PLA in an oven will varyUsing a heat gun gives you more control to evenly heat the print and overall better results than a static heat source, but even that produces inconsistent results. More aggressive heat sources like an open flame almost always damage the prints, even when they can be moved around.
Does isopropyl smooth PLA?
No, isopropyl alcohol (IPA) will not smooth PLA. However, you can get the desired results with Polymaker’s Polysmooth. This is a special PLA filament that has been treated to be more responsive to IPA.
Can you vapor smooth PLA?
Yes, technically you can smooth PLA 3D prints using a vapor deposition process, but the chemicals required are not safe for human exposure.
How do you smooth a 3D printed figure?
There are a few ways to smooth out a 3D printed figure. One is to use sandpaper to lightly sand down the rough edges. Another is to use a heat gun to slightly melt the edges and give them a smoother appearance.
You can also use chemicals like acetone or XTC-3D to smooth out the surface of the print. Whichever method you choose, make sure to take your time and be careful not to damage the figure.
Finally, the best way to create a smooth 3D printed figurine is by using resin 3D printing instead of FDM printing. There are plenty of 3D printers for miniatures that work well for this purpose.
How do I get a smooth finish with PLA?
There are a few things you can do to get a smoother finish with PLA. First, make sure your printer is calibrated correctly, for example by using a temperature tower to set the right temperatures. This will help ensure that the layers are printed evenly.
Second, use a higher-quality PLA filament. Some brands of PLA filament are known for having a smoother finish than others.
Recommended:
The 10 Best PLA Filaments for 3D Printing
Finally, try using a different nozzle size. A smaller nozzle size (and thus smaller layer heights) will result in a smoother finish.
Final Thoughts
Whether you enjoy the cleaner look of finished prints or need a smooth surface on your prints for functionality, you have several options for making your PLA prints look amazing.
Smoothing layer lines from PLA isn’t as easy as some other 3D printing materials, but there are several methods and products available to help you do it as painlessly as possible. From brush-on epoxy resin products that fill in layers to special filaments to basic sandpaper, there is a smoothing method that works for most projects.
Do you still have questions about smoothing PLA prints? Let us know in the comments!
Smoothing PLA 3D prints with sandpaper, solvents, and more
Using PLA with an FDM 3D printer can lead to excellent results. The process is fast and affordable, and PLA filament can produce functional printed parts with a good level of strength and stiffness.
But FDM has its drawbacks too. For instance, it produces visible layer lines, which can compromise the appearance and function of printed parts. Furthermore, PLA can be more difficult to work with than other 3D printing materials, as it can’t be smoothed with acetone.
Fortunately, there are several ways to smooth PLA 3D prints, ranging from beginner-friendly techniques like sanding to advanced methods like solvent application. This article looks at the best ways to smooth PLA prints, showing you which technique will work best in a given situation.
Untreated FDM parts have visible layer lines
Although FDM parts can’t easily attain the smoothness of, for instance, SLA parts, there are a number of post-processing techniques that can transform bumpy prints into smooth, rounded, and glossy parts. Some of these options involve adding material to the print (primer spray, epoxy resin), while others involve removing material (sanding, chemical smoothing).
Of course, adding a smooth surface to PLA printed parts will add time and cost to a project, but the results are often worth it. Not only does smoothing improve the appearance of the prints, it allows for less strict printing parameters — greater layer height, for instance — which in turn leads to faster printing.
Below are some of the most common methods for smoothing PLA prints. They should be carried out after preliminary post-processing steps, i.e. the manual removal of supports and large sections of excess material.
Sanding
The most common method for smoothing PLA prints is sanding. This method is highly practical, as it is inexpensive and poses no health risks. However, it is also one of the most time-consuming ways to smooth a print and is not especially suitable for fine features or reaching into deep crevices.
Sanding can be approached in different ways depending on the purpose of the parts and the desired level of smoothness. Large parts may require a sanding block (a piece of wood with sandpaper wrapped around it), while small parts and fine features may be suited to nail files. Though highly efficient, electric sanders are not recommended for PLA parts, as the heat they generate can melt the PLA and warp the part.
Sanding PLA parts requires sandpaper in different grit sizes
For most prints, sanding begins with coarse 200 or 400 grit sandpaper — either loose or wrapped around a sanding block — worked in circular motions over the surface of the part to remove the most extreme protrusions. After the whole part has been sanded, a slightly finer sandpaper is used, working up in increments to 3,000 grit.
Although it may seem like a big undertaking, it is worth obtaining sandpaper in the following grit sizes and sanding for a few minutes with each size:
200
400
600
800
1,000
1,500
2,000
2,500
3,000
With the finest grit sandpaper, a small amount of water can be applied to produce an even smoother finish.
Polishing
For high-shine PLA parts, the sanding stage (which gives a smooth but matte finish) can be followed by a polishing stage, using a cotton cloth and liquid plastic polish.
The technique for polishing 3D printed parts is similar to sanding: with polish applied, the wet cloth should be moved in even circular motions over the surface of the part until it is smooth and shiny.
Priming
Sanding alone can reduce the appearance of layer lines by shaving off the raised “steps,” but another approach is to fill in the crevices with primer spray then sand down the excess primer afterwards. This method works well because primer is easier to sand than PLA itself.
Priming is the most time-consuming way to smooth PLA parts, because primer must be applied in between each round of sanding then left to dry. However, it produces better results than sanding alone.
When priming a PLA print, the part is placed in a well-ventilated area and sprayed evenly with a very thin coat of the primer. One or two more coatings can be added before the first round of sanding. Alternate priming and sanding is then carried out, finishing with 3,000 grit sandpaper.
Priming and sanding is usually followed by spray painting, as uncoated primer will be susceptible to impact and environmental damage. Also note that very deep cavities should be filled with plastic filler rather than primer.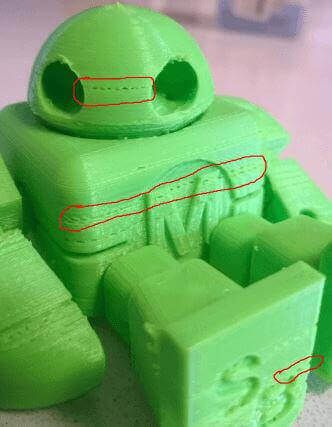
Epoxy resin
A different type of coating for smoothing PLA parts is epoxy resin, which comes in two parts (resin and hardener) that must be mixed together before use. Unlike primer, which comes in a spray can, epoxy resin can be applied to parts using a paintbrush and is suitable for filling even the deepest holes.
To ensure good adhesion of the epoxy, it is recommended to first carry out wet sanding on the PLA parts with fine-grit sandpaper. Once the part is dry, the epoxy can be applied in generous amounts and spread evenly across the part surface. Further layers of epoxy can be added until the desired level of smoothness is reached.
Note that the epoxy resin coating may be weaker than the PLA underneath, and bits of the coating may flake or chip off over time.
Generic epoxy resins can be used, but there are also mixtures designed specifically for smoothing 3D prints, such as Smooth-On XTC-3D.
Solvents
One of the big disadvantages of PLA is its resistance to acetone smoothing, a relatively safe-to-use chemical smoothing process suitable for materials like ABS. [1]
[1]
PLA prints can only be chemically smoothed using stronger chemicals that require laboratory equipment like nitrile gloves, protective eyewear, fume hoods, and a well-ventilated environment. These chemicals dissolve the top layer of material, resulting in a smooth finish — but they can dissolve other things too, such as plastic containers, work surfaces, and human skin.
Experienced users may smooth PLA parts with chemicals like tetrahydrofuran, dichloromethane, or chloroform.[2] However, these substances are difficult to obtain and can be dangerous to use.
A safer option is ethyl acetate, a solvent found in ordinary nail polish remover. Nail polish remover can be applied to PLA parts using a cloth or cotton swab, though it is limited in its effectiveness. In general, PLA is not highly suited to chemical smoothing.
Vapor smoothing
A safe and effective method of chemical smoothing PLA parts is to use an automated vapor smoothing machine such as the Polymaker Polysher, which creates a mist of alcohol to gently remove the top layer of a printed part. [3]
[3]
Unfortunately, the Polysher is only compatible with Polymaker’s modified PLA products, PolySmooth and PolyCast, which dissolve in alcohol.
Heat gun smoothing
Though not the most precise method of smoothing printed objects, using a heat gun to melt the outer surface of a part is a fast and easy way to remove layer lines. A heat gun is a device that resembles a hairdryer but is capable of reaching much higher temperatures.
When using a heat gun to smooth PLA parts, it is important to move the gun evenly to ensure consistent heating across the part surface (or place the part on a revolving platter and keep the heat gun steady).
This technique only works on medium-size or large parts that do not have fine features or hollow sections.
As we have seen, there are several ways to smooth PLA prints and reduce the appearance of layer lines. Choosing the right smoothing method (or methods) depends on the nature of the 3D printing project and your priorities. In general, we would recommend:
Priming and sanding for most PLA parts - effective, safe, cheap
Epoxy resin or polishing for cosmetic parts - high-shine finish
Vapor or heat gun smoothing for rapid parts - fast, least labor-intensive
Alternatively, resin 3D printing technologies like SLA and DLP, though more expensive than FDM, are much better at producing smooth parts without layer lines.
[1] Tuazon BJ, Espino MT, Dizon JR. Investigation on the effects of acetone vapor-polishing to fracture behavior of ABS printed materials at different operating temperature. In Materials Science Forum 2020 (Vol. 1005, pp. 141-149). Trans Tech Publications Ltd.
[2] Zhang B. Does Acetone Dissolve PLA? [Internet]. EcoReprap. 2021 [cited 2022Mar1]. Available from: https://ecoreprap.com/dissolve-pla/
[3] Kočí J.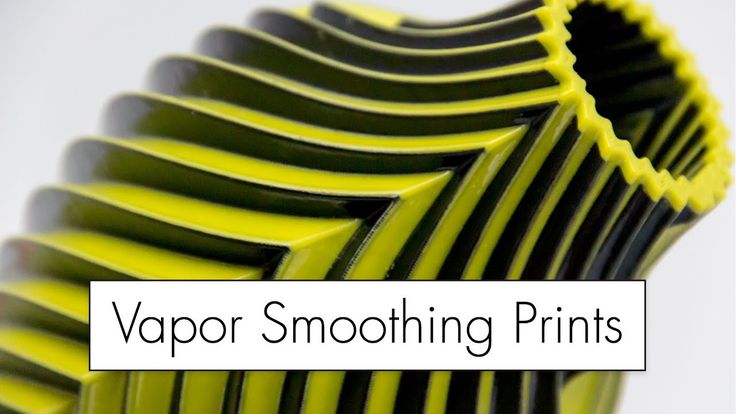 Improve your 3D prints with chemical smoothing [Internet]. PrusaPrinters Blog. 2020 [cited 2022Mar1]. Available from: https://blog.prusaprinters.org/improve-your-3d-prints-with-chemical-smoothing_36268/
How to smooth 3D printing?・Cults
Objects created with a 3D printer don't always look as good as they should. Even if visualization of 3D printed parts is usually acceptable, this may not be enough if the object is for sale or display. Some people just want a perfectly smooth and shiny surface for 3D printing. Fortunately, it is possible to achieve this level of perfection with the help of some suitable tools. This guide will show you how to smooth out ABS and PLA 3D prints for the best results.
The FDM 3D printer opens up endless possibilities for creating PLA 3D prints. However, parts may be printed with bad layers that need to be removed. If you want to give your 3D printed parts a shinier look, there are some easy ways to align your 3D printed PLA.
Use spray paint and polyurethane
The sanding method used to be the most common technique for leveling 3D printed PLA. Today there are new alternatives. You can use spray paint mixed with polyurethane to line up 3D printed PLA parts. To do this, you need to purchase the right tools:
- spray paint,
- polyurethane,
- fan for drying parts.
The smoothing process is one of the simplest. First of all, it is necessary to clean the product so that dust or other dirt does not linger on the surface of the object. Use a spray can to cover the 3D print with a layer of paint. Then a layer of polyurethane can be applied to the part. Be very careful and place the freshly coated 3D print under a fan to speed up the drying process .
After a few minutes, you will find that the mixture of polyurethane and paint starts to fill in unwanted holes and imperfections on your PLA 3D print. Once completely dry, the part can be recoated with the mix to remove any remaining surface defects .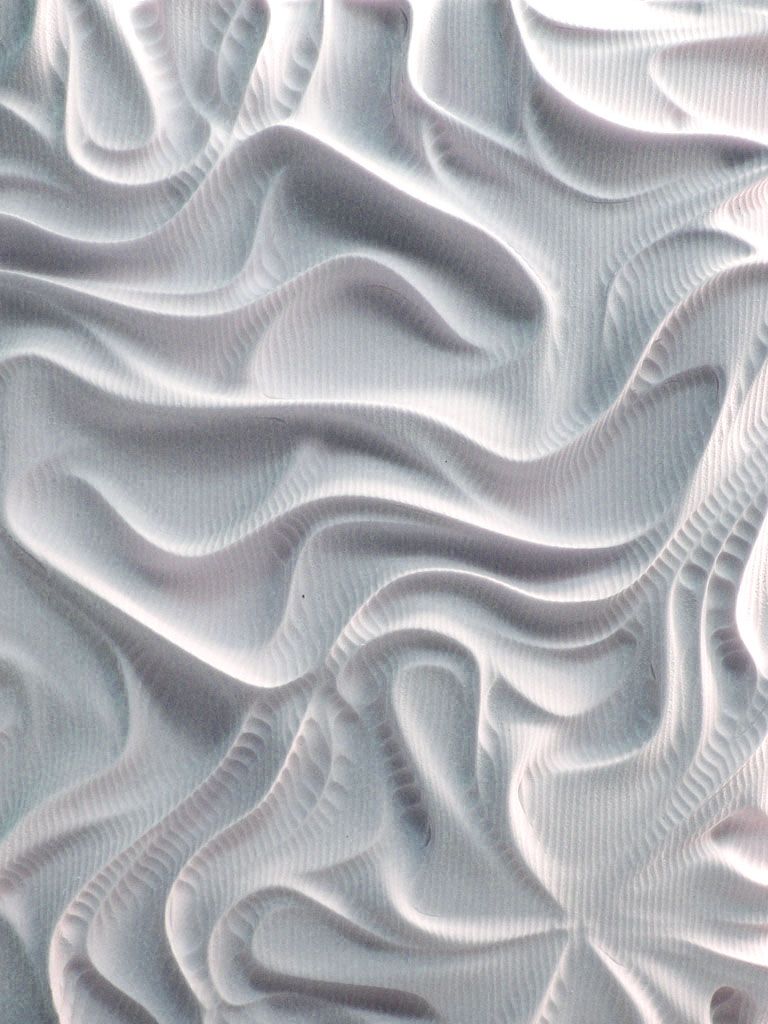 This method is less tiring than sanding.
Opt for XTC-3D Clear Epoxy
Although highly effective, using a mixture of paint and polyurethane to line a room can be too messy for some people. There are other alternative methods for anti-aliasing PLA 3D printing. Transparent epoxy resin XTC-3D has been specifically designed to align PLA 3D parts for an optimal finish . The product consists of two bottles that need to be mixed for 3D printing.
Remember to mix the product well and follow the instructions correctly. Using a brush, apply the resin to the printed parts. The dried product will harden into a smooth transparent layer. PLA 3D printing becomes smoother and shinier. XTC-3D can also be mixed with dyes and stains if you wish to color your parts. You can also add effects such as metallic highlights or palettes.
Use 3D Gloop
This adhesive has been specially developed for smoothing PLA 3D prints. 3D Gloop can be used for various purposes.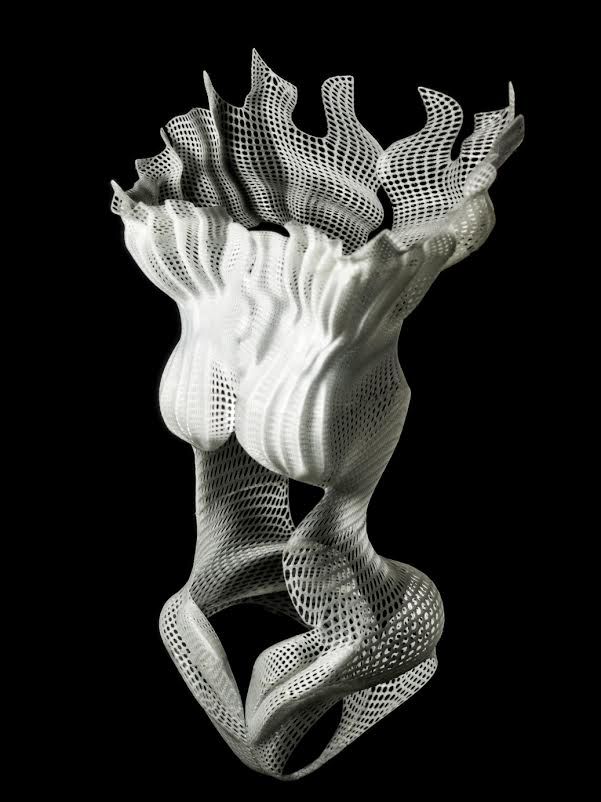 To smooth out a 3D print with this product, simply apply it to the printed part with a brush. It works like the XTC-3D, except it only has one bottle. This is a great advantage if you only want to use a small amount of glue. However, 3D Gloop is not without flaws. The product contains a number of toxic components. It should be used in a well ventilated area.
Acetone is a chemical stripper used by professionals to sand and clean certain materials. Due to its high toxicity, it should be handled with care in a well-ventilated area. Acetone can be used to level ABS 3D printing. The process does not require a lot of equipment. All that is required is metal or glass container .
Also add a few millimeters of acetone. In supermarkets, this product can be purchased for less than 2 euros. You will also need a stand to hold the part to be smoothed and a heating plate. To smooth the ABS 3D print, add 2-4 millimeters of acetone to the container. Place it on a hot stove and boil acetone at 90 to 120°C. At this temperature, the product releases the steam needed to begin flattening the ABS 3D print.
When the acetone has boiled off sufficiently, place the substrate in the container. Make sure the acetone is not touching the part that will be in contact with the 3D print. After the holder is correctly installed, place the printed part on it and close the container. Wait a few minutes for the acetone to take effect. The amount of time depends on the shape and size of the part, the desired level of smoothness, and steam output . The result is simply amazing. At the end of the process, your piece is completely smooth and looks like a piece of hand-sculpted art.
How to smooth PETG prints
Author Kirill Sokolov Reading 10 min. 468 views Posted by
After the ever-popular ABS and PLA filaments, PETG is probably the third most widely used material in desktop 3D printing.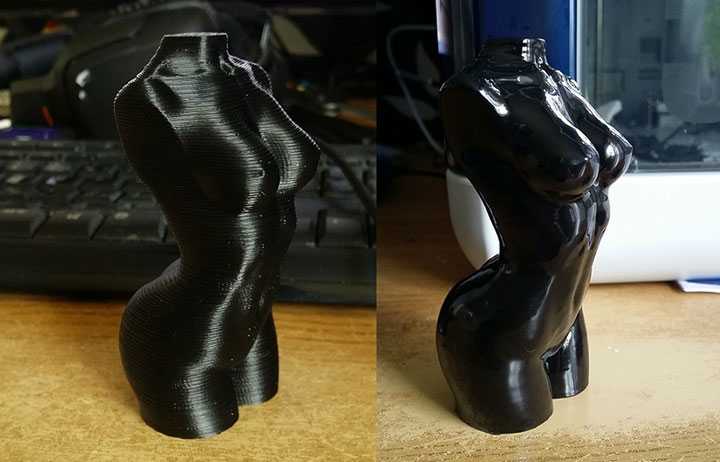 Simply put, PETG combines the best properties of ABS and PLA to create a durable, heat-resistant material that is easy to work with. However, PETG's unique characteristics also make smoothing it more difficult. What makes PETG so special? What is the best way to smooth out a PETG print?
Contents
- What is PETG?
- Characteristics PETG
- 1. The strength and impact resistance
- 2. Chemical resistance
- 3. Thermal resistance
- 4. Ease of use
- 5. Printing without a smell
- Petg
- 1. Grounding
- 2. Sanding with polishing paste
- 3. Heat treatment
- Smoothing with solvents and why it is not recommended
- Why smoothen your PETG prints anyway?
- Final thoughts
What is PETG?
PETG is a variant of polyethylene terephthalate (PET) and is one of the most widely used plastics in the world. Nowadays, you can probably see PET everywhere - in water bottles, food containers, and even in some clothing fabrics. It has become extremely popular due to its high mechanical strength, moisture resistance and resistance to extreme hot and cold temperatures. Due to these characteristics, PET has become widely used in the food industry and as a precursor to technical resins.
Modification in PETG occurs with the addition of a glycol group during the polymerization process, making PETG the "glycol modified" version of PET. The addition of glycol makes PETG slightly more flexible, less brittle, more transparent, and easier to handle. PETG is also excellent for printing and especially suitable for laminating, making it one of the most preferred materials for outdoor signage, electronic devices, medical and food containers, shop fittings, prostheses, and credit or gift cards.
Characteristics of PETG
PETG has a set of characteristics that easily distinguish it from other filament materials. Combining the best properties of PLA and ABS
1. Strength and impact resistance
The addition of a glycol group to the PET polymer chain gives PETG flexibility, which allows it to better absorb sudden impacts or sustained pressure. This characteristic is unique to PETG and is one of the few areas where it outperforms ABS and PLA. In terms of durability, ABS is only slightly ahead of PETG. While PETG prints are also very durable, their scratch resistance is not quite up to ABS standards.
2. Chemical resistance
The chain that defines the PETG polymer is laced with ring structures and double bonds that give the polymer its characteristic chemical resistance. This makes PETG resistant to degradation upon contact with alkalis or acids, including solvents. While the chemical resistance of PETG is one of its most desirable characteristics, it is also one of the reasons why smoothing out PETG prints is challenging. Since PETG is dissolved with a solvent, smoothing by applying a solvent (for example, smoothing with acetone for ABS) is not a good option.
3. Heat resistance
PETG prints at around 230°C, slightly lower than ABS but much higher than PLA. This makes PETG an excellent filament material choice for prints that need to be exposed to heat. While its heat resistance is still slightly lower than ABS, its high melting point makes it an alternative worth considering. In fact, PETG's heat resistance has made it one of the main materials for medical equipment that needs to be autoclaved.
The addition of glycol groups to the PETG chain makes it difficult for the polymer to crystallize when exposed to high temperatures. This means that PETG is not prone to heat embrittlement, and this property has made PETG a good material for outdoor signage and home fittings.
4. Ease of use
PETG offers the benefits of durability and heat resistance without the complex printing of ABS. When cooled, PETG undergoes very little shrinkage, so warping won't be that much of an issue. PETG also has excellent layer adhesion resulting in longer lasting prints and easier first layer adhesion to the build platform. PETG adheres so well that it's considered a terrible material to create support structures because it's the hardest to remove.
5. Odorless printing
Another property of PETG that makes it better than ABS is that it prints without an unpleasant odor. The smell that comes with printing with ABS is one of the most undesirable characteristics, and PETG offers an easy solution.
The characteristics of PETG highlight why many 3D printing professionals consider it a "bridge" material. between PLA and ABS. It offers a comparable level of strength, heat resistance and chemical resistance to ABS, but is just as easy to handle as PLA. Many users consider PETG to be "the best of both worlds" - a material they can use when they want to get a quality print without resorting to a complicated printing process.
Anti-aliasing methods for PETG
However, the same characteristics that make PETG a very popular material also make PETG print anti-aliasing a bit more of a challenge. Since PETG is more flexible than it is brittle, sanding out irregularities on its surface is not as easy as it is with PLA. The chemical resistance of PETG also means that smoothing with controlled solvent application is not an option. If you want to create perfectly smooth PETG prints, what are your options?
1. Sanding
Although sanding a PETG print is a bit more difficult than a PLA print, sanding smoothing is not a completely useless option. In fact, the process of sanding a PETG print is very similar, although a bit more complicated and time consuming.
When sanding a PETG print it is best to have a set of sandpaper with different grit sizes. Start by using the coarsest sandpaper to quickly remove the layer lines that are most visible in the final print. 200 grit paper is recommended for the first step. When you are satisfied with the results, you can move on to a coarser grit. This may require several steps if you really want a professional finish. We recommend a sequence of 400, 600, 800, 100, 1500, 2500 and up to 3000 grain sizes.
Please note that when sanding the PETG print, the circular sanding motion must be maintained. so that there are no visible lines in the print due to the direction shift. The sanding process can be accelerated by using the wet sanding method, which uses slightly damp sandpaper to remove loose particles from the outer surface of the print. Please note that for wet sanding you will need waterproof sandpaper. We recommend the 3M Wetordry Sandpaper Set, which includes a set of all the grit sizes needed to achieve a perfectly smooth PETG print.
2. Sanding with polishing paste
Even with the best efforts, it is simply impossible to get rid of the microscopic lines of the layer with sandpaper alone. The key to getting a smooth surface, even at the microscopic level, is to fill these gaps with the right polishing compound. You can use a metal polishing solution such as 3D One Polishing Finishing Compound or a solid wax based compound such as BeaverCraft's Polishing and Buffing Compound.
To use polishing compound, simply apply a small amount of compound to a soft cotton cloth and rub it into the print in a firm circular motion. The composition will fill the voids on the surface of the print. Then the imprint must be polished by wiping the surface with a piece of cloth that has not been treated with polishing paste. The improvement in the finish of your print should be obvious. The polishing paste can be reapplied and polished again to further improve the quality of the print until you are satisfied. With a little patience, you can achieve a mirror-like finish with a simple sanding and polishing.
3. Heat treatment
The heat resistance of PETG means that heat treatment smoothing will be very energy intensive, but it is possible. To do this, you will need a heat gun with very precise temperature control. Since the recommended temperature for heat treating a PETG print is very close to the melting temperature of PETG, the slightest mistake in temperature settings can ruin your print very quickly.
The purpose of the heat treatment is to melt a very thin layer of material onto the surface of the PETG print.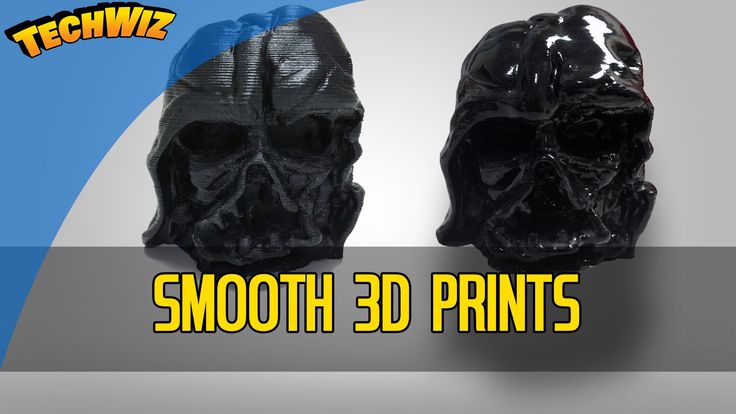 Done right, this results in layer lines melting and gap filling, even at the microscopic level. However, smoothing by heat treatment can also fail very easily. Excessive heat may result in distorted detail or a "wavy" surface finish..
Smoothing a print with a heat gun relies on a continuous and smooth movement to produce consistently good results. Easier said than done. If you are inexperienced with a heat gun, we recommend lowering the temperature settings to around 240°C so as not to permanently damage your print. Heat treatment at a lower temperature may be slower, but it is more forgiving of small errors.
Solvent smoothing and why it is not recommended
There are several user reviews of the possibility of smoothing PETG prints with solvents. There is no specific consensus on which solvents are best for smoothing PETG, but there are a few names that are more common, namely MEK (methyl ethyl ketone), toluene, and cyclohexanone.
The difficulty in flattening PETG using these solvents is that they are all highly regulated for different reasons. Toluene may sound familiar, if only because it is one of the main components of a very common explosive material. Both MEK and cyclohexanone are regulated because they are considered precursors in the illicit manufacture of certain illicit drugs.
In any case, none of these solvents is as harmless and available as acetone. Unfortunately, acetone has absolutely no effect on PETG.
The difficulty of obtaining these solvents, as well as the risks associated with them, are the main reasons why the practice of smoothing PETG with solvents has not become widespread. The rewards are simply not worth the risk and effort, which is why we recommend sticking with the tried and true methods we detailed above.
Why smoothen your PETG prints anyway?
Fused Deposition Modeling (FDM) prints are inherently layered with layer lines, resulting from an individual layering process. Although this drawback is simply inevitable, the print, which still shows the lines of the layers, creates an amateur atmosphere. Whether intended for rapid prototyping or more creative pursuits, professional 3D prints require a smoother, more polished surface. The smoothing of the PETG print allows it to visually stand out and give it an aesthetic that complements its excellent durability and heat resistance.
Final Thoughts
PETG is one of them. filament materials favored by the 3D printing community, and it's easy to see why. Like PLA, it is very easy to work with but has almost the same durability and heat resistance as PLA. It also has unique chemical resistance, which has made it a popular storage material for weakly acidic or alkaline compounds. However, the chemical resistance of PETG also means that it cannot be smoothed out with chemicals such as the acetone vapor bath used for ABS.
If you want to smooth out the PETG print, you're going to have to go back to the basic approach. If you are a beginner, we recommend going through the path of grinding and polishing. This is a slow and deliberate process, so there is very little chance of making a fatal mistake.