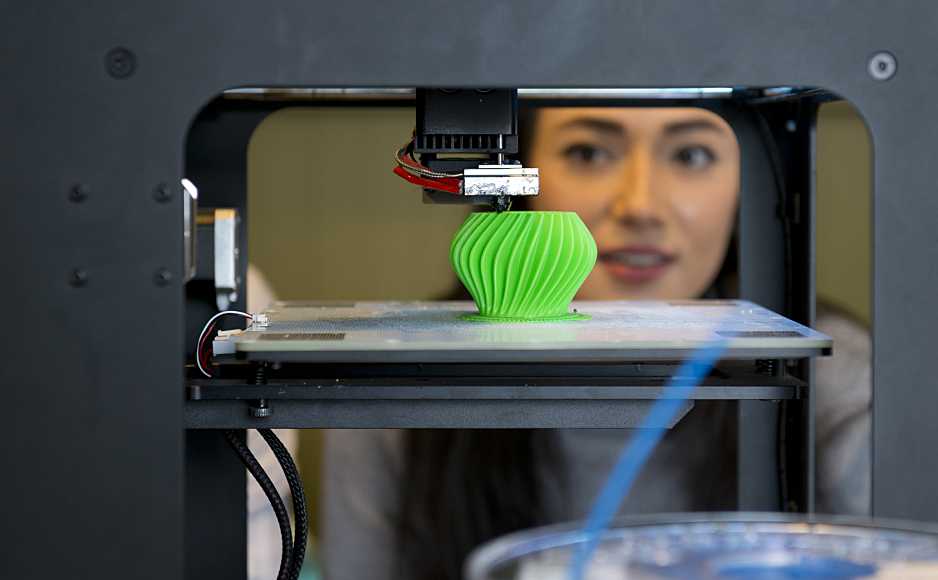
3D printer making car parts
How To 3D Print Replacement Car Parts [2022 Guide]
If you're looking to create your own car parts, you can do so with ease. Here is a guide on how to 3D print replacement car parts very cheap.
By Justin Evans
As 3D printing technology grows more popular, hobbyists and automotive industry leaders alike are starting to 3D print car parts as an alternative to expensive repairs and manufacturing.
This may seem unbelievable to people outside of the 3D printing space, but it is true. 3D printers can create all kinds of car parts, and they work just as well as traditionally manufactured parts.
There are plenty of reasons why people do this. They may want to personalize their car, make their car lighter, or just replace a part quickly without needing to pay an excessive amount for it.
For people who want to get into it, it is a lot easier than it looks.
Table of ContentsShow
What Kind of Parts Can You Make With 3D Printers?
There are several types of parts that you can use 3D printing to manufacture:
- Cosmetic customization (rear-view mirrors, cup holders, custom frames)
- Small parts (lids, valves, specialized parts)
- Larger parts (grills, dashboards)
While you can make powerful parts with 3D printing (like with carbon fiber), it is not recommended for making internal car parts. These parts must deal with excessive heat or pressure and require a specialized manufacturing process.
So long as you keep the part, your intended material, and what that part is used for in mind, the sky is the limit as far as what you can create.
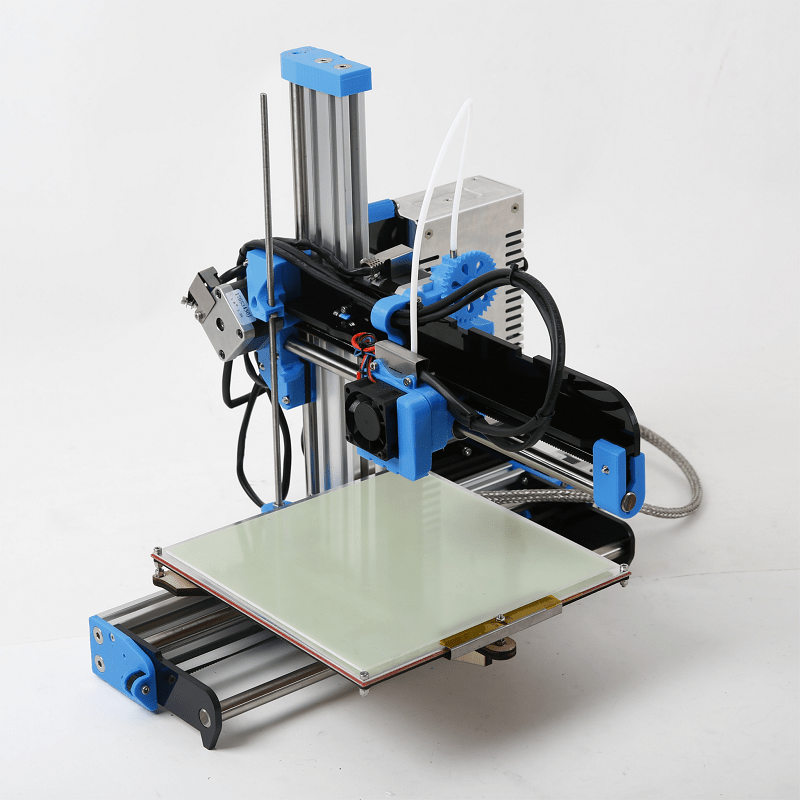
What Kinds of 3D Printers Are Best for 3D Printing Car Parts?
When 3D printing car parts, the ideal printer can vary depending on what you are trying to print.
For most things, an inexpensive basic printer is fine. Plenty of car parts are small and simple and should not need a heavy-duty machine to do the lifting.
If you plan on printing more complex parts or want intricate engravings on your customized parts, you may want to use a higher-end model that can handle that.
What Materials Should You Use?
There are plenty of materials you can use to 3D print your car parts, but the rule of thumb is they should be durable, lightweight, and flexible.
A few standout materials are:
- TPU (shock-absorbent, flexible, and durable)
- Polypropylene (great for airflow and fluid systems)
- Nylon PA11 (great if you are worried about sustainability)
- Polyamide 6 (heat resistant)
What material you use depends entirely on what part you want to make, so always do your due diligence and research what materials work best for each part before you start printing.
How Do You Go About 3D Printing Car Parts?
3D printing car parts seems complex, but when you get down to it, it is a simple process that only requires a few steps.
Make or Find a Scale Model
This is the most important step of the entire process.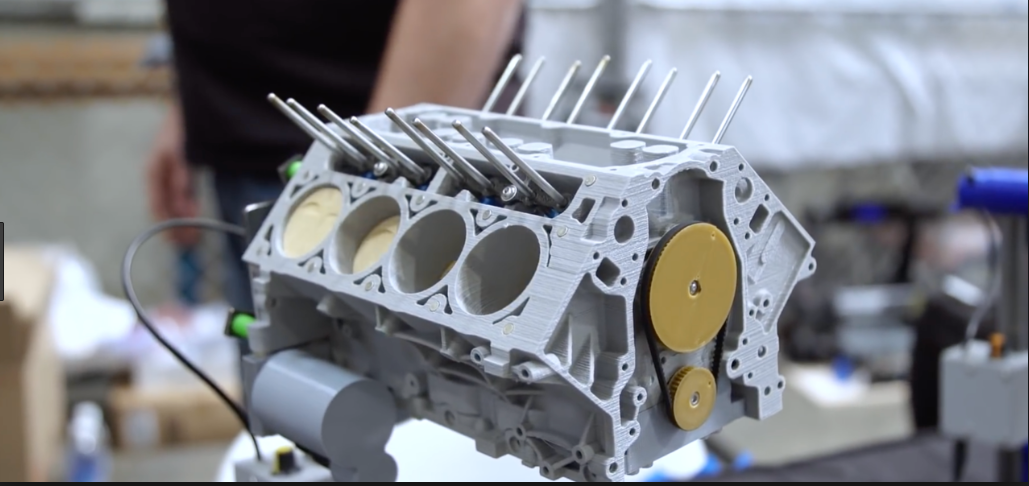 A high-quality 3D printed car part relies on using the proper material and creating it from a good model.
You can set up your scale model in one of two ways. You can make the model yourself using a 3D modeler or find a model online. If you are not confident in your 3D modeling skills, it may be best to find an online model rather than make it yourself.
Many websites offer 3D models for parts that you can download and use with your 3D printer. Make sure the model is from a reputable source for the best results.
Pick Your Material
After picking out your model, the next step is to pick what material you want to use. This will depend entirely on what part you are making and your specific needs.
Remember, materials are not a one-size-fits-all solution. Make sure the material you choose matches your part’s use (heat resistance or flexibility, for example). If you make a part with the wrong material and install it, it can break or damage your car.
Also, keep in mind that just because you can theoretically make engine parts with 3D printing does not mean that you should.
Print the Part
After you have your model and material, it is time to make your part. Make sure the parameters are set the way you want them and double-check everything before printing. Follow the instructions based on your specific printer.
Finishing Touches
Once your part is printed, it is time to add any finishing touches. This is when you paint any small details, like numbers on a knob, or coat the part in another material for a better finish.
You should also use this time to check over the part and make sure everything is up to standard. If there are any defects or issues with the part, you will need to start over.
Install the Part
After printing the part, it is time to install it. This is simple for a part like a cup holder or knob — just pop it in and see if it fits.
If you 3D printed a part like a grill or a dashboard, try going on a test drive first and see how it holds up under a stress test. If it looks like it is not holding up well, it’s time to go back to the drawing board.
What if You Don’t Want to Do It Yourself?
Sometimes 3D printing car parts is not feasible for everyone. A person may want to 3D print a part, but they do not have access to a printer or are not confident in their 3D modeling skills.
In this case, you may want to consider hiring a business that specializes in 3D printing car parts. Be sure to check the business’ rates, selection, and reviews before committing.
Conclusion
3D printing car parts is an easy way to customize and repair your car without breaking the bank. With the right model, materials, and plenty of patience, 3D printing your own parts is a reliable way to take care of your car and make it your own.
There are no limits to what can be done with 3D printing, whether you do it yourself or hire someone else to make the parts for you.
all you need to know – 3D Solved
A car contains literally hundreds of little plastic parts that can be very difficult to find online. Some of those have such low demand and are so specific that manufacturers do not even bother to produce and offer them.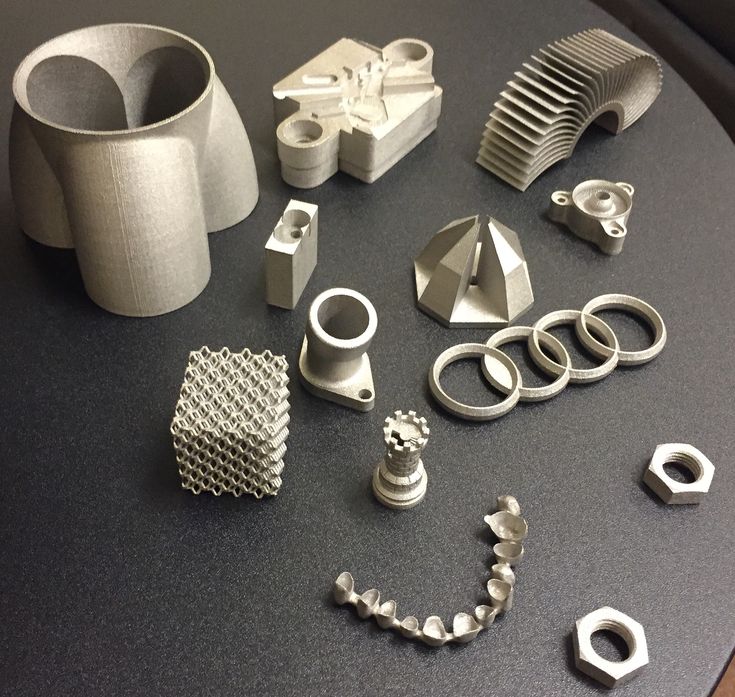
This is where 3D printing shines since it is especially valuable when we need to create custom parts in low quantities.
3D printing allows us to create high quality, custom-designed replacement parts for our cars, and on top of that, at a lower cost and especially at a much faster pace.
Table Of Contents
- Can you 3d print car parts?
- Popular 3D prints for your car
- Filaments for car parts
- How is 3D printing used in the automotive industry?
- Revolutionizing the prototyping process
- Allow for client customization
- Complex Parts
- 3D-Printed for the car manufacturing process
- Bonus: An (almost) totally 3d-printed Car
Can you 3d print car parts?
Yes, it is possible to 3D print replacements for specific parts of your car that are sometimes difficult or impossible to find. You can 3D print cup-holders, knobs, clips, and other non-safety related parts.
Unless you are an engineer with access to a million-dollar state of the art machine, I would probably avoid printing parts that are going to be subject to pressure, tension, or higher temperatures.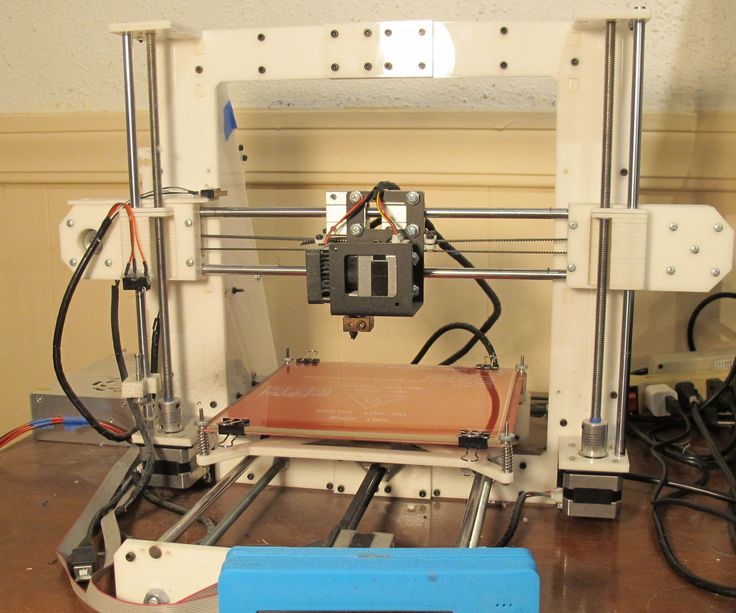
It might be a redundant statement, but please do not replace a component of your safety belt with a coarse PLA print. You will be on the fast track to earning your own Darwin Award.
Major industry players like BMW, Volkswagen, Opel and Bentley also make heavy use of additive manufacturing but, before you get too excited and try to start your own 3D-TeslaXYZ, you should consider the following caveat: the price tag in Bentley’s state of the art Stratasys 3D printer has 3 or 4 more zeroes than the one on your Ender-3.
Popular 3D prints for your car
Experienced designers can always take a caliper and create their own replacements. It can also be the case that you are too lazy, do not love your car that much, or a combination of both (my case).
Lucky for us, there are diligent and industrious folks that not only designed many parts but also were kind enough to share them. There is always a non-zero probability that we will find what we need on our own 3D model finder!
If your car has no broken plastic parts that are in desperate need of a replacement, do not despair! You do not have to break something as an excuse to justify your 3D printer.
Just take a look at these beautiful examples!
- Visor clip for your sunglasses
- Trash bag hooks for your seatback
- Coin organizer for your cup holder
- Customizable smartphone holder
I printed most of these. Perhaps they did not radically change my life, but they are nice additions. My coins look better in the organizer than on the floor*.
*My car was full of orange gadgets because I was too lazy to change the filament spool. Do not be like me, you will eventually regret it and print everything again in black.
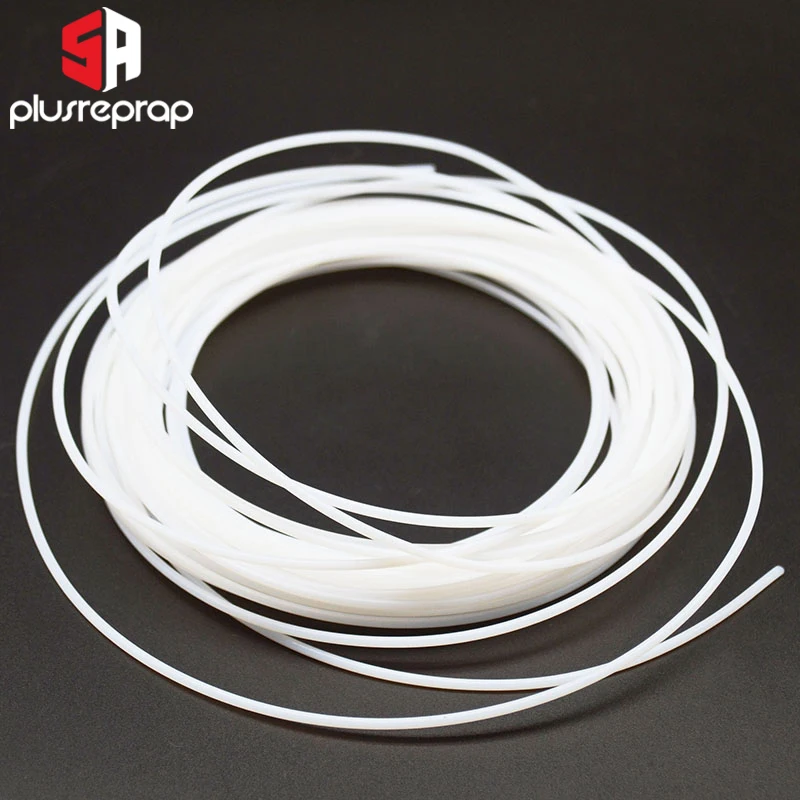
Filaments for car parts
The type of filament that you should use for printing your replacement parts is obviously dependent on the part but, as a rule of thumb, Acrylonitrile butadiene styrene (ABS) is a good choice. The main properties that make this thermoplastic suitable for your car are the following:
- It is both resistant to shock and flexible.
- It has a high glass transition temperature (105° C or 221° F).
- It can withstand temperatures ranges of -20° to 80° C for long periods of time.
On the downside, it can be tough to print ABS parts and I definitely recommend that you use a printer with a heated bed and an enclosure to avoid warping. You should also keep the room ventilated and avoid the inhalation of fumes.
If you are just getting started and do not have a printer with a heated bed and an enclosure, I should also tell you that it is perfectly OK to print your parts in PLA.
Just keep in mind that this thermoplastic has a lower (but still acceptable) glass transition temperature and is slightly less resistant. Just add a little more infill to your print and avoid parking your car in the Sahara desert during the summer.
However, if you want the ease of printing of PLA but a material that is much more heat- and shock resistant, try PETG!
PETG is a filament that is almost as easy to print as PLA (only suffers from poor bed adhesion at times) and it also costs the exact same.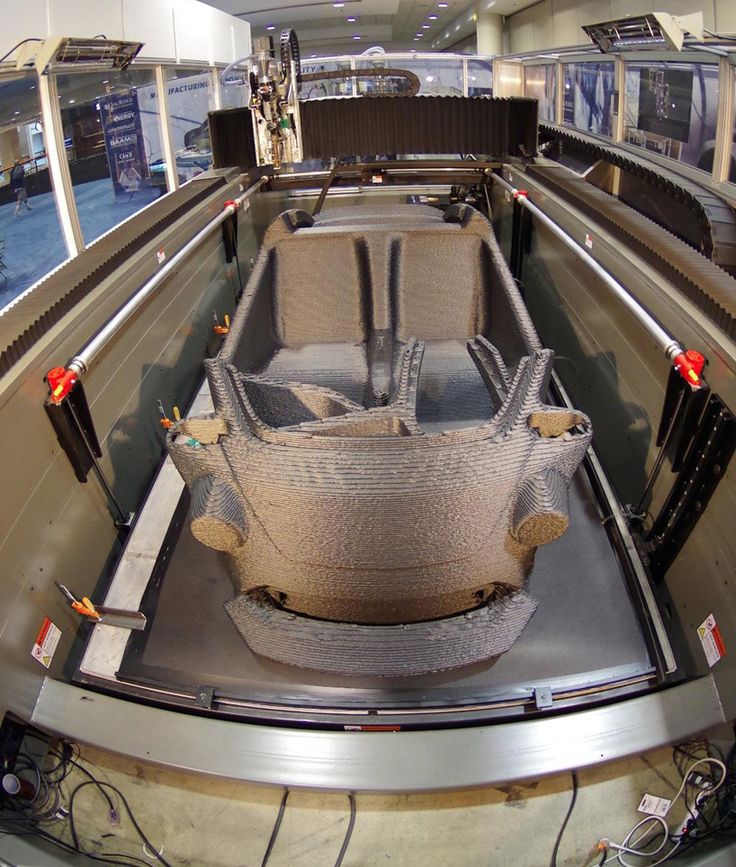
How is 3D printing used in the automotive industry?
Due to the nature of the automotive industry, most manufacturers have been early adopters or at least testers of the technology.
It not only revolutionized the way that manufacturers can iterate and prototype faster and more efficiently, but also allows them to create highly specific tools and complex parts.
Revolutionizing the prototyping process
Smaller companies use 3D Printing for creating highly customized parts that would otherwise be impossible to produce due to scale inefficiencies.
Additive manufacturing proved once again to be vital when iterating and perfecting designs. The whole process would be otherwise prohibitive due to its costs.
On the other hand, larger companies are combining traditional manufacturing processes with additive manufacturing.
Allow for client customization
In the early days of the automotive industry, Henry Ford stated, “A customer can have a car painted any color he wants as long as it’s black”.
This could not be less true nowadays thanks to 3d Printers! The British manufacturer MINI pushed this to the limit, allowing clients to have full control over the major design aspects of their cars.
If you want to acquire a MINI and are willing to pay for the premium, you can choose from a wide range of colors, patterns, fonts, and images.
If you want to find out more about mass customization in the automotive industry, you might be interested in reading about Twikit*, a startup based in Belgium that provides an end-to-end platform that allows users to personalize cars and tailor vehicles to each client’s own individual preferences.
*I find it necessary to say that I am by no means related to Twikit. I just find the company fascinating!
The output requires little to none technical operations since the software already outputs all files required for that specific order.
Customization of a MINI made possible by Twikit. Now you know how I first heard of this awesome startup!Complex Parts
Bentley, the luxury car manufacturer, is famous for heavily using Stratasys* printers. They first start with a 1/10 scale prototype that is taken to full size once it is validated by the design and engineering teams.
Stratasys industrial-grade printers allow Bentley to produce multi-material objects that were previously unimaginable. This is not a trivial feature, since it opens new design paradigms that allow for lighter, more efficient, and reliable parts by combining different elements.
They not only use it in the prototyping process but also incorporate it into the final cars that we see on the street.
Grills, headlamps, moldings and door mirrors are just a few example parts that Bentley 3d prints for most of its current models. Additive manufacturing allows to design difficult, weird and complex geometries that simply where impossible to create with injection molding.
*If you watched the Netflix documentary “Print the Legend”, you might remember Stratasys as the large company that sued and finally acquired MakerBot. In case you did not, close this tab and open Netflix right now!
3D-Printed for the car manufacturing process
Automotive factories are leveraging 3d-printing technology to create hundreds of high quality, tailor-made, and highly customized tools for their day-to-day operations.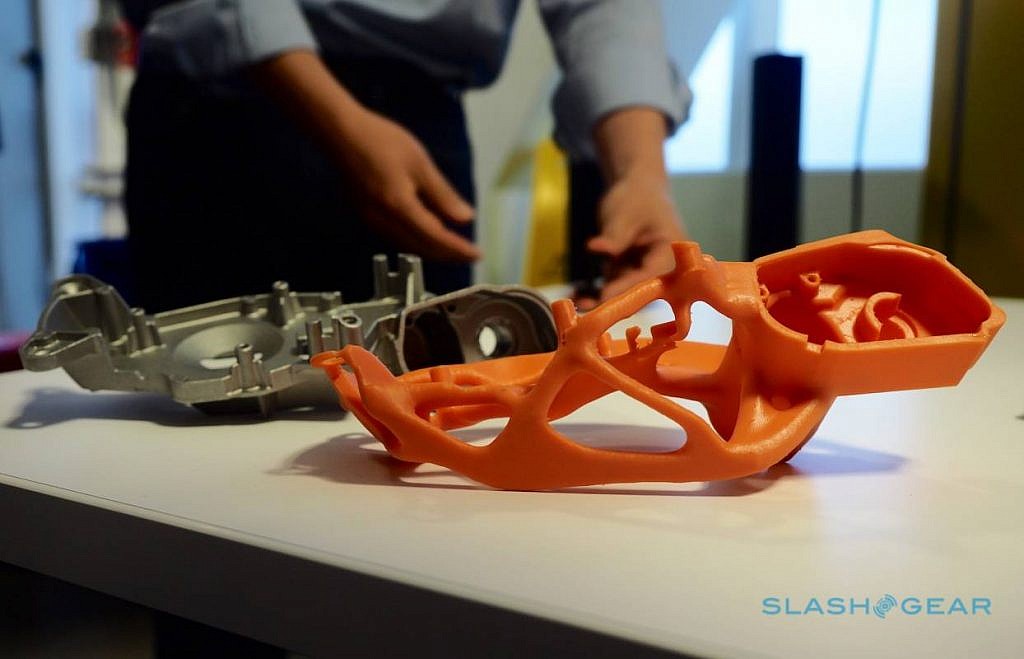
The fact that Volkswagen, BMW, and Opel, three major players in the industry are using the technology clearly vouches for additive manufacturing and its reliability.
Below is a simple example of a wheel protecting jig. Despite its simplicity, it reduces operational time, cost, and error rate.
For a regular person that only performs this task when changing a flat tire, this tool may not seem very valuable. On the other hand, if you had to do this a thousand times, you would be willing to pay a bucket full of cash*.
*Right now, I’m writing this from Argentina. It might surprise you how cheap it is to fill a bucket with cash.
Bonus: An (almost) totally 3d-printed Car
During the International Manufacturing Technology Show held in 2014, and after only 44 hours of printing, the first electric car that heavily utilized 3d-printing was born. It was build using a big area additive manufacturing machine (BAAM) or, in simpler terms, a big FDM printer.
Although it clearly does not meet the required safety test requirements of any country, I definitely would not mind having my own Strati!
Strati. You certainly do not need a 20/20 vision to see those layers. Now you know how they managed to print it in only 44 hours. Awesome!We created a recommended products section that will allow you to remove the guesswork and reduce the time spent researching what printer, filament, or upgrades to get, since we know that this can be a very daunting task and which generally leads to a lot of confusion.
We have selected just a handful of 3D printers that we consider to be good for beginners as well as intermediates, and even experts, making the decision easier, and the filaments, as well as the upgrades listed, were all tested by us and carefully selected, so you know that whichever one you choose will work as intended.
Industrial 3D printer CreatBot D600 for large parts. FDM 3D printing of car parts. Business Ideas 2020
Contents:
- 1.
 The choice of material and characteristics of the stand.
 - 2. Selecting a 3D model for printing and setting up a slicer.
- 3. Filling the plastic and preparing the printer.
- 4. Calculation and sending for 3D printing of a BMW rim.
- 5. Printing process.
- 6. Part removal and post-processing.
- 7. Total.
Hello everyone, Friends! 3DTool is with you!
Quite often we are asked the question, is it possible to print a bumper for a car on a 3D printer? And this is not a common meme among 3D printers, or some kind of boring joke, for example, representatives of a tuning studio really ask such questions first of all when they are interested in additive technologies. Well, we decided to print something really impressive in one run and evaluate how suitable FDM 3D printers are for such tasks? 9 was chosen as a stand for the experiment.0023 3D printer Creatbot D600 PRO is one of the most powerful and generally affordable printers. Let's see step by step what's what.
1. Selection of material and characteristics of the stand.
Let's pick the material first. It is not difficult to guess that this stage is characterized by the capabilities of the existing device. As a rule, large products are always printed from polymers with low shrinkage and not subject to delamination, such materials as PLA and its derivatives. However, this approach is only a tribute to the limitations of the first kinds of available models FDM 3D printers, for the most part, did not have closed chambers and even heated tables.
When it comes to professional devices, or even industrial ones, which is our bench Creatbot D600 PRO , such questions fade into the background.
A little about the printer.
You can find a detailed review of Creatbot D600 PRO on our website in the articles section on THIS link. We will confine ourselves to quoting its characteristics.
As you can see, Creatbot supports almost all materials available on the market, with the exception of very rare ones. So in the material we are not limited, but what if something goes wrong? It is better to choose the most affordable filament so that the cost of a mistake is not so painful. This means that we reject various composites and engineering thermoplastics.
Since the print is really voluminous, it is quite possible that we will need post-processing as well. So, based on the foregoing, our requirements are best suited to the beloved by domestic printers ABS .
Although this material is quite difficult for beginners, thanks to the chamber heating system, a powerful heating table and a productive all-metal extruder, printing this material on the CreatBot D600 PRO 3D printer should not cause any difficulties. In addition, we will use the well-proven adhesive from the company Picaso3D -
However, you can use the option that suits you best. For example, bundled with device PVA glue stick.
Well, we figured out the material, chose the adhesive, we have at our disposal 0.2 cubic meters of working chamber volume, two extruders and a choice of different nozzle diameters. What to print?
2. Selecting a 3D model for printing and setting up a slicer.
Let's start with the subject itself. Best of all, the dimensions of the print and clarity will be demonstrated by an ordinary rim of a car. And although it will be an impossible task to install it on the car due to the chosen material, it will be much easier to compare the dimensions with a real object.
Open Thingiverse and select a disk, for example from BMW.
Before us is a complete copy of the object with realistic proportions and thicknesses. Now it's time to load the program and scale the model according to the real prototype.
We will work in the slicer Ultimaker Cura 4. 4 . Initially, CreatBot 3D printers are designed to work in their native software CreatWare , but we are often asked to show the configuration of alternative slicers for working with such devices and we decided to demonstrate it.
First, let's open the bundled CreatWare .
In the menu Machine -> Add New Machine select the source printer.
Now let's open its settings and fix them in memory, or write them in a notepad.
After that, open Cura 4.4
Initially, our device is not in this program and first we need to add it. We go at Settings -> add printer -> add a non net-worked printer
And in the drop-down menu, select the scroll Custom .
In order not to get confused, enter the real name of the device in the field Printer Name and click add .
After that, a new device will be added and we can proceed to its configuration.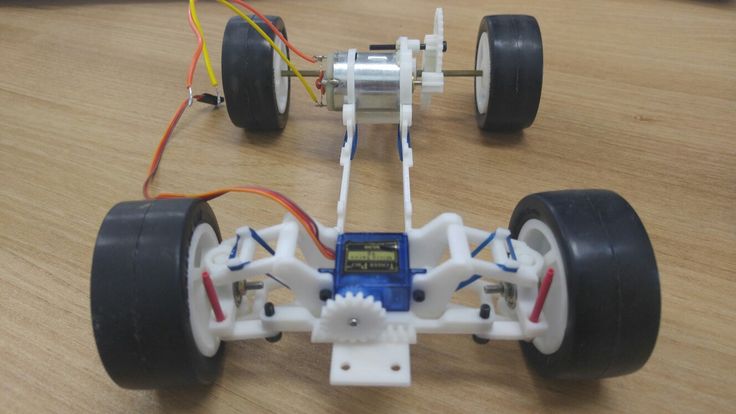
By pressing Machine Settings we will open the printer settings menu and now it's up to the small. Transfer settings step by step from the parameters we saved to Create Ware , as well as enter a suitable starting G-code . In CreatWare, you can find it in the star/End-Gcode tab. It is fully syntactically compatible with Cura, since in fact both programs use a common engine.
After copying all the settings, you should get the following result:
Note that we have already set the diameter of the second nozzle to 0.6 mm because We are planning volume printing and productivity is critical for us.
The next step is to check whether we have configured everything correctly, and whether our printer is also calibrated.
We will not dwell on the settings of Cura 4.4 in detail, because this is a topic for a separate large article, just select advanced settings and specify the required minimum parameters for our printing.
Because we set the nozzle to 0.6 mm , layer thickness will be 0.3 mm , thread width 0.7 mm , infill approx. 20% and Overlap infill approx.
Cura 4.4 uses a profile system for the material, which means we will need to create a new profile for our plastic.
To do this, open Settings -> Extruder ½ -> Material -> Manage Materials
Select the base material and click Duplicate .
In the dubbed material, remember to change the name Display Name and temperature settings Print Settings
Now we can assign this material to our extruder.
Let's check whether everything turned out right and send a test file for printing.
Open the model and press Slice , we selected the print settings in advance. It is important to say that we will be testing printing with two extruders, but in the future we will need only one.
The resulting G-Code is saved to a USB flash drive and inserted into the printer.
3. Filling the plastic and preparing the printer.
Time to fill the plastic and calibrate the 3D printer .
First, install the plastic spool ABS from ESUN . The compartment for plastic in the CreatBot D600 PRO printer is located at the back in a special niche, for each coil separately.
We stretch the thread along the guides and catch it at the output of the printing unit. It is problematic to do this operation alone, so we will resort to the help of colleagues. So, the thread is in place.
We thread it into the hole of the broaching mechanism and select the menu Load Material 9 on the display0116 .
Don't forget to change the plastic temperature in menu Status as The default temperature may not be sufficient.
Excellent! We got through almost everything.
Let's calibrate the table and start printing.
Creatbot D600 PRO is equipped with a special sensor that allows you to adjust the level of the desktop in auto mode - BL Touch .
So our task is greatly simplified. Simply run Auto Leveling from the display menu and verify that the calibration is correct.
To do this, we print our test task and check the result.
Everything seems to work out, let's move on to the final part of the story.
4. Calculation and sending for 3D printing of the BMW rim.
We are almost ready to start our grand seal. It remains to do a couple of last steps.
First, let's determine the size of our disk. Let its diameter be 17 inches.
By simple calculations, we get the result:
Which is equal to ~ 431 millimeters. Let's scale our model in the program.
As you can see, the model fits perfectly in the workspace, but let's still compress it in height to get a more or less sane print time, because. we are limited in terms of the execution time of the experiment. Seems like 120 mm will be enough with prosperity.
We leave the print settings that we set at the beginning, however, we additionally include support:
We decided not to use the second support material, because the result was unpredictable and I did not want to spend the rather expensive Hips . In addition, it is a pleasure to remove support from a product of this size and we use only 1 extruder.
Press Slice we get a pretty good result:
After checking on Preview whether everything was cut as it should, we will send G-code to the printer.
5. Printing process.
So, after the printer has warmed up, it will automatically check the level of the table again and start printing.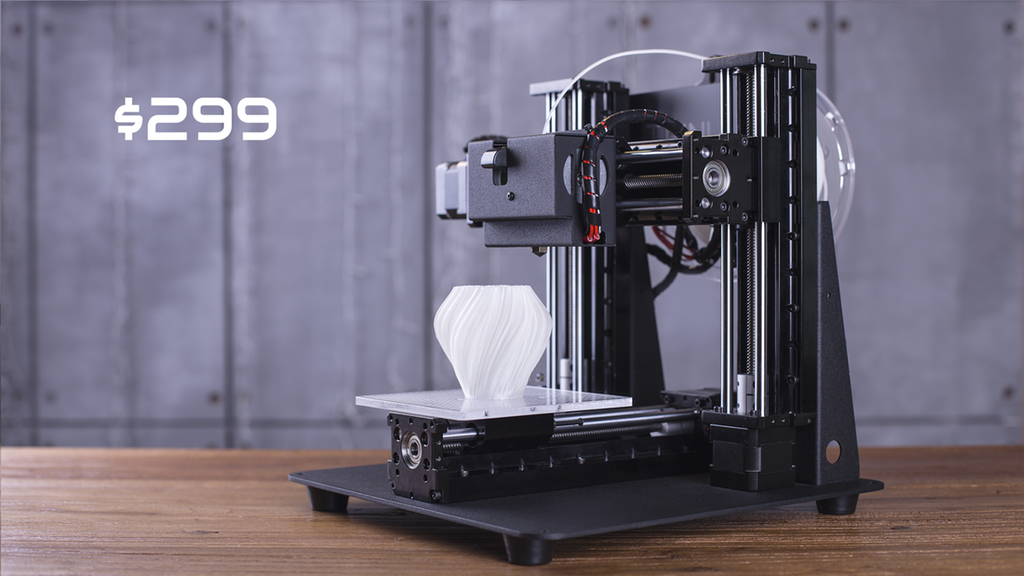 The most important thing now is to check the correctness and evenness of the printing of the first layer and periodically monitor the process in the future.
Never leave long-duration devices completely unattended. Though D600 PRO and has the necessary assistance and control systems, such as shutdown protection with the ability to start from the same place when printing was interrupted, you cannot leave the printer completely alone.
It is best to check the process every 5 - 10 hours , or install a webcam.
So. Let's follow our progress.
A little more and the disc will be ready ..
6. Part removal and post-processing.
After our part is ready, we remove it from the platform.
A fairly large layer of 300 microns is not very good quality, so we will use the acetone surface smoothing technique. To do this, we need a spatula and wire cutters to remove the supports, a brush and a bottle of acetone.
Pour acetone into a convenient container, dip the brush and gently smear the surface of the disc. The process should look something like this:
Also, you can combine this technique with sanding and further painting to achieve the perfect result.
You can read more about post-processing in THIS article of ours.
Well, as a result of our efforts, we got such a natural rim.
And here it is, but in comparison with the real one.
Let's summarize the process of our experiment.
7. Total.
For ourselves, we wanted to answer the main question - is it possible to print large objects made of complex plastics 3 D in almost the entire print area of the FDM 3 D printer?
Experience has shown that it is possible.
Is it possible to print bumper on 3 D printer?
- It is possible, but it will have to be done in parts, albeit large ones, and in any case, post-processing will be required. And also the material will have to be additionally reinforced, because. At this scale, ABS is still quite fragile.
Is 3 D printer Creatbot D600 PRO suitable for auto-tuning or printing parts?
- This is highly dependent on the specific task, however, everything indicates that the capabilities of this device are enough to solve many problems associated with 3D printing with refractory plastics in large sizes.
Well, personally, the result seems successful to us. What do you think?
Write your opinions below in the comments.
And that's all we have! See you soon!
You can purchase the Creatbot D600 PRO 3D printer from our company. We are the official distributor of the manufacturer's plant for the sale and service of CreatBot3D equipment in the Russian Federation.
Our contacts:
• By email: Sales@3dtool. ru
ru
• By phone: 8(800)775-86-69
• Or on our website: http://3dtool.ru
Also, don't forget to subscribe to our YouTube channel:
Subscribe to our groups in social networks:
In contact with
5 Ways 3D Printing Is Changing the Automotive Industry / Sudo Null IT News
You can't buy a fully 3D printed car in a car dealership yet, but additive technologies have been used in car design for many years. Every year, especially in recent years, 3D printing is taking an increasingly important place at all stages of production. This is evidenced by the rapid growth of 3D printing market share in automotive manufacturing, which is projected to reach $2.5 billion by 2023.
For example, luxury car companies including Bentley, Porsche, BMW and Ferrari are using 3D printing to create custom car interior parts. GM, Volvo, Ford are using 3D printing to produce tooling to save money, improve designs and reduce delivery times.
Source 3dprinting.com
3D printing is constantly emerging with new opportunities, it is becoming more accessible. If the first 3D printers cost about $20,000, now you can find 3D equipment for $100. Now companies can, with the help of additive technologies, produce the necessary components directly at their own enterprises and not depend on suppliers.
With new materials, 3D printers can print highly precise, functional end pieces. Additive technologies facilitate the production of custom products and increase productivity.
But this is only the beginning of the journey. Here are five key ways 3D printing is driving innovation in the automotive industry, from car design to production. Plus one bonus.
1. Changing the prototyping process
It was with the manufacture of prototypes that the use of 3D printers in the automotive industry began. 3D printed prototypes took much less time than traditional methods required.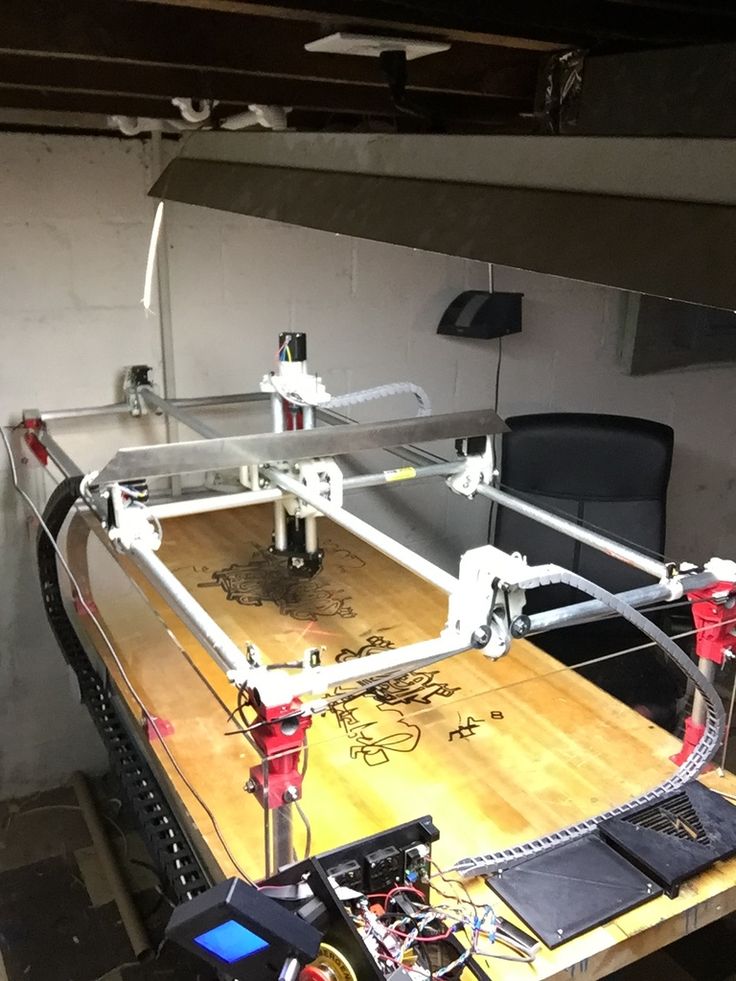
Using Raise3D 3D printers and ideaMaker software, Crazy Grandpa Garage was able to automate the process of creating custom car parts. Production costs have been reduced by 50%, design reliability has improved significantly, and lead time has been reduced by 83%. The parts now come out very well fitted to the car.
Source: facebook.com
Using 3D printing, car designers can quickly prototype individual parts or assemblies, from interior detail to dashboard, or even full-size car models. Thanks to 3D prototyping, the initial idea quickly turns into a physical embodiment of the concept - a conceptual model. The concept can then be developed into full-featured, high-fidelity prototypes, and after several validation steps, mass production begins. For the automotive industry, getting through these steps quickly is vital, and the entire downtime of an automobile production line in just an hour is very costly for the company.
For example, the assembly plant of the American car manufacturer General Motors claims that the purchase of a 3D printer in 2016 saved more than $300,000.
Ringbrothers designers and engineers are not dependent on third parties to implement laser stereolithography (SLA) in their facility. The cost is reduced, the development time is reduced. Source: formlabs.com
Hose for Eventuri BMW M4, Source: ultimaker.com
Traditional prototyping was time-consuming and costly, in part because the product went through more iterations. With 3D printing, you can create high-quality prototypes in one day and at a much lower cost. More examples.
The Ford Fiesta ST with 3D printed parts, ext. SEMA 2016, ultimaker.com
For example, General Motors has partnered with Autodesk to produce low cost, lightweight automotive parts using 3D printers. Tools, fixtures and fittings can now be produced at a fraction of the cost, according to Autodesk. For example, a 3D printed tool used to align engine and transmission ID numbers costs less than $3 at General Motors. A traditionally produced instrument will cost $3,000.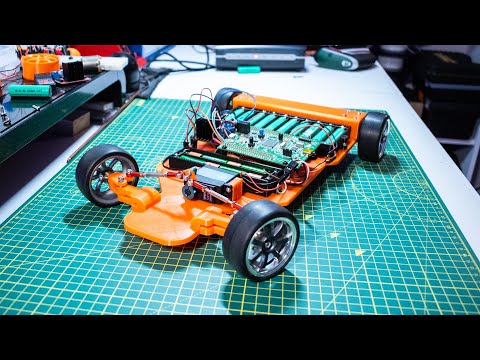 In addition, downtime due to faulty tools can be significantly reduced as new tools are produced in-house.
2. Creating custom and complex parts
Daihatsu, Japan's oldest car manufacturer, launched a project in 2016 to customize its Copen model.
Source: 3dprint.com
In partnership with Stratasys, Daihatsu customers can design and order custom 3D printed panels for their front and rear bumpers with a choice of over 15 basic patterns in 10 different colors.
Source: 3dprint.com
In Europe, the BMW MINI brand also uses 3D printing to create personalized car parts. Since the beginning of 2018, MINI customers have been able to personalize various trim elements such as the instrument panel, LED treadplates and illuminated bumpers, as well as choose from different colors and textures. These parts are then 3D printed using a range of technologies from DLS Carbon to SLS.
Source: formlabs.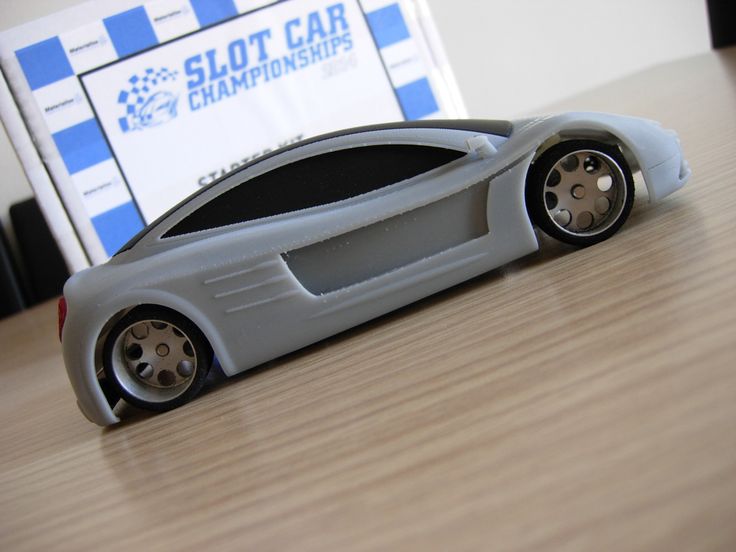 com
com
Volkswagen Motorsport's I.D. R Pikes Peak is designed with over 2000 3D printed test parts.
Source amfg.ai
The use of 3D printers makes it possible to experiment in the development of non-standard designs, reduces the cost of their production. Long production processes for custom-made products are becoming much shorter.
Ringbrothers uses 3D printing to create customized end pieces, such as ventilation grilles. Source: formlabs.com
Large companies are merging 3D printing technologies with traditional manufacturing methods. Volkswagen has recreated its iconic 1962 Microbus by replacing the petrol engine with a 120 hp electric one. The Type 20 concept electric minivan has received many improvements using 3D printed parts. These improvements include cast aluminum wheels. Even the wheel hubcaps, while looking like stamped steel, are actually printed on a Formlabs SLA 3D printer, then electroplated and polished. 9another example Bentley has used cutting-edge metal 3D printer technology to produce a grille, side vents, door handles and exhaust pipes much more complex than those used on current production models.
Bentley used metal 3D printing to create intricate micron precision parts. Source: formlabs.com
Source: youtube.com
3D printing has also made it possible to create parts that could not be made in any other way.
Bugatti's monobloc brake caliper is a prime example. For some components, Bugatti would have preferred titanium due to its high performance, but processing this metal with traditional methods is expensive and difficult. 3D printing has allowed Bugatti to produce a titanium alloy brake caliper. Due to the thin walls, the caliper turned out to be very light - almost two times lighter than forged aluminum. At the same time, the strength of the 3D-printed monoblock is superior to that of aluminum. The 3D printed titanium monoblock has a tensile strength of 1250 N/mm2. This means that a force of just over 125 kg will be applied per square millimeter of this titanium alloy without tearing the material. The new titanium caliper is 41 cm long, 21 cm wide and 13.6 cm high and weighs only 2.9kg compared to currently used aluminum, which weighs 4.9 kg.
Source: youtube.com
The Bugatti brake monobloc is the industry's largest functional 3D printed titanium component for a car. Source: formlabs.com
3. Tool making
Various devices help to facilitate and speed up the production and assembly processes, improve the safety of workers. Automotive factories and component suppliers use a large number of non-standard tooling that is specifically designed and optimized for end use. As a result, a lot of non-standard equipment and tools are made, which increases production costs.
This 3D protective wheel disc was purchased for 800 euros but can now be printed for just 21 euros. Tool development time has been reduced from 56 to 10 days.
Source: ultimaker.com
Delegating custom tooling and fixtures to service providers who machine parts from solid metal or plastic stock can delay production by weeks.
For example, a commutator motor can take up to four months to develop and prototype using conventional manufacturing techniques and cost about half a million dollars. Thanks to 3D printing, Ford was able to develop several variants in just 4 days and 99.4% cheaper - only $3,000.
Source: youtube.com
Additive technologies allow you to complete the task in a few hours and significantly reduce costs compared to ordering from a third-party enterprise. Since increasing the complexity of a 3D printed model does not incur additional costs, products can be better optimized for their application.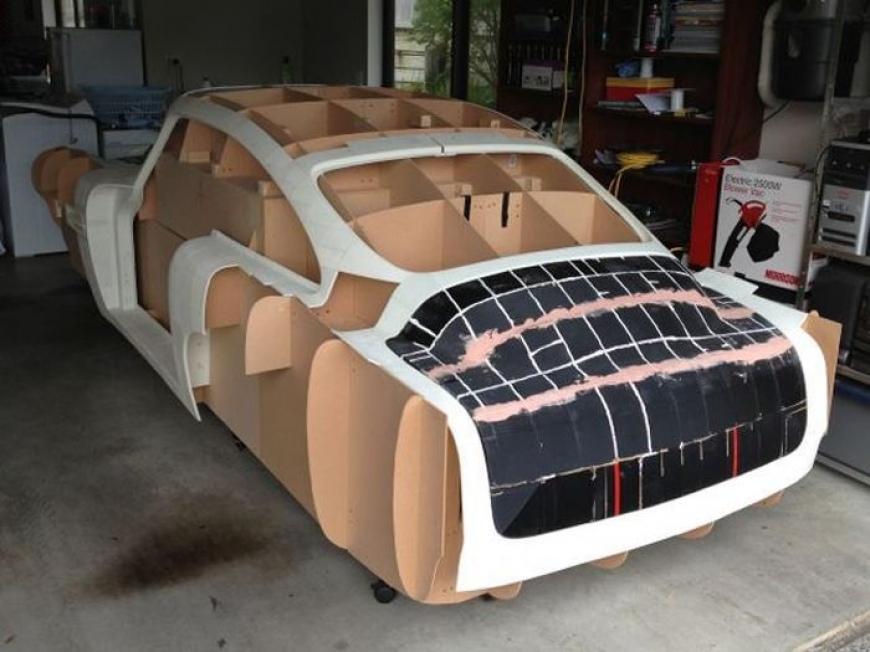 New elastic materials for 3D printing in many cases allow you to print plastic parts instead of metal or create prototypes on a 3D printer to test the tool before using it in production
Gradually, the production of 3D printed accessories and tools is becoming one of the largest applications of additive technologies.
Pankl Racing Systems uses 3D printed fixtures to fasten workpieces to a conveyor belt. Source: formlabs.com
For example, Pankl Racing Systems uses multiple Formlabs SLA 3D printers to make critical manufacturing tools. The multi-stage production of parts for transmissions on automatic lathes requires a series of fixtures and tools designed for each specific part.
With the help of 3D printing, Pankl's engineers have reduced the production time for the aids by 90%, from 2-3 weeks to around 20 hours. Costs were also reduced by 80-90%, saving $150,000.
The shift to 3D printing has helped Volkswagen Autoeuropa cut tooling development costs by 91% and tooling times by 95%.
4. Troubleshooting Parts
Spare parts have always been a problem for the automotive industry. The demand for them is either there or not, so the production of spare parts is not economically viable, and the storage of pre-fabricated replacement components is also costly. But if there are no repair parts available, difficulties arise and the main product becomes less valuable.
3D printing could solve the problem of parts in the automotive industry in many ways. The main factors are printed materials, which can match the characteristics of traditional materials used in parts and be cost-effective. There are prerequisites for this.
Using computer-aided design, drawings of all parts can be stored digitally, so there is no need to store the parts themselves. The parts needed by the client can be printed on a 3D printer right in the workshop.
Even obsolete parts whose drawings have not been preserved can in principle be recreated by making a 3D scan of existing parts of this type and applying reverse engineering (reverse engineering). You can read more about this on our blog. Old projects can take on new life. There are many lovers of vintage cars, with the help of 3D printing it would be possible to create parts for them.
Ringbrother 3D printed the Cadillac emblem for a custom built old car. Source: formlabs.com
5. Production of standard parts
As 3D printers and materials for 3D printing become more affordable, a gradual transition to the production of mass-produced automotive parts using additive technologies is possible.
3D printing makes it possible to combine components into a single whole. Let's say there is a mechanism assembled from six or seven car parts that can be combined into one printed part. It will save time and assembly costs. With 3D printing, it is also possible to reduce the weight of the combined assembly, as a result, the car will use fuel more efficiently.
3D Systems has developed an advanced exhaust pipe for a sport bike.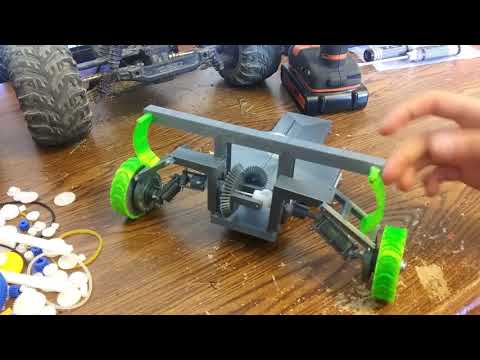 In the image below, you will see 20 sheet metal and hydroformed parts needed to assemble the original exhaust pipe. On the right is a monolithic exhaust pipe that does not require assembly, made using metal 3D printing.
Source designnews.com
The 3D printed tube was produced using Grade23 titanium in just 23 hours, compared to three weeks for traditional production. Design development time reduced from 6 weeks to 6 days. Additive manufacturing also eliminates the need for tooling, fixtures, multiple welding and multiple inspections.
Geometry optimization has reduced the amount of material required for maximum productivity. All elements of the original exhaust pipe are incorporated into the new design and, when printed with a typical wall thickness of 0.5mm, the 3D printed exhaust pipe is about 25% lighter than the original one.
A wide range of 3D printing materials is beginning to meet the requirements of various vehicle components. Since additive methods reduce costs compared to traditional methods (such as molding and injection molding), it makes a lot of sense from a production and financial point of view to further introduce 3D printing into the production of basic parts.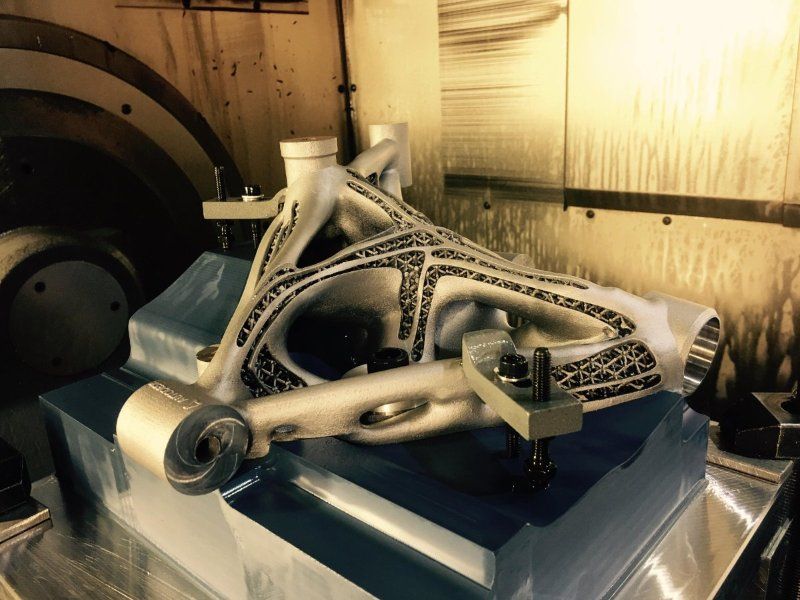
Volkswagen, one of the world's largest and most innovative car manufacturers, is using an HP Metal Jet 3D printer to produce high-performance functional parts with special design requirements, such as shift knobs and mirror mounts. Volkswagen's long-term plans to work with HP include accelerating the production of mass-customized parts such as key rings and exterior nameplates.
Source: youtube.com
+1. 3D printed cars
While 3D-printed cars have yet to hit the market, there are some interesting designs and concepts that can suggest a possible direction for the automotive industry.
Light Cocoon . German engineering firm EDAG was clearly inspired by nature to create the 3D printed supporting structure of the Light Cocoon concept car. The frame resembles the veins of a tree leaf or its branch. Despite the fact that the design of the EDAG took less material than a conventional frame, all the strength requirements for structurally significant components are met. Outside, the case is covered with a lightweight and durable waterproof fabric.
The cover protects EDAG Light Cocoon from bad weather and gives the car a unique personality. Source: formlabs.com
Blade . Blade ("Blade") announced as "the world's first 3D-printed supercar." It meets supercar standards but is made from inexpensive materials: carbon fiber tubes and aluminum rods, combined with 3D printed metal parts. Blade turned out to be very light and does not take long to assemble.
The world's first 3D printed Blade supercar. Source: formlabs.com
Strati . The American company Local Motors 3D printed and assembled the Strati electric car right at the exhibition stand, in just 44 hours. Most of the components were printed - the body, seats, interior parts. A car is made up of less than 50 assemblies, far fewer than the thousands of parts that go into a traditional car. The company intends to reduce the print time to 10 hours.