Sketch up 3d print
3D Printing with SketchUp: 10 Tricks | 3D Printing Blog
3D Printing with SketchUp: 10 Tips and Tricks
by Fabian | March 30, 2017
SketchUp is one of the most popular 3D modeling & design programs for 3D printing, as we found out from our analysis. However, preparing a SketchUp model for 3D printing can be a little tricky. That’s why we put together a list of 10 simple yet effective tips and tricks to make your SketchUp design 3D printable.
1: Set your Template to Millimeters or InchesSome simple clicks before getting started will make your life easier: you may want to set your SketchUp template to metric or imperial units. This way, you won’t need to re-scale the printing size of your model later.
You can change the template by clicking on Window > Preferences > Template and selecting ‘3D Printing – Millimeters’ or ‘3D Printing – Inches’.
2: Install the SketchUp STL ExtensionTypically you can save your 3D model as a SketchUp file (SKP). Even though our online 3D printing service accepts these files, you might want to get SketchUp’s free STL Extension. The STL file format is the most commonly used in the 3D printing community and will make it easier to share, print, and edit your design in other software.
With the SketchUp STL extension installed you can export your model as an STL file. Make sure to select the same unit type that you chose in your template (millimeters or inches) when exporting, and choose the binary file format to reduce the size of your file.
3: Avoid Paper-Thin Surfaces & Set Wall ThicknessesIn order to make your SketchUp model printable, you need to ensure that each and every surface has a wall thickness. Without setting a wall thickness, a 3D printer has no information about how thick or how thin it is supposed to print your part.
The picture below shows a model with paper-thin surfaces (not printable, left) and a solid object with thick walls (printable, right).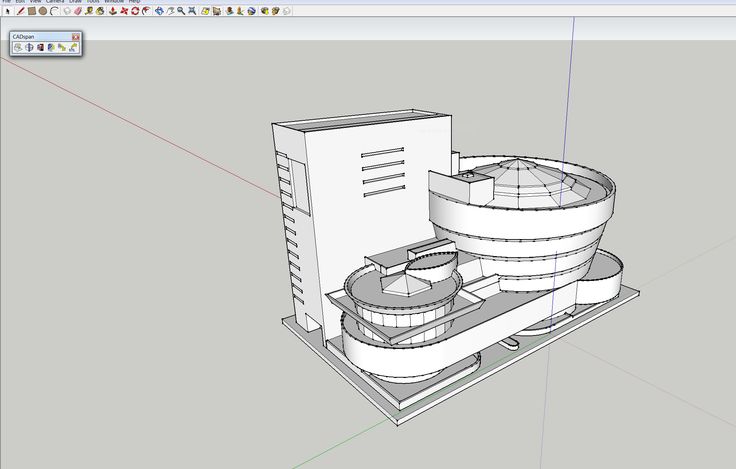 If you want to learn more about how thick your walls need to be exactly, make sure to read this blog post.
A printable model must not feature any holes in its surface. Ask yourself the question: if I were to put water inside my model, would it flow out? If that’s the case you need to find these holes and close them. This is one of the trickiest parts of creating 3D printable models in SketchUp.
The design below is an example of a model that is not watertight. You can clearly see that there is one big hole on its surface.
Once this hole is closed (for example by drawing new lines), SketchUp recognizes that the object is solid on the inside and ready for the printer! You can see such a watertight (also referred to as manifold) object below.
5: Avoid Internal OverlappingIntersections and walls within your design can make your life difficult since your model needs to have one continuous ‘outer shell’. That’s why it makes sense to think about your model in a 2-dimensional space first.
In the case below, the left shape will not be printable once it is pulled into a 3-dimensional object since it will feature paper-thin walls within the object. The shape on the right, however, won’t be a problem to print once it is pulled into a 3D object because it will only have one ‘shell’. It doesn’t feature paper-thin walls on the inside. We’ll look at an automatic way to create one outer shell later.
6: Check if Your Model Is SolidCreating watertight models with one continuous outside can be tough sometimes. Luckily SketchUp lets you check if you made any mistakes.
Here’s how it works:
- Triple-click on your model with the select tool (this will select everything).
- Right-click on your object and select ‘Make Group’.
- Right-click on your object again and select ‘Entity Info’.
If you designed an object with holes (not watertight) and internal intersection (not in one shell) the Entity Info window will say ‘Group’. This means that your model is not printable and you’ll have to check it again. Right-click on it and select ‘Explode’ to re-edit the components.
If you designed a watertight model in one shell, the Entity Info window will say ‘Solid Group’ and then you know that your model is ready to be 3D printed (in the next steps we’ll tell you how to fix this).
7: Look inside Your Model with the ‘Hide Tool’ and ‘X-Ray-Mode’Looking at your model from the outside means that the inside is a ‘black box’ for you. However, even the inside of your model could feature many modeling mistakes that would make your object unprintable. In the example below, the ‘Entity Info’ window indicates that the object is not solid.
Since it looks solid from the outside, it makes sense to take a look at what’s going on inside. Select a surface (face) you want to hide and select ‘Edit’ > ‘Hide’. And voila: you can find the trouble-making mistake. Alternatively, you can switch into x-ray-mode by clicking on ‘View’ > ‘Face Style’ > ‘X-ray’.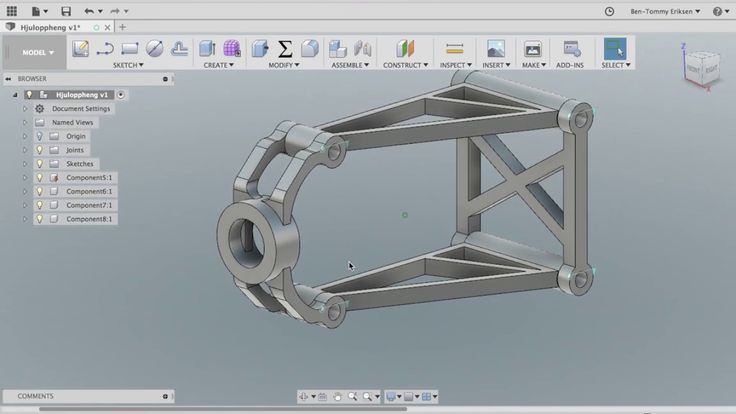
We already pointed out that designs with overlapping objects create problems for 3D printers. The good news: there’s an automated solution for creating one ‘outer shell’ around the overlapping objects, deleting all internal overlapping parts.
To start with, we have these two solid blocks. Each of these blocks was ‘grouped’ separately (Select > Right click > Make Group). We also selected the x-ray view to make things easier.
We then move one block into the other. We now have overlapping areas in the interior of this object.
To get rid of these, we select one block, click on ‘Tools’ and choose ‘Outer Shell’.
The last thing to do is to click on the second block. SketchUp automatically created one solid group out of these blocks. As you can see, the internal overlapping parts are gone. The result is a new solid object that is ready to be 3D printed!
9: Fix Reversed Faces (Inverted Normals)Another problem that can occur is so-called inward-facing or reversed faces. This means that a surface of your model is facing in the wrong direction (typically this means that it is facing the inside of the object instead of the outside). These surfaces are automatically colored in light blue.
To fix this, right-click on the inward-facing surface (face) and select ‘Reverse Faces’. You can see an example of this in the image below (left). On the right, you can see the object how it is supposed to be: all faces point to the outside again.
10: Increase Circle/Arc Segments to Getting Smooth CurvesSketchUp ‘smoothens’ arcs and circles in its visual presentation. Even though circles might look perfectly spherical in SketchUp, they are actually only made of 24 sides. Click on ‘View’ > ‘Hidden Geometry’ to see theses sides. When being printed, this circle might come out quite edged.
When you select the arc or curve tool, SketchUp will show you their default sides in the bottom right corner. You can then enter a higher number to increase the number of sides. Validate your entry by hitting the ‘Enter’ key and then draw your arc or circle.
The image below shows a comparison between the default 24 sides (left) and 150 sides (right).
Extra: Automatic File Fixing and PreparationSometimes problems are tiny and hard to see with the naked eye. There are SketchUp extensions like the Solid Inspector 2 that find problems automatically and point them out to you. Simply select a group or component and activate the Solid Inspector tool for an analysis of what would prevent it from being a solid manifold.
Another handy extension is CleanUp 3. It allows you to cleans up and optimize your SketchUp model with handy tools like “Erase hidden geometry” and “Erase duplicate faces”.
Also, SketchUp added a cool feature to their 3D Warehouse that was developed by Materialise. When uploading a model to the 3D Warehouse, you can check the “I want this to be 3D printable” button (see video below) to get modeling errors fixed instantly. This tool will make your 3D model watertight and allow you to download it as an STL file. While it might lead to somewhat less accurate results, it’s a very fast way to get a printable file. So if you’re searching for an easy-to-use tool that will save you a lot of time and effort (no more searching for file issues, no more exhausting fixing sessions), this is the tool for you.
Did you manage to follow our tips and tricks and create a printable SketchUp file? In order to send it to our printers, download the SketchUp 3D print service plugin. Alternatively, you can upload your models here and choose from hundreds of material options.
Get high-quality 3D prints like these with i.materialise’s online 3D printing service.
Is SketchUp Good for 3D Printing? – 3D Printerly
SketchUp is a CAD software that can be used for creating 3D models, but people wonder whether it’s good for 3D printing. I decided to write an article answering this question as well as other related questions.
Keep on reading for more information about 3D printing with SketchUp.
Is SketchUp Good for 3D Printing?
Yes, SketchUp is good for 3D printing, especially for beginners. You can create 3D models for 3D printing quickly in all types of shapes and geometries. SketchUp is known for being a simple software to use that has many features and tools that make it easy to use. You can export models as STL files to 3D print.
It is free to use and even has a cool model library called the 3D Warehouse that is full of standard parts that can go straight onto your build plate.
One user who has used SketchUp for many years did say curves are difficult to create. It also doesn’t have parametric modeling which means that if you need to adjust something specific that is the wrong size, it won’t automatically adjust the design, so you’d need to re-design the whole thing
Objects like screw threads, bolts, chamfered edges will not be easy to create according to the user.
They did say that it’s very quick if you want to make a prototype object that doesn’t need to be edited.
One user did mention that they love SketchUp for 3D printing and it’s the only software they use. On the other hand, someone recommended going with TinkerCAD instead of SketchUp, saying it’s easier to learn and does everything a beginner would need, along with great tutorials.
SketchUp is mostly made for architecture and not originally to create models to 3D print, but it does still work quite well for many people.
Check out the video below for an example of a user making 3D models with SketchUp.
If you really want to get into SketchUp, I’d recommend going through this playlist of SketchUp tutorials and various modeling techniques.
Can SketchUp Files be 3D Printed?
Yes, SketchUp files can be 3D printed as long as you export the 3D model as an STL file for 3D printing. If you are using the free version of SketchUp online rather than the desktop version, you can grab STL files by using the Download button rather than the Export button.
The desktop version does require a paid plan to export STL files and it has a 30-day free trial version if you want to test it out.
There are three versions of SketchUp:
- SketchUp Free – Basic features
- SketchUp Go – Added feature like solid tools, more export formats, unlimited storage at $119/yr
- SketchUp Pro – Premium version with a lot of added functionality, various layout tools, Style Builder, custom builders and more.
 Perfect for professional work and comes with a desktop platform at $229/yr
How to 3D Print From SketchUp – Does it Work With 3D Printers?
To 3D print from SketchUp, follow the steps:
- Go to File > Export > 3D Model to open the dialog box or go through the “Download” button on the online version
- Set the location where you want to export your SketchUp file & enter the file name
- Click on Stereolithography File (.stl) in the drop-down box under Save As.
- Select Save and another dialog box will open.
- Click on Export and SketchUp will start the export.
- Once you’ve successfully exported the SketchUp file, your model will be ready for 3D print.
SketchUp Vs Fusion 360 for 3D Printing
Both SketchUp and Fusion 360 are great platforms for 3D printing but the choice of the tool may differ depending on the users. Most people seem to prefer Fusion 360 due to its parametric modeling feature and advanced tools.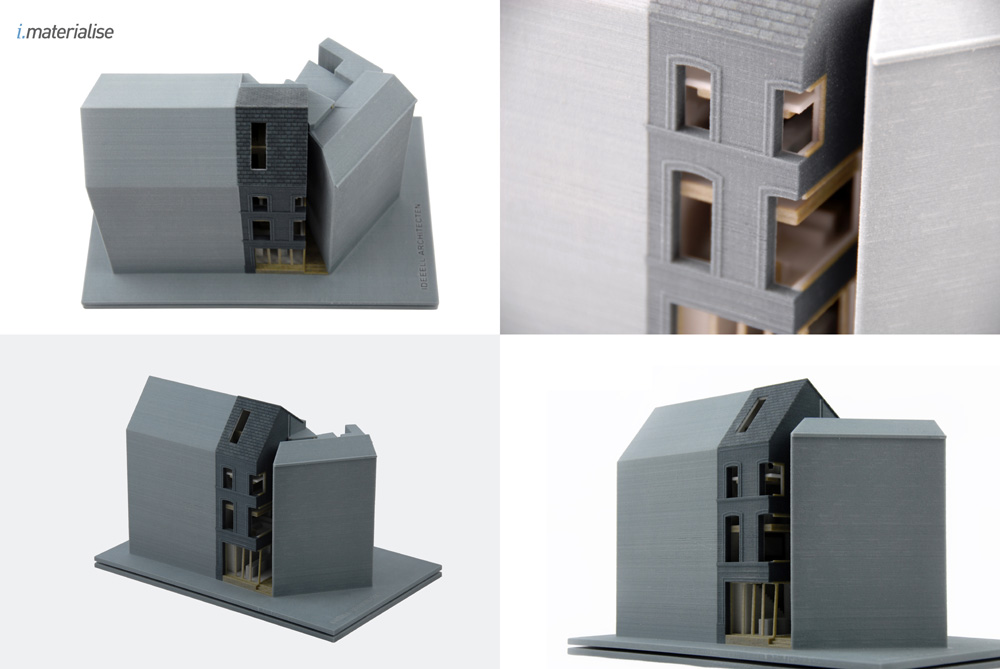 There are more capabilities for creating mechanical and unique models with Fusion 360.
I wrote an article called Is Fusion 360 Good for 3D Printing which you can check out.
One user who designed something really complex in SketchUp said that using a CAD software like Fusion 360 would have made designing those parts easier and faster, though for simple objects, SketchUp is the ideal software.
People agree that if you want to create something mechanical to 3D print, SketchUp isn’t the best option. Another thing to know is that the skills you learn in SketchUp aren’t easily transferable to other CAD software, unlike Fusion 360.
One user who has tried both SketchUp and Fusion 360 for 3D printing said that they initially started with SketchUp and ended up transitioning to Blender. Once they got a 3D printer, they stumbled upon Fusion 360 and it became their main go-to software for creating models.
They did admit that the learning curve for Fusion 360 is steeper than SketchUp but it’s still easier than other professional software.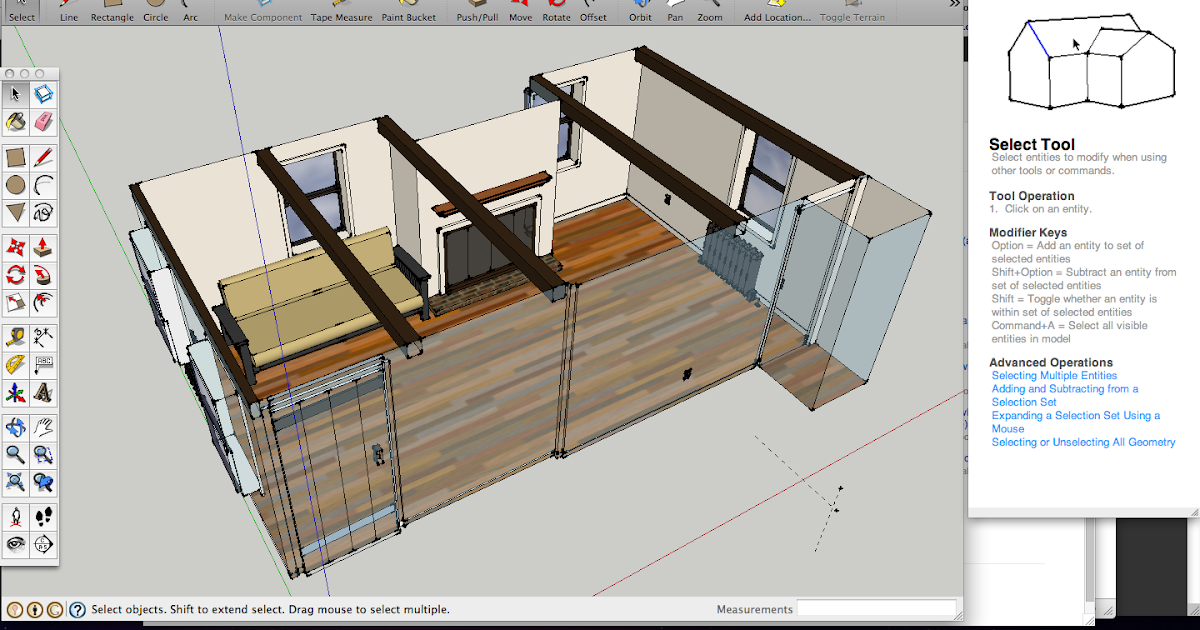
Another user who moved from SketchUp to Fusion 360, stated that Fusion 360 is parametric and SketchUp isn’t.
Parametric modeling basically eliminates the need to redraw your design each time one of the dimensions on your design changes since it changes automatically.
One person’s experience was that they started with SketchUp but quickly found Fusion 360 to actually be easier. They recommended having a play around with Fusion 360 for a few hours so you can really get a hang of it.
There are similar experiences as well, with one user saying he used SketchUp and abandoned it for Fusion 360. The main reason for them was because SketchUp wouldn’t render sub millimeter details which he did for smaller objects.
There are some key differences between the software in factors like:
- Layout
- Features
- Pricing
Layout
SketchUp is quite popular for its straightforward layout, which is preferred by beginners. In this tool, the top toolbar contains all the buttons and the useful tools also appear as bigger icons. There are floating windows when you select some tools on the platform.
Fusion 360’s layout resembles that of a conventional 3D CAD layout. There are tools like design history, grid system, part lists, different view modes, ribbon-style toolbar, etc. in this platform. And the tools are organized with names like Solid, Sheet Metals, etc.
Features
SketchUp comes with a handful of attractive features like Cloud Storage, 2D drawing, and Rendering- to name a few. The tool also has plug-ins, web access, and a 3D model repository. Overall, it’s perfect for beginners but may disappoint you if you’re a pro designer.
Fusion 360, on the other hand, provides Cloud Storage, 2D drawing, and Rendering too. But the best part of this platform is the collaboration in terms of file management and version control. Also, the platform is familiar to designers who know CAD tools.
Pricing
SketchUp provides you with four types of subscription plans such as Free, Go, Pro, and Studio.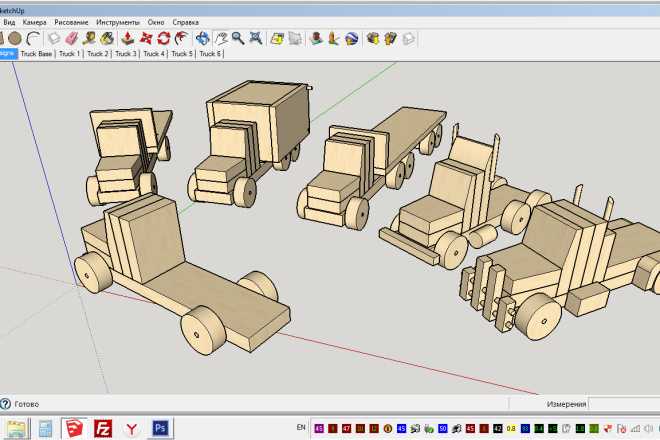 Except for the free subscription plan, there are yearly charges for all the plans.
Fusion 360 has four types of licenses named personal, educational, startup, and full. You can use the personal license for non-business use.
Verdict
Many users prefer Fusion 360 as it is a full-fledged CAD software with functionalities that go beyond 3D modeling. It’s easy to use and very easy to manage the features.
With all the functions, it becomes a more powerful tool when compared to SketchUp. Fusion 360 users specifically mention the better control and easy modifications the software offers.
On the other hand, SketchUp can work well for beginners. It is geared more towards a non-CAD user base. It offers intuitive design tools and interfaces for beginners. It has a shallow learning curve and comes with all the basic design tools.
Check out the video below comparing Fusion 360 and SketchUp.
3D Printer: How to Print SketchUp Models
Top
09/27/2017
Author: Andrey Kireev
1 star 2 stars 3 stars 4 stars 5 stars
3D printer: how to print SketchUp models - how it's done
1
5
1
5
With SketchUp, you can also print models on a 3D printer. You will find all the information about this in this article with practical tips.
- When you open the SketchUp software, you must first select which template you want to use. Here you can select a large or small object and determine its exact parameters.
- After that, using a simple Drag&Drop, you can transfer various geometric shapes to the workspace.
- However, pay attention to use the correct dimensions. They can be specified in the "Dimensions" window.
- At the same time, look at your model from all sides again and again so as not to miss any errors.
- If you want to give an object a specific color, double-click on it and then click on the paint bucket.
- When you're ready, you can check the file with the free Netfabb Basic program before sending it to the printer.
- In this case, you need to make all the necessary changes again in, since the free Netfabb Basic utility does not have such functions.
Photo: manufacturing companies
Tags 3d models
Author
Andrey Kireev
Was the article interesting?
Share link
By clicking on the "Subscribe" button,
you consent to the processing of personal data
Recommended
Review of the smartphone HONOR Magic Vs: everything goes as it should
How to ask an anonymous question in VK
USB device descriptor request failed: what to do?
Best TV set-top boxes: top 10 models in 2023
Why does the keyboard need a wrist rest?
2GIS on iPhone: how to return a popular app to iOS
How to update Sberbank Online on an Android phone
The keyboard does not work on a computer or laptop: what to do?
How to get rid of old technology and not harm nature
Advertising on CHIP Contacts
SketchUp STL Export Guide
Share on Facebook Share on Twitter Share on Vkontakte
This walkthrough is for Sketchup 7.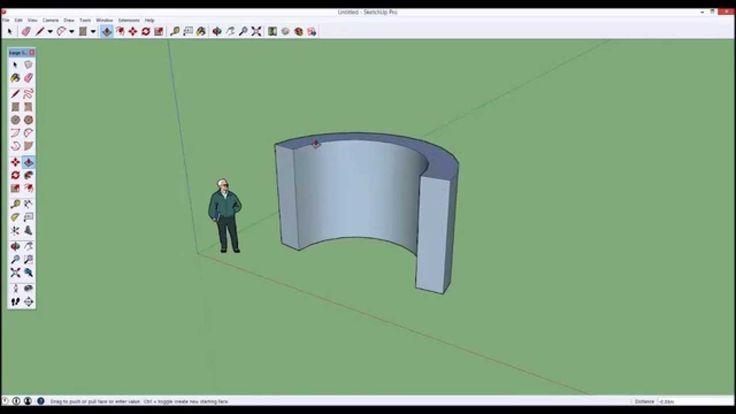 1 or higher. It also applies to both free versions of SketchUp as well as SketchUp Pro 7.
Step 1: Open your model in SketchUp and export to the correct format
several attempts, you come to the conclusion that most, if not all, are not good enough at this task.
Since the last update Sketchup to version 7.1, it has become very easy to create almost perfect files for 3D printing .stl, in addition, there are a couple of very useful and free programs like Sketchup - MeshLab and Accutrans3D . Meshlab is a free and open to all application. But you can use Accutrans freely only for 30 days.
Open your model in Sketchup :
Export as 3D Model (Collada) by opening File -> Export-> 3D model
Step 2: Open the file in Meshlab and save as STL
Now open the file in Meshlab and save it in the format STL
9000 9000 9000 9000 9000 9000 9000 9000 Step 3: Opening the file in Accutrans
Open the . stl file in Accutrans3D and run a water tightness test using Tools -> Check for Water Tight Meshes
models are blue.
Pro tip: remove a large surface or area
Sometimes these errors are obvious, but sometimes they are REALLY hard to see. With one trick, this can be avoided. Enough to return to your file at SketchUp and deliberately delete a large surface (in this case, the flat base of the model).
So much better - even though we now have a HUGE hole in the model, we know exactly where it is, because we just made it ourselves!
Pro tip 2: Go back to Accutrans and fix it in SketchUp
Now we export the file again, convert it to .stl format and upload again0039 Accutrans to re-test for water resistance, this will allow you to easily "look inside" your model to identify these annoying errors (most likely, you will see that the hole in the base that we just made is highlighted in red - do not pay attention to his attention and look for others!).
Go back to the model in Sketchup - find and fix the errors.
Look! Lots of holes!
And we fixed them with ease!
Step 4: Correcting model edge errors
There are many such errors: when deepening these areas SketchUp leaves panels in front of them - they need to be removed!
Now everything is fine.
Step 5: Final waterproof test
So, everything is in order, and you can save your file. To export it again, open File -> Export -> 3D model -> COLLADA file tabs.
Open in Meshlabs .
Save with .stl extension.
Open Accutrans3D in and run the waterproof test again.
Step 6: Upload the file
So now you are ready to upload your file, for example, to can-touch.ru, it should have a .