Skanect 3d scanner
Skanect Reviews and Pricing 2023
Audience
Any user looking for a 3D scanning solution to capture full color 3D models of objects
About Skanect
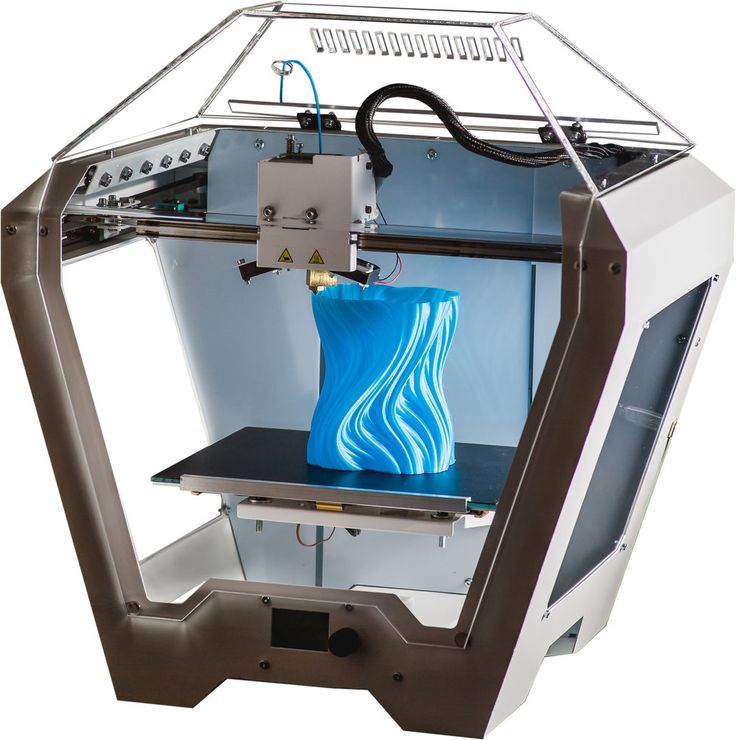
With Skanect, capturing a full color 3D model of an object, a person or a room has never been so easy and affordable. Skanect transforms your Structure Sensor or Structure Core depth sensor into a low-cost 3D scanner able to create 3D meshes out of real scenes in a few minutes. Enter the world of 3D scanning now! Unlike existing technologies, Skanect can acquire dense 3D information about a scene at up to 30 frames per second. Just move around your Structure Sensor or Structure Core to capture a full set of viewpoints, and you will get a 3D mesh in real time. Skanect makes it easy to 3D scan different kinds of scenes by providing a set of predefined scenarios, suitable for most use cases. You can then share your models online in a few clicks, there’s no need to be a trained professional to start 3D scanning! Skanect leverages consumer-grade 3D cameras like the Structure Sensor and Structure Core, limiting the hardware cost to a fraction of previous 3D scanning solutions.
Pricing
Starting Price:
$129 one-time payment
Free Version:
Free Version available.
Integrations
See Integrations
Ratings/Reviews - 1 User Review
Overall
1.0 / 5
ease
3.0 / 5
features
2.0 / 5
design
3.0 / 5
support
1.0 / 5
More Reviews Write a Review
Company Information
Skanect
Founded: 2011
skanect.occipital.com
Videos and Screen Captures
Adzapier Consent Management Platform
For companies that need a consent management and DSAR solution
Connecting Brands with their audience through safe & accurate data.
Learn More
Product Details
Platforms Supported
Windows
Training
Documentation
Videos
Support
Online
Skanect Frequently Asked Questions
Q: What kinds of users and organization types does Skanect work with? Q: What languages does Skanect support in their product? Q: What kind of support options does Skanect offer? Q: What other applications or services does Skanect integrate with? Q: What type of training does Skanect provide? Q: How much does Skanect cost?Skanect Product Features
3D Scanning
Skanect Reviews
Write a Review
Structure Scanner - Creating at Cline Library
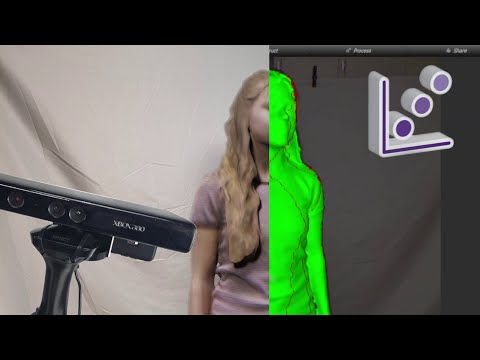
Structure Sensor
The Structure Sensor 3D Scanner allows you to scan people, objects, spaces, or anything else you can imagine using the Skanect mobile 3D scanning app for the Apple iPad. You can scan by moving around the object, making sure to capture it from as many angles as possible for the most accurate scan. The Structure Sensor 3D Scanner is available for checkout by NAU and CCC students, faculty, and staff, as well as community members on a first-come, first-served basis.
- NAU/CCC Affiliates and Public
- Number available: 2
- Loan period: 3 days
- Overdue fee: $25
- Replacement Cost: $1,100
View Availability
Kit Components
- Apple iPad
- Structure Sensor (attached)
- Sensor to Lightning Cord (attached)
- Sensor Charging Cord
- Microfiber Cleaning Cloth
- Sensor to USB Cord
- Lightning Cord
How To Guide
There are 4 main apps that are required during your experience using this scanner:
- Structure – Determines distance from an object and maps the scanner’s view.

- Skanect – Used to create a 3D-scanned model of an object.
- Scanner - Used to create a 3D-scanned model of an object.
- Room Capture – Used to create a 3D-scanned model of a room.
The Structure App
The Structure app includes a number of visualizations to show the raw data being captured and streamed by your Structure Sensor to your iPad. The first is the infrared feed being captured by the Structure Sensor's infrared camera. To view this feed:
- Connect your Structure Sensor to your iPad via the included Lightning cable.
- Log-in to your email on the iPad by entering Settings > Mail, Contacts, Calendars > Default Account
- Open the Structure app and tap "IR" on the right hand menu.
- Tap the light bulb icon (lower left) to turn on the infrared LEDs.
The next visualization you can explore is the raw depth stream being captured by your Structure Sensor.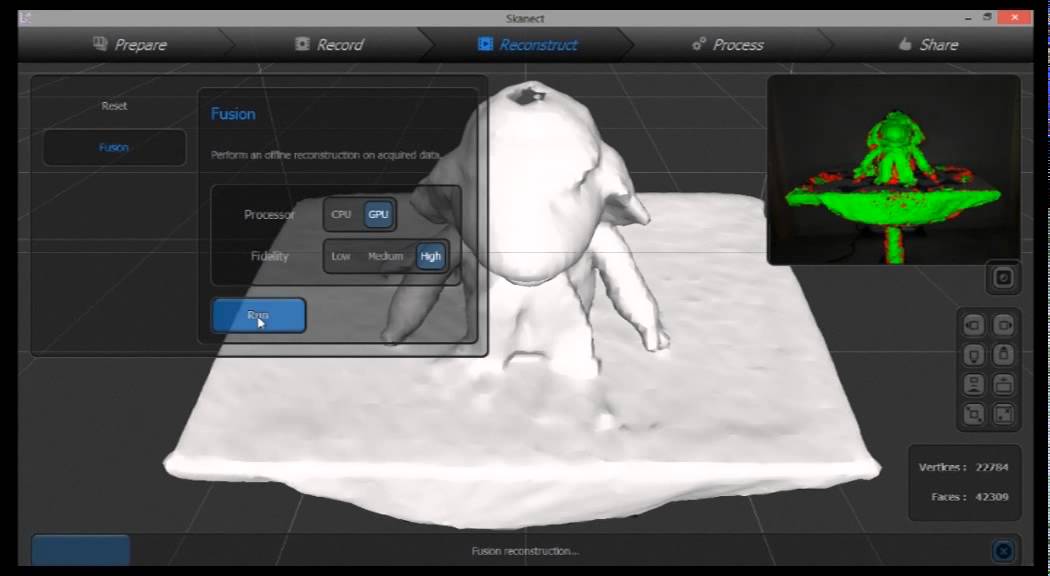
- Tap the "Depth" link in the right hand menu to view the depth stream.
- The circular target shows the distance between the Structure Sensor and objects closer than 4 meters.
- You can move your iPad to move the target, or you can tap the screen to move the target without moving the iPad.
- Tap the "Depth + Color" link in the right hand menu to view the depth stream with color images (image 2).
Using the Structure App
The Structure app has an advanced feature called Uplink. Uplink lets you connect your Structure Sensor on an iPad wirelessly and in real-time to a Mac or Windows PC on the same wireless network. This allows you to stream data from the Structure Sensor to a PC running a desktop application, therefore taking advantage of the mobility of your iPad/Structure Sensor along with the greater computing power and memory of the PC.
- The Uplink menu option will only appear when a computer running an Uplink compatible program is on the same WiFi network as your Structure Sensor/iPad combination.
- When a PC with an Uplink-compatible program is on the same network as your iPad, you will see the Uplink option appear in the Structure app's main navigation menu. Select the Uplink option in the menu to start streaming data from your Structure Sensor to the program running on the PC.
Using the Skanect App
Skanect allows you to create, refine and share high-quality 3D models of objects and people captured with your Structure Sensor. You can learn more about Skanect on the Skanect website. If you backed us on Kickstarter and got a Structure Sensor, you should have received an email from us with your free Skanect Pro license because we hit our stretch goal!
While we won't go into detail on how to get the best quality model using Skanect (we recommend visiting Skanect's support page to watch their video tutorials for that), we will show you the basics of using Skanect in conjunction with the Structure app.
- To begin, you need to ensure that your iPad/Structure Sensor is on the same wireless network as the Mac or PC that is running Skanect.
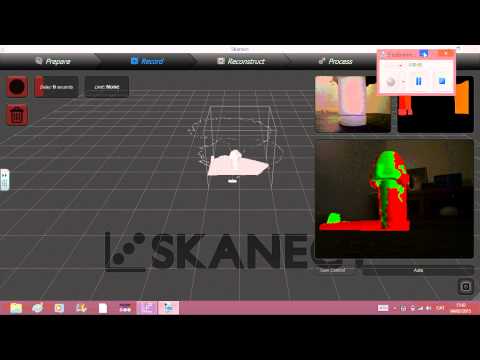
 If they are not on the same network, then Uplink will not be enabled, and the two devices will be unable to communicate with each other. Next, open Skanect on your Mac or PC, and then click the "Record" tab.
- The "Record" tab is the second from the left. The tab will be highlighted in blue when selected, as shown at left.
- Now, you can select the "Uplink" menu option within the Structure app on your iPad. You'll see that what is on your iPad's screen is now mirrored in the Skanect interface:
- The image on the iPad screen to the left is mirrored in real time on the Skanect interface above.
- Next, press the "Rec." button in the upper left hand part of your iPad's touchscreen to begin capturing an object or person in 3D. When your scan is complete, press the "Stop" button.
- Just as before, what you see on your iPad's screen will be mirrored in real time on your Mac or PC's screen.
- When your scan is complete and you have pressed stop, you can then manipulate and process your completed scan using Skanect.
 Again, we recommend viewing the video tutorials at Skanect's support page to learn how to use Skanect's processing features in detail.
Using the Scanner App
- Position the object you wish to scan within the box that appears on the screen
- You can adjust the size of the cube by using two fingers in a pinching motion
- Press ‘scan’ and the scanner will begin creating a digital model of your object
- Keep the object within the frame and move slowly around it to get the best image
- Click ‘done’ to view your model
- Clicking the ‘email’ link in the top right will allow you to retrieve your 3D scan, if you skip this step the scan will NOT be saved
- Click the ‘back’ button to reset the app and start scanning again!
Using the Room Capture App
- Stand facing the area of the room you would like to capture
- By adjusting the slider on the bottom right, you can change the distance the scanner will receive input
- Press ‘scan’ and the scanner will begin creating a digital model of the room
- Slowly pan around the whole are you want to capture, until you are finished
- Click the stop button to finish your scan and view your model
- On this screen, you can use the various options on the top to view your model in different ways
- You can also use the joystick on the bottom left as well as the touchscreen to move around the model
- Clicking the ‘email’ link in the top right will allow you to retrieve your 3D scan
- Click the ‘back’ button to reset the app and start scanning again!
Tutorial Videos
3D scanning at home.
 Cheaper and easier than ever!
 In the world of 3D technology, scanning is the yin to the yang of 3D printing. While the printer turns computer models into real things, the scanner turns real things into computer models. Along with sketch-based modeling, 3D scanning - in which a real part is scanned into a model in a computer - is another technology for preparing prototypes for subsequent printing.
Advanced 3D scanners are available, but they can be quite expensive and sometimes even more expensive than professional 3D printers.
Fortunately, today there are home 3D scanners that can be used to achieve outstanding results. Today, there are three scanning methods: laser line scanning, structured-illuminated scanning, and image-scanning modeling.
Line laser scanning.
Probably the most popular scanning method for personal scanners. It obtains data about the model by illuminating it with a laser beam. These scanners work best with a neutral background, such as an all white back set at a 9 degree angle.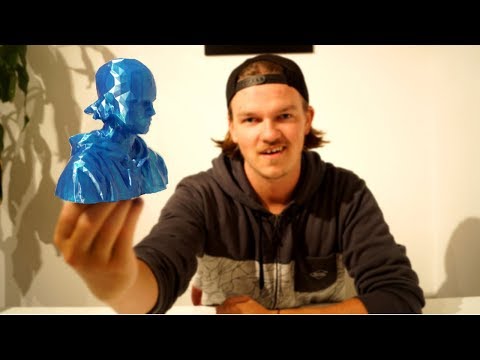 0 degrees. Such a background is inexpensive to make, and scanners based on this technology are cheap. The addition of a 360-degree rotating platform on which the scanned model can stand can greatly improve the quality of the scan.
When everything is ready, you simply turn off the light, illuminate the model with a laser from all sides, the software does the rest.
Although it is possible to use, for example, MATLAB to convert raw scanned images obtained in this way into a full-fledged 3D model, since 2006 the German company David Vision Systems began to develop special low-cost software for this purpose. This software simulates a 3D model in real time, and you immediately see the result of your work. It composes images taken from different angles and forms a 3D model in a format that is convenient for you. The latest versions of the software also support structured-illuminated scanning (see below). You can even use the free trial version to try it out.
Patterned Illuminated Scanning
This method combines a light projector, digital camera and image analysis software for the 3D scanning process and is generally faster than the line laser method.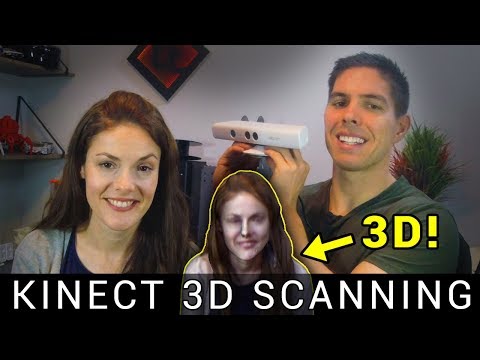 An additional plus is that there is no need to prepare the background from behind. The projector imposes a certain light pattern on the scanned model, often a grid of light and dark stripes, so that the program can determine the shape and coordinates of the object, depending on how the light pattern is distorted on it. The light pattern can be both visible and made in the form of infrared radiation, which you will not even notice.
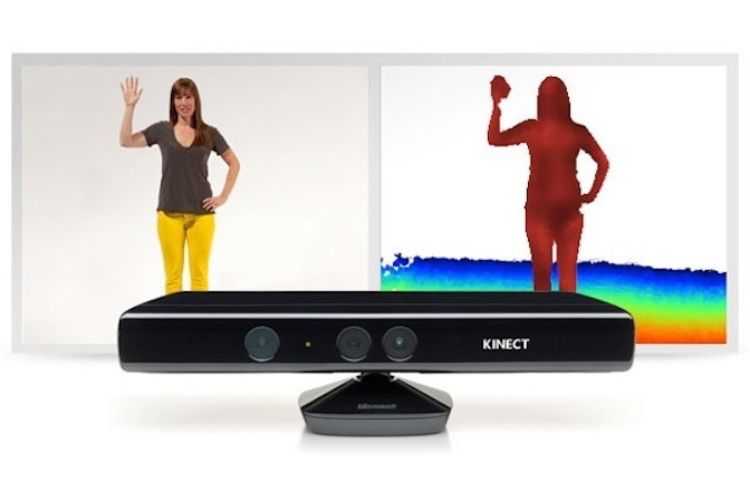
Infrared scanning has its advantages, for example, because this radiation does not interfere with external light radiation. For example, the Microsoft Kinect device for the XBOX gaming platform uses exactly the method of structural lighting through infrared radiation.
Prior to the use of infrared radiation, ordinary visible color was commonly used. Using this technology, for example, Radiohead's video for the song "House of Cards" was filmed in 2008. The software that supports structured-illuminated scanning is David's software, as mentioned above, as well as ThreePhase, a utility designed specifically for working with structured-illuminated scanning. Most programs are usually written for Mac OS X, but ThreePhase can run on all platforms - Mac OS, Windows, Linux.
However, since the introduction of the Kinect by Microsoft in 2010, scanning at home has changed a lot. After several years of development, as well as millions of dollars invested in its research, the Kinect device was obtained, consisting of five elements: right and left microphones, an RGB video camera, an infrared radiation projector, and a monochromatic sensor suitable for a laser. A pair of sensor / laser and allows you to scan and analyze the movement of a person.
In general, the release of the Kinect device prompted many to develop this technology, including in the field of 3D scanning. Against this background, as well as the inexpensive price of the device, interest in structured-illuminated visible light scanning has completely disappeared. Kinect is an incredibly powerful device at a very cheap price and is a great alternative to visible light. At the time of writing, the Kinect sensor costs about $100.
Among all the programs for 3D-scanning, one of the leading programs is the ReconstructMe program from the Austrian company Profactor. This is a quality commercial product that can easily be used for personal purposes. ReconstructMe scans the model immediately at its actual scale, so no further scaling is required. Unfortunately, the program is only available for Windows.
Skanect from the French company Manctl is another popular program that works with both Windows and Mac OS.
Modeling based on image scanning
If you have many photos of the same part from all angles, then special software will convert them into a 3D model. This method is sometimes called photogrammetric, and it has often been used in forensics to analyze crime scenes, car accidents, and so on. based on conventional 2D photos. In this method, the most important thing is to choose the right photos, shooting angles, and also choose the right software.
Programs like Eos Systems' PhotoModeler, David's D Sculptor, and Autodesk's 123Catch make it very easy to select anchor points for photo alignment and then create a 3D model.
This simulation works best when you have full access to the subject and the ability to take an unlimited number of photos. The more photos, the better the lighting and the more correctly the photo shooting angles are chosen, the better and clearer the models will be.
With good observance of all the factors described above, the programs themselves find a way to combine photos to obtain a model, and human intervention is not required at all.
What should I use?
The choice of one of the three methods described above is based on what equipment you have, what size models you are going to scan, and access to the object - the ability to turn and inspect the model from all sides. If you need some kind of rough rule of thumb to start with, then use laser line scanning for small models (less than a human head), for medium-sized objects, structured-illuminated method, and for something large (for example, for scenery) the optimal choice there will be a simulation based on image scanning.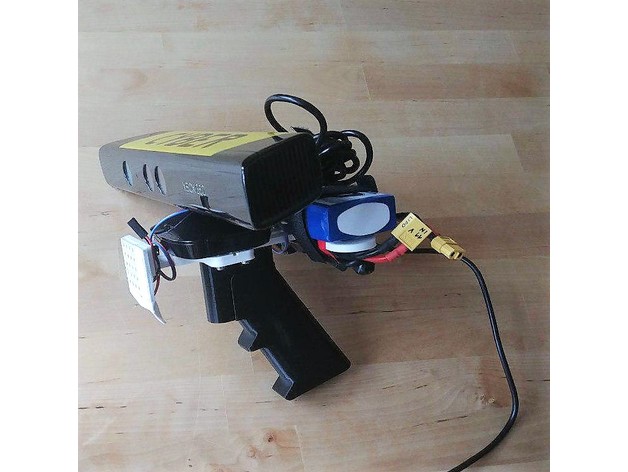
how to quickly create prostheses and other unique products
Reverse engineering
Implementation stories
Medicine
Author: Aleksey Chekhovich
Author: Aleksey Chekhovich
Video: Real-time 3D Face Scan | Order a free test scan | 3D scanner helps victims | 3D scanning of the human body in great detail
Creating prostheses using 3D technologies: the era of new possibilities
As technology improves and becomes more accessible, there are new opportunities to solve the most complex medical problems. A team of researchers from the company Chabloz Orthopedie (France) managed to create a unique and truly revolutionary prosthesis.
Chabloz Orthopédie worked with Denis Gauthier, who had his forearm amputated. First, the experts performed a 3D scan of the patient's healthy arm using a peel 3d scanner to obtain its mirror image. This was done so that the designed product ideally repeated the proportions of a healthy limb. The rest of the amputated arm was also scanned to achieve a comfortable and ergonomic fit for the prosthesis.
Denis Gaultier with finished prosthesis
The team then proceeded to design a CAD model and develop a myoelectric prosthesis. Batteries, sensor cables and an artificial hand were integrated with the fabricated forearm. The prosthesis itself was designed in CAD and printed on a 3D printer. HP Jet Fusion technology was used to print various components of the forearm. After manufacturing, all parts were finished and painted.
The use of 3D scanning and 3D printing guarantees not only the correct fit of the fixture, but also gives complete freedom of movement. A new approach to prosthesis design allows professionals to develop solutions that are lightweight and highly customizable. Did you know that 3D printed parts are 20% lighter than their carbon or fiberglass counterparts? Such products also have the necessary rigidity, hardness and durability.
Later, this innovative prosthesis was combined with the BeBionic hand, one of the most advanced bionic limbs, and a state-of-the-art myoelectric forearm and hand was custom-made. Gauthier's case is a great example of the innovative use of 3D measurement and 3D printing technologies.
The video shows the complete process of digitizing the face and ears using the Creaform Go!SCAN 20 portable 3D scanner (its analogue in white peel 2 is now being produced). This solution provides a detailed digital model for use in areas such as plastic and reconstructive surgery, in particular, facial prosthetics.
Order a test 3D scan for free!
3D scanner helps victims
Unfortunately, tragedies inevitably occur around the world, and those affected need help. But, fortunately, there are organizations such as Médecins Sans Frontières (Doctors Without Borders) that do their best to provide them with the necessary treatment and care. Since 2016, the organization has been working tirelessly to solve the problem of providing prostheses to those in need around the world. The goal is to help amputees regain independence. The solutions that are used in this case are 3D technologies.
Upon completion of the medical examination of the patient, doctors determine his needs and expectations. Using the peel 3d scanner, with minimal discomfort for the victim, a high-precision digital model of the injured limb is created. Compared to traditional impression making, 3D scanning is significantly faster and does not require contact. The result of the 3D scan is then transferred to the virtual sleeve and prosthesis design software. The developed component is made on a 3D printer and installed on the patient's limb. If necessary, during the installation process, the prosthesis and sleeve are finalized. After three months of use, the patient is invited to evaluate the comfort of the prosthesis.
MSF has also developed a similar procedure to create compression masks for burn patients. Here, the use of non-contact technology also provides significant advantages over traditional plaster bandages, not only making the procedure less painful for the patient, but also speeding it up, allowing for a much larger number of people in needy countries to be treated.
Physiotherapist Pierre Moreau scans a patient with head burns. Then, based on the scan, a transparent pressure therapy mask is created / Photo: Elisa Oddone, Al Jazeera
Physiotherapist Pierre Moreau of Médecins Sans Frontières says: “The purpose of the 3D project is to help patients who need special rehabilitation care. We launched this project in Amman in 2017, where we started providing upper limb amputees with 3D printed prostheses. But simply printing a prosthesis is not enough - we try to understand the needs of the victims, find individual solutions and keep them in their new position for as long as possible. We are assisted by an interdisciplinary team of rehabilitation workers and engineers. Then our specialists helped more than 30 patients in Jordan.
In 2018, we began to use the technology in another direction - for patients with burns, especially on the face and neck. Skin complications are a very serious problem for burn victims. Hypertrophic scars may form, and pressotherapy is needed. This requires transparent masks, but they are quite difficult to produce on site. So we started to explore 3D scanning, 3D printing and computer modeling in an attempt to help our team produce these devices for the patients who desperately need them. Now we provide more than 50 transparent facial orthoses.
When I think about this project, I always remember one story that demonstrates its development. In 2017 in Jordan, we had a small patient with burns and an amputation - she had no arm, and the condition of her remaining part was too complex to develop a prosthesis. Then we couldn't help her. But she came back the following year and we were finally able to make a prosthesis for her. For the first time, she was able to use her hand. This is one of our best memories of the project and a measure of its success.”
3D scanning of the human body in great detail
There are already more than 7.5 billion people on Earth, and although some are very similar to each other, there are no completely identical people. With such a variety of faces, it is not at all surprising that in the process of evolution the human brain became masterfully recognizing the smallest details that help to distinguish them. To get as close as possible to the original, the 3D scan of the statue must be extremely accurate and have a high geometric resolution.
3D copies: 2013 Kinect scan (left figure) and peel 3d (right figure)
To improve the quality of scanning, the Canadian company USIMM has begun using peel 3d. The company specializes in the machining of non-metallic materials and is constantly involved in artistic projects. The main goal was to show the evolution of CNC machining by comparing the results of a 3D version of one employee made a few years ago with current results.
According to USIMM's Leia Lepage, scanning a living person is not an easy task: “Scanners are usually quite sensitive to the smallest movements, even if it's just breathing. Scanning a person is very difficult.” In order to accomplish such an extraordinary task, the USIMM team needed a 3D scanner that was immune to certain movements - but at the same time had high resolution and accuracy. Peel 3d possesses such qualities: a resolution of up to 0.5 mm and a volumetric accuracy of 0.5 mm/m.
The team scanned the same employee in the same pose as they did a few years ago. The resulting 3D scan data was sent to a five-axis CNC machine, and then a full-size replica of a person was created from polystyrene. The results were incredible.
The scan results obtained earlier by the Skanect device did not stand next to the peel 3d results.