Auto shutdown 3d printer
Buy Best Auto Shut Down Modular For FDM 3D Printers – Kywoo3d
- Home
- Buy Auto Shut Off Modular For 3D Printers
Buy Auto Shut Off Modular For 3D Printers
China / Tycoon,Tycoon Max, Tycoon Idex - $25.99
- China / Tycoon,Tycoon Max, Tycoon Idex - $25.99
-
China / Tycoon Slim - $25.
99
Nice additional function
Purchased directly from Kywoo on Aliexpress. The goods arrived quickly and without problems. Assembly is without problems, I used the downloaded paper manual and a demo video on Youtube to help. I followed the instructions exactly, printed out a PET-G cover and mounted everything inside. I upgraded the firmware from version 1 to 2.1.3. Everything worked great the first time and everything looks luxurious. Thank you for an excellent supplement!
Two notes to improve:
1) In the next version of the firmware, reduce the time for auto shut-off from 20 minutes to, for example, 5 minutes, or preferably adjustable.
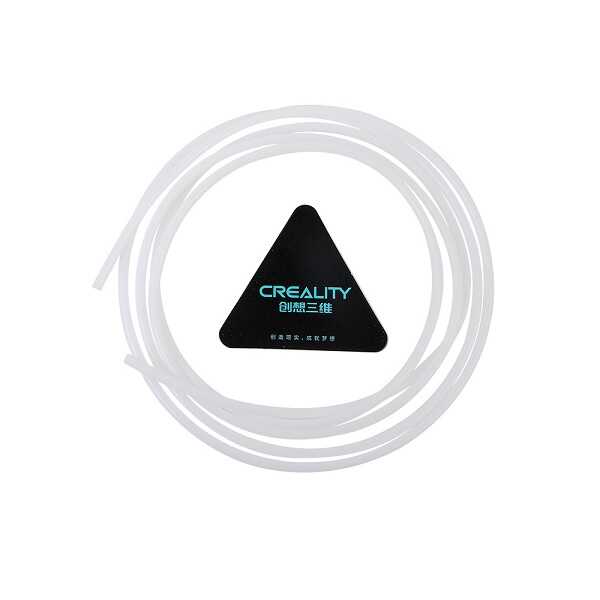
2) Add an insulating hose over all the wires at the bend at the top through the printer frame. The wires carry high voltage and it is not suitable for them to directly touch the frame of the printer!!! I added the insulating hose myself.
Regards, Peter
Auto Shut Off
Bestellung erhalten, System arbeitet ohne Probleme
Kywoo3D is deleting negative reviews of this product
I reviewed the auto-shutdown kit after attempting to install it, following the video tutorial from Kywoo. In my original review, I outlined my problems/concerns with the kit. To my surprise, I found that the two negative reviews for this kit (one being mine) had been deleted less than 2 months later!
I'd like to start off by saying that I believe Kywoo3D had the right to moderate product reviews (i.e. defending against high volumes of negative reviews). That being said, I was shocked to find my honest negative review (along with another's negative review) completely ablated from this product listing. I have supported this company from the very beginning, and expected they would reach out to address the concerns I raised in my original review. Sadly, thiz was not the case...
Here are the highlights from my original review:
1. One component of the kit is a high-voltage board; in Kywoo3D's installation video, this high voltage board is (much to my dismay) left hanging loosely inside the printer. I expected there would be a safer method to mount this board within the printer (anything is better than a high voltage board dangling freely inside your printer!)
2. While safety is my primary concern; form and function come next. Watching the install video again, I was very disappointed to see how the new power/reset button was simply left hanging loose inside the printer's housing in a hard to access position. The kit's power button is designed to fit through a clearance hole, and lock into place with a nut....BUT, there is no documentation or instruction on how to install this button CORRECTLY!
TLDR: Kywoo3D HAS DELETED negative product reviews; this kit contains a high-voltage board with no safe mounting method/instruction; install video leaves the new on/off switch hanging freely inside printer, rather than properly mounting it in the printer's eternal panel (near the built-in on/off switch).
Sloppy and dangerous implementation
I received my auto-shutdown kit and began installing it; however, I chose not to finish the installation as the kit’s board has “high voltage” warnings printed on it with no safe way to mount it inside the printer’s housing.
I watched the installation on YouTube; and they just leave the board hanging unsecured inside the printer!
To make matters worse, the push-button power switch is threaded with a nut (implying it can be installed in an appropriately sized hole in the housing), but in the same video it is left hanging freely inside the housing. This looks and feels sloppy.
Kywoo NEEDS to provide a method & video for properly and safely mounting the board switch button.
Very disappointed with this kit.
Auto Shut down
A few days ago I connected the board for the auto shutdown. After connecting all cables, the Auto Shutdown board only hangs on the screwed cable. There is no attachment to the housing. With cable ties I attached the Auto Shutdown board to the power supply. The Kywoo selling such a product is not professional. In Germany, such a thing would not be allowed. I wrote to the customer service of Kywoo and asked for a solution but unfortunately there was no answer. Really bad!!!
- Specifications
Specifications
{{/if}} {{if compare_at_price_min > price_min}}
-${Math. round((compare_at_price_min - price_min)*100/compare_at_price_min)}%
{{/if}} {{if !available}}
Out of stock
{{/if}} {{if tagLabelCustom}}
Bundle
{{/if}}
{{if images[1] }} {{else}} {{/if}}
Add to Wishlist Quick View
${title}
{{if compare_at_price_min > price_min}}
{{html Shopify. formatMoney(compare_at_price_min, theme.moneyFormat)}}
{{if price_varies}}
from
{{/if}}
{{html Shopify.formatMoney(price_min, theme.moneyFormat)}}
{{else}}
{{if price_varies}}
from
{{/if}}
{{html Shopify.formatMoney(price_min, theme.moneyFormat)}}
{{/if}}
formatMoney(compare_at_price_min, theme.moneyFormat)}}
{{if price_varies}}
from
{{/if}}
{{html Shopify.formatMoney(price_min, theme.moneyFormat)}}
{{else}}
{{if price_varies}}
from
{{/if}}
{{html Shopify.formatMoney(price_min, theme.moneyFormat)}}
{{/if}}
{{each options}}
${( downcased_option = name. toLowerCase() ),''}
${( option_color_swatch = window.swatch_recently), ''}
{{if option_color_swatch.indexOf(downcased_option) > -1}}
${( colorlist = '' ),''}
${( optionCount = 0 ),''}
${( count = 0 ),''}
{{each values}}
${( color = 0 ),''}
{{each variants}}
{{if position == 1}}
${( color = variants[($index)].option1 ),''}
{{/if}}
{{if position == 2}}
${( color = variants[($index)].option2 ),''}
{{/if}}
{{if position == 3}}
${( color = variants[($index)].
toLowerCase() ),''}
${( option_color_swatch = window.swatch_recently), ''}
{{if option_color_swatch.indexOf(downcased_option) > -1}}
${( colorlist = '' ),''}
${( optionCount = 0 ),''}
${( count = 0 ),''}
{{each values}}
${( color = 0 ),''}
{{each variants}}
{{if position == 1}}
${( color = variants[($index)].option1 ),''}
{{/if}}
{{if position == 2}}
${( color = variants[($index)].option2 ),''}
{{/if}}
{{if position == 3}}
${( color = variants[($index)]. option3 ),''}
{{/if}}
${( color_2 = color.toLowerCase().replace(" ", "") ),''}
{{if colorlist.indexOf(color)
${color}
option3 ),''}
{{/if}}
${( color_2 = color.toLowerCase().replace(" ", "") ),''}
{{if colorlist.indexOf(color)
${color}
{{/if}} ${( optionCount ++ ),''} ${( count = optionCount / 4 ),''} {{/if}} ${( colorlist = colorlist.concat(" ",color) ),''} {{/each}} {{/each}} {{if count > 4}}
+ ${count - 4}
{{/if}} {{/if}} {{/each}}
{{if !available}} {{else variants. length > 1 }}
+ Select options
{{else}}
{{/if}}
length > 1 }}
+ Select options
{{else}}
{{/if}}
When Should You Turn Off Your Ender 3? After the Print? – 3D Printerly
After completing a 3D print, many people wonder whether they should turn off their 3D printers. This is a question that will be answered in this article, as well as a few other related questions about turning off an Ender 3 or other 3D printers.
When Should You Turn Off Your Ender 3? After Print?
You should not turn off your Ender 3 right after the print, instead, wait for the hotend to cool down to a certain temperature before you turn the 3D printer off.
If you shut off your Ender 3 right after completing a print, the fan will stop immediately while the hotend is still hot and that can lead to heat creep.
This is because when you complete a print, the fan is cooling down the cooler end of the hotend where the filament is. If the fan is turned off, the heat can travel up to the filament and cause it to soften and jam.
The next time you try to print, you’ll have to clean out this jam/clog. Many people have talked about hot this clog has happened to them on a few occasions.
A user said that this decision will depend on different situations but it is better to let the hotend cool down, wait for its temperature to go below the glass transition temperature, and then shut the 3D printer off.
Another user shared his experience with Ultimaker 3D printers stating that their hotend gets jammed simply because the fans were not spinning because of a sucked-up string.
Another user said that you should only turn your 3D printer off immediately after completing print if there is a g-code written to completely cool down the hotend.
He further said that by using the PSU Control Plugin and OctoPrint, you can let your 3D printer wait and then shut off automatically after the hotend has cooled down to a certain or set temperature.
If you do a hard shutdown while the hotend is at full temperature, it could lead to a troublesome jam.
Another user says he always waits for the hotend to go below 100°C temperature before he turns off the 3D printer.
I think 100°C should work as a temperature cut off point because it’s not hot enough for the heat to travel up the cold end and soften the filament which can cause the clogs.
Similarly, another user said that waiting for the temperature to drop below 90°C is recommended before you turn your 3D printer off.
A user also said that he waits for the hotend to reach a temperature below 70°C before his printer shuts down. Another user further decreased this safe limit to 50°C.
How to Shut Down an Ender 3 (Pro, V2)
To shut down an Ender 3, you can simply flip the power switch on the 3D printer after your hotend has cooled down to a temperature below 100°C. There isn’t a command in your menu to turn the 3D printer off.
A user recommended different procedures to turn off your 3D printer depending upon different scenarios and situations:
If you have just completed a print, simply go to “Prepare” > “Cooldown”, wait for some time, and then turn off the switch.
It only takes a few minutes for the hotend to cool down, so if the print has been completed for a bit of time, then you can turn it off.
In a situation where you want to change out the filament, you can heat up the hotend, pull out the current filament, then replace it with the new filament and let it extrude out the nozzle.
You can then let the hotend cool down and turn off the 3D printer by flipping the switch when you are ready to start your next print.
Another user suggested modifying the “end” G-code in terms of adding a time or by waiting for the hotend to reach a certain temperature and then turning the 3D printer off.
You can add an end script within your slicer with a simple command of either:
- G4 P<time in milliseconds>
- G10 R100 (100°C)
Then normally turn off your 3D printer.
Here is a picture of the end G-Code in Cura.
One user found a unique way to automatically shut off your 3D printer after a print.
He used an Ender 3 V2 Auto Power Off Switch model that attaches to the 3D printer and automatically pushes the off switch when the 3D printer homes.
Here is the end G-Code used:
G91 ;Relative positioning
G1 E-2 F2700 ;Retract a bit
G1 E-2 Z0.2 F2400 ;Retract and raise Z
G1 X5 Y5 F3000 ;Wipe out
G1 Z10 ;Raise Z more
G90 ;Absolute positioning
G1 X0 ;X go home
M104 S0 ;Turn-off hotend
M140 S0 ;Turn-off bed
; Message and End Tones
M117 Print Completed
M300 S440 P200 ; Make Print Completed Tones
M300 S660 P250
M300 S880 P300
; End Message and End Tones
G04 S160 ;wait 160s to cool down
G1 Y{machine_depth} ;Present print
M84 X Y E ;Disable all steppers but Z
Check out this example in the video below.
One user made an interesting way of automatically turning off their 3D printer.
I redneck engineered my Ender 3 to automatically shut off after a print without a raspberry pi. The end Gcode tells the z axis to move up which kills the power. Enjoy 🙂 from 3Dprinting
People recommended that he implements a script to pause the 3D printer before moving up. Another technique with G-Code is to turn the hotend and bed off, then use a command that slowly raises the Z-axis up automatically.
This was the example given:
M140 S0 ;bed off
M104 S0 ;hotend off
G91 ;rel pos
G1 Z5 E-5; move away from print and retract
G28 X0 Y0; move x,y to endstops
G1 Z300 F2 ;move up slowly to switch up
G90 ;revert to abs pos just to be safe
M84 ;motors off just to be safe
Does the Ender 3 Cool Down After Prints? Auto Shutoff
Yes, the Ender 3 does cool down after the print is finished. You will see the temperature of the hotend and bed gradually decrease until it gets to room temperature. A full cool down for a 3D printer takes around 5-10 minutes to happen. The 3D printer will remain on until you turn it off though.
Slicers have an end G-Code that turns off the heaters to the hotend and bed after a print. This should happen normally unless you remove that script from the G-Code manually.
How to Turn Off Ender 3 Fan
You don’t want to turn off the Ender 3 fan because it’s a safety feature since the hotend fan is wired to a power terminal on the board so you can’t change things in the firmware or settings to turn it off, unless you wire it up differently. Similarly, the power supply fan should always run when it’s powered on.
It is possible to turn off the Ender 3 fan by tweaking its mainboard and adding an external circuit.
Here is a video by CHEP that will tell you how to do it.
The user said that you should let hotend fans run all the time because forcing them to shut off can cause a clog as the filament will keep on melting.
Other users recommended upgrading cooling fans to be much quieter as it is working fine for them.
You may buy a buck converter along with 12V fans (Noctua’s 40mm fans are recommended) as they are so quiet and seem like they are not running at all.
How to Turn Off 3D Printer Remotely – OctoPrint
To turn off your 3D printer remotely using OctoPrint, you can use the PSU Control plugin. This allows you to turn off your 3D printer after you complete a 3D printer. For safety, you can set a relay so it turns off after the hotend temperature decreases to a specific temperature.
You can also upgrade your firmware to Klipper and use Fluidd or Mainsail as your interface to do this. Klipper also allows you to do input shaping and pressure advance which is known to improve the 3D printing process.
One user said that if you are shutting off your 3D printer with OctoPrint attached, he recommends that you disconnect the 3D printer within the software, remove the USB cable, then do your normal shutdown by flipping the switch.
This is because he tried disconnecting from OctoPrint during a print and it didn’t stop the print.
The video below will show you how to remotely turn ON/OFF your 3D printer using OctoPrint and PSU Control.
A user also talked about using a TP-Link that comes with a power meter as well. It has a plugin compatible with OctoPrint that allows you to remotely control 3D printers such as shutting it down abruptly for safety issues or after the hotend has been cooled down.
Apart from OctoPrint, there are some other ways as well to remotely turn off or control your 3D printers.
A user suggested plugging in your 3D printer into a Wi-Fi outlet and you can turn off the outlet anytime you like.
Another user further added that he uses two Wi-Fi outlets. He plugs a Raspberry Pi in one outlet while the 3D printers are in the other.
A few people also talked about a new plugin, OctoEverywhere. This plugin gives you full control over different functionalities of 3D printers along with shutting them down.
Printer auto-off (light version)
Technician
Follow the author
Follow
Don't want
15
Auto-off is one of the most useful features of the printer.
But still on most models this has to be done manually. There are many versions of such an implementation, and this one should be somewhat different. So, this will be the simplest instruction. It will be possible to implement it by spending only on the relay unit (possibly a diode) . No additional codes, firmware, or extra circuit boards.
Relay box and four wires!
This is probably also the shortest article I will write here. And what to write something ... Here is the relay block SR0039-12-1L ( local bourgeois, ketai ) . One channel. I have a 12V SKR.
Who uses 24V , immediately take the appropriate voltage relay box. Maybe even reverse polarity control.
Auto power off must be a shutdown function when printing is complete. And at the end, you need to wait for the hotend to cool down, so as not to clog the seal with a cork. And turn off the power. All.
You don't have to reinvent the wheel if there are no extra tasks and the inner perfectionist is asleep. When printing is completed, the hot end fan spins for a while. After cooling down to 50 gr (someone like it) , it turns off and the printer goes into standby mode. This setting may differ for some, but it always has one condition - to wait for cooling to the optimum temperature. After this point, you can safely turn off the power. Therefore, our relay block will control the power to this fan, everything else is already is . We will not duplicate or add anything else, as well as add.
Minimum change.
When printing is started and you need to leave, leaving the printer in operation, you click the shutdown button as usual, but the printer remains in printing and continues to work until its logical conclusion.
After printing is completed, the standard post-code is processed, when the head returns to X0Y0 (someone like it) and remains there to cool. When there is sufficient cooling, the fan turns off and power to the printer is cut off with it. Just when the head is cool enough (set initially by printer firmware) .
Is it worth writing how it works in a circuit when only one standard relay block is involved here?
- The power normally open contact of the relay block is connected in parallel with the power button.
 And as soon as the key goes to the off position. it stops shunting the relay contact. If printing is not enabled, then will be a simple shutdown of the printer. If at this moment is printing , then the control reins are transferred to the relay contact .
 - Relay module control is connected in parallel with hot end cooling fan. While printing , relay block is powered from the fan and contact (NO) changes position to closed (NC). The printer continues to work . As soon as power fails , relay opens (NO) and printer turns off .
Here you can utterly simplify the design with just one relay (with the same coil voltage as the fan is powered by) and a block for easy connection or replacement of the relay. For such cases, there are industrial solutions. Or closer.
Do not forget to connect the diode in parallel with the relay coil, in the opposite direction. To protect against self-induction of the coil when off.
A similar solution could be the module from the link above. To control not only power, but also silence when idle or lighting.
But let's not get too far now. So far, only food, everything else is a similar situation.
And here are four wires:
2 wires - connect a normally open contact ( NO ) parallel to the power button.
2 wires ( in obligatory polarity ) are connected in parallel with the hot end cooling fan.
Well, 4 wires and one wire, as a jumper to the control contact of the relay from the plus.
If you look at the block diagram, it turns out like this:
And the relay module itself has a diagram:
From here it will not be difficult to guess how to connect the module if you have control by another pole.
Yes, it is possible to make humanly
on the control contact and without any jumpers,
if you replace p-n, but too lazy.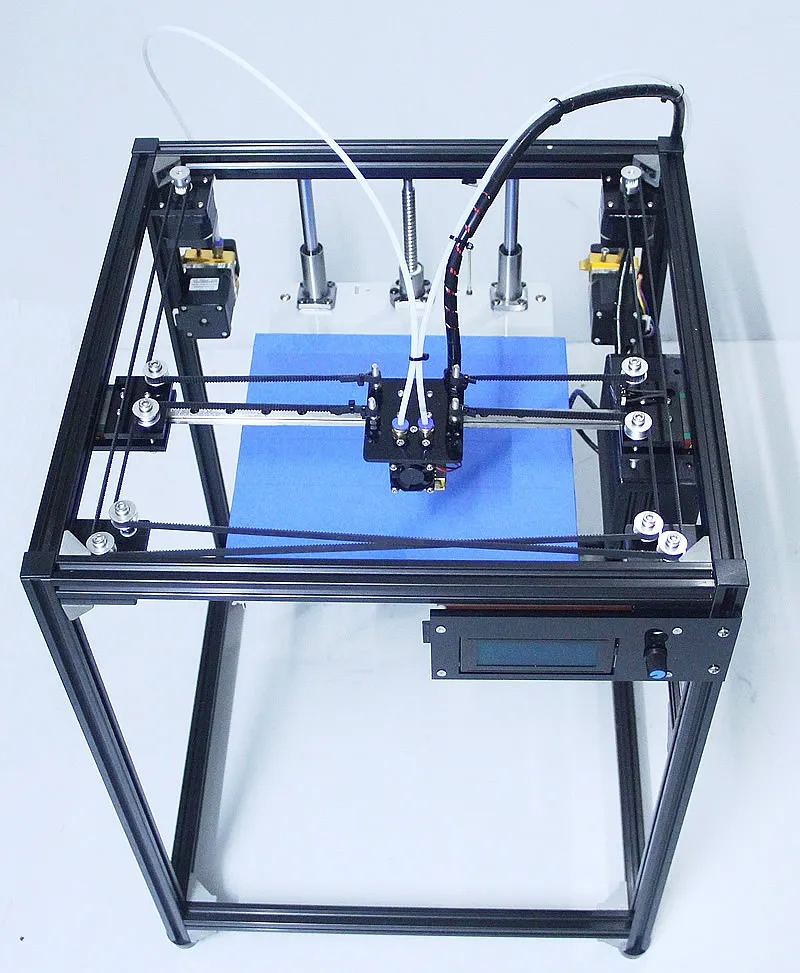
And initially there was no use task for the printer.
As they say from what happened.
Now I took a two-channel with "-" control,
but the essence is the same ... four wires.
Everything. For the task of turning off the printer after printing, it is enough. Parallel connections do not require much constructive intervention, you can stick into the existing clamps. It is not required to redefine the pins of the motherboard or install plugins on the GPIO in Octoprint on Raspberry
When you really want something right, ideal and more modern solution, you can throw meat on the relay and go all out. But at the same time, get the potential capabilities of the liner.
"Be Respectful and be honest with yourself and others." ©Perfect Root
Free STL file Automatic printer shutdown・3D printing template to download・Cults
Brio Toy Wooden level crossing with 5 joints - improved version
1 €
7" touch screen KD070V02
0. 50 €
50 €
Battery locomotive for wooden rails
€3.99
Retractable building plate compatible with Duplo
2.49 €
Level for drilling machine
2.99 €
Another Cube Gear
3.50 €
Anycubic Kobra SD Card adapter (regular size)
1,50 €
Another bit holder
1 €
The best files for 3D printers in the Tools category
Ikea LED Lamp / Logitech C270 Camera Mount
Free
filament spool stand
Free
Tape dispenser - tape gun
Free
Rope Clip/Line Tensioner
Free
hand drill holder for IKEA table
Free
HELPING HANDS - CREATORS
2. 25 €
25 €
Informative String Test - "If you can read this, fix your string."
0.50 €
USB CABLE ORGANIZER
4,96 €
Bestsellers in the Tools category
Creality Sonic Pad Mount for Ender 3 S1
0.99 €
Creality Ender 3 S1 Pro Advanced Cable Management System
1.50 €
Ender 3 S1 BEST cable guide - vertical
2,50 €
Fan air duct Sovol SV06 4020 - CFD optimized
3.75 €
INDICATOR FOR BETTER BED LEVELING FOR ENDER 3 PRO
2,37 €
Ender 3, 3 V2, 3 pro, 3 max, dual 40mm hot end duct/fang axial fan.
 CR-10, Micro Swiss direct drive and bowden compatible. Printing does not require support
 1.56 €
ARTEMIS -> Shop for Alligator 2 || 6.5" arrows || Repeating crossbow
6.25 €
HOT END DUCT 4020 OR 5015 FAN, ENDER 3 S1, S1 PRO, SPRITE, PROBE NO Y OFFSET, ABL ADAPTER BETA
2.26 €
Ender 3 Briss fang Gen2, red lizard, spider, nf crazy, dragonfly, etc.
1.73 €
Paint stand with scissors
5.22 €
Phone holder
2.79 €
V3 AIR DUCT FAN 5015, ENDER 3 S1, S1 PRO, SPRITE, ACCELEROMETER, LED strip
2,51 €
Ortur Laser Master 2 - long legs with locks
2.60 €
Tool holder for 3D printer V3.