Simplify 3d printing
Buy Simplify3D Software | Simplify3D
What comes with your Simplify3D license?
- Powerful Software – the most powerful 3D printing software available, giving you complete control over how your prints are created
- Extensive Support Resources – access industry-leading resources that help you improve your print quality and quickly learn the software
- Full-Time Professional Support Staff – our 3D printing experts are here to help if you run into any problems along the way
- Latest and Greatest Updates – your license includes 1 year of free upgrades so that you can stay up-to-date with the latest improvements
- Instant Online Delivery – download and start using the software immediately after your purchase
Purchase Simplify3D today
Buy Now
You may qualify for volume discounts!
Please contact us to learn more.
Try it for a full two weeks!
If you don’t love the software, return it for a full refund.
Frequently Asked Questions
How do I download the software after my purchase?
Simplify3D Software is an electronic download. Following your purchase, a verification email will be sent to you from [email protected]. You can follow the instructions in this email to download and install the software. If you do not see this email within 30 minutes, please check your spam folders. Please Contact Us if you need additional help locating the verification email. If you ever need to download the software again in the future, you can do this by logging in to your Simplify3D account on our website and then proceeding to the Downloads page.
How do I obtain a receipt for my purchase?
An order confirmation will be sent to you immediately following your purchase of the software. This email contains a “Click here for a printable version of this document” link near the bottom that can be used to view your official proof of purchase.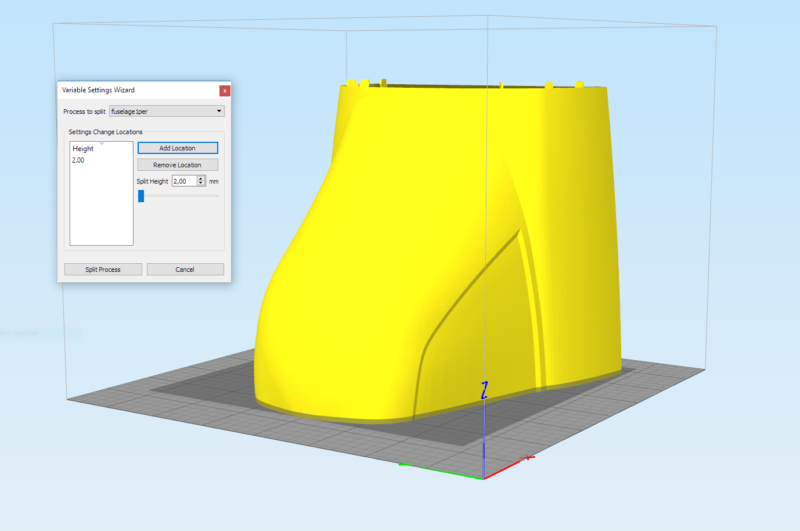
How can I get an receipt with my company’s VAT number or a relevant PO number?
If you are purchasing on behalf of a company, please enter the company name during the checkout process. You will also have the option of entering a PO number or a VAT number during checkout. This information will then be included in the order confirmation that is sent to you.
How do I purchase a license for someone else while still receiving the receipt for the purchase?
During the checkout process, please select that the license is “for someone else” and enter the name and email address of the person who will be using the software. After completing the purchase, the order confirmation will be sent directly to you, while the software download instructions will be sent to the licensee.
How can I add an additional license to my existing account?
If you need to add an additional license to your account, please complete the normal checkout process making sure that you enter the same email address that is currently associated with your account.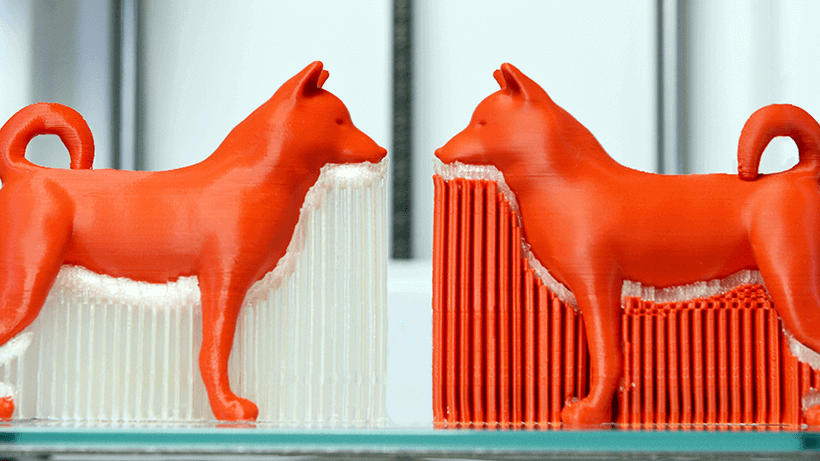 If the same email address is used, the new license will be automatically merged into your existing account.
Does Simplify3D offer an education discount for makerspaces, robotics teams, or administrators?
Yes, we currently offer a 25% discount to makerspaces and robotics teams. The team or space needs to be an official part of the school in order to qualify for the discount. Please review our Education page for more details. Once you are ready to place your order, please select the “Education programs” option on our Contact Form. Please contact us prior to placing your order, as this discount cannot be applied after the purchase has been submitted.
Do you offer an educational discount for students and teachers?
Yes, we currently offer a 25% educational discount for all enrolled university students and faculty. This discount is for the same professional version of Simplify3D that we offer to all other customers, so you will have access to all of the great features and performance that our software is known for.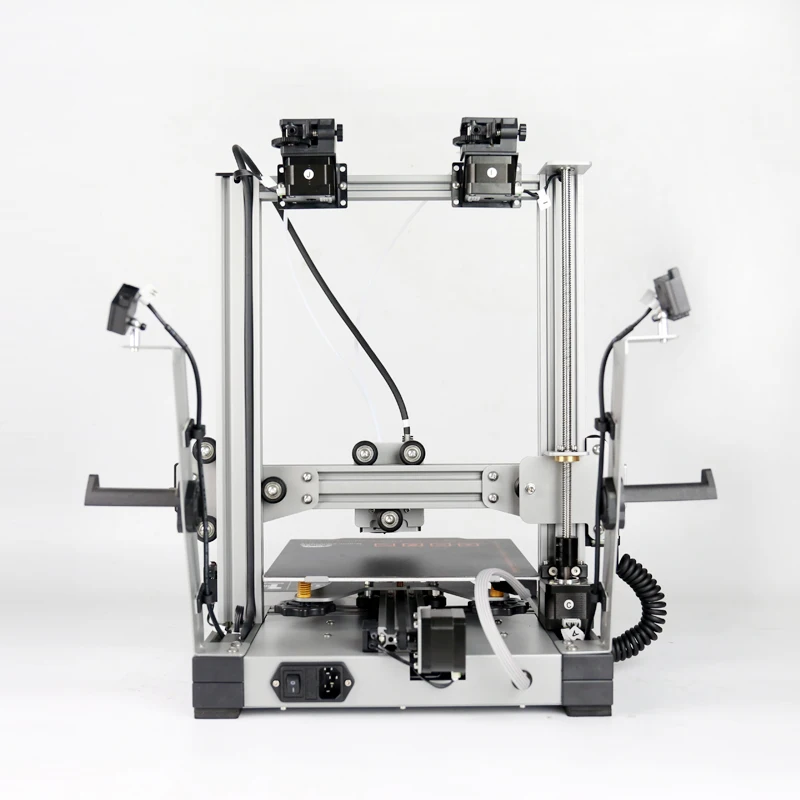 Once you are ready to purchase, please select the “Education programs” option on our Contact Form. Please contact us prior to placing your order, as this discount cannot be applied after the purchase has been submitted.
Do you offer bulk discounts for purchasing a large quantity of licenses?
Yes, we offer bulk discounts for organizations that need to purchase many licenses at once. Please Contact Us for additional details.
Is Simplify3D available in other languages?
Simplify3D is available in English, Japanese, Spanish, German, French, Italian, and Portuguese. To change the display language, go to Help > Change Language in the Simplify3D menu bar.
Software Features
The last 3D printing software you’ll ever need!
Simplify3D includes everything you need to work with your 3D printer.![]() Model setup and plating, slicing and print file creation, pre-print simulations, customizable support structures, mesh analysis and repair, machine control and monitoring, and much more! With support for hundreds of 3D printers, Simplify3D is the last software you’ll ever need!
Model setup and plating, slicing and print file creation, pre-print simulations, customizable support structures, mesh analysis and repair, machine control and monitoring, and much more! With support for hundreds of 3D printers, Simplify3D is the last software you’ll ever need!
Amazing Features
Calibrated for Your 3D Printer
Support for Hundreds of Different 3D Printers
Simplify3D has partnered with 3D printing companies in over 30 countries to ensure the software is compatible with the latest 3D printing hardware. We have tested and optimized hundreds of different 3D printers so that you can achieve exceptional results right out-of-the-box!
Easily Switch Between Multiple Machines
Instead of learning a different software program for each 3D printer that you buy, you can now use the same application for all of your 3D printing hardware. The software can be quickly switched between different machine configurations, allowing you to control everything from one central application.
Simulate Your Prints in Advance
Incredibly Realistic Simulations
Simplify3D includes an incredibly realistic pre-print simulation that allows you to see the exact actions your 3D printer will perform before you start the print. You can literally watch an animation of the extruder as it lays down each individual line of plastic, giving you more insight than ever before!
Identify Issues In Advance
The simulation includes information about the exact speeds, sequences, and settings that are used for your print so that you can quickly verify these settings at a glance. Stop wasting time on failed prints and use the realistic simulation to spot potential issues before even turning on your 3D printer!
Award-Winning Support Structures
Improved Print Quality and Easy Break-Away Removal
Simplify3D is well-known for providing the best support structures available, allowing you to achieve the highest level of surface quality for even the most complex prints. Once the print is finished, the supports break-away easily without any special tools or post-processing.
Customize Your Supports for the Perfect Print
The software automatically suggests where support material should be added, but the ability to customize your supports is a fan favorite! Easily add more support in areas that may be prone to instability, or remove unnecessary supports for faster print times.
Expert Resources and Support
Resources to Improve Your Print Quality
Simplify3D customers have access to industry-leading resources that have been developed to help our customers improve their print quality. We’ve put decades worth of knowledge into these resources to make sure you can achieve the best print quality possible.
Experts Are Available to Help
If you encounter issues using your 3D printer, contact the 3D printing experts at Simplify3D who are here to help! Our support team has helped thousands of users improve their print quality.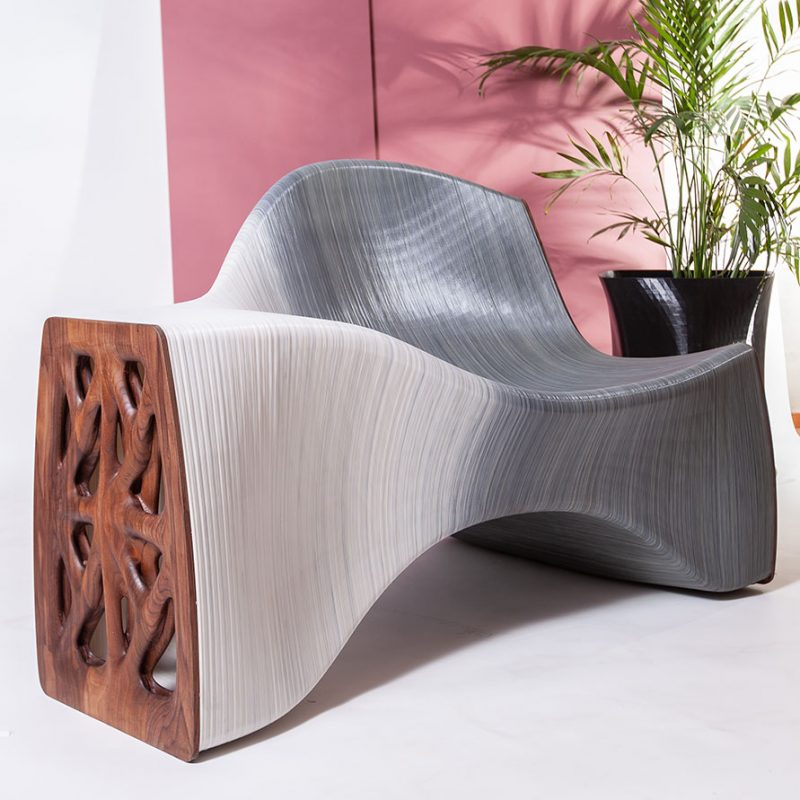 Buy with confidence knowing that our team is available if you run into any issues.
Universal Compatibility
Trusted by users worldwide in over 120 countries. Software translations in French, German, Italian, Japanese, Spanish and Portuguese.
Simplify3D has already been tested and optimized for hundreds of different 3D printers.
See Supported Printers
Windows, Mac, and Linux versions are available to support any desktop environment.
View Technical Specifications
Pro-Tools and Advanced Options
Built for High Performance
Simplify3D is known for its lightning-fast slicer that allows you to process incredibly complex models with ease. This allows you to spend more time perfecting your prints, and less time waiting on the software!
Variable Print Settings
Simplify3D has a unique ability that allows you to vary the slicing settings for different regions of your print. Optimize the settings for different features of your model or vary the mechanical properties of your part with only a few clicks!
Optimized for Multiple Extruders
The software contains many features that were specifically created to improve the print quality from multi-extruder printers.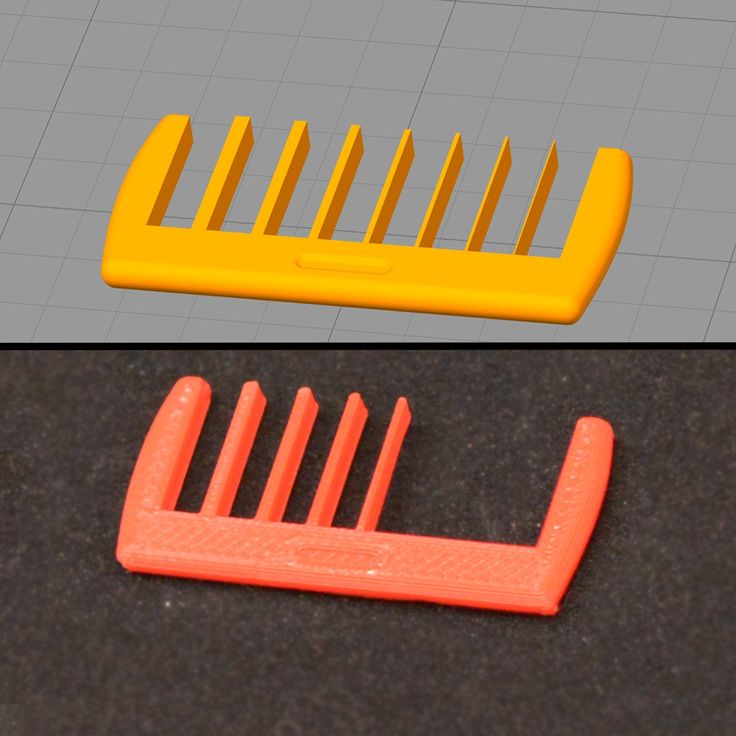 Quickly access these features using the built-in Dual Extrusion Wizard for simple setup.
Precision for Small Features
Innovative features allow you to print smaller shapes than previously possible on FFF/FDM printers. The software dynamically adjusts the amount of flow to print small, tapering, or sharp edges with better definition.
Multi-Part Customization
Simplify3D includes an unprecedented level of control for multi-part prints. Adjust the order of how each part is printed, optimize the settings used for different models, or print each object one-by-one to minimize travel movements.
Total Control, Improved Quality
If you’re looking to achieve the best print quality possible, the software includes many advanced tools to optimize your printer’s performance. Whether you’re seeing zits, strings, banding, or gaps, the software has the options you need!
Powerful Scripting Engine
The software includes a built-in scripting engine so that you can customize your print files.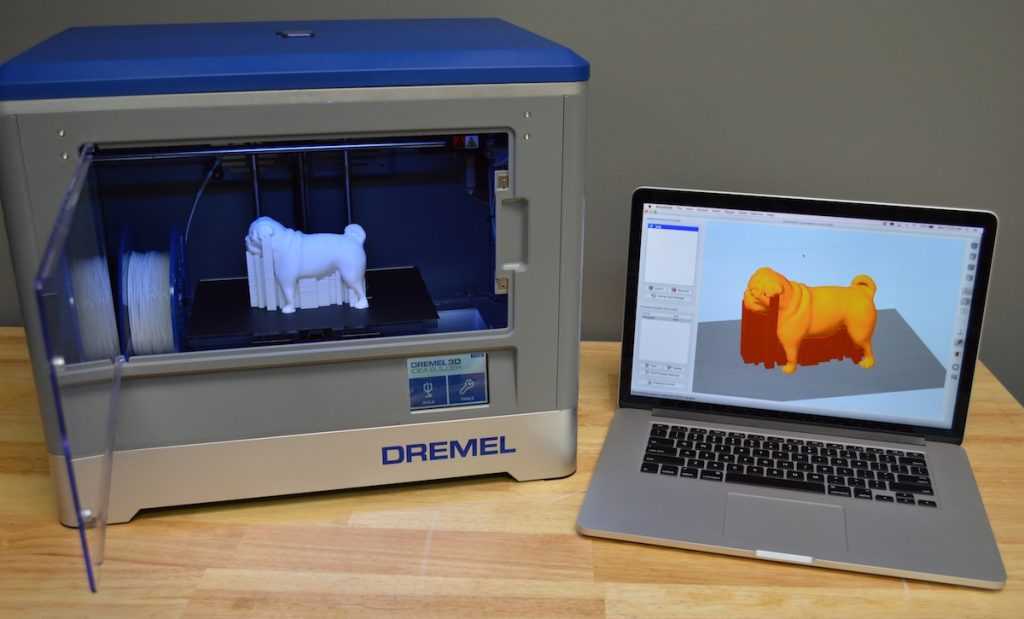 Insert custom commands at a specific layer, modify critical sequences of the print, or customize the command syntax for new applications.
Mesh Analysis and Repair
If you’ve ever worked with a problematic STL file, you know how frustrating that can be! Simplify3D includes built-in tools to help you identify and fix common mesh issues so that you can quickly get back to printing.
Machine Control and Monitoring
Simplify3D knows how to talk to your printer. The software includes a full machine interface, allowing you to manually control the 3D printer. You can also monitor the printer in real-time to make sure you know the latest status.
Start improving your print results today!
Buy Simplify3D Now - Risk Free!
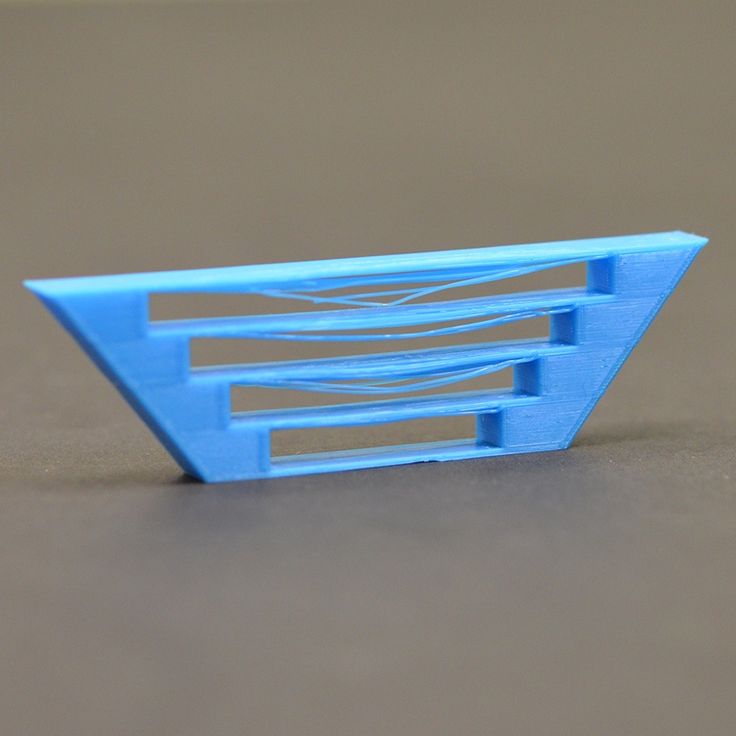
3D printing made it easier to create tensegrity structures
South Korean engineers proposed to print tensegrity structures on a 3D printer. First, the printer prints a billet made of consumable plastic with rigid frame elements inside, and then an elastic material is poured into the prepared channels, which acts as cables.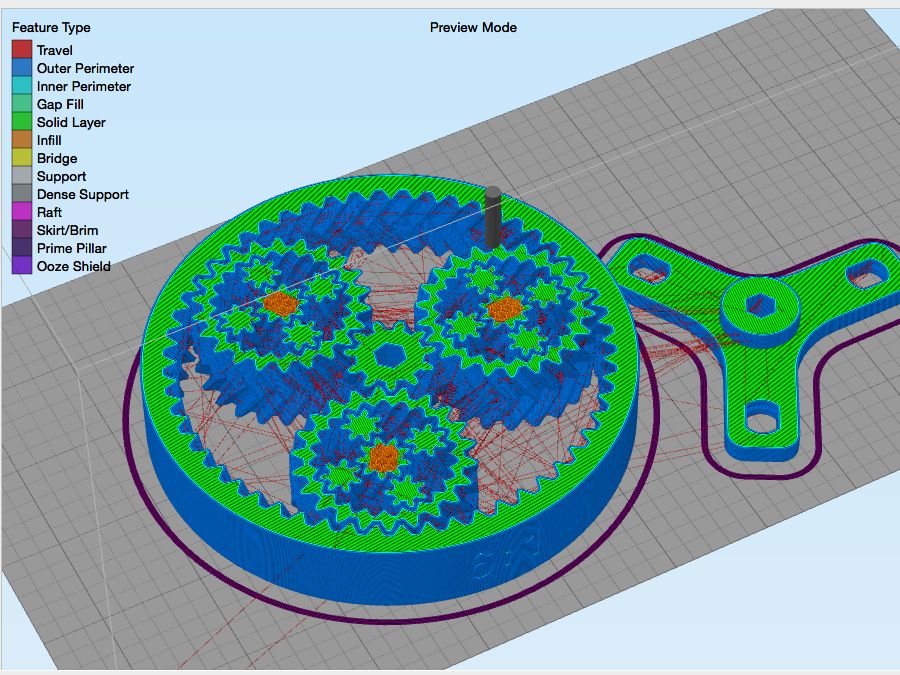 After that, the consumable material is removed and only the tensegrity structure remains. The method made it possible to create small but complex structures that would be difficult to assemble with conventional methods, as well as a robot with magnetic elastomer tensegrity legs. An article about the method was published in the journal Science Robotics .
Tensegrity, or stressed integrity, is a type of structure consisting of rigid and flexible components. As a rule, these are rods and cables that connect the ends of the rods to each other. The main distinguishing feature of tensegrity structures is that the rigid rods do not touch each other and are suspended on cables. Due to this, the cables work in tension, and the rods only in compression, but not in bending. As a result, such structures have a high ratio of rigidity to mass, they are resistant to deformations, and are also able to redistribute deformation from one part to the entire structure.
Although some projects with tensegrity design already exist (for example, a robot that is resistant to dropping from a helicopter), in general it cannot be called popular - despite all the advantages.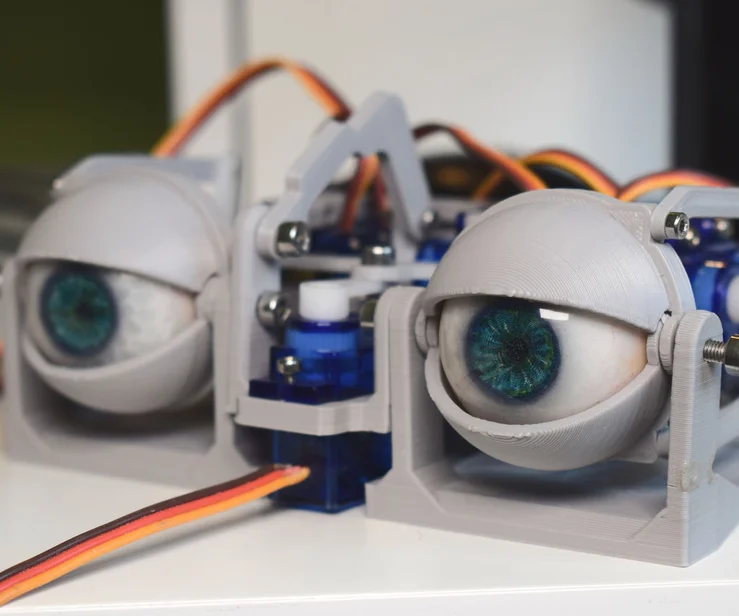 This is partly due to the fact that not all materials are suitable for it, and also such a design is difficult to assemble from a variety of elements, as well as to select the desired tension.
Researchers from the Ulsan National University of Science and Technology, led by Jiyun Kim, proposed not to assemble tensegrity structures from individual elements, but to print on a 3D printer in the form of a single structure. The method consists of two stages. On the first, a printer with two printheads simultaneously prints a consumable matrix made of polyvinyl alcohol, and inside it are polylactide rods and empty channels for cables. At the second stage, it is necessary to pour the cable material into the empty channels of the already frozen matrix, and then, when it also hardens, remove the polyvinyl alcohol. Engineers used PDMS, PBAT or a mixture of them as a material for cables, as well as ferromagnetic particles of iron oxide dissolved in them. This allows you to control the deformation of the material not only mechanically, but also non-contact with the help of a magnetic field.
In most prototypes of tensegrity structures, the authors used a base cell with a hexagonal prism structure, which, depending on the tasks, was connected to other similar cells into a column or torus. They showed many different examples of the use of such structures and their capabilities. For example, tensegrity with cables that respond to a magnetic field can be used for programmed folding, and reversible: when a magnetic field appears, the balance of tension and compression is disturbed, and the structure folds, but returns to its original form when the field is turned off.
Another notable example is a five-legged crawling robot with tensegrity legs. Each of them consists of five hexagonal prisms with alternating direction. At the base of the legs, two motors are installed, connected to the side or central part of the end of the leg through a rope. When winding the central rope, the leg is shortened due to alternating prisms, and when winding the side leg is bent down.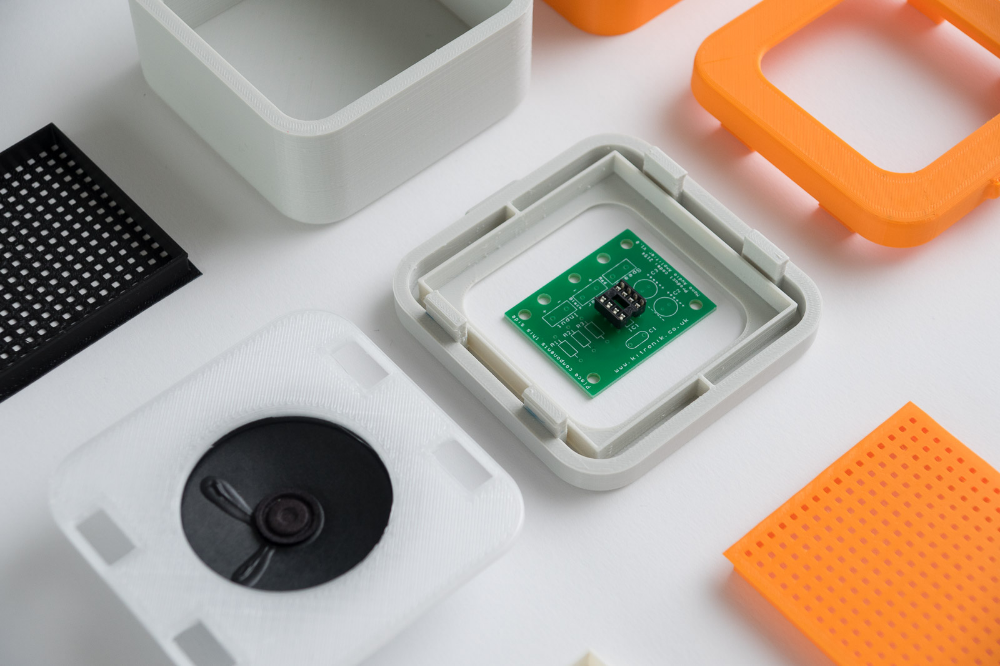 Thanks to this, a robot with such legs was able to walk around the floor, turning in the right direction.
The authors note that 3D printing will allow not only to create more complex structures than those created by conventional methods, but also to take advantage of 3D printing (the ability to quickly create many prototypes with well-defined parameters and select the best designs) and design optimization methods.
3D printing has been used before to create lattice structures controlled by a magnetic field, but in a different way. For example, in 2018, a group of American scientists presented a method for creating lattices from hollow tubes, inside which it is necessary to pour a magnetorheological fluid. This structure allows you to control the rigidity of the structure using a magnetic field, without changing the shape of the structure, unlike the new method of Korean engineers.
Grigory Kopiev
Found a typo? Select the fragment and press Ctrl+Enter.
How to simplify your 3D printable model
The best way to simplify a complex 3D printable model is to reduce its triangular mesh. This process, sometimes called decimation, eliminates a lot of complex geometry, which is very useful for online models, but not so good for print platform models.
All STL files are made up of many triangles, some large, some very small, that reproduce the curves and bumps you see on the model, so when you look at a curve you see hundreds of little triangles that look bent.
With 3D Builder, we can thin out these triangles to reduce complexity and reduce the time it takes for the model to print, which also saves us filament.
Read more: How to separate your models for 3D printing
Step by step
- Open model in 3D Builder
- Select tab " Edit "
- Select Simplify
- Use slider, to select the reduction percentage
- Check box Reduce faces
- Click the Restore Model button in the lower right corner.

Deep
Once you have selected the model you want to process, you can load it into 3D Builder. From there, you will need to go to the edit tab and click simplify. Here you will see a slider that allows you to select the triangle percentage to reduce the model, the higher the percentage, the more triangles will be removed. There is a lot of trial and error here, as removing too many triangles will ruin the fine details of your model.
The default is fifty percent, but I think this might be too aggressive. I'd start at about twenty-five percent and work my way up to thirty-three percent if you're sure the model will support it. As you can see in the pictures above, the more you thin out, the less detail you get - take a close look at the medallion around Buddy Cthulhu's neck - so start with a lower number and work your way up.
After you check the "Reduce Faces" box, you will almost always see a warning box in the right corner asking you to fix the damaged model. This is perfectly normal, as removing the triangles can make the model no longer a solid object. By clicking on the restore button, 3D Builder will automatically correct these errors and make the model available for printing again.
Read More: Everything you need to start 3D printing
Aftercare
Once you've downgraded your model to the right level, there are a few things you can do to keep it looking great and printing well, squeezing, smoothing and fixing.
embossing
Embossing your model reduces the amount of plastic needed to print it. Many slicing programs now break your model automatically and use padding to fill in the space, but sometimes this is counterproductive. Many models require very little, if any, infill for successful printing. By using the hollow tool in 3D Builder, you can create a wall about 1-1.5mm thick and potentially eliminate the need for infill entirely.
smooth
Using the 3D Builders smooth tool will help you with some models to remove some sharp edges caused by face reduction. This will essentially add more triangles back into certain areas and therefore may seem counterproductive, but it always adds fewer triangles than you removed so you still have a net gain of the lower triangles and a great model.
Netfabb Model Repair
Using a repair service like Netfabb is always the last thing I do before putting the model into the slicer for printing. By uploading your model to Netfabb, they can analyze it, find errors that 3D Builder may have missed and fix them. It will then give you a new model with the _fixed suffix. You must save and use this model for 3D printing.
Final Thoughts
Decimating models is incredibly useful whether you're using someone else or when you're making your own, especially if you're making your own. When creating 3D models, programs tend to overdo the geometry because they assume that you are creating models for computer applications. By reducing the edges of your models, you can get a much better result for your 3D prints.