
Sculpting in zbrush for 3d printing
ZBrush 3D Printing Tutorial | 3D Printing Blog
Begin typing your search above and press return to search. Press Esc to cancel.
by Fabian | October 18, 2018 | Tutorials
by Fabian | October 18, 2018
ZBrush is hands down the most popular and powerful digital sculpting software out there. That’s why this program is mainly used for designing figurines, sculptures, game characters, or any other design that needs an organic shape. Some users have trouble turning these 3D models into 3D prints – and that’s where we come in! In this hands-on tutorial, we will show you step-by-step how you can prepare your ZBrush models for 3D printing.
Tutorial Overview3D printing a ZBrush model typically requires three steps:
- 1st step: It all starts with you sculpting your piece of art with ZBrush and then adjusting it for 3D printing. This includes checking wall thickness, merging objects together, and hollowing the model (if needed).
- 2nd step: After the modeling part is done, you can optimize your design with the freely available Decimation Master plugin. This will allow you to reduce your poly count while keeping a high level of detail.
- 3rd step: The last thing left for you to do is to export your design as a 3D printable file. With 3D Print Exporter you will be able to export your 3D model as an STL, WRL, or OBJ file.
So let’s look into this in some more detail now.
This “Ring Of The Monkey Pirate King” by Ben Dansie was 3D modeled in ZBrush and Blender…
… and then turned into a stunning Sterling Silver 3D print.
1st Step: Preparing Your Design for 3D PrintingBefore being able to print your model correctly, you will need to prepare your design and adjust some things here and there.
- Material Guidelines: If you know which material you want your 3D model to be printed in, be sure to learn more about the specific design rules for the material of your choice.
 You can find these restrictions for i.materialise’s materials right here.
 - Watertight Model: Your 3D mesh needs to be watertight. Ask yourself the question: if I were to put water inside my model, would it flow out? If that’s the case, then you need to find those holes and close them. Sometimes this process is also called ‘creating a manifold model’. You can find more about this here.
- Wall Thickness: It’s important that your model sticks to the minimum wall thickness required for your material (learn more about minimum wall thickness here). You can check if your object conforms to the minimum wall thickness by using ZBrush’s transpose or move tool. You can learn how to use this tool in this explanation by 3DHubs.
- Merging & Hollowing: If your ZBrush model consists of several elements (SubTools), you could already combine them into one mesh by using the merging tool. Besides creating a single continuous mesh, Dynamesh can also help you to hollow out your design.
 Hollowing out your model might help you to cut down 3D printing costs. We’ve got a good summary about this right here.
Checking the four points mentioned above are vital for a great print. However, we also encourage you to do an overall check. Take a look at your handy file preparation checklist to ensure you will get the exact result that you wanted.
2nd Step: Optimize Your Design with the Decimation Master PluginYour ZBrush 3D model typically has an incredible level of detail – and is therefore also quite heavy. While this is perfectly fine when modeling within ZBrush, it can make things tricky when you want to export your file to different software or if you want to 3D print it. With i.materialise for example, your file size should not exceed 100 MB.
That’s where the freely available Decimation Master plugin comes into play. In a nutshell, this plugin allows you to greatly reduce the poly count of a model while preserving the high-resolution detail.
Don’t worry about losing detail information for your 3D print. Printers typically do not need any detail information that is smaller than 0.01 millimeters since they cannot print at this level of detail anyway. Avoid increasing the file resolution to more than 0.01 millimeters, however, in order to make sure that the triangles which make up your design won’t be visible. We have a dedicated tutorial about file resolution here, in case you want to learn more about this.
In the image below you can see an original ZBrush file with a poly count of 11,000,000 (left), and an optimized 3D model with a polygon count of 750,000. While this dramatically reduces the file size, the level of detail practically stays untouched.
11,000,000 vs. 750,000 polygons. Image by Pixologic.
3rd Step: Export Your Design as a 3D Printable FileThe final step before 3D printing your ZBrush model is carried out by the 3D Print Exporter plugin, which is already included in the ZBrush 4R7 installer.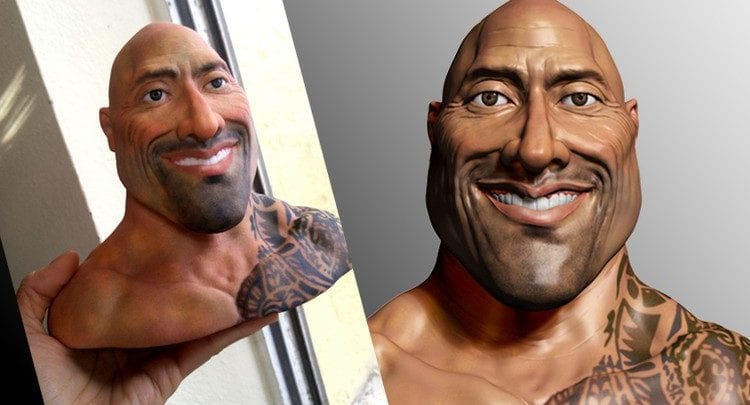
This plugin is very intuitive and only takes a few minutes to use.
- Open the plugin: With your model selected, open ZPlugin and select “3D Print Exporter” from the menu.
- Scale to preferred size: Click on “Update Size Ratios” to capture the ZTool’s bounding box size.
- Choose your units: millimeters or inches.
- Change one of the three sliders to define the size of your 3D print.
- Choose SubTools: Choose if you would like to export all SubTools, only the visible SubTools, or just the currently selected SubTool.
- Select file format: Finally, select the file format you want to export, i.e. STL, OBJ or WRL. If you choose WRL or OBJ, you can of course also export texture files.
Find out more about this plugin and how to use it on the 3D Print Exporter documentation.
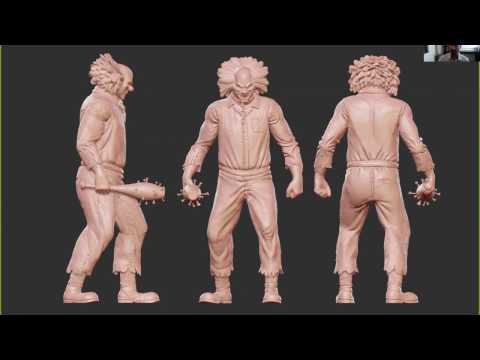
This zombie 3D print by Milos Tutus was created in ZBrush.
Now that you’ve got your printable 3D file, it’s all set to be sent to our printers. If you want a high-quality 3D print of your digital sculpts you can simply upload it here and you’ll see the price immediately. Make sure to visit our overview of all the materials that we offer as well – ZBrush users that use textures often choose the Multicolor+ material.
Featured image: 3D model by Andy Jones
Preparing ZBrush Models for 3D Printing
Freelance Digital Sculptor, Monsters & Media
Maarten Verhoeven is a freelance digital sculptor with a love for the dark and weird. He specializes in work for 3D sculptures for concept art, fine art, films, commercials, prototypes, designer toys, and collectibles. With a background in art, he handles many different aspects of production, from original concept sculpts, high-res assets, engineering, and 3D prints. For the past 10 years, he’s working from Belgium as a freelance ZBrush artist, contributing his talents worldwide to various companies, publications and projects.
"Maarten is a tremendous sculptor and one of the masters in the digital field. From sculpting from life or imagination he has a great ability to twist the realm of reality and still make it believable. Each new work Maarten completes pushes the bar for digital sculpting higher; even a small insight into his creative process and techniques is worth it's weight in gold."
- Joseph Drust
Artist/Creative Development Manager at Pixologic, INC."Maarten's signature style is distinctive and easily recognised from afar. His brilliant portrait busts, figurines and creatures designs have it all. It’s always a pleasant surprise to see what he’s been working on; from a disturbing monstrous creature to erotic pin-up art to legendary film characters, he emphasises the shapes and poses perfectly for the mood and in his own unique way."
- Rudy Massar
The Moving Picture Company"I have followed Maarten's work for years now.
 It never ceases to amaze me how stunning his work is. Each sculpture has its own sense of life. His work display a strong sense of gesture, weight, and most importantly character. I'm incredibly excited to learn from from his lectures."
- Bryan Wynia
Senior Character ArtistTrust me when I tell you: There is so much you are going to learn from Maarten. When it comes to learning ZBrush, Maarten is always one of the artists I recommend reaching out to for classes. His work is so inspiring to me and the ZBrush community. I feel like every new piece he posts keeps pushing the envelope of creativity and showcasing what you can do in the digital art world.
- Paul Gaboury
3D Product Development Manager at Pixologic IncMaarten is one of the most proficient digital sculptors working in the profession. His unique talents for storytelling and visual design complement his technical skills and software knowledge, [which are] reflected in his impressive body of both professional and personal work.
- James W Cain
Digital SculptorMaarten is a reference in the industry, really talented, polyvalent, and dedicated. He has a strong artistic and creative eye and pushes constantly his limits. Maarten has been an asset in many successful studios; he has a great sense of professionalism that makes him an asset in any project/production, artistic and production-wise.
- Cedric Seaut
Art Director & Co-Founder at Keos Masons
online 3D modeling training - Skillbox
Participates in the Christmas sale Discounts up to 60% 0 days 00:00:00
You will master the course
for creating characters and popular modeling program. You will be able to professionally embody the ideas of the customer in ZBrush or "revive" your heroes. Become a sought-after specialist in cinema, advertising or game design.
- Duration 2 months
- online at a convenient time
- Practice on real cases
- Access to the course forever
On profession
3D modeling-a demanded direction in the market
where ZBRUSH
- in the cinema, cartoons and advertisements of 9000
used to create recognizable characters - from cartoon characters to realistic 3D copies of actors.
- In games and illustrations
Most of the game's iconic characters are created in ZBrush. The program allows you to quickly implement complex creative concepts.
- 3D printing and scientific imaging
ZBrush can create detailed 3D models for science, prosthetics, machine parts, and collectible miniatures.
What you will learn
- Create character characters
- Bring finished sculptures to life with facial expressions, hair, clothes and accessories
- Add an atmospheric environment for a character
- Confidently to work with ZBRUSH
- tools to change the texture and color of the prototype
- Make high-speed sculpture
- Make 3D models of different difficulties
English language free
Skillbox English. Sign up for the course and get one year free access to project materials.
The offer is valid for users who have purchased any course since December 22, 2021.
Waiting for you:
- method of accelerated memorization of words and grammar;
- personal language learning program to help you start speaking from scratch;
- the possibility of individual sessions with curators.
About Skillbox
Skillbox
No. 1 in the quality of training organization among EdTech companies in the CPE segment. Rating from Smart Ranking. nine0009
for the quality of education. All theory is recorded with top market experts, and practice is as close as possible to real work tasks. Hear what those who have already achieved their goals with Skillbox have to say.
How to learn on the platform
- Registration
Get to know the platform
The Skillbox platform is our own development, which we are constantly improving.
 Videos, practical tasks and communication with curators are waiting for you. Access to the materials will open immediately after the purchase of the course. nine0009
 - Theory
Gain knowledge
Courses consist of thematic videos of different lengths. Watch them anytime, anywhere. Access is perpetual, so you can always come back and repeat the theory.
- Practice
Complete tasks
We believe that skills are developed only through practice. Therefore, after the theory, practical work or a test awaits you. All tasks are close to real - they can be proudly put in the portfolio. nine0009
- Feedback
Working with a supervisor
Tasks are checked by curators. These are experts on the topic of the course. They will help with difficult tasks and suggest how to improve your projects. You can communicate with checking curators directly on the platform.
-
Digital sculpting and introduction to ZBrush
Learn the basics of digital sculpting in ZBrush and be able to shape your character.
 nine0009
 -
Basic tools. Dynamesh and ZRemesher
Learn how to set up the workspace, make the fingers, eyes, legs of the character and modify it according to the reference.
-
Character Sculpting
Learn character modeling and editing techniques, master ZSpheres and ZSketch.
-
Create character clothes. Polygroups, masks and ZModeller
Learn how to create character clothing with the Inflate command and the Extract function. nine0009
-
Working with texture and texture
Learn how to work with alphas: settings, import, creation. You will be able to detail your model and make it more textured.
-
Creating additional elements
Learn how to work on the fingers, ears and body of the character with Subtool and Subdivision. Create photorealistic hair strands, buttons and laces.
-
Additional tools
Master the solid modeling tools: Geometry, Deformation, Edgeloop tabs.
-
Preparing a Model for Presentation
Learn how to animate a model, render and prepare a 3D sculpture for presentation.
-
Intensive Sculpting: From Sphere to Character
Detail the character and create a 3D dragon model.
Get expert advice and course presentation
Your application Successfully sent
Our manager will contact you in the near future
download program downloadSpeaker
Work of Speaker
Side Hero
Modeling, Texture, Settings, Personnel for a short cartoon.
3D character
Cute girl in traditional Armenian costume - done in my spare time. nine0009
Your resume after passing the course
3D modeller at Zbrush
from 40 000 ₽
My skills:
- Search for the character’s idea and work with references
- Work and modifiers
- Preparation for presentation
- 3D character modeling in ZBrush
- Speedsculpt
- Render
Skillbox certificate
confirms that you have completed the course and will become an additional argument when applying for a job. nine0009
Certificate example
FAQ
- I have never modeled. Will I succeed?
The course is specially designed for beginners. Our methodologies and support system will allow you to learn how to create 3D models in ZBrush from scratch. The main thing is to take a responsible approach to learning on the platform, expand your horizons on your own and complete practical tasks in a timely manner.
- What is the training schedule on the platform? Can you combine it with work? nine0235
You can study the course materials in a mode convenient for you, combine learning on the platform with work and personal life. Moreover, all videos will be available at the end of the course, so you can brush up on your knowledge at any time.
- How many hours per week will I need to spend on the platform?
It all depends on you. On average, platform users work from three to five hours a week.
- Who will help me learn on the platform? nine0235
You will have reviewers and a curator in the course's Telegram chat. They will comment on practical work, give useful advice and answer any questions. You can adopt their experience, professional knowledge and life hacks.
- Are there any installment plans?
Yes, you can buy the course in installments and plan your budget by splitting the entire amount into small monthly payments.
- What is the training schedule? Can you combine it with work? nine0235
You can work through the course materials at your own pace, moving through the program at your own pace. Moreover, all lessons will be available at the end of the course, forever, so you can refresh your knowledge at any time. The training is organized in such a way that you can combine it with work, study and personal life.
- St. Petersburg
- Almaty
- Kyiv
- Minsk
- Moscow
https://www.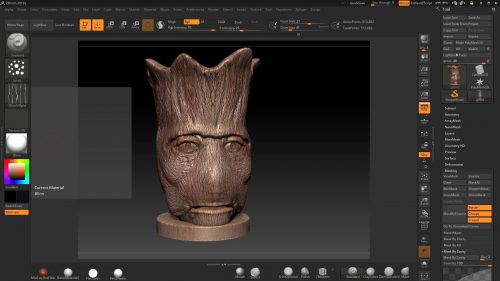 ggac.com/v2/work/detail/169998
https://render.ru/ru/gallery/artwork/211240
At the moment I'm just starting out in the gaming industry, so I'm open to any job offers.
My favorite hobby is board games, I really enjoy building and painting models and then playing with them. Having mastered the basic skills of design and modeling, I decided to start developing my own wargame from the lineup. The first unit was the BMP "Ferus" (here it is on ArtStation: https://www.artstation.com/artwork/8wo90m) because Hard Surface is my favorite and I could test the glue-free build, spinning wheels and turret. After choosing a topic, I began to select references. Usually I don't limit myself in the number of images, as they can be conveniently saved and sorted in the wonderful PureRef program.
I usually use ZBrush and Maya for modeling. In Maya, you can very quickly make Blockout and Kitbash for a future model, after which you can work on the shape, silhouette and guide lines in ZBrush, put the model together. nine0009
Due to the lack of clay modeling skills, as well as the absence of my own 3D printer (but it will appear soon :)), I turned to a company that prints on an SLA printer.
Before sending the model to be printed, I did a few steps. Below is a short guide.
1) Make sure the model is solid. This can be verified in ZBrush using the 3D Print Hub plugin. If the parts do not pass the test, then you can correct the geometry using the functions in the Geometry menu. nine0009
2) Then you need to reduce the number of polygons using the Decimation Master plugin, and then repeat the test.
3) Next, check that all parts are to the correct scale. Since OBJ and FBX do not contain information about the size of parts in real dimensions, you need to use the 3D Print Hub plugin to export from ZBrush (watch the dimensions carefully!), Or use a simple but long method so as not to be mistaken. I decided on the dimensions and, using a box, scaled each detail and saved it in STL format. nine0009
4) After that, don't forget to make holes in the parts to reduce material consumption, check the mesh again.
5) Next, you need to arrange supports for printing, many programs can help you with this, which will place them automatically, you just have to add additional supports in the necessary places or move already generated ones.
After all the preparation steps, I sent the model to the company, where it was printed, dried in an ultraviolet oven and the supports were cut off. I recommend additionally cleaning the model in an alcohol or soapy solution after production, because even small residues of the polymer are quite toxic. For additional protection, you can varnish the model or paint it. nine0009
I learned all the necessary information to prepare the model for printing when communicating with the company's employees, or found it on the Internet.
These videos helped me a lot: