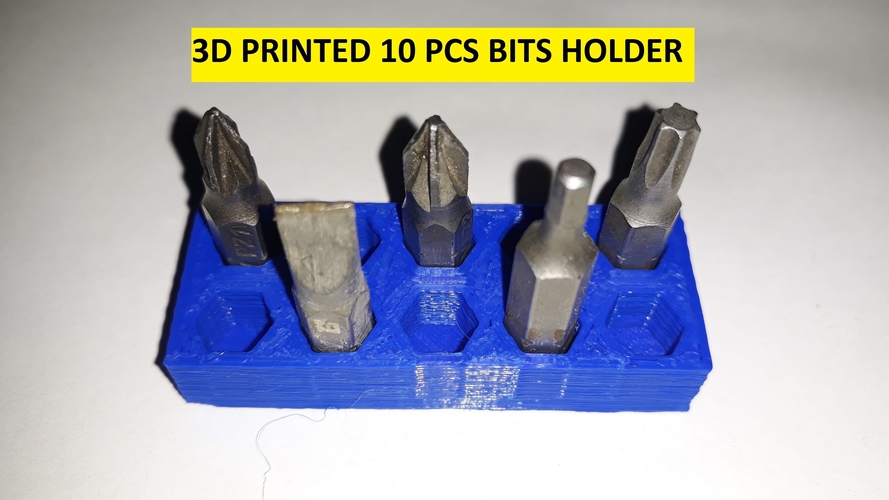
How do i use a 3d printer
How to 3D print? The Beginner’s Guide to 3D Printing
Learning how to 3D print has never been easier!3D printing is an ever-evolving and expanding field. If you’re a beginner at 3D printing, the number of possibilities and applications can seem so vast, it can be a bit overwhelming when you’re just starting to know how to 3D print and how to use a 3D printer.
In this beginner’s guide to 3D printing, we’ll explain what exactly 3D printing is, how it works, how to 3D print, the best materials for beginners, and what you need to get started.
What is 3D Printing?3D printing is the process of creating a three-dimensional object, usually done by systematically layering material on top of itself. The printer reads a digital file from the computer which dictates how to layer the material to build the object.
This is why 3D printing is also known as additive manufacturing. 3D printing and additive manufacturing are mostly synonymous, although you may hear additive manufacturing used more frequently in the context of mass consumption or mass manufacturing.
Depending on the specific print you are planning to do there could be more or fewer steps in your process. But in general, 3D printing involves the following actions:
Step 1: Create or Find a DesignThe first step of 3D printing typically starts on a computer. You must create your design using a 3D design software, typically a CAD (computer-aided design) software. If you are unable to create the design yourself, you can also find many free resources online with free designs.
Step 2: Export the STL FileOnce you have created or chosen a design, you must either export or download the STL file. The STL file is what stores the information about your conceptual 3D object.
Step 3: Choose Your Materials Typically you may have an idea about what kind of material you will use before you print. There are many different 3D printing materials available, and you can choose them based on the properties that you want your object to have.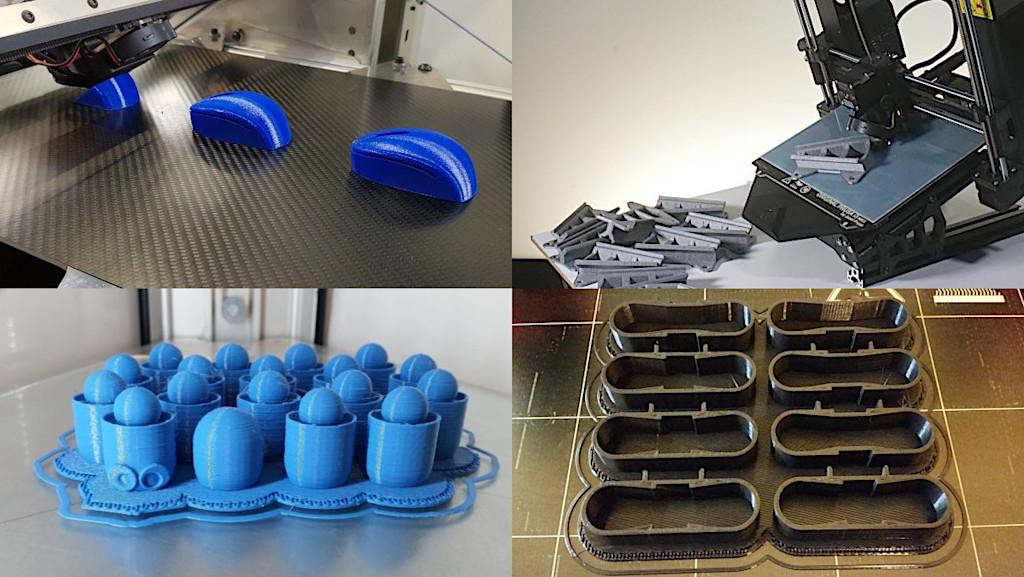 We will discuss this more in-depth below.
The next step is then deciding on the different parameters of your object and the printing process. This includes deciding on the size and placement of your print.
Step 5: Create the GcodeYou will then import the STL file into a slicing software, like BCN3D Cura. The slicing software will convert the information from the STL file into a Gcode, which is a specific code containing exact instructions for the printer.
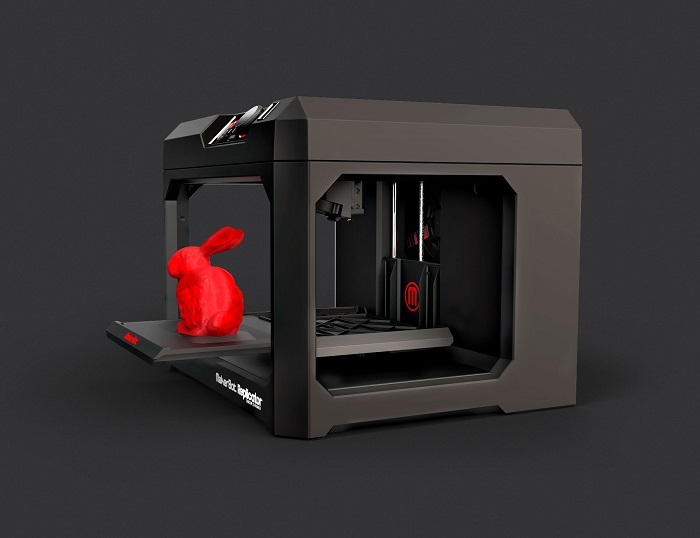
Step 6: PrintThis is when the magic happens! The printer will create the object layer by layer. Depending on the size of your object, your printer, and the materials used, the job can be done in a matter of minutes or over several hours.
Depending on what you want your final product to be or the material you used, there may be additional post-processing steps after printing, like painting, brushing off powder, etc.
What is 3D Printing Used For?3D printing can be used both recreationally and professionally, across various industries.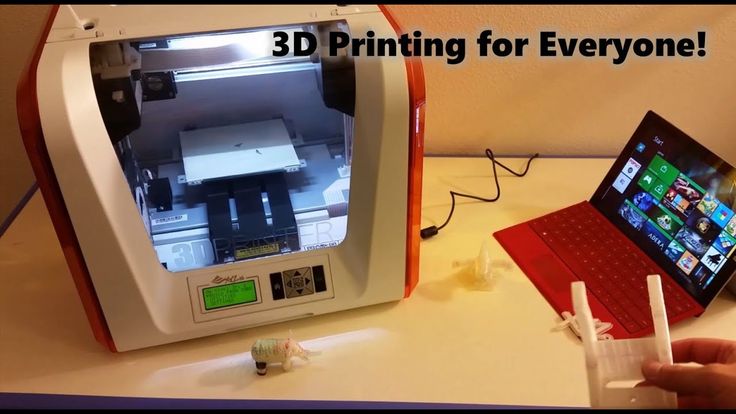 It has applications in many different fields and sectors, from the healthcare industry to engineering, and even fashion.
Increasingly, 3D printing is seen as a sustainable and cost-friendly solution for creating prototypes and tools for different manufacturing projects and processes. Traditionally, acquiring prototypes can be time-consuming and costly, requiring companies to depend on outside manufacturers. 3D printing allows companies to quickly make units of an object, tool, or prototype, all in-house.
A great example of this is shoe company Camper. In-house 3D printing has allowed them to transform their nearly month and a half long modeling and designing process into an operation that takes only several days.
3D Printing For Beginners: How To Get Started
So, what do you need to get started with 3D printing? Your specific needs will depend on why and what you want to print, but in general, there are three considerations for getting started:
- A 3D printer
- Filament
- Slicing software
If you plan on creating your own designs you will also need the appropriate designing software. But, as we mentioned earlier, you can also find many free resources online to download designs.
If you have not yet purchased a 3D printer, we have a guide that can help steer you through the most important considerations.
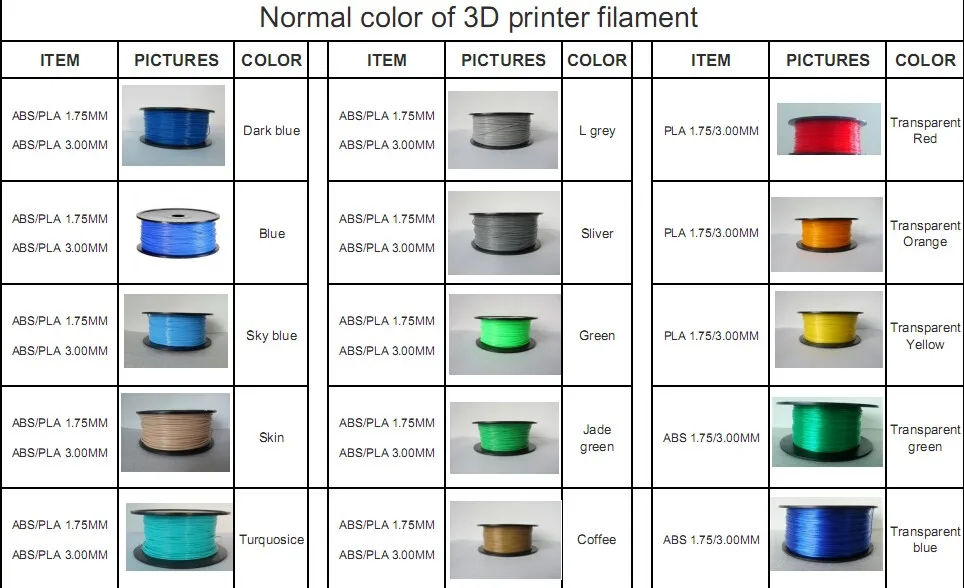
3D printer FilamentsThe material also called filament, you choose for your print will depend on many different factors:
- Do you want your object to be flexible?
- Heat resistant?
- Does it need to be very durable?
These are just some of the factors to consider when choosing your filament.
In general, most beginners start with PLA. This is because PLA is cost-effective and typically easy to print with a standard configuration. Depending on your specific project, PLA could be good starter material.
PET-G is also considered a beginner-friendly material, although it is a bit more technical than PLA. However, it is great for industries like engineering and manufacturing. It is a good material for functional prototypes because it can withstand higher temperatures and has a different chemical makeup that is ideal for these uses.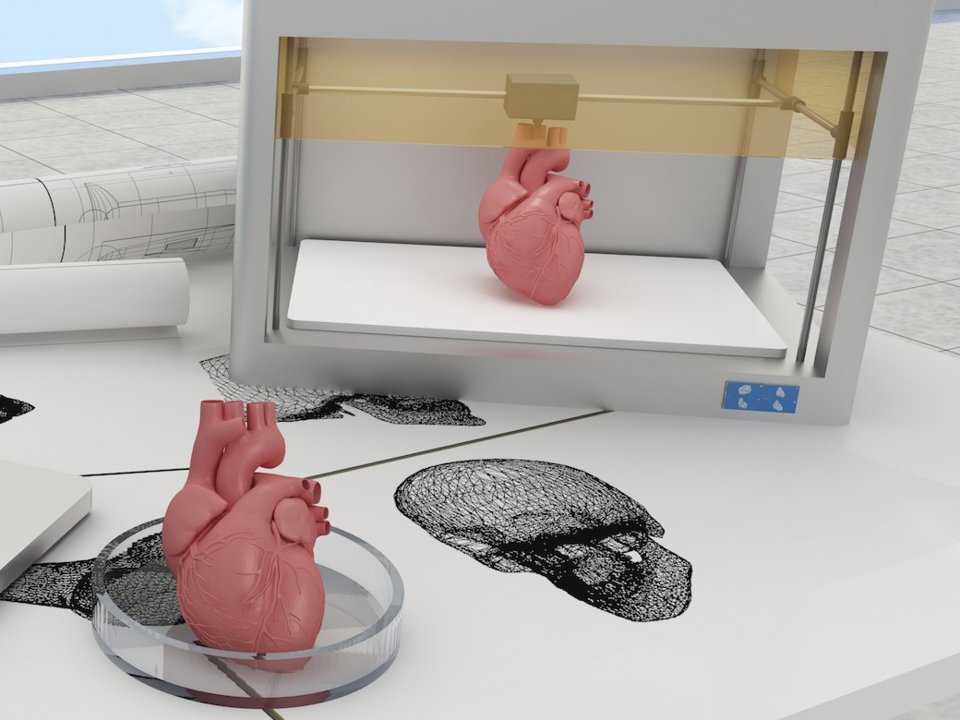
There are two important pieces of software for 3D printing: CAD and slicing software.
Typically, you can use any CAD system that can create a functional model. CAD is essential if you want to create your own models and objects. You must be able to export an STL file from your CAD software.
The slicing software is the second part of the equation. This software translates the STL file into a language that the printer can understand. The Gcode contains movement information that tells the printer how and where to move its axis, as well as how much material to deposit. The Gcode is sent to the printer via an SD card or wifi.
Final Thoughts3D printing is now more beginner-friendly than it has ever been. In the beginning, many people saw 3D printing as something inaccessible to the major public, but this sentiment is changing, and for good reason. While it takes practice to perfect your prints and technique, learning how to 3D print is an attainable skill.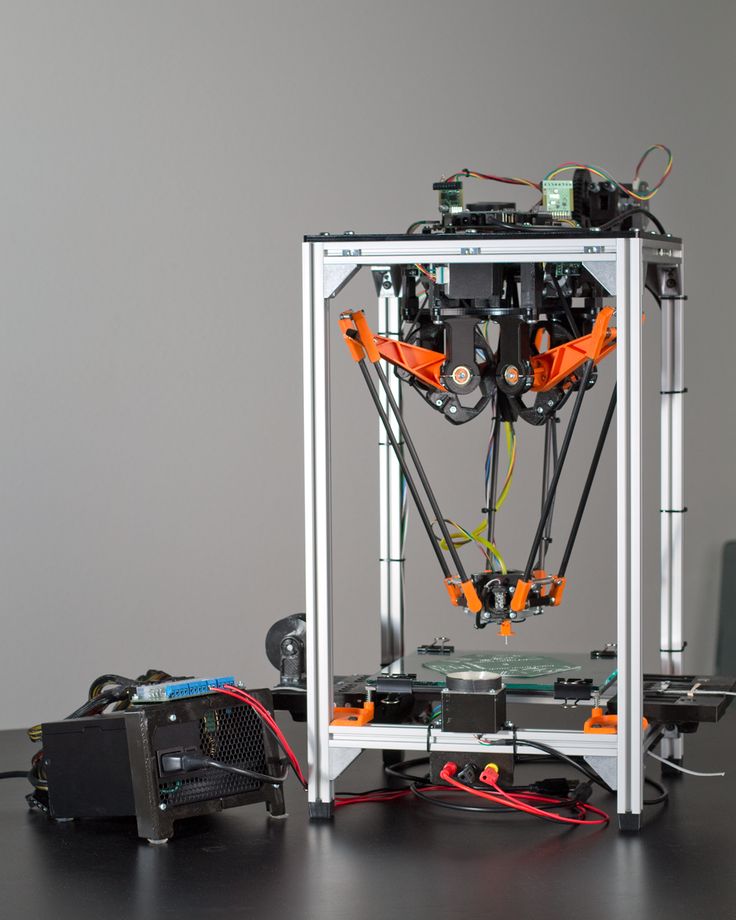
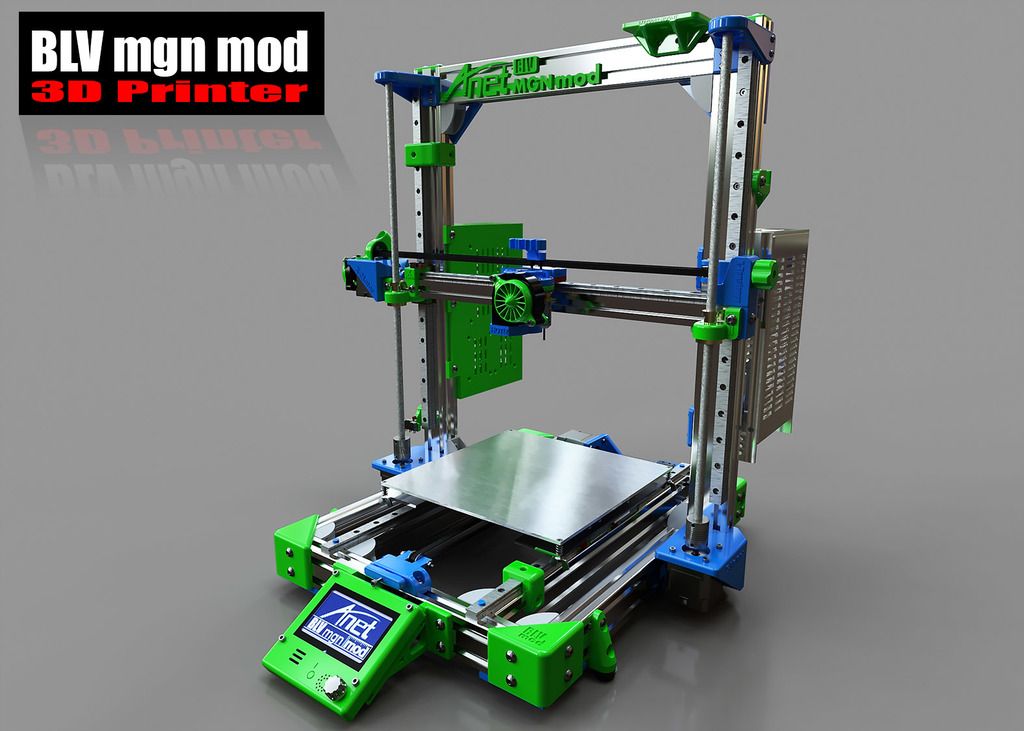
How to use a 3D printer
David Roberson14 September 2021
Guide
How do you use a 3D printer step by step? Many different technologies share the same basic steps which we’ll cover next, but each 3D printer can also be easier or harder to use depending on its features.
Step 1 – Prepare your design for 3D printingBy this point, it’s important you have a part ready to print and you have chosen your material. This part can be one you designed yourself using CAD (computer aided design), one taken from a 3D scan, or one you have taken from an inventory of existing designs.
Before you start printing, you need to translate your design into ‘coordinates’ the 3D printer can understand, as well as tell it important parameters such as the material you are printing with.
This is known as ‘slicing’, because it involves slicing the 3D design into – you guessed it – layers. This is typically done in a program known as slicing or print preparation software.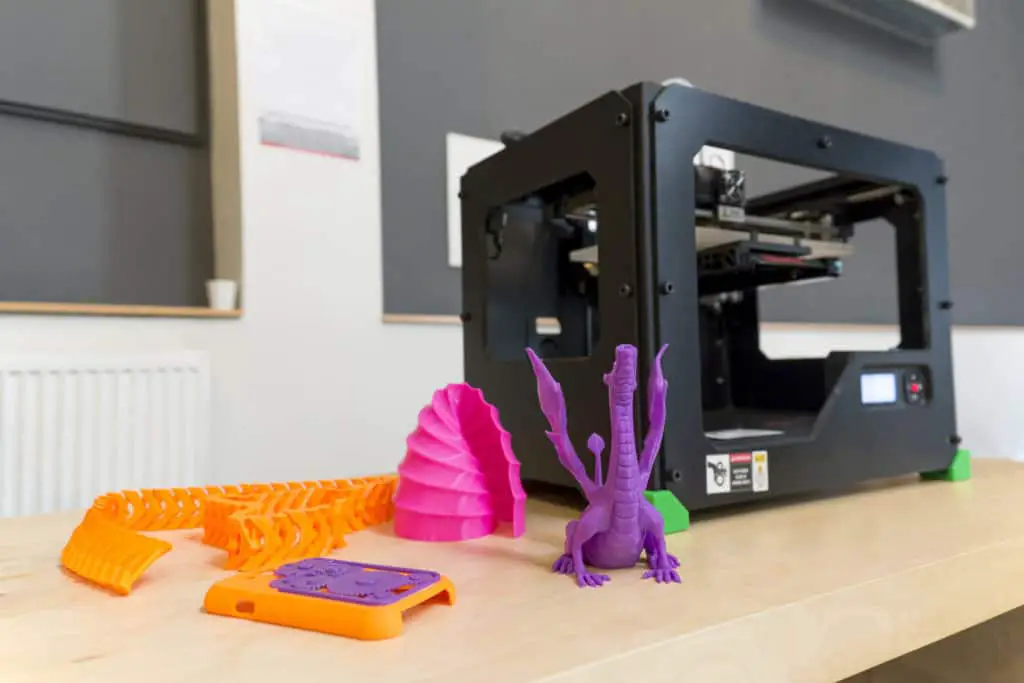 Our Ultimaker Cura slicing software comes with many preconfigured settings so will normally only take you a matter of seconds to prepare a print. Or if you prefer granular control of the printing process, there are also hundreds of custom settings to use. Once the slicing is done, your file is ready to print.
Preparing a 3D print with Ultimaker Cura software
Step 2 – Set up your printerYou could also do this step first if you like. Or you may not need to at all, for example if you regularly print the same type of parts.
But before you start printing, be sure to check you have the right material loaded. FFF 3D printers like Ultimaker also let you choose different nozzle sizes, with a smaller nozzle giving more detailed prints and a larger nozzle faster print times. If you’re using Ultimaker software together with an Ultimaker 3D printer, it will check your printer configuration and prompt you if anything needs changing.
Step 3 – Send your file to the printerOnce you are ready to go, you need to get the file to your 3D printer.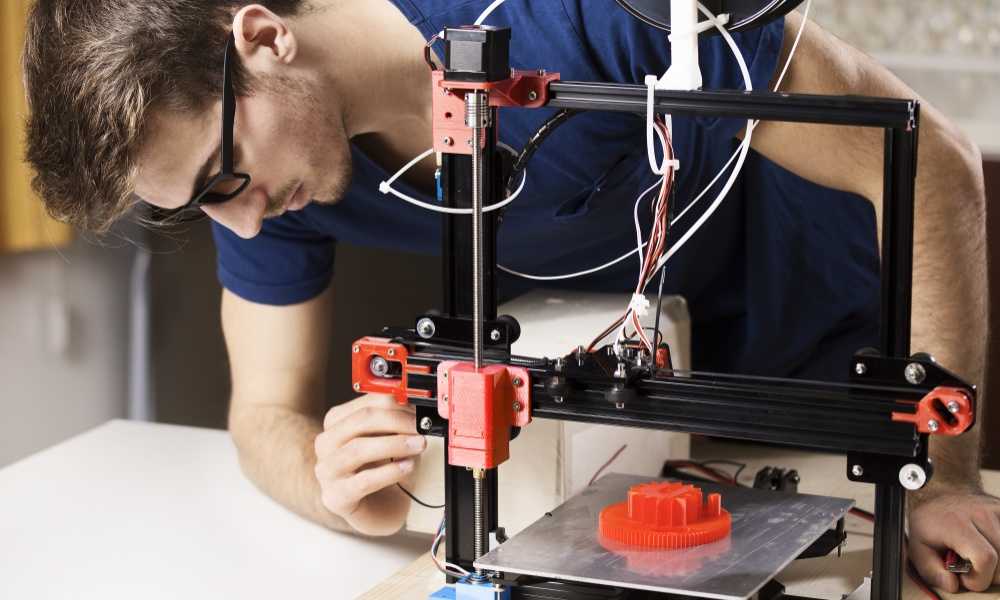 There are two main ways to do this. One is to load the file onto a data storage device (such as a USB drive), put it in the printer, and start your print job via the printer’s interface. The other option is to send the job remotely to a network enabled printer via your local network or the cloud. Remote printing is particularly helpful if you are not in the same location as your 3D printer.
Now you can sit back and relax! Or if you’re at work, get on with something else while the printer does its job.
Printing times vary depending on the size and detail level of your printed object and your 3D printer type. On an FFF 3D printer such as Ultimaker, a small component or rough prototype may only take a few hours. Most parts will be ready the next day if you leave the printer running overnight. And if you need a very large, detailed print, you may have to wait a couple of days.
Some 3D printing platforms enable you to monitor your print job.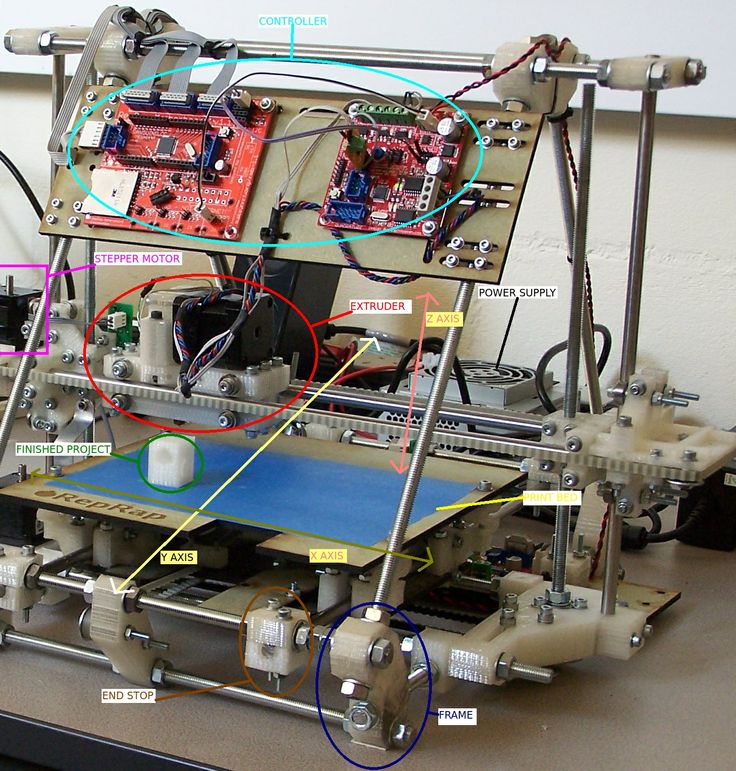 You can do this via the Ultimaker Digital Factory – and with an Ultimaker S3 or Ultimaker S5 printer, even view progress via a webcam feed.
When the print is finished, remove from the printer. Depending on your chosen material and printing process, some final manual steps may be needed before it’s ready to use. With an FFF 3D printer, this ‘post-processing’ is often little more than peeling off a small brim of material around the part. Other methods like SLA or SLS typically need more intricate post-processing, for example removing the loose powder from the chamber of an SLS printer.
With the Ultimaker platform you can prepare a print, choose a printer with your required setup, then send the print job – all remotely. Just collect it when it’s done
Are 3D printers easy to use?
This can depend on a lot of factors, but in general 3D printing is one of the most accessible manufacturing processes available. Compared to injection molding or CNC machining, 3D printers are a much easier way to make parts and models, which is why it works as a desktop technology everywhere from schools to offices.
But, there are a few things to be aware of that will help make your experience of 3D printing hassle-free:
Material choice – Perhaps the key area where all 3D printers are not created equal. Check which materials a 3D printer can print or you may end up surprised to discover you are limited to only one or two. Even worse, some printer manufacturers only let you print with their own material products, so you’re locked into using these forever. Look for a 3D printer that’s compatible with a wide range of materials, including those made by third parties, so you can leverage the near endless options on the market and benefit from open innovation
Automation – There are potentially hundreds of parameters and configurations involved every time you 3D print, such as printer temperatures or how the nozzle will travel to build up the print. But at Ultimaker, we don’t believe this should mean complexity for the user. For example, our material spools come with embedded NFC chips so the printer knows what’s loaded, preconfigured printing profiles in our software dramatically reduce setup time for each print, and you can manage the whole end-to-end process in one place via the Ultimaker Digital Factory
Support and service – If things do go wrong, it can be frustrating and impact your productivity.
 So be sure to check your 3D printer comes with comprehensive support and a warranty. Check for troubleshooting, FAQs, and other resources so you can easily solve problems yourself and stay productive
What do you need to 3D print?
Your 3D printer should come with everything you need to get started out of the box. Below we list the essentials, as well as the optional extras it’s good to know about:
A 3D printer – OK, this one’s obvious
Material – Your printer should include some in the box or it can be bought from 3D printing vendors
Software – Some printer brands supply their own, or you may have to find a compatible program. Note that there are two types of 3D printing software – print preparation (or slicing) software and printer (or print job) management software
Consumables – In addition to materials, your 3D printer may require or come with other consumables. For example, oil or grease for maintenance, or adhesive aids for the build surface.
 With Ultimaker, everything you need to get started comes in the box
Tools (largely optional) – Some 3D printers may require one or two basic tools for configuration changes or maintenance. (Again, with Ultimaker everything essential comes in the box.) Otherwise, if you’re going to be using your 3D printers a lot and will need to do some post-processing of prints, it’s useful to keep a few tools handy. We created a guide to tools for FFF 3D printers
Peripherals (optional) – These can add more functionality to your 3D printer. For example, for some of our printers you can also add an Air Manager, which encloses the 3D printer and filters up to 95% of UFPs (ultrafine particles), or Material Station which stores filament in an optimal environment and automatically loads material when a spool runs out
Next to this, all you need is a power supply and a clean, safe workspace for your 3D printer. You can find more advice on these topics in our free, in-depth white papers.
How do you use a 3D printer at home?
Hobbyists and entrepreneurs have been using desktop 3D printers at home for years, but at a time when remote working is more common than ever, this is an important question.
Generally, the same setup advice as above for a workplace is recommended. But think carefully about two key considerations – safety and space. SLS and SLA printers require careful processing of hazardous chemicals before unused resin or powder can be disposed of with your household waste. And as space is likely at a premium in the home, choosing a large format printer like the Ultimaker S5 Pro Bundle may not be practical compared to a smaller unit like an Ultimaker 2+ Connect or Ultimaker S3.
3D printers vary in size. Check the dimensions before installing it in your chosen location
There's more to discover...
Explore the wider world of 3D printing by checking out our answers to these common questions:
What is 3D printing?
What can you 3D print?
How much does 3D printing cost?
How I use a hobby 3D printer.

Health and prosperity to all!
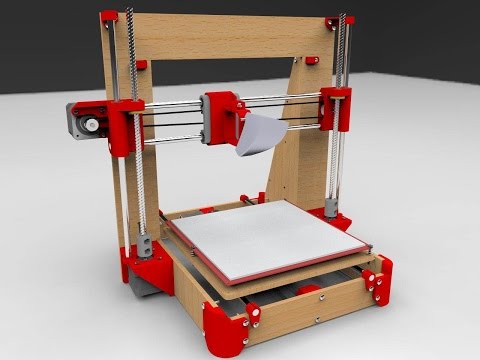
I started using my 3D printer (Anycubic I3 mega) not so long ago and very actively, but still quite often for various hobby projects.
I learned about the printing technology itself quite a long time ago. Immediately struck by her prospects. Unfortunately, I couldn’t get a printer for a long time, and after an unsuccessful attempt to create a CNC on my own, the milling cutter realized that precision mechanics requires more specific skills, spare parts and tools (as well as funds for their acquisition ...))) than I had at that time . Therefore, I decided to immediately purchase a ready-made device with a minimum of work on setting it up, which I still use to this day. nine0003
Models were needed to realize our own projects. Those that are in the public domain are either not always satisfied, or require good refinement to suit their conditions (in my experience, almost always). A simulation program was required. I tried several: Invertor, SolidWorks and Solid Edge, and stopped at the last one.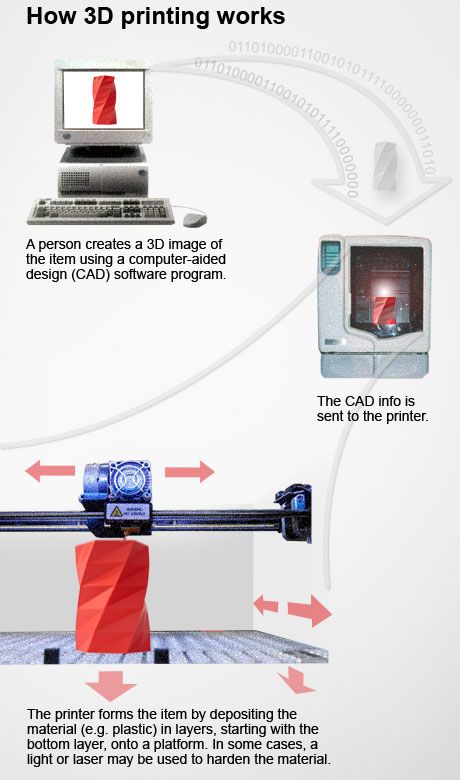 She has some dark sides that I do not understand, but in general I really liked working in her.
Dmitry Sorkin's review helped me choose a slicer, and it was Cura, which picked up my device without any problems. nine0003
Of course, one of the first was the project to modernize the printer: circular airflow. 5 models were printed and it was created on the remnants of transparent PETG: On the basis of the e3d_v6 system from Tingevers, a casing was developed and printed for a thermal barrier, under a quiet cooler, also from PETG (in the picture above it is higher than the airflow, but naturally only the wall is visible):
A child needed to adjust the height of the shower head.
Considered to acquire an expensive and unnecessary business, and began to develop.
The task was to make a device easily adjustable in height without changing the angle of inclination of the nozzle itself - I decided to leave the inclination as standard, like in stock shower arms.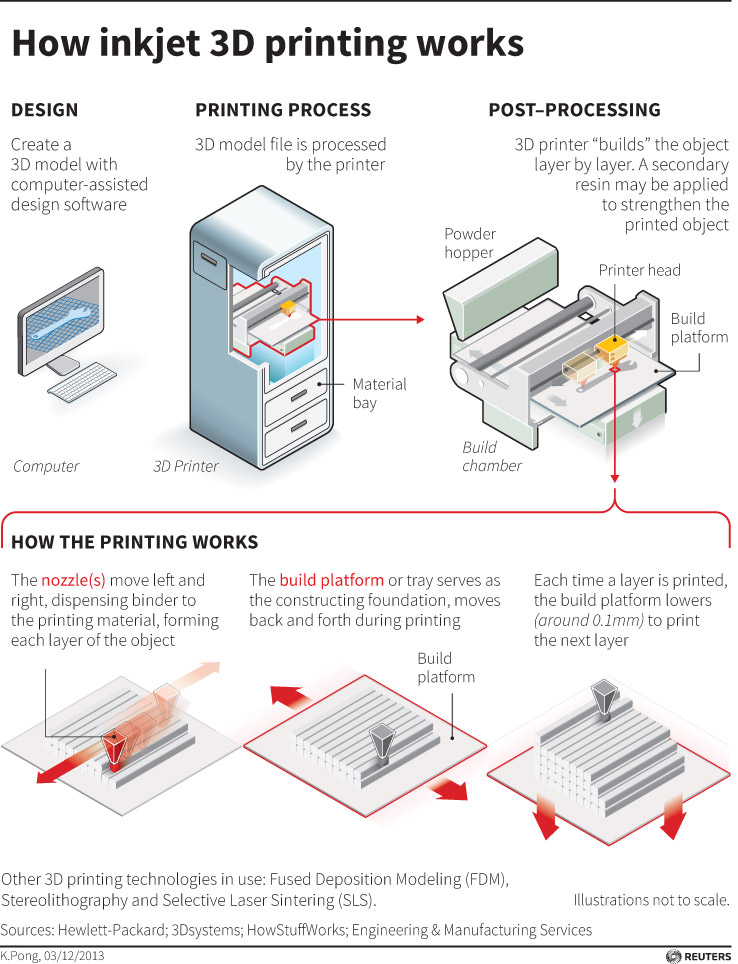 Also, the device should be compact, inexpensive and easy to assemble. As a stand - a piece of aluminum tube Ф10 mm. After working for several evenings in CAD, I drew a project. I decided to use a wedge to fix the bracket:
|
|
|
The bracket was assembled using silicone sealant. The project was implemented in 2019 and has been working great all this time.
Sewer blockages in the kitchen occurred mainly in the corrugation connecting the elbow and the outlet pipe. Yes, it will be correct to put a smooth one, but it is problematic. The reason for blockages lay in the fact that the corrugation sagged and in this place there was an accumulation of deposits, which further aggravated the sagging. A temporary solution with tying a piece of aluminum tube to it solved the problem until the first removal of household chemicals, then displacement and sagging again ... Several measurements with a tape measure and calipers, 3 hours to draw a clip with a printout and fitting, and the problem is solved:
|
|
|
Four clips prevent the pipe from bending, and taking out and putting in household items no longer moves the pipe.
A colleague at work, having seen my CAD exercises, asked about the possibility of creating a spare part for a car: during his road trips, on his BMW, the plug on the bottom of the bumper disappeared. Her inconsolable twin sister was put at my disposal for modeling:
|
|
|
Printed in 0.2mm PLA with 30% infill. At that point, I ran out of PETG and made a test print to try it on. The plug fell into place like a native and a colleague wanted to leave it like that, and without waiting for the next one. I honestly warned him that this plastic could decompose, but this did not stop him and so far he has been traveling with her for the second year and is very pleased, including with the money saved. nine0003
On a clear day, my supervisor brought his son's toy - a model of a radio-controlled racing car - and complained about poor handling when cornering. Having disassembled the remote control, I found 2 problems: the wear of the regulator tracks (fortunately they are wide enough and there was an opportunity to move the sliders) and what led to this problem is the destruction of the steering wheel angle limiter. In a couple of evenings I created a model and printed it out:
|
|
|
Compared to the original, the thickness of the retainers has increased slightly, the material is PETG.
I purchased a set of drills and taps on a well -known Chinese site, but here's the bad luck: keeping them in bags is not comme il faut ... Again for modeling:
|
| 9000 9000 |
At the first attempt to print, I decided to optimize the filling of the walls - I made it tape, on the advice from the article I read, but I didn’t take into account something (I didn’t have enough experience) and instead of strong walls I got a connected set of threads in places . .. Flexibility is good, but not in this case! Mm-yes: 2 hours of work per basket ... Redid it. The next problem arose, as it were, from nowhere: I doubted that with a 2mm thickness of the loops it would not be possible to install it. I reduced it to 1.5 mm, printed it out and ... one hinge broke during installation. Eh!!! I didn’t redo it, I welded it with pieces of flash, I decided that it was temporary ... But, as they say, there is nothing more permanent ... In general, I left it as it is, I use it mostly at home. When you open the lid flies off, but until the hands reach to remake. nine0003
I decided to introduce my child to technology, and yes, she likes to collect something like robots from time to time. I bought a 14 in 1 constructor, started assembling ... So the first model is ready, but ... As always, this is a "but" - to ensure the movement of the model, the set has a micromotor that works according to the creators' plans, from solar energy. The first tests with bringing a battery close to the lamp and lighting it with an LED from the phone gave positive results. But after assembly, bringing it to the lamp is problematic and there is no response to the LED ... To restore a good mood, disappointed by the impossibility of testing the child’s model, I urgently sit down at the computer ... 15 minutes of modeling and 10 minutes of printing worked a miracle: the child’s mood, as if by magic, soared to sky-high heights - the engine started working from an alternative power source - AAA element! Material PETG, layer 0.2mm, 30% infill. It is possible to fix on the motor block. nine0003
|
|
9000 9000 |
Hurray, and to be running tests!))
In his practice of sisadmin-amateur, often faced with the need to fix the wires, power supply units and extension cords on users to give users to provide users workplace tidiness. I decided to start by looking at what is on the open spaces of the network on this issue. As a result of the search, I liked two products manufactured by the industry, I don’t remember the exact name, but one of them is a mini-organizer for wires, and the second is a bracket for mounting various equipment. As it usually happens, it is necessary now, and it is unacceptably long to wait for 2 months for arrival from China, because you need to restore beauty yesterday ... nine0003
Well, I'm starting modeling, spent about a couple of evenings on it, and got convenient fasteners for wires, power supplies, extension cords and more:
All organizers are attached with adhesive tape. The invisible bracket came to the place at home - I fixed an extension cord and a power supply on it, it is very convenient: if necessary, remove it from your eyes, and if necessary, get it. There is a latch in the bracket model in the picture, but later it had to be abandoned, because. it is easy to snap it on, but then it is almost impossible to open it. nine0003
The wire organizer is quite easy to attach and carry when needed, and it's a pleasure to run wires through it. Even thin wires are held in it and do not pop out.
One of my projects required an Arduino Uno enclosure. I didn’t like the one found on Tingeverse and printed out for testing: the hole for the USB cable is poorly located and the upper part of the case-insert covers it, you won’t connect.
The case is designed for stand-alone operation, but I need mains operation. nine0003
The second half of the case, with such a modular scheme, is not rigid and the case opens at the slightest pressure. In general, he left the main idea of the author, but redesigned the case: he added sides to the middle part and to the covers. They ensured the rigidity of the structure during connection, now the case will not open spontaneously and it is possible to build up sections, of course, it didn’t cost a couple of evenings.
The board and the housing itself are fastened with latches. This is convenient for the board, but not quite for the case, since it can only be closed once. In the future, I plan to close the top cover with the help of a screw, but for now the project is on hold ... nine0003
what he can do and how to make money on it
Viktor tells how he turned his hobby into a profitable business. And why he no longer has "work time"
Victor tells how he turned his hobby into a profitable business. And why does he no longer have "working hours"
Victor
On YouDo
since October 2016
Victor prints everything (almost) on the printer - from a machine gun to dental crowns. And on YouDo he finds couriers who deliver all this. We decided to ask him what kind of business it is - 3D printing, how it works and whether it is profitable to do it. nine0173
Victor
On YouDo
since October 2016
Victor prints everything (almost) on the printer - from a machine gun to dental crowns. And on YouDo he finds couriers who deliver all this. We decided to ask him what kind of business it is - 3D printing, how it works and whether it is profitable to do it.
How I got hooked
Four years ago I realized that the office is not about me. I try in life to do only what is interesting. Something to create, organize, be creative. My hobbies have always been something like this. nine0173
Manufacturers say: “I brought it home, pulled it out of the box — voila, print it!” But this is all marketing
3D printing was in full view then. It seemed to me that it was just about creation and creativity, so I got hooked. I bought a printer, installed it at home, and began to find orders via the Internet.
Manufacturers say: “I brought it home, pulled it out of the box - voila, print it!” But this is all marketing, you need at least elementary training. You will have to spend at least a day to understand how the printer is refueled and a special slicer program works, which converts a 3D model into a special G-code. By reading this code, the printer understands what and how to print. nine0173
Four years ago, Victor decided to turn his hobby into a business
What you need to know at the start
A 3D printer is used in the jewelry industry, in the automotive industry, and in instrument making.
Even rocket parts and photopolymer dental crowns have been printed on it! That's why I love 3D printing so much: you cover a wide range of issues, you can communicate with specialists from completely different fields.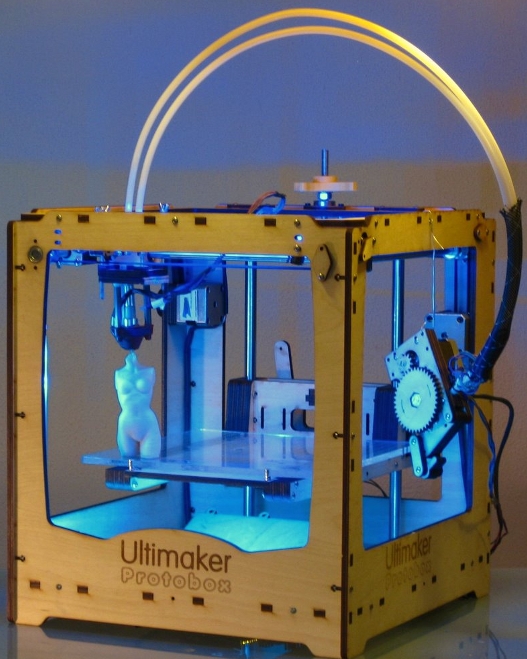 It broadens your horizons!
3D printers are different. There are capricious samples, but there are user-friendly ones. These cost from 50,000 ₽. 80,000 ₽ will be enough to start your business. nine0173
Calculation for launch
-Printer-50 000 ₽
-plastic (1 kg)-from 800 ₽
-10 000 ₽
-Internet advertising-20 000 ₽
starting budget
There are no complex algorithms in the production process itself, I quickly figured it out. But to improve the level of skill, it takes time. Only after working on several printers and performing hundreds of diverse tasks did I understand how, for example, to increase the speed of printing without losing its quality. nine0003
I'll show you how it all happens using the YouDo logo as an example.
Draw a drawing
I do rendering and 3D visualization of
I choose plastic
I load the coil in the printer
I put the thread to the extruder
so plastic is supplied, the smiley of
is printed first and let it print
Packed in a box
What we left and what we came to
My first product was a prototype of a mouse for a computer. It turned out so badly that I thought they wouldn't accept it - miraculously it worked. At that time, I did everything myself: I posted ads on the Internet, took orders, did modeling - I created a 3D model in a special program and printed it. nine0173
The first order turned out so badly that I thought they wouldn’t accept it - it miraculously worked
The number of orders began to grow over time, I began to hire freelance assistants. Until now, a significant part of our team are freelance modelers who create 3D models.
Two people work in the office:
- a full-time modeller,
- a project manager responsible for receiving applications and printing parts.
There is also an accountant, but he works remotely. We also do not need a regular courier, because on average we have one delivery per day. We arrange delivery through YouDo. I know that you can find cheaper delivery options, but YouDo is more reliable: you look at the rating, reviews - it’s immediately clear who you are working with.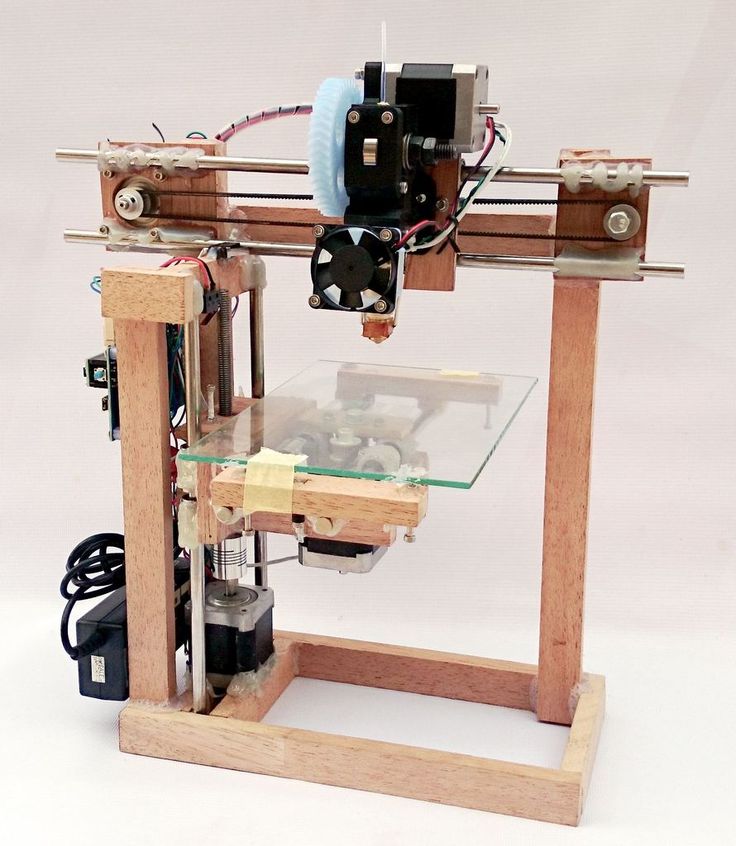 Our main requirement for the courier is to be careful, especially when some unusual things need to be delivered. nine0173
New tips and stories are released every week. Subscribe so you don't miss out.
| Subscribe |
Submit what is possible and that it is possible and that it is possible and what is possible and the tasks of our company I divide into creative, engineering, production and scientific:
- Creative -Mastodont figures, machine models, work with jewelers. Most often it is souvenir products, the creative process.
- Engineering is the creation of elements of device cases, a copy of parts. The latter is especially relevant. If some part is broken, it is not for sale, or you can only buy it complete with a mechanism - we come to the rescue. nine0260
- Scientific - any experimental samples that are used by scientists for research. For example, for graduate students in dentistry, we made dentures, metal crowns, special samples of dental polymer, which they tested for strength.
Souvenirs made of plastic, photopolymers, which are stored in Victor's workshop
The largest order in size is a copy of a two-meter machine gun
Often there is something adjacent. Once they made a souvenir for a large oil company: they printed typewriters that they actually operate at their facilities. They also made hands for robots. The robots themselves are funny: they ride on caterpillars, there is a display on their stomach. We printed their hands, now some of them work as waiters in a cafe. nine0003
The largest order in terms of size is a copy of a Russian-made two-meter machine gun for a military-patriotic camp. On May 9, they attached it to an UAZ with a cut-off roof, drove it to a performance.
What now?
Once upon a time, 3D printing was just my hobby. Gradually, it grew into a profitable business. So far not so profitable that my salary was much more than the office one. But I realized how cool it is when a hobby brings money.
One printer was enough for a hobby, now four is not enough
I don't have to rush between work and free time. I am basically free. I plan my day the way I want. And each of my days can be completely unique and not like the next or the previous one.
In the morning I work on one project, and in the afternoon I discuss another, and so on. And I can generally take it and go for a ride on a scooter in the middle of the day.
I no longer have such a thing as "working time". Or "non-working". There is just time, and I use it the way I want. nine0173
How do you know when it's time to leave your office and start your own business?
- Drives a hobby, but there is not enough time for it.
- There are several business ideas with at least approximate business plans, and not an abstract desire to "do something of your own."
- At the beginning, you are ready to take almost all the work on yourself and do not expect a crowd of professional altruists to run into your startup.

Learn more